Introduction
Welcome to the world of smart home security with the Wyze Video Doorbell Pro. If you’re looking for a reliable and affordable video doorbell that offers both convenience and peace of mind, you’ve come to the right place. In this guide, we will walk you through the step-by-step process of setting up your Wyze Video Doorbell Pro, from unboxing to troubleshooting.
The Wyze Video Doorbell Pro is packed with features that will enhance the safety and security of your home. With its high-definition video recording and two-way audio communication, you’ll be able to see and talk to whoever is at your doorstep, whether you’re at home or away. Additionally, the motion detection and customizable zones allow you to receive alerts and monitor specific areas that matter most to you.
Before we delve into the setup process, it’s important to ensure that you have the necessary tools and resources. You will need a compatible smartphone or tablet to download the Wyze Video Doorbell Pro app, a stable Wi-Fi connection, and access to your home’s electrical wiring. Once you have these ready, you’re all set to embark on your journey to a smarter, more secure home.
Throughout this guide, we will provide you with detailed instructions and tips to ease the installation and configuration process. Whether you’re a tech-savvy individual or new to smart home devices, we’ve got you covered.
So, let’s begin the exciting journey of setting up your Wyze Video Doorbell Pro and experiencing the convenience and peace of mind it brings. Follow along closely, and you’ll soon have your doorbell up and running in no time!
Unboxing the Wyze Video Doorbell Pro
Before diving into the installation process, it’s essential to unbox your Wyze Video Doorbell Pro and familiarize yourself with its contents. The package should include:
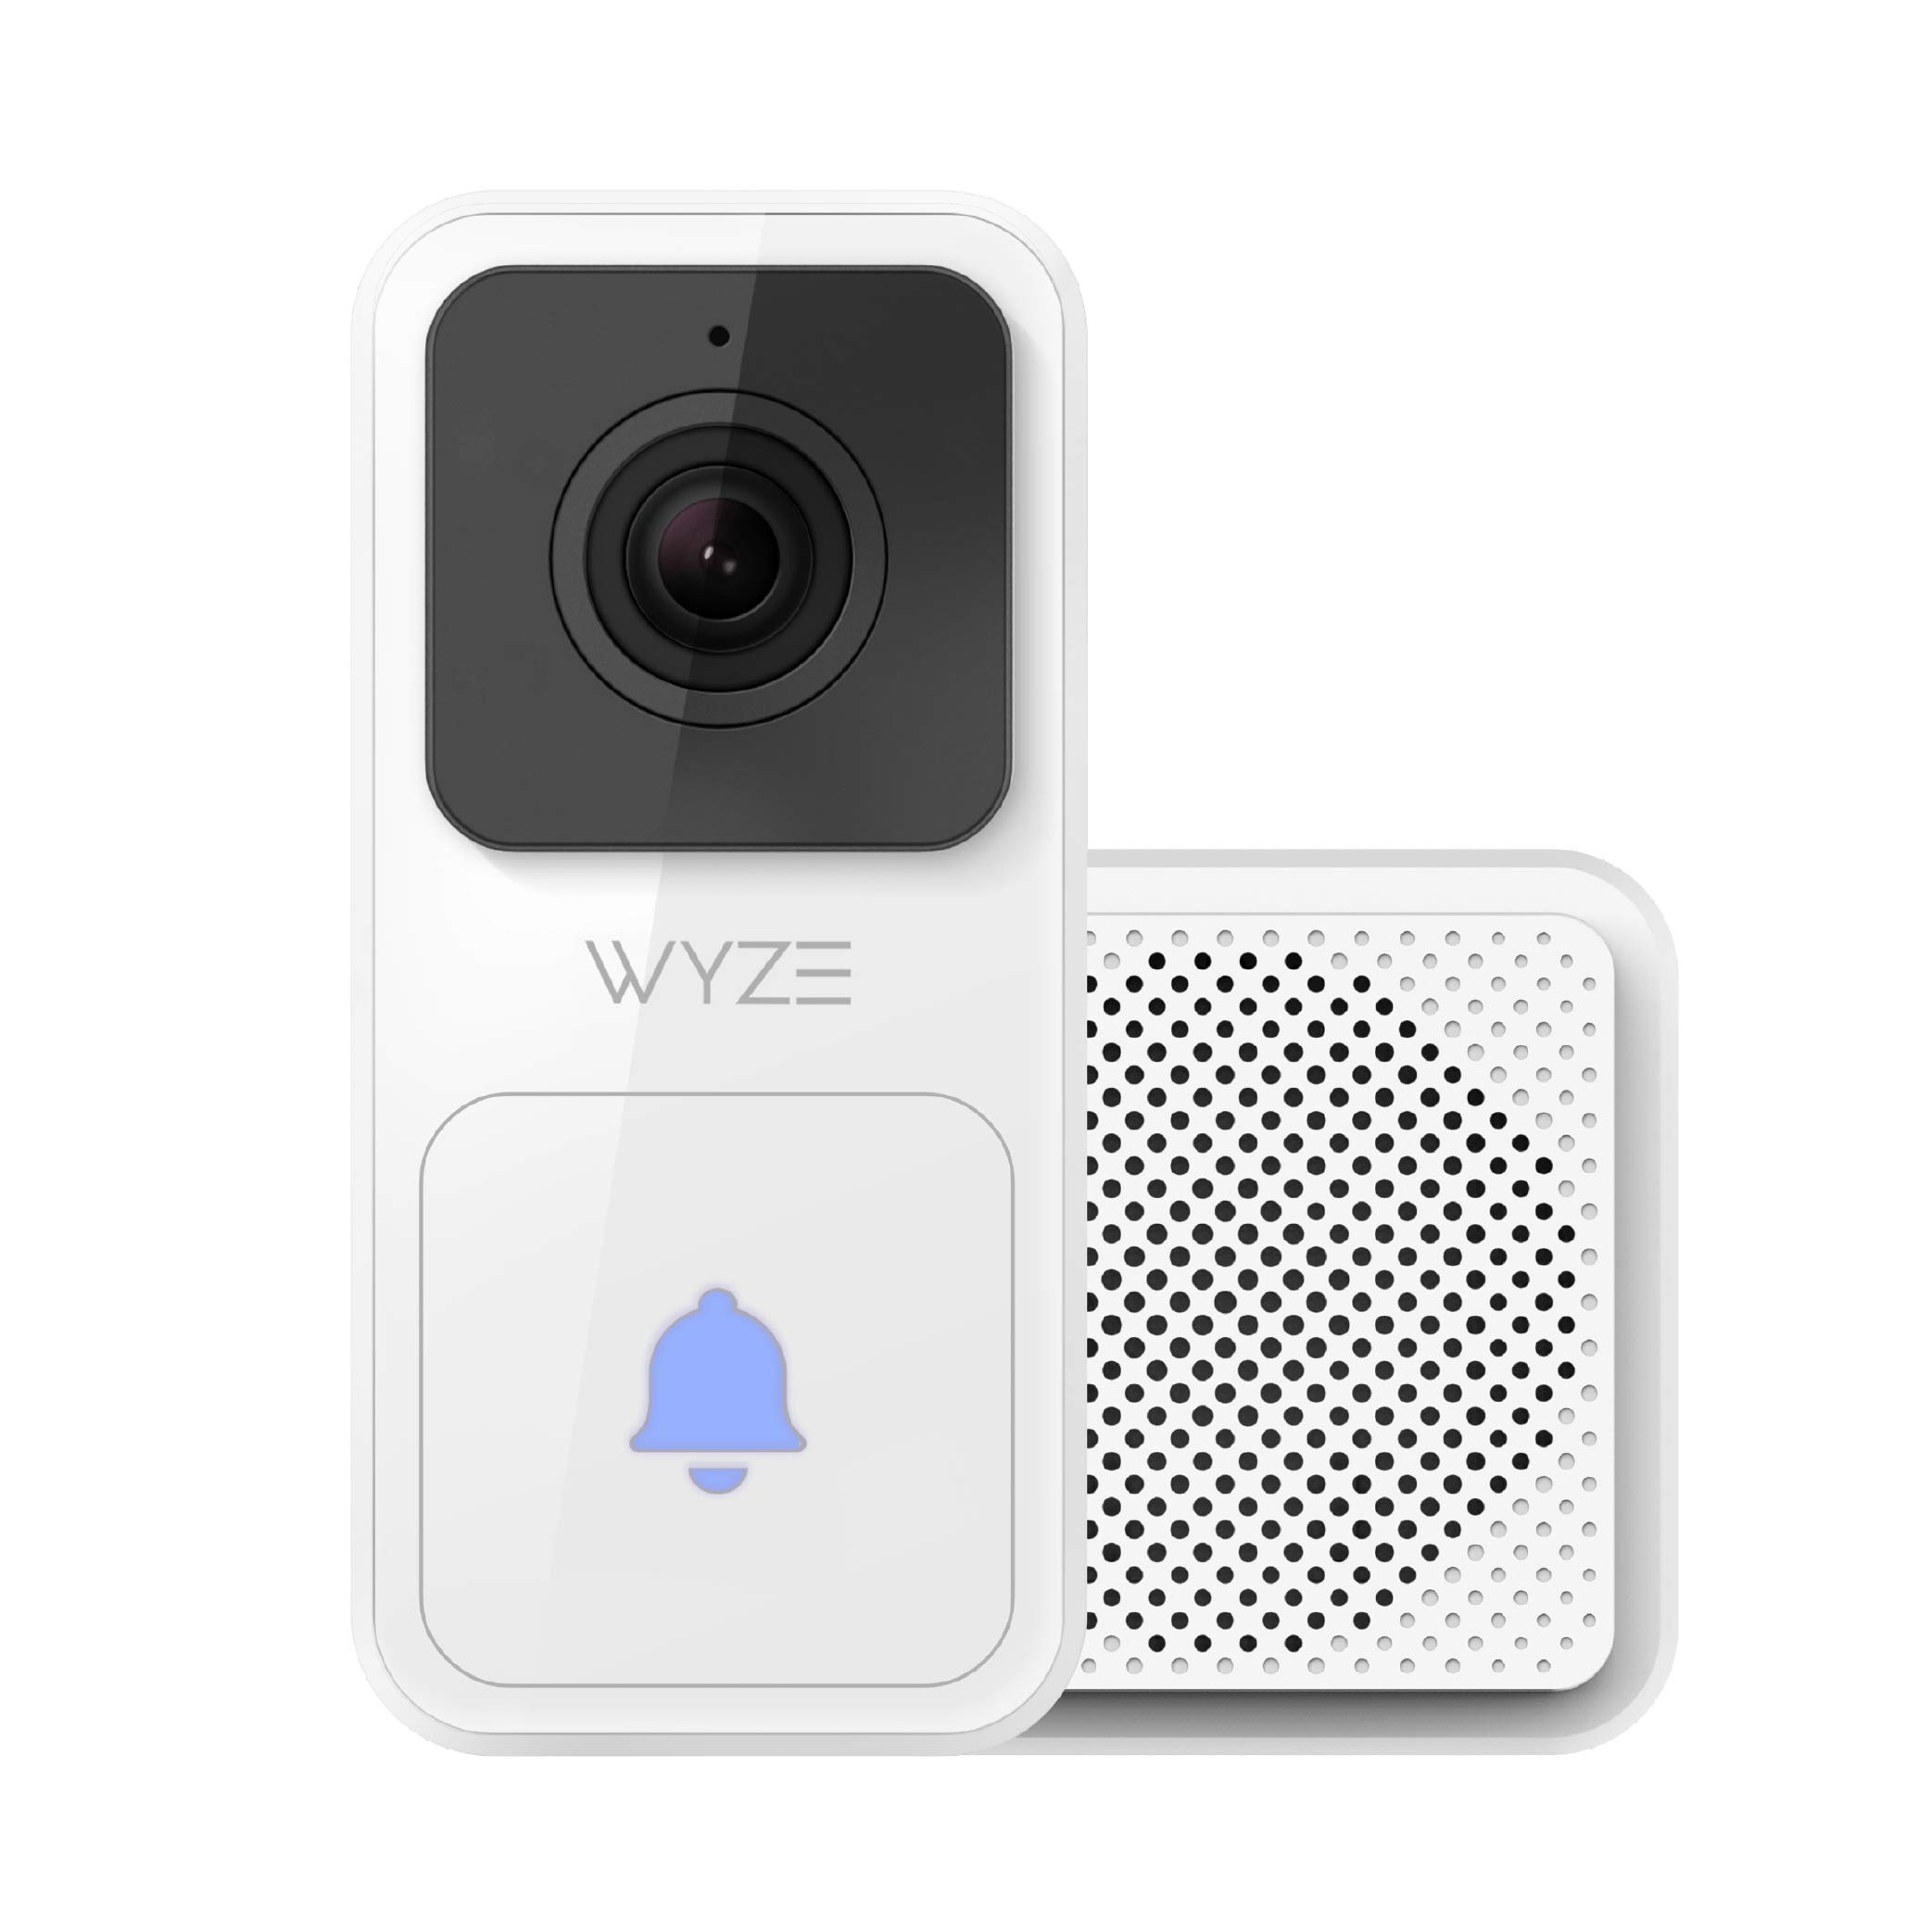
- Wyze Video Doorbell Pro
- Mounting bracket
- Hardware kit with screws and anchors
- Chime connector
- User guide
Start by carefully opening the box and inspecting the contents. Ensure that everything is present and undamaged. Familiarize yourself with the user guide, as it will provide valuable information for the installation process.
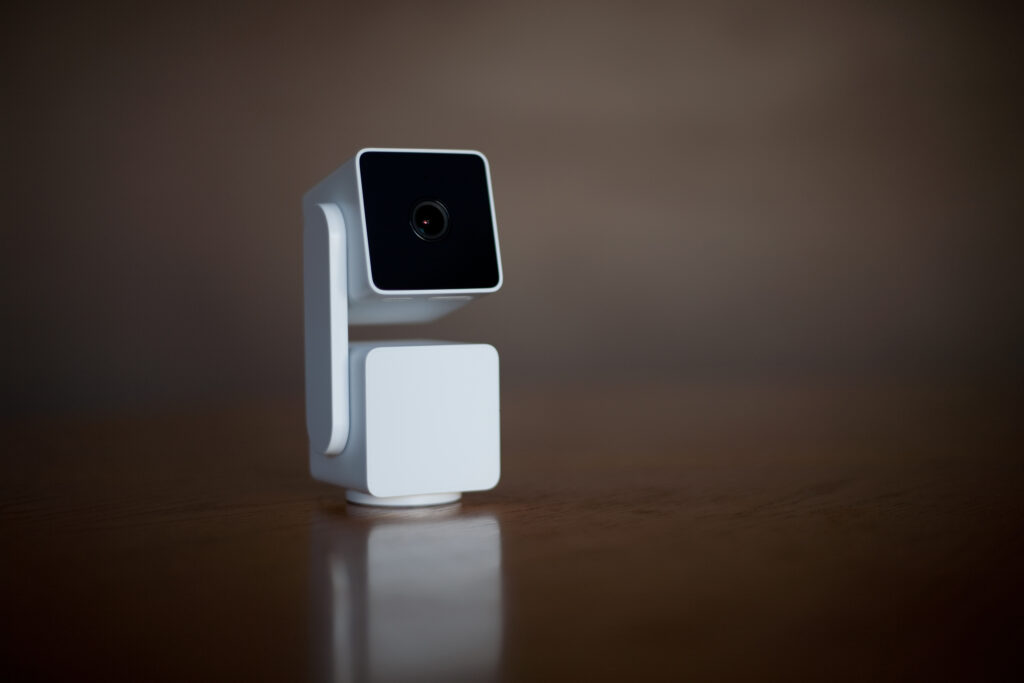
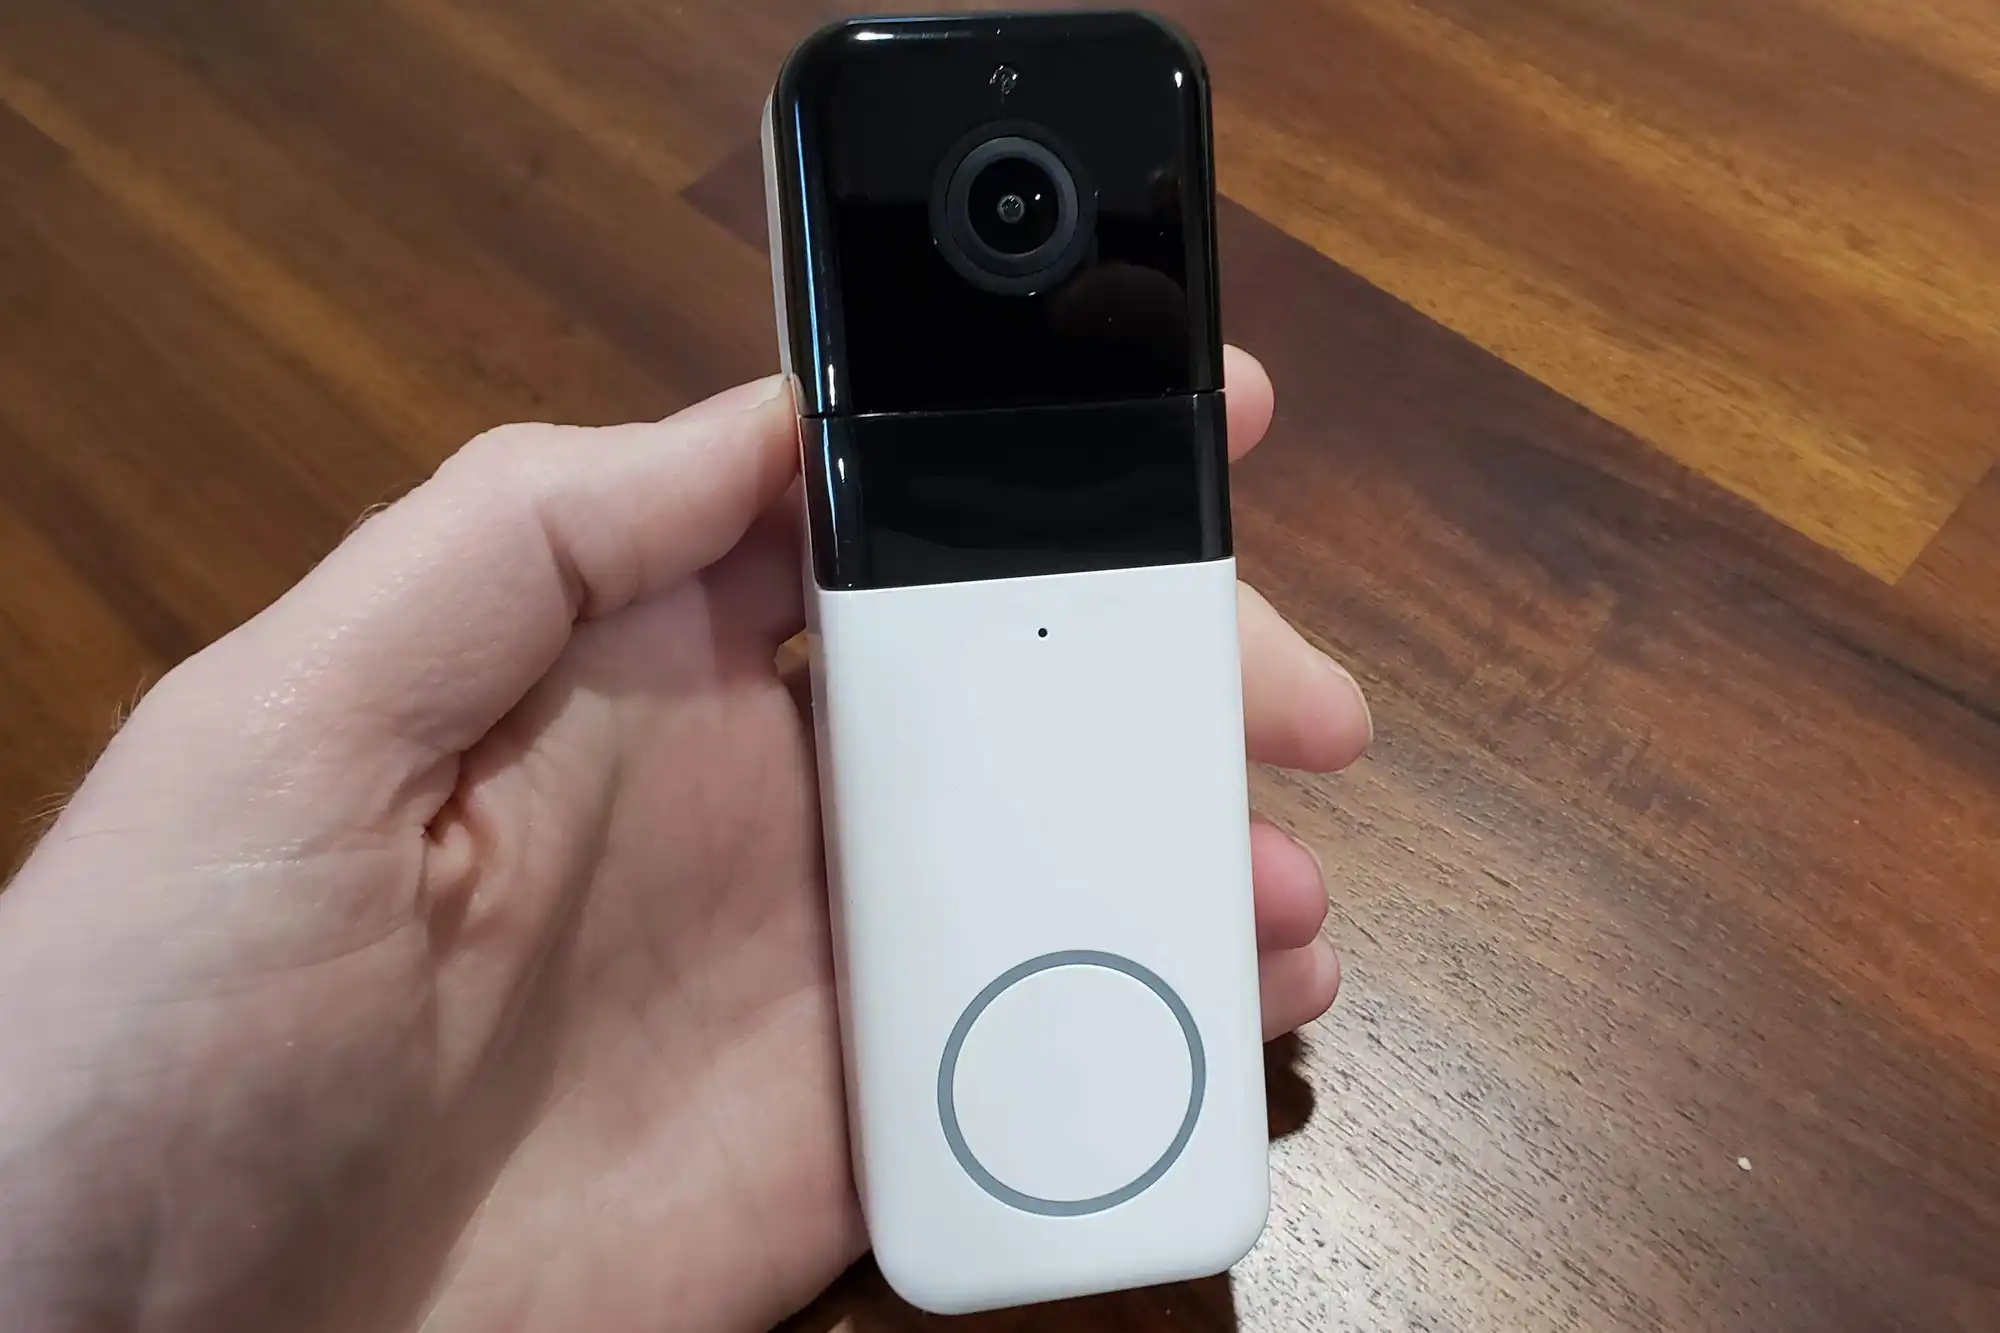
Take a closer look at the Wyze Video Doorbell Pro itself. It features a sleek and compact design that blends seamlessly into your home’s exterior. The front of the doorbell houses the camera lens, speaker, and microphone, while the back contains the ports and connectors.
Make sure to remove any protective films or covers from the camera lens or other surfaces. This will ensure clear and unobstructed video and audio communication.
The mounting bracket is an essential component for securely installing the Wyze Video Doorbell Pro. Take a few moments to familiarize yourself with its design and functionality. This bracket will be attached to your door frame or siding and serve as the anchor point for the doorbell.
The hardware kit contains screws and anchors for mounting the bracket. Carefully examine these components to ensure they are in good condition and suitable for your installation needs.
Lastly, locate the chime connector, which facilitates the connection between your existing doorbell chime and the Wyze Video Doorbell Pro. This connector ensures that you hear the traditional doorbell sound inside your home when someone rings the doorbell.
Once you have familiarized yourself with the items in the box, you’re ready to move on to the next step: checking the system requirements. Stay tuned!
Checking System Requirements
Prior to installing the Wyze Video Doorbell Pro, it is crucial to ensure that your home meets the necessary system requirements. By verifying these requirements, you can guarantee a smooth installation process and optimal performance of your video doorbell.
The following are the key system requirements to consider:
- Power Supply: The Wyze Video Doorbell Pro requires a stable power source to operate effectively. It is designed to work with 16-24VAC, 10VA doorbell transformers. Verify that your home’s electrical system provides the correct voltage and power capacity to support the doorbell.
- Wi-Fi Connection: A reliable Wi-Fi connection is essential for seamless communication between the Wyze Video Doorbell Pro and the Wyze app on your smartphone or tablet. Ensure that you have a strong Wi-Fi signal in the vicinity of your doorbell installation location. We recommend using a 2.4GHz Wi-Fi network for optimal performance.
- Smartphone or Tablet: To control and access the features of the Wyze Video Doorbell Pro, you will need a compatible smartphone or tablet. Ensure that your device meets the minimum system requirements for the Wyze app, which can be found on the app store or Wyze website. It’s recommended to keep your device’s operating system up to date for the best compatibility.
- Internet Connection: Besides a Wi-Fi connection, you will also need an active internet connection for remote access and functionality of the Wyze Video Doorbell Pro. Make sure that your home’s internet service is working properly by testing the connection speed and stability.
- Physical Requirements: Assess the layout and structure of your door frame or siding to determine if it is suitable for mounting the Wyze Video Doorbell Pro. Ensure that there is sufficient space and a solid surface for attaching the mounting bracket securely. Additionally, consider the available wiring and chime system compatibility if you plan to connect the doorbell to an existing chime.
By checking these system requirements, you can identify any potential challenges or modifications needed before proceeding with the installation. This preparation step will save you time and ensure a successful setup of your Wyze Video Doorbell Pro. Next, we’ll guide you through installing the Wyze Video Doorbell Pro app on your smartphone or tablet. Stay tuned!
Installing the Wyze Video Doorbell Pro App
Before you can start using your Wyze Video Doorbell Pro, you will need to install the Wyze app on your smartphone or tablet. The Wyze app is available for both iOS and Android devices and provides a user-friendly interface for controlling and managing your Wyze products.
Follow these steps to install the Wyze app:
- Open the App Store or Google Play Store on your device.
- Search for “Wyze” in the search bar at the top of the screen.
- Locate the official Wyze app in the search results and tap on it.
- Tap the “Install” or “Get” button to download and install the app on your device.
- Once the installation is complete, launch the Wyze app.
- If you don’t have a Wyze account, you will need to create one. Tap on the “Sign Up” option and follow the prompts to create your account.
- If you already have a Wyze account, tap on the “Log In” option and enter your credentials to sign in.
After successfully logging into the Wyze app, you will have access to a range of features and settings for your Wyze Video Doorbell Pro. From the app, you can view the live feed from your doorbell, control motion detection settings, configure notifications, and more.
It’s important to note that the Wyze app may require certain permissions to operate correctly. Make sure to grant any requested permissions related to accessing your device’s camera, microphone, and location, as these are necessary for the proper functioning of the Wyze Video Doorbell Pro.
Once you have installed the Wyze app and set up your account, you are one step closer to enjoying the full functionality of your Wyze Video Doorbell Pro. In the next section, we will guide you through the process of connecting your doorbell to Wi-Fi. Keep reading!
Connecting the Video Doorbell Pro to Wi-Fi
Now that you have the Wyze app installed on your smartphone or tablet, it’s time to connect your Wyze Video Doorbell Pro to your home’s Wi-Fi network. This step is crucial for seamless communication and remote access to your doorbell.
Follow these steps to connect the Video Doorbell Pro to Wi-Fi:
- Launch the Wyze app on your device and log in to your account if you haven’t already done so.
- In the Wyze app, tap on the “+” icon in the top-left corner of the screen to add a new device.
- Scroll through the list of available Wyze devices and select “Wyze Video Doorbell Pro”.
- Next, carefully follow the on-screen instructions provided by the app. The app will guide you through the Wi-Fi setup process step by step.
- First, you’ll be prompted to press the setup button on the Wyze Video Doorbell Pro. This button is located on the back of the doorbell unit.
- Once the setup button is pressed, the doorbell will enter pairing mode and emit a voice prompt or LED indicator to confirm.
- Return to the Wyze app and continue following the instructions. You will be asked to select your home’s Wi-Fi network from a list of available networks.
- Enter the password for your Wi-Fi network when prompted.
- The app will then attempt to establish a connection between your Video Doorbell Pro and your Wi-Fi network. Be patient as this may take a few moments.
- Once the connection is established, you will receive a confirmation message in the app. Your Wyze Video Doorbell Pro is now connected to your Wi-Fi network.
It’s important to note that during the Wi-Fi setup process, it’s recommended to place your smartphone or tablet in close proximity to the Video Doorbell Pro. This ensures a strong and stable Wi-Fi signal during the setup process.
If you encounter issues during the Wi-Fi setup, ensure that your Wi-Fi network is functioning properly and that you have entered the correct password. Consider restarting your Wi-Fi router or moving your router closer to the doorbell to improve signal strength.
Once your Wyze Video Doorbell Pro is successfully connected to your Wi-Fi network, you can move on to the next step: mounting the doorbell. We’ll guide you through the process in the next section. Keep reading!
Mounting the Video Doorbell Pro
Now that your Wyze Video Doorbell Pro is connected to your Wi-Fi network, it’s time to mount it in its designated location. Proper mounting ensures that the doorbell is securely attached to your door frame or siding, providing an optimal view of your front entrance.
Follow these steps to mount your Video Doorbell Pro:
- Choose the desired location for the doorbell on your door frame or siding. Keep in mind that the doorbell should be positioned at a height that allows for clear visibility of the front entrance.
- Using a pencil, mark the location where you will be installing the mounting bracket. Ensure that the surface is even and clean before proceeding.
- Hold the Wyze Video Doorbell Pro against the marked location and align it with the mounting bracket. Use a level to make sure the doorbell is straight.
- Once you are satisfied with the positioning, use a drill to create pilot holes for the screws that will secure the mounting bracket. Ensure that the holes are aligned with the holes on the mounting bracket.
- With the pilot holes in place, attach the mounting bracket to the door frame or siding using the provided screws. Use a screwdriver or drill to tighten the screws securely.
- Ensure that the mounting bracket is firmly attached to the surface, with no wobbling or movement.
- With the mounting bracket securely in place, gently attach the Wyze Video Doorbell Pro to the bracket. Align the slots on the back of the doorbell with the mounting bracket and slide it into position until it clicks or securely locks into place.
- Once the doorbell is attached, give it a gentle tug to ensure that it’s properly locked in place.
It’s important to note that if you plan to wire your Video Doorbell Pro to an existing doorbell chime, be careful not to twist or damage the wires during the mounting process. Ensure that the wires are securely connected and positioned correctly.
After mounting the Video Doorbell Pro, step back and visually confirm that it is level and aligned. Double-check that the camera lens is facing the desired direction and provides a clear view of your front entrance.
With the Wyze Video Doorbell Pro securely mounted, you are now ready to proceed to the next step: wiring the doorbell. Stay tuned for the next section, where we’ll guide you through the process step by step!
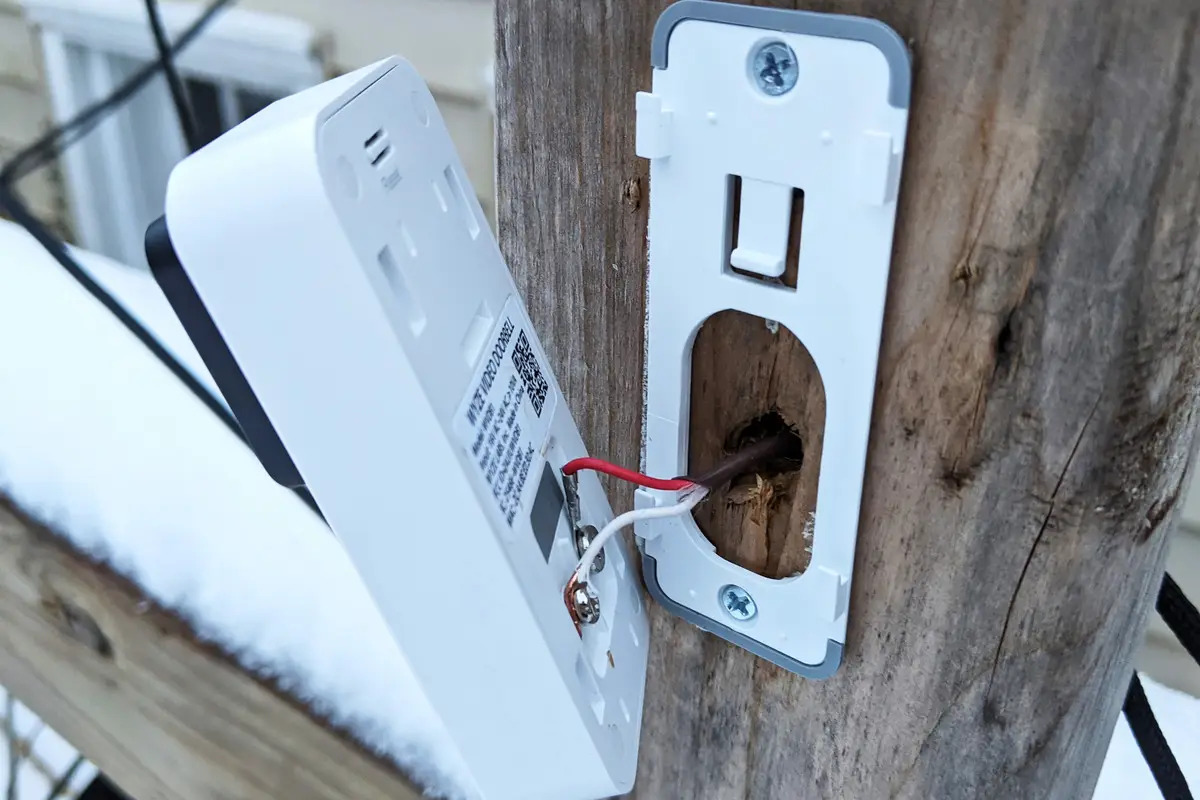
Wiring the Video Doorbell Pro
Wiring the Wyze Video Doorbell Pro is an important step in the installation process, as it ensures that the doorbell receives power and functions properly. Proper wiring also allows you to integrate the Video Doorbell Pro with an existing doorbell chime, providing you with an audible alert when someone rings the doorbell.
Follow these steps to wire your Video Doorbell Pro:
- Ensure that the power to your doorbell circuit is turned off to avoid any electrical mishaps. Locate the circuit breaker corresponding to your doorbell and switch it off.
- Identify the existing doorbell chime in your home. Remove the cover or faceplate to access the wiring behind it.
- Examine the wiring and identify the transformer wires. These are usually labeled “TRANS” or “TR” and connected to the transformer inside your chime.
- Locate the chime connector that came with your Wyze Video Doorbell Pro. Connect the transformer wires to the chime connector following the wiring diagram provided in the user guide. Ensure that the connections are secure.
- If you don’t have an existing doorbell chime, or you do not wish to connect the Video Doorbell Pro to a chime, you can skip this step and proceed to the next.
- Next, locate the wires on the back of the Wyze Video Doorbell Pro. These will typically consist of an “A” wire (usually red) and a “B” wire (usually white). Thread these wires through the mounting bracket and bring them out at the bottom.
- Attach the “A” wire to the doorbell chime connector’s “A” terminal and the “B” wire to the “B” terminal. Ensure that the connections are snug and secure.
- If your Video Doorbell Pro does not have a “B” wire, it means that your existing chime is not compatible with the doorbell. In this case, you can bridge the “B” terminal directly to the “TRANS” terminal in the chime connector.
- Once the wiring is complete, gently push any excess wire back into the wall cavity. Ensure that the wires do not interfere with the doorbell’s installation or obstruct the mounting bracket.
- Double-check all the connections to make sure they are secure and properly positioned.
- If you have disconnected the power during the wiring process, you can now switch it back on at the circuit breaker.
After wiring the Wyze Video Doorbell Pro, it is crucial to test the functionality of the doorbell and the chime. Open the Wyze app on your smartphone or tablet and navigate to the Video Doorbell Pro settings to perform a test. Verify that the doorbell rings and the chime inside your home sounds correctly.
If you encounter any issues during the wiring process or the test, consult the troubleshooting tips in the user guide or seek assistance from Wyze customer support.
With the Wyze Video Doorbell Pro properly wired, you are now ready to move on to the next step: setting up motion detection zones. Keep reading for the next section of our guide!
Setting Up Motion Detection Zones
Setting up motion detection zones for your Wyze Video Doorbell Pro allows you to customize and fine-tune the areas where you want to receive motion alerts. By defining specific motion detection zones, you can minimize false alarms and focus on the areas that are most important to you.
Follow these steps to set up motion detection zones on your Video Doorbell Pro:
- Open the Wyze app on your smartphone or tablet and navigate to the settings for your Video Doorbell Pro.
- Choose the “Motion Detection” or similar option in the settings menu.
- Select “Motion Detection Zones” to access the zone setup interface.
- You will see a live preview from your doorbell’s camera, along with a grid overlay.
- Tap and drag the corners of the grid to adjust its size and position. Position the grid to cover the areas where you want to receive motion alerts.
- Ensure that the motion detection zones cover the desired area without capturing unnecessary motion, such as busy sidewalks or areas beyond your property.
- After defining the motion detection zones, save your settings and exit the configuration interface.
- The Wyze Video Doorbell Pro will now only detect motion within the specified zones and send you alerts accordingly.
It’s important to note that you can define multiple motion detection zones if needed, but keep in mind that each additional zone may increase the chance of false notifications. Experiment with different zone configurations until you find the optimal setting for your specific environment.
Additionally, take some time to fine-tune the sensitivity of the motion detection feature. In the same settings menu, you will find options to adjust the motion detection sensitivity. Test different sensitivity levels and find the right balance between capturing important events and minimizing false alerts.
Once you have set up your motion detection zones and adjusted the sensitivity, it’s important to test the functionality. Walk around the areas covered by the zones and verify that the Wyze Video Doorbell Pro detects the motion and sends you timely notifications.
With the motion detection zones configured, you can now focus on customizing other settings, such as two-way audio and video quality. We’ll walk you through these settings in the upcoming sections. Keep reading!
Adjusting Motion Detection Sensitivity
Adjusting the motion detection sensitivity of your Wyze Video Doorbell Pro is crucial for ensuring accurate and reliable motion alerts. By fine-tuning the sensitivity, you can customize the doorbell’s responsiveness to motion and avoid unnecessary or excessive notifications.
Follow these steps to adjust the motion detection sensitivity:
- Open the Wyze app on your smartphone or tablet and navigate to the settings for your Video Doorbell Pro.
- Select the “Motion Detection” or similar option within the settings.
- Locate the sensitivity slider or numerical values that control the motion detection level.
- Drag the sensitivity slider or adjust the numerical values to increase or decrease the motion detection sensitivity. Higher values make the doorbell more sensitive to motion, while lower values make it less sensitive.
- Make gradual adjustments to find the optimal sensitivity level for your specific environment. Test different settings and observe how the doorbell responds to motion.
- Continue making adjustments until you achieve a balance between capturing genuine motion events and minimizing false alerts.
- Once you are satisfied with the sensitivity setting, save your changes and exit the settings menu.
When adjusting the motion detection sensitivity, consider the specific characteristics of your surroundings. Factors such as nearby roads, trees, or busy foot traffic can impact the optimal sensitivity level. It may take some trial and error to find the perfect setting that suits your needs.
It’s important to strike a balance with the sensitivity setting. If the sensitivity is set too high, you may receive a large number of false alerts triggered by small or insignificant movements. On the other hand, if the sensitivity is set too low, you may miss important motion events that you want to be notified about.
Regularly monitor the performance of your Wyze Video Doorbell Pro after adjusting the sensitivity. Fine-tune the setting further if necessary to ensure that it accurately detects and notifies you about the desired motion events.
With the motion detection sensitivity adjusted, you can now proceed to explore other customizable settings of your Wyze Video Doorbell Pro. Next, we will guide you on how to enable two-way audio communication. Keep reading!
Enabling Two-Way Audio
One of the standout features of the Wyze Video Doorbell Pro is its two-way audio capability, which allows you to communicate with visitors at your doorstep, even when you’re not at home. Enabling two-way audio provides an added layer of convenience and security. Here’s how to enable it:
- Open the Wyze app on your smartphone or tablet and navigate to the settings for your Video Doorbell Pro.
- Choose the “Audio Settings” or similar option within the settings menu.
- Toggle the switch to enable the two-way audio feature.
- You may have the option to adjust the microphone and speaker volume levels. Test the audio by speaking and listening through the doorbell to ensure the desired sound quality.
- Once you are satisfied with the settings, save your changes and exit the settings menu.
With two-way audio enabled, you can now communicate with visitors through the Wyze app on your smartphone or tablet. When someone presses the doorbell or when motion is detected, you will receive a notification, allowing you to open the app and engage in a conversation with the person at your doorstep.
Two-way audio can be especially useful for receiving package deliveries, communicating with guests, or deterring potential intruders. It adds an extra layer of security to your home and allows you to maintain peace of mind, even when you’re away.
It is important to note that while two-way audio enables communication with visitors, it does not grant them access to your home. It is purely a means of conversation and can be controlled by you through the Wyze app.
Experiment with the microphone and speaker volume levels to find the optimal settings that suit your needs. Adjusting the volume allows for clear and audible communication, ensuring that you can hear visitors and they can hear you effectively.
With two-way audio functionality enabled, you can now customize other settings of your Wyze Video Doorbell Pro. Next, we’ll guide you through the process of customizing the doorbell’s settings according to your preferences. Keep reading!
Customizing Video Doorbell Pro Settings
Customizing the settings of your Wyze Video Doorbell Pro allows you to tailor its functionality to your specific preferences and needs. From adjusting video quality to managing notifications, these settings empower you to create a personalized experience. Here’s how you can customize the settings:
- Open the Wyze app on your smartphone or tablet and navigate to the settings for your Video Doorbell Pro.
- Explore the available settings options, which may include:
- Video Settings: Adjust the resolution and quality of the video feed from the doorbell. Higher quality settings may consume more data and bandwidth.
- Notification Settings: Manage the types of notifications you receive from the Video Doorbell Pro. Customize alert sounds, toggle motion detection notifications, and specify the frequency of notifications.
- Storage Settings: Set up or manage cloud storage for storing recorded video footage from the doorbell. You may have options for free or paid storage plans.
- Device Settings: Access additional device-specific settings, such as camera rotation, night vision settings, or power management options.
- Advanced Settings: Explore advanced options, including network settings, firmware updates, or integration with other smart home devices.
- Event Recording Settings: Configure settings related to recording events triggered by motion or button presses, such as the duration of recordings or enabling continuous recording.
- Adjust the settings according to your preferences and needs. Take the time to explore each setting and understand its impact on the functionality of your Wyze Video Doorbell Pro.
- Experiment with different configurations to find the perfect combination of settings that suit your requirements.
- Once you have customized the settings to your liking, save your changes and exit the settings menu.
It’s important to periodically review and adjust the settings based on your evolving needs. For example, you might want to increase video quality when expecting an important delivery or adjust notification settings during specific time periods to avoid unnecessary interruptions.
Remember to check for firmware updates regularly. Keeping your Wyze Video Doorbell Pro up to date ensures that you have access to the latest features and improvements developed by Wyze.
By customizing the settings of your Video Doorbell Pro, you can optimize its performance, enhance your user experience, and tailor it to your unique requirements. With the settings configured, it’s time to put your doorbell to the test. We’ll cover this in the next section. Keep reading!
Testing the Video Doorbell Pro
After completing the setup and customization of your Wyze Video Doorbell Pro, it’s crucial to perform thorough testing to ensure that all features are functioning correctly. Testing allows you to verify the doorbell’s performance, video streaming quality, motion detection, and two-way audio capabilities. Here’s how you can test your Video Doorbell Pro:
- Using the Wyze app on your smartphone or tablet, navigate to the live view of your Video Doorbell Pro.
- Observe the live video stream from the doorbell’s camera. Check for clear and crisp video quality, ensuring that you have a good view of your front entrance.
- Walk around your porch or front yard to trigger the motion detection feature. Observe if the doorbell accurately detects motion and sends you timely notifications.
- Initiate a test call or send a test sound through the app to test the two-way audio functionality. Ensure that you can clearly hear audio from the doorbell and that your voice is heard through the doorbell’s speaker.
- If you have connected the doorbell to an existing chime, press the doorbell button and verify that it triggers the chime and generates an audible alert inside your home.
- Repeat these tests periodically to ensure that the performance of your Video Doorbell Pro remains consistent over time.
- If you encounter any issues during testing, consult the troubleshooting tips provided in the user guide or contact Wyze customer support for assistance.
Testing is crucial to ensure that your Wyze Video Doorbell Pro is functioning as intended and providing the level of security and convenience you expect. By verifying the doorbell’s performance, you can address any potential issues promptly and enjoy a smooth and hassle-free experience.
Keep in mind that environmental factors, such as lighting conditions and Wi-Fi signal strength, can affect the performance of your Video Doorbell Pro. Make adjustments to settings or positioning as necessary to optimize performance.
By completing the testing process, you can have peace of mind knowing that your Wyze Video Doorbell Pro is ready to protect your home and provide you with valuable features. In case you encounter any problems along the way, don’t hesitate to seek assistance from Wyze customer support.
Now that you’ve successfully tested your Video Doorbell Pro, you’re all set to enjoy the convenience and security it brings to your home. In the final section, we’ll provide you with some troubleshooting tips to help you overcome common challenges. Keep reading!
Troubleshooting Tips
While setting up and using your Wyze Video Doorbell Pro, you may encounter some common challenges or issues. For a smooth and optimal experience, here are some troubleshooting tips to help you overcome any obstacles:
- Issue: Poor video quality or streaming issues. Ensure that your Wi-Fi signal is strong and stable by positioning your router closer to the doorbell or using a Wi-Fi range extender. You may also need to adjust the video quality settings within the Wyze app.
- Issue: Motion detection not working as expected. Verify that the motion detection zones are properly set up and that the sensitivity level is adjusted appropriately. Ensure that there are no obstructions or obstacles blocking the view of the doorbell’s camera.
- Issue: No sound or audio delays during two-way communication. Check your internet connection and ensure that both your smartphone and the doorbell have a stable connection. Adjust the microphone and speaker volume levels within the Wyze app to ensure optimal audio quality.
- Issue: Doorbell not connecting to Wi-Fi. Make sure that you entered the correct Wi-Fi credentials during the setup process. If the issue persists, try restarting your Wi-Fi router and ensure that the doorbell is within range of the Wi-Fi signal.
- Issue: Doorbell does not trigger existing chime. Double-check the wiring connections between the doorbell and the chime connector. Ensure that the doorbell is compatible with your existing chime, or consider contacting Wyze customer support for assistance.
- Issue: App connection issues or notifications not received. Verify that your smartphone or tablet has a stable internet connection and that the Wyze app has the necessary permissions. Ensure that notifications are enabled within the app settings and that you haven’t accidentally muted or disabled them.
- Issue: Short battery life. If your Video Doorbell Pro is battery-powered, make sure it is adequately charged. Consider adjusting the settings in the Wyze app to optimize battery usage, such as reducing video quality or enabling power-saving features.
- Issue: Difficulty with firmware updates. Ensure that your Wyze app and the Video Doorbell Pro have the latest firmware versions. If you encounter issues with firmware updates, try restarting the doorbell or contacting Wyze customer support for assistance.
If you continue to experience problems or encounter issues not mentioned here, consult the user guide provided with your Wyze Video Doorbell Pro or reach out to Wyze customer support for further assistance. They will be equipped to help you troubleshoot and resolve any additional challenges you may face.
Remember, troubleshooting is a normal part of the setup and usage process, and with the right guidance, you can effectively address any technical issues that arise. By following these troubleshooting tips, you can ensure a smooth and reliable experience with your Wyze Video Doorbell Pro.
Now that you’re equipped with troubleshooting knowledge, you can confidently navigate any challenges that may arise, providing you with peace of mind and a secure home environment.
Conclusion
Congratulations! You have successfully set up and customized your Wyze Video Doorbell Pro. By following the step-by-step instructions, unboxing the device, checking system requirements, installing the app, connecting to Wi-Fi, mounting the doorbell, wiring it, setting up motion detection zones, enabling two-way audio, and customizing the settings, you have transformed your home’s security and convenience.
The Wyze Video Doorbell Pro offers an array of features, including high-definition video recording, motion detection, two-way audio, and customizable settings. It provides you with the ability to monitor and communicate with visitors at your doorstep, whether you’re at home or away. The motion detection zones and sensitivity settings allow you to fine-tune the doorbell’s behavior to your specific needs, minimizing false alerts. With the added convenience of two-way audio, you can easily communicate with guests, delivery drivers, or potential intruders.
Throughout the setup and usage process, it’s important to remember the troubleshooting tips provided to overcome any challenges that may arise. Whether you encounter issues with video quality, motion detection, or connectivity, they can be resolved with a few simple steps.
By embracing the capabilities of your Wyze Video Doorbell Pro and customizing it to your preferences, you have taken an important step towards enhancing the security and peace of mind in your home. Whether you’re receiving package deliveries, interacting with guests, or monitoring your property, the doorbell provides you with a powerful tool to stay connected and in control.
Remember to periodically review and adjust your settings as needed, stay up to date with firmware updates, and take advantage of the customer support resources available to you should you require further assistance.
Enjoy the benefits of your Wyze Video Doorbell Pro and the peace of mind that comes with knowing you have a reliable and effective home security solution at your doorstep.