Introduction
Installing a wired video doorbell is an excellent way to enhance the security and convenience of your home. With a wired video doorbell, you can monitor who is at your front door and communicate with them, even when you’re not home. Whether you’re upgrading from a traditional doorbell or installing a video doorbell for the first time, this guide will provide you with step-by-step instructions to help you through the installation process.
Before diving into the installation, it’s important to ensure that you have the necessary tools and materials handy. The specific requirements may vary depending on the make and model of your video doorbell, so be sure to refer to the manufacturer’s instructions for any additional items you may need.
In this guide, we will cover the installation of a wired video doorbell using a mounting bracket that attaches to the wall or door frame. If your video doorbell comes with a different mounting style, consult the manufacturer’s instructions for the appropriate installation steps.
Now let’s get started with step one, where we will gather the necessary tools and materials to complete the installation.
Step 1: Gather the necessary tools and materials
Before you begin the installation process, it’s essential to ensure that you have all the required tools and materials. By having everything ready, you can streamline the installation and avoid unnecessary delays.
Here’s a list of tools and materials you’ll need:
- A wired video doorbell kit
- A screwdriver (check the specifications needed for the doorbell)
- A drill and drill bits
- A wire cutter/stripper
- A voltage tester
- A level
Before starting the installation, ensure that you have read the instructions provided by the manufacturer. This will give you a better understanding of the specific tools and materials required for your video doorbell model.
Once you have gathered all the necessary tools and materials, you can move on to the next step, where we will prepare the doorbell unit for installation.
Step 2: Prepare the doorbell unit
Before you install the doorbell unit, it’s important to prepare it and make sure it’s in proper working condition. This step will ensure a smooth installation process and optimize the functionality of your video doorbell.
Here are the key steps to prepare the doorbell unit:
- Read the manufacturer’s instructions: Familiarize yourself with the specific requirements and recommendations provided by the manufacturer. This will help you understand the unique features and functionalities of your video doorbell.
- Inspect the unit: Carefully inspect the doorbell unit to ensure there are no visible damages or defects. Check for any loose screws or connection points that may need attention.
- Charge the battery (if applicable): If your video doorbell uses a battery, make sure it’s fully charged before installing it. Refer to the manufacturer’s instructions on how to charge the battery properly.
- Adjust the camera angle: Many video doorbells have an adjustable camera angle to optimize the viewing area. Adjust the camera angle according to your specific needs, ensuring that it is pointing towards the desired area and capturing the right field of view.
- Test the doorbell functionality: Before proceeding with the installation, test the doorbell unit to ensure it is functioning correctly. Check if the camera, microphone, speaker, and other features are working as expected.
By following these steps, you can ensure that your doorbell unit is ready for installation. Taking the time to prepare the unit will help you avoid any unforeseen issues that may arise during the installation process.
Once you have prepared the doorbell unit, you are now ready to move on to the next step, which is installing the mounting bracket.
Step 3: Install the mounting bracket
The mounting bracket is an essential component of the wired video doorbell installation process. It provides a secure base for attaching the doorbell unit to the wall or door frame. Installing the mounting bracket correctly is crucial for the stability and functionality of your video doorbell.
Follow these steps to install the mounting bracket:
- Choose the installation location: Select a suitable location for installing the mounting bracket. Ensure that it is at a height that allows for optimal camera coverage and accessibility. Additionally, check if there is enough space for routing the wires.
- Mark the screw hole locations: Hold the mounting bracket against the wall or door frame and use a pencil or marker to mark the screw hole locations. Make sure the bracket is level to ensure a proper installation position.
- Pre-drill the holes: Use a drill and the appropriate drill bit to pre-drill holes at the marked locations. The size of the drill bit should match the screws provided with the mounting bracket.
- Align the bracket: Hold the mounting bracket against the wall or door frame and align it with the pre-drilled holes. Ensure that it is level and positioned correctly.
- Secure the bracket: Insert and tighten the screws through the holes in the mounting bracket and into the pre-drilled holes. Use a screwdriver to ensure a secure fit.
Once the mounting bracket is securely installed, it will provide a sturdy foundation for attaching the doorbell unit. Take a moment to verify that the bracket is level and firmly in place before moving on to the next step.
With the mounting bracket successfully installed, you can now proceed to the next step, where we will discuss how to connect and route the wiring for your wired video doorbell.
Step 4: Connect and route the wiring
Connecting and routing the wiring for your wired video doorbell is a crucial step in the installation process. Properly handling the wires ensures a secure and efficient electrical connection, as well as prevents any potential issues down the line.
Follow these steps to connect and route the wiring:
- Turn off the power: Before handling any electrical connections, turn off the power to the existing doorbell or the designated circuit breaker. This step ensures your safety and prevents any electrical mishaps.
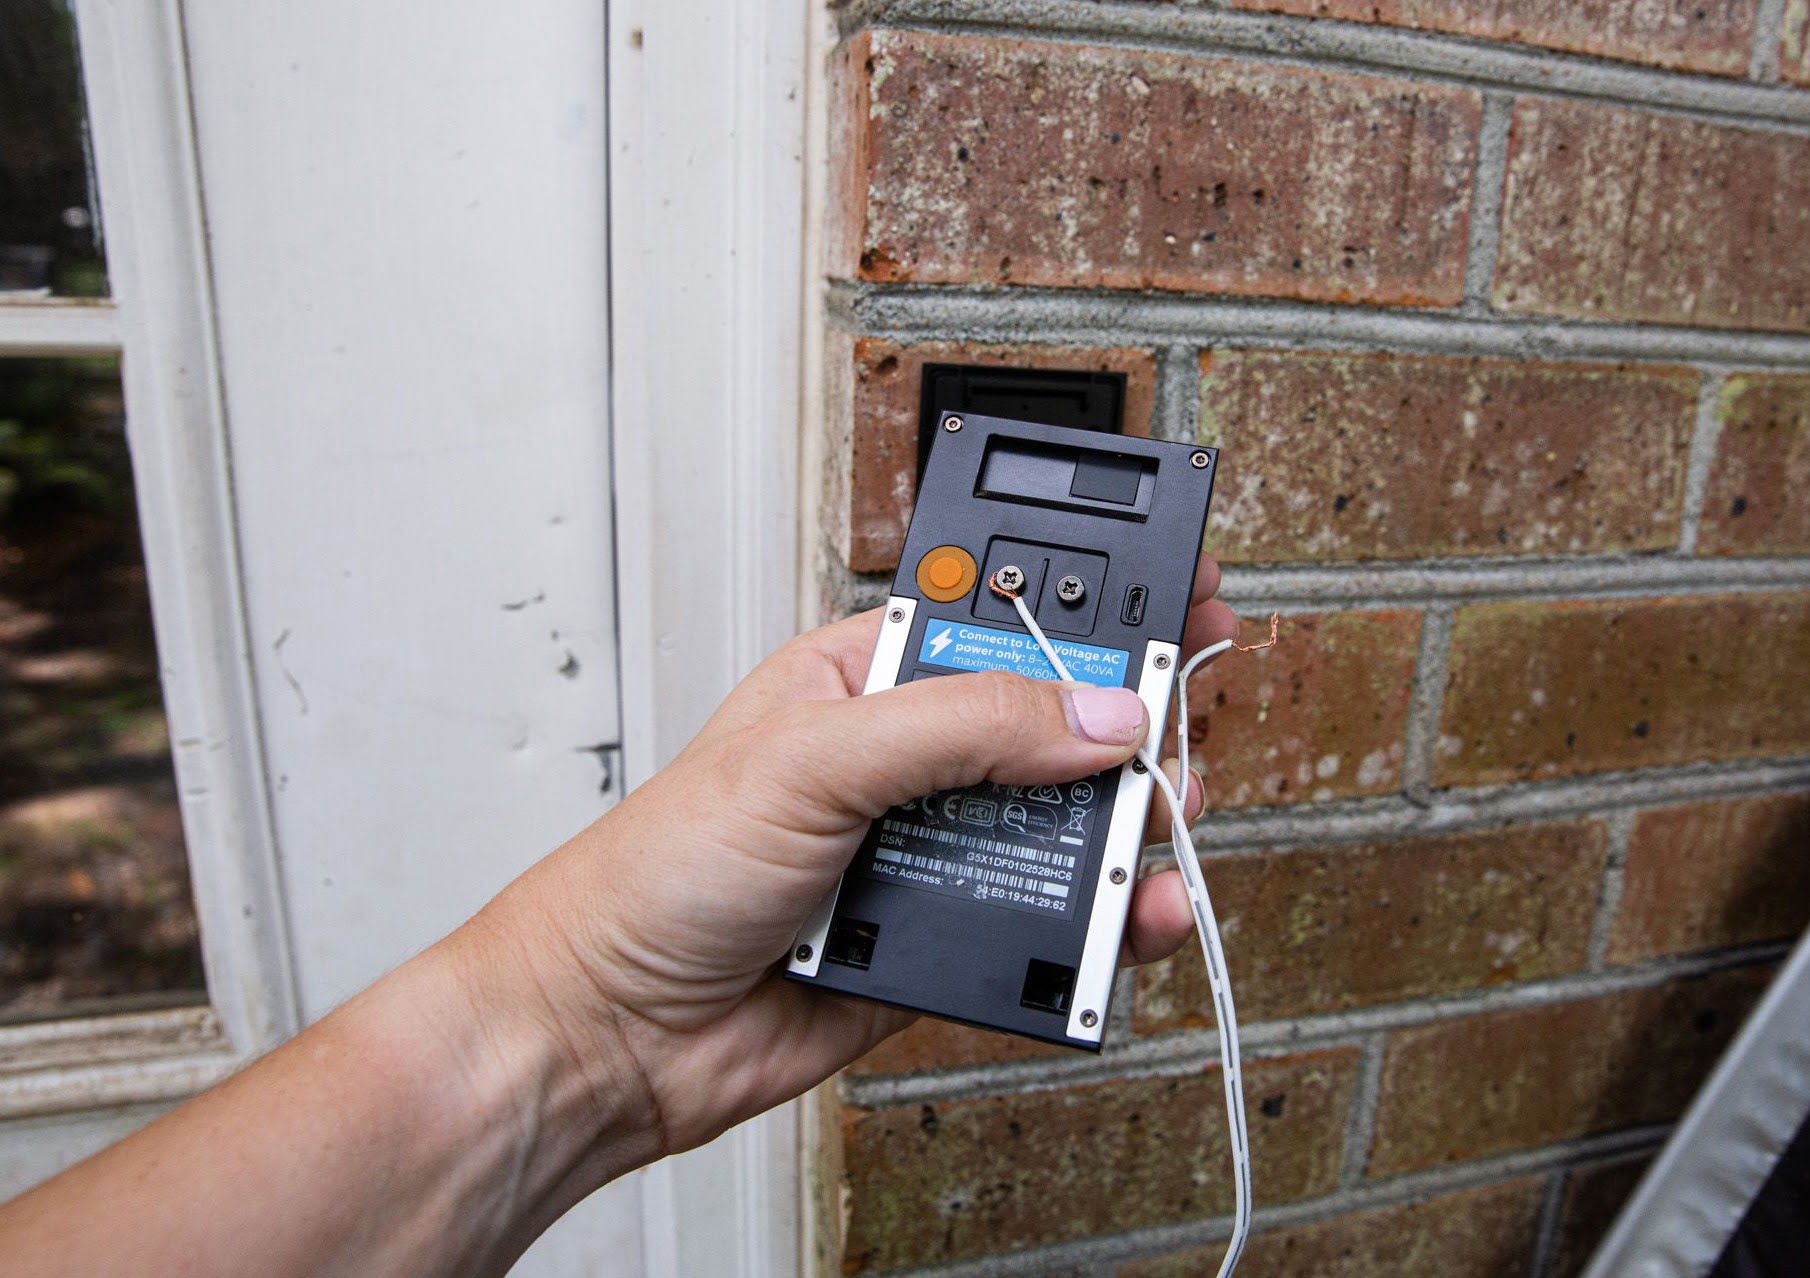
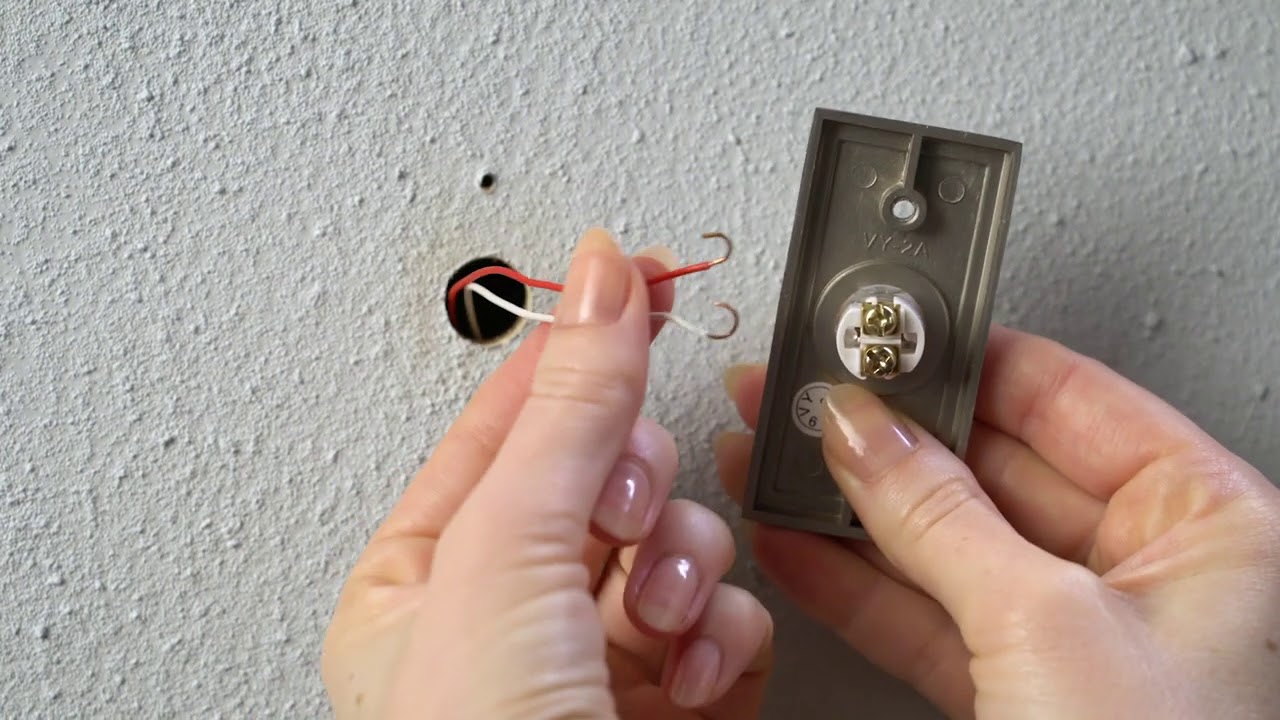
- Prepare the wires: Strip the insulation from the ends of the doorbell wires using a wire cutter/stripper. This will expose enough copper wire to create a secure connection.
- Route the wires: Identify a suitable pathway to route the wires from the mounting bracket to the location where the doorbell chime or transformer is located. Make sure to choose a route where the wires are protected and hidden from sight.
- Secure the wires: Use cable clips or staples to secure the wires along the route you’ve chosen. This will prevent them from dangling or getting damaged.
- Connect the wires: Follow the manufacturer’s instructions for the specific wiring configuration of your video doorbell. Connect the wires from the mounting bracket to the appropriate terminals on the doorbell chime or transformer.
- Double-check the connections: After making the connections, ensure that they are secure and tightened properly. Loose connections can lead to malfunctions or intermittent operation.
- Maintain wire separation: If you have multiple wires, keep them separate and ensure that they do not touch or cross over each other. This prevents any interference or short circuits.
By carefully connecting and routing the wiring, you will ensure a safe and reliable power supply to your video doorbell. Take your time to double-check the connections and make any necessary adjustments before proceeding to the next step.
Now that the wiring is in place, we can move on to the next step, which is mounting the doorbell unit onto the bracket.
Step 5: Mount the doorbell unit
Mounting the doorbell unit onto the installed mounting bracket is the next step in the installation process. This step involves attaching the doorbell unit securely to the bracket, ensuring stability and proper alignment.
Follow these steps to mount the doorbell unit:
- Position the doorbell unit: Hold the doorbell unit near the mounting bracket, aligning it with the screw holes.
- Line up the holes: Carefully align the screw holes on the back of the doorbell unit with the corresponding holes on the mounting bracket.
- Insert and tighten the screws: Insert the screws through the screw holes on the doorbell unit and into the pre-drilled holes on the mounting bracket. Use a screwdriver to tighten the screws securely.
- Ensure proper alignment: Confirm that the doorbell unit is level and aligned correctly. Adjust the position if needed before tightening the screws fully.
- Check for stability: Gently tug on the doorbell unit to ensure that it is firmly attached to the mounting bracket. It should not move or feel loose.
Properly mounting the doorbell unit is crucial for maintaining its stability and functionality. It ensures that the camera captures the desired field of view and that the doorbell is securely attached to the wall or door frame.
Once the doorbell unit is securely mounted, it’s time to connect the wires from the mounting bracket to the appropriate terminals in the doorbell unit. This will be covered in the next step of the installation process.
Step 6: Connect the wires
With the doorbell unit securely mounted, the next step is to connect the wires from the mounting bracket to the appropriate terminals in the doorbell unit. This step will establish the electrical connection required for the video doorbell to function.
Follow these steps to connect the wires:
- Identify the wire terminals: Take a close look at the back of the doorbell unit and locate the wire terminals. These terminals are usually labeled with letters or symbols that indicate their corresponding functions.
- Match the wires to the terminals: Typically, the doorbell wires are color-coded – one wire will be labeled “Front” or “Trans” (for the transformer connection) and the other wire “Rear” or “Chime” (for the doorbell chime connection).
- Connect the wires: Take the wire labeled “Front” or “Trans” and securely connect it to the corresponding terminal on the doorbell unit. Repeat this step for the wire labeled “Rear” or “Chime” and its respective terminal. Follow the manufacturer’s instructions for proper wire attachment.
- Ensure proper connections: Double-check the connections to ensure that the wires are properly secured to the terminals. Loose connections can result in intermittent operation or a complete loss of functionality.
- Organize and tuck away wires: Arrange the connected wires in a neat and organized manner to minimize any interference or obstruction. Use cable clips or tape to secure the wires and prevent them from being exposed.
Once the wires are properly connected and organized, you have established the electrical connection necessary for your wired video doorbell to operate. Make sure the connections are secure before proceeding to the next step.
In the next step, we will test the doorbell functionality to ensure everything is working smoothly.
Step 7: Test the doorbell functionality
Once the wires are securely connected, it’s time to test the functionality of your wired video doorbell. Testing ensures that everything is working as intended and allows you to address any potential issues before completing the installation.
Follow these steps to test the doorbell functionality:
- Restore power: Turn the power back on to the doorbell circuit or restore power to the area where your video doorbell is connected.
- Trigger the doorbell: Press the button on the doorbell or use the designated method to trigger a doorbell event.
- Observe the response: Pay attention to how the video doorbell responds. Check if the camera captures the video feed, if the doorbell chime or app receives the notification, and if you can hear and communicate with the person at your door.
- Test different scenarios: Try different scenarios, such as someone ringing the doorbell, motion detection activating the doorbell, or utilizing any other features specific to your video doorbell model. This will help you identify any potential issues or fine-tune the settings.
- Verify audio and video quality: Ensure that the audio quality is clear and that the video feed is of adequate quality to clearly see visitors. If there are any issues, consult the manufacturer’s instructions for troubleshooting options.
By thoroughly testing the doorbell functionality, you can ensure that all components are working correctly and that you’re satisfied with the performance of your wired video doorbell.
If you encounter any issues during the testing phase, refer to the manufacturer’s troubleshooting guide or contact customer support for assistance. Once you’re confident that the doorbell is functioning as expected, you can proceed to the final step of the installation process.
Step 8: Finalize the installation
Congratulations! You’ve made it to the final step of installing your wired video doorbell. This step involves completing any remaining tasks to ensure a polished and professional installation.
Follow these final steps to finalize the installation:
- Tidy up the wires: Take a moment to tidy up the wires and ensure they are neatly arranged and securely tucked away. Use cable clips or tape to manage any excess wire length and prevent them from being exposed or tangled.
- Seal any openings: If there are any openings or gaps around the doorbell unit or wiring, use weather-resistant sealant or silicone caulk to seal them. This will help protect the components from moisture and ensure the longevity of your video doorbell.
- Secure the doorbell cover: If your video doorbell has a removable cover or faceplate, make sure it is properly secured in place. This will protect the internal components from dust, debris, and the elements.
- Double-check security features: If your video doorbell has additional security features such as motion detection or facial recognition, review the settings and adjust them based on your preferences. Familiarize yourself with any available security and privacy options.
- Review the user manual: Take some time to review the user manual or any relevant support documentation provided by the manufacturer. This will ensure you are aware of all the features and functionalities of your specific video doorbell model.
By completing these final tasks, you can ensure that your installation is not only functional but also visually appealing and well-protected. Take pride in your newly installed wired video doorbell, knowing that it will provide enhanced security and convenience to your home.
With the installation finalized, you can now enjoy the benefits of having a wired video doorbell, including enhanced security, remote monitoring, and convenient communication with visitors at your doorstep.
Remember to keep the user manual and contact information for customer support in case you need further assistance or have any questions in the future.
Conclusion
Installing a wired video doorbell can significantly enhance the security and convenience of your home. By following the step-by-step instructions outlined in this guide, you have successfully completed the installation process. From gathering the necessary tools and materials to mounting the doorbell unit and connecting the wiring, each step has brought you closer to enjoying the benefits of a wired video doorbell.
During the installation process, you have learned how to properly prepare the doorbell unit, install the mounting bracket, connect and route the wiring, and test the doorbell’s functionality. By meticulously completing each step, you have ensured that the installation is done correctly and efficiently.
Now, you can confidently monitor your front door from anywhere, receive notifications, and communicate with visitors, providing you with peace of mind and enhanced security. Whether it’s detecting motion, answering the door remotely, or reviewing saved video footage, your wired video doorbell offers advanced features to keep your home safe.
Remember, each wired video doorbell model may have specific instructions and requirements, so always refer to the manufacturer’s instructions for your specific device. Regularly check for firmware or software updates to ensure the optimal performance of your video doorbell.
Enjoy the benefits of your newly installed wired video doorbell and make the most of the added security and convenience it brings to your home. Welcome to a smarter way of monitoring and protecting your property!