Introduction
Connecting a TV to an AV receiver without HDMI is a common challenge faced by many home entertainment enthusiasts. While HDMI has become the standard for high-definition audio and video transmission, older TVs and AV receivers may not have HDMI ports. Fortunately, there are alternative methods to establish a seamless connection between your TV and AV receiver, allowing you to enjoy immersive audio and crystal-clear visuals.
In this guide, we will explore various non-HDMI connection options for linking your TV to an AV receiver. Whether you have an older TV with limited connectivity or an AV receiver that predates HDMI technology, these methods will enable you to harness the full potential of your home theater system.
By understanding the different types of audio and video connections available, you can make informed decisions about how to best integrate your TV and AV receiver. From optical and digital coaxial cables to RCA connections, each approach offers its own advantages and considerations. Additionally, we will delve into the setup process for your AV receiver to ensure optimal performance when using non-HDMI connections.
As we embark on this journey to connect your TV to an AV receiver without HDMI, it's essential to approach the process with a sense of exploration and discovery. While it may seem daunting at first, the satisfaction of achieving a seamless connection and experiencing high-fidelity audio and stunning visuals will make the effort well worth it.
So, let's dive into the world of non-HDMI connections and unlock the full potential of your home entertainment system. Whether you're a seasoned audio-visual enthusiast or a newcomer to the world of home theater setups, this guide will equip you with the knowledge and confidence to bridge the gap between your TV and AV receiver, creating an immersive and captivating viewing experience.
Understanding the AV Receiver and TV Connections
Before delving into the specific methods for connecting your TV to an AV receiver without HDMI, it’s crucial to understand the fundamental principles of these devices’ connections and compatibility. An AV receiver serves as the central hub for audio and video signals in a home entertainment system, while the TV acts as the primary display for visual content. Both devices rely on various input and output ports to facilitate seamless communication and signal transmission.
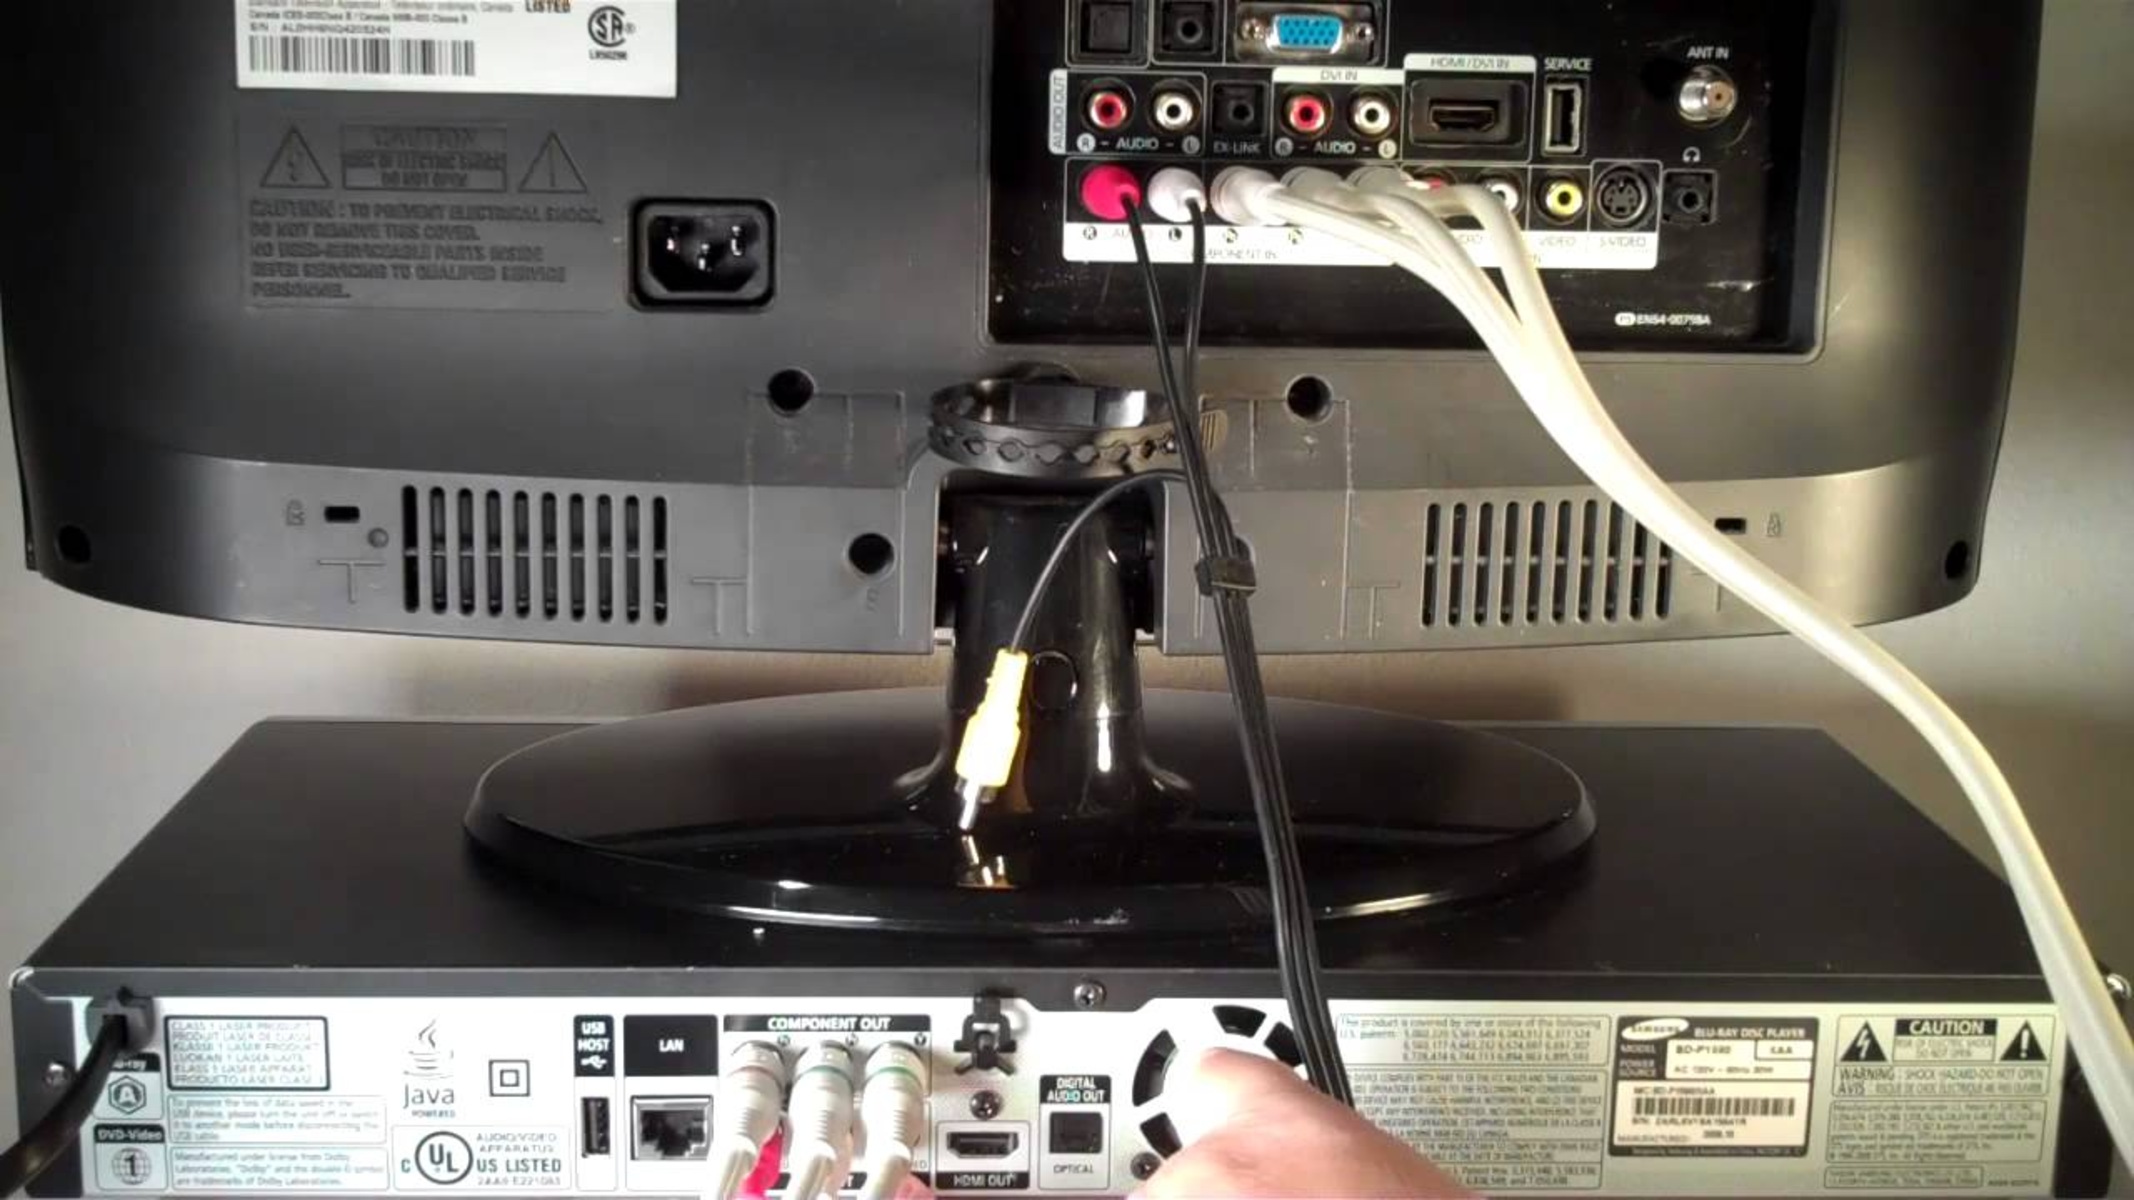
When exploring non-HDMI connection options, it’s essential to identify the available input and output ports on both the TV and AV receiver. Older TVs may feature analog audio and video inputs, such as composite and component connections, in addition to digital audio outputs like optical and digital coaxial ports. Similarly, AV receivers designed before the widespread adoption of HDMI may offer a range of analog and digital audio inputs and outputs to accommodate diverse connectivity needs.
Understanding the specific ports and their corresponding audio and video signals is crucial for determining the most suitable connection method for your TV and AV receiver. For instance, if your TV lacks HDMI but features an optical audio output, you can leverage this digital audio connection to transmit high-quality sound to the AV receiver. Additionally, recognizing the limitations and capabilities of each type of connection will empower you to make informed decisions when establishing the link between your TV and AV receiver.
Moreover, compatibility between the audio and video formats supported by the TV and AV receiver is a key consideration. While HDMI offers a unified solution for transmitting both audio and video signals, non-HDMI connections may require separate cables for audio and video transmission. This distinction underscores the importance of aligning the capabilities of your TV and AV receiver to ensure seamless compatibility and optimal performance.
By gaining a comprehensive understanding of the input and output options, as well as the audio and video formats supported by your TV and AV receiver, you can navigate the process of connecting them without HDMI with confidence and clarity. This foundational knowledge forms the bedrock for exploring the specific non-HDMI connection methods detailed in the subsequent sections, enabling you to tailor the approach to your unique home entertainment setup.
Connecting the TV to the AV Receiver using Optical or Digital Coaxial Cable
When your TV lacks HDMI connectivity but features digital audio outputs such as optical or digital coaxial ports, leveraging these interfaces to connect to your AV receiver can yield high-fidelity audio transmission. Optical and digital coaxial cables are capable of transmitting digital audio signals, providing a reliable and immersive audio experience when paired with a compatible AV receiver.
To establish the connection using an optical cable, begin by locating the optical audio output port on your TV. This port is typically labeled as “Optical,” “TOSLINK,” or “SPDIF,” and it utilizes a distinctive square-shaped connector. Once identified, insert one end of the optical cable into the TV’s optical output port, ensuring a secure fit to maintain optimal signal transmission.
Next, locate the corresponding optical audio input port on your AV receiver. This port is often labeled to indicate its compatibility with optical connections. Insert the other end of the optical cable into the AV receiver’s optical input port, aligning the connector with the port and gently securing it in place.
If your TV features a digital coaxial output, the connection process follows a similar approach. Locate the digital coaxial output port on your TV, which is typically labeled as “Digital Coaxial” or “Coax Out.” Connect one end of the digital coaxial cable to this port, ensuring a snug and secure fit to maintain signal integrity.
Subsequently, identify the digital coaxial input port on your AV receiver. This port may be labeled to indicate its compatibility with digital coaxial connections. Insert the other end of the digital coaxial cable into the AV receiver’s digital coaxial input port, aligning the connector with the port and securing it firmly to establish a reliable audio link.
Upon completing the optical or digital coaxial connection between your TV and AV receiver, ensure that the audio input settings on the AV receiver are configured to correspond with the selected input source. This may involve accessing the AV receiver’s settings menu and designating the optical or digital coaxial input as the active audio source.
By utilizing optical or digital coaxial cables to connect your TV to the AV receiver, you can harness the full potential of digital audio transmission, delivering immersive soundscapes that complement the visual experience. These non-HDMI connection options offer a seamless and effective means of integrating your TV and AV receiver, ensuring a captivating audio-visual journey in your home entertainment environment.
Connecting the TV to the AV Receiver using RCA Cables
When seeking to establish a connection between your TV and AV receiver without HDMI, utilizing RCA cables presents a viable solution, particularly for transmitting analog audio signals. While HDMI represents a digital interface for audio and video transmission, RCA cables, also known as composite cables, facilitate analog audio and video connections, offering a versatile alternative for non-HDMI setups.
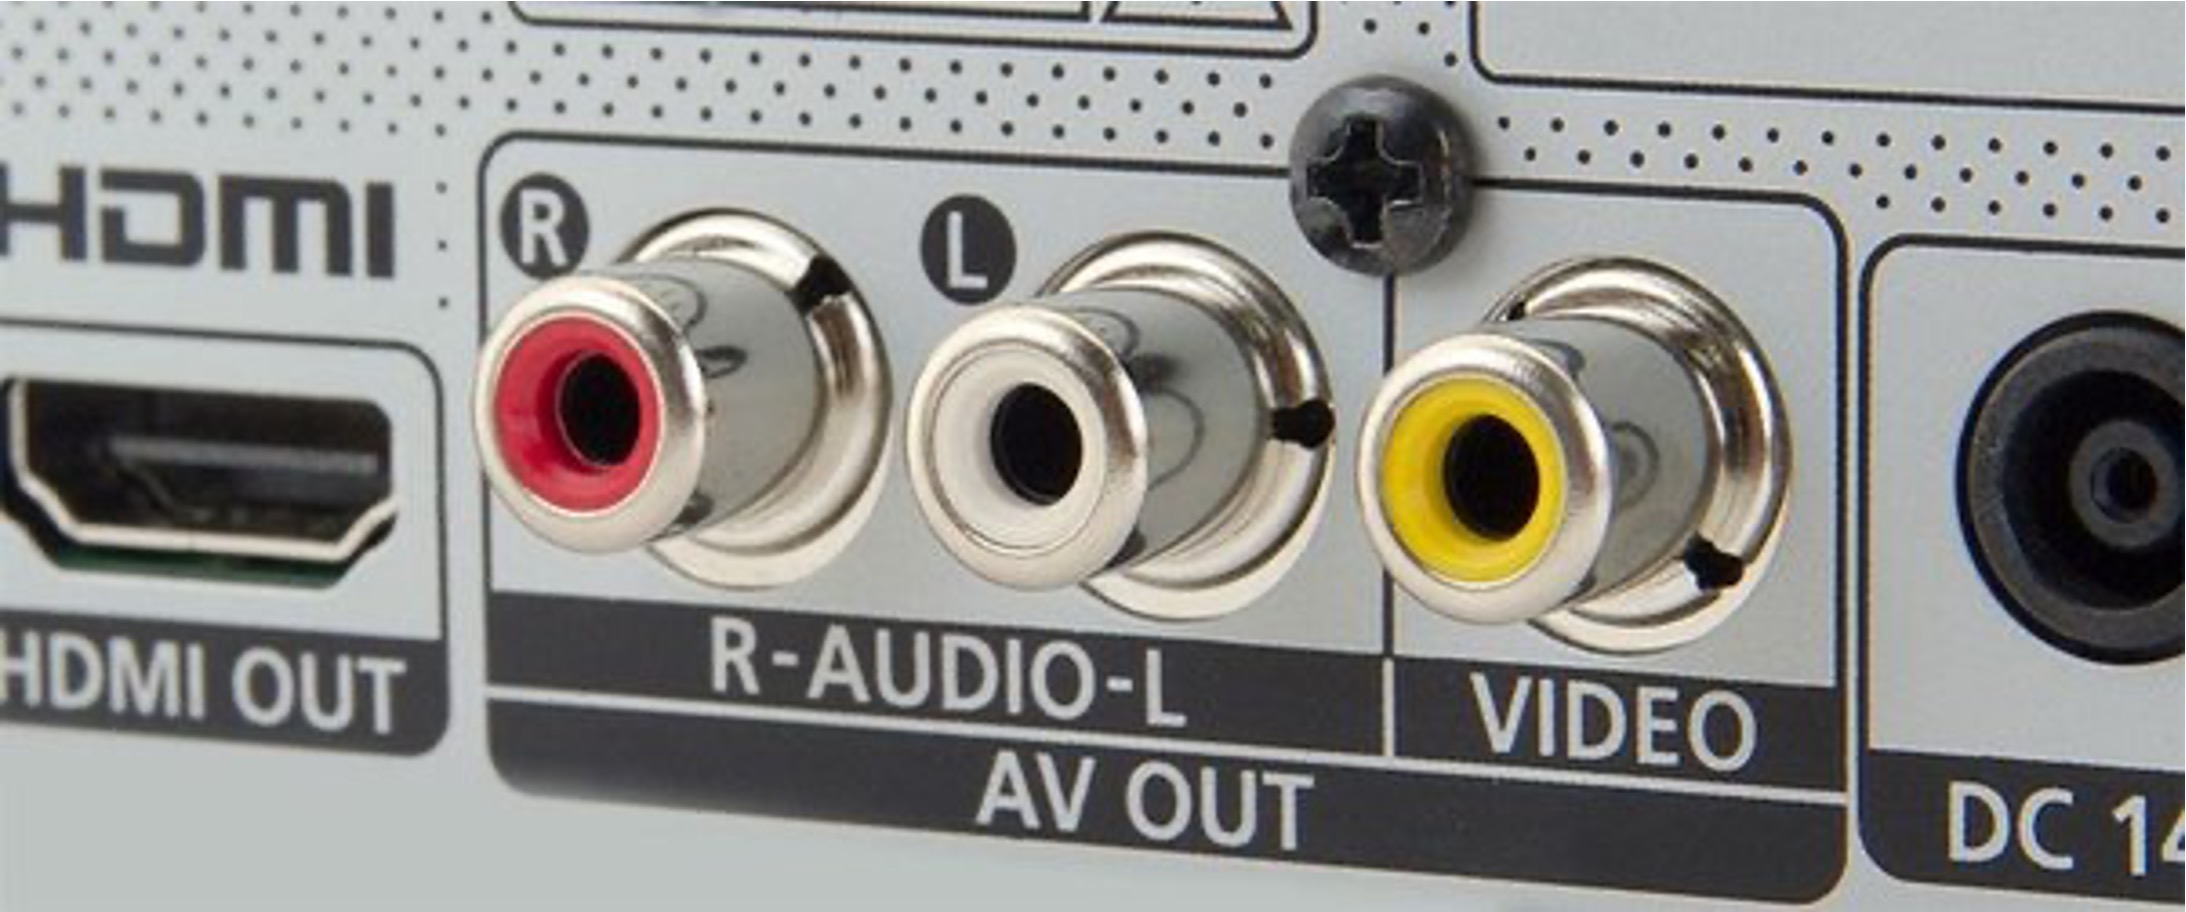
To initiate the connection using RCA cables, identify the analog audio output ports on your TV. These ports are typically color-coded as red and white, corresponding to the right and left audio channels, respectively. Insert one end of the RCA cables into the matching red and white output ports on your TV, ensuring a secure and snug fit to maintain reliable audio signal transmission.
Subsequently, locate the analog audio input ports on your AV receiver. These ports may be labeled to indicate their compatibility with RCA connections, often denoted as “Audio In” or “Auxiliary In.” Insert the other end of the RCA cables into the corresponding analog audio input ports on the AV receiver, aligning the red and white connectors with their respective ports to establish a seamless audio link.
It’s important to note that RCA cables are designed specifically for analog audio transmission and may not support video signals. Therefore, if you intend to transmit both audio and video signals from your TV to the AV receiver, alternative connection methods, such as optical or digital coaxial cables for audio and separate video connections, may be necessary to achieve a comprehensive integration of audio-visual components.
After connecting the TV to the AV receiver using RCA cables, it’s essential to configure the audio input settings on the AV receiver to correspond with the selected input source. This may involve accessing the AV receiver’s settings menu and designating the RCA input as the active audio source, ensuring that the analog audio signals from the TV are processed and amplified effectively.
By leveraging RCA cables to establish the audio connection between your TV and AV receiver, you can bridge the gap between analog audio sources and modern AV receiver systems, enabling a seamless integration of audio components within your home entertainment environment. While HDMI represents a digital standard for audio-visual transmission, RCA cables offer a reliable and versatile method for transmitting analog audio signals, contributing to a rich and immersive auditory experience when paired with a compatible AV receiver.
Setting up the AV Receiver for Non-HDMI Connections
Configuring your AV receiver to accommodate non-HDMI connections is essential for optimizing the audio-visual experience when linking it to a TV without HDMI capabilities. Whether utilizing optical, digital coaxial, or RCA cables to establish the connection, the setup process involves adjusting the AV receiver’s settings to recognize and process the incoming audio signals effectively.
Firstly, access the AV receiver’s settings menu, typically accessible through the on-screen display or a dedicated setup button on the receiver or remote control. Navigate to the input settings or audio configuration section to customize the receiver’s behavior when receiving audio signals from the connected TV.
If using an optical or digital coaxial connection, select the corresponding input source on the AV receiver to align with the port to which the TV is connected. This ensures that the receiver’s audio processing capabilities are directed towards the optical or digital coaxial input, enabling it to decode and amplify the incoming digital audio signals effectively.
For RCA connections, designate the analog audio input port on the AV receiver as the active source for the connected TV. This involves identifying the specific input channel associated with the RCA connection and selecting it within the AV receiver’s settings to ensure that the analog audio signals are processed and amplified accurately.
Additionally, verify that the AV receiver’s audio processing settings are tailored to the characteristics of the incoming audio signals. This may involve configuring the receiver’s audio mode, equalization settings, and channel configuration to optimize the playback of audio content transmitted from the TV. By fine-tuning these settings, you can tailor the audio output to suit your preferences and the capabilities of your speaker system.
Furthermore, if your TV supports multiple audio formats, such as Dolby Digital or DTS, ensure that the AV receiver is equipped to decode and process these formats. Access the receiver’s audio format settings to verify that it can effectively handle the audio signals transmitted via the non-HDMI connection, enabling you to experience immersive surround sound and high-fidelity audio reproduction.
By setting up the AV receiver to accommodate non-HDMI connections, you can ensure that the audio signals from the connected TV are processed and amplified with precision, delivering an immersive and captivating auditory experience. Whether utilizing optical, digital coaxial, or RCA connections, tailoring the AV receiver’s settings to align with the incoming audio signals is crucial for unlocking the full potential of your home entertainment system.
Testing the Connection and Troubleshooting Issues
After establishing the non-HDMI connection between your TV and AV receiver using optical, digital coaxial, or RCA cables, it’s essential to conduct thorough testing to ensure the seamless integration of audio and, if applicable, video signals. By verifying the connection and addressing potential issues, you can fine-tune the setup and address any challenges that may arise, ultimately enhancing the overall performance of your home entertainment system.
Begin the testing process by powering on the TV and AV receiver, ensuring that both devices are configured to receive input from the designated sources. Select the corresponding input channel on the AV receiver that aligns with the connected TV, allowing it to process the incoming audio signals effectively. If utilizing RCA cables for analog audio transmission, confirm that the AV receiver is set to receive input from the designated analog audio input ports.
Play a variety of audio and video content from different sources, such as streaming services, Blu-ray players, or gaming consoles, to assess the performance of the non-HDMI connection. Listen for clear and immersive audio reproduction, ensuring that the AV receiver processes the incoming signals accurately and delivers high-quality sound to your speaker system.
If transmitting video signals in addition to audio, verify that the video output from the TV is displayed seamlessly on the screen. Check for any visual artifacts, signal disruptions, or compatibility issues that may affect the video playback, and adjust the settings on both the TV and AV receiver as needed to optimize the visual experience.
During the testing phase, be attentive to any potential issues that may arise, such as audio dropouts, distorted video output, or compatibility challenges between the TV and AV receiver. If you encounter any issues, consider the following troubleshooting steps:
- Inspect the cable connections to ensure they are secure and properly seated in the respective ports on the TV and AV receiver.
- Verify that the selected input channels and audio/video settings on both the TV and AV receiver align with the connected sources.
- Check for firmware updates for the TV and AV receiver, as updated software may address compatibility issues and enhance performance.
- Consult the user manuals for the TV and AV receiver to explore specific troubleshooting steps and recommended settings for non-HDMI connections.
If troubleshooting efforts do not resolve the issues, consider consulting with technical support or seeking assistance from audio-visual professionals to diagnose and address any persistent challenges. By conducting thorough testing and troubleshooting, you can refine the non-HDMI connection between your TV and AV receiver, ensuring a seamless and immersive audio-visual experience that enriches your home entertainment environment.