Introduction
Connecting an AV receiver to a TV is a fundamental step in creating a home theater system that delivers high-quality audio and video. Whether you're a movie enthusiast, a gaming aficionado, or a music lover, the seamless integration of your AV receiver and TV is essential for an immersive entertainment experience. By establishing this connection, you can unlock the full potential of your audiovisual setup, allowing you to enjoy crisp sound and vibrant visuals.
In this comprehensive guide, we will walk you through the process of connecting your AV receiver to your TV, covering various methods and providing step-by-step instructions. By the end of this tutorial, you will have the knowledge and confidence to set up this essential link in your home entertainment system.
Let's dive into the intricacies of this connection, from gathering the necessary cables and equipment to adjusting the settings on both your AV receiver and TV. Whether you're a tech-savvy individual or a newcomer to the world of audiovisual setups, this guide is designed to be accessible and informative for all levels of expertise.
So, grab your HDMI, optical, or coaxial cables, and let's embark on this journey to seamlessly connect your AV receiver to your TV. Get ready to elevate your home entertainment experience to new heights as we explore the steps to establish a robust and reliable connection between these two pivotal components of your entertainment hub.
Step 1: Gather the Necessary Cables and Equipment
Before diving into the connection process, it’s essential to gather the required cables and equipment to ensure a smooth setup. Here’s a list of items you’ll need:
- HDMI Cable: This cable will serve as the primary connection between your AV receiver and TV, transmitting both high-definition video and audio signals. Ensure that you have an HDMI cable with the appropriate length to reach from your AV receiver to your TV.
- Optical or Coaxial Cable (Optional): Depending on your specific audio setup, you may also need an optical or coaxial cable to transmit digital audio signals from your AV receiver to your TV.
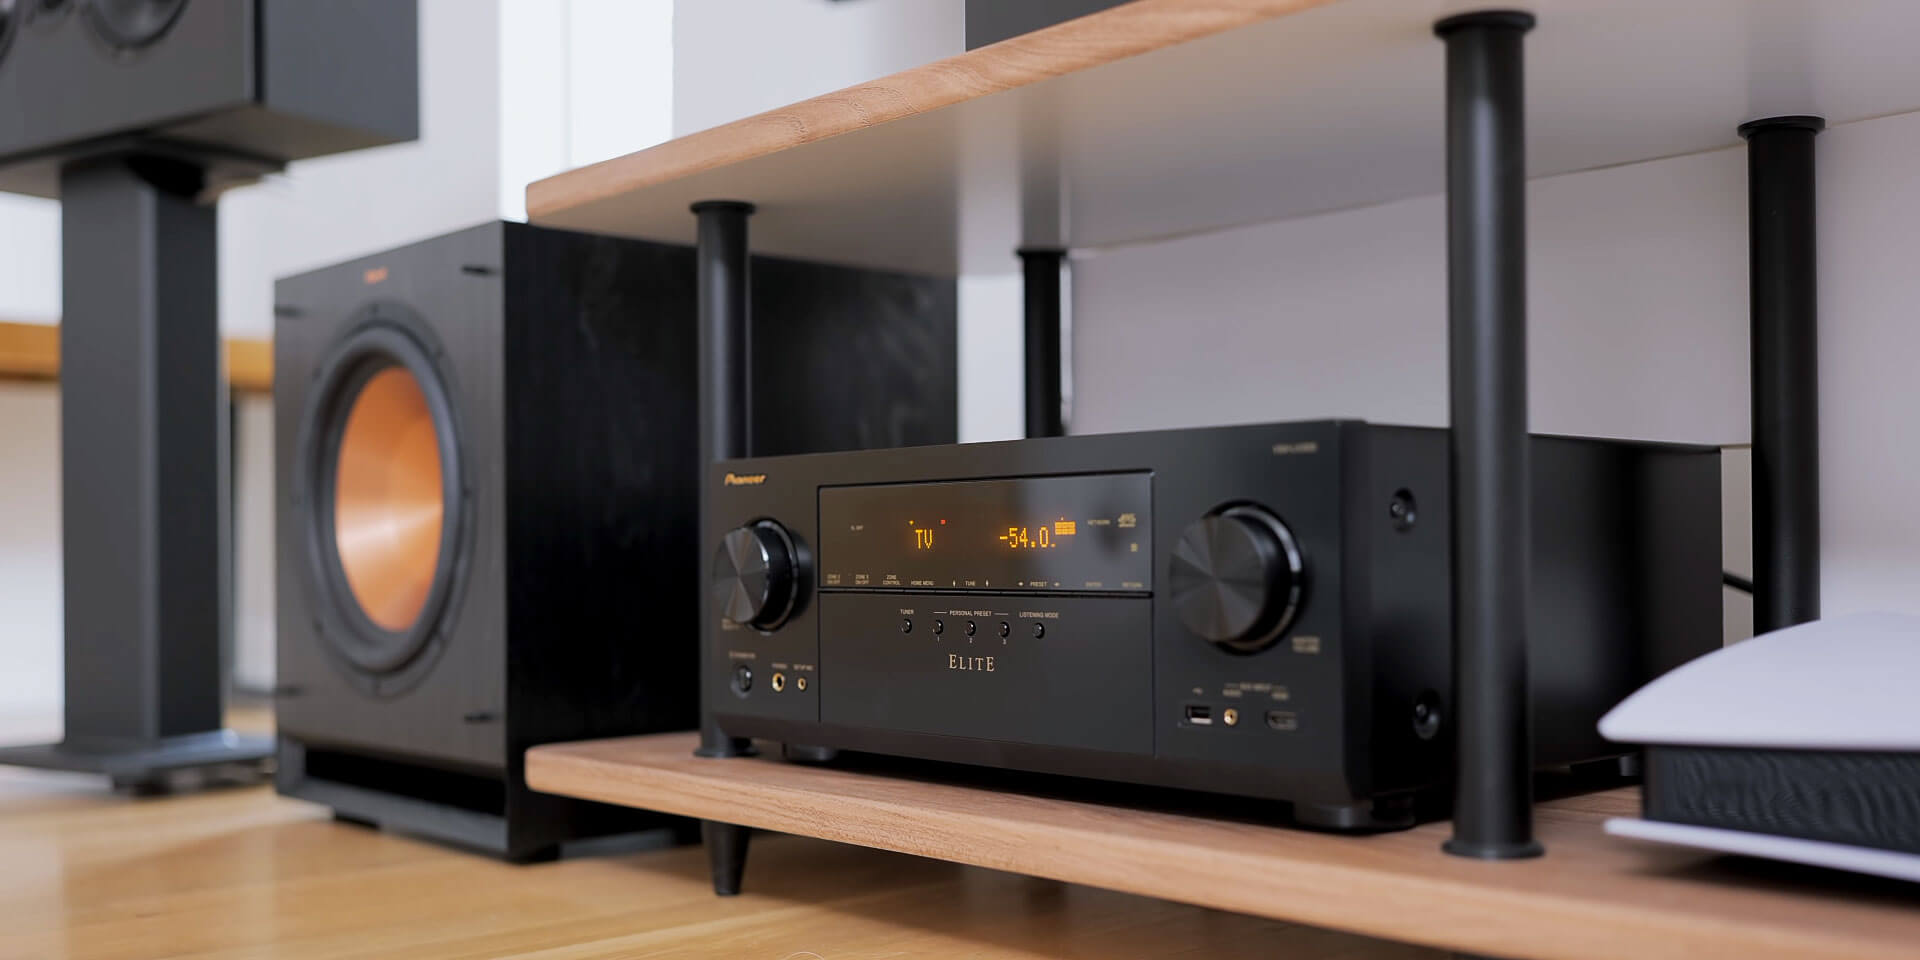
- AV Receiver: Of course, you’ll need your AV receiver, the central hub for processing audio and video signals, to be ready for the setup process.
- TV: Ensure that your TV is in place and ready to be connected to the AV receiver. Take note of the available input ports on the TV for the connection.
- Remote Control: Keep the remote control for your AV receiver handy, as you may need to access its settings during the setup process.
Once you have gathered these essential items, you’ll be well-prepared to proceed with the connection process. It’s always beneficial to double-check that you have all the necessary components before starting, as this can save time and prevent interruptions during the setup.
Now that you’ve assembled the required cables and equipment, let’s move on to the next step, where we’ll delve into the process of connecting your AV receiver to the TV using an HDMI cable.
Step 2: Connect the AV Receiver to the TV Using HDMI
Connecting your AV receiver to the TV using an HDMI cable is a straightforward and effective method to ensure high-quality audio and video transmission. Follow these steps to establish the HDMI connection:
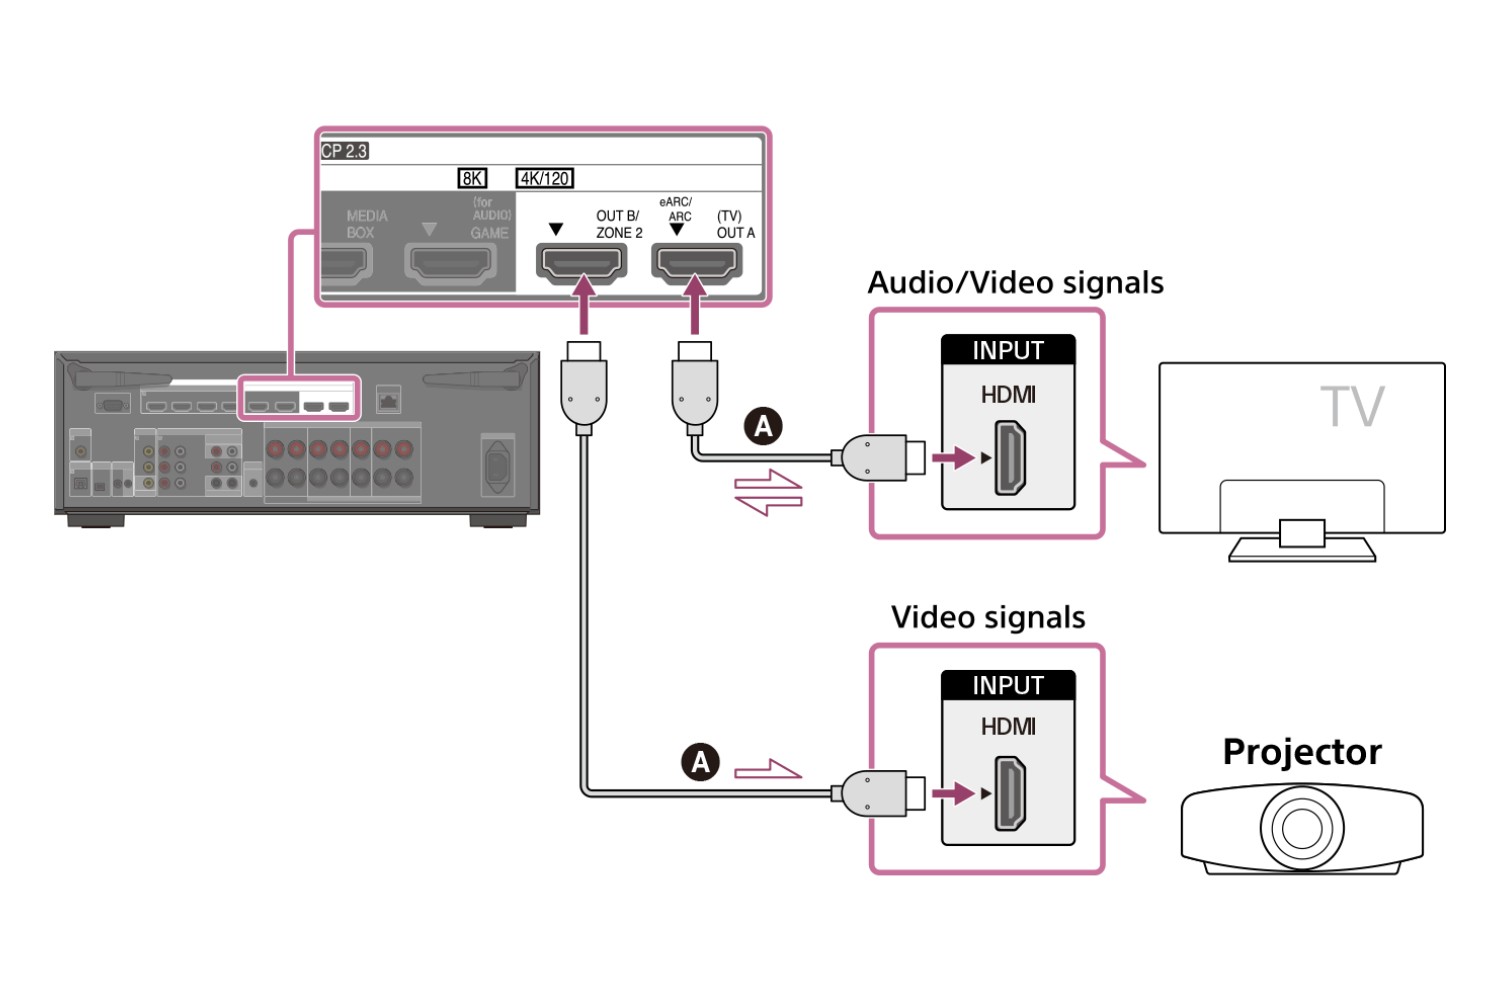
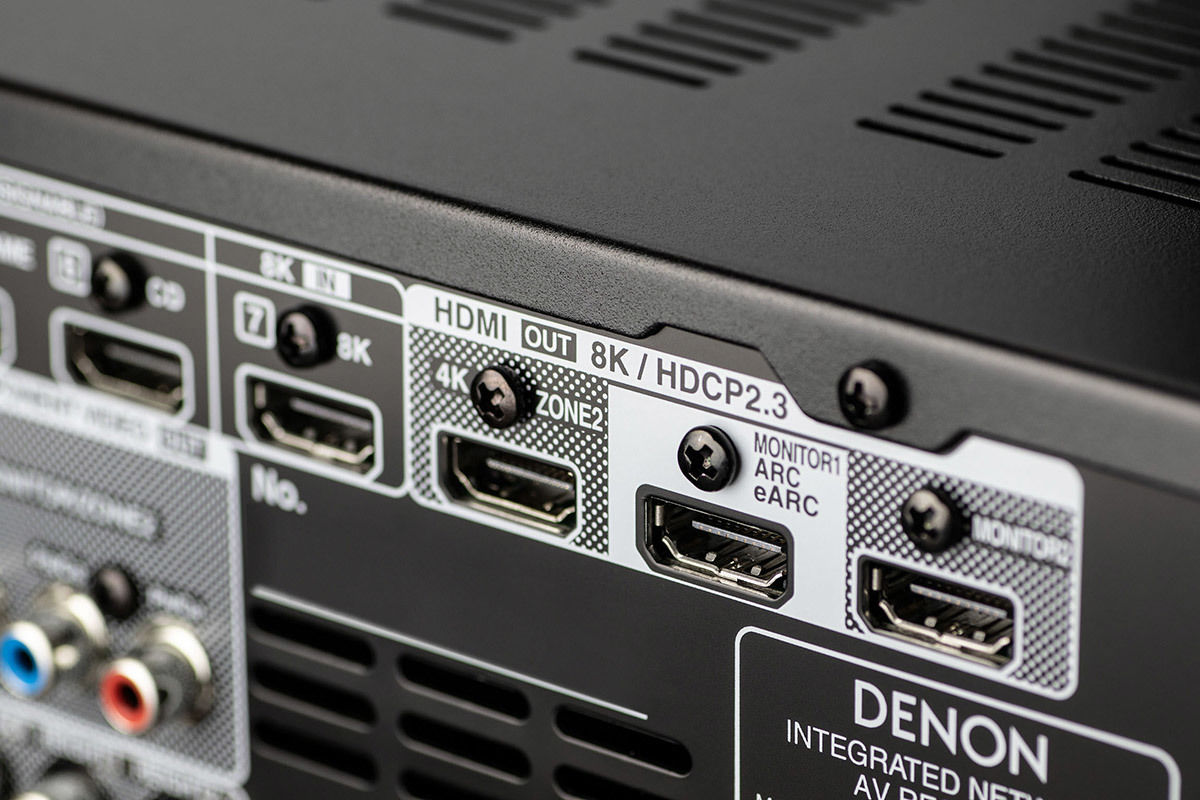
- Locate HDMI Ports: Identify the HDMI output port on your AV receiver and the HDMI input port on your TV. These ports are typically labeled to indicate their purpose, such as “HDMI Out” on the receiver and “HDMI In” on the TV.
- Plug in the HDMI Cable: Take one end of the HDMI cable and insert it into the HDMI output port on your AV receiver. Ensure a secure connection to prevent any signal disruptions.
- Connect to the TV: With the other end of the HDMI cable, plug it into the HDMI input port on your TV. Again, ensure a firm connection to guarantee reliable signal transmission.
- Power On and Select Input: Power on your AV receiver and TV. Using your TV’s remote control, navigate to the input/source selection menu and choose the HDMI input to which your AV receiver is connected.
- Adjust AV Receiver Settings: Access the settings menu on your AV receiver and configure the audio and video output settings as desired. This may involve selecting the appropriate input source and adjusting audio preferences.
- Test the Connection: Play a video or audio source through your AV receiver and observe the TV to ensure that both the audio and video signals are being transmitted correctly. Make any necessary adjustments to the settings if the output is not as expected.
Once you’ve completed these steps, your AV receiver should be successfully connected to your TV using the HDMI cable, allowing for seamless transmission of high-definition audio and video signals. This method provides a convenient and efficient way to integrate your audiovisual components, enhancing your overall entertainment experience.
With the HDMI connection established, you’re ready to explore an alternative method of connecting the AV receiver to the TV using optical or coaxial cables. This approach is particularly useful for transmitting digital audio signals, offering flexibility in catering to various audio setups.
Step 3: Connect the AV Receiver to the TV Using Optical or Coaxial Cables
If you prefer to transmit digital audio signals from your AV receiver to the TV using optical or coaxial cables, follow these steps to establish the connection:
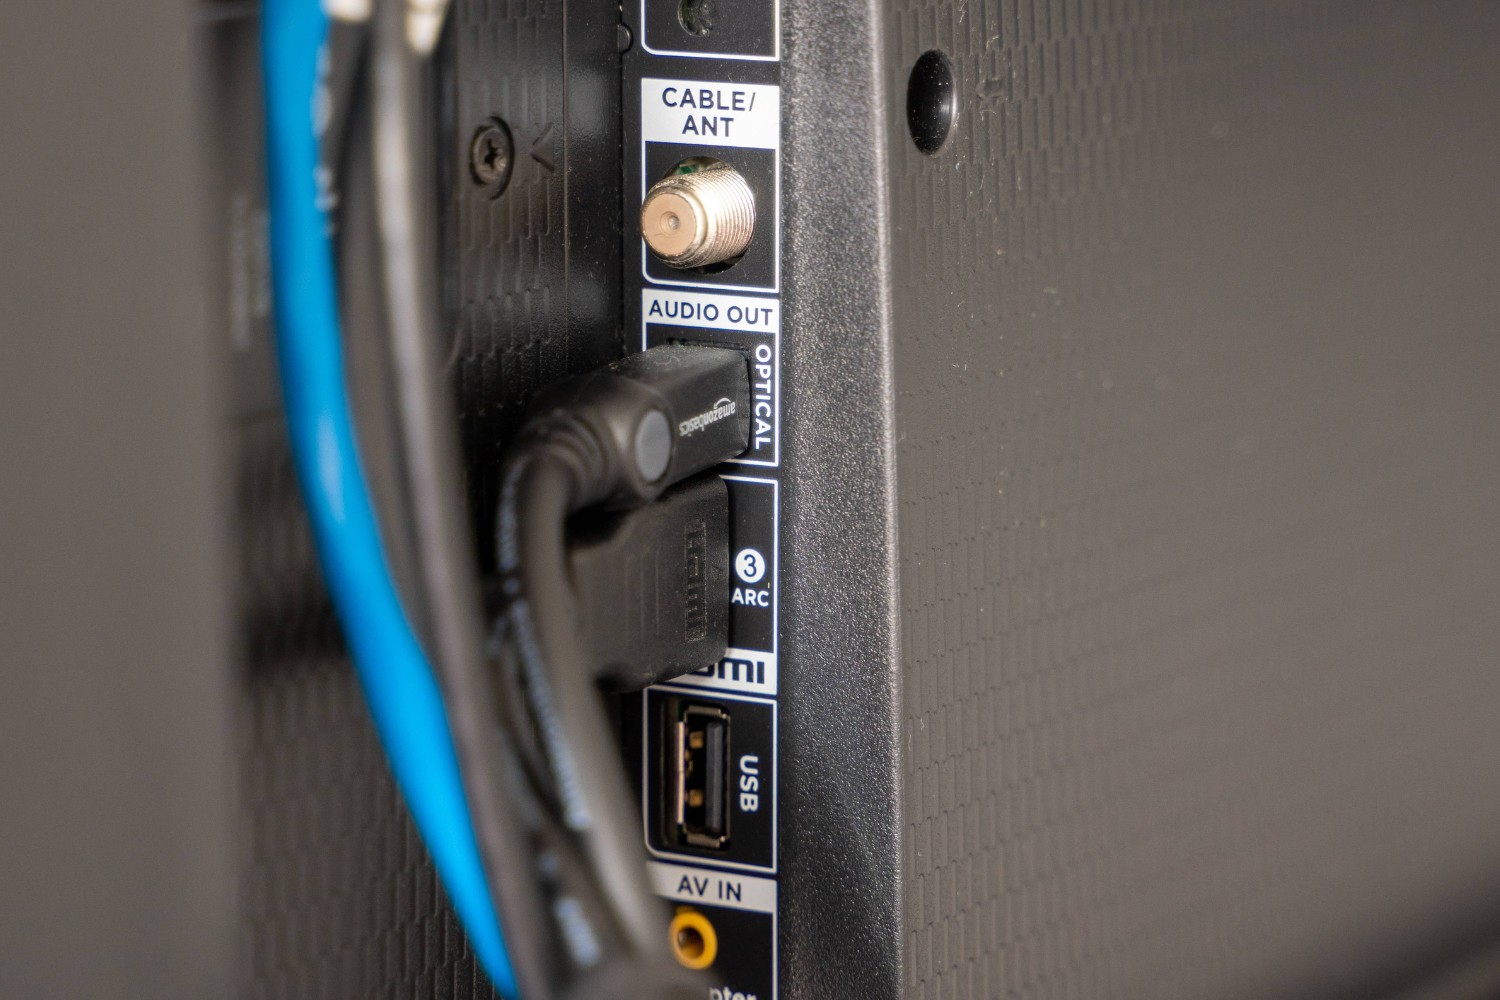
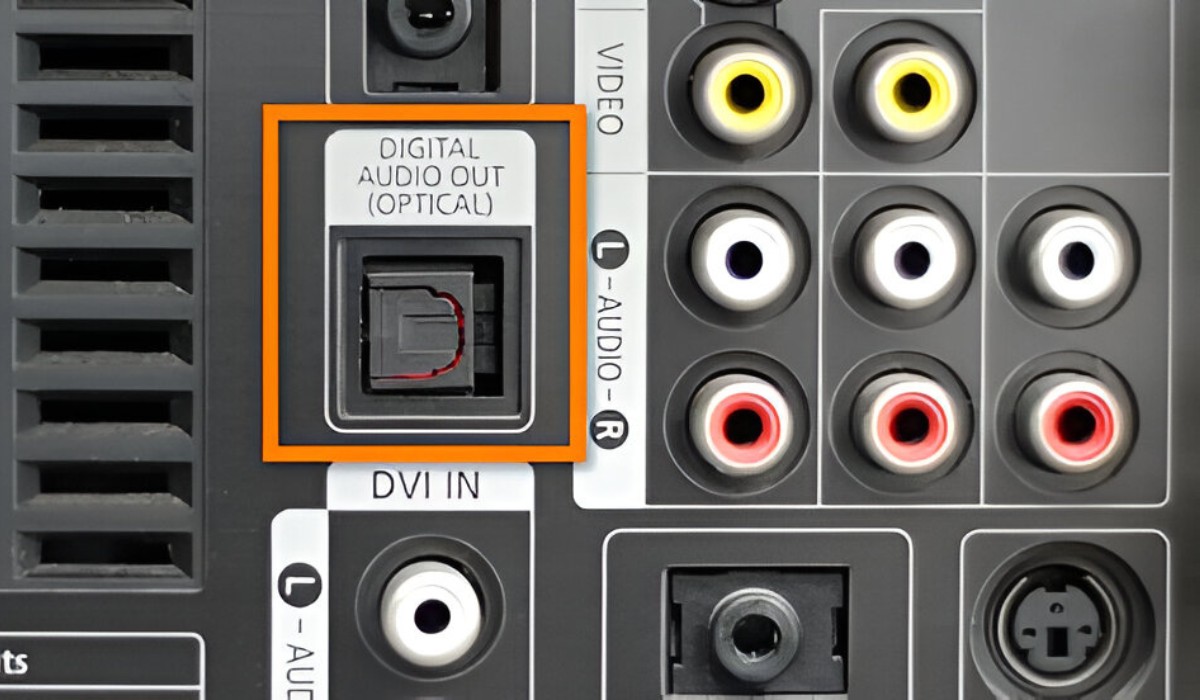
- Identify Audio Output Ports: Locate the optical or coaxial audio output ports on your AV receiver. These ports are typically labeled to indicate their function and may be situated near other audio output connections.
- Choose the Cable Type: Select either an optical or coaxial cable based on the available input ports on your TV. Optical cables transmit audio signals using light, while coaxial cables use electrical signals.
- Connect the Cable: Take one end of the optical or coaxial cable and insert it into the corresponding output port on your AV receiver. Ensure a secure connection to maintain signal integrity.
- Connect to the TV: Plug the other end of the cable into the optical or coaxial input port on your TV. As with the AV receiver connection, ensure a firm and secure attachment.
- Power On and Adjust Settings: Power on your AV receiver and TV. Access the audio settings on your AV receiver to designate the optical or coaxial output as the preferred audio source for your TV.
- Configure TV Audio Settings: On your TV, navigate to the audio settings and select the optical or coaxial input as the audio source. This ensures that the TV recognizes the audio signal transmitted from the AV receiver.
- Test the Connection: Play an audio source through your AV receiver and monitor the TV to confirm that the audio signal is being transmitted and reproduced accurately. Adjust the settings if necessary to optimize the audio output.
By following these steps, you can successfully establish a digital audio connection between your AV receiver and TV using optical or coaxial cables. This method is particularly useful for transmitting high-quality audio signals, catering to various audio setups and preferences.
With the AV receiver now connected to the TV using either HDMI or optical/coaxial cables, the next step involves setting up the AV receiver and TV settings to ensure optimal performance and compatibility. This crucial phase allows you to fine-tune the audio and video output to suit your preferences and maximize the potential of your home entertainment system.
Step 4: Set Up the AV Receiver and TV Settings
After establishing the physical connections between your AV receiver and TV, it’s essential to configure the settings on both devices to ensure seamless audio and video transmission. Follow these steps to set up the AV receiver and TV settings:
- Access AV Receiver Menu: Using the remote control or front panel of your AV receiver, access the settings menu. This may involve pressing a dedicated “Settings” or “Menu” button.
- Input Source Selection: Navigate to the input source selection within the AV receiver’s settings. Choose the input to which your TV is connected, whether it’s the HDMI input or the optical/coaxial input, depending on your chosen connection method.
- Audio Settings: Configure the audio settings on your AV receiver, including speaker setup, audio calibration, and sound mode preferences. Adjust the settings to achieve the desired audio output based on your speaker configuration and listening environment.
- Video Settings: If your AV receiver processes video signals, access the video settings to adjust parameters such as resolution, aspect ratio, and video processing options. This step ensures that the video output aligns with your TV’s capabilities and your visual preferences.
- TV Audio Output Selection: On your TV, access the audio output settings to designate the AV receiver as the preferred audio output source. This step ensures that audio signals from the TV’s internal apps or connected devices are routed through the AV receiver for enhanced audio playback.
- HDMI Control (CEC) Setup: If utilizing HDMI connectivity, consider enabling HDMI Control (Consumer Electronics Control or CEC) features on both the AV receiver and TV. This allows for convenient control of multiple devices using a single remote and facilitates seamless communication between connected devices.
By meticulously configuring the settings on your AV receiver and TV, you can optimize the audio and video output to suit your preferences and ensure compatibility between the two devices. This step is crucial for fine-tuning the performance of your home entertainment system and maximizing the potential of your audiovisual setup.
With the settings adjusted and optimized, the final step involves testing the connection and troubleshooting any potential issues to guarantee a seamless and enjoyable entertainment experience. This ensures that your AV receiver and TV are working in harmony to deliver exceptional audio and video performance.
Step 5: Test the Connection and Troubleshoot Any Issues
Once the physical connections and settings adjustments are complete, it’s time to test the connection between your AV receiver and TV to ensure that both audio and video signals are transmitting as intended. Follow these steps to test the connection and troubleshoot any potential issues:
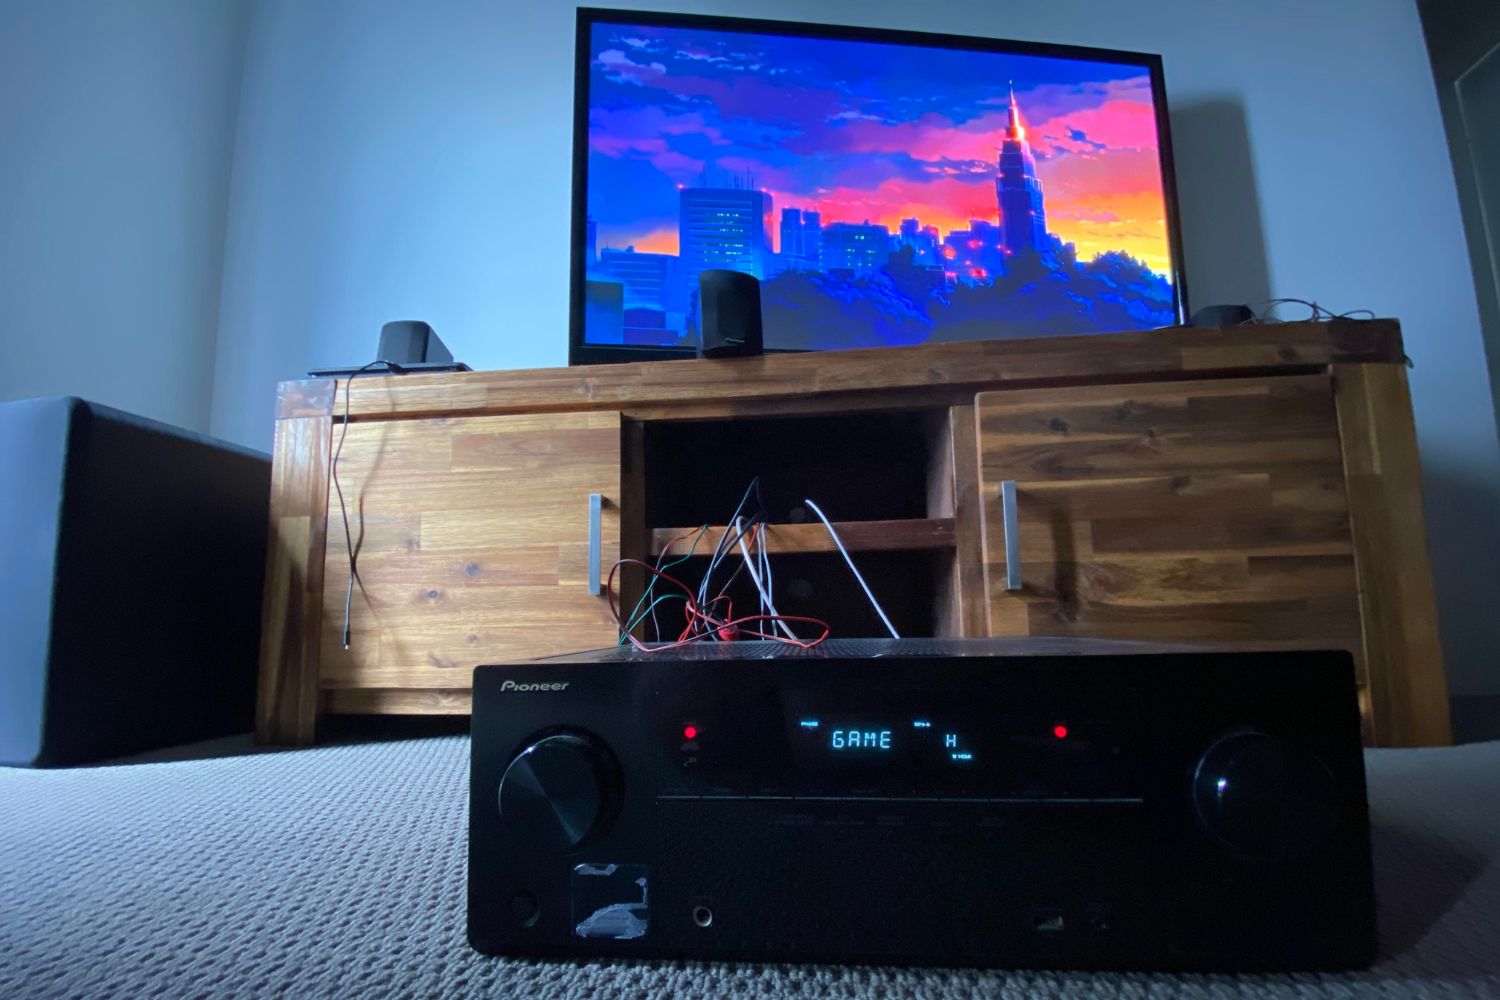
- Audio and Video Playback: Play a variety of audio and video content through your AV receiver, including music, movies, and TV shows. Observe the TV to ensure that the video output is clear and vibrant, while also listening for high-quality audio playback through your connected speakers.
- Signal Recognition: Verify that your TV recognizes the audio and video signals from the AV receiver. Check the TV’s input/source display to confirm that the connected input (HDMI, optical, or coaxial) is receiving signals and displaying content accordingly.
- Audio Channel Verification: If you have a multi-channel speaker setup, ensure that each speaker is receiving the correct audio signals. Test each speaker individually to confirm that the audio output is correctly distributed across your surround sound system.
- Input Switching: Use the remote control for your AV receiver to switch between different input sources and audio modes. Verify that the TV responds accordingly, displaying the appropriate content and adjusting the audio output based on your selections.
- Troubleshooting: If you encounter any issues during the testing phase, such as audio dropouts, video artifacts, or compatibility issues, refer to the user manuals for your AV receiver and TV for troubleshooting guidance. Common solutions may involve cable reseating, firmware updates, or adjusting specific settings to address the issue.
By meticulously testing the connection and addressing any potential issues, you can ensure that your AV receiver and TV are working harmoniously to deliver a captivating audiovisual experience. Troubleshooting any encountered issues promptly can prevent disruptions and enhance the overall reliability of your home entertainment system.
With the connection successfully tested and any potential issues resolved, you can now enjoy the fruits of your labor—a seamlessly connected AV receiver and TV, ready to deliver immersive audio and stunning visuals for your entertainment pleasure.
Conclusion
Connecting your AV receiver to your TV is a pivotal step in creating a captivating home entertainment experience. By following the steps outlined in this guide, you have successfully established a robust and reliable connection, allowing for the seamless transmission of high-quality audio and video signals between these essential components of your entertainment setup.
From gathering the necessary cables and equipment to configuring the settings on your AV receiver and TV, you’ve embarked on a journey to elevate your home entertainment system to new heights. Whether you opted for the HDMI connection for integrated audio and video transmission or utilized optical or coaxial cables for digital audio signals, you’ve demonstrated the versatility and adaptability of your audiovisual setup.
By meticulously testing the connection and troubleshooting any potential issues, you’ve ensured the optimal performance and reliability of your interconnected devices. This attention to detail and commitment to seamless integration is a testament to your dedication to creating an immersive and enjoyable entertainment environment in your home.
As you embark on your audiovisual adventures, whether it’s immersing yourself in blockbuster movies, indulging in gaming experiences, or simply enjoying your favorite music, the connection between your AV receiver and TV serves as the cornerstone of your entertainment oasis. The audiovisual harmony achieved through this connection sets the stage for captivating experiences that resonate with your senses and elevate your entertainment pursuits.
With your AV receiver and TV seamlessly connected, you’re poised to embark on a journey filled with captivating soundscapes and stunning visuals, all within the comfort of your own home. As you delve into the world of immersive entertainment, may the seamless connection between your AV receiver and TV serve as the conduit for unforgettable moments and unforgettable experiences.