Introduction
So, you've got your hands on a top-notch TCL Roku TV and a high-quality AV receiver, and you're eager to experience the ultimate home entertainment setup. Connecting an AV receiver to a TCL Roku TV can significantly enhance your audio and video experience, transforming your living room into a mini home theater. With the right cables and a clear understanding of the setup process, you'll be well on your way to enjoying immersive sound and crystal-clear visuals.
In this guide, we'll walk you through the steps to seamlessly hook up your AV receiver to your TCL Roku TV. Whether you're a tech enthusiast or a novice in the world of audio-visual setups, we've got you covered. By following these simple instructions, you'll be able to unlock the full potential of your home entertainment system and elevate your viewing and listening pleasure.
Before we dive into the nitty-gritty of connecting your AV receiver to your TCL Roku TV, it's essential to gather all the necessary cables and equipment. Ensuring that you have the right tools at your disposal will streamline the setup process and minimize any potential hiccups along the way. So, let's get started on this exciting journey to create a cinematic experience right in the comfort of your own home.
Step 1: Gather the necessary cables and equipment
Before embarking on the process of connecting your AV receiver to your TCL Roku TV, it’s crucial to gather the essential cables and equipment. Having the right tools at your disposal will ensure a smooth and hassle-free setup, allowing you to enjoy uninterrupted entertainment in no time.
Here’s a list of the items you’ll need:
- HDMI cable: This cable will serve as the primary connection between your AV receiver and your TCL Roku TV. Opt for a high-speed HDMI cable to support high-definition audio and video signals.
- Speaker wire: Depending on your speaker setup, you’ll require speaker wire to connect your speakers to the AV receiver. Ensure that the gauge and length of the wire are suitable for your specific speaker configuration.
- Power cords: You’ll need power cords for both the AV receiver and the TCL Roku TV. Ensure that the cords are in good condition and long enough to reach the power outlets.
- Remote control: The remote control for your AV receiver will be essential for configuring and fine-tuning the audio settings. Ensure that the remote has working batteries.
- AV receiver manual: Keep the manual for your AV receiver handy. It will serve as a valuable reference guide for the setup process and troubleshooting, if needed.
Once you’ve gathered all the necessary cables and equipment, you’ll be well-prepared to proceed with the next steps of connecting and setting up your AV receiver with your TCL Roku TV. With these tools in hand, you’re ready to elevate your home entertainment experience to new heights.
Step 2: Connect the AV receiver to the TCL Roku TV
Now that you’ve gathered all the necessary cables and equipment, it’s time to proceed with connecting your AV receiver to your TCL Roku TV. This crucial step lays the foundation for a seamless audio-visual setup that will enhance your viewing and listening experience.
Follow these steps to establish the connection:
- Locate the HDMI ports: Identify the HDMI ports on both the AV receiver and the TCL Roku TV. Typically, modern AV receivers and TVs have multiple HDMI ports, so ensure that you choose the ones labeled for audio and video input/output.
- Connect the HDMI cable: Take the high-speed HDMI cable and plug one end into the HDMI output port on the AV receiver. Then, connect the other end of the HDMI cable to an available HDMI input port on your TCL Roku TV. Ensure a secure connection at both ends to prevent signal loss or disconnection.
- Power on the devices: Once the HDMI cable is securely connected, power on both the AV receiver and the TCL Roku TV. Use the respective power cords and ensure that the devices are receiving power from the outlets.
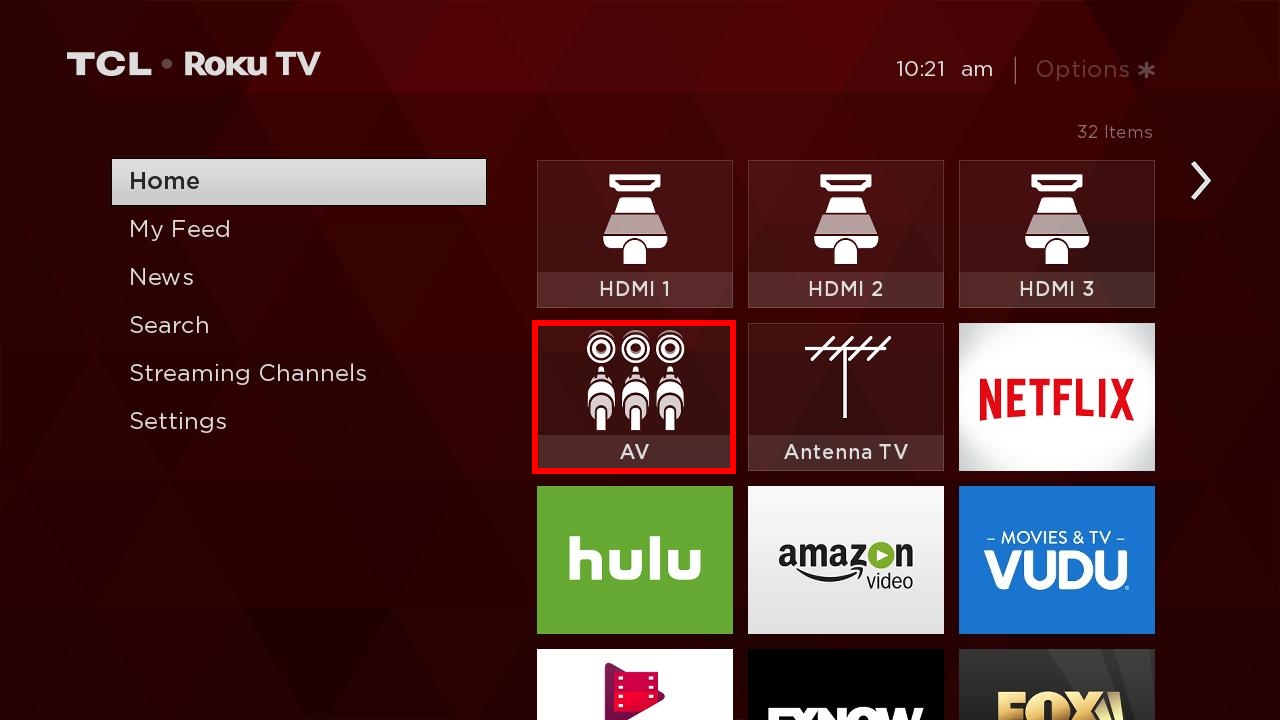
- Select the input source: Using the remote control for your TCL Roku TV, navigate to the input/source selection menu. Choose the HDMI input port to which you connected the AV receiver. This step allows the TV to receive audio and video signals from the AV receiver.
- Check for signal recognition: After selecting the input source, verify that the TCL Roku TV recognizes the connected AV receiver. You should see a confirmation message or indication on the TV screen that a new device is detected.
By following these steps, you’ll successfully establish a solid connection between your AV receiver and your TCL Roku TV. This pivotal link forms the backbone of your home entertainment system, paving the way for immersive audio and stunning visuals that will elevate your viewing experience.
Step 3: Set up the AV receiver
With the AV receiver connected to your TCL Roku TV, the next crucial step is to set up the receiver to optimize your audio experience. Configuring the AV receiver’s settings will ensure that you harness its full potential, delivering rich, immersive sound that complements the stunning visuals on your TV.
Follow these essential steps to set up your AV receiver:
- Access the setup menu: Using the remote control for your AV receiver, access the setup menu. This menu allows you to customize various audio settings, including speaker configuration, sound modes, and audio enhancements.
- Speaker configuration: Configure the speaker settings based on your home theater setup. Specify the number of speakers connected, their placement, and the size of each speaker. This step ensures that the receiver optimally distributes audio to create a surround sound experience.
- Sound modes and enhancements: Explore the sound modes and audio enhancements offered by the AV receiver. Depending on your preferences and the content you’re watching, you can choose from options such as Dolby Atmos, DTS:X, or other proprietary audio technologies to tailor the sound to your liking.
- Audio calibration: Some AV receivers feature automatic audio calibration systems that analyze your room’s acoustics and speaker setup to optimize sound performance. Follow the on-screen prompts to run the calibration process and fine-tune the audio output.
- Connect additional devices: If you have other audio-visual devices, such as a Blu-ray player or gaming console, you can connect them to the AV receiver to centralize your entertainment setup. Use the available input ports on the receiver to establish these connections.
By meticulously setting up your AV receiver, you’ll unlock its full potential, delivering a captivating audio experience that complements the stunning visuals on your TCL Roku TV. With the audio settings tailored to your preferences and home theater configuration, you’re poised to immerse yourself in a cinematic audio journey right in your living room.
Step 4: Test the connection
After connecting and setting up your AV receiver with your TCL Roku TV, it’s essential to test the connection to ensure that both devices are seamlessly integrated, and the audio-visual performance meets your expectations. By conducting thorough testing, you can address any potential issues and fine-tune the settings for an optimal viewing and listening experience.
Here’s how to effectively test the connection between your AV receiver and TCL Roku TV:
- Audio playback test: Play a variety of audio content, including music, movies, and TV shows, to gauge the performance of the connected speakers and the AV receiver. Listen for clarity, depth, and surround sound effects to ensure that the audio output is immersive and well-balanced.
- Video quality assessment: Watch high-definition content on your TCL Roku TV to assess the visual quality and ensure that the connection with the AV receiver maintains the integrity of the video signal. Look for vibrant colors, sharp details, and smooth motion to confirm that the video output is optimized.
- Input switching: Test the functionality of the AV receiver’s input switching by seamlessly transitioning between different connected devices, such as a Blu-ray player, gaming console, or streaming device. Verify that the receiver accurately detects and switches between the input sources without any signal loss.
- Remote control operation: Ensure that the remote control for the AV receiver effectively adjusts audio settings, sound modes, and volume levels. Test the responsiveness of the remote to guarantee smooth and intuitive control over the receiver’s functions.
- Surround sound experience: If your home theater setup includes surround sound speakers, play content specifically designed for surround sound to experience the immersive audio effects. Verify that the AV receiver accurately distributes audio across the speakers to create an enveloping soundstage.
By thoroughly testing the connection between your AV receiver and TCL Roku TV, you can address any potential issues and fine-tune the settings to achieve an exceptional audio-visual experience. This comprehensive testing phase ensures that your home entertainment system operates seamlessly, delivering captivating audio and stunning visuals that elevate your viewing pleasure.
Conclusion
Congratulations! You’ve successfully navigated the process of connecting and setting up your AV receiver with your TCL Roku TV, paving the way for an immersive home entertainment experience. By following the steps outlined in this guide, you’ve established a seamless audio-visual connection that enhances your viewing and listening pleasure.
With the AV receiver seamlessly integrated with your TCL Roku TV, you’re now poised to indulge in a cinematic journey right in the comfort of your own home. The meticulously established connection ensures that you can enjoy captivating audio and stunning visuals, transforming your living room into a mini home theater.
By gathering the necessary cables and equipment, establishing the connection, setting up the AV receiver, and thoroughly testing the integration, you’ve laid the foundation for a captivating audio-visual experience. Whether you’re watching your favorite movies, streaming content, or immersing yourself in gaming adventures, the seamless connection between your AV receiver and TCL Roku TV ensures that every moment is enriched with exceptional audio and visual quality.
As you embark on this exciting journey of home entertainment, remember that fine-tuning the audio settings, exploring sound modes, and experimenting with different content will further elevate your viewing and listening experience. Embrace the immersive soundscapes and breathtaking visuals that your meticulously connected AV receiver and TCL Roku TV have to offer, and immerse yourself in a world of captivating entertainment.
With your home entertainment system now seamlessly integrated, it’s time to sit back, relax, and immerse yourself in the captivating audio-visual experiences that await you. Whether it’s the thunderous roar of an action-packed movie or the melodic tunes of your favorite music, your AV receiver and TCL Roku TV stand ready to deliver an unforgettable journey through sound and vision.