Introduction
Are you ready to take your home entertainment to the next level? Connecting a surround sound system can transform your living room into a cinematic experience, immersing you in rich and powerful audio. Whether you’re a movie buff, a music lover, or a gaming enthusiast, a surround sound system can elevate your audio experience and make you feel like you’re right in the middle of the action.
But before you dive into setting up your surround sound system, it’s important to understand the basics. This guide will walk you through the process of connecting a surround sound system, from choosing the right components to troubleshooting common issues. By the end of this article, you’ll have the knowledge and confidence to create the ultimate audio setup in your own home.
Whether you’re starting from scratch or upgrading an existing audio setup, there are a few key factors to consider when choosing a surround sound system. The right system will not only enhance your audio experience but also be compatible with your TV and other devices. Keep reading to learn how to select the perfect surround sound system for your needs.
– Determine Your Budget: Surround sound systems come in a range of prices, so it’s essential to establish a budget before you start shopping. Consider how much you’re willing to invest in your audio setup and prioritize features that are important to you.
– Room Size and Layout: The size and layout of your room will play a significant role in determining the type of surround sound system you need. Larger rooms may require more powerful speakers and additional components, while smaller rooms may benefit from compact and space-saving options.
– Audio Quality: The quality of audio reproduction is a crucial factor to consider. Look for systems that offer clear, detailed, and immersive sound. Consider the frequency response, power output, and speaker configuration to ensure optimal audio performance.
Choosing the Right Surround Sound System
Now that you have a better understanding of the basics, it’s time to dive into the process of choosing the right surround sound system for your home. There are a multitude of options available, ranging from simple soundbars to elaborate multi-channel setups. Consider the following factors to help you make an informed decision:
– Speaker Configuration: Surround sound systems typically consist of multiple speakers, including a center channel speaker, front speakers, rear speakers, and a subwoofer. The configuration you choose will depend on your personal preferences and the layout of your room. Opt for a system that provides the desired audio coverage and balance.
– Compatibility: Ensure that the surround sound system you choose is compatible with your TV and other devices. Check the available input and output options on both the system and your devices to ensure a seamless connection. Compatibility with popular audio formats, such as Dolby Digital or DTS, is also important for an immersive experience.
– Wireless or Wired: Decide whether you prefer a wireless or wired setup. Wireless systems offer more flexibility in terms of speaker placement but may be susceptible to interference. Wired systems provide a more stable and reliable connection but require running cables throughout your room.
– Additional Features: Consider the additional features offered by the surround sound system. Some systems come with built-in Bluetooth, Wi-Fi connectivity, or smart capabilities, allowing you to stream audio wirelessly from your smartphone or other devices. Others may include advanced sound modes or equalization options to tailor the audio to your liking.
– Reviews and Recommendations: Before making a final decision, read reviews and seek recommendations from trusted sources. Look for feedback on the audio quality, ease of setup, and overall user experience. This can help you make an informed decision and avoid any potential pitfalls.
By taking the time to consider these factors, you can select a surround sound system that meets your requirements and enhances your audio enjoyment. Once you have chosen the right system, it’s time to move on to the next step: understanding the components of a surround sound system.
Understanding the Components of a Surround Sound System
A surround sound system is made up of several components that work together to create an immersive audio experience. Understanding these components and their functions is essential for setting up and connecting your surround sound system correctly. Let’s take a closer look at each component:
– Receiver: The receiver is the heart of your surround sound system. It acts as a central hub, receiving audio signals from your TV or other devices and distributing them to the different speakers. The receiver also provides amplification for the speakers and decodes various audio formats. Make sure to choose a receiver that supports the number of channels you plan to use in your system.
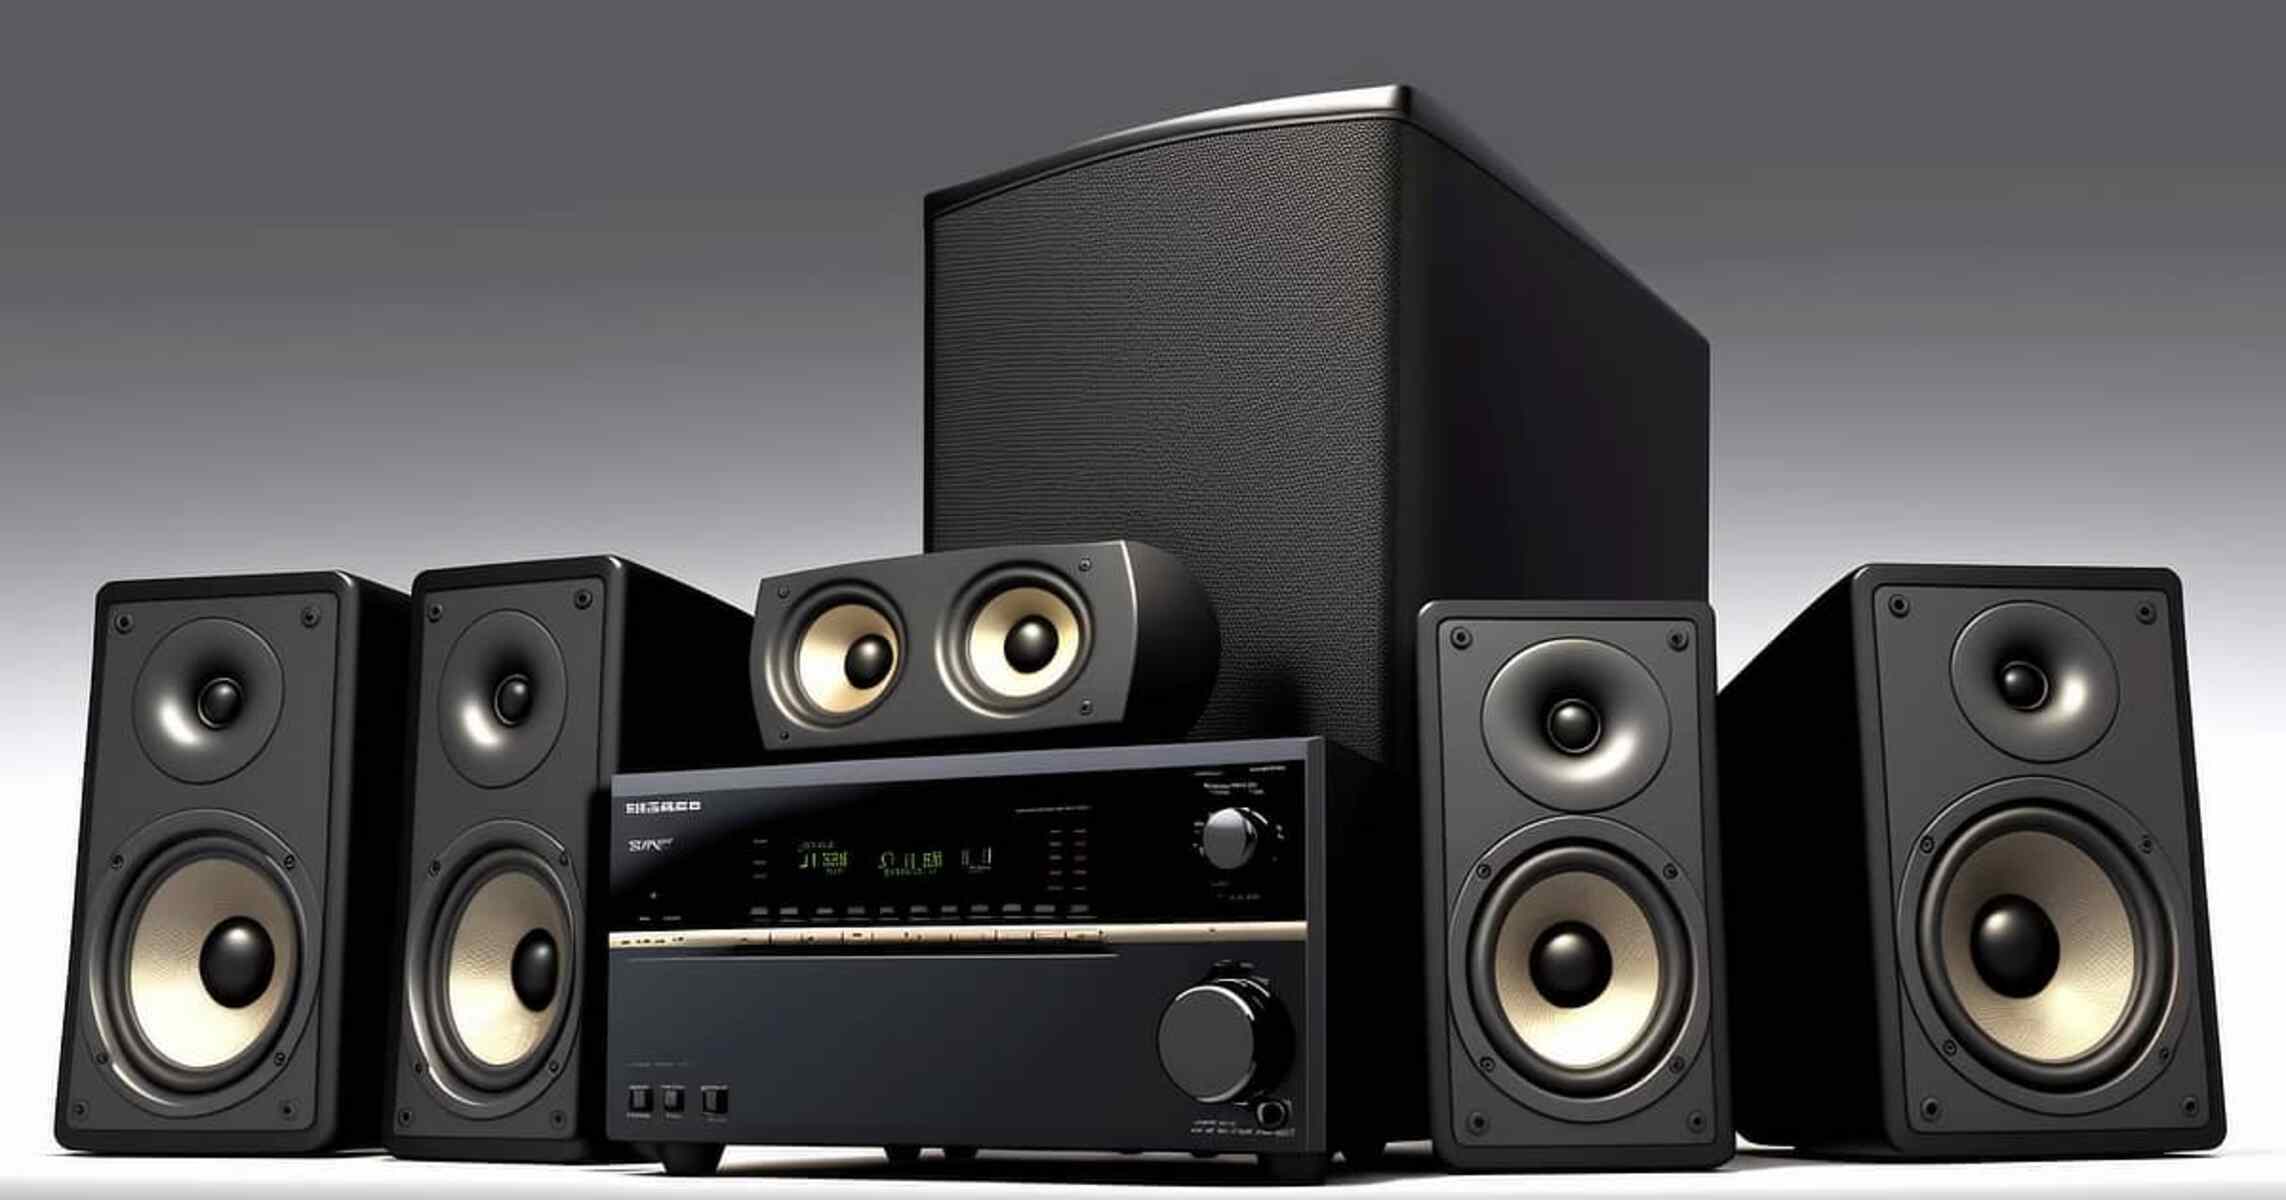
– Speakers: Speakers are the most important components of a surround sound system, responsible for producing the audio you hear. The number and configuration of speakers will depend on the surround sound format you choose, such as 5.1, 7.1, or even more advanced setups. Each speaker has a specific role, including the center channel speaker for dialogue, front speakers for left and right audio, rear speakers for surround effects, and a subwoofer for deep bass frequencies.
– Subwoofer: The subwoofer is a specialized speaker designed to reproduce low-frequency sounds, such as explosions or thunder. It adds depth and impact to your audio, creating a more immersive experience. The subwoofer is typically connected to the receiver using a dedicated cable.
– Cables and Connectors: To connect your surround sound system, you will need various cables and connectors. HDMI cables are commonly used to transmit both audio and video signals between the receiver and your TV. For audio-only connections, you may use optical or digital coaxial cables. Speaker wires are used to connect the speakers to the receiver, ensuring proper signal transmission.
– Remote Control: Most surround sound systems come with a remote control that allows you to adjust the volume, switch between audio modes, and control other settings. Familiarize yourself with the remote control functions to take full advantage of your surround sound system.
– Calibration Microphone: Some surround sound systems include a calibration microphone. This microphone is used to measure the acoustic properties of your room and optimize the audio settings accordingly. By running a calibration process, you can ensure that the sound is tailored to your specific room setup.
By understanding the role and function of each component, you will be able to connect your surround sound system with confidence. In the next section, we will walk you through the process of connecting the receiver to your TV.
Connecting the Receiver to Your TV
Once you have chosen your surround sound system and familiarized yourself with its components, it’s time to connect the receiver to your TV. This connection is crucial as it allows the receiver to receive audio signals from your TV and distribute them to the speakers. Follow these steps to properly connect the receiver to your TV:
1. Identify the HDMI ports: Locate the HDMI ports on both your TV and the receiver. HDMI ports are typically labeled with numbers or names like “HDMI 1” or “ARC” (Audio Return Channel).
2. Connect HDMI cable: Take an HDMI cable and plug one end into the HDMI output port of the receiver. Then, plug the other end into the HDMI input port on your TV, preferably the one labeled “ARC” if available. This will allow for two-way audio communication between the TV and receiver.
3. Turn on devices and switch input: Turn on both the TV and the receiver. Using the TV remote, navigate to the input/source settings and select the HDMI input to which you have connected the receiver. This will ensure that you can hear the audio from your TV through the surround sound system.
4. Enable ARC (if necessary): If you have connected your receiver to the HDMI ARC port on your TV, you may need to enable the ARC feature in your TV’s settings menu. This enables the TV to send audio signals back to the receiver for a seamless audio experience.
5. Test the connection: Play some audio or a TV show/movie with sound to test the connection. Adjust the volume on your receiver to ensure that the audio is coming through the speakers. If the sound is not working correctly, double-check the HDMI connections and TV settings.
It’s worth noting that if your TV or receiver doesn’t have an HDMI ARC port, you may need to use alternative audio connections such as optical or digital coaxial cables. The process will be similar – just connect the corresponding audio output on your TV to the audio input on your receiver using the appropriate cables.
By successfully connecting your receiver to your TV, you have completed an important step in setting up your surround sound system. In the next section, we will guide you through the process of connecting the speakers to your receiver.
Connecting the Speakers to Your Receiver
Now that you have your receiver connected to your TV, it’s time to connect the speakers to the receiver. This step is crucial in creating a surround sound setup that delivers immersive audio. Follow these steps to properly connect the speakers to your receiver:
1. Identify speaker terminals: Locate the speaker terminals on the back of your receiver. These terminals are typically labeled with positive (+) and negative (-) symbols and correspond to each speaker channel (center, front left, front right, rear left, rear right, etc.).
2. Prepare speaker wires: Cut the speaker wire into the desired lengths for each speaker. Remove a small portion of insulation from the ends of the wires to expose the bare wire.
3. Connect the wires to the speakers: Match the positive and negative ends of the speaker wire to the corresponding terminals on each speaker. Ensure that the positive (+) wire is connected to the positive terminal and the negative (-) wire is connected to the negative terminal. Twist the wire strands together or use banana plugs if your speakers support them.
4. Connect the wires to the receiver: Take the other end of the speaker wires and connect them to the corresponding speaker terminals on the receiver. Again, match the positive (+) and negative (-) wires to the respective terminals. Make sure the connections are secure by tightening the terminals or using banana plugs, if applicable.
5. Double-check connections: Once all the speaker wires are connected, double-check the connections to ensure they are secure and properly matched to the correct terminals. Incorrect wiring can result in poor audio quality or no sound at all.
6. Position the speakers: Place each speaker in its designated position in your room. The center channel speaker should be positioned above or below your TV, facing the seating area. The front left and right speakers should be placed on either side of the TV, angled towards the seating area. The rear speakers should be positioned behind the seating area, facing towards the front of the room.
7. Set the speaker sizes and levels: Use the receiver’s setup menu to configure the speaker sizes and levels. This ensures that the receiver knows the characteristics of each speaker and can distribute the audio correctly. You may also need to set the crossover frequency for the speakers to ensure a seamless transition between the different frequency ranges.
By successfully connecting the speakers to your receiver, you have taken another crucial step in setting up your surround sound system. In the next section, we will guide you through the process of configuring your surround sound system.
Configuring Your Surround Sound System
After connecting the speakers to your receiver, it’s time to configure your surround sound system to ensure optimal audio performance. This step involves adjusting settings and optimizing the sound to suit your preferences and room acoustics. Follow these steps to properly configure your surround sound system:
1. Access the receiver’s setup menu: Using the remote control or front panel buttons on your receiver, access the setup menu. The exact procedure may vary depending on your specific receiver model.
2. Speaker configuration: In the setup menu, locate the speaker configuration options. Verify that the receiver recognizes the correct number and type of speakers you have connected. Adjust the settings if necessary.
3. Channel levels and delays: Next, adjust the channel levels and delays to ensure consistent sound from each speaker. The receiver may have an automatic calibration feature that uses a microphone to measure the acoustic properties of your room and set the levels and delays automatically. Alternatively, you can manually adjust these settings by following the on-screen instructions in the setup menu.
4. Sound modes and equalization: Explore the sound mode options on your receiver. These modes can enhance the audio experience by simulating different environments or optimizing sound for specific content types like movies, music, or games. Experiment with different modes to find the one that suits your preferences best. Also, check if your receiver has an equalizer to fine-tune the audio frequencies according to your liking.
5. Test the system: Once you have configured the settings, it’s time to test the system. Play audio content that utilizes different audio channels (e.g., movies with surround sound effects) to ensure that sound is correctly distributed to all speakers. Adjust the volume levels and balance to achieve the desired audio experience. Pay attention to any issues like low audio output, distorted sound, or unbalanced levels, and make adjustments as needed.
6. Save your settings: After configuring your surround sound system to your satisfaction, save the settings in the receiver’s memory. This allows you to easily recall your preferred configuration in the future.
Remember, the configuration process may differ depending on your specific receiver model and its features. Consult your receiver’s user manual or online resources for detailed instructions specific to your system.
By properly configuring your surround sound system, you can optimize the audio quality and ensure an immersive experience. In the next section, we will discuss troubleshooting common issues that you may encounter while setting up your surround sound system.
Testing and Fine-tuning Your Surround Sound System
Once you have connected and configured your surround sound system, it’s important to test and fine-tune the settings to ensure optimal performance. Testing and fine-tuning your system allows you to fine-tune the audio, correct any issues, and achieve the best possible listening experience. Follow these steps to test and fine-tune your surround sound system:
1. Speaker placement: Start by reviewing the placement of your speakers. Ensure they are positioned correctly according to the recommended guidelines, such as having the center channel speaker above or below the TV, the front speakers angled towards the seating area, and the rear speakers behind the seating area. Make any necessary adjustments to improve the audio dispersion.
2. Audio balance: Check the balance between the different speakers. Adjust the balance settings in your receiver’s setup menu to ensure that audio is evenly distributed across all speakers. This helps create a seamless soundstage and an immersive listening experience.
3. Bass management: Fine-tune the bass management settings to ensure a well-balanced bass response. Adjust the crossover frequency and subwoofer level in the receiver’s setup menu. Experiment with different settings to find the optimal balance between the subwoofer and the other speakers.
4. Surround sound effects: Test the surround sound effects by playing movies or content specifically designed to showcase surround sound capabilities. Listen for accurate placement of sounds and directional effects. If the surround sound effects are not satisfactory, try adjusting the speaker levels, delays, or using different sound modes available on your receiver.
5. Volume levels: Adjust the volume levels to your liking. Listen to audio content at different volume levels to ensure clarity and dynamic range. Make adjustments to avoid overly loud or distorted audio. Remember to also consider the volume limits recommended for your specific speakers.
6. Fine-tune equalizer settings: If your receiver has an equalizer, make further adjustments to refine the sound according to your preferences. Experiment with the equalizer settings to enhance specific frequencies or address any audio imbalances.
7. Test different audio sources: Play audio from various sources, such as movies, music, or games, to ensure that your surround sound system performs well with different types of content. Each type of content may have different audio characteristics, so testing with a variety of sources helps ensure a versatile and enjoyable audio experience.
Regularly testing and fine-tuning your surround sound system allows you to achieve the best possible audio quality for your specific room and preferences. Remember to consult your receiver’s user manual or online resources for detailed instructions specific to your system, as the fine-tuning process may vary depending on your equipment.
In the next section, we will address common issues that you may encounter while setting up your surround sound system and provide troubleshooting tips to help resolve them.
Troubleshooting Common Issues
While setting up a surround sound system, you may encounter some common issues. Don’t worry, as these issues can usually be resolved with a few troubleshooting steps. Here are some common problems you may come across and how to address them:
1. No sound or low audio output: If you’re not hearing any sound or if the audio output is too low, check the following:
- Ensure that all cables are securely connected to the correct ports on both the receiver and TV.
- Check the volume settings on your receiver, TV, and any connected devices. Increase the volume levels if necessary.
- Verify that the correct input source is selected on your receiver and TV.
- Ensure that the speakers are connected properly and that their wires are securely attached to the correct terminals.
2. Distorted or muffled sound: If the audio is distorted or muffled, try the following solutions:
- Check the speaker connections to ensure they are properly wired and securely attached to the receiver.
- Inspect the speaker wires for any damage or loose connections. Replace or reattach them if needed.
- Adjust the speaker levels in the receiver’s setup menu to achieve a balanced sound.
- Ensure that the speakers are not placed too close to walls or corners, as this can cause unwanted reflections and affect sound quality.
3. Unbalanced sound between speakers: If the sound seems unbalanced, with one speaker being louder or softer than the rest, consider the following solutions:
- Check the speaker wires to ensure they are securely connected to the correct terminals on both the receiver and the speaker.
- Verify that the speaker levels are properly adjusted in the receiver’s setup menu. Increase or decrease the levels as needed to achieve a balanced sound.
- Ensure that the speakers are positioned correctly and at equal distances from the listening area. Make any necessary adjustments to speaker placement.
4. Audio syncing issues: If you notice a delay between the audio and video, follow these steps:
- Check your TV and receiver for any audio delay or lip-sync settings. Adjust these settings to decrease or eliminate any audio syncing issues.
- If using streaming services or external devices, ensure that they are set to output audio and video in sync.
- Consider connecting your sources directly to the TV and using an optical audio cable to connect the TV to the receiver, which can help synchronize the audio and video signals.
5. Remote control not functioning: If your remote control isn’t working as expected, try the following:
- Check the batteries in the remote control and replace them if necessary.
- Ensure that there are no obstructions between the remote control and the receiver.
- Check if the remote control needs to be synced or paired with the receiver. Consult your receiver’s manual for instructions.
- If possible, try using a universal remote control to determine if the issue lies with the original remote control or the receiver.
If you’re still experiencing issues after trying the steps above, consult the troubleshooting section of your receiver’s manual or contact the manufacturer’s customer support for further assistance. They can provide specific guidance based on your equipment and setup.
By troubleshooting common issues, you can overcome any obstacles and enjoy your surround sound system to its fullest potential.
Conclusion
Setting up a surround sound system can be an exciting and rewarding endeavor that elevates your home entertainment experience. By following the steps outlined in this guide, you can successfully connect and configure your surround sound system for optimal audio performance.
During the setup process, it’s important to choose the right surround sound system that suits your needs and budget. Understanding the components of the system, including the receiver, speakers, and cables, is crucial for a smooth installation. Properly connecting the receiver to your TV and the speakers to your receiver ensures that audio signals are transmitted correctly.
Configuring your surround sound system allows you to fine-tune settings such as speaker levels, sound modes, and equalization to personalize your audio experience. Testing and fine-tuning your system ensures that you achieve the best possible audio quality and immerse yourself in rich and immersive sound.
If you encounter any issues along the way, troubleshooting common problems such as no sound, distorted audio, or syncing issues can help you overcome obstacles and enjoy your surround sound system to its fullest potential.
Remember to consult the user manuals and resources provided by your specific equipment manufacturer for detailed instructions and guidance tailored to your setup.
With your surround sound system properly set up, you can now sit back, relax, and enjoy a cinematic audio experience right in the comfort of your own home. Get ready to immerse yourself in the captivating audio of movies, music, and games like never before!