Introduction
Inserting a SIM card into your Sony Xperia device is a fundamental step in setting up your mobile phone for communication. Whether you're activating a new phone or switching to a different carrier, understanding how to properly insert a SIM card is essential. This guide will walk you through the process, ensuring that you can seamlessly integrate your SIM card into your Sony Xperia device.
A SIM (Subscriber Identity Module) card serves as the key to unlocking your phone's connectivity, enabling you to make calls, send messages, and access mobile data. Without this small yet crucial component, your device would be unable to connect to your mobile network. Therefore, knowing how to insert a SIM card correctly is vital for optimizing your phone's functionality.
In the following steps, you will learn how to locate the SIM card slot on your Sony Xperia device, power off the phone, insert the SIM card, and power it back on. By following these instructions, you will be able to ensure that your SIM card is securely in place, allowing you to enjoy uninterrupted access to your mobile network.
Now, let's delve into the step-by-step process of inserting a SIM card into your Sony Xperia device, empowering you to harness the full potential of your mobile phone's communication capabilities.
Step 1: Locate the SIM card slot
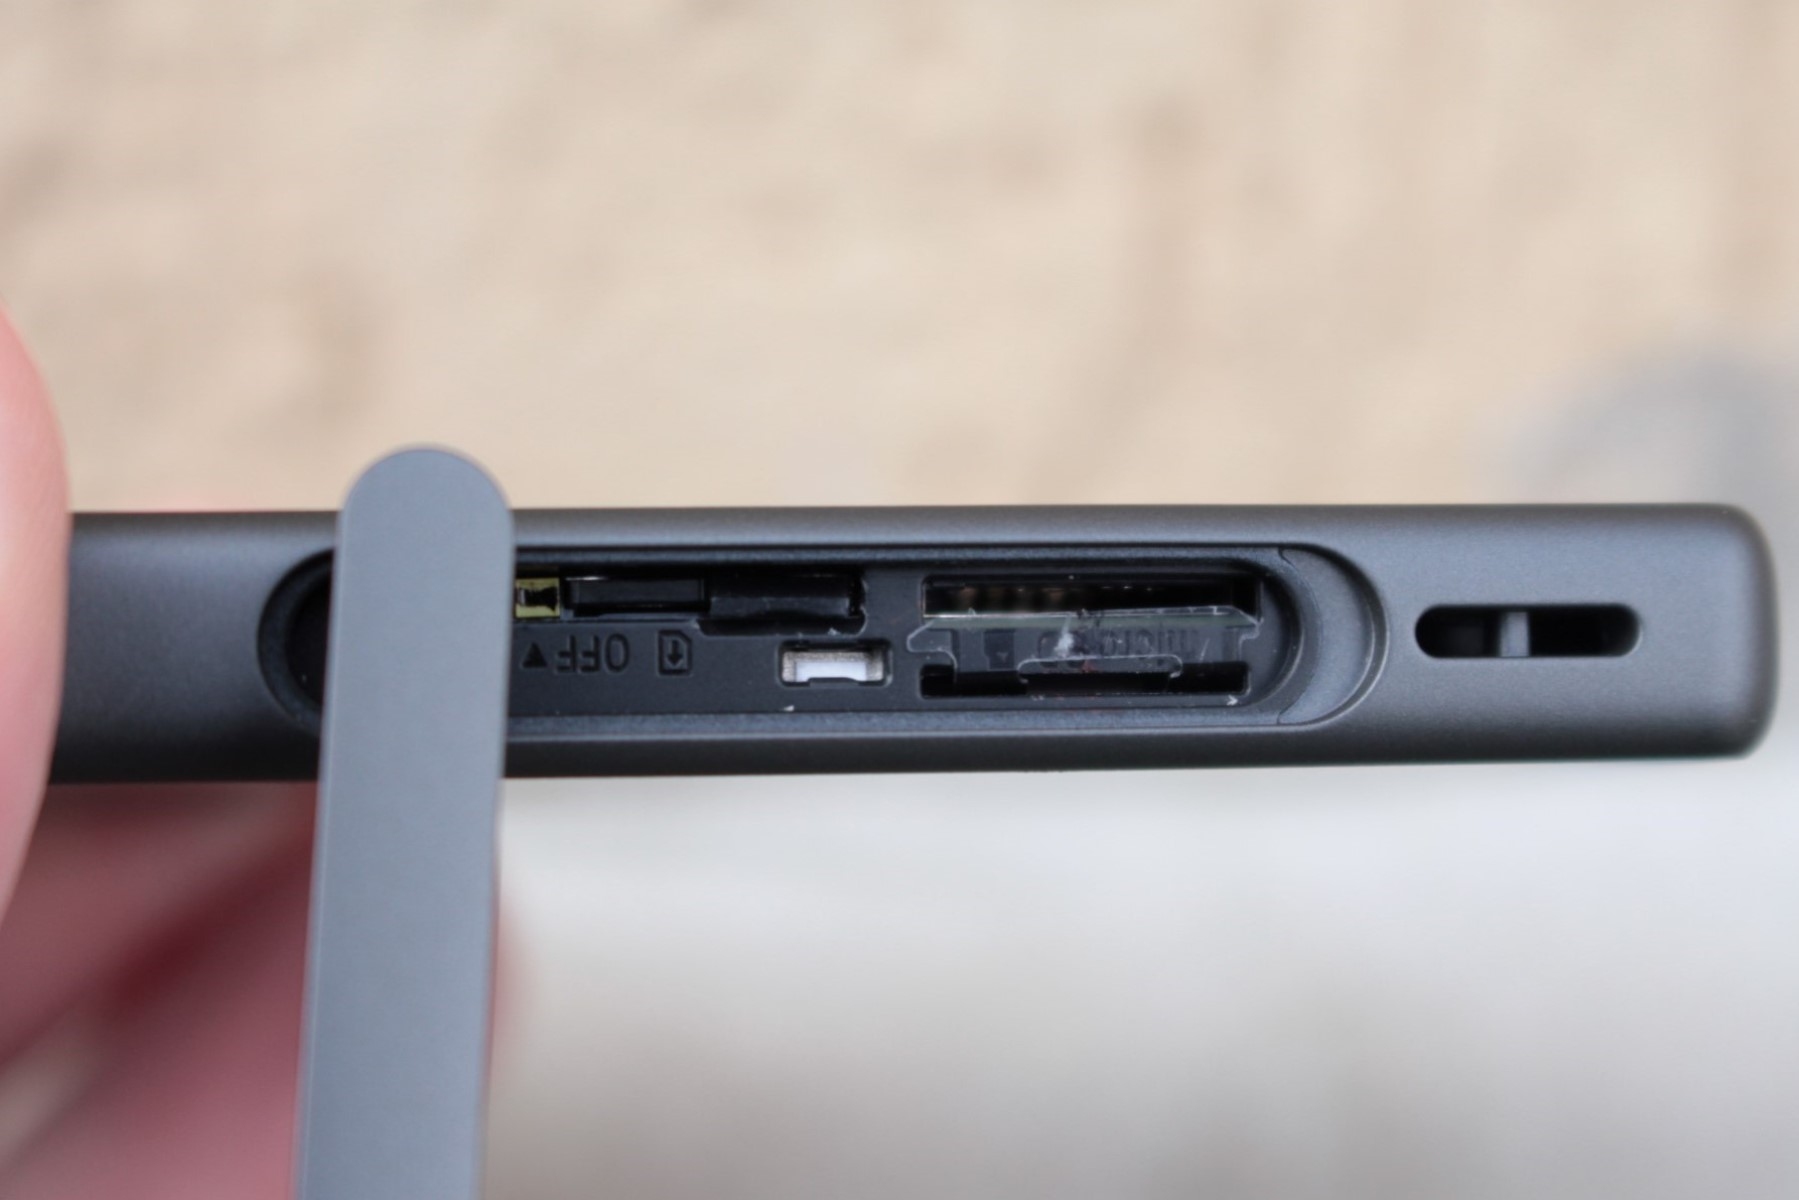
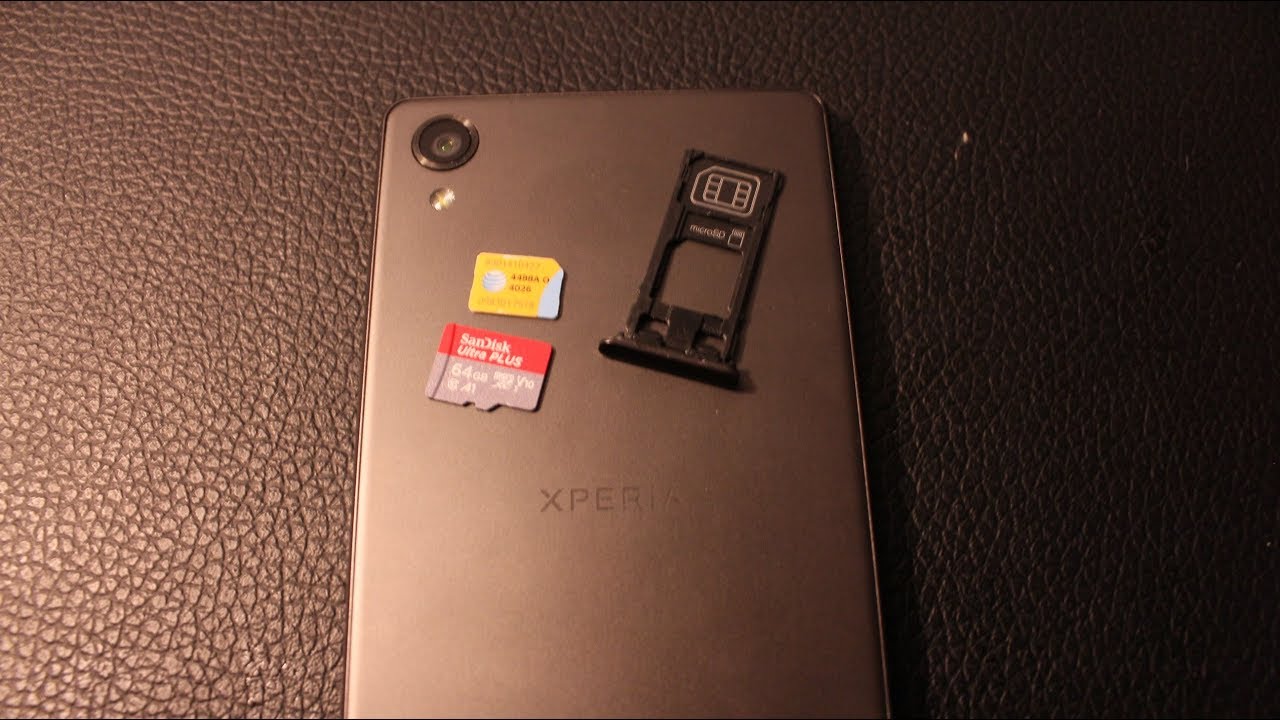
Locating the SIM card slot on your Sony Xperia device is the first crucial step in the process of inserting a SIM card. The SIM card slot is typically situated on the side of the phone, although the exact location may vary depending on the specific model of your Xperia device. To begin, carefully examine the sides of your phone, looking for a small tray or compartment with a pinhole or a removable cover.
On most Sony Xperia models, the SIM card slot is located on the left-hand side of the device. It is often positioned above or below the volume buttons, and can be identified by a small, discreet outline. Some Xperia devices may feature a combined SIM and SD card slot, while others have separate slots for the SIM card and the SD card. It's important to note that the SIM card slot may be located in a slightly different position on older or newer Xperia models, so it's advisable to consult the user manual for precise guidance.
Once you have located the SIM card slot, take a moment to familiarize yourself with its design and orientation. The slot is designed to accommodate the SIM card securely, ensuring that it remains in place during everyday use. It's essential to handle the SIM card slot with care, as any damage to this component could affect the functionality of your device.
By successfully identifying the SIM card slot on your Sony Xperia device, you have completed the first step in the process of inserting a SIM card. This foundational step sets the stage for the subsequent actions, guiding you toward seamlessly integrating the SIM card into your phone. With the SIM card slot now located, you are ready to proceed to the next step, which involves powering off the device to prepare for the insertion of the SIM card.
Step 2: Power off the device
Before inserting the SIM card into your Sony Xperia device, it is essential to power off the phone to prevent any potential disruption during the insertion process. By turning off the device, you create a safe and stable environment for handling the SIM card and accessing the SIM card slot without any interference.
To power off your Sony Xperia device, begin by pressing and holding the power button, which is typically located on the right-hand side of the phone. Upon pressing and holding the power button, a menu will appear on the screen, presenting various options such as power off, restart, and emergency mode. From this menu, select the "Power off" option to initiate the shutdown process.
As the device powers down, you will notice the screen dimming and eventually turning off, indicating that the phone is successfully entering the powered-off state. It is important to wait for the device to completely power off before proceeding to the next step. This ensures that the phone's internal components are fully inactive, minimizing the risk of any electrical interference while handling the SIM card.
Once the device is powered off, you can proceed with confidence to the next step of inserting the SIM card into your Sony Xperia device. The act of powering off the phone serves as a crucial preparatory measure, allowing you to approach the SIM card insertion process with ease and peace of mind.
By following this simple yet essential step, you are taking the necessary precautions to ensure a smooth and trouble-free experience when inserting the SIM card. With the device powered off, you are now ready to move on to the subsequent step, which involves the actual insertion of the SIM card into the designated slot on your Sony Xperia device.
Step 3: Insert the SIM card
With your Sony Xperia device powered off and the SIM card slot identified, you are now ready to proceed with the crucial step of inserting the SIM card. This step requires precision and care to ensure that the SIM card is properly positioned within the designated slot, allowing for seamless connectivity and functionality.
To begin, locate the SIM card tray or compartment on your Sony Xperia device. Depending on the model, you may need to use the SIM card removal tool provided with your phone or a small paperclip to gently press the pinhole next to the SIM card slot. This action will release the SIM card tray, allowing you to carefully pull it out from the device.
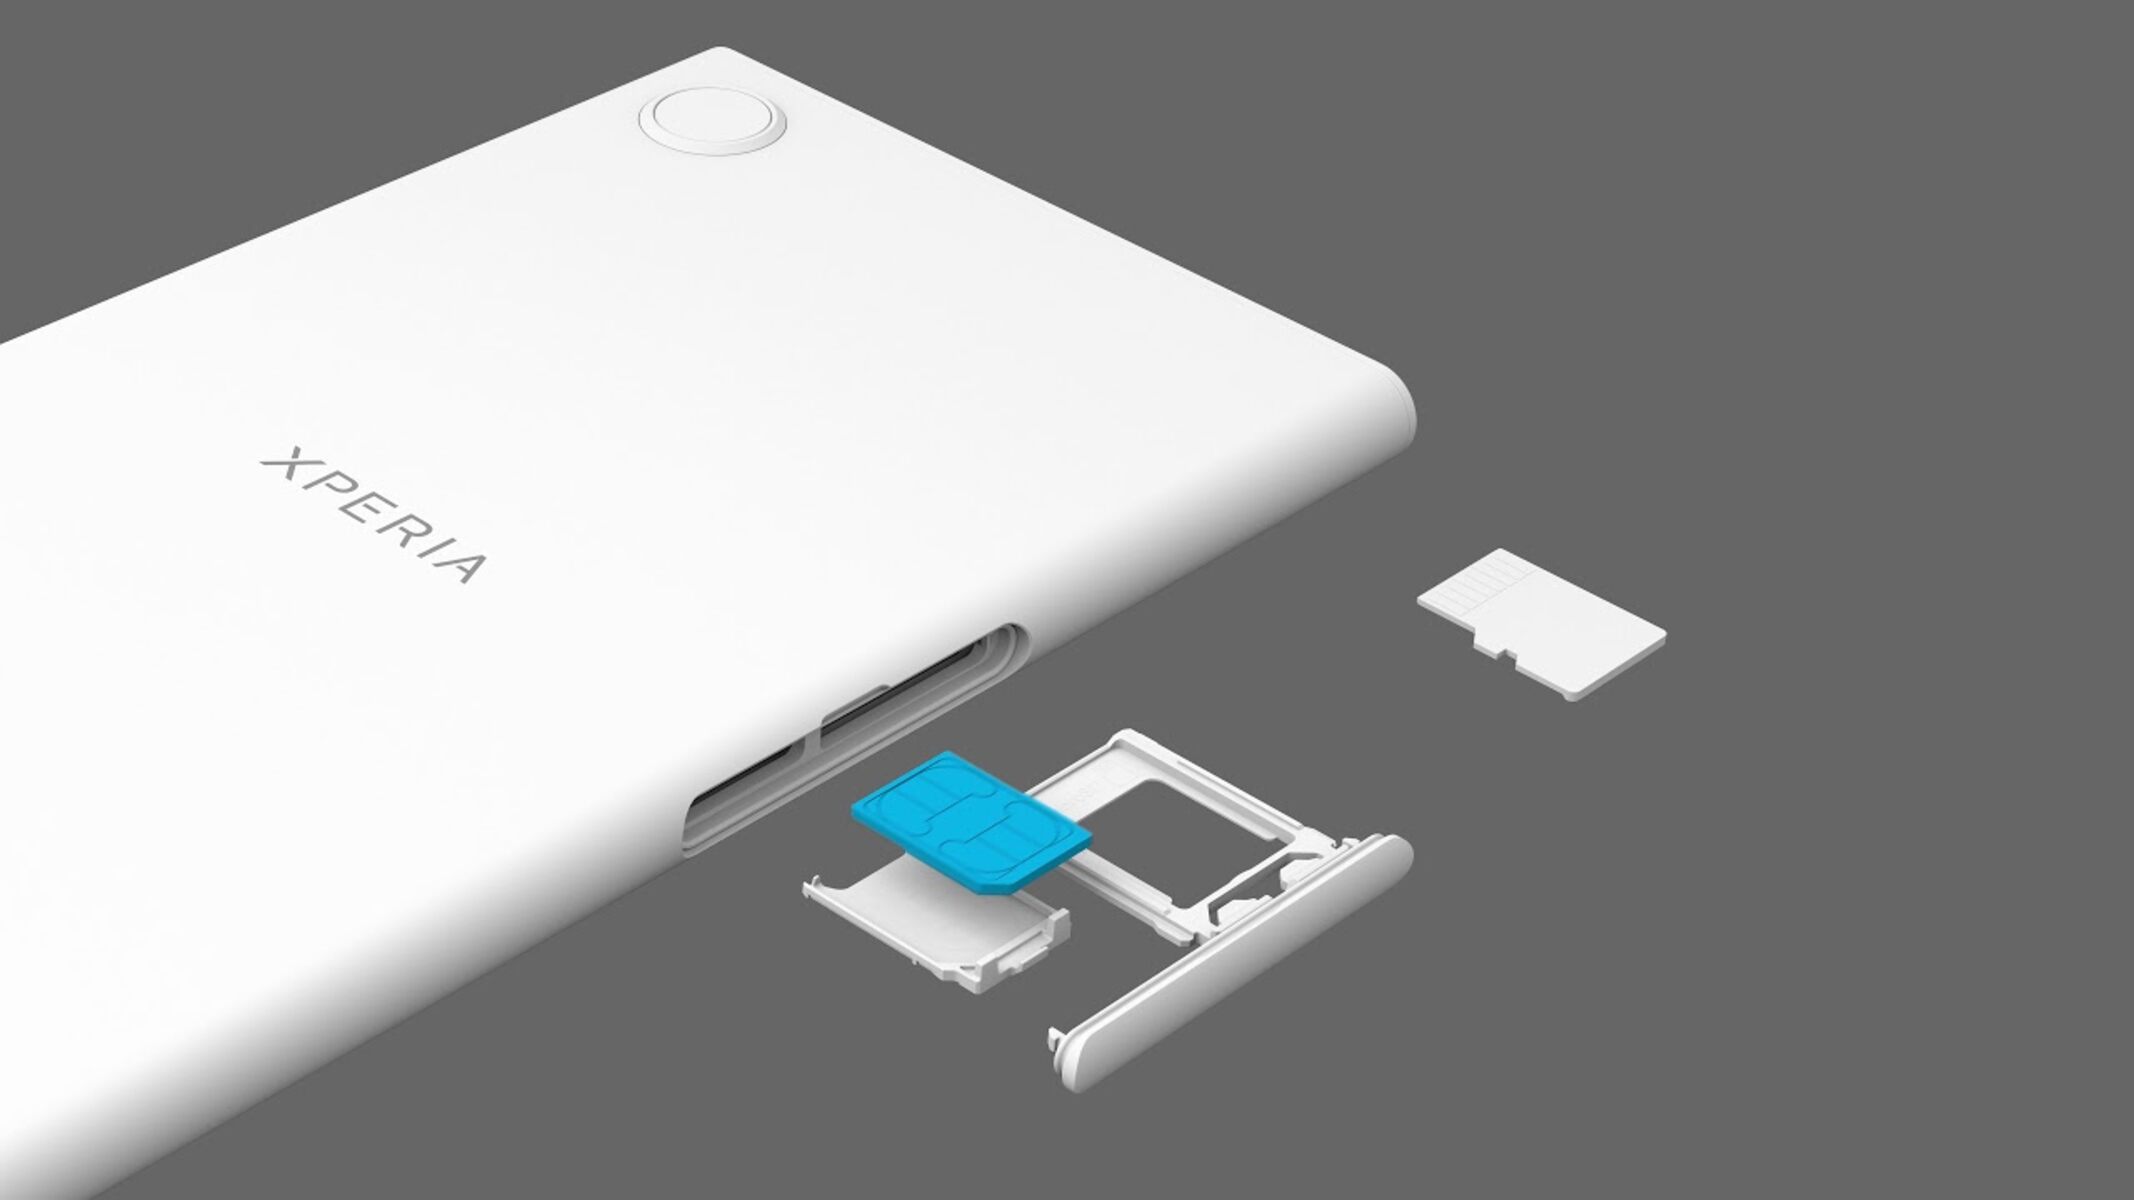
Once the SIM card tray is accessible, take your SIM card and examine it closely. Note the orientation of the SIM card and the positioning of the notched corner, as this will guide you in aligning the card correctly within the tray. Most SIM cards are designed with a notched corner or a subtle cutout, ensuring that they can only be inserted in one specific orientation.
With the orientation of the SIM card in mind, gently place the SIM card into the designated area on the SIM card tray, ensuring that it fits snugly and aligns with the tray's contours. Take care to avoid applying excessive force, as the SIM card should slide smoothly into place without resistance. Once the SIM card is positioned correctly, carefully slide the tray back into the SIM card slot until it is fully seated within the device.
As the SIM card tray is securely reinserted, take a moment to ensure that the SIM card is properly aligned and seated within the slot. The SIM card should be flush with the tray and should not protrude or feel loose. This secure positioning is essential for maintaining a stable connection and preventing any potential issues with the SIM card's functionality.
With the SIM card successfully inserted into your Sony Xperia device, you have completed a critical step in the process of integrating the SIM card into your phone. This step sets the stage for the final action of powering on the device, allowing you to activate the SIM card and initiate communication capabilities on your Sony Xperia device.
Now that the SIM card is securely in place, you are ready to proceed to the next and final step, which involves powering on the device to complete the process of inserting the SIM card into your Sony Xperia device.
Step 4: Power on the device
After successfully inserting the SIM card into your Sony Xperia device, the final step involves powering on the phone to activate the SIM card and restore connectivity. This pivotal action marks the completion of the SIM card insertion process, allowing you to harness the full potential of your Sony Xperia device's communication capabilities.
To power on your Sony Xperia device, press and hold the power button located on the right-hand side of the phone. As you press the power button, the screen will illuminate, and the Sony logo may appear, indicating that the device is booting up. Depending on the model and software version of your Xperia device, the startup process may vary slightly, but the fundamental steps remain consistent.
As the device powers on, you will notice the screen transitioning from the initial boot-up sequence to the lock screen or home screen, signifying that the phone is now active and ready for use. It is important to allow the device a few moments to complete the startup process and establish a connection with the mobile network.
Upon successfully powering on your Sony Xperia device, you will observe the signal strength indicator and network status displayed on the screen, confirming that the SIM card has been recognized and activated. This visual cue signifies that your phone is now ready to make calls, send messages, and access mobile data using the inserted SIM card.
With the device powered on and the SIM card activated, you have completed the final step in the process of inserting a SIM card into your Sony Xperia device. This action culminates in the seamless integration of the SIM card, enabling you to enjoy uninterrupted connectivity and communication capabilities on your Sony Xperia device.
By following these step-by-step instructions, you have successfully inserted a SIM card into your Sony Xperia device, empowering you to leverage the full functionality of your mobile phone. Whether you are activating a new phone or switching to a different carrier, mastering the process of inserting a SIM card ensures that you can seamlessly integrate your SIM card into your Sony Xperia device, unlocking its communication potential.
Now that the SIM card is activated and your Sony Xperia device is powered on, you are ready to explore the myriad features and capabilities of your phone, knowing that you have successfully completed the essential task of inserting a SIM card into your Sony Xperia device.
Conclusion
In conclusion, the process of inserting a SIM card into your Sony Xperia device is a fundamental step that paves the way for seamless communication and connectivity. By following the step-by-step guide outlined in this article, you have gained the knowledge and confidence to navigate through the essential stages of locating the SIM card slot, powering off the device, inserting the SIM card, and powering on the device. These actions collectively ensure that your SIM card is securely integrated into your Sony Xperia device, allowing you to harness its full potential.
Mastering the art of inserting a SIM card empowers you to activate your phone, enabling you to make calls, send messages, and access mobile data with ease. The process of locating the SIM card slot on your Sony Xperia device serves as the initial point of engagement, guiding you to identify the precise location of the slot and familiarize yourself with its design and orientation. This foundational step sets the stage for the subsequent actions, laying the groundwork for a smooth and successful SIM card insertion process.
Powering off the device before inserting the SIM card is a crucial preparatory measure that ensures a safe and stable environment for handling the SIM card and accessing the SIM card slot. By powering off the device, you create an optimal setting for seamlessly integrating the SIM card into your Sony Xperia device, mitigating the risk of any potential disruption during the insertion process.
The actual insertion of the SIM card into the designated slot requires precision and care to ensure that the SIM card is properly positioned within the tray, allowing for seamless connectivity and functionality. By following the detailed instructions for inserting the SIM card, you have successfully navigated through this critical step, ensuring that the SIM card is securely in place and ready for activation.
Finally, powering on the device marks the completion of the SIM card insertion process, activating the SIM card and restoring connectivity. This pivotal action signifies the successful integration of the SIM card into your Sony Xperia device, allowing you to enjoy uninterrupted communication capabilities and access to your mobile network.
By mastering the process of inserting a SIM card into your Sony Xperia device, you have equipped yourself with the essential skills to optimize your phone's functionality and seamlessly integrate your SIM card, ensuring that you can fully leverage the communication potential of your Sony Xperia device. With the SIM card securely in place and your device powered on, you are now ready to embark on a seamless and connected mobile experience, knowing that you have successfully completed the essential task of inserting a SIM card into your Sony Xperia device.