Introduction
Removing a SIM card from a Sony Xperia C3 is a simple yet essential task that may be required when switching to a new device, changing carriers, or troubleshooting connectivity issues. The SIM card, which stands for Subscriber Identity Module, is a small, removable smart card that securely stores the unique identification information used to authenticate a mobile device on a network. It also holds the user's personal data, such as contacts and text messages, making it a crucial component of the phone.
Understanding how to properly remove the SIM card from your Sony Xperia C3 is important to avoid damaging the card or the device itself. This guide will walk you through the step-by-step process, ensuring that you can confidently and safely remove the SIM card without any hassle.
Whether you're a tech-savvy individual or a newcomer to the world of mobile devices, this guide is designed to provide clear and concise instructions, allowing you to complete the task with ease. By following the outlined steps, you'll be able to remove the SIM card from your Sony Xperia C3 without encountering any complications.
Now, let's delve into the specific steps required to remove the SIM card from your Sony Xperia C3. Whether you're preparing to switch to a new device or simply need to access the SIM card for any reason, this guide will equip you with the knowledge and confidence to complete the process smoothly.
Step 1: Locate the SIM card slot
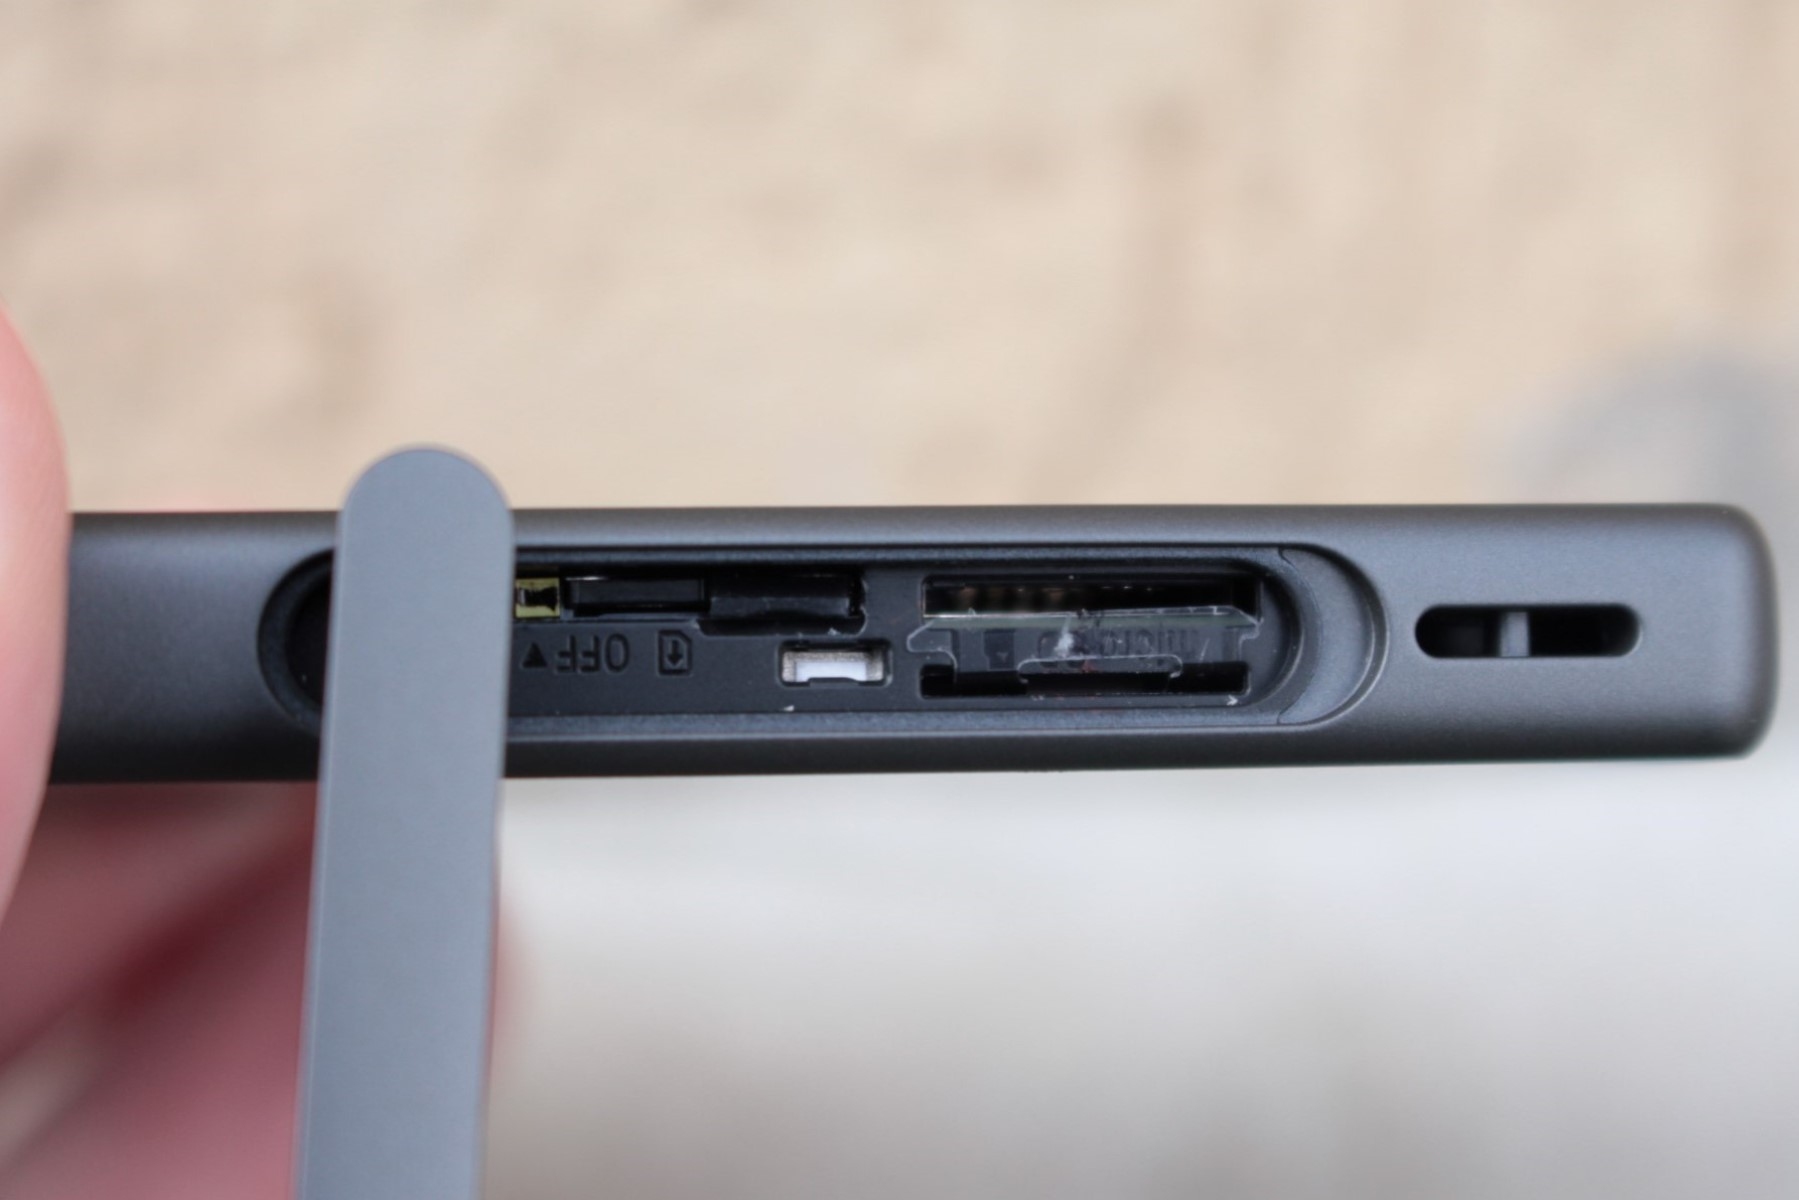
The first step in removing the SIM card from your Sony Xperia C3 is to locate the SIM card slot. The SIM card slot is typically located on the side of the device. In the case of the Sony Xperia C3, the SIM card slot is usually positioned on the left-hand side of the phone. It's important to note that the exact location of the SIM card slot may vary slightly depending on the specific model of the Xperia C3, but it is commonly found on the side of the device.
To locate the SIM card slot, you can start by gently examining the sides of your Sony Xperia C3. Look for a small, discreet opening or compartment that is designed to accommodate the SIM card. The slot may be covered by a small panel or door, which can be easily opened using a SIM card eject tool or a paperclip.
Once you have located the SIM card slot, take a moment to familiarize yourself with its appearance and position. It's essential to handle the device with care during this process to avoid causing any damage. If you're having trouble locating the SIM card slot, referring to the device's user manual can provide helpful visual guidance and specific instructions for your particular model of the Sony Xperia C3.
By successfully identifying the SIM card slot, you have completed the first crucial step in the process of removing the SIM card from your Sony Xperia C3. With the location of the slot confirmed, you are now ready to proceed to the next step, which involves ejecting the SIM card tray from the device.
Understanding the location of the SIM card slot is fundamental to the overall process, as it sets the stage for the subsequent steps involved in safely removing the SIM card from your Sony Xperia C3. With this initial step accomplished, you are well on your way to completing the task with confidence and precision.
Step 2: Eject the SIM card tray
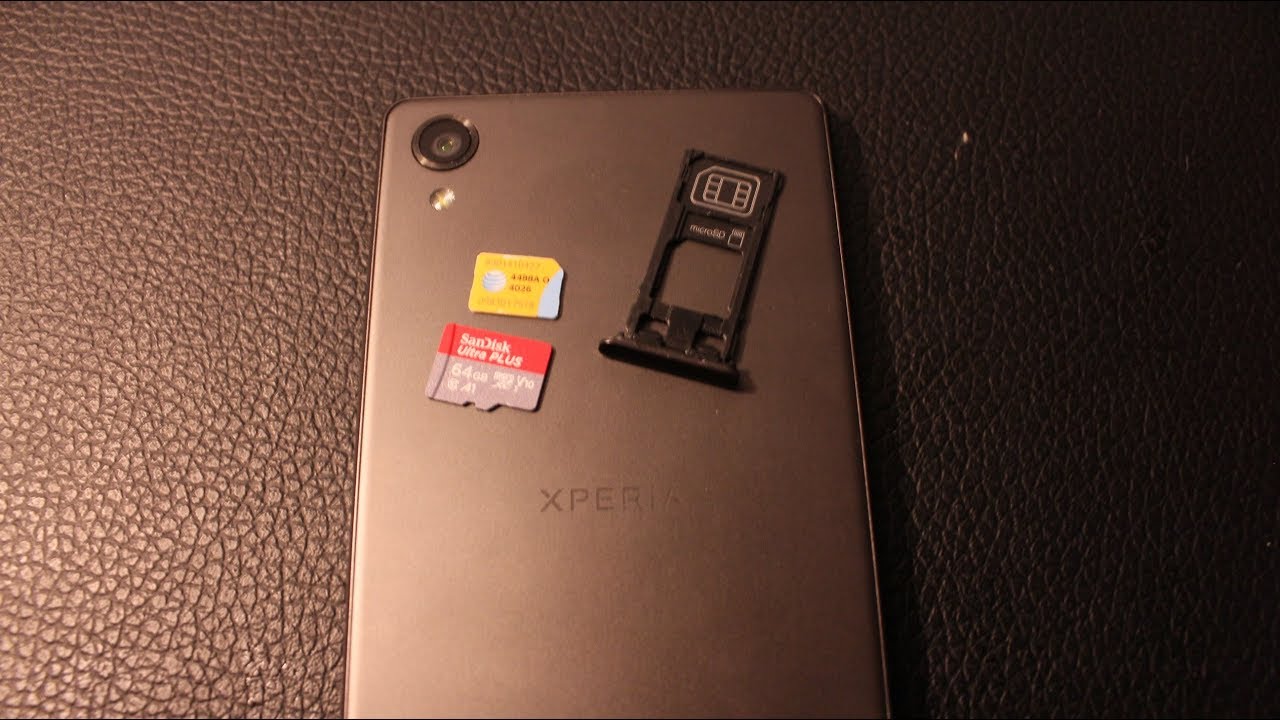
Ejecting the SIM card tray from your Sony Xperia C3 is a pivotal step in the process of removing the SIM card. The SIM card tray is a small, slender compartment that securely holds the SIM card within the device. Ejecting this tray allows you to access the SIM card and proceed with its removal. Here's a detailed guide on how to successfully eject the SIM card tray from your Sony Xperia C3:
-
Prepare the SIM card eject tool: Before proceeding, ensure that you have the SIM card eject tool that was provided with your Sony Xperia C3. This tool is specifically designed to facilitate the safe ejection of the SIM card tray. If the original eject tool is unavailable, a small paperclip can be used as an alternative. However, it's important to exercise caution and use a tool that fits snugly into the ejection hole to avoid causing any damage to the device.
-
Locate the ejection hole: Once you have the SIM card eject tool at hand, carefully examine the sides of your Sony Xperia C3 to locate the ejection hole. The ejection hole is a tiny, pin-sized opening adjacent to the SIM card slot. It is strategically positioned to allow the insertion of the eject tool for the purpose of releasing the SIM card tray.
-
Insert the SIM card eject tool: With the ejection hole identified, gently insert the SIM card eject tool into the hole. Apply a small amount of pressure to ensure that the tool is inserted all the way into the ejection hole. You may feel a slight resistance, but it's important to proceed with a steady and controlled motion to avoid any mishaps.
-
Eject the SIM card tray: Once the eject tool is securely inserted into the ejection hole, exert a gentle but firm outward pressure to trigger the release of the SIM card tray. As you apply pressure, you should feel the tray start to protrude from the device. Continue to carefully guide the tray out until it is fully extended, allowing you to access the SIM card resting within it.
By following these detailed steps, you can effectively eject the SIM card tray from your Sony Xperia C3, setting the stage for the subsequent removal of the SIM card. This critical phase of the process ensures that the SIM card is safely and easily accessible for extraction, enabling you to proceed with confidence and precision.
Step 3: Remove the SIM card
With the SIM card tray successfully ejected from your Sony Xperia C3, the next step is to carefully remove the SIM card from the tray. The SIM card is a small, rectangular chip that is vital for connecting your device to the mobile network and storing essential subscriber information. Here's a detailed guide on how to safely and effectively remove the SIM card from your Sony Xperia C3:
-
Inspect the SIM card tray: Before proceeding with the removal of the SIM card, take a moment to inspect the SIM card tray. The tray will now be partially extended from the device, revealing the SIM card nestled within it. Ensure that the tray is stable and fully accessible, as this will facilitate the smooth extraction of the SIM card.
-
Gently remove the SIM card: With the SIM card tray in a secure and accessible position, carefully grasp the exposed edge of the SIM card. Apply gentle pressure to slide the SIM card out of the tray. It's important to handle the SIM card with care, avoiding any excessive bending or forceful movements that could potentially damage the card.
-
Inspect the SIM card: As you remove the SIM card from the tray, take a moment to inspect it for any signs of damage or wear. Check the gold contacts on the back of the SIM card for any debris or discoloration, as these can affect the card's functionality. If any issues are detected, it may be necessary to clean the contacts or consider replacing the SIM card.
-
Safe storage of the SIM card: Once the SIM card has been successfully removed from the tray, it's crucial to store it in a safe and secure location. A SIM card holder or a small, labeled envelope can be used to safeguard the SIM card from damage or loss. Additionally, it's advisable to keep the SIM card away from direct sunlight, moisture, and extreme temperatures to preserve its integrity.
By following these detailed steps, you can effectively remove the SIM card from your Sony Xperia C3 with precision and care. This phase of the process ensures that the SIM card is safely extracted from the device, allowing you to proceed with confidence and complete any necessary tasks, such as transferring the SIM card to a new device or making changes to your mobile service.
Step 4: Reinsert the SIM card tray
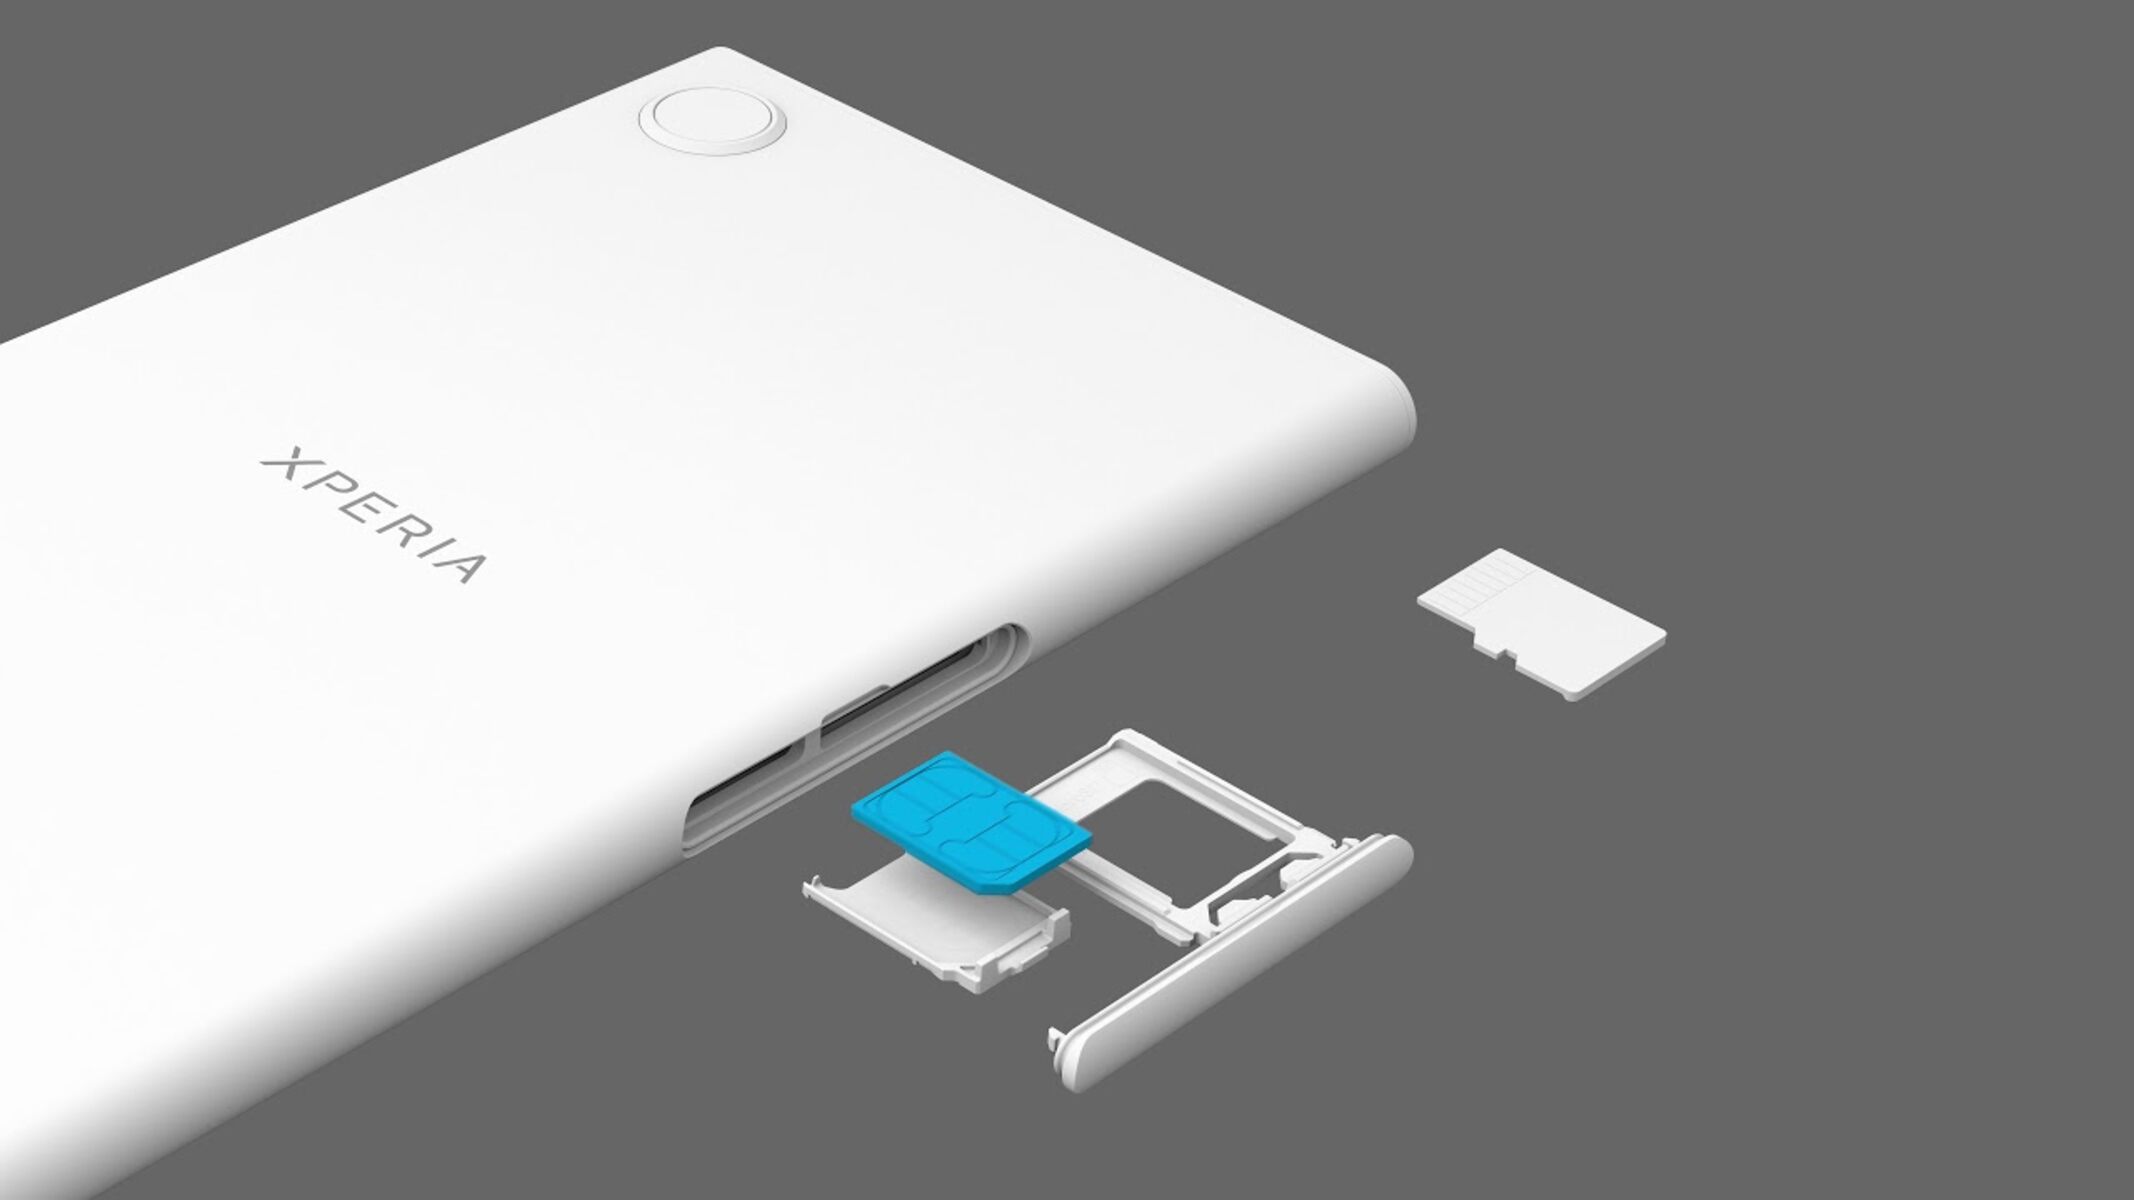
After successfully removing the SIM card from your Sony Xperia C3, the final step involves reinserting the SIM card tray back into the device. This step is crucial to ensure that the SIM card is securely placed within the device, allowing for seamless connectivity and functionality. Here's a detailed guide on how to effectively reinsert the SIM card tray into your Sony Xperia C3:
-
Prepare the SIM card tray: Before proceeding with the reinsertion, carefully inspect the SIM card tray to ensure that it is free from any debris or damage. It's important to verify that the tray is clean and in good condition, as this will facilitate the smooth reinsertion of the SIM card.
-
Position the SIM card: With the SIM card tray in hand, carefully place the SIM card back into the designated slot on the tray. The SIM card should fit snugly into the slot, aligning with the corresponding grooves to ensure a secure fit. Take care to position the SIM card correctly, avoiding any forced insertion that could potentially damage the card or the tray.
-
Align the SIM card tray: Once the SIM card is securely placed in the tray, align the tray with the SIM card slot on your Sony Xperia C3. Ensure that the tray is oriented in the correct position, with the SIM card facing downwards to align with the internal contacts within the device.
-
Gently insert the SIM card tray: With the SIM card tray properly aligned, carefully guide the tray back into the SIM card slot on the side of your Sony Xperia C3. Apply gentle pressure to slide the tray back into place, taking care to avoid any abrupt or forceful movements that could cause damage to the device or the tray.
-
Verify secure placement: Once the SIM card tray is fully inserted, take a moment to verify that it is securely positioned within the device. Ensure that the tray sits flush with the exterior of the device, indicating that it is properly seated and aligned. This step is crucial to guarantee that the SIM card is securely housed within the device, allowing for uninterrupted network connectivity.
By following these detailed steps, you can effectively reinsert the SIM card tray into your Sony Xperia C3 with precision and care. This final phase of the process ensures that the SIM card is securely placed within the device, allowing you to resume normal usage and enjoy seamless connectivity.
Conclusion
Successfully removing the SIM card from your Sony Xperia C3 is a fundamental task that empowers you to manage your mobile connectivity and device functionality with ease. By following the step-by-step guide outlined in this article, you have gained the knowledge and confidence to navigate the process of removing and reinserting the SIM card with precision and care.
Understanding the significance of the SIM card as a vital component of your mobile device is essential in appreciating the importance of safely handling and managing it. Whether you're preparing to switch to a new device, troubleshooting network issues, or simply need to access the SIM card for any reason, the ability to confidently remove and reinsert the SIM card is a valuable skill that enhances your overall mobile experience.
By locating the SIM card slot, ejecting the SIM card tray, removing the SIM card, and reinserting the tray back into your Sony Xperia C3, you have demonstrated a proactive approach to managing your device's essential components. This hands-on experience not only equips you with practical skills but also fosters a deeper understanding of the intricate workings of your mobile device.
Furthermore, the process of removing and reinserting the SIM card serves as a reminder of the importance of regular device maintenance and care. By handling the SIM card and its corresponding tray with delicacy and attention to detail, you contribute to the overall longevity and optimal performance of your Sony Xperia C3.
As you reflect on the completion of this task, you can take pride in your ability to navigate the technical aspects of your device with confidence and proficiency. The knowledge and skills acquired through this process empower you to take control of your mobile experience, ensuring that your Sony Xperia C3 operates seamlessly and efficiently.
In conclusion, the successful removal and reinsertion of the SIM card from your Sony Xperia C3 exemplify your proactive approach to device management and maintenance. By mastering this essential task, you have enhanced your understanding of your device's functionality and solidified your ability to navigate similar processes in the future. With this newfound expertise, you are well-equipped to manage your mobile connectivity and device components with confidence and precision.