Introduction
Transferring files from your Sony Xperia L1 to a SIM card can be a convenient way to store important data, such as contacts and messages, in a portable and easily accessible format. Whether you're upgrading to a new device or simply want to create a backup of essential information, this step-by-step tutorial will guide you through the process with ease.
By following these instructions, you can ensure that your valuable data remains secure and readily available, even when you're not using your Xperia L1. With just a few simple steps, you'll be able to transfer files to your SIM card, providing peace of mind and a sense of preparedness for any situation.
Now, let's delve into the specifics of how to access the file manager on your Xperia L1 and select the files you wish to copy to the SIM card. This tutorial will also cover the process of choosing the SIM card as the destination for the copied files and confirming the copy process. With these steps, you can effectively safeguard your data and enjoy the convenience of having it stored on a SIM card.
Step 1: Accessing the File Manager
Accessing the file manager on your Sony Xperia L1 is the initial step in the process of transferring files to a SIM card. The file manager serves as the gateway to your device's internal storage, allowing you to navigate through various folders and select the files you wish to copy.
To begin, unlock your Xperia L1 and navigate to the home screen. From there, locate the "Apps" icon, typically represented by a grid of squares, and tap on it to access the list of installed applications. Scroll through the apps until you find the "File Manager" or "Files" app, which is commonly denoted by a folder icon. Once you've located the file manager app, tap on it to launch the application.
Upon opening the file manager, you will be presented with a user-friendly interface that displays the contents of your device's internal storage. You can browse through various folders, such as "Downloads," "Pictures," "Music," and "Documents," to locate the specific files you intend to transfer to the SIM card.
In the file manager, you can utilize the search functionality or manually navigate through the folders to find the files you wish to copy. Once you've located the desired files, you can proceed to the next step of the tutorial, which involves selecting the files for copying.
Accessing the file manager on your Xperia L1 is a straightforward process that empowers you to manage your device's data efficiently. By familiarizing yourself with the file manager interface, you can easily navigate through your device's internal storage and access the files you need to transfer to the SIM card.
With the file manager at your disposal, you are equipped to initiate the file transfer process and safeguard your important data by storing it on a SIM card. This initial step sets the stage for the subsequent actions involved in copying files to the SIM card, ensuring a seamless and organized approach to managing your data on the Xperia L1.
Step 2: Selecting the Files to Copy
After accessing the file manager on your Sony Xperia L1, the next crucial step in transferring files to a SIM card is selecting the specific files you want to copy. This process allows you to identify and choose the data that holds significance to you, ensuring that it is securely stored on the SIM card for future access.
As you navigate through the file manager, you will encounter various folders and files that are stored on your Xperia L1's internal storage. It's essential to carefully review the contents and pinpoint the files that you intend to transfer to the SIM card. Whether it's important contacts, messages, or other data, the file manager provides a comprehensive view of your device's stored information.
To select the files for copying, you can employ intuitive touchscreen gestures to tap and hold on a specific file or use the checkboxes provided within the file manager interface. This allows you to mark individual files or multiple items for copying, depending on your preferences and the nature of the data you wish to transfer.
As you go through the selection process, take the time to consider the significance of each file and its relevance to your storage needs. By carefully evaluating the contents of your Xperia L1's internal storage, you can ensure that the files chosen for copying to the SIM card align with your data management objectives.
Additionally, the file manager may offer sorting and filtering options, enabling you to streamline the selection process by organizing files based on criteria such as file type, date modified, or size. Leveraging these features can enhance the efficiency of selecting files for copying, allowing you to focus on the specific data that holds value to you.
By meticulously selecting the files to copy, you are taking proactive steps to safeguard your important data and ensure its accessibility on the SIM card. This deliberate approach empowers you to maintain control over the transfer process, enabling you to prioritize the files that are integral to your communication and information management needs.
As you proceed with selecting the files for copying, keep in mind the significance of each piece of data and the role it plays in your daily interactions and digital organization. This mindful approach sets the stage for the subsequent steps involved in transferring the selected files to the SIM card, reinforcing the importance of thoughtful data management on your Sony Xperia L1.
Step 3: Choosing the SIM Card as the Destination
Once you have selected the files you wish to transfer from your Sony Xperia L1, the next pivotal step is choosing the SIM card as the destination for the copied files. This process involves specifying the SIM card as the target location where the selected files will be stored, ensuring that they are readily accessible and securely preserved.
To choose the SIM card as the destination, you will typically encounter a set of options or actions within the file manager interface that allow you to designate the desired location for the file transfer. Depending on the specific file manager app installed on your Xperia L1, this step may involve tapping on a "Copy to" or "Move to" function, which prompts you to select the destination for the copied files.
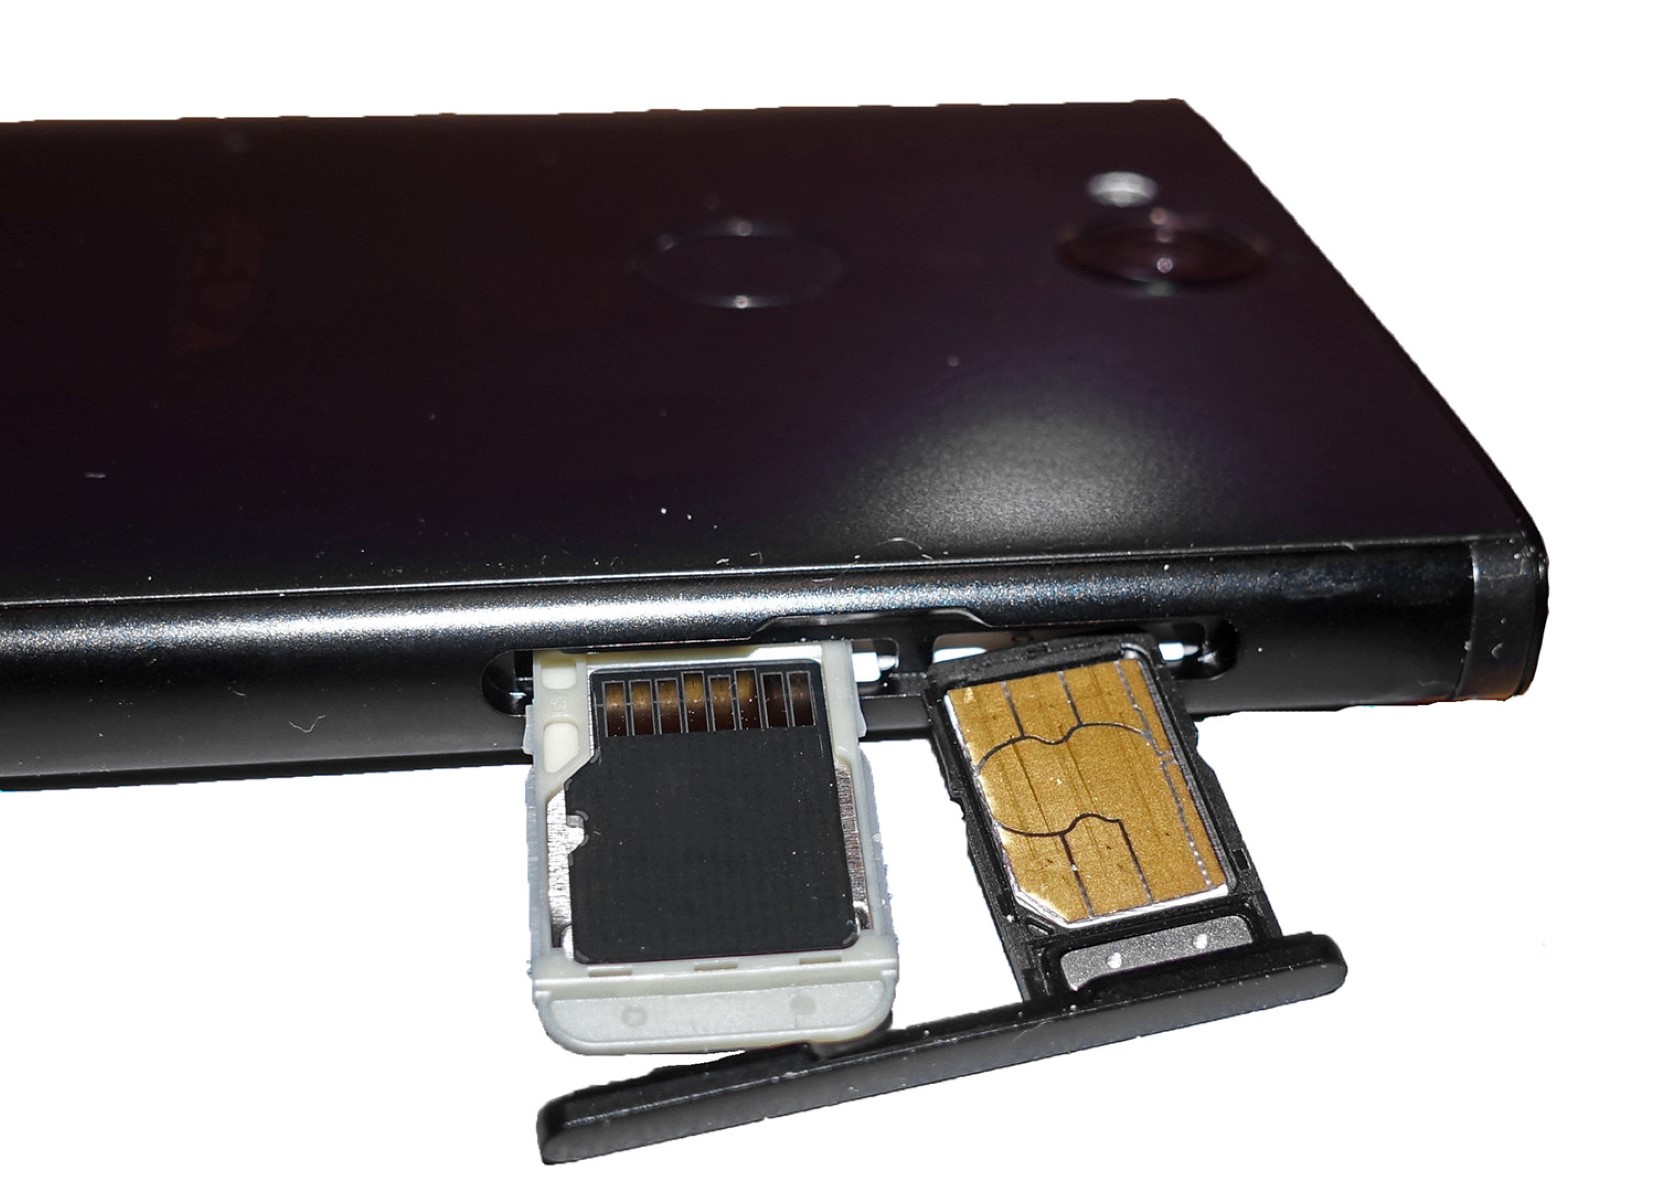
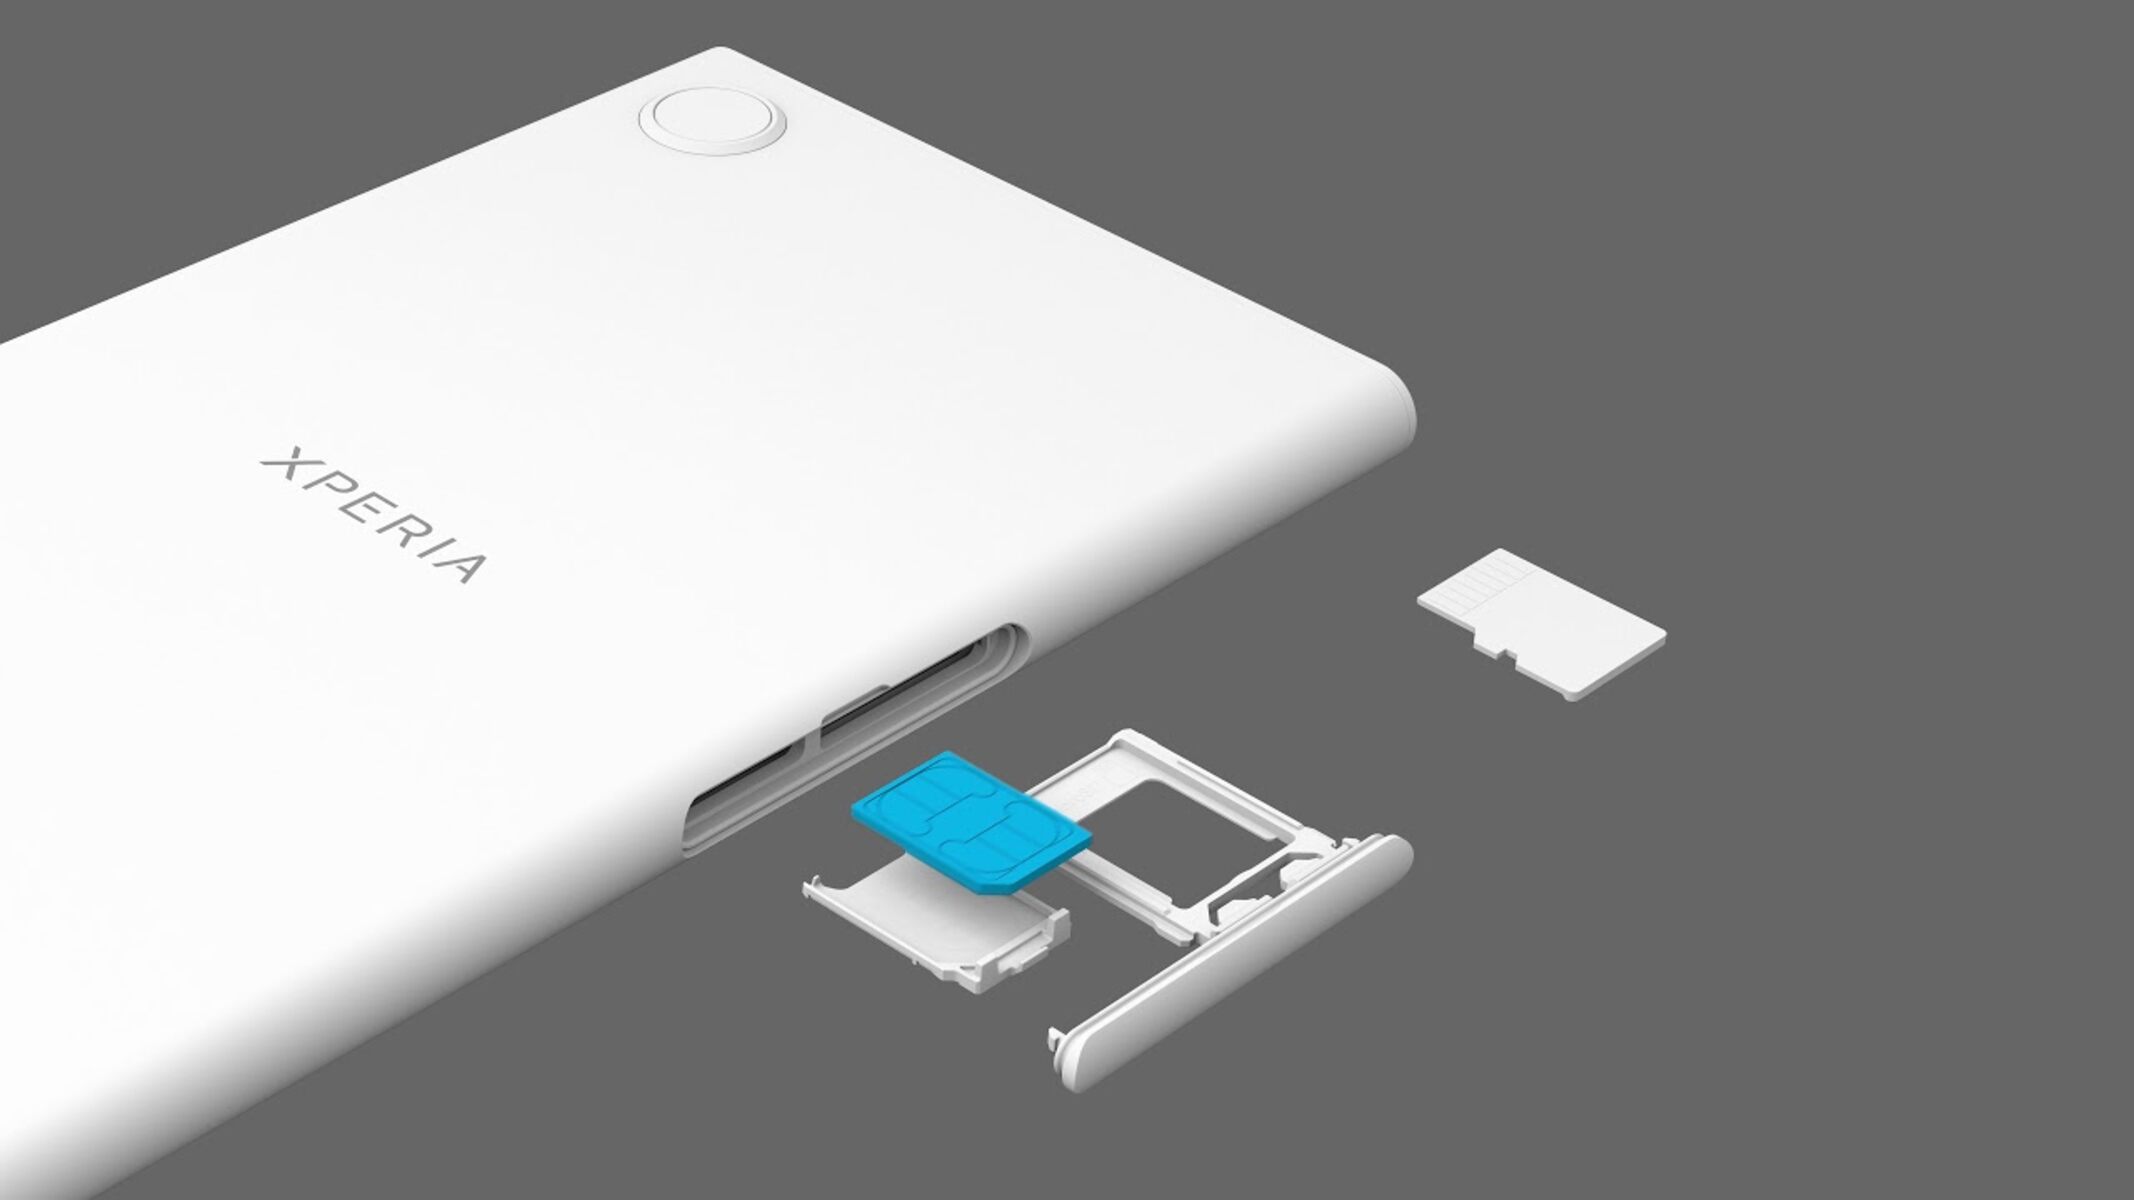
Upon initiating the file transfer action, you will be presented with a list of available storage locations, including the internal storage, SD card (if applicable), and the SIM card. It is essential to identify and select the SIM card from the list of storage options, indicating that the copied files are to be stored on the SIM card.
When choosing the SIM card as the destination, it's important to consider the storage capacity of the SIM card and ensure that it has adequate space to accommodate the selected files. This proactive approach allows you to prevent any potential storage limitations and guarantees a seamless transfer process without encountering storage-related issues.
Furthermore, the file manager interface may provide visual cues or indicators to differentiate between the various storage options, helping you identify the SIM card as the designated destination with clarity and confidence. This visual guidance streamlines the selection process, enabling you to make informed decisions regarding the storage location for the copied files.
By choosing the SIM card as the destination for the copied files, you are leveraging the portable and secure nature of the SIM card to store essential data from your Xperia L1. This deliberate action ensures that your selected files are readily available on the SIM card, offering a convenient and accessible storage solution for your valuable data.
As you proceed with designating the SIM card as the destination, you are taking proactive steps to safeguard your important files and optimize the storage capabilities of your Sony Xperia L1. This intentional approach sets the stage for the subsequent confirmation of the copy process, marking a pivotal milestone in the seamless and efficient transfer of files to the SIM card.
Step 4: Confirming the Copy Process
After selecting the files and designating the SIM card as the destination for the transfer, the final step involves confirming the copy process to initiate the seamless transfer of your selected files from the Sony Xperia L1 to the SIM card. This pivotal confirmation step ensures that the chosen files are accurately and securely copied to the SIM card, providing peace of mind and reassurance regarding the integrity of your data transfer.
Upon selecting the SIM card as the destination, the file manager interface typically presents a confirmation prompt or dialogue box that outlines the details of the impending file transfer. This confirmation dialogue serves as a crucial checkpoint, allowing you to review the selected files, the designated destination (SIM card), and any pertinent transfer settings before proceeding with the copy process.
In the confirmation prompt, you may have the opportunity to verify the file transfer details, such as the number of files being copied, the total size of the data being transferred, and the estimated time required to complete the transfer. This comprehensive overview empowers you to validate the transfer parameters and ensure that the selected files align with your intended data management objectives.
Once you have reviewed the transfer details and confirmed the accuracy of the selected files and destination, you can proceed to initiate the copy process by tapping the "Confirm" or "Copy" button within the file manager interface. This decisive action signals the commencement of the file transfer, prompting the Xperia L1 to execute the copy operation and transfer the selected files to the SIM card.
Throughout the copy process, the file manager may provide real-time progress indicators or visual cues to convey the status of the transfer, such as a progress bar or percentage completion. These visual cues offer transparency and insight into the ongoing transfer operation, allowing you to monitor the process and anticipate the successful completion of the file transfer to the SIM card.
Upon the successful completion of the copy process, you will receive a confirmation message or notification within the file manager interface, indicating that the selected files have been successfully transferred to the SIM card. This confirmation serves as a testament to the seamless execution of the file transfer, affirming that your valuable data is now securely stored on the SIM card for future access and utilization.
By confirming the copy process, you have effectively safeguarded your important files and leveraged the portable storage capabilities of the SIM card to store essential data from your Sony Xperia L1. This deliberate confirmation step marks the culmination of the file transfer process, underscoring your proactive approach to data management and the seamless integration of the SIM card as a secure storage solution for your valuable files.
Conclusion
In conclusion, the process of transferring files from your Sony Xperia L1 to a SIM card encompasses a series of deliberate and essential steps that empower you to safeguard your important data and optimize the storage capabilities of your device. By following the step-by-step tutorial outlined in this guide, you have gained valuable insights into accessing the file manager, selecting the files for copying, choosing the SIM card as the destination, and confirming the copy process. These actions collectively form a comprehensive approach to managing your data and leveraging the portable storage capabilities of the SIM card.
Through the deliberate process of accessing the file manager, you have familiarized yourself with the interface and gained the ability to navigate through your Xperia L1's internal storage with ease. This foundational step sets the stage for efficient data management, allowing you to locate and access the specific files you wish to transfer to the SIM card.
The meticulous selection of files for copying underscores your proactive approach to data management, enabling you to prioritize the data that holds significance to you and aligns with your storage needs. By carefully evaluating the contents of your device's internal storage, you have ensured that the chosen files are integral to your communication and information management objectives.
Choosing the SIM card as the destination for the copied files signifies a strategic utilization of the SIM card's portable and secure storage capabilities. This deliberate action empowers you to store essential data from your Xperia L1 on the SIM card, ensuring that it remains readily accessible and protected in a portable format.
The confirmation of the copy process serves as a pivotal checkpoint, allowing you to validate the accuracy of the selected files and destination before initiating the transfer. This decisive step reinforces your commitment to data integrity and provides reassurance regarding the seamless execution of the file transfer to the SIM card.
By embracing these steps, you have effectively leveraged the portable and secure nature of the SIM card to store your important files, ensuring that they remain accessible and preserved for future use. This proactive approach to data management on your Sony Xperia L1 exemplifies your commitment to safeguarding valuable information and optimizing the storage capabilities of your device.
In essence, the process of transferring files to a SIM card from your Xperia L1 not only provides a practical backup solution but also reflects your proactive stance in managing and preserving your digital data. By integrating the SIM card as a secure storage solution, you have enhanced the accessibility and security of your important files, underscoring the value of thoughtful data management in the digital age.