Introduction
Transferring photos to an SD card on your Sony Xperia can be a convenient way to free up space on your device and ensure that your precious memories are safely stored. Whether you're running out of internal storage or simply want to create a backup of your photos, the process of transferring them to an SD card is relatively straightforward. In this guide, we'll walk you through the steps to seamlessly transfer your photos from your Sony Xperia device to an SD card. By following these simple instructions, you can declutter your device and gain peace of mind knowing that your photos are securely stored on an external memory card.
Now, let's delve into the step-by-step process of transferring your photos to an SD card on your Sony Xperia. Whether you're a tech-savvy individual or a novice when it comes to mobile devices, this guide is designed to be user-friendly and accessible to all. With just a few simple steps, you can master the art of managing your photo storage and enjoy the benefits of having extra space on your Sony Xperia device. Let's get started on this journey to streamline your photo storage and enhance the efficiency of your device.
Step 1: Inserting the SD Card
To begin the process of transferring photos to an SD card on your Sony Xperia, you'll first need to ensure that the SD card is properly inserted into your device. This step is crucial as it establishes the foundation for seamlessly transferring your photos to the external storage. Here's a detailed guide on how to insert the SD card into your Sony Xperia:
-
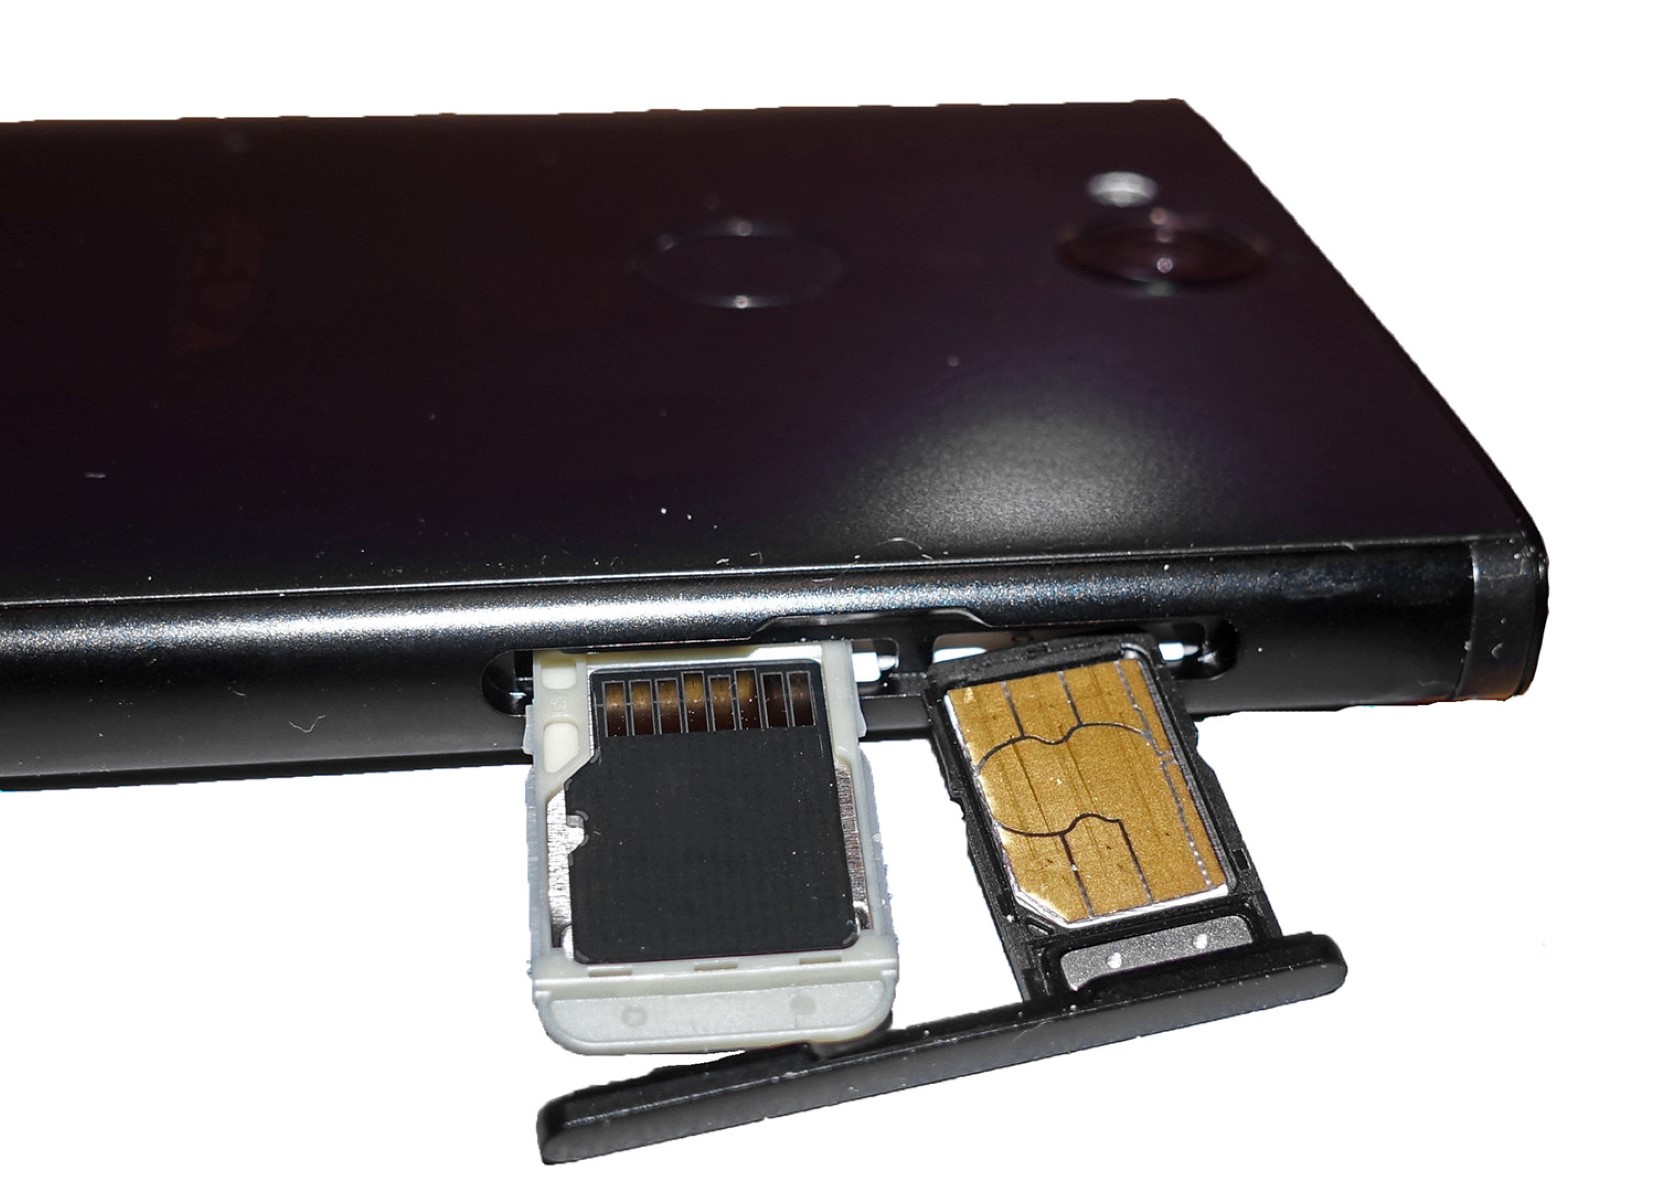
Locate the SD Card Slot: Depending on the model of your Sony Xperia device, the location of the SD card slot may vary. Typically, the slot is situated on the side of the device. Use a SIM card removal tool or a small paperclip to gently eject the tray from the slot.
-
Insert the SD Card: Once the tray is ejected, carefully place the SD card into the designated slot on the tray. Ensure that the gold contacts on the SD card are facing downward and align with the corresponding contacts within the slot.
-
Reinsert the Tray: After securely placing the SD card on the tray, gently slide the tray back into the slot until it clicks into place. Be cautious not to apply excessive force to avoid damaging the SD card or the device.
-
Verify the Connection: Power on your Sony Xperia device and navigate to the settings to confirm that the SD card has been successfully recognized. You can typically find the SD card status under the "Storage" or "Memory" section in the device settings.
By following these simple steps, you can ensure that the SD card is correctly inserted into your Sony Xperia device, laying the groundwork for the subsequent process of transferring your photos. With the SD card securely in place, you're now ready to proceed to the next step of accessing the photos on your Sony Xperia.
Now that the SD card is inserted, let's move on to the next step of accessing the photos on your Sony Xperia.
Step 2: Accessing the Photos on Your Sony Xperia
Accessing the photos on your Sony Xperia is the pivotal next step in the process of transferring them to an SD card. With the SD card securely inserted, you can effortlessly navigate through your device's photo gallery and select the images you wish to transfer. Here's a detailed guide on how to access the photos on your Sony Xperia:
-
Open the Photo Gallery: Unlock your Sony Xperia device and locate the "Photos" or "Gallery" app on the home screen or in the app drawer. Tap on the app icon to launch the photo gallery, where all your captured images and videos are neatly organized.
-
Navigate Through Folders: Once inside the photo gallery, you may find that your photos are organized into different folders based on the source or date. You can browse through these folders to locate the specific photos you intend to transfer to the SD card.
-
Select the Photos: Tap on the first photo you wish to transfer to activate the selection mode. You can then scroll through the gallery and tap on additional photos to add them to the selection. Most devices allow you to select multiple photos at once by tapping on each image.
-
Access Additional Options: After selecting the desired photos, look for the options menu, typically represented by three vertical dots or a gear icon. Tap on this menu to reveal a list of actions you can perform with the selected photos.
-
Choose the "Move" Option: Within the options menu, look for the "Move" or "Transfer" option. This action allows you to relocate the selected photos from the internal storage of your device to the SD card. Tap on this option to initiate the transfer process.
-
Select the SD Card as the Destination: Upon choosing the "Move" option, you will be prompted to select the destination for the selected photos. Ensure that you choose the SD card as the destination to complete the transfer. The device may display the available storage locations, including the internal storage and the SD card.
-
Confirm the Transfer: After selecting the SD card as the destination, confirm the transfer to initiate the process. Depending on the number of photos being transferred and the speed of your device, the process may take a few moments to complete.
By following these steps, you can seamlessly access the photos on your Sony Xperia and initiate the process of transferring them to the SD card. This pivotal step ensures that your cherished memories are securely stored on the external memory card, freeing up valuable space on your device and providing a reliable backup for your photos. With the photos successfully accessed, you're now ready to proceed to the final step of transferring them to the SD card.
Now, let's move on to the next step of transferring photos to the SD card on your Sony Xperia.
Step 3: Transferring Photos to the SD Card
With the photos successfully accessed on your Sony Xperia, the final step involves transferring them to the SD card. This process ensures that your valuable memories are securely stored on the external memory, freeing up space on your device and providing a reliable backup for your photos. Here's a detailed guide on how to seamlessly transfer your photos to the SD card:
-
Select the Destination: After choosing the "Move" option, you will be prompted to select the destination for the selected photos. Ensure that you choose the SD card as the destination to complete the transfer. The device may display the available storage locations, including the internal storage and the SD card.
-
Confirm the Transfer: After selecting the SD card as the destination, confirm the transfer to initiate the process. Depending on the number of photos being transferred and the speed of your device, the process may take a few moments to complete.
-
Monitor the Transfer Progress: During the transfer process, you can monitor the progress through a visual indicator or a progress bar displayed on the screen. This provides visibility into the status of the transfer and ensures that you are informed about the completion of the process.
-
Verify the Transferred Photos: Once the transfer is complete, navigate to the SD card using the file manager or the gallery app to verify that the photos have been successfully transferred. You can browse through the SD card's directory to locate the folder where the photos are stored.
-
Ensure Data Integrity: It's essential to ensure that the transferred photos are intact and accessible. Open a few transferred photos from the SD card to confirm that they can be viewed without any issues. This step provides peace of mind knowing that your photos are safely stored on the external memory.
By following these steps, you can seamlessly transfer your photos from your Sony Xperia device to the SD card, ensuring that your cherished memories are securely stored and easily accessible. This process not only optimizes the storage space on your device but also provides a reliable backup for your photos, safeguarding them against unexpected data loss. With the photos successfully transferred to the SD card, you can enjoy the benefits of an organized and efficient photo storage solution on your Sony Xperia device.
Conclusion
In conclusion, mastering the art of transferring photos to an SD card on your Sony Xperia device empowers you to efficiently manage your photo storage while safeguarding your cherished memories. By following the step-by-step process outlined in this guide, you've gained valuable insights into seamlessly transferring your photos to an external memory card, thereby optimizing the storage space on your device and creating a reliable backup for your photos.
The journey begins with the crucial step of inserting the SD card into your Sony Xperia, ensuring that the foundation for transferring your photos is securely established. With the SD card in place, you seamlessly transition to accessing the photos on your device, navigating through the photo gallery, and selecting the images you wish to transfer. This pivotal step sets the stage for the final phase of transferring the selected photos to the SD card, culminating in the secure storage of your memories on the external memory.
As you navigate through the process, you've not only decluttered your device's internal storage but also created a safety net for your photos, guarding against unforeseen data loss. The seamless transfer of photos to the SD card ensures that your memories remain intact and easily accessible, providing peace of mind and organizational efficiency.
By embracing the convenience of external storage, you've unlocked the potential to expand your device's capacity for storing photos, videos, and other media, thereby enhancing the overall user experience. The ability to seamlessly transfer photos to an SD card on your Sony Xperia device exemplifies your commitment to efficient data management and proactive safeguarding of your digital assets.
In essence, the process of transferring photos to an SD card on your Sony Xperia transcends mere technicality; it embodies the preservation of your memories and the optimization of your device's functionality. As you embark on this journey, you've not only gained practical skills but also nurtured a deeper appreciation for the seamless integration of technology into your everyday life.
With your photos securely stored on the SD card, you can confidently capture new memories, knowing that your existing ones are safeguarded and easily accessible. Embrace the empowerment that comes with mastering the art of transferring photos to an SD card on your Sony Xperia, and revel in the seamless harmony between technology and the preservation of your cherished moments.