Introduction
Shopping online has become a popular and convenient way to purchase items, and Amazon is undoubtedly one of the most trusted and widely used e-commerce platforms. With the increasing popularity of mobile payment options, many customers are looking for alternative methods to pay for their online purchases. One such option is Venmo, a mobile payment service owned by PayPal. Venmo allows users to send and receive payments quickly and securely, making it a convenient choice for online shopping.
In this article, we will guide you through the process of paying for Amazon purchases using Venmo. We will explain the steps required to set up your Venmo account, add it as a payment method on Amazon, and complete your purchase seamlessly. By following these steps, you can take advantage of the benefits offered by both Venmo and Amazon, making your online shopping experience more efficient and enjoyable.
Before we delve into the step-by-step guide, it’s important to note that using Venmo to pay for Amazon purchases is only supported on mobile devices at the moment. Therefore, you will need to have the Venmo app installed on your smartphone or tablet to proceed with the process. If you don’t have the app yet, don’t worry – we will cover how to download and set it up in the first step. Let’s get started!
Step 1: Download the Venmo App
The first step is to download the Venmo app on your mobile device. Venmo is available for both iOS and Android platforms, and you can find it on the Apple App Store or Google Play Store. Simply open the app store on your device, search for “Venmo,” and tap on the download button to initiate the installation.
Once the Venmo app has finished downloading, locate the icon on your home screen and tap on it to launch the application. You will be prompted to create an account or sign in if you already have one. If you are a new user, click on “Sign up” and follow the on-screen instructions to create your Venmo account.
During the account creation process, you will be required to provide some personal information, such as your email address, phone number, and a secure password. Make sure to choose a strong password to protect your Venmo account from unauthorized access.
After successfully creating your Venmo account, you will be taken to the app’s main screen. From here, you can explore the various features and settings of Venmo. Take a moment to familiarize yourself with the app’s interface and navigation.
Now that you have the Venmo app installed and your account set up, you are ready to proceed to the next step, where we will guide you on how to add a payment method to your Venmo account. This step is essential to be able to use Venmo for your Amazon purchases. Let’s move on!
Step 2: Set Up Your Venmo Account
Now that you have downloaded the Venmo app and created your account, it’s time to set up your Venmo account to make it ready for transactions. Setting up your Venmo account involves adding necessary information and connecting it to your preferred funding source, such as your bank account or debit card.
To begin, open the Venmo app on your mobile device and log in to your account using your registered email address or phone number and password.
Once logged in, you will be prompted to link a funding source to your Venmo account. Tap on the “☰” icon located at the top left corner of the screen to open the main menu. From there, select “Settings,” and then choose the “Payment Methods” option.
In the Payment Methods section, you can add, remove, or update your preferred payment sources. Depending on your preference, you can link your bank account or debit card by following the prompts provided within the app. Venmo also gives you the option to enable Venmo Credit Card as a funding source, if available in your region.
When adding a bank account, you will be required to provide your bank account number and routing number. These details can typically be found on your checks, online banking portal, or by contacting your bank directly.
If you choose to link a debit card, you will need to enter the card number, expiration date, and CVV code. Make sure you have this information handy before proceeding.
After successfully adding the desired payment source, Venmo will verify the information and once confirmed, your account will be fully set up and ready for use.
It’s important to note that Venmo may require additional verification steps, such as confirming your identity or providing additional documents, depending on your usage or account activity. Follow the instructions provided by Venmo to complete any necessary verifications.
With your Venmo account properly set up and linked to a funding source, you are now prepared to move on to the next step, which is to add Venmo as a payment method on Amazon. This will allow you to seamlessly use Venmo for your Amazon purchases. Let’s proceed!
Step 3: Add Payment Method to Venmo
Now that your Venmo account is set up, the next step is to add a payment method to your Venmo account. By adding a payment method, you will be able to fund your Venmo account and make purchases using Venmo. Here’s how you can do it:
1. Open the Venmo app on your mobile device and log in to your Venmo account.
2. Tap on the “☰” icon located at the top left corner of the screen to open the main menu.
3. Select “Settings” from the menu options.
4. In the Settings menu, choose “Payment Methods”.
5. Tap on the option to “Add a Bank or Card”.
6. You will be presented with two options: “Bank” or “Card”. Choose the option that suits your preference.
If you select the “Bank” option:
– Enter your bank account details, including the routing number and account number.
– Venmo will then initiate a verification process to ensure the accuracy of the information.
If you select the “Card” option:
– Enter your card details, including the card number, expiration date, and CVV code.
– Venmo will also verify the card information to ensure its validity.
7. Once the bank account or card is successfully linked, you will see it listed under the Payment Methods section in your Venmo account settings.
It’s important to note that Venmo may charge a small fee for linking certain card types. Additionally, Venmo may require additional verification steps or documentation before allowing you to use certain payment methods. Follow the instructions provided by Venmo to complete any necessary verifications.
With a payment method added to your Venmo account, you are now ready to proceed to the next step, which is to link your Amazon account to Venmo. This will enable you to use Venmo as a payment option during the checkout process on Amazon. Let’s move on!
Step 4: Link Your Amazon Account to Venmo
Linking your Amazon account to Venmo is an important step to enable Venmo as a payment option during the checkout process. By linking the two accounts, you can seamlessly use Venmo for your Amazon purchases. Here’s how you can link your Amazon account to Venmo:
1. Open the Amazon app or visit the Amazon website on your mobile device.
2. Log in to your Amazon account using your username and password.
3. Once logged in, navigate to the “Your Account” section. This can usually be found in the menu or settings options.
4. In the “Your Account” section, look for the “Payment options” or “Payment methods” tab.
5. Select the option to “Add a payment method” or “Add a new payment method”.
6. Look for the option to add a new “Mobile Wallet” or “Digital Payment Method”.
7. From the list of available payment methods, choose “Venmo”.
8. You may be prompted to grant permission for Amazon to access your Venmo account. Follow the instructions to authorize the connection between the two accounts.
9. Once the connection is established, you will receive a confirmation message indicating that your Amazon account is now linked to Venmo.
It’s important to note that linking your Amazon account to Venmo may not be available in all regions or for all Amazon accounts. If you do not see the option to add Venmo as a payment method, it is possible that it is not supported for your account at this time.
With your Amazon account successfully linked to Venmo, you are now ready to proceed to the next step, which is to complete the checkout process on Amazon using Venmo. Let’s move on!
Step 5: Checkout on Amazon using Venmo
Now that you have linked your Amazon account to Venmo, you can proceed to checkout on Amazon using Venmo as your preferred payment method. Here’s how to complete the checkout process:
1. Find the item(s) you want to purchase on Amazon and add them to your cart.
2. Once you have added all the desired items to your cart, click on the cart icon to proceed to the checkout page.
3. On the checkout page, review your order details, including the items, quantity, and shipping address.
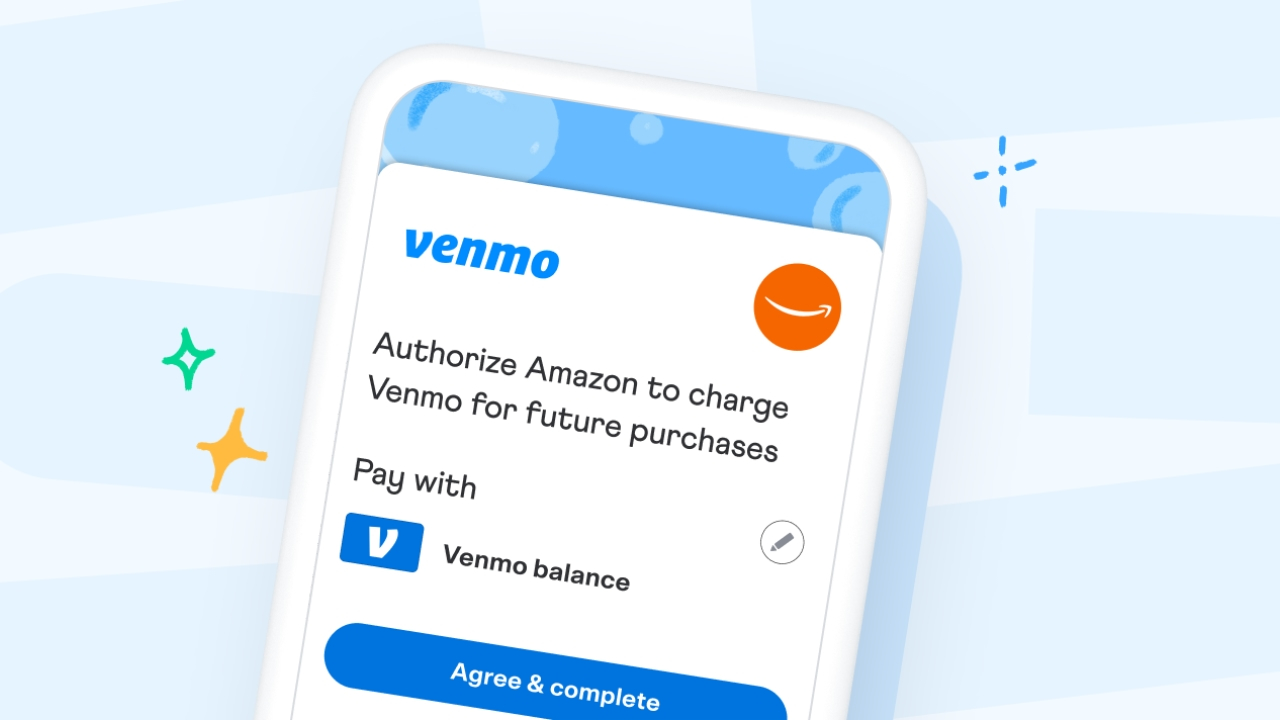
4. Under the payment section, you will find the available payment methods. Select the option to pay with Venmo.
5. If prompted, confirm your decision to use Venmo as your payment method for the purchase.
6. You will be redirected to the Venmo interface within the Amazon app or website.
7. Log in to your Venmo account using your registered email address or phone number and password.
8. Review and verify the payment details, including the total amount to be charged to your Venmo account.
9. Proceed with the payment by following the prompts on the screen, such as providing any additional security or verification steps requested by Venmo.
10. Once the payment is authorized and processed, you will receive a confirmation from Venmo.
11. Return to the Amazon checkout page, where you should see a confirmation that your payment using Venmo was successful.
12. Complete the checkout process by clicking on the “Place your order” or similar button on Amazon.
It’s important to note that the availability of Venmo as a payment option on Amazon may vary depending on your location and account eligibility. If you do not see the option to pay with Venmo, it may not be supported for your account at this time.
With the checkout process successfully completed using Venmo as your payment method, you are now ready to move on to the next step, which is to confirm your payment.
Step 6: Confirm Your Payment
After completing the checkout process on Amazon using Venmo as your payment method, it’s important to verify and confirm that the payment has been successfully processed. Confirming your payment ensures that your order will be processed and shipped in a timely manner. Here’s what you need to do to confirm your payment:
1. Once you have completed the checkout process on Amazon using Venmo, you should see a confirmation page or order summary. Review this page to ensure that all the details, including the items, quantities, and total amount, are accurate.
2. Take note of the order number or confirmation number provided on the page. You may want to save or screenshot this information for future reference.
3. Check your email inbox associated with your Amazon account for an order confirmation email. This email serves as further confirmation that your payment has been received and processed.
4. In the order confirmation email, review the order details once again to ensure that everything is correct. If you notice any discrepancies or issues, contact Amazon customer support immediately.
5. It’s a good practice to regularly check your Venmo account for any transaction activity. Open the Venmo app or log in to your Venmo account on the website and navigate to the transaction history section.
6. Look for the recent transaction corresponding to your Amazon purchase. Verify that the transaction details, including the payment amount, seller name (if applicable), and description, match your Amazon order.
7. If you have any concerns or questions regarding the payment, contact Venmo customer support for assistance.
By confirming your payment, you can ensure that your order will be processed and shipped without any delays. It also allows you to keep track of your transactions and maintain a record of your purchases.
With your payment successfully confirmed, you can proceed to the final step, which is to manage your Venmo transactions on Amazon. Let’s move on!
Step 7: Manage Your Venmo Transactions on Amazon
Now that you have completed your purchase on Amazon using Venmo as your payment method, it’s important to know how to manage and keep track of your Venmo transactions within the Amazon platform. Here’s how you can effectively manage your Venmo transactions on Amazon:
1. After your purchase is confirmed, you can view your order details and track the shipment status by visiting the “Your Orders” section on Amazon.
2. Log in to your Amazon account and navigate to the “Your Orders” page. Here, you’ll find a comprehensive list of your recent orders and their current status.
3. Look for the specific order made with Venmo as the payment method. You can identify it by the order number or any other relevant details associated with the transaction.
4. Click on the order to view the order details, including the items purchased, shipping information, and the estimated delivery date.
5. If you have any questions or concerns about your order, such as delays or missing items, you can reach out to Amazon’s customer support for assistance.
6. In addition to monitoring your Venmo transactions through the Amazon platform, it’s also a good practice to keep track of your Venmo activity directly from the Venmo app or website.
7. Open the Venmo app or login to your Venmo account on the website and navigate to the transaction history section.
8. Look for the corresponding transaction for your Amazon purchase. Review the details to ensure that it matches your order on Amazon, including the payment amount and seller name (if applicable).
9. You can further manage your Venmo transactions, such as categorizing them or adding notes, directly within the Venmo app or website.
10. If you have any questions or issues regarding your Venmo transaction, including discrepancies or unauthorized charges, contact Venmo’s customer support for assistance.
By effectively managing your Venmo transactions on Amazon, you can stay updated on the status of your orders and ensure a seamless and reliable shopping experience.
With this final step, you have now successfully learned how to pay for Amazon purchases using Venmo and manage your transactions. Enjoy the convenience and flexibility that Venmo brings to your online shopping ventures!
Conclusion
Using Venmo as a payment method for your Amazon purchases offers a convenient and secure way to complete transactions. By following the step-by-step guide provided in this article, you have learned how to download and set up the Venmo app, add a payment method to your Venmo account, link your Amazon account to Venmo, and successfully complete the checkout process using Venmo as your preferred payment method.
Remember that Venmo is currently only supported on mobile devices, so make sure to have the Venmo app installed on your smartphone or tablet to take advantage of this payment option on Amazon.
Managing your Venmo transactions on Amazon is straightforward. You can track your orders, view order details, and monitor shipment status on the Amazon platform. Additionally, you can keep track of your Venmo activity through the Venmo app or website, ensuring accuracy and facilitating easy reference.
It’s important to note that the availability of Venmo as a payment method on Amazon may vary based on region and account eligibility. If you encounter any issues or have questions, it is recommended to reach out to Amazon’s customer support or Venmo’s customer support for assistance.
By utilizing Venmo for your Amazon purchases, you can enjoy a seamless and efficient online shopping experience. The ease of payment and added security provided by Venmo enhances your ability to shop with confidence.
So, why wait? Start exploring the world of hassle-free online shopping by using Venmo as your preferred payment method on Amazon.
Happy shopping!