Introduction
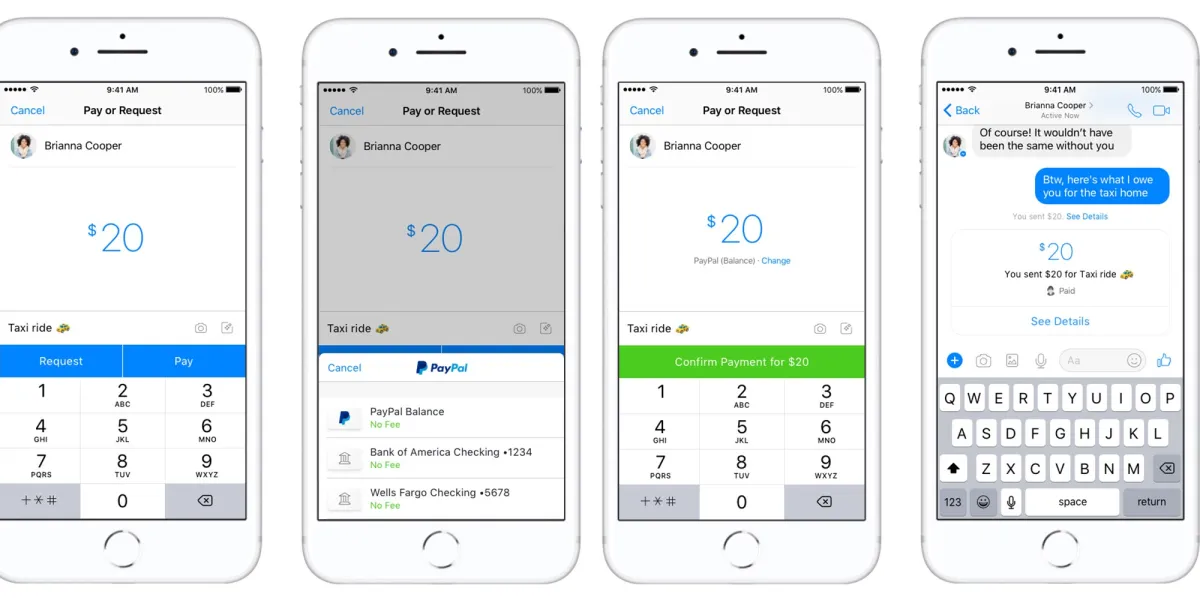
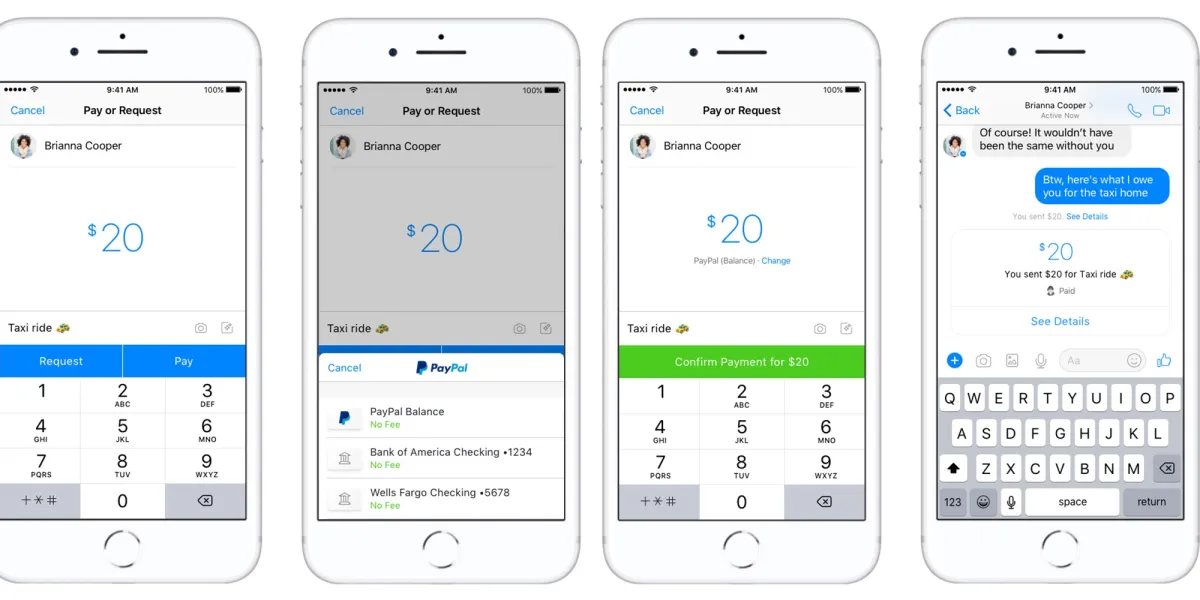
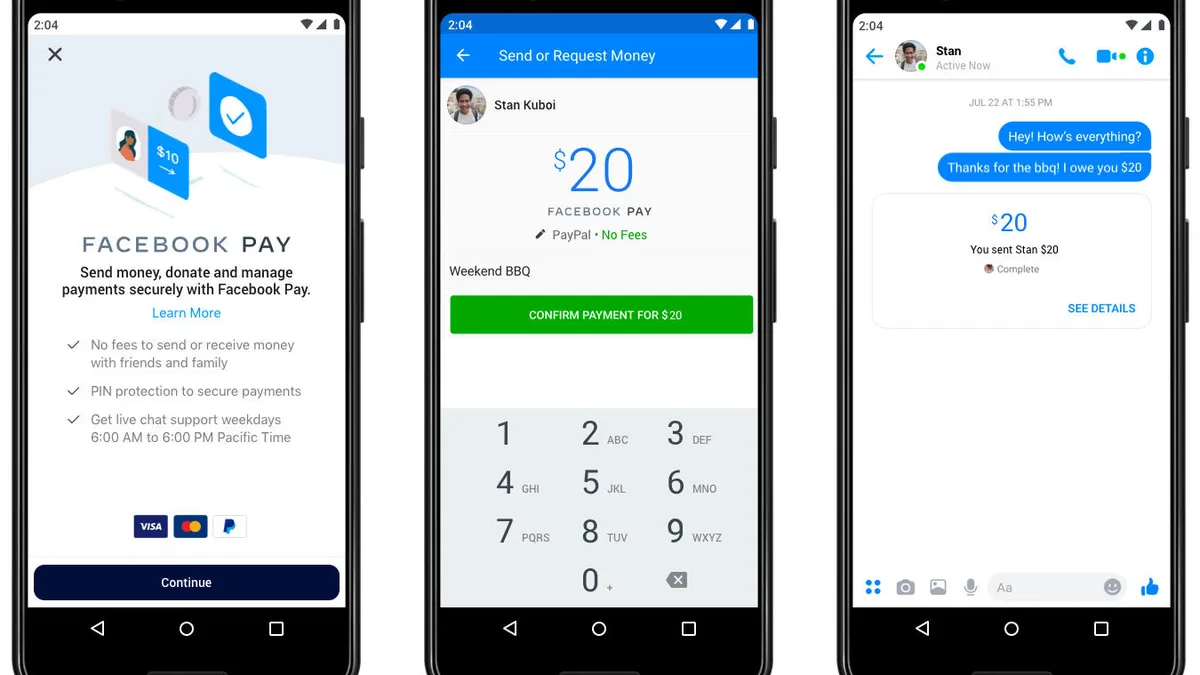
Linking your PayPal account to Facebook Pay offers a convenient and secure way to make payments on the Facebook platform. Whether you want to purchase products from Facebook Marketplace or send money to friends and family through Messenger, having your PayPal account connected to Facebook Pay simplifies the transaction process. This integration allows you to seamlessly use your PayPal balance, bank account, or credit card to make payments on Facebook.
By linking these two accounts, you can enjoy the benefits of both platforms. Facebook Pay offers a streamlined payment solution specifically designed for Facebook services, while PayPal provides a trusted and widely accepted online payment service. Together, they create a powerful combination that enhances your online shopping and money transfer experience.
In this guide, we will walk you through the simple steps to link your PayPal account to Facebook Pay on the Facebook mobile app. You’ll learn how to access the necessary settings and authorize the connection between these two platforms. So, let’s get started!
How to Link PayPal to Facebook Pay
If you’re ready to link your PayPal account to Facebook Pay, follow these step-by-step instructions:
- Open the Facebook app on your mobile device.
- Access the Settings menu. Look for the three horizontal lines at the top right corner of the screen (iOS) or the bottom right corner (Android). Tap on it and scroll down to find “Settings”.
- Select the “Facebook Pay” option. On the Settings page, you’ll see a list of various options. Find and tap on “Facebook Pay”.
- Tap on the “Add Payment Method” button. This will take you to a screen where you can add a payment method to your Facebook account.
- Choose “PayPal” as your preferred payment method. From the list of available payment options, tap on the “PayPal” option. If you don’t see PayPal, make sure you have the latest version of Facebook app installed on your device.
- Log in or create a PayPal account. If you already have a PayPal account, simply enter your login credentials (email address and password) to proceed. If you don’t have a PayPal account, tap on “Sign Up” to create one. Follow the instructions provided by PayPal to set up your account.
- Authorize Facebook to access your PayPal account. Once you’ve logged in to your PayPal account, you’ll be asked to grant permission to Facebook for accessing your account information. Review the details and click on “Agree” to proceed.
- Confirm the linking of PayPal to Facebook Pay. After authorizing the connection, you’ll receive a confirmation message that your PayPal account is now linked to Facebook Pay. You can now use PayPal as a payment method for various transactions on Facebook.
That’s it! You have successfully linked your PayPal account to Facebook Pay. You can now enjoy the convenience and security of making payments using your PayPal balance, bank account, or credit card on the Facebook platform.
Remember that you can manage your linked payment methods at any time through the Facebook Pay section in the Settings menu. You can add or remove payment methods, set your default payment method, and review your transaction history.
Step 1: Open the Facebook app on your mobile device
To begin the process of linking your PayPal account to Facebook Pay, the first step is to open the Facebook app on your mobile device. Make sure you have the latest version of the Facebook app installed on your device to access all the necessary features and options.
If you don’t already have the Facebook app installed, you can download it from the App Store (iOS devices) or the Google Play Store (Android devices). Once the app is installed, locate the Facebook icon on your home screen or app drawer and tap on it to open the app.
Upon opening the Facebook app, you’ll be presented with the login screen. Enter your Facebook credentials (email address and password) and tap on the “Log In” button to proceed. If you don’t have a Facebook account, you’ll need to create one before proceeding with the linking process.
After successfully logging in to your Facebook account, you’ll be taken to the Facebook News Feed, where you can see posts, updates, and other content from your friends and pages you follow. Now, you’re ready to move on to the next step to link your PayPal account to Facebook Pay.
Step 2: Access the Settings menu
Once you have opened the Facebook app and logged in to your account, the next step is to access the Settings menu. The Settings menu allows you to customize various aspects of your Facebook experience, including privacy settings, notification preferences, and account information.
To access the Settings menu, look for the three horizontal lines at the top right corner of the screen (on iOS devices) or the bottom right corner of the screen (on Android devices). Tap on these lines to open the side menu, also known as the “hamburger menu”. You’ll see a list of options displayed on the left side of the screen.
Scroll down the list until you find the “Settings” option. This option is usually represented by a gear or a cogwheel icon, indicating the settings menu. Tap on “Settings” to proceed.
Upon tapping on “Settings”, you’ll be taken to a new screen where you’ll find a variety of settings categories such as Account Settings, Privacy, Security, and more. This is where you can customize your Facebook experience according to your preferences.
Now that you have successfully accessed the Settings menu, you’re one step closer to linking your PayPal account to Facebook Pay. Let’s move on to the next step and continue the process.
Step 3: Select “Facebook Pay” option
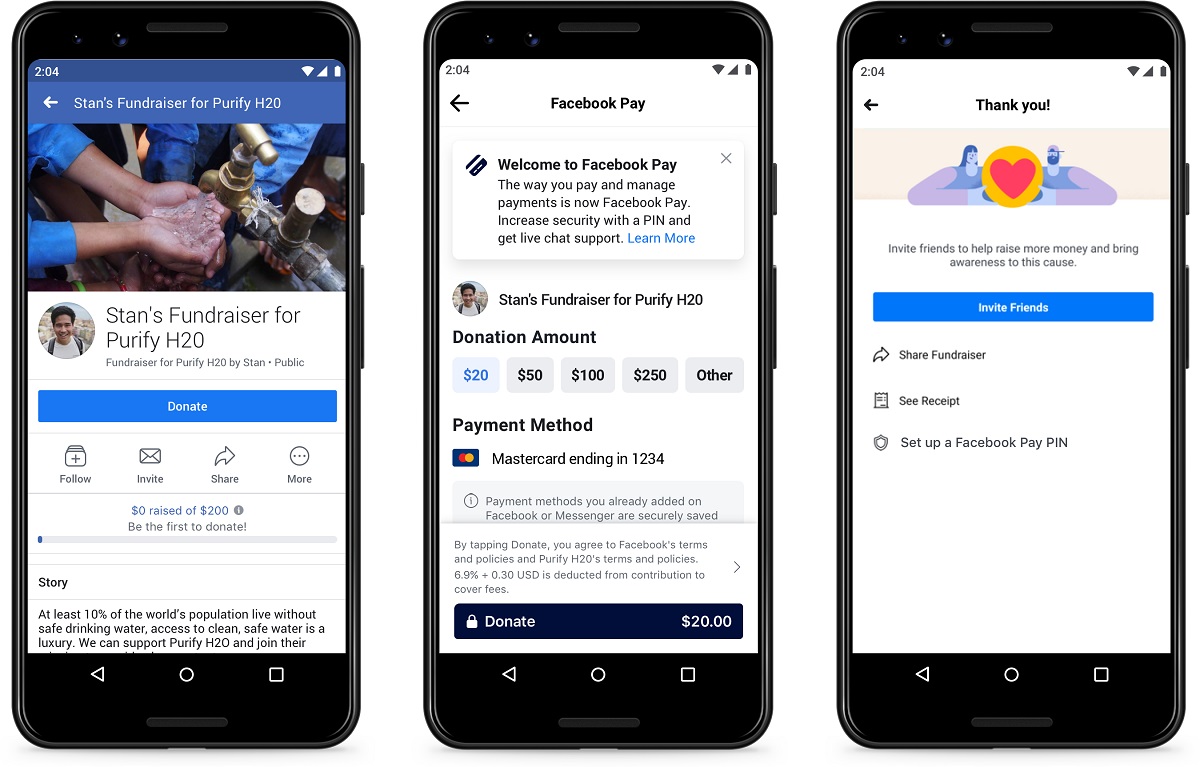
After accessing the Settings menu on the Facebook app, the next step is to select the “Facebook Pay” option. This option allows you to manage your payment settings and link your preferred payment methods to your Facebook account.
Scroll down the Settings menu until you find the “Facebook Pay” option. The exact position of this option may vary depending on the version of the Facebook app you are using, but it is usually located under the “Payments” or “Monetization” section.
Tap on the “Facebook Pay” option to proceed. This will open the Facebook Pay settings page, where you can view and manage your payment methods, transaction history, and other related settings.
On this page, you’ll find information about Facebook Pay and its key features. It’s worth taking a moment to familiarize yourself with the benefits and functionalities of Facebook Pay before proceeding.
Once you’re ready, continue to the next step to add a payment method and link your PayPal account to Facebook Pay.
Step 4: Tap on the “Add Payment Method” button
After selecting the “Facebook Pay” option from the Settings menu, the next step is to tap on the “Add Payment Method” button. This will allow you to add a new payment method to your Facebook account and link your PayPal account to Facebook Pay.
On the Facebook Pay settings page, look for the “Add Payment Method” button. This button is usually prominently displayed at the top of the page or under the “Payment Methods” section.
Tap on the “Add Payment Method” button to proceed. This action will open a new screen where you can select your preferred payment method from the available options.
In addition to PayPal, Facebook Pay also supports other payment methods such as credit cards and debit cards. However, for the purpose of this guide, we will focus on linking your PayPal account.
By tapping on the “Add Payment Method” button, you are one step closer to completing the process of linking your PayPal account to Facebook Pay. Continue to the next step for instructions on how to choose PayPal as your preferred payment method.
Step 5: Choose “PayPal” as your preferred payment method
After tapping on the “Add Payment Method” button in the Facebook Pay settings, the next step is to choose “PayPal” as your preferred payment method. By selecting PayPal, you will be able to link your PayPal account to Facebook Pay and use it for transactions on the platform.
On the screen where you are prompted to choose your payment method, look for the option that says “PayPal”. This option is typically listed along with other available payment methods such as credit cards and debit cards.
Tap on “PayPal” to select it as your preferred payment method. By choosing PayPal, you are opting to link your PayPal account to Facebook Pay and use it for making payments on the Facebook platform.
It’s important to note that in order to choose PayPal as your preferred payment method, you need to have a valid and active PayPal account. If you don’t have a PayPal account yet, you will be prompted to create one during the linking process.
Once you have successfully chosen PayPal as your preferred payment method, you are ready to proceed with the next steps to log in to your PayPal account and authorize Facebook to access your account details. Let’s move on to the next step.
Step 6: Log in or create a PayPal account
Once you have selected PayPal as your preferred payment method in the Facebook Pay settings, the next step is to log in to your PayPal account or create a new one if you don’t already have an account.
If you already have a PayPal account, tap on the “Log In” button and enter your PayPal login credentials. This typically includes your email address or mobile number associated with your PayPal account, as well as your password. Once you’ve entered the required information, tap on “Log In” or “Continue” to proceed.
If you don’t have a PayPal account, you can tap on the “Sign Up” or “Create Account” button to create a new PayPal account. Follow the on-screen instructions provided by PayPal to set up your account. This usually involves entering personal and financial information, as well as creating a password and agreeing to PayPal’s terms and conditions.
It’s important to ensure that the information you provide when creating a PayPal account is accurate and up to date. This will help facilitate a smooth and secure linking process between PayPal and Facebook Pay.
After successfully logging in to your PayPal account or creating a new one, you’re one step closer to linking your PayPal account to Facebook Pay. The next step involves authorizing Facebook to access your PayPal account. Continue reading to find out how to complete this step.
Step 7: Authorize Facebook to access your PayPal account
After logging in to your PayPal account or creating a new one, the next step is to authorize Facebook to access your PayPal account. This is necessary for the linking process and allows Facebook Pay to securely use your PayPal information for transactions made on the Facebook platform.
On the screen where you have logged in to your PayPal account, you will see a prompt asking for your permission to grant access to your PayPal account. This is a standard security measure to ensure that you are aware of and in control of the linking process.
Review the request carefully and ensure that you trust Facebook to access your PayPal account. Facebook will need certain information from your PayPal account, such as your transaction history and basic account details, in order to facilitate payments on the platform.
If you’re comfortable with granting access, tap on the “Agree,” “Authorize,” or similar button to proceed. This action will authorize Facebook to access your PayPal account and link it to Facebook Pay.
It’s important to note that Facebook takes privacy and security seriously. The authorization process ensures that your PayPal information is encrypted and protected while being used for transactions on the Facebook platform. If you have any concerns about privacy or security, you can review Facebook’s privacy policies and terms of service to understand how your data is managed.
Once you have authorized Facebook to access your PayPal account, you’re one step away from completing the process of linking PayPal to Facebook Pay. The final step involves confirming the linking of your PayPal account to Facebook Pay. Continue reading to find out how to complete this last step.
Step 8: Confirm the linking of PayPal to Facebook Pay
After authorizing Facebook to access your PayPal account, the final step is to confirm the linking of PayPal to Facebook Pay. This step ensures that the connection between the two accounts is established successfully and ready to be used for transactions on the Facebook platform.
Once you have granted authorization, you will receive a confirmation message on the screen, indicating that your PayPal account has been successfully linked to Facebook Pay. This message may vary slightly depending on the version of the Facebook app you are using, but it will generally provide a positive confirmation of the linking process.
Take a moment to review the confirmation message and ensure that it accurately states that your PayPal account is linked to Facebook Pay. This is important to verify that the linking process was completed successfully.
With the confirmation message displayed, you can proceed to start using your PayPal account for transactions on the Facebook platform. You can now make purchases on Facebook Marketplace, send money to friends and family through Messenger, and use other Facebook Pay features that require a payment method.
Remember that you can manage your linked payment methods and update your Facebook Pay settings at any time. This includes selecting a default payment method, adding or removing payment methods, and reviewing your transaction history.
Congratulations! You have successfully linked your PayPal account to Facebook Pay. Enjoy the convenience and security of using PayPal for transactions on the Facebook platform.
Conclusion
Linking your PayPal account to Facebook Pay offers a seamless and secure way to make payments on the Facebook platform. By following the step-by-step instructions provided in this guide, you can easily connect your PayPal account to Facebook Pay and enjoy the convenience of using your PayPal balance, bank account, or credit card for transactions.
Remember that by linking PayPal to Facebook Pay, you can make purchases on Facebook Marketplace, send money to friends and family through Messenger, and utilize other Facebook Pay features that require a payment method. The integration of these two platforms provides a powerful combination that enhances your online shopping and money transfer experience.
Throughout the linking process, make sure to carefully review the authorization prompt and understand the permissions you are granting Facebook. Facebook takes privacy and security seriously, and your PayPal information will be encrypted and protected.
Additionally, it’s essential to keep your PayPal account login credentials secure and regularly monitor your transactions for any suspicious activity. If you have any concerns about privacy or security, review Facebook’s privacy policies and terms of service to ensure a clear understanding of how your data is managed.
Now that you have successfully linked your PayPal account to Facebook Pay, you’re ready to embark on a seamless and convenient payment journey on the Facebook platform. Enjoy the benefits of using PayPal for your transactions and make the most out of your Facebook experience.


