Introduction
Welcome to the exciting world of cryptocurrency! If you’re interested in buying Polygon (MATIC) crypto, you’ve come to the right place. Polygon is an innovative blockchain network that aims to improve scalability and transaction speed for decentralized applications (dApps). With its growing popularity, many investors are looking to get their hands on some Polygon crypto.
Buying Polygon crypto may seem intimidating at first, especially if you’re new to the world of cryptocurrency. However, with the right guidance, the process can be straightforward and streamlined. In this article, we will guide you through the step-by-step process of buying Polygon crypto, from choosing a reliable crypto exchange to securely storing your assets.
But before we dive into the details, let’s quickly cover the basics. Polygon, formerly known as Matic Network, is a Layer 2 scaling solution for Ethereum. It aims to address Ethereum’s inherent scalability issues, allowing for faster and cheaper transactions. Polygon achieves this by employing sidechains, which are separate blockchains connected to the Ethereum mainnet. These sidechains facilitate faster processing of transactions and reduce congestion on the main Ethereum network.
With its low transaction fees and fast execution, Polygon has gained significant traction in the decentralized finance (DeFi) space. It has become a preferred choice for developers to build and deploy their dApps, leading to an increase in the value and demand for Polygon crypto.
Now that you have a basic understanding of Polygon, let’s delve into the step-by-step process of buying this exciting cryptocurrency.
What is Polygon Crypto?
Polygon, formerly known as Matic Network, is a Layer 2 scaling solution for the Ethereum blockchain. It aims to address the scalability and usability issues of Ethereum by providing a framework for constructing and connecting multiple blockchains, known as sidechains, to the Ethereum mainnet. This infrastructure allows for faster and cheaper transactions, making Polygon an attractive option for developers and users alike.
One of the key features of Polygon is its ability to enable interoperability, meaning that assets and data can be easily transferred and utilized across different blockchains within the Polygon ecosystem. This interoperability opens up a world of possibilities for decentralized applications (dApps) and smart contracts, enabling them to seamlessly communicate and interact with each other.
Another essential aspect of Polygon is its support for the Ethereum Virtual Machine (EVM), which means that developers can use familiar programming languages and tools to build and deploy their dApps on Polygon. This makes it easier for developers to transition from Ethereum to Polygon, leveraging their existing knowledge and skills to create innovative solutions.
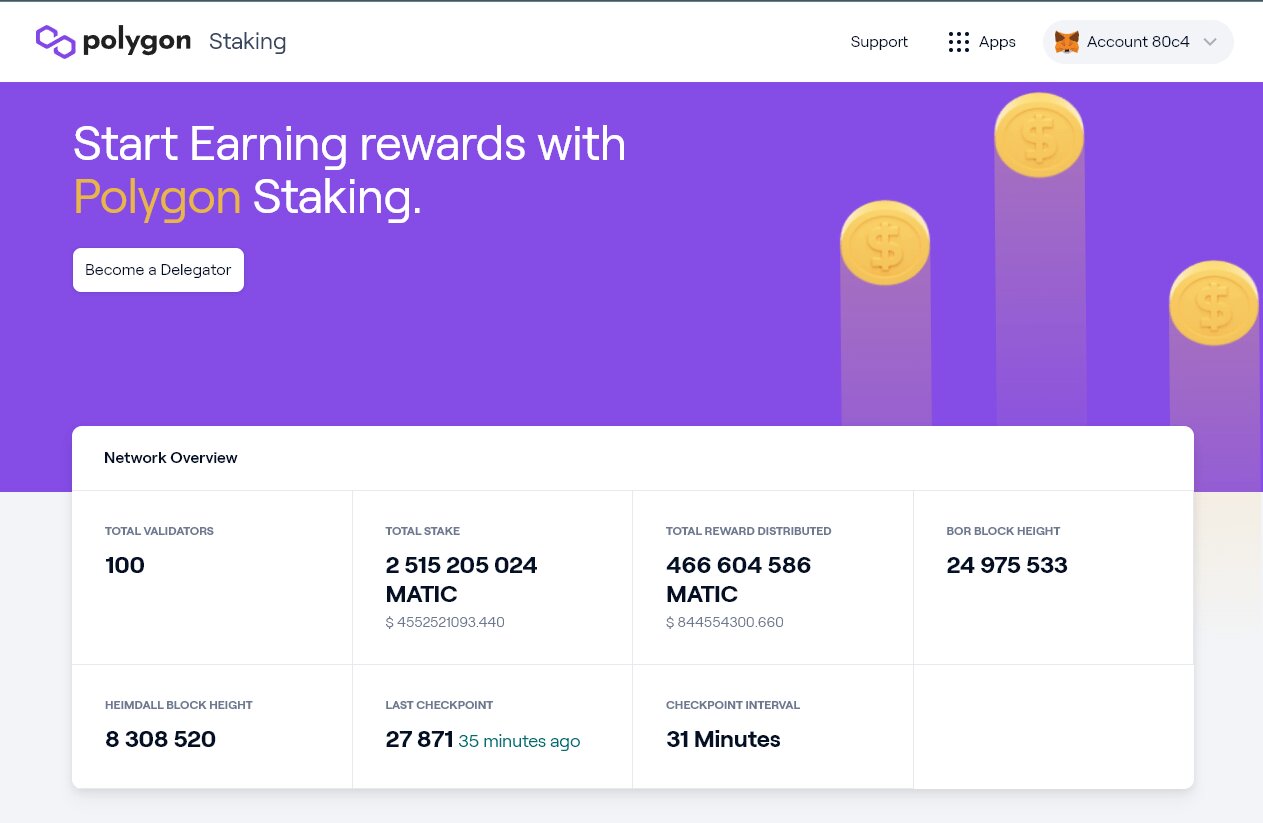
Furthermore, Polygon has its own native cryptocurrency called MATIC. MATIC serves several purposes within the Polygon ecosystem. Firstly, it is used as a utility token to pay for transaction fees and network services on Polygon. Secondly, MATIC is staked by users as collateral to participate in the network’s consensus mechanism, known as Proof of Stake. Finally, MATIC holders can also participate in governance decisions by staking their tokens and voting on proposals.
Since its launch, Polygon has experienced significant growth and adoption. Its cutting-edge technology, combined with its focus on scalability and usability, has attracted the attention of both developers and cryptocurrency enthusiasts. Polygon has become a thriving hub for various dApps, gaming platforms, decentralized exchanges, and other innovative projects.
In summary, Polygon is a Layer 2 scaling solution for Ethereum that aims to improve scalability and usability. By utilizing sidechains and supporting interoperability, Polygon offers a more efficient and cost-effective environment for developers and users. With its native cryptocurrency, MATIC, Polygon has positioned itself as a prominent player in the blockchain space.
Step 1: Choose a Reliable Crypto Exchange
The first step in buying Polygon crypto is to choose a reliable crypto exchange. A crypto exchange is a platform where you can buy, sell, and trade various cryptocurrencies, including Polygon. Selecting the right exchange is crucial as it ensures a safe and secure trading experience. Here are a few factors to consider when choosing a crypto exchange:
1. Reputation and Security: Look for exchanges that have a solid reputation in the industry and prioritize the security of their users’ funds. Research the exchange’s history, reviews, and security measures, such as two-factor authentication (2FA) and cold storage for digital assets.
2. Supported Countries: Ensure that the exchange you choose operates in your country. Some exchanges have restrictions based on geographical locations.
3. User-Friendliness: Consider the user interface and overall user experience of the exchange. A user-friendly interface makes it easier for beginners to navigate the platform and execute trades without confusion.
4. Liquidity: Liquidity refers to the ease of buying or selling an asset. Choose an exchange that has sufficient liquidity for Polygon to ensure that your orders can be executed quickly and at fair prices.
5. Fees: Take into account the transaction fees charged by the exchange. Different exchanges have varying fee structures, including deposit fees, withdrawal fees, and trading fees. It’s important to understand these fees to avoid any surprises.
6. Customer Support: A reliable crypto exchange should have an efficient customer support system in place. Look for exchanges that offer multiple channels of support, such as live chat, email, or phone support, to address any issues or concerns.
Some popular crypto exchanges that support Polygon are Binance, Coinbase, Kraken, and Huobi. However, it’s always recommended to do thorough research and compare multiple exchanges before making a decision.
Once you’ve chosen a reliable crypto exchange, proceed to the next step: creating an account on the chosen exchange.
Step 2: Create an Account on the Chosen Exchange
After selecting a reliable crypto exchange to buy Polygon crypto, the next step is to create an account on the chosen platform. This account will grant you access to the exchange’s features and allow you to deposit funds, place orders, and manage your Polygon holdings. Here’s a step-by-step guide on how to create an account:
1. Visit the Exchange Website: Go to the official website of the crypto exchange you have chosen. Ensure that you are visiting the correct website to avoid phishing scams.
2. Sign Up: Look for the “Sign Up” or “Register” button on the homepage and click on it. You will be directed to a registration page.
3. Fill in the Required Information: Provide your personal details such as your full name, email address, and a secure password. Make sure to choose a strong password that includes a combination of uppercase and lowercase letters, numbers, and special characters for added security.
4. Agree to the Terms and Conditions: Carefully read through the terms and conditions of the exchange and click on the checkbox to agree to them. It’s essential to understand the rules and regulations that govern the use of the platform.
5. Complete the Verification Process: Some exchanges require users to complete a verification process to ensure compliance with anti-money laundering (AML) and Know Your Customer (KYC) regulations. This process typically involves providing a copy of your identification document (e.g., passport or driver’s license) and proof of address (e.g., utility bill or bank statement).
6. Enable Two-Factor Authentication (2FA): To enhance the security of your account, enable 2FA, if available. This feature adds an extra layer of protection by requiring a unique verification code along with your password, significantly reducing the risk of unauthorized access.
7. Account Verification and Activation: Once you have filled in all the required information and completed the verification process (if applicable), submit your registration. The exchange will review your application and send you an email confirming the activation of your account.
8. Log in to Your Account: After receiving the activation email, log in to your newly created account using your registered email address and password. Take some time to explore the exchange’s interface and familiarize yourself with its features.
Remember to keep your account credentials and personal information secure. Avoid sharing sensitive information and be cautious of phishing attempts. Additionally, it’s advisable to set up additional security measures like email or SMS notifications for account activity.
Once you have successfully created an account on the chosen exchange, you’re ready to proceed to the next step: completing the verification process.
Step 3: Complete the Verification Process
After creating an account on the chosen crypto exchange, the next step is to complete the verification process. Many exchanges have Know Your Customer (KYC) and anti-money laundering (AML) policies in place to ensure compliance with regulations and enhance security. Completing the verification process is crucial as it allows you to unlock higher trading limits and access additional features. Here’s a step-by-step guide on how to complete the verification process:
1. Login to Your Account: Go to the exchange’s website and log in using your registered email address and password.
2. Access the Verification Page: Look for the “Verification” or “Account Verification” option in your account settings. This is usually found in the “Profile” or “Settings” section of the platform.
3. Choose Your Verification Level: Depending on the exchange, you may be required to complete different verification levels. Typically, there are multiple levels, such as Level 1, Level 2, and Level 3, each with different requirements and corresponding benefits. Select the level that aligns with your needs and the limits you wish to have.
4. Provide the Required Information: The exchange will ask for certain information to verify your identity. This may include personal details such as your full name, residential address, date of birth, and nationality. Enter the information accurately and truthfully to ensure a smooth verification process.
5. Upload Supporting Documents: To validate your identity, you will need to provide supporting documents. Commonly requested documents include a scan or photo of your government-issued identification documents, such as a passport or driver’s license. Some exchanges may also ask for additional proof of address, such as a utility bill or bank statement issued within the last three months.
6. Double-Check Your Documents: Before submitting the documents, double-check that they are clear, legible, and meet the exchange’s requirements. Make sure that all relevant information is visible and not obscured.
7. Submit Your Verification Request: Once you have filled in the required information and uploaded the necessary documents, review your submission to ensure accuracy. Click on the “Submit” or “Finish” button to send your verification request for review.
8. Wait for Verification Approval: The exchange’s verification team will review your submission. The time it takes for verification approval may vary depending on the exchange’s policies and workload. During this time, it’s essential to be patient and avoid making any changes to your submitted information.
9. Verification Status Update: Once your verification request has been reviewed, you will receive a notification regarding the status of your verification. If approved, you will gain access to higher trading limits and other features offered by the exchange.
Completing the verification process is a necessary step to ensure the security and compliance of the crypto exchange. It adds an extra layer of protection for both the exchange and its users, helping to prevent fraudulent activity and unauthorized access.
With the verification process completed, you’re now ready for the next step: depositing funds into your exchange account.
Step 4: Deposit Funds into Your Exchange Account
Once you have successfully completed the verification process on your chosen crypto exchange, the next step is to deposit funds into your exchange account. Depositing funds allows you to have a balance that you can use to buy Polygon crypto or any other cryptocurrencies available on the exchange. Here’s a step-by-step guide on depositing funds:
1. Login to Your Account: Go to the exchange’s website and log in using your registered email address and password.
2. Locate the Deposit Section: Look for the “Deposit” or “Funds” option in your account settings. Different exchanges may have slightly different naming conventions, but commonly, it is found under the “Wallet” or “Balance” section.
3. Choose the Currency: Select the cryptocurrency or fiat currency that you want to deposit into your exchange account. If you want to deposit fiat currency, such as USD or EUR, make sure the exchange supports fiat deposits.
4. Generate a Deposit Address: The exchange will provide you with a unique wallet address to which you can send your funds. This address is specific to your account and serves as the destination for your deposit. Copy the deposit address carefully, ensuring no typos or errors.
5. Initiate the Deposit: Open your external cryptocurrency wallet or bank account and initiate a transfer to the provided deposit address. Ensure that you are sending funds to the correct address by verifying it multiple times.
6. Enter the Required Details: Depending on the deposit method you choose, the exchange may require additional information, such as transaction ID or reference number, to identify your deposit. Fill in the required details accurately to facilitate the deposit verification process.
7. Confirm and Submit: Double-check all the information you provided, including the deposit address and transaction details. Once you are certain that everything is accurate, click on the “Submit” or “Confirm” button to initiate the deposit.
8. Wait for Confirmation: The time it takes for your deposit to be confirmed may vary depending on the cryptocurrency you are depositing and the blockchain network’s congestion. Generally, cryptocurrency deposits require confirmations, which can take a few minutes to several hours. Fiat deposits may take longer, depending on the processing time of the respective banks or payment methods.
9. Verify Deposit Transaction: After your deposit has been confirmed, you can verify the transaction status by checking your account balance or the transaction history page. The deposited funds should reflect in your account balance, ready for you to use for trading or purchasing Polygon crypto.
It’s important to note that different exchanges have varying deposit methods and policies. Some exchanges may also charge deposit fees or have deposit minimums. Therefore, it’s always recommended to review the exchange’s deposit guidelines and terms before initiating any deposits.
Now that you have successfully deposited funds into your exchange account, you’re ready for the next step: searching for Polygon (MATIC) on the exchange.
Step 5: Search for Polygon (MATIC) on the Exchange
With funds deposited into your exchange account, the next step is to search for Polygon (MATIC) on the platform. This will allow you to find the trading pairs available for Polygon and initiate your buy order. Here’s a step-by-step guide on how to search for Polygon (MATIC) on the exchange:
1. Login to Your Account: Go to the exchange’s website and log in using your registered email address and password.
2. Navigate to the Trading Section: Look for the “Trade” or “Exchange” option in the navigation menu. This will take you to the trading interface where you can search for different cryptocurrencies.
3. Search for Polygon (MATIC): Use the search bar or browse through the cryptocurrency listings to find Polygon (MATIC). You can search for “Polygon,” “MATIC,” or enter the specific trading pair you wish to use, such as “MATIC/USD” or “MATIC/BTC”.
4. Select the Trading Pair: Once you locate the Polygon (MATIC) listing, click on it to select the trading pair you want to use. Common trading pairs include MATIC/USD, MATIC/BTC, and MATIC/ETH.
5. Review the Trading Pair Information: Take a moment to review the trading pair information, including the current price, trading volume, and any applicable fees. This information can help you make informed decisions when placing your buy order.
6. Check the Order Books: On the trading interface, you will typically find two order books – a buy order book and a sell order book. These books show the current bids (buy orders) and asks (sell orders) available in the market. Understanding the order books can give you insights into the current market sentiment and help you determine the price at which you want to place your buy order.
7. Choose an Order Type: Exchanges usually offer various order types, including market orders and limit orders. A market order allows you to buy Polygon (MATIC) at the current market price, while a limit order allows you to set a specific price at which you want to purchase MATIC. Choose the order type that suits your trading strategy and preferences.
8. Place Your Buy Order: Enter the quantity of Polygon (MATIC) you wish to purchase and review the order details, including the total cost. If you are placing a market order, click on the “Buy” or “Place Order” button to execute the order immediately. If you are placing a limit order, ensure that the specified price meets your requirements and click on the “Buy” or “Place Order” button to submit the order to the market.
9. Confirm the Order Execution: Once your buy order is executed, you will receive a confirmation message indicating the successful purchase of Polygon (MATIC). The purchased MATIC will now be credited to your exchange account balance.
It’s important to note that market conditions can impact the price and availability of Polygon (MATIC) on the exchange. Prices may fluctuate, and the availability of buy orders may change rapidly. Therefore, it’s essential to monitor the market and make informed decisions based on your research.
Now that you have successfully executed your buy order for Polygon (MATIC), the next step is to review and confirm your order details.
Step 6: Place an Order to Buy Polygon
Now that you have searched for Polygon (MATIC) on the exchange and reviewed the trading information, it’s time to place an order to buy Polygon. Placing an order allows you to specify the price and quantity at which you want to purchase Polygon. Here’s a step-by-step guide on how to place an order:
1. Login to Your Account: Go to the exchange’s website and log in using your registered email address and password.
2. Navigate to the Trading Section: Look for the “Trade” or “Exchange” option in the navigation menu to access the trading interface.
3. Select the Polygon Trading Pair: Locate the Polygon (MATIC) trading pair you want to use. This could be MATIC/USD, MATIC/BTC, or any other available pairing.
4. Choose the Order Type: Exchanges typically offer different order types, such as market orders and limit orders. A market order allows you to buy Polygon at the current market price, while a limit order allows you to specify the price at which you want to buy Polygon.
5. Enter the Quantity: Specify the quantity of Polygon (MATIC) you want to buy. Be sure to enter the desired quantity accurately to ensure your order is executed correctly. It’s important to consider the available funds in your account and your desired investment amount when determining the quantity.
6. Set the Price (For Limit Orders): If you are placing a limit order, enter the price at which you are willing to buy Polygon. The order will only be executed if the market reaches or surpasses your specified price. Take into account the current market conditions and any analysis you have conducted to determine an appropriate price.
7. Review the Order Details: Double-check all the order details, including the trading pair, order type, quantity, and price (if applicable). Ensure that all information is accurate before proceeding.
8. Place the Order: Once you are satisfied with the order details, click on the “Buy” or “Place Order” button to submit your order to the exchange. Your order will be processed, and if it matches with an available sell order on the market, the transaction will be executed.
9. Monitor the Status: After placing the order, you can monitor its status through the exchange’s trading interface. Keep an eye on the order book to see if your order is being filled. Additionally, you may receive notifications or emails from the exchange regarding the status of your order.
It’s important to note that in highly volatile markets, the price of Polygon (MATIC) can change rapidly. This means that the execution price of your order may differ from the price at which you placed it. It’s also crucial to review and understand the exchange’s fee structure to be aware of any trading fees or commissions that may be associated with your purchase.
With your order placed, you can now proceed to the next step: reviewing and confirming your order details.
Step 7: Review and Confirm Your Order
After placing your order to buy Polygon (MATIC), it’s crucial to review and confirm the order details before finalizing the transaction. This step ensures that everything is accurate and as intended. Here’s a step-by-step guide on how to review and confirm your order:
1. Login to Your Account: Visit the exchange’s website and log in to your account using your registered email address and password.
2. Navigate to the Order History Section: Look for the “Order History” or “My Orders” option in the trading interface. This section contains a record of all your previous and current orders.
3. Locate Your Order: Find the order you placed to buy Polygon (MATIC) in the order history. Depending on the exchange, the order details may include information such as order ID, transaction timestamp, trading pair, order type, quantity, and price.
4. Verify the Order Details: Carefully review all the information associated with your order. Ensure that the trading pair, order type, quantity, and price (if applicable) match your intention. Double-checking these details helps prevent any missteps or discrepancies.
5. Confirm the Order Execution: If your order has been executed successfully, it will be marked as “Filled” or “Completed” in the order history. This indicates that the purchase of Polygon (MATIC) has been completed, and the funds have been deducted from your account balance.
6. Review the Total Cost: Take note of the total cost of your order, including any applicable trading fees or commissions. Ensure that you are aware of the final amount deducted from your account for the transaction.
7. Record the Order Details: It’s a good practice to document the order details for your records. This can include saving screenshots or taking note of the order ID, transaction timestamp, trading pair, quantity, price, and total cost. Having this information on hand can be useful for future reference or tax purposes.
8. Monitor Your Account Balance: After confirming your order, keep an eye on your account balance to verify the deduction of funds for the purchase of Polygon (MATIC). It should reflect the updated balance reflecting the completed order.
9. Check the Polygon Wallet: If the exchange supports individual wallets for cryptocurrencies, check your Polygon wallet to ensure that the purchased MATIC has been credited to your account. It should show the correct quantity of Polygon (MATIC) that you purchased.
By carefully reviewing and confirming your order, you can ensure that the transaction has been executed correctly and that the necessary amount of Polygon (MATIC) has been acquired. Remember to keep records of the order details and check your account balance and Polygon wallet for accuracy.
With your order reviewed and confirmed, the next step is to securely store your Polygon crypto.
Step 8: Securely Store Your Polygon Crypto
Once you have purchased Polygon (MATIC), it’s essential to securely store your crypto assets to ensure their safety and protect them from unauthorized access. Here are some key steps to consider when storing your Polygon crypto:
1. Set up a Wallet: Consider using a cryptocurrency wallet to store your Polygon (MATIC) safely. Wallets can be categorized as hot wallets (connected to the internet) or cold wallets (offline storage). Both types have their advantages, and the choice depends on your specific needs and preferences. Hot wallets offer more convenience for frequent access, while cold wallets provide enhanced security for long-term storage.
2. Choose a Reliable Wallet: When selecting a wallet, opt for well-established and reputable wallet providers. Look for wallets that specifically support Polygon (MATIC) or Ethereum-based assets. Popular wallet options include Metamask, MyEtherWallet, Ledger Nano S, and Trezor. Research different wallet features, security measures, and user reviews to find the one that best suits your requirements.
3. Implement Strong Security Measures: Ensure that your wallet and the device you use to access it (such as your smartphone or computer) are protected with strong security measures. This includes using strong, unique passwords, enabling two-factor authentication (2FA), and keeping your operating system, antivirus software, and wallet software up to date with the latest security patches.
4. Backup Your Wallet: It is crucial to create regular backups of your wallet, particularly for cold wallets. Store physical copies (if using a paper wallet) or encrypted digital backups (if using a hardware or software wallet) in secure and separate locations. This ensures that you can recover your Polygon (MATIC) in case of loss, theft, or damage to your primary storage device.
5. Be Cautious of Phishing Attempts: Be vigilant against phishing attempts and avoid clicking on suspicious links or providing your wallet credentials or recovery phrase to anyone. Always verify the authenticity of the website or application you are using, especially when accessing your wallet.
6. Keep Private Keys Secure: If you are using a wallet that provides you with a private key, ensure that you keep it confidential and do not share it with anyone. Your private key is essentially your access to your Polygon (MATIC) and should be treated with the utmost care.
7. Stay Informed: Stay updated on the latest security practices and news related to cryptocurrencies. Regularly check the official websites and social media channels of the wallet provider and Polygon (MATIC) to stay informed about any security updates or best practices.
By following these steps and being vigilant about the security of your Polygon (MATIC) crypto assets, you can mitigate the risks associated with theft, hacking, or loss. Remember that the responsibility for safeguarding and securing your Polygon assets ultimately lies with you as the owner.
It’s important to note that storing your Polygon (MATIC) in an exchange account can be convenient for active trading purposes. However, for long-term storage and increased security, transferring your assets to a personal wallet is highly recommended.
Congratulations! You have now securely stored your Polygon (MATIC) crypto and taken the necessary precautions to keep your assets safe. This completes the process of buying and securing your Polygon (MATIC) investment.
Conclusion
Congratulations! You have successfully navigated the process of buying Polygon (MATIC) crypto. By choosing a reliable crypto exchange, creating an account, completing the verification process, depositing funds, searching for Polygon, placing an order, reviewing and confirming the order, and securely storing your Polygon crypto, you have taken the essential steps to become a Polygon investor.
Polygon, with its innovative Layer 2 scaling solution and focus on improving scalability and usability, has gained significant popularity in the cryptocurrency market. As you embark on your Polygon investment journey, remember to stay informed about market trends, monitor the performance of your investments, and consider diversifying your portfolio to manage risk effectively.
Additionally, always prioritize the security of your crypto assets. Utilize secure wallets, implement strong security measures, and remain cautious of phishing attempts and potential threats to protect your Polygon holdings from unauthorized access.
It’s important to note that the cryptocurrency market is volatile, and prices can fluctuate rapidly. Conduct thorough research and analysis before making investment decisions, and consider consulting with financial professionals if needed.
Remember, buying Polygon (MATIC) crypto is just the beginning of your journey. Stay informed, be patient, and adapt to the ever-evolving cryptocurrency landscape. Whether you’re looking to participate in the decentralized finance (DeFi) ecosystem, support blockchain development, or hold Polygon as a long-term investment, this exciting digital asset has the potential to offer a range of opportunities.
Happy investing!


