Introduction
Having a reliable Ethernet connection is crucial in today’s digital age. Whether you’re working from home, streaming your favorite shows, or gaming online, a stable Ethernet connection ensures a seamless and uninterrupted experience. However, there may be instances when your Ethernet connection isn’t working as expected, leaving you frustrated and disconnected from the online world.
There can be various reasons why your Ethernet connection is not functioning properly. It could be due to a problem with the Ethernet cable, a network adapter issue, or even a network configuration error. Fortunately, most Ethernet connection issues can be easily resolved with a few troubleshooting steps.
In this article, we’ll explore the common causes of Ethernet connection problems and provide you with a step-by-step guide to troubleshooting and fixing these issues. Whether you’re a tech-savvy individual or a beginner, these troubleshooting steps will help you get your Ethernet connection back up and running in no time.
Common Causes of Ethernet Connection Issues
There are several reasons why your Ethernet connection may be experiencing problems. Understanding these common causes can help you identify and resolve the issue more efficiently. Here are a few potential culprits:
1. Faulty Ethernet Cable: A damaged or faulty Ethernet cable can disrupt the connection between your device and the network. Check for any visible signs of physical damage, such as frayed or bent connectors, and replace the cable if necessary.
2. Network Adapter Issues: The network adapter, whether it’s built-in or an external device, plays a crucial role in establishing and maintaining a stable Ethernet connection. Outdated or malfunctioning network drivers can cause connection issues. Ensure that your network drivers are up to date to avoid any compatibility issues.
3. Network Configuration Errors: Incorrect network settings on your device can interfere with the Ethernet connection. Check your IP address, subnet mask, and default gateway settings to ensure they are correctly configured for your network. Incorrect DNS settings can also lead to connectivity problems, so be sure to double-check those as well.
4. Network Congestion: If there are too many devices connected to your network or excessive data traffic, it can lead to network congestion. This can slow down your Ethernet connection or cause intermittent disconnections. Disconnecting unnecessary devices or upgrading your network equipment can help alleviate this issue.
5. Hardware or Power Issues: Faulty network switches, routers, or modems can cause Ethernet connection problems. Ensure that all your network equipment is powered on and functioning correctly. If possible, try using a different power outlet or resetting the devices to troubleshoot any potential hardware or power-related issues.
Remember that these are just some of the common causes of Ethernet connection issues. It’s essential to identify the specific issue affecting your connection through the troubleshooting steps we will discuss next.
Troubleshooting Steps
When your Ethernet connection is not working, it’s important to follow a systematic approach to identify and resolve the issue. Here are some step-by-step troubleshooting steps to help you get your Ethernet connection back up and running:
- Check Ethernet Cable: Start by examining the Ethernet cable connecting your device to the router or modem. Ensure that it is securely plugged in on both ends and not damaged. Consider trying a different Ethernet cable if you suspect that the current one is faulty.
- Restart Your Devices: Sometimes, a simple restart can resolve connection issues. Power off your computer, router, and modem. Wait a few minutes, then power them back on in the following order: modem, router, and then your computer. This can refresh the network connection and potentially fix any temporary glitches.
- Update Network Drivers: Outdated or incompatible network drivers can cause connectivity problems. Visit the manufacturer’s website for your device or network adapter to download and install the latest drivers. This step ensures that your device can communicate properly with the network infrastructure.
- Disable and Enable Ethernet Adapter: Temporarily disabling and re-enabling the Ethernet adapter can help refresh the connection. To do this, go to your device’s Network Connections settings, locate the Ethernet adapter, right-click, and select “Disable.” Wait a few seconds, then right-click the adapter again and choose “Enable.”
- Run Network Troubleshooter: Most operating systems have a built-in network troubleshooter that can automatically detect and resolve common connection issues. Access your system’s network settings, and look for the network troubleshooter or diagnostic tool. Follow the prompts to run the troubleshooter and apply any suggested fixes.
- Check Network Settings: Take a closer look at your network settings to ensure they are correctly configured. Verify that the IP address, subnet mask, default gateway, and DNS settings are accurate for your network. You can find this information in the network settings of your device.
- Test with a Different Ethernet Port: If your device has multiple Ethernet ports, try connecting the cable to a different port. This can help determine if the issue lies with the port itself.
- Check for Network Congestion: Excessive network traffic can impact your Ethernet connection. If possible, reduce the number of connected devices or limit bandwidth-intensive activities to alleviate congestion. Consider upgrading your network equipment if network congestion is a recurring issue.
- Reset Network Settings: As a last resort, you can reset your network settings to default. Keep in mind that this will remove any custom configurations. Access the network settings on your device, look for the option to reset network settings, and follow the prompts to reset.
By following these troubleshooting steps, you should be able to diagnose and resolve most Ethernet connection issues. However, if the problem persists, it may indicate a more complex network issue that requires professional assistance.
Check Ethernet Cable
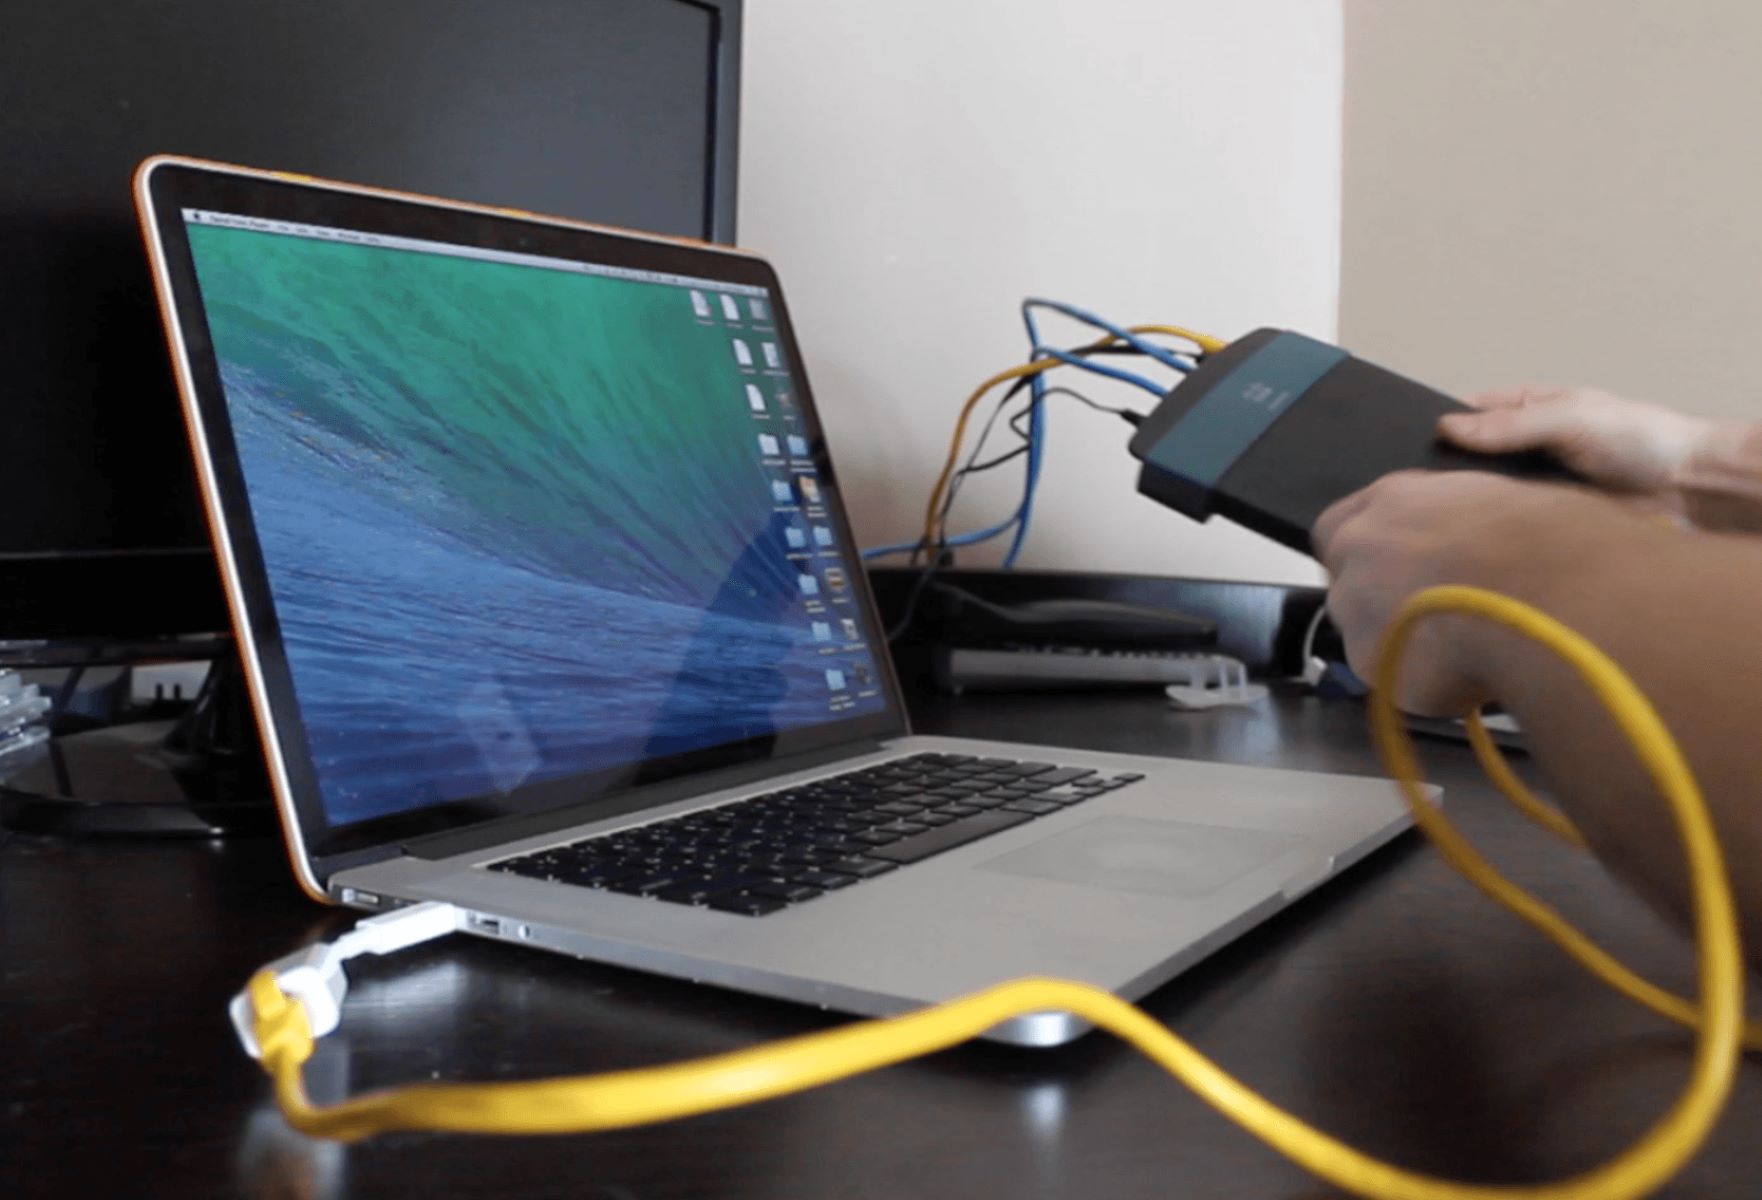
One of the first and simplest steps to troubleshoot your Ethernet connection is to check the Ethernet cable. A faulty or damaged cable can disrupt the connection between your device and the network, leading to connectivity issues. Here are some things to consider when checking your Ethernet cable:
- Physical Inspection: Carefully examine the Ethernet cable for any visible signs of damage, such as frayed wires or bent connectors. Pay close attention to both ends of the cable, as this is where the connection is established. If you notice any physical damage, it’s best to replace the cable.
- Secure Connection: Ensure that the Ethernet cable is securely plugged in on both ends, both in your device’s Ethernet port and the router or modem. Sometimes, a loose connection can cause intermittent connectivity issues. Gently push the connector into the port to ensure a snug fit.
- Try a Different Cable: If you suspect that the current Ethernet cable is faulty, try using a different cable. Borrow one from a friend or use a spare if available. This will help determine if the issue lies with the cable itself or another component of the network.
By checking the Ethernet cable, you can quickly identify and resolve any physical issues that may be affecting your Ethernet connection. Remember, even a slight damage to the cable can interfere with the transmission of data, so it’s crucial to ensure that the cable is in good condition and securely connected.
Restart Your Devices
When faced with Ethernet connection issues, restarting your devices can often be an effective troubleshooting step. This simple action can help resolve minor glitches and refresh the network connection. Here are the steps to follow when restarting your devices:
- Power Down: Start by turning off your computer, router, and modem. Use the power buttons or unplug the devices from the power source.
- Wait: Allow a few minutes for the devices to fully power down. This gives them time to clear any temporary caches or memory.
- Power Up: Begin by powering on the modem first, followed by the router, and finally, your computer. It’s important to wait for each device to finish booting up before proceeding to the next one.
By restarting your devices in this sequence, you give them a chance to establish a fresh connection with the network. This can resolve any issues that might have occurred due to temporary software glitches or conflicting settings.
When you restart your computer, it clears any temporary network configurations and refreshes the operating system. Similarly, rebooting your router and modem helps them recalibrate and establish a stable connection with your Internet Service Provider (ISP).
If you have other devices connected to the same network, such as smart TVs or gaming consoles, consider restarting them as well. This ensures that all devices start with a clean network state and can contribute to resolving the Ethernet connection issue.
Remember, a restart is a basic troubleshooting step that should be attempted before diving into more complex solutions. It’s simple, quick, and often resolves many common connectivity problems.
Update Network Drivers
Outdated or incompatible network drivers can often be the culprit behind Ethernet connection issues. Network drivers act as a bridge between your device’s operating system and the network hardware, facilitating the communication necessary for a stable connection. If these drivers are outdated or corrupted, it can lead to performance issues or even complete connection failure. Here’s how you can update your network drivers:
- Identify the Network Adapter: Determine the specific network adapter installed on your device. This information can typically be found in the Device Manager on Windows or the System Information panel on macOS. Look for the network adapter section and note down the exact model and manufacturer.
- Visit the Manufacturer’s Website: Once you have the details of your network adapter, visit the manufacturer’s website. They usually provide support and driver resources on their site. Locate the support or downloads section and search for the latest drivers for your specific network adapter model.
- Download and Install the Latest Drivers: Once you’ve found the appropriate drivers for your network adapter, download them onto your computer. Most manufacturers offer driver installation packages that include an easy-to-use installer. Run the installer and follow the on-screen instructions to update your network drivers.
- Restart Your Computer: After the installation is complete, restart your computer. This ensures that the new drivers are properly loaded and any previous network configurations are cleared.
Updating your network drivers is essential to maintain optimal performance and compatibility with the latest network protocols. Manufacturers regularly release driver updates to address compatibility issues, security vulnerabilities, and performance improvements. By keeping your network drivers up to date, you can ensure a smoother and more reliable Ethernet connection.
If you’re not comfortable manually updating your network drivers, you can also use driver management software that automatically scans and updates the drivers for you. These tools can simplify the process and keep your drivers up to date without the need for manual intervention.
Remember, network drivers are specific to your network adapter model, so it’s important to download and install the correct drivers from the manufacturer’s official website. Using drivers from unofficial sources may lead to compatibility issues and potentially compromise the stability of your Ethernet connection.
Disable and Enable Ethernet Adapter
Disabling and re-enabling the Ethernet adapter on your device can help refresh the connection and resolve certain Ethernet connection issues. This simple step can clear temporary network configurations and reset the adapter, potentially fixing any underlying problems. Here’s how you can disable and enable the Ethernet adapter:
- Access Network Connections: On Windows, right-click the network icon in the system tray and select “Open Network & Internet Settings.” Then, click on “Change Adapter Options.” On macOS, go to System Preferences, select Network, and choose the Ethernet connection from the list on the left.
- Disable the Ethernet Adapter: In the Network Connections or Network pane, locate the Ethernet adapter and right-click on it. From the context menu, select “Disable.” You may be prompted for administrative privileges to disable the adapter.
- Enable the Ethernet Adapter: After disabling the Ethernet adapter, right-click on it again and select “Enable” from the context menu. This action enables the adapter and allows it to establish a fresh connection with the network.
Disabling and enabling the Ethernet adapter resets its settings and clears any temporary configurations that may be causing connectivity issues. This action can also help troubleshoot driver-related problems by triggering a reinitialization of the adapter.
After enabling the Ethernet adapter, give it a few moments to establish a connection. You can check the network icon in the system tray or the Network pane on macOS to verify that the adapter has successfully reconnected.
Keep in mind that the steps may vary slightly depending on your operating system version. If you’re unsure about the exact procedure, refer to the documentation provided by the operating system or consult online resources for detailed instructions.
If disabling and enabling the Ethernet adapter doesn’t resolve the issue, you may need to try other troubleshooting steps to further diagnose and fix the problem with your Ethernet connection.
Run Network Troubleshooter
Running the built-in network troubleshooter can be a helpful step in diagnosing and resolving Ethernet connection issues. Most operating systems, including Windows and macOS, provide a network troubleshooter that can automatically detect and fix common connectivity problems. Here’s how you can run the network troubleshooter on your device:
- Open Network Settings: On Windows, right-click the network icon in the system tray and select “Open Network & Internet Settings.” Then, click on “Network Troubleshoot” or “Troubleshoot Problems.” On macOS, go to System Preferences, select Network, and click on the “Assist me” button.
- Run the Troubleshooter: In the Troubleshoot menu or pane, select the option related to network or Ethernet connectivity. Some operating systems may have specific troubleshooters for different types of network adapters. Click on the troubleshooter and follow the on-screen instructions to run the diagnostic tool.
- Apply Suggested Fixes: Once the network troubleshooter completes its scan, it will provide a diagnosis and recommend any necessary fixes or changes. Review the results and apply the suggested fixes by following the prompts. This can include resetting network configurations, enabling or disabling certain options, or installing driver updates.
The network troubleshooter is designed to detect and resolve common network issues automatically. It scans your network settings, adapter configurations, and related components to identify any potential problems that may be causing Ethernet connection issues. By following the suggested fixes, you can address any detected issues and restore a stable connection.
However, please note that the network troubleshooter may not be able to fix every problem. If the troubleshooter is unable to resolve the issue, it’s recommended to try other troubleshooting steps mentioned earlier or consult with a professional if necessary.
Remember to update your operating system regularly as updates often include bug fixes and improvements that can enhance network stability and resolve known issues. Keeping your system up to date can help prevent network connectivity problems in the future.
Check Network Settings
Checking your network settings is crucial when troubleshooting Ethernet connection issues. Incorrect network configurations can lead to connectivity problems and hinder your ability to establish a stable connection. To ensure your network settings are properly configured, follow these steps:
- Access Network Settings: On Windows, right-click the network icon in the system tray and select “Open Network & Internet Settings.” Then, click on “Change Adapter Options.” On macOS, go to System Preferences, select Network, and choose the Ethernet connection from the list on the left.
- Review IP Address Settings: In the network settings or network properties, locate the TCP/IP settings or IPv4 settings. Verify that the IP address, subnet mask, default gateway, and DNS server information are correctly entered. If you are using DHCP, ensure that the settings are set to obtain an IP address automatically.
- Verify DNS Settings: DNS (Domain Name System) settings are crucial for translating domain names into IP addresses. If your DNS settings are incorrect, it can result in connectivity issues. Ensure that the DNS server addresses are accurate. You can use public DNS servers like Google DNS (8.8.8.8 and 8.8.4.4) or OpenDNS (208.67.222.222 and 208.67.220.220).
- Check Firewall and Security Settings: Firewalls and security software can sometimes block network traffic, interfering with your Ethernet connection. Temporarily disable any firewall or security software and check if the connection improves. If it does, consider adjusting the settings to allow network communication for your specific adapter and applications.
- Reset Network Configurations: If you suspect that there may be incorrect or conflicting network configurations, you can reset your network settings to their default values. Most operating systems provide an option to reset network settings within the network settings or network properties menu. Follow the prompts to reset the settings and reboot your device.
Checking your network settings ensures that the IP address, subnet mask, default gateway, DNS server, and other configurations are correctly set. Misconfigured network settings can disrupt the communication between your device and the network, affecting your Ethernet connection. By verifying and correcting any errors or inconsistencies, you can help establish a stable connection.
Keep in mind that the steps and options may vary depending on your operating system version. If you’re unsure about specific settings or require further assistance, consult the documentation provided by the operating system or seek help from knowledgeable sources.
Test with a Different Ethernet Port
If you’re experiencing Ethernet connection issues, it’s worth testing your device with a different Ethernet port. Sometimes, a faulty port can be the cause of the problem. By utilizing another available Ethernet port, you can determine if the issue lies with the port itself or another component of the network. Here’s how to test with a different Ethernet port:
- Identify Available Ethernet Ports: Take note of the Ethernet ports available on your device, such as the ones on the back of your computer or the ports on your router. Ensure that you have access to another Ethernet port to perform the test.
- Disconnect the Ethernet Cable: Gently unplug the Ethernet cable from the current port on your device. Avoid pulling on the cable itself to prevent any damage. Take note of the specific port you’re disconnecting from for reference later.
- Connect to a Different Port: Take the unplugged end of the Ethernet cable and connect it to a different Ethernet port on your device. Ensure that the cable is securely inserted into the new port.
- Check for Connection: After connecting to the different Ethernet port, check if you have a stable connection. Look for the network icon on your device’s system tray (Windows) or the network settings on macOS to verify if the new port is detecting and connecting to the network.
Testing with a different Ethernet port helps determine if the issue is localized to a specific port on your device or if there’s a more general problem affecting your Ethernet connection. If the connection is successful with the new port, it suggests that the original port may be faulty or experiencing issues. In this case, you may need to have the port repaired or consider using the newly tested port as a workaround solution.
However, if the connection issue persists even when using a different Ethernet port, it indicates that the problem likely lies elsewhere, such as with the Ethernet cable, network adapter, or network configuration. In such cases, you can proceed with additional troubleshooting steps or seek professional assistance if needed.
Remember, testing with a different Ethernet port is a straightforward way to identify if the port itself is causing the connection issue. It’s a crucial step in isolating and troubleshooting Ethernet connection problems effectively.
Check for Network Congestion
Network congestion can significantly impact the performance of your Ethernet connection. When too many devices are connected to the network or there is excessive data traffic, it can lead to slower speeds and intermittent disconnections. To check for network congestion and alleviate any related issues, consider the following steps:
- Assess the Number of Connected Devices: Determine the number of devices currently connected to your network. This includes smartphones, tablets, computers, smart TVs, gaming consoles, and any other devices accessing the internet. The more devices connected, the greater the potential for congestion.
- Reduce Unnecessary Devices: Disconnect any unnecessary devices from the network. Devices that are not actively being used or require a stable connection can be temporarily disconnected to free up network resources. This can help reduce congestion and improve the performance of your Ethernet connection.
- Limit Bandwidth-Intensive Activities: Bandwidth-intensive activities such as streaming high-definition videos, online gaming, or large file downloads can significantly affect network performance. Consider limiting or scheduling these activities during periods of low network usage to ease congestion.
- Upgrade Network Equipment: If network congestion is an ongoing issue, it may be time to upgrade your network equipment. Older routers or switches may not be capable of handling the increased data demands of modern devices. Upgrading to newer equipment with higher bandwidth capabilities can alleviate congestion and improve overall network performance.
By checking for network congestion and taking steps to alleviate the issue, you can experience smoother and more consistent Ethernet connection speeds. It’s important to remember that network congestion can also be influenced by external factors, such as the performance of your Internet Service Provider (ISP) and the overall demand in your area.
If network congestion persists despite your efforts, it may be beneficial to contact your ISP to inquire about your internet plan’s capacity and any potential network issues in your area. They may be able to provide guidance or suggest alternative solutions to improve your Ethernet connection’s performance.
Monitoring network congestion and actively managing your network resources can help ensure a more reliable and efficient Ethernet connection, enabling you to enjoy seamless online experiences without interruptions caused by network congestion.
Reset Network Settings
If you’ve exhausted all other troubleshooting steps and are still experiencing problems with your Ethernet connection, resetting your network settings can be a final resort to resolve the issue. Resetting the network settings will undo any custom configurations and revert them to their default state. Here’s how to reset network settings:
- Access Network Settings: On Windows, go to the “Control Panel” or “Settings” and navigate to the “Network and Internet” or “Network and Sharing Center” section. On macOS, go to System Preferences and select “Network.”
- Reset Network Settings: Look for an option to reset network settings within the network settings menu. The precise wording may vary depending on your operating system. Click on this option to initiate the reset process.
- Follow the Prompts: Depending on your operating system, you may be prompted to confirm the reset action. Make sure you understand the consequences of resetting the network settings, as it will remove any custom configurations or saved Wi-Fi networks.
- Restart Your Device: After the network settings reset is complete, restart your device to apply the changes. This will give your device a fresh start with default network settings.
Resetting network settings can resolve issues related to misconfigured settings or conflicting network configurations. By restoring the network settings to their default state, you eliminate any potential errors that could be causing the Ethernet connection problem.
However, keep in mind that resetting network settings will remove any custom settings or saved Wi-Fi networks. You will need to reenter Wi-Fi passwords and configure any specific network settings again. Before resetting, it’s a good idea to take note of any important network information or settings you may need to restore later.
If resetting network settings does not resolve the Ethernet connection issue, it may indicate a more complex problem that requires professional assistance or further investigation. In such cases, contacting your Internet Service Provider (ISP) or seeking expert help can help diagnose and resolve the underlying cause of the problem.
Remember, resetting network settings should be considered as a final troubleshooting step when all other methods have failed. It is a significant change that should only be performed if necessary.
Conclusion
A reliable Ethernet connection is essential for smooth and uninterrupted internet access. When faced with Ethernet connection issues, it’s important to adopt a systematic troubleshooting approach to identify and resolve the problem effectively. By following the steps outlined in this article, you can diagnose and fix most common Ethernet connection issues.
We started by exploring the common causes of Ethernet connection problems, which include faulty Ethernet cables, network adapter issues, network configuration errors, network congestion, and hardware or power issues. Understanding these causes helps pinpoint the potential source of the problem.
Next, we provided a step-by-step guide to troubleshooting Ethernet connection issues. We discussed checking the Ethernet cable for physical damage, restarting your devices to clear temporary glitches, updating network drivers to ensure compatibility, disabling and enabling the Ethernet adapter to refresh the connection, running the network troubleshooter to automatically detect and fix common issues, checking and correcting network settings for proper configuration, testing with a different Ethernet port to identify potential port-related problems, considering network congestion as a cause of connection issues, and resetting network settings as a final resort.
It’s important to note that these troubleshooting steps may vary slightly depending on your operating system and specific network setup. Therefore, it’s recommended to consult the documentation provided by your operating system or seek additional resources for more detailed instructions.
By following these troubleshooting steps, you can resolve many Ethernet connection problems and restore a stable and reliable connection. However, if the issue persists or if you are uncertain about any step, it’s advisable to seek professional assistance from your Internet Service Provider or a qualified technician.
Remember, having a well-maintained Ethernet connection is essential in today’s digital world. By being proactive and addressing any connection issues promptly, you can enjoy a seamless browsing experience, efficient remote work, smooth streaming, and lag-free gaming.