Introduction
Welcome to our guide on connecting your Hydro Series H75 liquid CPU cooler to the appropriate fan header. The Hydro Series H75 is a high-performance cooler designed to provide efficient cooling for your CPU. However, it’s essential to properly connect the cooler to the correct fan header on your motherboard to ensure optimal performance.
If you’re not familiar with fan headers, don’t worry. We’ll explain what they are and how they work before diving into the specific fan headers you can use to connect your Hydro Series H75 cooler.
Understanding fan headers is crucial because different fan headers on your motherboard serve specific purposes. Each fan header has different voltage and speed control capabilities, affecting the performance of your liquid CPU cooler. By correctly selecting the appropriate fan header, you can ensure that your Hydro Series H75 operates flawlessly.
In this guide, we’ll discuss various fan headers, including the CPU_FAN header, CPU_OPT header, system fan headers, and dedicated AIO pump headers. We’ll explain how each one works and guide you on selecting the right fan header for your Hydro Series H75 cooler.
Whether you’re a first-time builder or an experienced computer enthusiast, this guide will help you connect your Hydro Series H75 cooler with confidence. So without further ado, let’s dive in and explore the different fan headers and how to connect your Hydro Series H75 liquid CPU cooler to them!
Understanding Fan Headers
Before we proceed with determining which fan header to use for your Hydro Series H75 liquid CPU cooler, let’s take a moment to understand what fan headers are and how they function.
Fan headers are connectors on your motherboard specifically designed to control and power cooling fans. These headers provide both power and control signals to the fans, allowing you to regulate their speed and optimize cooling performance.
Most motherboards come equipped with several fan headers, each with its own unique characteristics. These headers can vary in power delivery, control options, and functionality, which makes it important to choose the right one for your cooler.
Typically, fan headers can be categorized as follows:
- CPU_FAN Header: This header is specifically designed to control the cooling fan for your CPU. It provides precise temperature-based fan speed control to ensure efficient cooling of the processor.
- CPU_OPT Header: This header is often found in high-end motherboards and is intended for connecting an additional cooling fan to support the CPU_FAN header. It offers the same temperature-based fan control as the CPU_FAN header.
- System Fan Headers: These headers are provided for connecting additional case fans. They are generally designed to operate at a constant speed or with basic voltage control.
- Dedicated AIO Pump Headers: Some motherboards feature dedicated headers specifically designed for all-in-one (AIO) liquid cooling pumps. These headers often provide higher voltage and power delivery to support the demands of AIO pump motors.
Understanding the different fan headers and their capabilities is essential for selecting the right header to connect your Hydro Series H75 cooler. It ensures that your cooler operates optimally and allows you to make the most of its cooling capabilities.
Now that we have a good grasp of fan headers, let’s move on to selecting the appropriate fan header for your Hydro Series H75 liquid CPU cooler.
Choosing the Right Fan Header for your Hydro Series H75 Liquid CPU Cooler
When it comes to connecting your Hydro Series H75 liquid CPU cooler, it’s crucial to select the correct fan header on your motherboard. The right fan header can ensure optimal performance and temperature control for your cooler. Let’s explore the different options and determine the most suitable choice.
If your motherboard has a dedicated CPU_FAN header, this is the recommended choice for connecting your Hydro Series H75 cooler. The CPU_FAN header is specifically designed to control the cooling fan for your CPU. It provides precise temperature-based fan speed control, allowing your cooler to efficiently cool your processor. When connected to the CPU_FAN header, the fan speed will adjust automatically based on the CPU temperature, ensuring that your CPU remains at an optimal operating temperature.
In some cases, your motherboard may have a CPU_OPT header, often found in high-end models. The CPU_OPT header is intended for connecting an additional cooling fan to support the CPU_FAN header. If you have an additional fan that needs to be connected alongside your Hydro Series H75 cooler, using the CPU_OPT header can provide synchronized temperature-based fan control, enhancing the overall cooling performance.
If your motherboard doesn’t have a dedicated CPU_FAN or CPU_OPT header, you can connect your Hydro Series H75 cooler to a system fan header. System fan headers are designed for connecting additional case fans and generally operate at a constant speed or with basic voltage control. While the system fan header may not provide the same level of precise temperature-based control as the CPU_FAN or CPU_OPT, it can still effectively power and control your Hydro Series H75 cooler to ensure optimal cooling performance.
Additionally, if your motherboard has a dedicated AIO pump header, you can connect your Hydro Series H75 cooler to this header. AIO pump headers often provide higher voltage and power delivery to meet the demands of AIO pump motors. By utilizing the dedicated AIO pump header, you can ensure that your Hydro Series H75 cooler operates at its full potential.
When choosing the right fan header for your Hydro Series H75 liquid CPU cooler, consider the specific headers available on your motherboard and their capabilities. Take into account factors such as temperature-based control, additional fan support, and power delivery to make an informed decision.
Now that you understand the different fan header options, let’s explore how to connect your Hydro Series H75 cooler to each of these headers.
Connecting the Hydro Series H75 to the CPU_FAN Header
If your motherboard has a dedicated CPU_FAN header, connecting your Hydro Series H75 liquid CPU cooler to this header is the recommended method. The CPU_FAN header is specifically designed to control the cooling fan for your CPU, providing precise temperature-based fan speed control.
Here are the steps to connect your Hydro Series H75 to the CPU_FAN header:
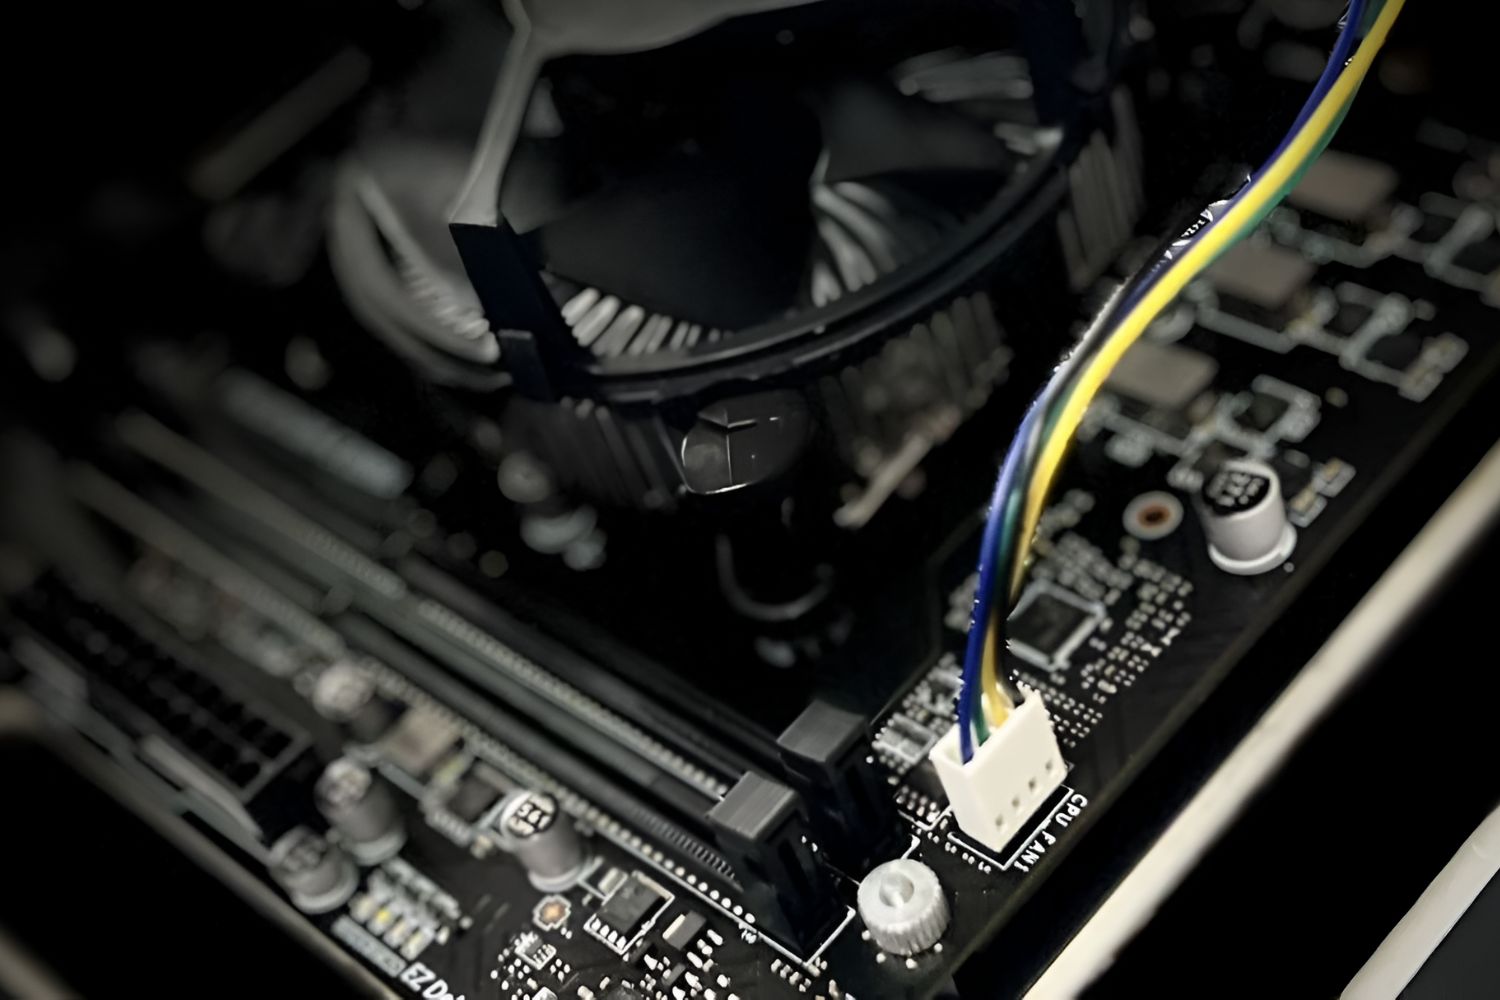
- Locate the CPU_FAN header on your motherboard. It is usually labeled as “CPU_FAN” or “CPU_COOLER”.
- Ensure that your computer is turned off and unplugged from the power source to avoid any potential electrical damage.
- Take the fan cable from your Hydro Series H75 and connect it to the CPU_FAN header on your motherboard. The cable is typically a three-pin or four-pin connector.
- Ensure that the connection is secure by gently pushing the connector into the header until it clicks into place.
- Once the connection is secure, you can proceed to mount the radiator and fan of your Hydro Series H75 according to the manufacturer’s instructions.
- After mounting the radiator and fan, you can now power on your computer, and the CPU_FAN header will automatically control the fan speed based on the CPU temperature.
By connecting your Hydro Series H75 to the CPU_FAN header, you can take advantage of the precise temperature-based fan control, ensuring efficient cooling for your CPU.
Remember to consult your motherboard manual for any specific instructions or recommendations regarding the CPU_FAN header. Some motherboards may have additional settings in the BIOS that allow you to customize the fan speed control or monitor the fan performance.
Now that you’ve successfully connected your Hydro Series H75 to the CPU_FAN header, let’s move on to exploring the option of connecting it to the CPU_OPT header.
Connecting the Hydro Series H75 to the CPU_OPT Header
If your motherboard has a CPU_OPT header, it can be a useful option for connecting your Hydro Series H75 liquid CPU cooler. The CPU_OPT header is often found in high-end motherboards and is specifically designed to support an additional cooling fan for the CPU.
Here are the steps to connect your Hydro Series H75 to the CPU_OPT header:
- Identify the CPU_OPT header on your motherboard. It is usually located near the CPU socket and labeled as “CPU_OPT”. Refer to your motherboard manual if you’re unsure of its exact location.
- Ensure that your computer is powered off and disconnected from the power source to prevent any potential electrical damage.
- Take the fan cable from your Hydro Series H75 and connect it to the CPU_OPT header on your motherboard. The cable is typically a three-pin or four-pin connector.
- Ensure that the connection is secure by gently pushing the connector into the header until it clicks into place.
- Once the connection is secure, proceed to install the radiator and fan of your Hydro Series H75 following the instructions provided by the manufacturer.
- Power on your computer, and both the CPU_FAN and CPU_OPT headers will work together to control the fan speed based on the CPU temperature.
By connecting your Hydro Series H75 to the CPU_OPT header, you can achieve synchronized temperature-based fan control, enhancing the overall cooling performance for your CPU. This is particularly beneficial if you have an additional fan that needs to be connected alongside your Hydro Series H75 cooler.
Remember to refer to your motherboard manual for any specific recommendations regarding the CPU_OPT header. Some motherboards may have additional BIOS settings that allow you to customize the fan speed control or monitor the performance of the CPU_OPT header.
Now that you’ve successfully connected your Hydro Series H75 to the CPU_OPT header, let’s explore the option of connecting it to a system fan header.
Connecting the Hydro Series H75 to a System Fan Header
If your motherboard doesn’t have a dedicated CPU_FAN or CPU_OPT header, you can still connect your Hydro Series H75 liquid CPU cooler to a system fan header. System fan headers are designed to support additional case fans and can effectively power and control your Hydro Series H75 cooler.
Here are the steps to connect your Hydro Series H75 to a system fan header:
- Locate a system fan header on your motherboard. Depending on your motherboard model, there may be multiple system fan headers available. They are typically labeled as “SYS_FAN” or “CHA_FAN”.
- Ensure your computer is powered off and disconnected from the power source to avoid any potential electrical damage.
- Take the fan cable from your Hydro Series H75 and connect it to the selected system fan header on your motherboard. The cable is usually a three-pin or four-pin connector.
- Ensure the connection is secure by gently pushing the connector into the header until it clicks into place.
- Once the connection is secure, proceed to mount the radiator and fan of your Hydro Series H75 according to the manufacturer’s instructions.
- Power on your computer, and the system fan header will provide power and control to the fan of your Hydro Series H75 cooler.
While a system fan header may not provide the same level of precise temperature-based control as the CPU_FAN or CPU_OPT header, it can still effectively power and control your Hydro Series H75 cooler. This ensures that your CPU receives adequate cooling and maintains optimal performance.
Refer to your motherboard manual for any specific instructions or recommendations regarding the system fan headers. Some motherboards may allow you to adjust the fan speed using BIOS settings or dedicated software provided by the motherboard manufacturer.
Now that your Hydro Series H75 is successfully connected to a system fan header, let’s explore the option of connecting it to a dedicated AIO pump header if available.
Connecting the Hydro Series H75 to a Dedicated AIO Pump Header
If your motherboard has a dedicated AIO pump header, it offers an excellent option for connecting your Hydro Series H75 liquid CPU cooler. These headers are specifically designed to provide higher voltage and power delivery to meet the demands of AIO pump motors.
Here are the steps to connect your Hydro Series H75 to a dedicated AIO pump header:
- Locate the dedicated AIO pump header on your motherboard. It is usually labeled as “AIO_PUMP” or “PUMP_FAN”. Refer to your motherboard’s manual for the exact location.
- Make sure your computer is powered off and unplugged from the power source to prevent any potential electrical damage.
- Take the fan cable from your Hydro Series H75 and connect it to the dedicated AIO pump header on your motherboard. The cable is typically a three-pin or four-pin connector.
- Ensure that the connection is secure by gently pushing the connector into the header until it clicks into place.
- Proceed to install the radiator and fan of your Hydro Series H75 following the manufacturer’s instructions.
- Power on your computer, and the dedicated AIO pump header will provide the necessary power and control to ensure optimal performance for your Hydro Series H75 cooler.
By connecting your Hydro Series H75 to a dedicated AIO pump header, you can take advantage of the enhanced power delivery specifically designed for AIO pump motors. This ensures that your Hydro Series H75 cooler operates at its full potential, delivering efficient cooling to your CPU.
Consult your motherboard’s manual for any specific recommendations or settings related to the dedicated AIO pump header. Some motherboards may offer additional customization options through the BIOS or dedicated software provided by the motherboard manufacturer.
Now that you’ve successfully connected your Hydro Series H75 to a dedicated AIO pump header, you’re ready to experience the optimal cooling performance it offers!
Conclusion
Properly connecting your Hydro Series H75 liquid CPU cooler to the appropriate fan header on your motherboard is essential for optimal cooling performance. By understanding the different fan headers available and selecting the right one, you can maximize the efficiency and effectiveness of your cooler.
In this guide, we discussed the importance of fan headers and their functions. We explored various options for connecting the Hydro Series H75, including the CPU_FAN header, CPU_OPT header, system fan headers, and dedicated AIO pump headers. Each of these headers offers unique benefits and control capabilities for your liquid cooler.
If your motherboard has a dedicated CPU_FAN header, it is the recommended choice for connecting your Hydro Series H75. This header provides precise temperature-based fan speed control, ensuring efficient cooling for your CPU. The CPU_OPT header, if available, can be used to support an additional cooling fan and provide synchronized temperature-based control.
If dedicated CPU headers are not available, connecting your Hydro Series H75 to a system fan header is a viable option. While it may not offer temperature-based control, it can still effectively power and control your cooler to ensure optimal cooling performance.
For motherboards with dedicated AIO pump headers, connecting your Hydro Series H75 to this header provides higher voltage and power delivery to optimize the performance of the cooler.
Regardless of the specific fan header you choose, it is important to consult your motherboard manual for any specific instructions or recommendations. Additionally, some motherboards may offer BIOS settings or software that allows you to customize the fan speed control or monitor the performance of the connected fan.
By following the appropriate steps and making the right connections, you can ensure that your Hydro Series H75 cooler functions efficiently and effectively, keeping your CPU cool and protecting its performance. Enjoy the benefits of a properly cooled system and enhanced computing experience!