Introduction
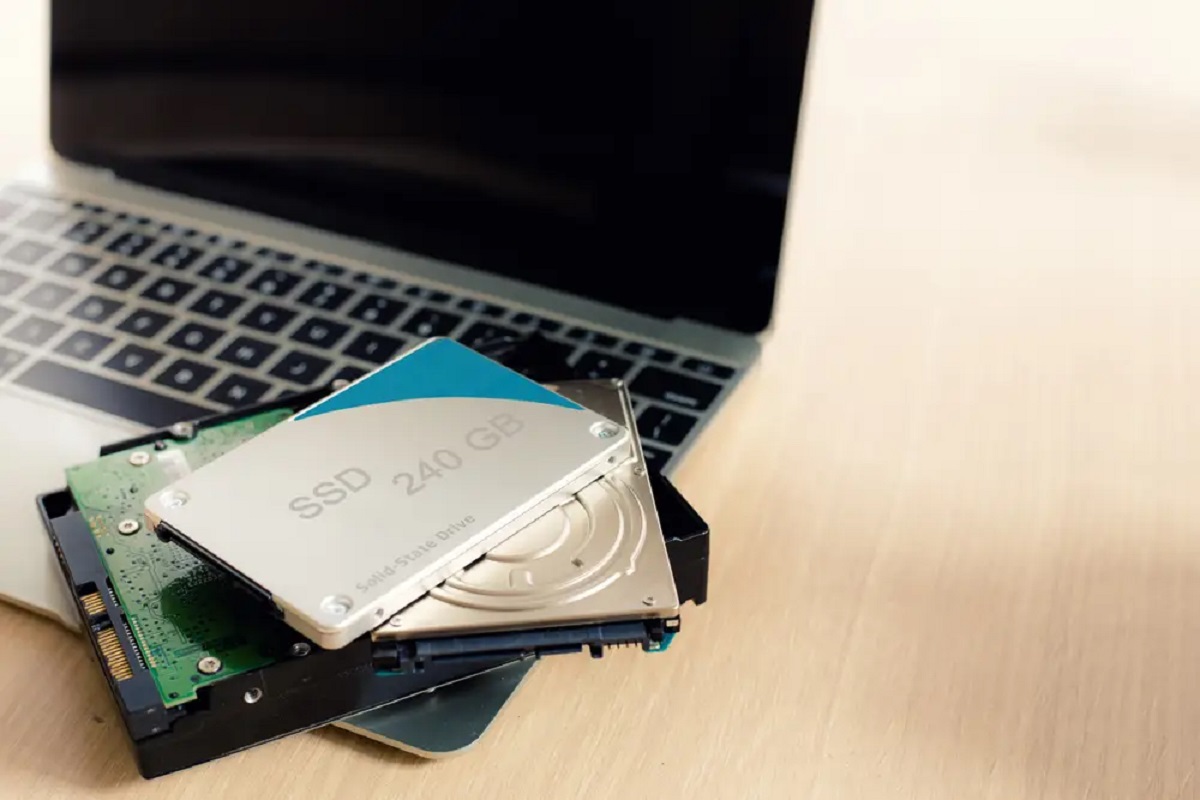
Welcome to the world of solid state drives (SSDs)! If you’re looking to give your computer a significant performance boost, installing an SSD might be just what you need. SSDs are becoming increasingly popular due to their faster read and write speeds, improved reliability, and compact design compared to traditional hard disk drives (HDDs).
In this article, we will explore the benefits of installing an SSD and provide step-by-step instructions for both desktop computers and laptops. Whether you’re a tech enthusiast or a casual computer user, this guide will help you understand the process of installing an SSD and optimize your system’s performance.
Upgrading to an SSD offers numerous advantages over HDDs. The most notable one is the enhanced speed. Traditional HDDs rely on mechanical moving parts to read and write data, which can cause delays in accessing information. SSDs, on the other hand, use flash memory chips, enabling lightning-fast operations. This results in faster boot times, quicker application launches, and improved overall system responsiveness.
Another benefit of SSDs is their durability. Since there are no moving parts, they are less susceptible to physical damage from shocks or drops. Furthermore, SSDs consume less power than HDDs, which not only contributes to longer battery life in laptops but also leads to lower energy consumption in desktop computers.
Before diving into the installation process, it’s important to consider a few factors. First, determine the storage capacity you require. SSDs come in various sizes, so choose one that suits your needs, whether it’s for basic productivity tasks or high-performance gaming and multimedia editing. Additionally, it’s crucial to check if your computer has an available SATA (Serial ATA) port for connecting the SSD. Most modern computers have at least one SATA port, but it’s essential to verify this before making a purchase.
Now that you have an overview of the benefits and considerations, the next sections will provide detailed instructions for installing an SSD in both desktop computers and laptops. Follow the steps carefully, and soon you’ll experience the remarkable speed and efficiency provided by an SSD. Let’s get started!
Benefits of Installing a Solid State Drive (SSD)
Upgrading to a solid state drive (SSD) can bring a multitude of benefits to your computer system. Let’s explore these advantages in more detail.
1. Improved Speed: One of the biggest advantages of an SSD is its lightning-fast read and write speeds. Unlike traditional hard disk drives (HDDs), which rely on spinning disks and mechanical components, SSDs use flash memory technology. This allows them to access and retrieve data almost instantly, resulting in significantly faster boot times, quicker application launches, and seamless multitasking.
2. Enhanced Performance: The increased speed of an SSD translates into improved overall system performance. Whether you’re loading large files, editing videos, or running resource-intensive applications, an SSD can handle these tasks with ease. It reduces lag, enhances responsiveness, and provides a smoother user experience, even during demanding operations.
3. Reliability: SSDs are more durable and reliable than HDDs. With no moving parts, there is less risk of mechanical failure, making SSDs less susceptible to physical damage. This makes them ideal for portable devices like laptops where shocks and bumps are more common. Additionally, SSDs have a lower chance of developing bad sectors or facing data corruption, ensuring the safety of your important files.
4. Energy Efficiency: SSDs require less power to operate compared to HDDs. This not only leads to longer battery life in laptops but also reduces energy consumption in desktop computers. As a result, using an SSD not only benefits you in terms of performance but also helps to save on electricity costs and reduce your carbon footprint.
5. No Noise: HDDs produce noise due to the spinning disks and moving parts. On the other hand, SSDs have no moving components, resulting in silent operation. This can significantly improve the overall user experience, especially if you prefer a quiet working environment or if you use your computer in noise-sensitive environments such as recording studios.
6. Compact Design: SSDs come in compact form factors, allowing for flexible installation options. They are slim and lightweight, making them ideal for use in laptops, ultrabooks, and other portable devices. Their small size also enables more efficient airflow within desktop computers, preventing overheating and optimizing system performance.
Overall, installing an SSD is an excellent investment that can transform your computer’s performance and reliability. Whether you’re a gamer, a creative professional, or a regular computer user, the benefits of an SSD extend to all areas of computing. So, take the leap and experience the speed and efficiency of an SSD for yourself!
Considerations Before Installation
Before rushing into the installation process, there are a few important considerations to keep in mind. These factors will ensure a smooth and successful installation of a solid state drive (SSD) in your computer system.
1. Storage Capacity: Determine the appropriate storage capacity for your needs. SSDs come in various sizes ranging from smaller capacities such as 128GB to larger ones like 2TB or even higher. Consider the amount of data you currently have and the future storage requirements. It’s recommended to choose an SSD that offers enough space for your operating system, applications, and frequently accessed files.
2. Available SATA Port: Check if your computer has an available SATA (Serial ATA) port. Most desktop computers and laptops have at least one SATA port, which is used for connecting storage devices like SSDs. However, it’s essential to verify this before making a purchase. If your computer doesn’t have an available SATA port, you may need to consider alternative options such as using an external SSD or upgrading your computer’s hardware.
3. Data Backup: It’s highly recommended to back up your data before starting the installation process. While installing an SSD shouldn’t result in data loss, it’s always better to be safe than sorry. Creating a backup ensures that you have a copy of your files and settings in case of any unforeseen circumstances. You can use external hard drives, cloud storage, or even create a system image using built-in backup utilities in your operating system.
4. Operating System Compatibility: Ensure that your operating system is compatible with installing an SSD. Most modern operating systems, such as Windows, macOS, and Linux, fully support SSDs. However, it’s essential to check for any specific requirements or compatibility issues that may arise. Updating your operating system to the latest version is often recommended to take advantage of any performance enhancements or optimizations related to SSD usage.
5. BIOS Settings and Firmware Updates: Familiarize yourself with the basic input/output system (BIOS) settings of your computer. In some cases, you may need to make changes to the BIOS settings to ensure that the SSD is properly detected and configured. Additionally, check if there are any firmware updates available for your SSD model. Firmware updates can provide improvements in performance, compatibility, and overall stability of the SSD.
By considering these factors before installing an SSD, you can ensure a seamless and hassle-free installation process. Taking the time to plan and prepare will save you from encountering any unexpected issues along the way and ensure that you can fully enjoy the benefits of an SSD once it’s installed.
Installing an SSD in a Desktop Computer
Upgrading your desktop computer with a solid state drive (SSD) can significantly boost its performance and responsiveness. Follow the step-by-step guide below to install an SSD in your desktop computer.
Step 1: Preparation
Before beginning the installation, gather the necessary tools and materials. You will need an SSD, a screwdriver, SATA cables, and an available SATA power connector from your power supply. It’s also a good idea to have a grounding strap or regularly touch a grounded metal surface to discharge any static electricity.
Step 2: Physically Installing the SSD
1. Power off your computer and disconnect all cables. Open the computer case by removing the screws at the back or side panel.
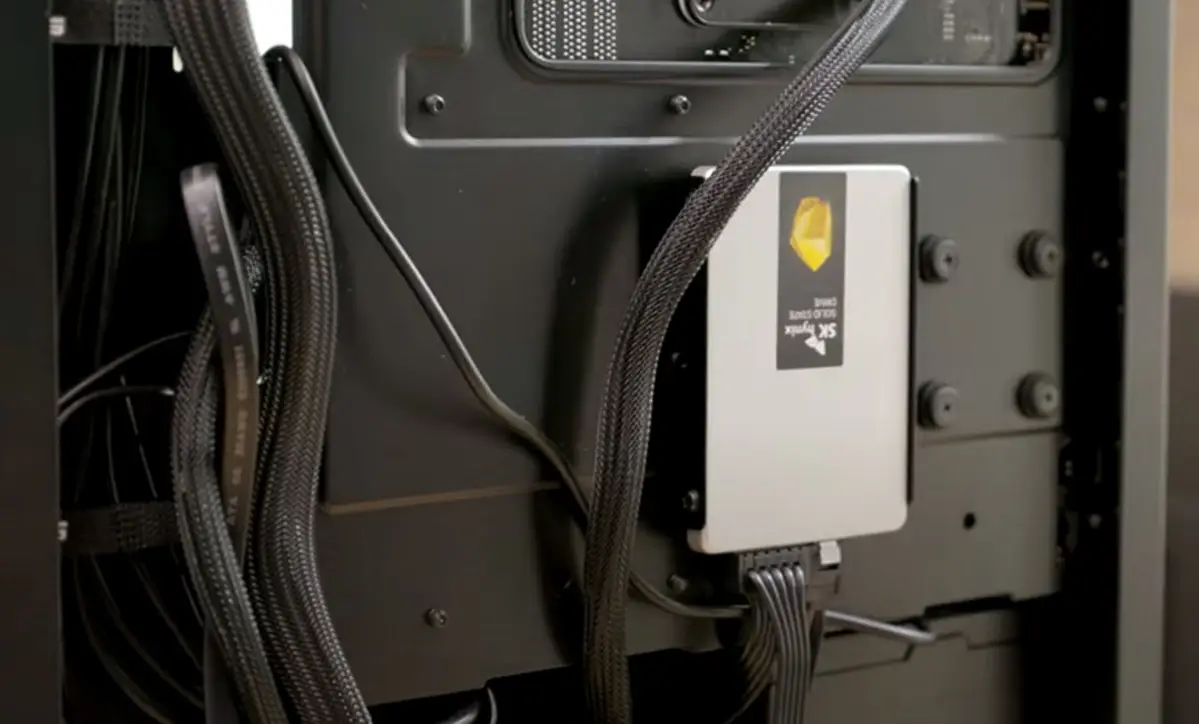
2. Find an available 2.5″ or 3.5″ drive bay to mount the SSD. Most SSDs come with mounting brackets or screws. Attach the SSD to the bracket or directly to the case using the provided screws.
3. Carefully connect the SATA data cable to the SATA port on the SSD and the other end to an available SATA port on the motherboard. Ensure the connection is secure.
4. Connect the SATA power cable from your power supply to the SSD. Ensure a secure connection but be gentle to avoid any damage.
Step 3: Connecting the SSD
1. Once the physical installation is done, close the computer case and secure it with the screws.
2. Reconnect all the cables to your computer, including the power cord, keyboard, mouse, and any other peripherals.
3. Power on your computer and access the BIOS by pressing the designated key (usually Del, F2, or F12) during the boot process. Check if the SSD is detected in the BIOS. If not, ensure the connections are properly made and try again.
Step 4: Configuring the BIOS and Formatting the SSD
1. In the BIOS, navigate to the “Boot” or “Storage” section and set the SSD as the primary boot device. This will ensure that your computer boots from the SSD rather than the previous storage drive.
2. Save the BIOS settings and exit. Your computer will restart.
3. Once your operating system loads, go to the Disk Management utility (Windows) or Disk Utility (macOS) to format the SSD. Follow the on-screen instructions to create a new partition and allocate the desired size.
Step 5: Transferring Data to the SSD and Setting as Boot Drive
1. If you want to transfer your existing operating system and data to the SSD, you can use disk cloning software or perform a clean installation of the operating system. Ensure you have a backup of your important data before proceeding.
2. After transferring the data or reinstalling the operating system onto the SSD, set it as the boot drive in the BIOS to further optimize the performance of your computer.
Congratulations! You have successfully installed an SSD in your desktop computer. Enjoy the improved speed and performance that the SSD brings to your computing experience.
Step 1: Preparation
Before beginning the installation process for your solid state drive (SSD) in a desktop computer, it’s important to gather the necessary tools and materials. Proper preparation ensures a smooth and efficient installation process. Here are the steps to follow for the preparation phase:
1. Gather the Necessary Tools: Ensure you have all the required tools and materials readily available. You will need a screwdriver, SATA cables, and an available SATA power connector from your power supply. It’s also recommended to have a grounding strap or to regularly touch a grounded metal surface to discharge any static electricity, protecting your SSD from potential damage caused by electrostatic discharge.
2. Power Off and Disconnect Cables: Before opening your computer case, ensure the computer is powered off. Disconnect all cables, including the power cord, keyboard, mouse, monitor, and any other peripherals, from the back of your computer. This prevents any accidental damage to the components and ensures your safety.
3. Open the Computer Case: Most desktop computer cases can be opened by removing the screws located at the back or side panel. Carefully unscrew the screws and set them aside in a safe place, as you will need them later to secure the case.
4. Identify an Available Drive Bay: Locate an available 2.5″ or 3.5″ drive bay in your computer case where you will install the SSD. If you are unsure which bays are available, consult your computer’s manual or look for empty slots that can accommodate the SSD. Most SSDs come with mounting brackets or screws for installation. Use the provided screws or bracket to securely mount the SSD in the chosen drive bay.
5. Connect the SATA Data Cable: Find the SATA port on your SSD. It is a small L-shaped connector. Connect one end of a SATA cable to the SSD’s SATA port. Then, locate an available SATA port on the motherboard and connect the other end of the cable to it. Ensure a secure connection by firmly pushing the cable into the ports, but be careful not to exert excessive force, as it could damage the connectors.
6. Connect the SATA Power Connector: Locate an available SATA power connector from your power supply. It is a wider rectangular connector with L-shaped pins. Attach the SATA power connector to the corresponding port on the SSD. Again, make sure the connection is secure but be gentle to avoid any damage to the connectors.
By following the steps above, you have now completed the preparation phase for the installation of an SSD in your desktop computer. You are now ready to move on to the next step – physically installing the SSD into the computer case.
Step 2: Physically Installing the SSD
Once you have completed the preparation phase for installing a solid state drive (SSD) in your desktop computer, you can proceed with the physical installation of the SSD. This step involves mounting the SSD securely in a drive bay and connecting the necessary cables. Follow the steps below to successfully install the SSD:
1. Power Off and Open the Computer Case: Ensure your computer is powered off, and then open the computer case by removing the screws located at the back or side panel. Set the screws aside in a safe place, as you will need them later.
2. Locate an Available Drive Bay: Identify an available 2.5″ or 3.5″ drive bay in your computer case. These bays are typically used for storage devices such as hard drives and SSDs. If you are unsure which bays are available, consult your computer’s manual or look for empty slots that can accommodate the SSD.
3. Securely Mount the SSD: Most SSDs come with mounting brackets or screws for installation. If your SSD includes a mounting bracket, attach the SSD to the bracket using the provided screws. If your SSD does not include a bracket, you can mount it directly to the case by screwing it in with the provided screws. Make sure the SSD is positioned securely and aligned properly within the drive bay.
4. Connect the SATA Data Cable: Locate the SATA port on the SSD. It is a small L-shaped connector. Take a SATA data cable and connect one end to the SSD’s SATA port. Then, find an available SATA port on the motherboard and connect the other end of the cable to it. Ensure a secure connection by pushing the cable into the ports firmly, but be careful not to use excessive force that could damage the connectors.
5. Connect the SATA Power Connector: Locate an available SATA power connector from your power supply. It is a wider rectangular connector with L-shaped pins. Take the SATA power connector and attach it to the corresponding port on the SSD. Again, ensure a secure connection, but be gentle to avoid any damage to the connectors.
6. Close the Computer Case: Once you have completed the physical installation of the SSD, close the computer case by placing the back or side panel back into position. Use the screws you removed earlier to secure the case. Make sure the case is tightly closed to protect the components inside.
By following these steps, you have successfully completed the physical installation of the SSD in your desktop computer. The SSD is now securely mounted and connected to the motherboard and power supply. In the next step, we will cover the process of connecting the SSD and configuring the BIOS settings to ensure proper functionality.
Step 3: Connecting the SSD
In the previous steps, you have successfully completed the physical installation of the solid state drive (SSD) in your desktop computer. Now, it’s time to connect the SSD to the necessary components to ensure proper functionality. Follow the steps below for a successful connection:
1. Close the Computer Case: Before proceeding with the connection, ensure that the computer case is closed by placing the back or side panel back into position. Use the screws you removed earlier to secure the case. This step ensures the safety and security of the internal components.
2. Reconnect the Cables: Reconnect all the cables to your computer, including the power cord, keyboard, mouse, monitor, and any other peripherals you were using before the installation. Ensure each cable is securely plugged into the appropriate ports. This will allow your computer to function properly once it is powered on.
3. Power on the Computer: Once all the cables are reconnected, plug in the power cord and power on your computer. You should see the startup screen and hear the computer’s fans running.
4. Access the BIOS Settings: To ensure that the SSD is properly recognized by your computer, you need to access the basic input/output system (BIOS) settings. During the boot process, the BIOS can usually be accessed by pressing the designated key on your keyboard, such as Del, F2, or F12. Consult your computer’s manual or look for on-screen prompts to determine the correct key for your system.
5. Verify SSD Detection: Once in the BIOS settings, navigate to the “Storage” or “Drives” section. Check if the SSD is detected in the list of connected drives. It should be listed along with other storage devices such as hard drives or optical drives. If the SSD is not listed, verify that the connections are secure and try restarting your computer. If the problem persists, consult your computer’s manual or seek further assistance.
6. Save and Exit: Once you have verified that the SSD is detected in the BIOS, save the changes and exit the BIOS settings. This will allow your computer to continue booting and load the operating system from the SSD.
Congratulations! You have now successfully connected the SSD to your desktop computer. The SSD should be recognized by your computer’s BIOS, and you are ready to proceed with configuring the BIOS settings and formatting the SSD in order to prepare it for use. Move on to the next step in which we will cover the configuration process.
Step 4: Configuring the BIOS and Formatting the SSD
After connecting the solid state drive (SSD) to your desktop computer, the next step is to configure the BIOS settings and format the SSD. This ensures that the SSD is properly recognized by your computer and ready for use. Follow the steps below to complete this process successfully:
1. Boot into the BIOS: Restart your computer and access the BIOS settings by pressing the designated key during the boot process. The key to access the BIOS varies depending on the computer manufacturer and model. Common keys include Del, F2, or F12. Consult your computer’s manual or look for on-screen prompts to determine the correct key for your system.
2. Navigate to the Boot or Storage Section: Once inside the BIOS, navigate to the “Boot” or “Storage” section. The exact location and naming of this section may vary depending on the BIOS version and manufacturer.
3. Set the SSD as the Primary Boot Device: Within the boot section, locate the boot order or boot priority option. Adjust the boot order so that the SSD is listed as the primary boot device. This ensures that your computer boots from the SSD rather than from the previous storage drive. Save the changes and exit the BIOS settings.
4. Restart the Computer: After saving the changes in the BIOS, restart your computer. It will now boot from the SSD, providing a significant improvement in boot times and overall system performance.
5. Access the Operating System: Once your computer has finished booting, it will load the operating system from the SSD. If you have already installed an operating system on the SSD, it should seamlessly start up. However, if you have not yet installed an operating system on the SSD, you will need to proceed with the installation process.
6. Formatting the SSD: If you are installing a new SSD or if you choose to format the SSD, you will need to use the disk management utility (Windows) or disk utility (macOS) to format the SSD. This process creates a file system on the SSD and prepares it for storing and accessing data. Consult the documentation of your operating system to learn how to use the disk management or disk utility tool. Follow the provided instructions to format the SSD as desired.
By following these steps, you have successfully configured the BIOS settings to ensure that your computer recognizes the SSD as the primary boot device. Additionally, you have formatted the SSD, preparing it for use as a storage drive. Now you can fully enjoy the benefits of the improved speed and performance provided by the SSD.
Step 5: Transferring Data to the SSD and Setting as Boot Drive
After configuring the BIOS settings and formatting the solid state drive (SSD), the next step is to transfer your data to the SSD and set it as the boot drive. This will ensure that your operating system and applications run from the SSD, taking full advantage of its speed and performance. Follow the steps below to successfully complete this process:
1. Transferring Data: If you want to transfer your existing operating system and data to the SSD, you have a few options. You can use disk cloning software to make an exact copy of your current drive onto the SSD. Alternatively, you can perform a clean installation of the operating system on the SSD and manually transfer your important files over. Consider the size of your data and the capabilities of your SSD to determine the best method for transferring data.
2. Disk Cloning: If you choose to use disk cloning software, follow the instructions provided with the software to create a clone of your current drive onto the SSD. Make sure that the SSD is large enough to accommodate the data from your current drive. Cloning the drive will replicate the entire contents, including the operating system, installed applications, and user files.
3. Clean Installation: If you opt for a clean installation of the operating system, you will need to reinstall your operating system onto the SSD. To do this, create a bootable USB drive or DVD with the installation media for your operating system. Boot your computer from the installation media and follow the on-screen instructions to install the operating system onto the SSD. Ensure that you have a backup of your important files before proceeding with a clean installation.
4. Setting as Boot Drive: Once the data transfer is complete, it’s time to set the SSD as the boot drive. Restart your computer and access the BIOS settings as before. Navigate to the boot order or boot priority section and ensure that the SSD is listed as the primary boot device. Save the changes and exit the BIOS settings. This configuration ensures that your computer boots directly from the SSD, maximizing its speed and performance.
5. Finalize Data Transfer: After setting the SSD as the boot drive, boot into the operating system from the SSD and verify that everything is functioning correctly. Double-check that all your files, applications, and settings have been transferred successfully. If any issues arise, consult the documentation of your operating system or seek further assistance.
By following these steps, you have successfully transferred your data to the SSD and set it as the boot drive. Your operating system and applications now run from the SSD, providing optimal performance and responsiveness. Enjoy the improved speed and efficiency that the SSD brings to your computer system.
Installing an SSD in a Laptop
If you own a laptop and want to improve its performance and storage capacity, installing a solid state drive (SSD) is a great option. Upgrading to an SSD can significantly enhance your laptop’s speed and responsiveness. Follow the steps below to install an SSD in your laptop:
Step 1: Preparation
1. Gather the Necessary Tools: Before you start, make sure you have the necessary tools and materials. You will need an SSD, a screwdriver (usually a small Phillips-head screwdriver works best for laptops), and any additional components or adapters that may be required for your specific laptop model.
2. Back Up Your Data: It’s important to back up your data before making any changes to your laptop. You can use an external hard drive, cloud storage, or other backup solutions to ensure that your files are safe in case of any unforeseen issues during the installation process.
Step 2: Removing the Existing Hard Drive
1. Power Off and Disconnect: Shut down your laptop and unplug the power cord. Remove the laptop’s battery, if it is removable. Also, disconnect any other peripherals and external devices that may be connected.
2. Locate the Hard Drive Bay: Identify the location of the hard drive bay on your laptop. Consult the laptop’s manual if you are unsure.
3. Remove the Access Panel: Unscrew the access panel that covers the hard drive bay. Some laptops may require you to remove additional screws or clips to access the hard drive.
4. Disconnect the Hard Drive: Locate the existing hard drive and carefully unplug the SATA connector and power connector. Gently remove the hard drive from its slot.
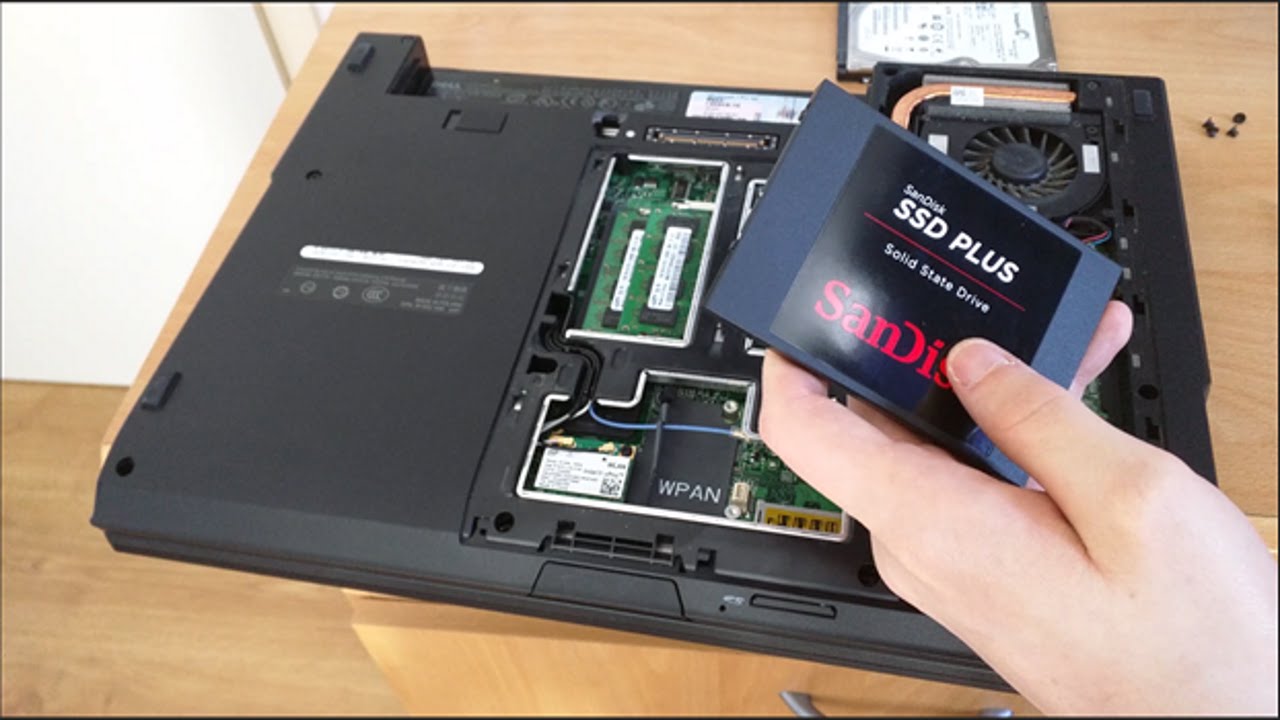
Step 3: Installing the SSD
1. Prepare the SSD: If necessary, attach any additional components or adapters to the SSD to make it compatible with your laptop. Refer to the SSD’s manual for specific instructions.
2. Insert the SSD: Carefully slide the SSD into the empty slot in the hard drive bay. Make sure it fits securely and aligns with the screw holes or mounting points in the laptop.
3. Secure the SSD: Use the screws provided with the SSD or the ones you removed from the original hard drive to secure the SSD in place. Tighten the screws gently, ensuring that the SSD is firmly seated.
Step 4: Reassembling the Laptop
1. Connect the Cables: Reconnect the SATA connector and power connector to the SSD. Ensure that the connections are secure.
2. Replace the Access Panel: Put the access panel back in place and tighten the screws to secure it.
3. Reinsert the Battery: If you removed the laptop’s battery in the beginning, reinsert it now.
Step 5: Configuring BIOS and Transferring Data
1. Power On and Enter BIOS: Power on your laptop and enter the BIOS settings by pressing the appropriate key during the boot process. Consult your laptop’s manual to determine the correct key.
2. Configure the SSD: In the BIOS settings, make sure the SSD is detected. If necessary, adjust the boot order to ensure the SSD is set as the primary boot device.
3. Save and Exit: Save the BIOS settings and exit. Your laptop will restart.
4. Operating System and Data Transfer: Install your operating system on the SSD either through a clean installation or by cloning the existing hard drive. Transfer your important files and applications to the SSD and configure the laptop to use it as the primary storage device.
By following these steps, you can successfully install an SSD in your laptop. Enjoy the improved speed, performance, and storage capacity that the SSD brings to your portable computing experience.
Step 1: Preparation
Before you begin the process of installing a solid state drive (SSD) in your laptop, it’s crucial to properly prepare. This step ensures that you have everything you need and minimizes any potential issues during the installation. Follow the steps below to ensure a smooth and successful installation:
1. Gather the Necessary Tools: Before you start, gather all the tools and materials you will need. You typically require an SSD that is compatible with your laptop, a small Phillips-head screwdriver (or a tool specifically designed for laptop screws), and any additional components or adapters that may be required. Refer to your laptop’s manual or manufacturer’s website to ensure you have the correct tools.
2. Back Up Your Data: Before making any changes to your laptop, it’s essential to back up your data. This step ensures that your important files and documents are safe in case of any unforeseen issues during the installation process. Use an external hard drive, cloud storage, or other backup solutions to store your data securely.
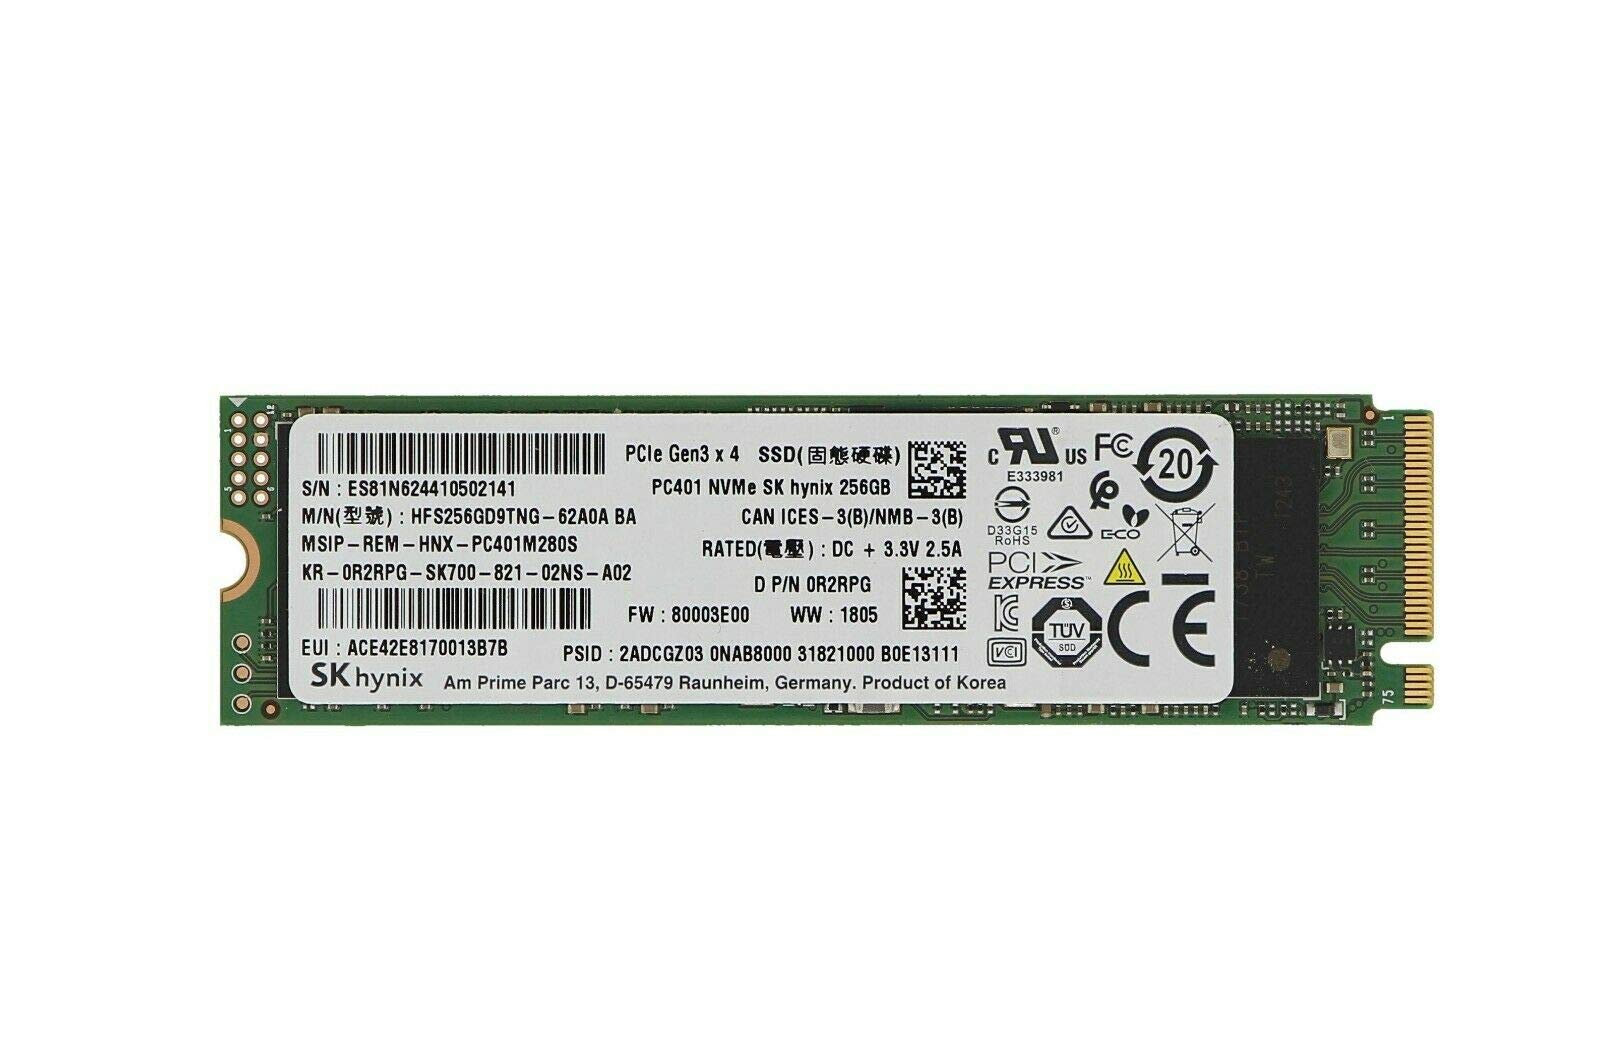
3. Confirm Compatibility: Verify that the SSD you have chosen is compatible with your laptop. Check the specifications of your laptop and the SSD to ensure they are compatible in terms of size, connection type (usually SATA or PCIe), and form factor (e.g., 2.5-inch, M.2, or mSATA). This compatibility check is essential to avoid any issues during installation.
4. Read the Laptop Manual: Consult your laptop’s manual or manufacturer’s website for specific instructions related to upgrading or replacing the storage drive. The manual provides valuable information about accessing the storage drive bay, locating the screws, and other specific instructions that may apply to your laptop model.
5. Take Precautions: Before starting the installation, take precautions to protect yourself and your laptop from static electricity. Wear an anti-static wrist strap, or regularly touch a grounded metal surface, to discharge any static electricity. This step prevents any potential damage to sensitive electronic components.
By following these preparation steps, you can ensure a smooth and successful installation of the SSD in your laptop. Proper preparation enables you to have all the necessary tools, back up your important data, verify compatibility, and take precautions to protect your laptop. With these steps completed, you are ready to move on to the next phase of the installation process.
Step 2: Removing the Existing Hard Drive
Before installing a solid state drive (SSD) in your laptop, you need to remove the existing hard drive. This step requires careful handling to ensure the safe removal of the drive. Follow the steps below to successfully remove the existing hard drive from your laptop:
1. Power Off and Disconnect: Shut down your laptop and unplug the power cord. If your laptop has a removable battery, remove it as well. It’s crucial to disconnect all power sources to prevent any potential damage to the laptop or yourself.
2. Locate the Hard Drive Bay: Identify the location of the hard drive bay in your laptop. Refer to your laptop’s manual or manufacturer’s website if you are unsure. The hard drive bay is usually located on the bottom of the laptop and is secured by screws or a removable cover.
3. Remove the Hard Drive Bay Cover: If there is a cover over the hard drive bay, use a small screwdriver to unscrew the screws securing the cover. Set the screws aside in a safe place. Slide the cover off to expose the internal components.
4. Disconnect Cables: Locate the existing hard drive within the bay. It will be connected with a SATA data cable and a power connector. Gently unplug the SATA data cable and power connector from the hard drive. Take care not to damage the connectors or the cables.
5. Remove the Hard Drive: Most laptops secure the hard drive with screws or brackets. Using a screwdriver, unscrew the screws (usually 2 or 4) securing the hard drive in place. If there are brackets holding the hard drive, remove them as well. Carefully slide the hard drive out of the bay, making sure not to force it or cause any damage to the laptop or drive.
6. Store the Hard Drive: If you are replacing the hard drive with the SSD, store it in an antistatic bag or container to protect it from any potential damage. You may want to keep the hard drive as a backup or use an external enclosure to repurpose it for additional storage or backup purposes.
By following these steps, you have successfully removed the existing hard drive from your laptop. Take care to properly disconnect the cables and remove any securing screws or brackets. With the hard drive safely removed, you are now ready to proceed with the installation of the SSD in your laptop.
Step 3: Installing the SSD
With the existing hard drive successfully removed from your laptop, it’s time to install the solid state drive (SSD) in its place. The installation process ensures that the SSD is securely connected and properly positioned within the laptop. Follow the steps below to install the SSD in your laptop:
1. Prepare the SSD: Before installing the SSD, make sure it is compatible with your laptop in terms of size, connection type (SATA or PCIe), and form factor (2.5-inch, M.2, or mSATA). If necessary, attach any additional components or adapters to the SSD to make it compatible with your laptop. Refer to the SSD’s manual or manufacturer’s instructions for specific guidance.
2. Insert the SSD: Carefully insert the SSD into the empty drive bay in your laptop. Ensure that it is inserted in the correct orientation, aligning the connector pins with the socket in the laptop. Gently push the SSD into the socket until it is fully seated. Depending on the laptop model and form factor of the SSD, it may require a bit of force, but exercise caution to avoid causing any damage.
3. Secure the SSD: Once the SSD is properly inserted, secure it in place. Some laptops have dedicated screws to hold the SSD in position, while others use brackets or clips. Refer to your laptop’s manual or manufacturer’s instructions to determine the specific method for securing the SSD. Use the included screws or any existing brackets to firmly hold the SSD in place.
4. Connect the Cables: Attach the SATA data cable to the SSD by connecting it to the appropriate socket. Ensure that the cable is properly aligned and securely plugged in. Next, connect the power cable to the SSD, providing it with the necessary power for operation. Again, confirm a secure connection to avoid any issues later on.
5. Inspect and Test: Take a moment to visually inspect the SSD and cables, ensuring that they are properly connected and securely in place. Make sure no cables are kinked or obstructing the airflow within the laptop. Once you are satisfied with the installation, proceed to the next step of reassembling the laptop.
By following these steps, you have successfully installed the SSD in your laptop. Make sure the SSD is securely connected, properly positioned, and firmly held in place. With the SSD in position, you are one step closer to enjoying the faster speeds and improved performance that it brings to your laptop.
Step 4: Reassembling the Laptop
Now that you have successfully installed the solid state drive (SSD) in your laptop, it’s time to reassemble it. Reassembling the laptop involves putting the components back together and securing them in place. Following the proper reassembly process ensures the laptop functions properly and avoids any potential issues. Follow the steps below to reassemble your laptop after installing the SSD:
1. Connect the Cables: Take note of any cables that you disconnected during the disassembly process. Carefully reconnect these cables, ensuring they are properly aligned and securely plugged into the corresponding sockets. Make sure they are not tangled or interfering with any other components.
2. Replace the Battery: If you removed the laptop’s battery earlier, now is the time to reinsert it. Align the battery with the designated slot and gently press it down until it is securely in place. If your laptop has a non-removable battery, skip this step.
3. Secure Any Additional Components: If you had to remove any additional components, such as the bottom cover or access panels, reattach them using the screws or clips that were removed. Ensure they are tightly secured, but be cautious not to overtighten the screws as it may damage the laptop’s housing.
4. Double-Check Connections: Before fully closing the laptop, double-check all cable connections, especially those involving the display, keyboard, touchpad, and any other important components. Ensure they are securely plugged in and properly seated. This step ensures that all internal connections are intact and will prevent any functionality issues.
5. Secure the Laptop Case: Once you have confirmed all connections, gently put the laptop case back together. Align the edges and press down firmly to close the case. Use the appropriate screws to secure the case in place. Make sure to tighten the screws evenly but avoid overtightening, as it may cause damage to the laptop’s housing.
6. Power On and Test: With the laptop reassembled, connect the power adapter and turn on the laptop. Verify that the SSD is properly recognized and that the laptop boots up correctly. Additionally, test the performance of the laptop to ensure everything is functioning as expected. Run a few programs and open files to see the improved speed and performance offered by the new SSD.
By following these steps, you have successfully reassembled your laptop after installing the SSD. Ensure all cables are securely connected, components are properly secured, and the laptop case is closed tightly. With the reassembly complete, your laptop is now ready to provide you with a faster and more efficient computing experience with the new SSD.
Step 5: Configuring BIOS and Transferring Data
After reassembling your laptop and installing the solid state drive (SSD), the final steps involve configuring the BIOS settings and transferring your data to the new drive. This ensures that the laptop recognizes the SSD correctly and that your files and operating system are properly migrated. Follow the steps below to successfully complete this process:
1. Power On and Enter BIOS: Turn on your laptop and enter the BIOS settings by pressing the designated key during startup. The key to access the BIOS varies depending on the laptop manufacturer and model. Common keys include Del, F2, or F12. Consult the laptop’s manual or manufacturer’s website for the correct key.
2. Navigate to the Boot Order: Within the BIOS settings, navigate to the boot order or boot priority section. Here, you can specify the order in which the laptop checks for bootable devices. Ensure that the SSD is listed as the top priority, so the laptop boots from the SSD and takes advantage of its speed and performance. Save the changes and exit the BIOS settings.
3. Power Off and Connect External Storage: Power off your laptop and connect any external storage devices that contain your data backup or migration files. These devices could be USB drives, external hard drives, or cloud storage services. Make sure they are properly connected and accessible by the laptop.
4. Data Transfer Options: There are different methods to transfer your data to the new SSD. You can use software such as disk cloning software to create an exact copy of your existing drive onto the SSD. Alternatively, you can perform a fresh installation of the operating system on the SSD and manually transfer your files over. Choose the method that suits your needs and preferences.
5. Transferring Data: If you choose to clone your existing drive, follow the software’s instructions to initiate the cloning process. It will create an exact copy of your operating system, files, and settings on the new SSD. If you prefer a clean installation, install the operating system directly onto the SSD and then manually transfer your files using your backup or external storage devices.
6. Verify Data Transfer: After the data transfer is complete, double-check that all your files, applications, and settings have been successfully transferred to the SSD. Ensure that everything is functioning correctly and that your important data is intact. If any issues arise, consult your backup or seek further assistance.
By following these steps, you have successfully configured the BIOS settings to recognize the SSD and transferred your data to the new drive. The laptop will now boot from the SSD, offering improved speed and performance. Enjoy the benefits of faster data access and smoother operation with your newly installed SSD.
Conclusion
Congratulations on successfully installing a solid state drive (SSD) in your computer or laptop! By upgrading to an SSD, you have unlocked a new level of speed, performance, and efficiency in your computing experience. The benefits of the SSD, such as faster boot times, quicker application launches, and improved overall system responsiveness, will greatly enhance your productivity and enjoyment.
Throughout the installation process, you carefully followed the steps for preparing, removing the existing drive, installing the SSD, reassembling the system, configuring the BIOS, and transferring your data. These steps ensure a smooth and successful installation, allowing you to maximize the benefits of your new SSD.
Remember to regularly back up your data to ensure its safety and to keep your system running smoothly. Also, don’t forget to keep your SSD firmware up to date to take advantage of the latest performance improvements and bug fixes.
If you encountered any difficulties during the installation process or have questions about your SSD, consult the user manual or the manufacturer’s support resources. They can provide further assistance and guidance specific to your device.
Enjoy the improved performance and reliability that your new SSD brings to your computer or laptop. With faster speeds and increased storage capacity, you are equipped to tackle demanding tasks, enjoy multimedia content, and make your computing experience seamlessly efficient. Cheers to a faster and more efficient computing journey with your newly installed SSD!