Introduction
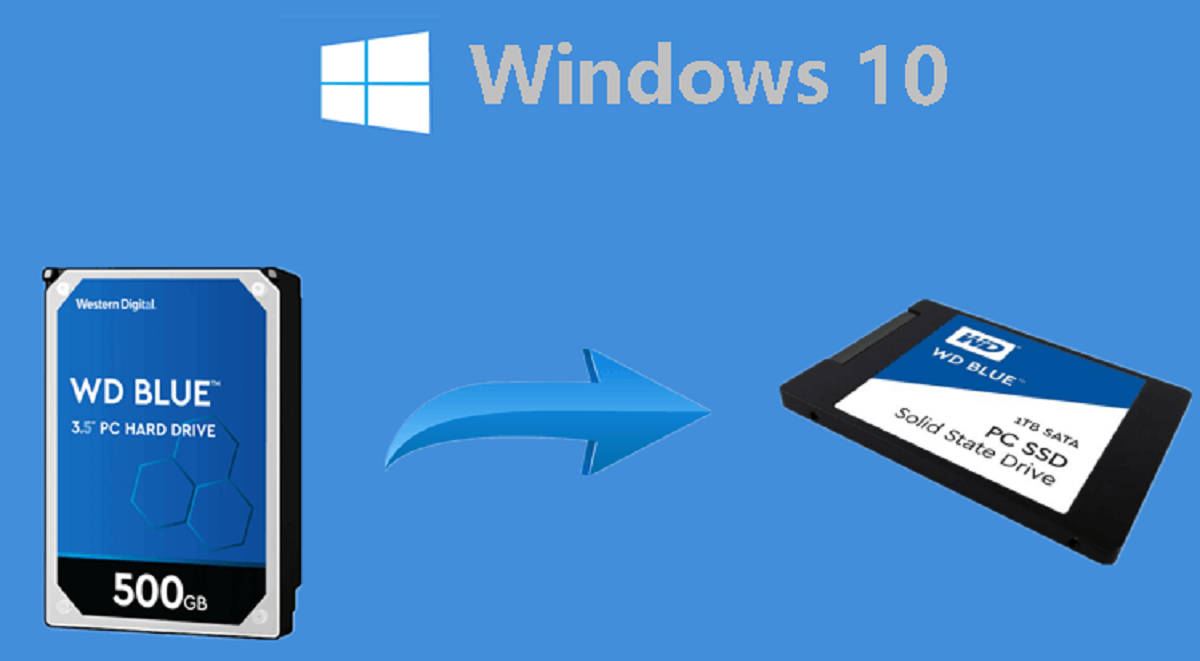
Welcome to our guide on how to install Windows 10 on a Solid State Drive (SSD). Upgrading your computer’s hard drive to an SSD can significantly improve its overall performance and speed. Windows 10, the latest version of Microsoft’s operating system, is designed to take advantage of the capabilities of modern SSDs, providing a faster and smoother computing experience.
In this article, we will walk you through the step-by-step process of installing Windows 10 on an SSD. We will cover everything from preparing for installation to post-installation steps to ensure a successful and optimized setup. Whether you are upgrading an existing computer or building a new one, this guide will help you make the most of your SSD and get Windows 10 up and running.
Before we dive into the installation process, it’s important to understand the benefits of using an SSD over a traditional hard drive. Unlike traditional hard drives that use spinning disks to read and write data, SSDs are based on flash memory technology, providing faster data access times and improved reliability. This means faster boot times, faster application loading, and smoother overall system performance.
While the installation process may seem daunting, rest assured that it can be straightforward if you follow the steps carefully. We will guide you through each stage, ensuring that you have a clear understanding of what needs to be done. So, let’s get started on transforming your computer into a high-speed powerhouse with Windows 10 and an SSD!
Preparing for Installation
Before diving into the Windows 10 installation process on your SSD, there are a few important steps you need to take to ensure a smooth and successful installation.
1. Backing Up Your Data
Before making any changes to your computer’s storage system, it’s crucial to back up all your important files and data. This is a precautionary measure to protect your data in case anything goes wrong during the installation process. You can use an external hard drive, cloud storage, or a backup software to create a secure copy of your files.
2. Checking System Requirements
Before installing Windows 10 on your SSD, ensure that your computer meets the minimum system requirements. Microsoft recommends a 1 GHz processor, 2 GB of RAM, and at least 20 GB of free space on your SSD. It’s also important to check compatibility with your computer’s hardware components, such as graphics cards and peripherals.
3. Acquiring a Windows 10 Installation Disc or ISO File
To install Windows 10, you will need either a physical installation disc or an ISO file. If you don’t have a disc, you can download the ISO file from the official Microsoft website. Make sure to choose the correct version and edition of Windows 10 that matches your license or requirements.
4. Creating a Bootable USB Drive
If you have an ISO file, you will need to create a bootable USB drive to install Windows 10. This can be done using various software tools like Rufus or the official Windows USB/DVD Download Tool. Follow the instructions provided by the tool to create a bootable USB drive.
By following these preparation steps, you will be ready to begin the Windows 10 installation process on your SSD. Ensuring that you have backed up your data, checked system requirements, and acquired the necessary installation tools will help streamline the installation and protect your valuable files. Next, we will guide you through the process of installing the SSD and setting up the BIOS.
Backing Up Your Data
Before embarking on any major changes to your computer, such as installing Windows 10 on an SSD, it is crucial to back up all your important data. This step ensures that even if something unexpected occurs during the installation process, your files will remain safe and secure.
There are several methods you can use to back up your data:
1. External Hard Drive or SSD:
One of the simplest ways to back up your data is by using an external hard drive or SSD. Simply connect the external storage device to your computer and copy all your important files onto it. Make sure to create separate folders or categories to keep everything organized.
2. Cloud Storage Services:
Cloud storage services like Google Drive, Dropbox, or OneDrive offer secure and convenient options for backing up your data. You can upload your files to the cloud and access them from any device with an internet connection. Some services even offer automatic backup options, ensuring that your files are always up to date.
3. Backup Software:
An alternative option is to use backup software to create a system image or create regular backups of your important files. These software tools are designed to simplify the backup process and ensure that you don’t miss any critical data.
When backing up your data, it’s important to consider the following:
1. Determine What Data to Back Up:
Take the time to assess which files and folders are essential to you. Focus on documents, photos, videos, and any other irreplaceable data. Avoid backing up unnecessary files to save time and storage space.
2. Verify Your Backups:
After creating the backups, take a moment to verify that all the important files have been successfully copied. Double-check that the backup device or cloud storage is functioning correctly and that your data is accessible.
3. Regularly Update Your Backups:
Once you have completed the initial backup, it is crucial to regularly update your backups to include any new or modified files. Set a schedule for backing up your data to ensure that you never lose the most recent versions of your files.
Backing up your data before performing any major installation or system changes is a fundamental practice to protect your important files. By following these steps and choosing a backup method that suits your needs, you can proceed with the installation of Windows 10 on your SSD with peace of mind.
Checking System Requirements
Before proceeding with the installation of Windows 10 on your Solid State Drive (SSD), it is vital to ensure that your computer meets the minimum system requirements. Checking the system requirements will help guarantee the compatibility and smooth functioning of Windows 10 on your machine.
The minimum system requirements for Windows 10 are as follows:
- Processor: A 1 GHz or faster processor is recommended.
- Memory (RAM): You should have at least 2 GB of RAM for 64-bit systems and 1 GB for 32-bit systems.
- Storage Space: Windows 10 requires a minimum of 20 GB of free space on your SSD.
- Graphics Card: Your computer should have a DirectX 9 graphics device or later with a WDDM 1.0 driver.
- Display: A screen resolution of at least 800×600 pixels is recommended.
- Internet Connection: An internet connection is necessary for certain Windows 10 functions and updates.
While these are the minimum requirements, it is advisable to exceed them to achieve optimal performance. More RAM, a faster processor, and additional storage space will enhance the overall experience of using Windows 10.
In addition to the hardware requirements, you should also consider software compatibility. Ensure that the software programs and applications you rely on are compatible with Windows 10. Visit the manufacturers’ websites or check compatibility databases to verify that your essential software will work effectively on the new operating system.
Before proceeding with the installation, it is worth noting that some older hardware may not have fully compatible drivers for Windows 10. It is crucial to do some research on the manufacturer’s website or consult with their customer support to ensure that your hardware components, such as printers, scanners, or specialized peripherals, will be fully functional on Windows 10.
By checking the system requirements and verifying compatibility with your hardware and software, you can avoid any potential issues or incompatibilities during the installation process. It is essential to have a system that meets or exceeds the minimum requirements for a smooth and efficient Windows 10 experience.
Acquiring a Windows 10 Installation Disc or ISO File
To install Windows 10 on your Solid State Drive (SSD), you will need either a physical installation disc or an ISO file. Here are the steps to acquire the necessary installation media:
1. Official Microsoft Website:
The official Microsoft website provides the option to download a Windows 10 ISO file. Visit the Microsoft website and navigate to the Windows 10 download page. Choose the edition and language that is suitable for your needs. The website will guide you through the process of downloading the ISO file.
2. Using the Media Creation Tool:
If you prefer a more automated process, Microsoft offers the Media Creation Tool. This tool allows you to create a bootable USB drive or download an ISO file directly. Download and run the Media Creation Tool from the Microsoft website, and follow the on-screen instructions to create the installation media.
3. Physical Installation Disc:
If you prefer a physical copy of Windows 10, you can purchase an installation disc from various sources, including online retailers or local computer stores. Ensure that you choose the correct version and edition of Windows 10 that matches your license or requirements.
When acquiring the installation media, it is important to consider the following:
1. Edition and Version:
Make sure to select the edition and version of Windows 10 that aligns with your needs. There are different editions available, such as Home, Pro, and Education. Choose the one that best suits your requirements.
2. License:
Ensure that you have a valid license for Windows 10. The installation media itself does not include the license. You will need to either purchase a license or use an existing valid license to activate Windows 10 during the installation process.
3. Storage Medium:
Decide whether you want to use a USB drive or an installation disc. USB drives are more versatile and convenient, as they can be reused and easily created using the ISO file. However, if you prefer a physical copy, an installation disc may be the preferred choice.
Acquiring a Windows 10 installation disc or ISO file is an essential step in the installation process. By following these steps and ensuring that you have the correct edition, valid license, and desired storage medium, you will be ready to proceed with installing Windows 10 on your SSD.
Creating a Bootable USB Drive
Before you can install Windows 10 on your Solid State Drive (SSD), you will need to create a bootable USB drive. This will allow you to boot your computer from the USB drive and begin the installation process. Here are the steps to create a bootable USB drive:
1. Choose a USB Drive:
Select a USB drive with sufficient capacity to hold the Windows 10 installation files. At least an 8GB USB drive is recommended to ensure you have enough space. Make sure the USB drive doesn’t contain any important data, as creating a bootable USB will erase all existing data.
2. Obtain the Windows 10 ISO File:
If you haven’t already, download the Windows 10 ISO file from the official Microsoft website or through the Media Creation Tool. Save the ISO file to a location on your computer where you can easily access it.
3. Use a USB/DVD Download Tool:
Microsoft provides a tool called “Windows USB/DVD Download Tool” that simplifies the process of creating a bootable USB drive. Download and install the tool, then launch it.
4. Select the Windows 10 ISO File:
In the Windows USB/DVD Download Tool, click “Browse” and navigate to the location where you saved the Windows 10 ISO file. Select the file and click “Next.”
5. Choose the USB Drive:
On the next screen, choose the option to “USB device” as the media type. Make sure the correct USB drive is selected from the drop-down menu. Then, click “Begin copying.”
6. Wait for the Process to Complete:
The tool will now begin the process of creating the bootable USB drive. It will copy the necessary files from the ISO to the USB drive, which may take several minutes. Be patient and do not remove the USB drive until the process is complete.
7. Boot from the USB Drive:
Once the bootable USB drive is created, restart your computer and enter the BIOS settings. Set the USB drive as the primary boot device. Save the changes and exit the BIOS. Your computer will now boot from the USB drive.
With the bootable USB drive ready, you are now prepared to begin the installation process of Windows 10 on your SSD. Follow the on-screen instructions and prompts to complete the installation. Creating a bootable USB drive is a crucial step that allows you to conveniently install Windows 10 on your SSD with ease and efficiency.
Installing the SSD
Before installing Windows 10 on your Solid State Drive (SSD), you’ll need to physically install the SSD into your computer. Here are the steps to successfully install the SSD:
1. Prepare Your Workstation:
Ensure that your workspace is clean, well-lit, and free from static electricity. Gather the necessary tools, including a screwdriver, and power off your computer.
2. Locate the Drive Bay:
Identify the drive bay where the SSD will be installed. This will vary depending on the type and model of your computer. Most desktop computers have designated slots specifically for SSD storage.
3. Remove the Side Panel or Case:
If you’re working on a desktop computer, remove the side panel or case. This will provide access to the interior of the computer where you can install the SSD.
4. Connect the Data and Power Cables:
Locate the SATA data and power cables. Connect one end of the SATA data cable to the SSD and the other end to the SATA port on the motherboard. Connect the SATA power cable from the power supply to the SSD.
5. Mount the SSD:
If the drive bay has brackets or cages, secure the SSD into place using screws provided. If the bay uses a tool-less installation design, simply slide the SSD into the slot until it clicks into place.
6. Reassemble Your Computer:
After ensuring that the SSD is securely installed, reattach the side panel or case of your computer. Make sure all connections are secure and that there are no loose cables.
7. Power On Your Computer:
Once you’ve reassembled your computer, power it on and enter the BIOS settings. Check if the SSD is detected by the computer. If not, verify the connections and ensure that you have installed the SSD correctly.
With the SSD successfully installed into your computer, you are now ready to proceed with the installation of Windows 10. The next steps will involve setting up the BIOS and initiating the Windows 10 installation process, which will be covered in the following sections.
Installing the SSD is an essential step in upgrading your computer’s storage system and ensuring optimal performance. By following these steps carefully, you can enjoy the benefits of faster data access and improved overall performance with your newly installed SSD.
Setting Up the BIOS
Before installing Windows 10 on your Solid State Drive (SSD), it is important to properly configure your computer’s BIOS settings. The BIOS (Basic Input/Output System) is firmware that controls the basic functions of your computer and provides a means of communication between the operating system and the hardware.
Here are the steps to set up the BIOS for installing Windows 10 on your SSD:
1. Restart Your Computer:
Save any open files and restart your computer. As it boots up, you’ll need to access the BIOS settings. Most computers prompt you to press a specific key, such as F2, Del, or Esc, during the startup process to enter the BIOS.
2. Access the BIOS Setup:
Once you’ve entered the BIOS, use the arrow keys on your keyboard to navigate through the different BIOS settings. The exact layout and options may vary depending on your computer’s manufacturer and model.
3. Set Boot Priority:
Navigate to the “Boot” or “Boot Options” section in the BIOS. Set the boot priority to prioritize the USB drive (or DVD drive if using an installation disc) where the Windows 10 installation media is located. This ensures that your computer boots from the USB drive or installation disc.
4. Enable AHCI Mode:
In the BIOS, look for the SATA Configuration or Storage Configuration settings. Enable AHCI (Advanced Host Controller Interface) mode for the SATA ports that your SSD is connected to. AHCI allows for improved SSD performance and additional features.
5. Save and Exit:
After making the necessary changes, save the BIOS settings and exit the setup. This is typically done by pressing the “F10” key on your keyboard or following the on-screen prompts. The computer will restart.
By configuring the BIOS settings correctly, you ensure that your computer boots from the correct device and that your SSD is properly recognized. This is crucial for a successful Windows 10 installation on your SSD. With the BIOS set up correctly, you can now proceed with the installation of Windows 10 on your SSD by following the on-screen prompts.
Note: The specific steps and options in the BIOS may vary depending on your computer’s manufacturer and model. Refer to the documentation provided by the manufacturer for precise instructions on accessing and navigating the BIOS settings.
Installing Windows 10
Now that you have prepared your computer, acquired the necessary installation media, installed the SSD, and set up the BIOS, you are ready to begin the installation of Windows 10 on your Solid State Drive (SSD). Follow these steps to successfully install Windows 10:
1. Boot from the Installation Media:
Insert the bootable USB drive or installation disc into your computer. Restart your computer and enter the BIOS settings. Make sure the boot priority is set to boot from the installation media. Save the changes and exit the BIOS. Your computer will then boot from the installation media.
2. Language and Region Settings:
Once the installation process starts, you will be prompted to select your language, time format, and keyboard input method. Choose the settings that apply to your region and click “Next” to proceed.
3. Product Key:
If prompted, enter the product key for your copy of Windows 10. This is typically found on a sticker attached to your computer or in the confirmation email if you purchased a digital copy. Alternatively, you can choose to skip this step and enter the product key later.
4. License Agreement:
Read and accept the license terms and conditions to continue with the installation. It is important to understand and agree to the terms before proceeding.
5. Select the Installation Type:
You will be presented with different installation options. Choose “Custom: Install Windows Only” to perform a clean installation on your SSD. This option allows you to select the SSD as the destination drive for Windows 10.
6. Select the SSD:
In the next step, you will see a list of available drives. Select your SSD from the list and click “Next” to continue. This will initiate the installation of Windows 10 on the selected SSD.
7. Install Windows 10:
Windows 10 will now begin to install on your SSD. The installation process may take some time, so have patience and avoid restarting or turning off your computer during the process. Your computer may restart multiple times as part of the installation process.
8. Set Up Windows 10:
Follow the on-screen prompts to complete the initial setup of Windows 10. This includes configuring your region and language preferences, creating a user account, and customizing settings according to your preferences.
9. Windows Updates:
Once the initial setup is complete, Windows 10 will check for updates and download any available updates. It is recommended to keep your system up to date to ensure security and functionality.
After completing these steps, you will have successfully installed Windows 10 on your SSD. Enjoy the faster performance and improved overall experience that comes with using an SSD. Remember to reinstall any necessary software, restore your backed-up files, and configure settings to personalize your Windows 10 setup according to your needs.
Post-Installation Steps
Congratulations on successfully installing Windows 10 on your Solid State Drive (SSD)! While the installation process is complete, there are a few post-installation steps you can take to optimize your system and ensure a smooth experience:
1. Install Device Drivers:
After installing Windows 10, it is essential to install the necessary device drivers for your hardware components. Check the manufacturer’s website for the latest drivers specific to your computer model. Install drivers for components such as graphics cards, sound cards, network adapters, and any other peripherals.
2. Update Windows:
Keeping your operating system up to date is crucial for security and performance. Go to the “Settings” app, click on “Update & Security,” and then select “Windows Update.” Download and install any available updates to ensure you have the latest features and bug fixes for Windows 10.
3. Install Essential Software:
Install the software programs that you regularly use, such as web browsers, productivity tools, media players, and antivirus software. Be careful to download software only from reputable sources to avoid malware or unwanted programs.
4. Restore Backed-Up Data:
If you backed up your files before installing Windows 10, it’s time to restore them to your new system. Copy your important files, documents, photos, and other data from your backup storage device to the appropriate folders on your SSD.
5. Customize Settings:
Take some time to adjust the settings in Windows 10 to suit your preferences. Personalize your desktop background, screen resolution, power settings, and other options according to your needs. Explore the “Settings” app to optimize various aspects of your operating system.
6. Install Additional Software:
Install any additional software programs or applications that you require for work, entertainment, or other purposes. Consider productivity tools, creative software, or utilities that can enhance your computing experience.
7. Set Up Data Backup:
To protect your data, create a regular backup routine. Set up automated backups using cloud storage services or backup software. Regularly backup your important files and folders to ensure you have a copy in case of hardware failure or data loss.
By following these post-installation steps, you can fine-tune your Windows 10 system for optimal performance and customize it according to your preferences. Remember to periodically check for updates, optimize your system, and maintain regular backups to keep your SSD and Windows 10 installation in top shape.
Conclusion
Congratulations on successfully installing Windows 10 on your Solid State Drive (SSD)! The installation process may have seemed daunting at first, but by following the steps outlined in this guide, you have successfully upgraded your computer’s storage system and set up Windows 10 for optimal performance.
By installing Windows 10 on an SSD, you have unlocked a world of benefits, including faster boot times, improved application loading speed, and overall enhanced system responsiveness. The speed and efficiency of your computer will be greatly improved, allowing you to work, play, and accomplish tasks more quickly and smoothly.
Throughout this guide, we emphasized the importance of key steps such as backing up your data, checking system requirements, acquiring the necessary installation media, creating a bootable USB drive, installing the SSD, setting up the BIOS, and finally installing Windows 10 itself. These steps ensure that your installation process goes smoothly and that you are left with a stable and optimized operating system.
However, the installation process is just the beginning. To truly make the most of your new Windows 10 installation, consider the post-installation steps outlined in this guide. By installing device drivers, updating Windows, restoring backed-up data, customizing settings, and installing additional software, you can tailor your Windows 10 experience to suit your needs and preferences.
Remember to periodically update your system, regularly back up your data, and maintain good computing habits to keep your Windows 10 installation running smoothly and securely. Stay vigilant by using reputable antivirus software, practicing safe browsing habits, and keeping a clean and organized system.
Thank you for following this guide on how to install Windows 10 on an SSD. We hope that the information provided has been helpful in upgrading your computer and optimizing its performance. Enjoy the speed and efficiency that Windows 10 on an SSD provides, and make the most of your digital experiences!