Introduction
File Explorer is an essential tool in Windows 10 that allows users to navigate through their files and folders in a user-friendly and intuitive way. Whether you are searching for a document, organizing your photos, or managing your files, File Explorer provides a central hub for all your file management needs.
In this article, we will explore the various ways to access File Explorer in Windows 10 and learn how to make the most out of its features. Whether you are a novice user or an experienced professional, understanding File Explorer’s functionalities can greatly enhance your productivity and help you stay organized.
By delving into the different methods of opening File Explorer, we will ensure that you have a comprehensive understanding of how to access this powerful tool. From locating File Explorer in the Start Menu to utilizing the search bar and pinning it to the taskbar, we will cover it all.
Once we have opened File Explorer, we will guide you through the process of navigating its interface, including accessing drives and folders, and utilizing the ribbon menu for advanced actions. You will discover how to customize File Explorer’s settings according to your preferences, allowing you to tailor your file management experience to meet your specific needs.
Whether you are a student, professional, or casual user, the ability to effectively navigate and manage your files is crucial for a seamless computing experience. By understanding the ins and outs of File Explorer in Windows 10, you will gain the necessary knowledge and skills to efficiently organize, locate, and manage your files and folders.
So, without further ado, let’s dive into the world of File Explorer and unlock its full potential in Windows 10.
Understanding File Explorer in Windows 10
File Explorer is a key component of the Windows 10 operating system that provides users with a graphical user interface (GUI) for managing files and folders on their computer. It serves as a central hub where you can navigate through your local storage, external storage devices, network connections, and cloud storage services.
With File Explorer, you can perform various actions such as creating new folders, copying, moving, and renaming files, as well as accessing file properties and changing file attributes. Its intuitive interface allows you to visually browse through your files and organize them in a hierarchical manner, making it easier to locate and work with your documents, images, videos, and other file types.
In addition to basic file management tasks, File Explorer also provides features like file searching, file compression, and file sharing. You can use the search bar in the top-right corner to quickly locate specific files or folders by entering keywords or file names. File compression allows you to reduce the size of multiple files into a single compressed file, making it easier to store or share them. Furthermore, you can easily share files and folders with others by using the sharing options available in File Explorer.
File Explorer also integrates with various cloud storage services, such as OneDrive, Dropbox, and Google Drive, allowing you to access and manage your cloud-stored files seamlessly. This integration provides a convenient way to back up your files and access them from any device connected to the internet.
Understanding the different components of File Explorer is essential for efficient file management in Windows 10. The main window of File Explorer consists of a navigation pane on the left side, which displays a hierarchical structure of your drives, folders, and libraries. The content pane on the right side displays the contents of the selected folder or drive, allowing you to view, open, and interact with your files. At the top of the File Explorer window, you will find the toolbar, which contains various buttons and commands for performing actions on files and folders.
In the next sections, we will explore the various ways to open File Explorer in Windows 10 and delve into its functionalities in more detail. By familiarizing yourself with the different aspects of File Explorer, you will be able to navigate, manage, and organize your files efficiently and effectively.
Different Ways to Open File Explorer
Opening File Explorer in Windows 10 is a breeze, and there are multiple ways to access this essential file management tool. Whether you prefer using the Start Menu, the search bar, or even pinning it to the taskbar for quick access, Windows 10 offers several convenient methods to open File Explorer.
The most straightforward way to open File Explorer is through the Start Menu. Simply click on the Start button located at the bottom-left corner of your screen, and then click on the “File Explorer” option from the list of available apps. Alternatively, you can press the “Windows key + E” on your keyboard as a keyboard shortcut to instantly open File Explorer.
Another way to open File Explorer is by using the search bar. Located next to the Start button, the search bar enables you to search for various items on your computer, including applications and files. To open File Explorer, type “File Explorer” in the search bar and click on the corresponding result.
If you find yourself frequently using File Explorer, you may want to consider pinning it to the taskbar. This way, you can access File Explorer with just a single click. To pin File Explorer to the taskbar, open File Explorer using one of the previously mentioned methods, right-click on the File Explorer icon in the taskbar, and then select “Pin to taskbar” from the context menu.
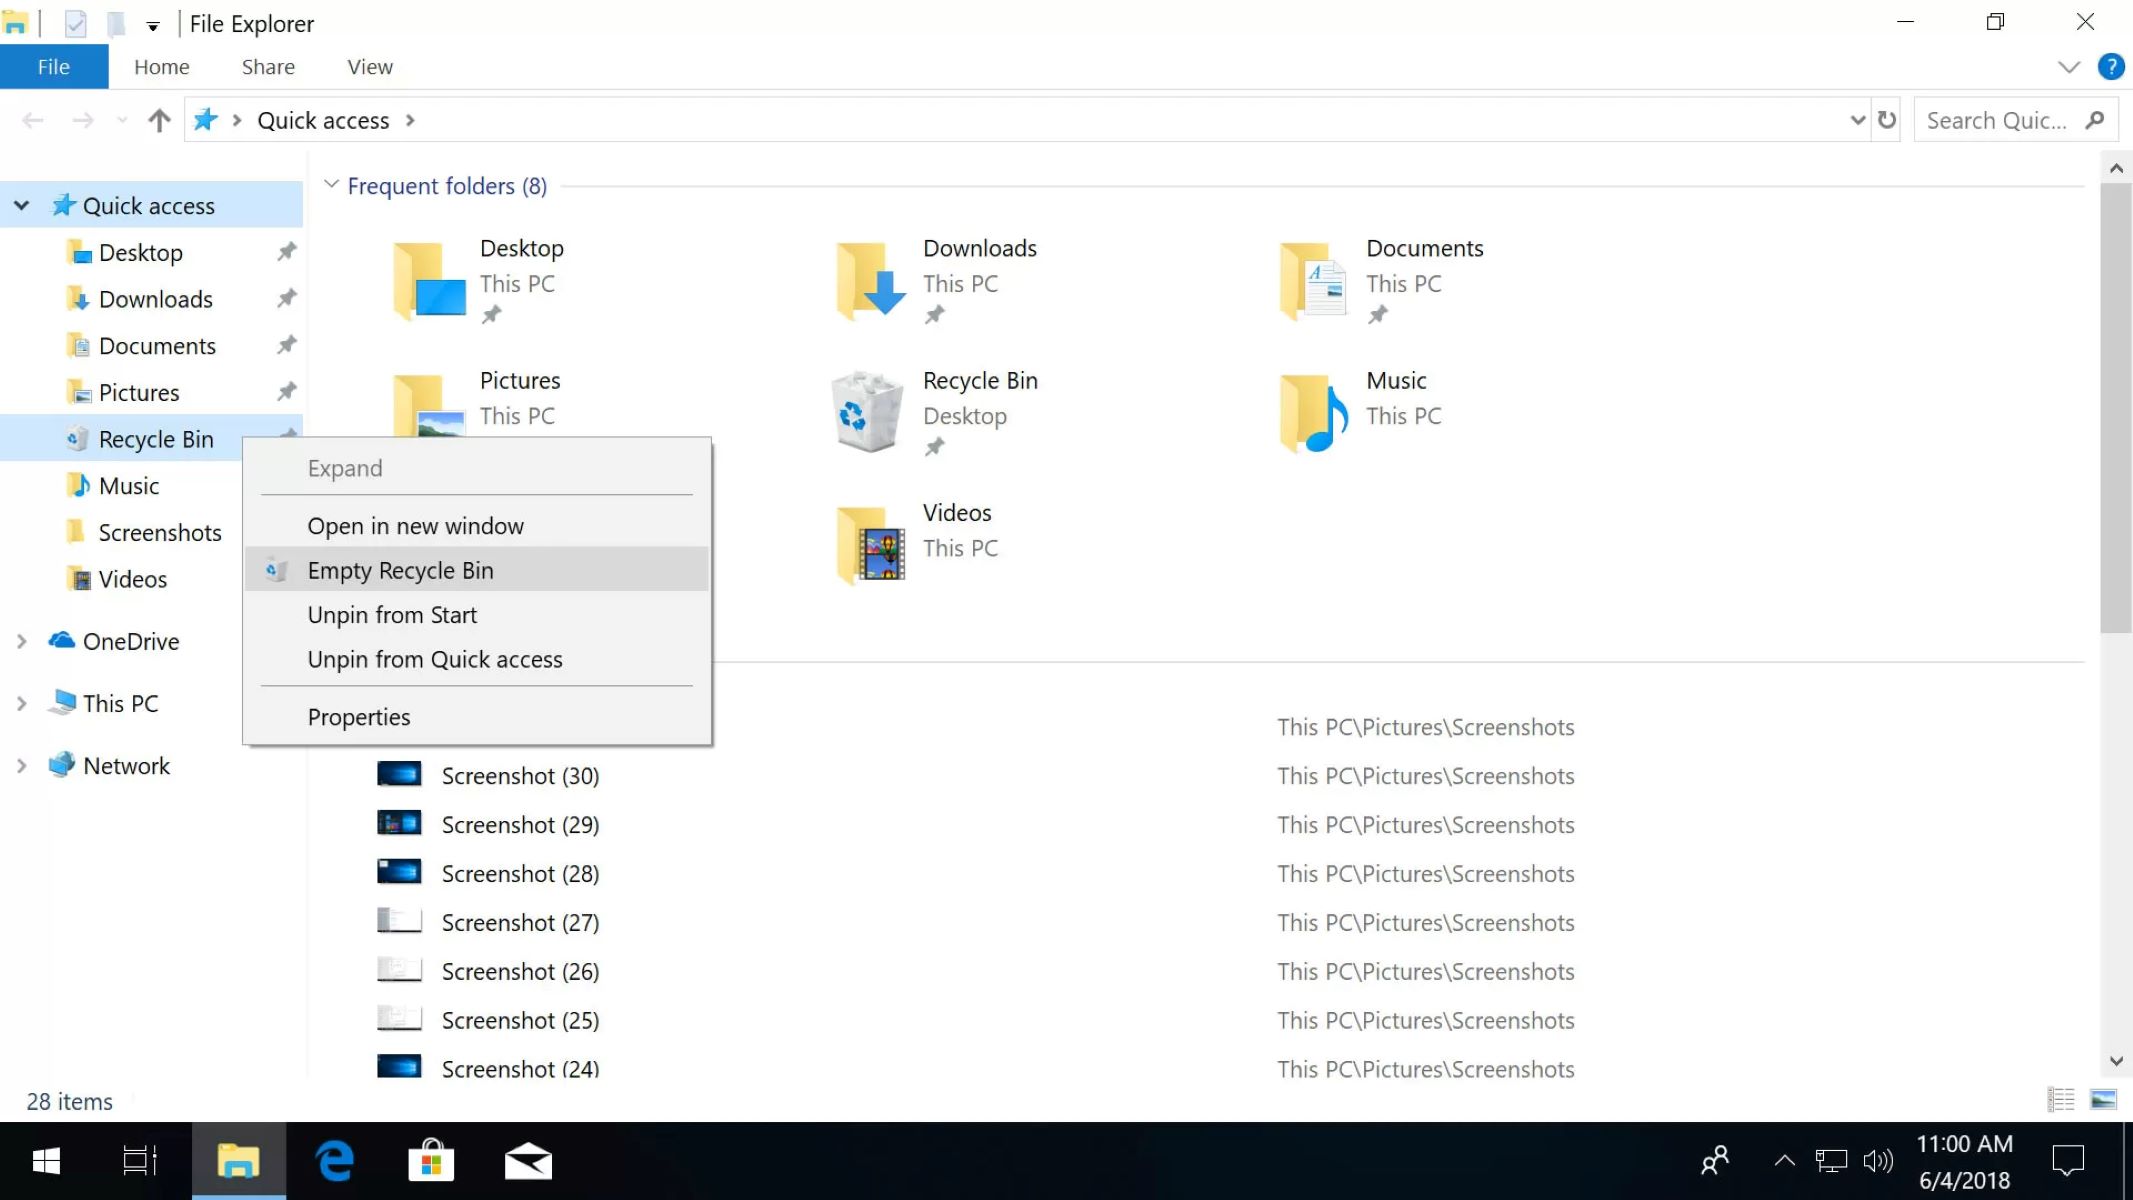
In addition, you can also access File Explorer from the Quick Access menu. Right-click on the File Explorer icon in the taskbar, and you will see a list of your most recently accessed folders. Simply click on a folder to open it in File Explorer.
Understanding the different ways to open File Explorer allows you to choose the method that best suits your workflow and preferences. Whether you opt for the Start Menu, the search bar, or the taskbar, rest assured that accessing File Explorer in Windows 10 is a quick and straightforward process.
Now that we have explored the various ways to open File Explorer, let’s move on to understanding how to navigate its interface and make the most of its features.
Finding File Explorer in the Start Menu
The Start Menu is a central hub in Windows 10 that provides quick access to various applications and tools, including File Explorer. By locating and opening File Explorer from the Start Menu, you can easily navigate through your files and folders in a user-friendly interface.
To find File Explorer in the Start Menu, click on the Start button located at the bottom-left corner of your screen. The Start Menu will open, displaying a column on the left side with a list of installed applications and shortcuts.
Scroll down the list until you find the “Windows System” folder. Click on the folder to expand it, and then search for “File Explorer” in the list of apps. You can either click directly on “File Explorer,” or you can hover over it and click on the arrow that appears to the right to reveal additional options.
When you click on “File Explorer” in the Start Menu, a new window will open, displaying the default view of File Explorer. From here, you can start navigating through your local drives, network connections, and other locations to access your files and folders.
If you frequently use File Explorer and want to have quicker access to it, you can also pin it to the Start Menu. To do this, right-click on the “File Explorer” option in the Start Menu, and then select “Pin to Start.” This will place the File Explorer icon as a tile on the right side of the Start Menu, allowing you to open it with a single click.
By finding File Explorer in the Start Menu, you can easily access this powerful file management tool and streamline your file organization and navigation tasks. Whether you have recently switched to Windows 10 or have been using it for a while, knowing how to locate and open File Explorer from the Start Menu is a valuable skill.
In the next section, we will explore another method of opening File Explorer using the search bar in Windows 10. This method offers a quick and convenient way to access File Explorer, particularly if you prefer using keyboard shortcuts or have a large number of applications installed on your computer.
Using the Search Bar to Access File Explorer
The search bar in Windows 10 is a powerful tool that allows you to quickly find applications, files, and settings on your computer. By utilizing the search bar, you can easily access File Explorer without having to navigate through multiple menus or folders.
To open File Explorer using the search bar, click on the Start button located at the bottom-left corner of your screen, or press the Windows key on your keyboard to open the Start Menu. Once the Start Menu is open, you will see a search bar next to the Start button.
Click on the search bar and type “File Explorer.” As you start typing, Windows will immediately display search results based on your input. You should see “File Explorer” listed as one of the top results. Simply click on the “File Explorer” search result to open it.
An alternative way to access File Explorer using the search bar is by pressing the “Windows key + S” keyboard shortcut. This will open the search bar directly, allowing you to type “File Explorer” and quickly open it without going through the Start Menu.
Using the search bar to access File Explorer is particularly useful if you prefer using keyboard shortcuts or if you have a large number of applications installed on your computer. It allows for a quicker and more efficient way to open and access File Explorer without the need to navigate through multiple menus.
Furthermore, the search bar also offers additional functionalities when using File Explorer. After opening File Explorer through the search bar, you can utilize the search bar within the File Explorer window itself to search for specific files or folders within your local drives or network connections. This allows you to quickly locate and access files without manually browsing through your entire file system.
Now that you know how to access File Explorer using the search bar in Windows 10, you have a convenient and efficient method to quickly open and navigate through your files and folders. In the next section, we will explore another approach to accessing File Explorer by pinning it to the taskbar for easy and quick access.
Pinning File Explorer to the Taskbar
If you frequently use File Explorer and want to have quick and easy access to it, pinning it to the taskbar is a convenient option. By pinning File Explorer to the taskbar, you can open it with a single click, eliminating the need to navigate through menus or use keyboard shortcuts.
To pin File Explorer to the taskbar, first, open File Explorer using one of the previously mentioned methods, such as through the Start Menu or the search bar. Once File Explorer is open, locate the File Explorer icon in the taskbar, which is typically found at the bottom of your screen.
Right-click on the File Explorer icon in the taskbar, and a context menu will appear. From the context menu, select the “Pin to taskbar” option. This will add the File Explorer icon as a permanent shortcut on the taskbar.
Now, whenever you need to open File Explorer, simply click on the File Explorer icon in the taskbar, and a new window will open, ready for you to browse through your files and folders. The pinned icon will remain on the taskbar even after you close File Explorer, ensuring easy access for future use.
In addition to pinning the default File Explorer icon to the taskbar, you can also pin specific folders or drives to File Explorer for even quicker access. To do this, open File Explorer and navigate to the folder or drive that you want to pin. Right-click on the folder or drive icon, and from the context menu, select the “Pin to File Explorer” or “Pin to Quick Access” option. This will add a shortcut to the selected folder or drive within File Explorer’s navigation pane for easy and direct access.
Pinning File Explorer to the taskbar provides a convenient and time-saving method to access your files and folders. Whether you frequently use File Explorer for work, personal organization, or both, having it only a click away on your taskbar ensures quick and efficient navigation through your files and directories.
In the next section, we will explore how to navigate File Explorer’s interface and make the most out of its features to manage your files and folders effectively.
Navigating File Explorer
Once you have opened File Explorer in Windows 10, you can start navigating through your files and folders to locate and manage your documents, images, videos, and more. Understanding how to navigate File Explorer’s interface is crucial for efficient file management and organization.
The main window of File Explorer consists of various elements that allow you to navigate through your files. On the left side, you will find the navigation pane, which displays a hierarchical structure of your drives, folders, and library locations. This pane provides an overview of your file system and allows you to quickly jump to specific locations.
To navigate through your drives and folders, simply click on the desired location in the navigation pane. This will update the content pane on the right side of the window, displaying the contents of the selected folder or drive. As you drill down into folders, you can keep track of your location using the breadcrumbs at the top of the File Explorer window.
In addition to using the navigation pane, you can also utilize the address bar located at the top of the File Explorer window. The address bar displays the current location and allows you to enter specific paths or addresses to navigate directly to a particular folder or drive.
Another way to navigate File Explorer is by using keyboard shortcuts. For example, the “Backspace” key takes you to the previous location, while the “Alt + D” keys allow you to quickly jump to the address bar. These shortcuts help streamline the navigation process, especially for those who prefer using the keyboard over the mouse.
As you navigate through File Explorer, you can perform various actions on your files and folders. Right-clicking on an item presents a context menu with options such as copying, cutting, deleting, renaming, and more. Additionally, you can utilize the toolbar at the top of the File Explorer window to access common file operations and view-specific options.
By mastering the navigation of File Explorer, you can efficiently browse through your files and folders, locate specific items, and perform actions to manage your files effectively. Whether you need to organize your documents, move files between folders, or simply locate a particular file, knowing how to navigate File Explorer is essential.
In the next section, we will explore how to access drives and folders within File Explorer and discuss some common file management tasks.
Accessing Drives and Folders
In File Explorer, accessing drives and folders is a fundamental aspect of efficient file management. Whether you are looking to open a specific folder, navigate through your local drives, or access external storage devices, understanding how to access drives and folders in File Explorer is essential.
When you open File Explorer, the navigation pane on the left side of the window displays a list of your connected drives, such as the C: drive, D: drive, and any additional drives you have. Simply click on a drive to view its contents in the main content pane on the right side of the window. From there, you can explore the folders within the selected drive and access the files inside them.
If you need to navigate to a specific folder within a drive or a subfolder within a folder, you can simply click on its corresponding entry in either the navigation pane or the content pane. This will update the content pane to display the contents of the selected folder.
In addition to accessing drives and folders within your local storage, File Explorer also allows you to access external storage devices such as USB drives or external hard drives. When you connect an external storage device to your computer, it will typically appear as a separate entry in the navigation pane, allowing you to easily access its contents.
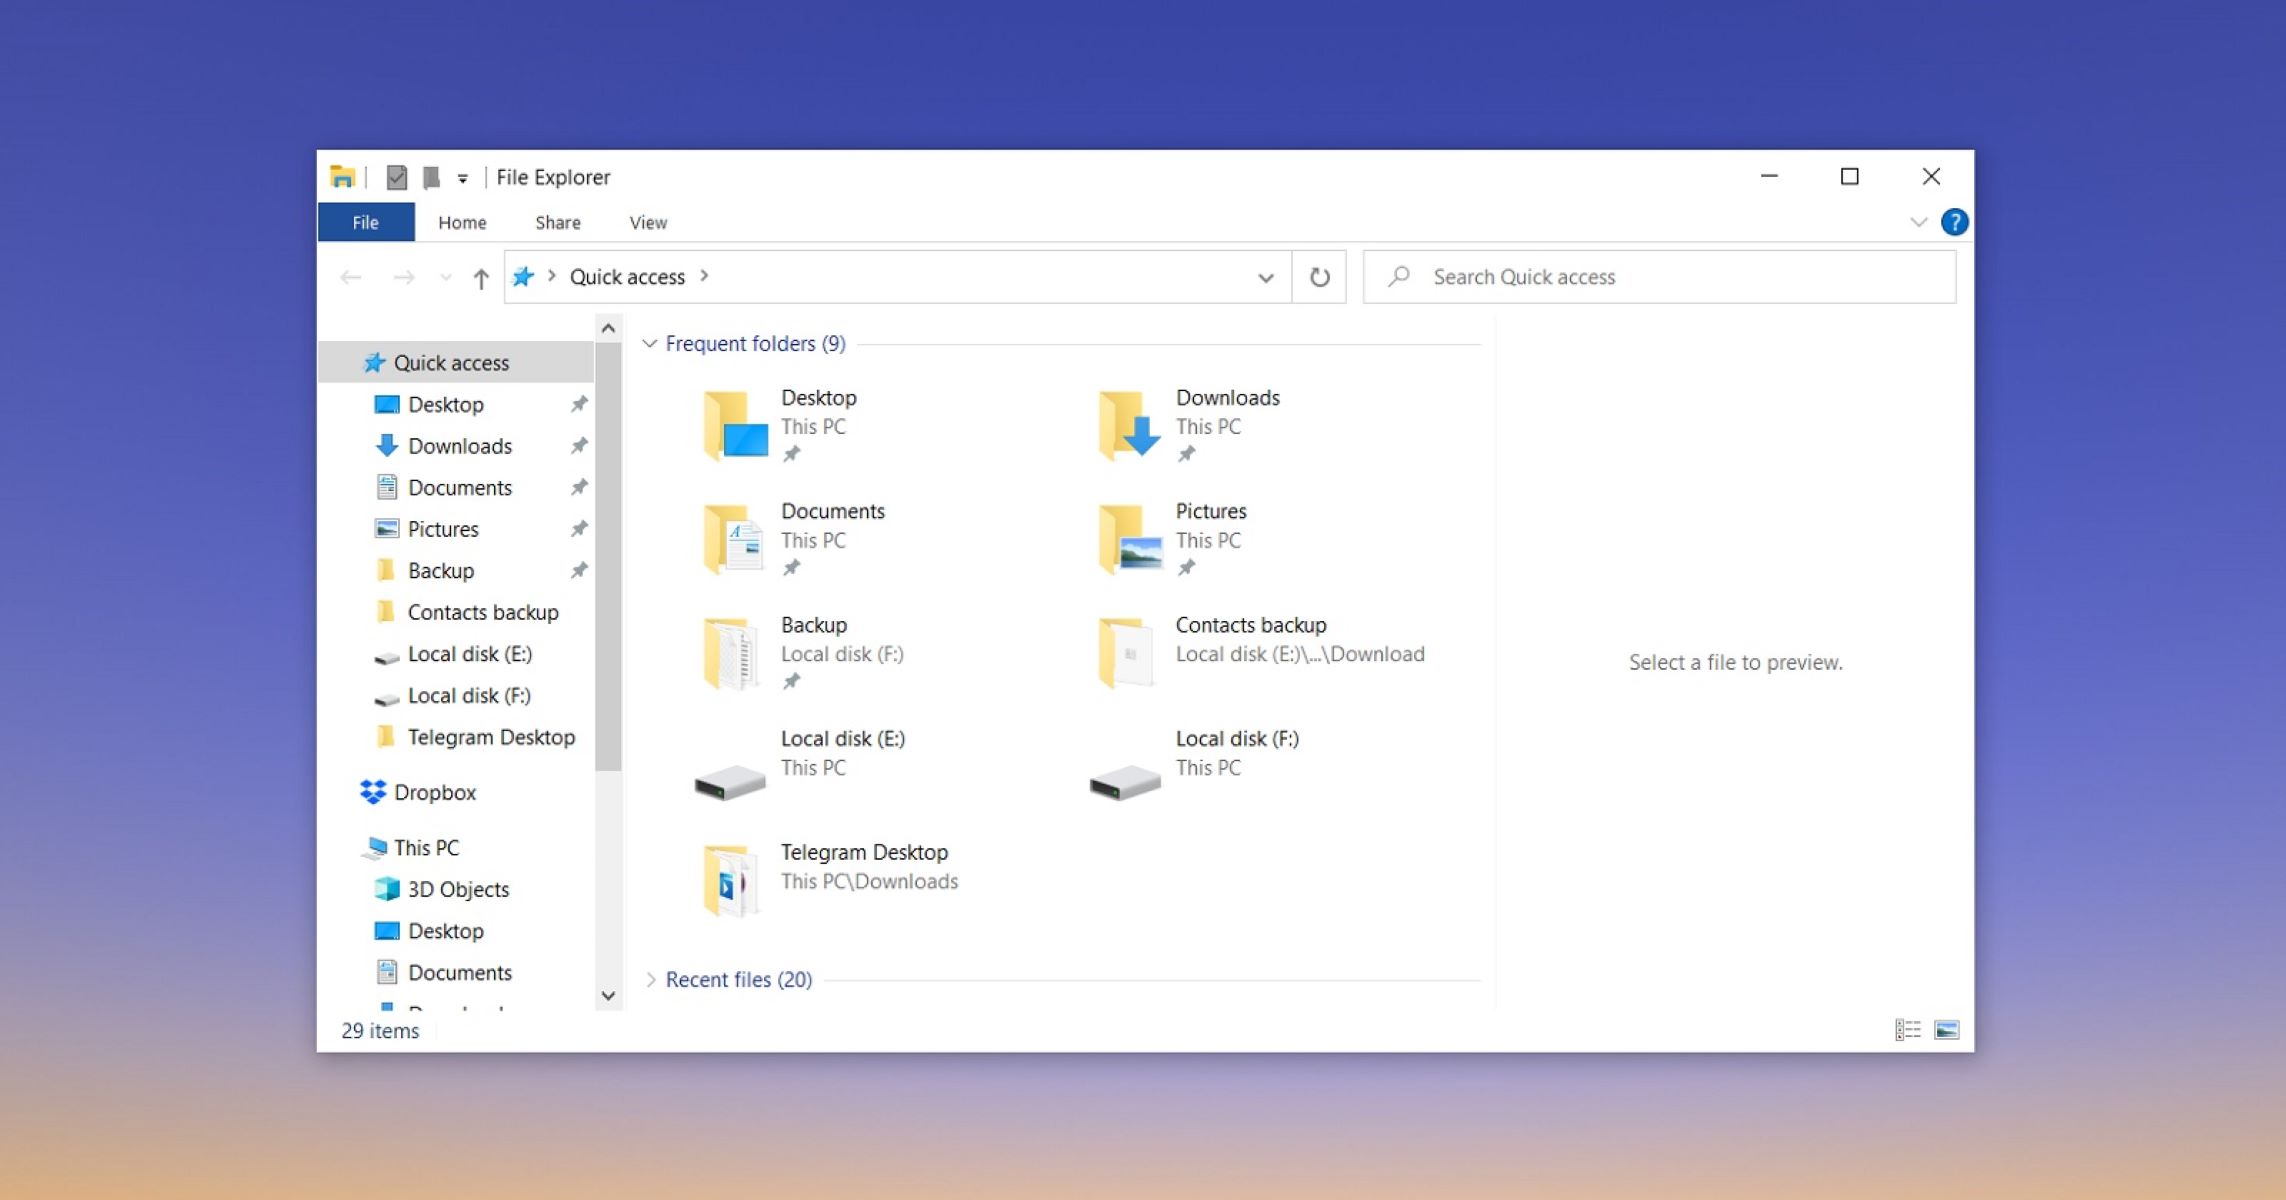
Furthermore, File Explorer provides quick access to frequently used folders through the “Quick Access” section, located in the navigation pane. Quick Access includes commonly accessed folders such as Documents, Downloads, Pictures, and Desktop. By clicking on the desired folder in the Quick Access section, File Explorer will open the corresponding folder in the content pane.
If you have a specific folder or drive that you frequently access, you can also pin it to the Quick Access section for even faster access. To do this, simply right-click on the desired folder or drive and select “Pin to Quick Access” from the context menu. The pinned item will then appear at the top of the Quick Access section for easy and quick navigation.
By understanding how to access drives and folders in File Explorer, you can effortlessly navigate through your local and external storage, locate specific files and folders, and efficiently manage your files. In the next section, we will explore the ribbon menu in File Explorer, which provides additional options and features for file management.
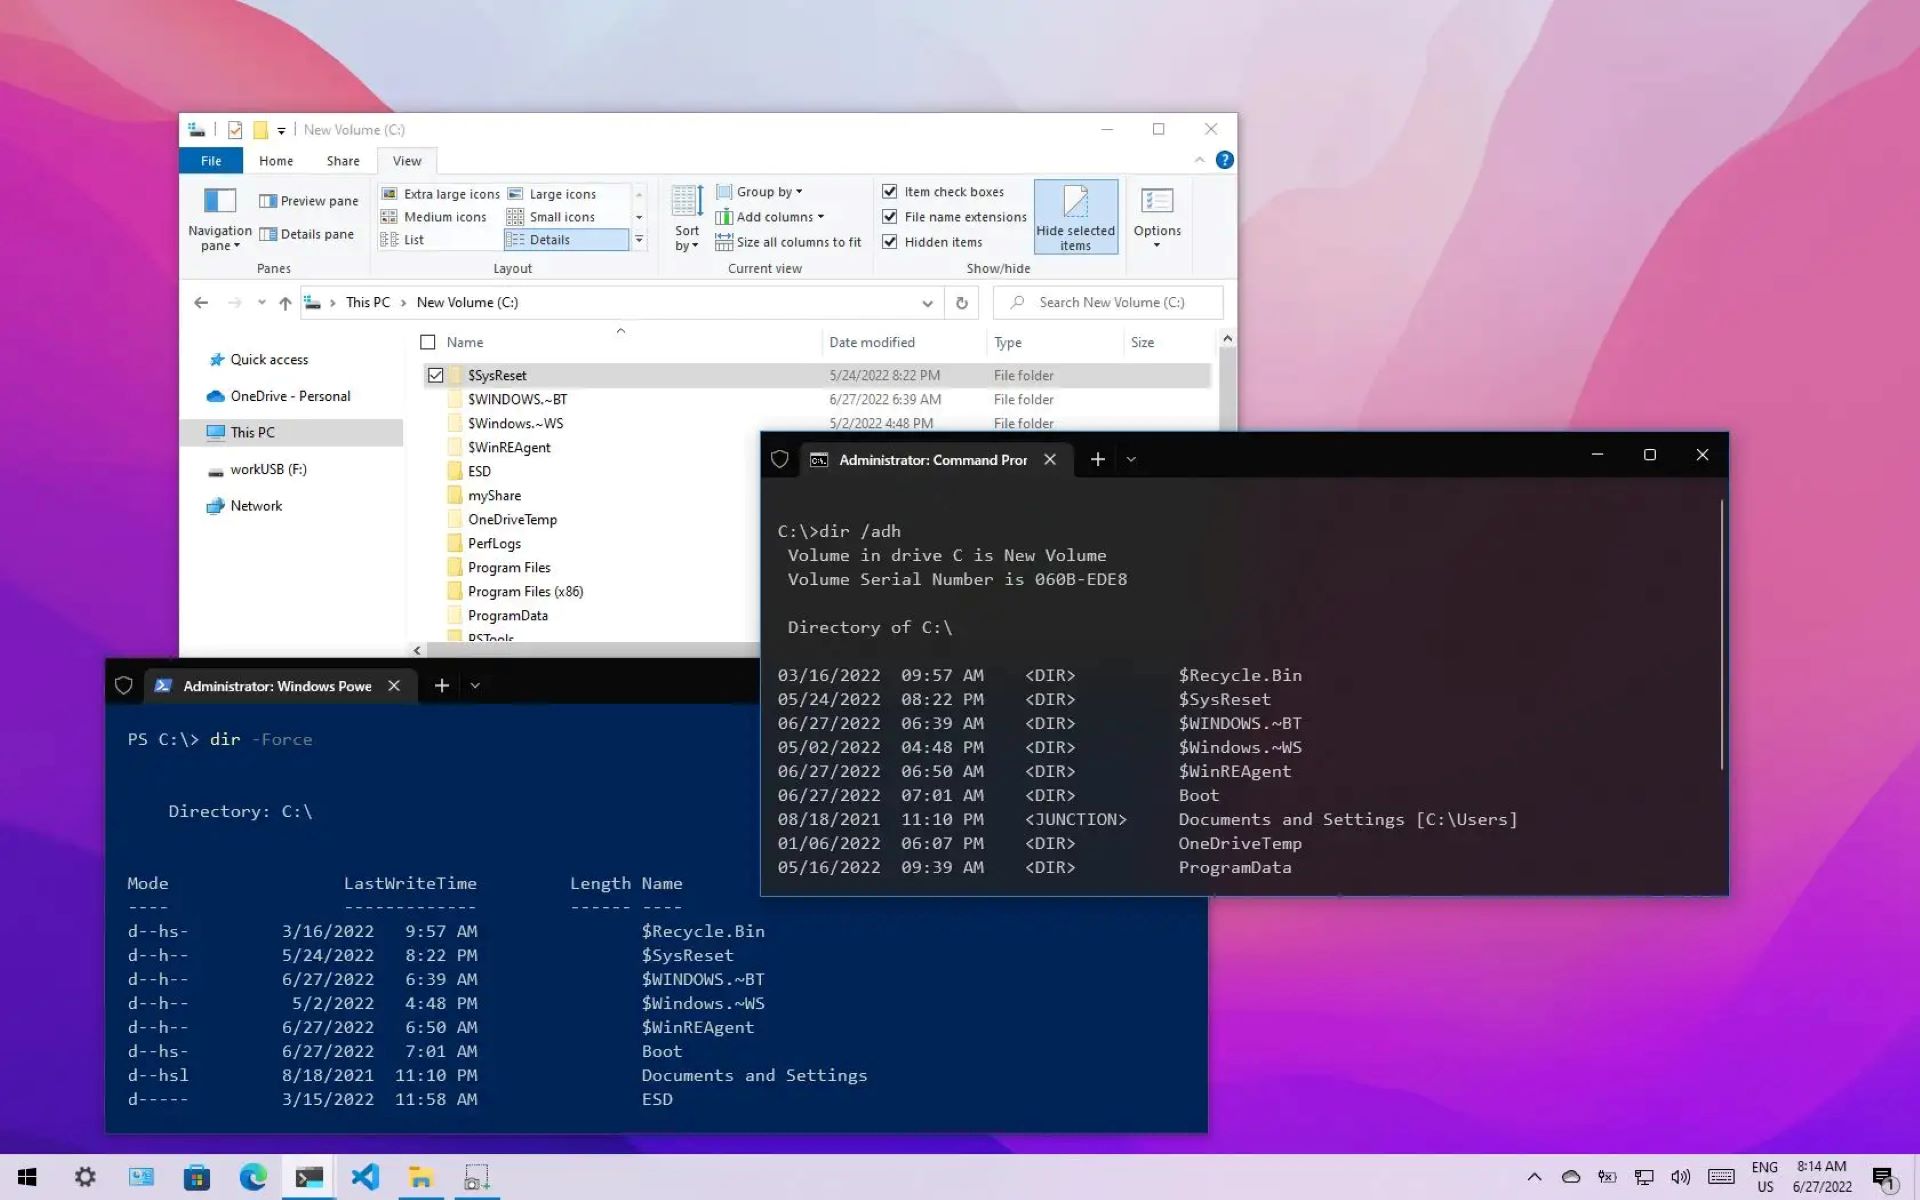
Using File Explorer’s Ribbon Menu
File Explorer in Windows 10 features a ribbon menu, a powerful toolbar that provides a wide range of options and features for managing your files and folders. The ribbon menu is located at the top of the File Explorer window and offers quick and convenient access to various tools and actions.
The ribbon menu in File Explorer is divided into different tabs, each representing a specific category of options. The tabs include “File,” “Home,” “Share,” “View,” and “Search.” Each tab contains related commands and functions to help you perform specific tasks related to file management and navigation.
The “Home” tab is the default tab that appears when you open File Explorer. It includes commonly used commands such as copying, cutting, pasting, deleting, and renaming files or folders. Additionally, you will find options for selecting multiple files, creating new folders, and changing the view of your files and folders.
The “Share” tab provides options for sharing files and folders with others. You can use this tab to send files through email, burn files to a disc, or share files and folders on a network. This can be especially useful when collaborating on projects or sharing files with colleagues or friends.
The “View” tab allows you to customize your file and folder views. You can change the layout, sort files and folders based on various criteria, and choose which file details to display. Additionally, you can toggle the display of file extensions, hidden files, and file name extensions.
The “Search” tab offers advanced search options to quickly find specific files or folders. You can refine your search criteria, specify file properties to search for, and even save search queries for future use. This can be particularly helpful when you need to locate specific files among a large number of files and folders.
By utilizing the ribbon menu in File Explorer, you can access a wide range of tools and features to enhance your file management and navigation experience. Whether you need to perform common file operations, share files, customize views, or conduct advanced searches, the ribbon menu provides a convenient and efficient way to access these functionalities.
As you become familiar with the different tabs and commands in the ribbon menu, you will be able to navigate File Explorer more efficiently and leverage its robust features to manage your files and folders effectively.
In the next section, we will explore how to customize File Explorer’s options and settings to tailor it to your specific preferences and workflow.
Customizing File Explorer Options
File Explorer in Windows 10 offers a range of customizable options and settings that allow you to personalize your file management experience. By customizing File Explorer to suit your preferences, you can optimize your workflow and enhance efficiency when working with files and folders.
To access the customization options for File Explorer, open File Explorer and click on the “View” tab in the ribbon menu. In the “View” tab, you will find several options that allow you to customize the appearance and behavior of File Explorer.
One of the primary customization options in File Explorer is the “Layout” section. Here, you can choose how files and folders are displayed in the content pane. You can select from options such as “Extra Large Icons,” “Large Icons,” “Medium Icons,” “Small Icons,” “Details,” and more. Experimenting with different layouts can help you find the most suitable view for your file management needs.
In the “Show/hide” section of the “View” tab, you can control which elements of File Explorer are displayed. For example, you can choose to show or hide the navigation pane, the preview pane, the details pane, and the status bar. Adjusting these settings can help streamline your File Explorer interface and remove clutter that may disrupt your workflow.
Additionally, File Explorer allows you to customize the options for sorting and grouping files in the “Sort by” and “Group by” sections. You can choose different criteria for sorting files, such as name, date, type, and size. Similarly, you can group files by certain characteristics, such as date modified or file type. These customization options can help you organize and locate files more efficiently.
File Explorer also provides options for displaying file extensions and hidden files. In the “Show/hide” section, you can toggle the display of file extensions, allowing you to easily identify file types. Moreover, you can show or hide hidden files and folders, which are typically hidden to avoid accidental modification or deletion.
To access more advanced customization options, such as changing folder options, managing file associations, and configuring shortcut options, you can click on the “Options” button located at the far-right side of the ribbon menu in the “View” tab. This will open the Folder Options dialog box, where you can refine various settings related to File Explorer’s behavior and appearance.
By customizing File Explorer options, you can tailor the file management experience to align with your preferences and workflow. Experiment with different layouts, sorting criteria, and display options to find the settings that help you maximize productivity and efficiency when working with files and folders.
In the next section, we will conclude our exploration of File Explorer in Windows 10, summarizing the key points and highlighting the importance of understanding and utilizing this essential tool for effective file management.
Conclusion
File Explorer is a vital component of Windows 10, providing users with a user-friendly interface to manage and navigate through files and folders. By exploring the different ways to open File Explorer, understanding its functionalities, and customizing its options, you can enhance your file management workflow and optimize efficiency.
Throughout this article, we discussed various methods of opening File Explorer, including accessing it from the Start Menu, using the search bar, and pinning it to the taskbar for quick access. We also emphasized the importance of understanding the layout and navigation features of File Explorer, such as using the navigation pane and the address bar to access drives and folders.
Furthermore, we explored the ribbon menu in File Explorer and its different tabs, which provide access to a wide range of tools and options for managing files and folders effectively. By utilizing the ribbon menu, you can perform common file operations, customize views, share files, and conduct advanced searches.
Lastly, we discussed the customization options available in File Explorer, enabling you to personalize the appearance and behavior of the tool according to your preferences. You can customize the layout, show or hide different interface elements, adjust sorting and grouping criteria, and manage file extensions and hidden files.
By becoming proficient in File Explorer, you can optimize your file management experience, whether you are a student organizing your documents, a professional finding files for a project, or a casual user managing personal files and folders.
With a solid understanding of File Explorer’s features and functionalities, you can navigate through your files and folders with ease, locate specific items efficiently, perform essential file operations, and keep your files organized for improved productivity and streamlining your workflow.
In conclusion, mastering File Explorer in Windows 10 is a valuable skill that can greatly enhance your file management capabilities. Utilize the various methods of opening File Explorer, navigate through drives and folders, leverage the ribbon menu and its functionalities, and customize the options to suit your preferences. By doing so, you can bring efficiency and organization to your file management tasks, saving time and effort in your daily computing activities.