Introduction
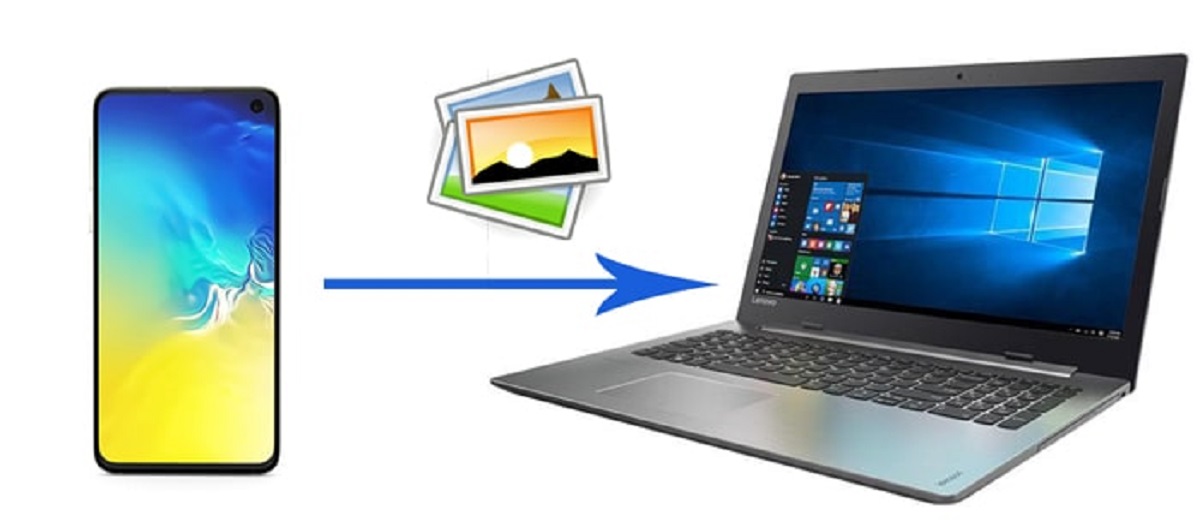
Transferring photos from your Android smartphone to your Windows 10 PC is a common task that many users need to perform. Whether you want to back up your precious memories, free up space on your device, or simply have easier access to your photos on your computer, there are several methods you can use to complete this process.
In this article, we will explore different ways to transfer photos from your Android device to your Windows 10 PC. We will discuss both traditional and modern methods, giving you a range of options to choose from based on your preferences and the available resources at your disposal.
Whether you prefer using a USB cable, leveraging cloud storage services, or relying on file transfer apps, we have got you covered. By simplifying the instructions and providing step-by-step guidance, we aim to make the process as user-friendly as possible, even for those who are not tech-savvy.
So, if you are ready to learn how to transfer photos from your Android device to your Windows 10 PC, let’s dive in and explore the various methods together.
Option 1: Using a USB Cable
One of the most straightforward and traditional methods to transfer photos from your Android device to your Windows 10 PC is by using a USB cable. This method allows for a direct connection between your phone and computer, enabling fast and reliable file transfer.
To get started, you will need a USB cable that is compatible with your Android device. Most Android smartphones use USB Type-C or micro-USB connectors. Once you have the appropriate cable, follow these steps:
- Connect one end of the USB cable to your Android device, and the other end to an available USB port on your Windows 10 PC.
- On your Android device, you may need to unlock the screen and select the “File Transfer” or “MTP” option from the USB notification that appears.
- On your Windows 10 PC, open the File Explorer by pressing the Windows key and E simultaneously, or by clicking on the folder icon in the taskbar.
- In the File Explorer, you should see your Android device listed under the “This PC” or “Devices and drives” section. Click on it to open the device’s storage.
- Navigate to the folder that contains the photos you want to transfer. This may vary based on your device’s storage configuration and the location of your photos.
- Select the photos you want to transfer by either clicking and dragging to create a selection box or holding Ctrl and clicking on individual photos.
- Once you have selected the desired photos, right-click on any of the selected files and choose “Copy” from the context menu. Alternatively, you can use the Ctrl+C keyboard shortcut.
- Navigate to the destination folder on your Windows 10 PC where you want to save the transferred photos.
- Right-click inside the destination folder and choose “Paste” from the context menu, or use the Ctrl+V keyboard shortcut to paste the copied photos.
- The selected photos will now be transferred from your Android device to your Windows 10 PC. The transfer speed may vary depending on the number and size of the photos.
Once the transfer is complete, you can safely disconnect your Android device from the USB cable. The transferred photos will now be available on your Windows 10 PC, allowing you to view, edit, and organize them as needed.
Using a USB cable is a reliable method for transferring photos, especially for users who prefer a direct and wired connection. However, it does require the physical presence of both devices and may not be as convenient as wireless alternatives. If you prefer a wireless transfer method, continue reading to explore other options.
Option 2: Using Google Photos
Google Photos is a popular cloud-based photo storage and sharing platform that offers a seamless way to transfer photos from your Android device to your Windows 10 PC. The advantage of using Google Photos is that it eliminates the need for cables and allows you to access your photos from any device with an internet connection.
Here’s how you can transfer photos from your Android device to your Windows 10 PC using Google Photos:
- On your Android device, open the Google Photos app. If you don’t have it installed, download it from the Google Play Store and sign in with your Google account.
- In the Google Photos app, tap on the three horizontal lines at the top left corner to open the menu.
- From the menu, select “Settings” and then tap on “Backup & sync”.
- Toggle the “Backup & sync” option to enable it. This will automatically backup and sync the photos on your Android device to your Google Photos cloud storage.
- Wait for the backup process to complete. Depending on the size of your photo library and your internet connection speed, this may take some time. Once the backup is finished, all your photos will be accessible in the Google Photos app.
- On your Windows 10 PC, open a web browser and go to the Google Photos website (photos.google.com).
- Sign in to your Google account that is associated with the same Google Photos app on your Android device.
- Navigate to the “Photos” section in the Google Photos website to view all your uploaded photos.
- To transfer specific photos, select the desired photos by clicking on them. To select multiple photos, hold down the Ctrl key while clicking on each photo.
- Once you have selected the photos, click on the “Download” button at the top right corner of the page. This will download the selected photos to your default download location on your Windows 10 PC.
Once the download is complete, you can locate the transferred photos on your Windows 10 PC and move them to the desired folders for easy access and organization.
Using Google Photos provides a convenient way to transfer photos wirelessly and effortlessly. It ensures that your photos are securely backed up in the cloud, giving you peace of mind in case of any device loss or damage. Additionally, Google Photos offers advanced features such as automatic organization, facial recognition, and easy sharing options, making it an all-in-one solution for managing your photo library.
Option 3: Using a File Transfer App
If you prefer a more specialized approach to transferring photos from your Android device to your Windows 10 PC, you can use a file transfer app. These apps are designed to simplify the process of transferring files wirelessly between devices, making it a convenient option for photo transfer.
Here’s how you can use a file transfer app to transfer photos from your Android device to your Windows 10 PC:
- On your Android device, go to the Google Play Store and download a file transfer app such as “Send Anywhere”, “AirDroid”, or “SHAREit”.
- Install and launch the file transfer app on your Android device.
- On your Windows 10 PC, open a web browser and navigate to the official website of the file transfer app you installed on your Android device.
- Follow the instructions on the website to download and install the corresponding file transfer app for Windows 10.
- Open the file transfer app on both your Android device and Windows 10 PC.
- On your Android device, select the photos you want to transfer. The method may vary depending on the file transfer app you are using.
- Once the photos are selected, look for a sharing or transfer button within the file transfer app and tap on it.
- A transfer code, QR code, or a nearby device scanning option will appear on the Android device screen. Follow the instructions provided by the app to initiate the transfer process.
- On your Windows 10 PC, use the corresponding option in the file transfer app to scan the code or connect to the Android device.
- Once the connection is established, the file transfer app will begin transferring the selected photos from your Android device to your Windows 10 PC.
- After the transfer is complete, you can locate the transferred photos in the designated folder on your Windows 10 PC.
Using a file transfer app simplifies the process of transferring photos without the need for cables or cloud storage. These apps often offer additional features such as easy file sharing between devices, remote file management, and even the ability to transfer files between different platforms.
Remember to only use trusted file transfer apps from reputable sources to ensure the security and privacy of your photos during the transfer process.
Option 4: Using a Cloud Storage Service
Cloud storage services provide a convenient and efficient way to transfer photos from your Android device to your Windows 10 PC. By uploading your photos to the cloud, you can access them from anywhere with an internet connection and easily download them to your PC. There are several popular cloud storage services available, such as Google Drive, Dropbox, and OneDrive.
Here’s how you can transfer photos from your Android device to your Windows 10 PC using a cloud storage service:
- On your Android device, download and install the cloud storage app of your choice from the Google Play Store.
- Sign in to the cloud storage app using your account credentials or create a new account if you don’t have one.
- Select the photos you want to transfer by either tapping and holding on a photo or selecting multiple photos using the provided selection tool.
- Once the photos are selected, look for a sharing or upload button within the cloud storage app and tap on it.
- The app will begin uploading the selected photos to your cloud storage account. The upload speed will depend on your internet connection speed and the size of the photos.
- On your Windows 10 PC, open a web browser and go to the website of the cloud storage service you are using.
- Sign in to your cloud storage account using the same credentials you used on your Android device.
- Navigate to the folder where you uploaded the photos from your Android device.
- Select the photos you want to transfer to your Windows 10 PC by clicking on them or using the provided selection tool.
- Once the photos are selected, look for a download or save button within the cloud storage website and click on it.
- Choose the destination folder on your Windows 10 PC where you want to save the transferred photos.
- The cloud storage service will begin downloading the selected photos to your Windows 10 PC.
Using a cloud storage service offers the advantage of seamlessly syncing photos across multiple devices and ensuring that your photos are backed up in a secure and remote location. Additionally, it allows for easy sharing of photos with others by simply sending them a link to the cloud storage folder.
Keep in mind that most cloud storage services offer limited free storage, and you may need to consider a paid subscription if you have a large photo library or require additional storage space.
Option 5: Using an SD Card Reader
If your Android device has a removable SD card, you can transfer photos to your Windows 10 PC by using an SD card reader. This method allows you to directly access the files on the SD card and transfer them to your computer without the need for any additional software or cables.
Here’s how you can transfer photos from your Android device to your Windows 10 PC using an SD card reader:
- Power off your Android device and remove the SD card from its slot. Consult your device’s user manual or manufacturer’s website for specific instructions on how to remove the SD card.
- Insert the SD card into the SD card reader. If your computer does not have a built-in SD card reader, you can use an external USB card reader that is compatible with your SD card.
- Connect the SD card reader to an available USB port on your Windows 10 PC.
- Once the SD card is recognized by your computer, open the File Explorer by pressing the Windows key and E simultaneously, or by clicking on the folder icon in the taskbar.
- In the File Explorer, you should see the SD card listed under the “This PC” or “Devices and drives” section. Click on it to open the SD card’s storage.
- Navigate to the folder that contains the photos you want to transfer. This may vary depending on how your photos are stored on the SD card.
- Select the photos you want to transfer by either clicking and dragging to create a selection box or holding Ctrl and clicking on individual photos.
- Once you have selected the desired photos, right-click on any of the selected files and choose “Copy” from the context menu. Alternatively, you can use the Ctrl+C keyboard shortcut.
- Navigate to the destination folder on your Windows 10 PC where you want to save the transferred photos.
- Right-click inside the destination folder and choose “Paste” from the context menu, or use the Ctrl+V keyboard shortcut to paste the copied photos.
- The selected photos will now be transferred from the SD card to your Windows 10 PC. The transfer speed may vary depending on the number and size of the photos.
Once the transfer is complete, you can safely remove the SD card reader from your Windows 10 PC and reinsert the SD card back into your Android device.
Using an SD card reader provides a simple and direct method of transferring photos, especially if you frequently store your photos on an SD card. It eliminates the need for cables or additional software, making it a straightforward and convenient option.
Remember to handle your SD card with care and store it in a safe place when not in use to prevent any damage or loss of your valuable photos.
Conclusion
Transferring photos from your Android device to your Windows 10 PC doesn’t have to be a complicated process. Whether you prefer the traditional method of using a USB cable or opt for a more modern approach like using cloud storage services or file transfer apps, there are multiple options available to suit your needs.
In this article, we explored five different methods to transfer photos from Android to PC on Windows 10. Using a USB cable offers a direct and reliable connection, while Google Photos provides the convenience of cloud storage and accessibility across devices.
File transfer apps offer specialized features for wireless transfer, and cloud storage services ensure secure backup and easy synchronization of your photos. If you have an SD card, using an SD card reader provides a straightforward option for transferring photos without any additional software.
Choose the method that best fits your preferences and available resources. Whether you value simplicity, speed, wireless convenience, or cloud storage capabilities, there is a solution for everyone.
By following the instructions provided in each method, you can safely and efficiently transfer your photos from your Android device to your Windows 10 PC. Remember to consider factors such as transfer speed, storage capacity, and security when deciding which method to use.
Now that you are equipped with the knowledge of these different methods, you can easily transfer your cherished photos from your Android device to your Windows 10 PC and enjoy them on a larger screen, organize them effortlessly, or create backups for peace of mind.
Start exploring the various methods and find the one that works best for you. Preserve your memories and make your photo transfer process a breeze!


