Introduction
Welcome to the world of Google Photos, where your cherished memories are stored and accessible anytime, anywhere. With Google Photos, you can effortlessly store, manage, and share your photos and videos, ensuring they are safe and easily accessible whenever you need them. Whether you’re using a mobile device or a computer, Google Photos offers seamless integration across platforms, making it convenient to access your photos from various devices.
If you’ve ever wondered how to find your Google Photos or navigate the features of this powerful platform, you’ve come to the right place. In this guide, we’ll walk you through the various methods of accessing and managing your Google Photos on both mobile devices and computers. Whether you’re an avid photographer or just looking to organize your personal collection, Google Photos has the tools and features to meet your needs.
From finding specific photos to organizing them into albums, Google Photos offers a range of intuitive options to make managing your visual memories a breeze. We’ll also explore how you can efficiently search for specific photos using keywords, locations, and faces, and share some tips and tricks to optimize your experience.
Additionally, we’ll cover how to back up and sync your photos with Google Photos to ensure that every precious moment is securely stored in the cloud. Plus, we’ll address some common troubleshooting issues you may encounter along the way.
So, whether you’re a seasoned Google Photos user or just getting started, buckle up as we take you on a journey through the wonderful world of Google Photos. Let’s dive in and discover how to find and manage your Google Photos with ease.
Understanding Google Photos
Before diving into the specifics of finding and accessing your Google Photos, it’s important to understand the core features and capabilities of this versatile platform. Google Photos is a cloud-based photo storage and sharing service provided by Google. It allows you to upload, organize, and manage your photos and videos in a centralized location.
One of the key advantages of Google Photos is its ability to automatically backup your photos and videos from your mobile devices. Once uploaded, they are securely stored in your Google account, freeing up valuable space on your device. This backup feature ensures that your memories are safe even if your device is lost, damaged, or upgraded.
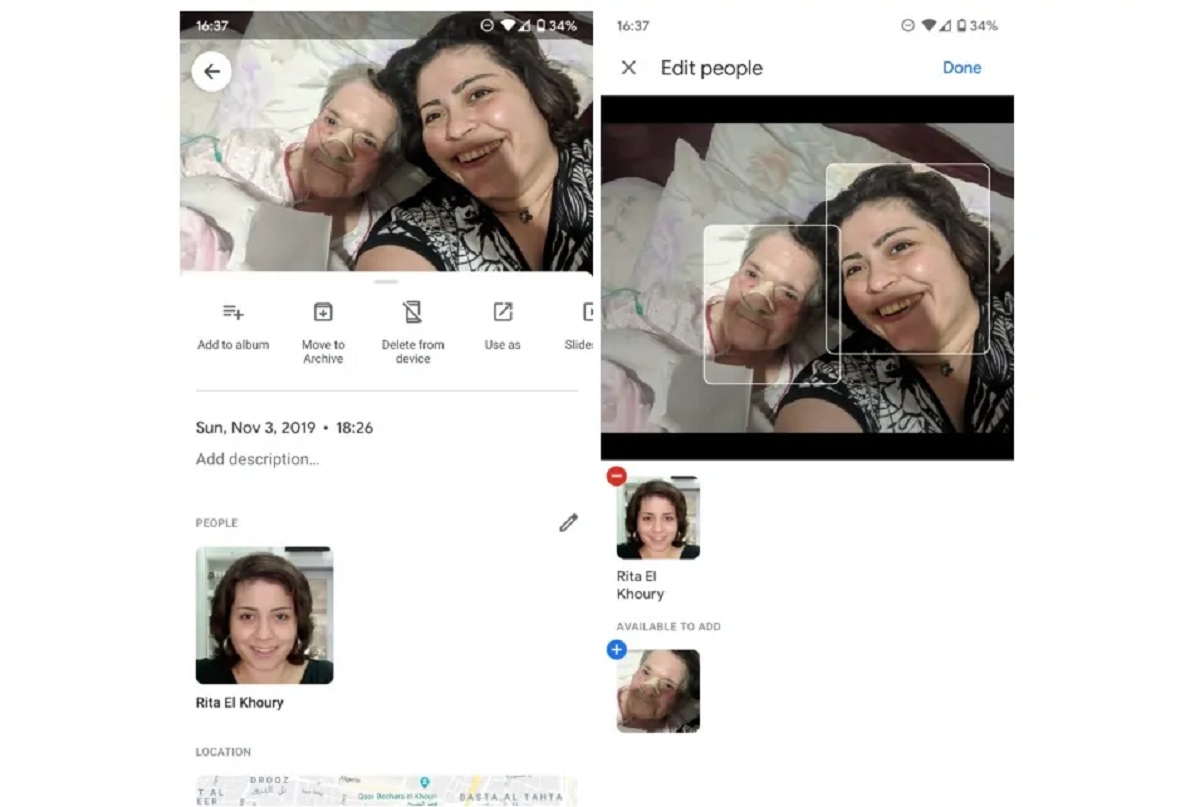
Google Photos also offers a powerful search function, allowing you to easily find specific photos based on various criteria. Whether you’re looking for photos of a specific person, a particular location, or even an object, Google Photos can identify and display them with just a few taps or clicks.
Another notable feature of Google Photos is its intelligent categorization. It automatically organizes your photos into albums based on factors like time, location, and recognizable objects or faces. This makes it effortless to browse through your collection and rediscover treasured moments.
In addition to these core functionalities, Google Photos provides seamless integration across devices. Whether you’re using a mobile phone, tablet, or computer, your photos and videos will be accessible from any device with an internet connection. This makes it incredibly convenient to view and manage your photos, even when you’re on the go.
Furthermore, Google Photos allows for easy sharing of your photos and videos with friends and family. You can create shared albums, invite others to contribute their own photos, and even generate links to share specific content. This makes it a great tool for collaborative photo albums and sharing experiences with your loved ones.
Now that we have a solid understanding of what Google Photos has to offer, let’s explore the different methods of accessing and finding your photos on both mobile devices and computers.
Accessing Google Photos on your mobile device
Accessing your Google Photos on your mobile device is simple and convenient. Google Photos is available as a mobile app for both Android and iOS devices, allowing you to access your photos anytime, anywhere.
To get started, you’ll need to download the Google Photos app from the respective app store for your device. Once downloaded and installed, follow these steps:
- Open the Google Photos app on your mobile device.
- Sign in to your Google account. If you don’t have one, you can create a new account for free.
- Grant necessary permissions to the app, such as accessing your photos, media, and files.
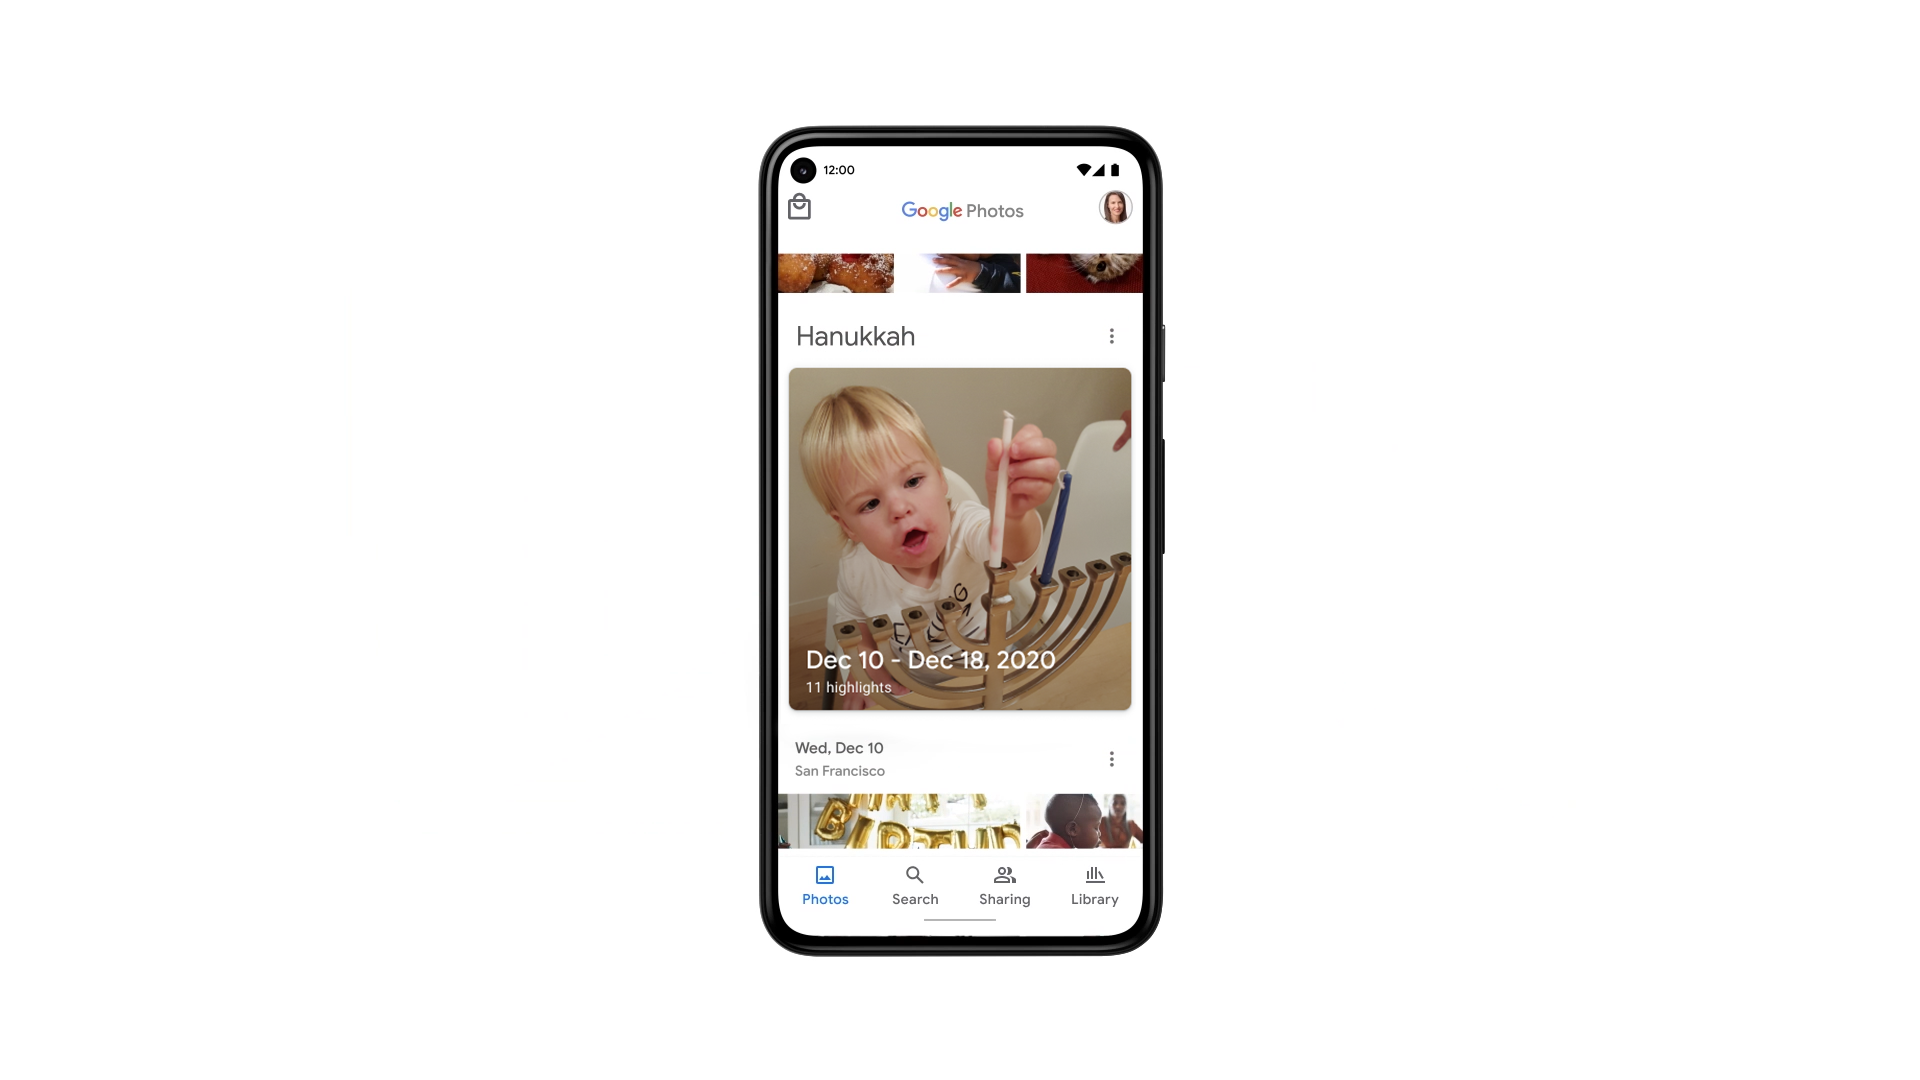
- Once signed in, you’ll see all your photos and videos displayed in the app’s main interface.
Once you’re in the Google Photos app, you can navigate through your photos in various ways:
- Browse through your photos by scrolling vertically through the timeline. Photos are displayed in reverse chronological order, with the most recent ones appearing at the top.
- Swipe left or right to move between individual photos.
- Pinch in or out to zoom in or out of a photo.
You can also search for specific photos by tapping the search icon in the bottom navigation bar. This allows you to search for photos using keywords, locations, or even specific people’s faces.
In addition to accessing your photos, the Google Photos app offers a range of other features. You can create albums, collages, animations, and even movies with ease. You can also edit your photos, apply filters, and make adjustments to enhance their appearance.
Lastly, sharing your photos is effortless on the mobile app. Simply select the photos or albums you want to share, tap on the share icon, and choose the platform or contact you want to share them with. You can share via email, messaging apps, or even directly to social media platforms.
Accessing and managing your Google Photos on your mobile device couldn’t be easier with the Google Photos app. Let’s now explore how to access and view your Google Photos on your computer in the next section.
Accessing Google Photos on your computer
Accessing and viewing your Google Photos on your computer is just as simple as on a mobile device. While there isn’t a dedicated Google Photos app for computers, you can still access your photos through the Google Photos website. Here’s how:
- Open a web browser on your computer.
- Navigate to the Google Photos website by entering “photos.google.com” in the URL bar.
- Sign in to your Google account if you haven’t already.
- You will be directed to the Google Photos main interface, where all your photos and videos are organized.
Once you’re logged in to Google Photos on your computer, you can navigate through your collection in various ways:
- Scroll vertically to browse through your photos in reverse chronological order, with the most recent ones appearing at the top.
- Click on individual photos to view them in a larger format.
- Use the arrow keys or navigation buttons to move between photos.
- Zoom in or out of a photo using the zoom buttons or pinch gesture on your trackpad.
Similar to the mobile app, you can also search for specific photos on the Google Photos website. Just click on the search bar and enter keywords, locations, or specific people’s names to find relevant photos.
On the Google Photos website, you have additional options for organizing and managing your photos. You can create albums, add photos to existing albums, and even share albums with others. The website also provides editing tools to enhance your photos, such as applying filters, adjusting brightness, and cropping.
Sharing your photos from the Google Photos website is straightforward as well. Simply select the photos or albums you want to share, click on the share icon, and choose the platform or contact you want to share them with. You can share via email, social media, or generate links to share with others.
Accessing and managing your Google Photos on your computer is a convenient way to view, organize, and share your visual memories. In the next sections, we’ll explore how to find your Google Photos through the Google Photos app on your mobile device and through the Google Photos website on your computer.
Finding your Google Photos through the Google Photos app
Finding specific photos or organizing your collection in the Google Photos app is a seamless and intuitive process. Whether you’re looking for a particular memory or creating albums to categorize your photos, the app offers various features to help you find and manage your Google Photos with ease.
Here are some steps to guide you through the process:
- Open the Google Photos app on your mobile device and sign in to your Google account if you haven’t already.
- In the main interface, you’ll see all your photos and videos displayed in reverse chronological order, with the most recent ones at the top.
- To search for specific photos, tap on the search icon in the bottom navigation bar. Here, you can enter keywords, locations, or even search for specific people’s faces to find relevant photos.
- If you’re looking for photos organized by date, you can scroll vertically through the timeline or use the scroll bar on the right side of the screen to navigate through specific time periods.
- For more advanced organizing options, you can create albums. To do this, select the photos you want to include in the album, tap on the “+ Add to” button, and choose “Album” from the options. Give your album a name and hit “Create”.
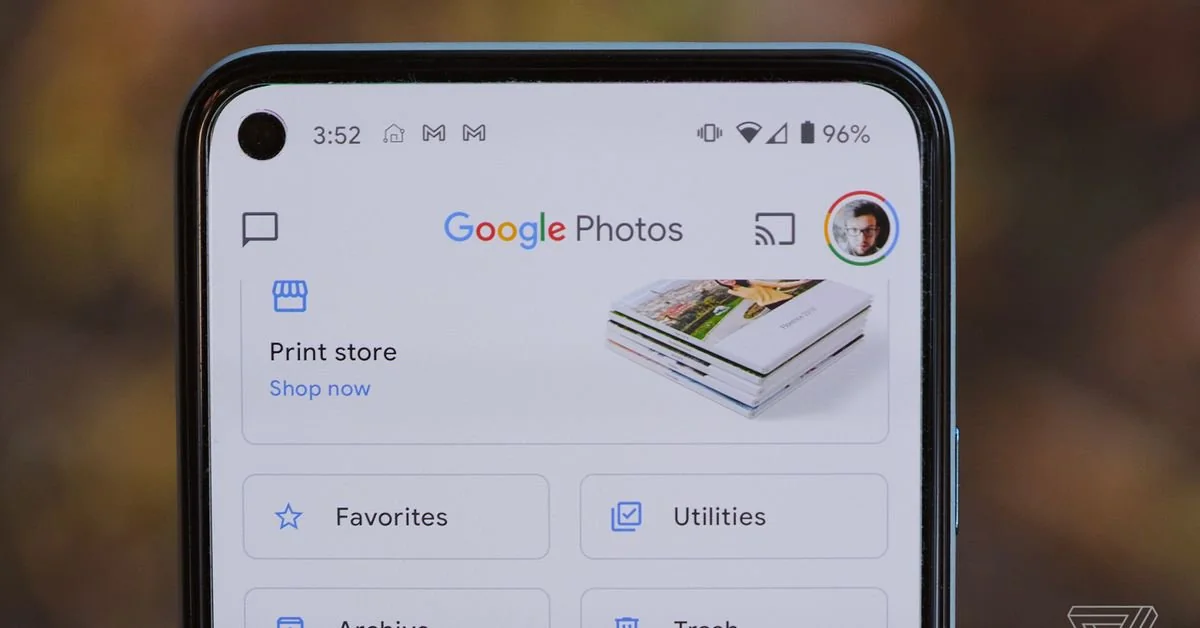
- You can also organize your photos using labels such as “Favorites” or “Shared”. To mark a photo as a favorite, simply tap on the heart-shaped icon below the photo. To view your favorites or other labeled photos, tap on the three horizontal lines in the top-left corner, then choose the corresponding label.
- Furthermore, the Google Photos app can automatically create albums based on specific events or trips. These albums are generated using artificial intelligence and can be found in the “Albums” tab. You can add or remove photos from these auto-created albums as needed.
With the Google Photos app, you have a range of options to find and organize your photos, from simple searching to creating and managing albums. Whether you’re looking to relive a specific memory or categorize your photos for easy access, the app’s features make it effortless to navigate and organize your Google Photos.
In the next section, we’ll explore how to find your Google Photos through the Google Photos website on your computer.
Finding your Google Photos through the Google Photos website
When it comes to finding and managing your Google Photos on your computer, the Google Photos website provides a user-friendly interface with powerful search capabilities and organizational options. Whether you’re searching for specific photos or creating albums to group your pictures, the website offers a seamless experience for accessing and organizing your Google Photos.
Here’s how you can find and manage your Google Photos through the Google Photos website:
- Open a web browser on your computer and navigate to the Google Photos website by entering “photos.google.com” in the URL bar.
- Sign in to your Google account if you haven’t already.
- On the website’s main interface, you’ll see your photos displayed in reverse chronological order, with the most recent ones appearing at the top.
- To search for specific photos, click on the search bar at the top of the page and enter keywords, locations, or even search for specific people’s faces to find relevant photos.
- If you prefer to organize your photos into albums, click on the “+ Create” button on the left side of the screen and select “Album” from the dropdown menu. Give your album a name and click “Create” to generate the album.
- You can also add photos to existing albums by selecting the desired photos, clicking on the “+ Add to” button, and choosing the album to add them to.
- Furthermore, the Google Photos website provides options to categorize and label your photos. You can mark photos as favorites by clicking on the star icon below each photo. To view your favorite photos or other labeled photos, click on the three horizontal lines in the top-left corner of the page and select the corresponding label.
- Additionally, the website automatically generates albums based on events, trips, or people using its artificial intelligence. These auto-created albums can be found in the “Albums” tab and can be customized by adding or removing photos as desired.
With the Google Photos website, you have the flexibility to search, organize, and manage your Google Photos with ease. Whether you’re searching for specific photos or creating personalized albums, the website’s features provide a seamless experience for accessing and organizing your visual memories.
In the next sections, we’ll explore tips for efficient searching in Google Photos and provide information on backing up and syncing your photos with Google Photos.
Organizing and managing your Google Photos
One of the key advantages of Google Photos is its ability to help you organize and manage your vast collection of visual memories. From creating albums to labeling and editing photos, Google Photos provides a range of features to make organizing and managing your photos a breeze.
Here are some tips and methods for organizing and managing your Google Photos:
Create albums
Creating albums allows you to group photos together based on certain events, themes, or locations. To create an album, simply select the photos you want to include, click on the “+ Add to” button, and select “Album” from the options. Give your album a name and click “Create” to generate the album. You can also add or remove photos from existing albums as needed.
Use labels and favorites
Labels and favorites provide additional organizational options for your photos. You can mark photos as favorites by clicking on the heart-shaped icon below each photo. This allows you to easily access your favorite photos later on. Additionally, you can assign labels to your photos, such as “Family”, “Vacation”, or “Best moments”. To view your labeled photos, click on the three horizontal lines in the top-left corner of the page and select the corresponding label.
Edit and enhance your photos
Google Photos offers basic editing tools to enhance the appearance of your photos. You can apply filters, adjust brightness and contrast, crop, rotate, and even remove unwanted objects or red-eye effects. To edit a photo, simply open it in the Google Photos app or website and click on the editing tools to make desired adjustments.
Collaborate and share
Google Photos makes it easy to collaborate and share your photos with others. You can create shared albums, invite others to contribute their own photos to the album, and even generate links to share specific content. This is particularly useful for sharing experiences with friends and family, as everyone can contribute and view the album in real-time.
Auto-generated albums and creations
The Google Photos app and website automatically generate albums and creations based on specific events, trips, or people, utilizing artificial intelligence. These auto-generated albums can be found in the “Albums” tab and can be customized by adding or removing photos. Additionally, the creations feature allows you to automatically generate collages, animations, movies, and more using your photos.
With these organizing and management features, Google Photos empowers you to keep your visual memories in order and easily accessible. Whether you’re creating albums, assigning labels, editing photos, or sharing with loved ones, Google Photos provides the tools to efficiently manage and organize your collection.
In the next section, we’ll discuss some tips for efficient searching in Google Photos, allowing you to find specific photos with ease.
Tips for efficient searching in Google Photos
Searching for specific photos within a large collection can be a daunting task, but Google Photos offers powerful search capabilities to help you find exactly what you’re looking for. By using these tips and tricks, you can efficiently search your Google Photos and locate specific photos with ease.
Use keywords
When searching for a particular photo, think about relevant keywords that may be associated with it. For example, if you’re looking for photos taken at the beach, enter keywords like “beach,” “ocean,” or specific beach names. Google Photos will search the metadata of your photos, including location data and any manually-entered descriptions, to find matches.
Search by location
If you recall the location where a photo was taken but not the exact date or description, you can search by location. Simply enter the name of the city, landmark, or specific address in the search bar, and Google Photos will display all photos that match that location. This is particularly handy for finding vacation photos or memories from specific places.
Search by people
If you have people who frequently appear in your photos, Google Photos can help you locate photos featuring specific individuals. By using facial recognition technology, you can search for a person’s name, and Google Photos will present you with photos containing that person. This feature is especially useful for finding photos of family members, friends, or colleagues.
Search by date
When your collection spans across several years, searching by a specific date or range of dates can be helpful. Enter the date in the format “YYYY-MM-DD” or use relative terms like “yesterday” or “last week” to narrow down your search. This method allows you to find photos taken on specific occasions or during specific time periods.
Combine search criteria
For more precise searches, you can combine different search criteria. For example, you can search for photos of a specific person taken at a particular location or within a specific time frame. By combining keywords, locations, dates, and people, you can refine your search and quickly locate the exact photos you’re looking for.
By utilizing these tips for efficient searching in Google Photos, you can save time and quickly find the photos you need. Whether you’re searching by keywords, location, people, or dates, Google Photos’ robust search capabilities ensure that you can effortlessly navigate through your collection and relive your cherished memories.
In the next section, we’ll discuss the importance of backing up and syncing your photos with Google Photos to ensure their safety and accessibility.
Backing up and syncing your photos with Google Photos
Backing up and syncing your photos with Google Photos is essential to ensure the safety and accessibility of your visual memories. By taking advantage of the backup and syncing features, you can rest assured knowing that your photos and videos are securely stored in the cloud and synchronized across all your devices. Here’s how to back up and sync your photos with Google Photos:
Automatic backup on mobile devices
The Google Photos app for mobile devices offers automatic backup functionality, enabling you to effortlessly back up all your photos and videos. Once you enable this feature, it will continuously upload your media files to your Google account’s allocated storage space.
To enable automatic backup on your mobile device:
- Open the Google Photos app and sign in to your Google account.
- In the app’s settings, navigate to “Backup & sync.”
- Toggle the switch to enable the backup and syncing feature.
- You can also adjust settings such as backup quality, whether to use cellular data for backup, and whether to include videos in the backup.
Once enabled, the Google Photos app will silently upload your photos and videos in the background, ensuring that they are securely backed up and accessible from any device.
Syncing across devices
With Google Photos, your photos and videos are seamlessly synchronized across all your devices. This means that any changes you make on one device, such as editing a photo, creating an album, or adding a label, will be reflected on all your other devices as well.
To make sure that your photos and changes sync across devices, ensure that the “Sync” feature is enabled in the Google Photos app settings on each device you use. This way, you can view and manage your photos on your mobile device, computer, or any other device with internet access.
Checking backup status
If you want to check the status of your backup or see which photos are already backed up, you can do so in the Google Photos app:
- Open the Google Photos app and go to “Settings.”
- Select “Back up & sync.”
- Here, you can view the backup status, including the number of photos and videos backed up and the storage used in your Google account.
By regularly checking the backup status, you can ensure that all your precious photos and videos are safely stored in the cloud.
Backing up and syncing your photos with Google Photos is a crucial step in protecting and accessing your visual memories. By enabling automatic backup and syncing across devices, you can have peace of mind knowing that your photos and videos are securely stored and readily available whenever you need them.
In the next section, we’ll address some common troubleshooting issues that you may encounter while using Google Photos.
Troubleshooting common issues with Google Photos
While Google Photos is a robust and reliable platform, you may encounter some common issues along the way. Here, we address a few of these issues and provide troubleshooting steps to help you resolve them.
Issue: Photos not backing up
If you’re experiencing problems with photos not backing up to Google Photos, try the following troubleshooting steps:
- Ensure that you have a stable internet connection. Wi-Fi is recommended for faster and more reliable uploads.
- Check that the “Backup & sync” option is enabled in the Google Photos app settings.
- Verify that you have sufficient storage space available in your Google account. If your account is full, consider upgrading to a higher storage plan or freeing up space by deleting unnecessary files.
- Make sure that there is no restriction on background data usage or background app refresh for the Google Photos app.
- Restart your device and try initiating the backup process again.
- If the issue persists, try clearing the cache and data of the Google Photos app to refresh its settings and configurations.
Issue: Photos not syncing across devices
If your photos are not syncing across devices, follow these steps to troubleshoot the issue:
- Ensure that the “Sync” feature is enabled in the Google Photos app settings on all devices you want to sync.
- Check that you have a stable internet connection on the devices experiencing the syncing issue.
- Make sure that you are signed in to the same Google account on all devices.
- Restart the devices and try syncing your photos again.
- If the problem persists, try signing out of your Google account on all devices, then sign back in to re-establish the syncing connection.
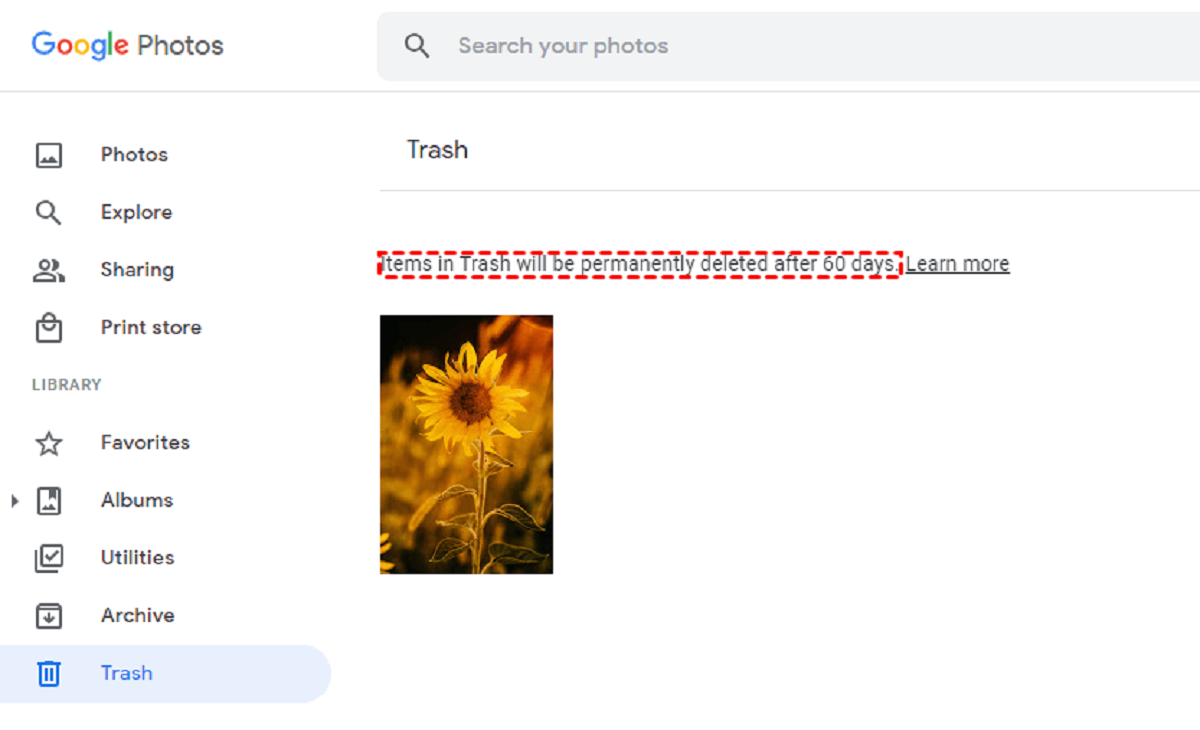
Issue: Missing or deleted photos
If you’re missing or accidentally deleted photos from Google Photos, follow these steps to try and recover them:
- Check the “Trash” or “Recently deleted” folder in the Google Photos app or website. Deleted photos are retained in this folder for a limited period before being permanently deleted.
- If the photos were deleted within the past 60 days, you can restore them by selecting the photos and choosing the “Restore” option.
- If the photos were deleted more than 60 days ago or have been permanently deleted from the “Trash” folder, unfortunately, they cannot be recovered.
Issue: Slow performance or freezing app
If the Google Photos app is performing slowly or freezing, follow these troubleshooting steps:
- Close and restart the app to refresh its processes.
- Make sure you have the latest version of the Google Photos app installed from the app store.
- Clear the app cache or data to remove any temporary files or corrupted data that may be causing the performance issues.
- Restart your device to clear any background processes that could be affecting app performance.
- If the problem persists, uninstall and reinstall the Google Photos app to ensure a fresh installation.
If you encounter any other issues or errors while using Google Photos, it’s recommended to visit the Google Photos Help Center or contact Google support for further assistance. They can provide specific troubleshooting steps based on your situation.
By following these troubleshooting steps, you can resolve common issues and ensure a smooth and seamless experience while using Google Photos.
In the next section, we’ll wrap up our guide to finding and managing your Google Photos. Happy photo organizing!
Conclusion
Google Photos is a powerful and convenient platform for storing, organizing, and managing your photos and videos. Whether you access your Google Photos through the mobile app or the website, it offers a range of features to help you find, organize, and share your visual memories with ease.
In this guide, we’ve covered the essentials of navigating Google Photos. We started by understanding the platform and its core features, including automatic backup, intelligent categorization, and seamless cross-device syncing.
We then explored how to access Google Photos on both mobile devices and computers. You now know how to download the Google Photos app, sign in to your account, and navigate through your collection on your device of choice.
We discussed different methods for finding your Google Photos, whether through the search functionality, browsing by date, or using intelligent categorization. Additionally, we explored the various options for organizing and managing your photos, such as creating albums, marking favorites, and applying labels.
Efficient searching in Google Photos is essential, and we provided useful tips for finding specific photos based on keywords, locations, people, and dates. These search methods will help you quickly locate the exact photos you’re looking for.
We emphasized the importance of backing up and syncing your photos with Google Photos to ensure their safety and accessibility. By enabling automatic backup and syncing across devices, you can be confident that your photos are securely stored in the cloud and easily accessible from any device.
Lastly, we addressed common troubleshooting issues that you may encounter while using Google Photos, including photos not backing up, syncing issues, missing photos, and app performance problems. Following the provided troubleshooting steps can help resolve these issues and ensure a seamless experience while using the platform.
With the knowledge and insights gained from this guide, you’re well-equipped to dive into the world of Google Photos and make the most of its features. Remember to regularly back up your photos, organize them into albums, and take advantage of the powerful search capabilities to efficiently navigate through your visual memories.
Now that you’re a Google Photos pro, go ahead and start organizing, sharing, and reliving your favorite moments. Happy photo managing!