Introduction
When it comes to building or upgrading a computer, one crucial component that needs careful attention is the motherboard. The motherboard acts as the central hub, connecting all the major components of the computer, including the CPU, RAM, and expansion cards. To ensure the stability and proper functioning of the motherboard, it needs to be securely fastened to the computer case.
But have you ever wondered what type of screws are used to secure the motherboard in place? Well, look no further! In this article, we will explore the different types of screws commonly used for motherboards, their sizes and lengths, and some tips for installing them.
Whether you are a seasoned PC builder or a beginner trying to assemble your first computer, understanding the types of screws required for your motherboard is essential. Using the right screws will not only ensure a secure fit but also prevent any damage to the motherboard or other components due to loose connections.
So, let’s dive into the world of motherboard screws and discover the key information you need to know!
Types of Screws for Motherboard
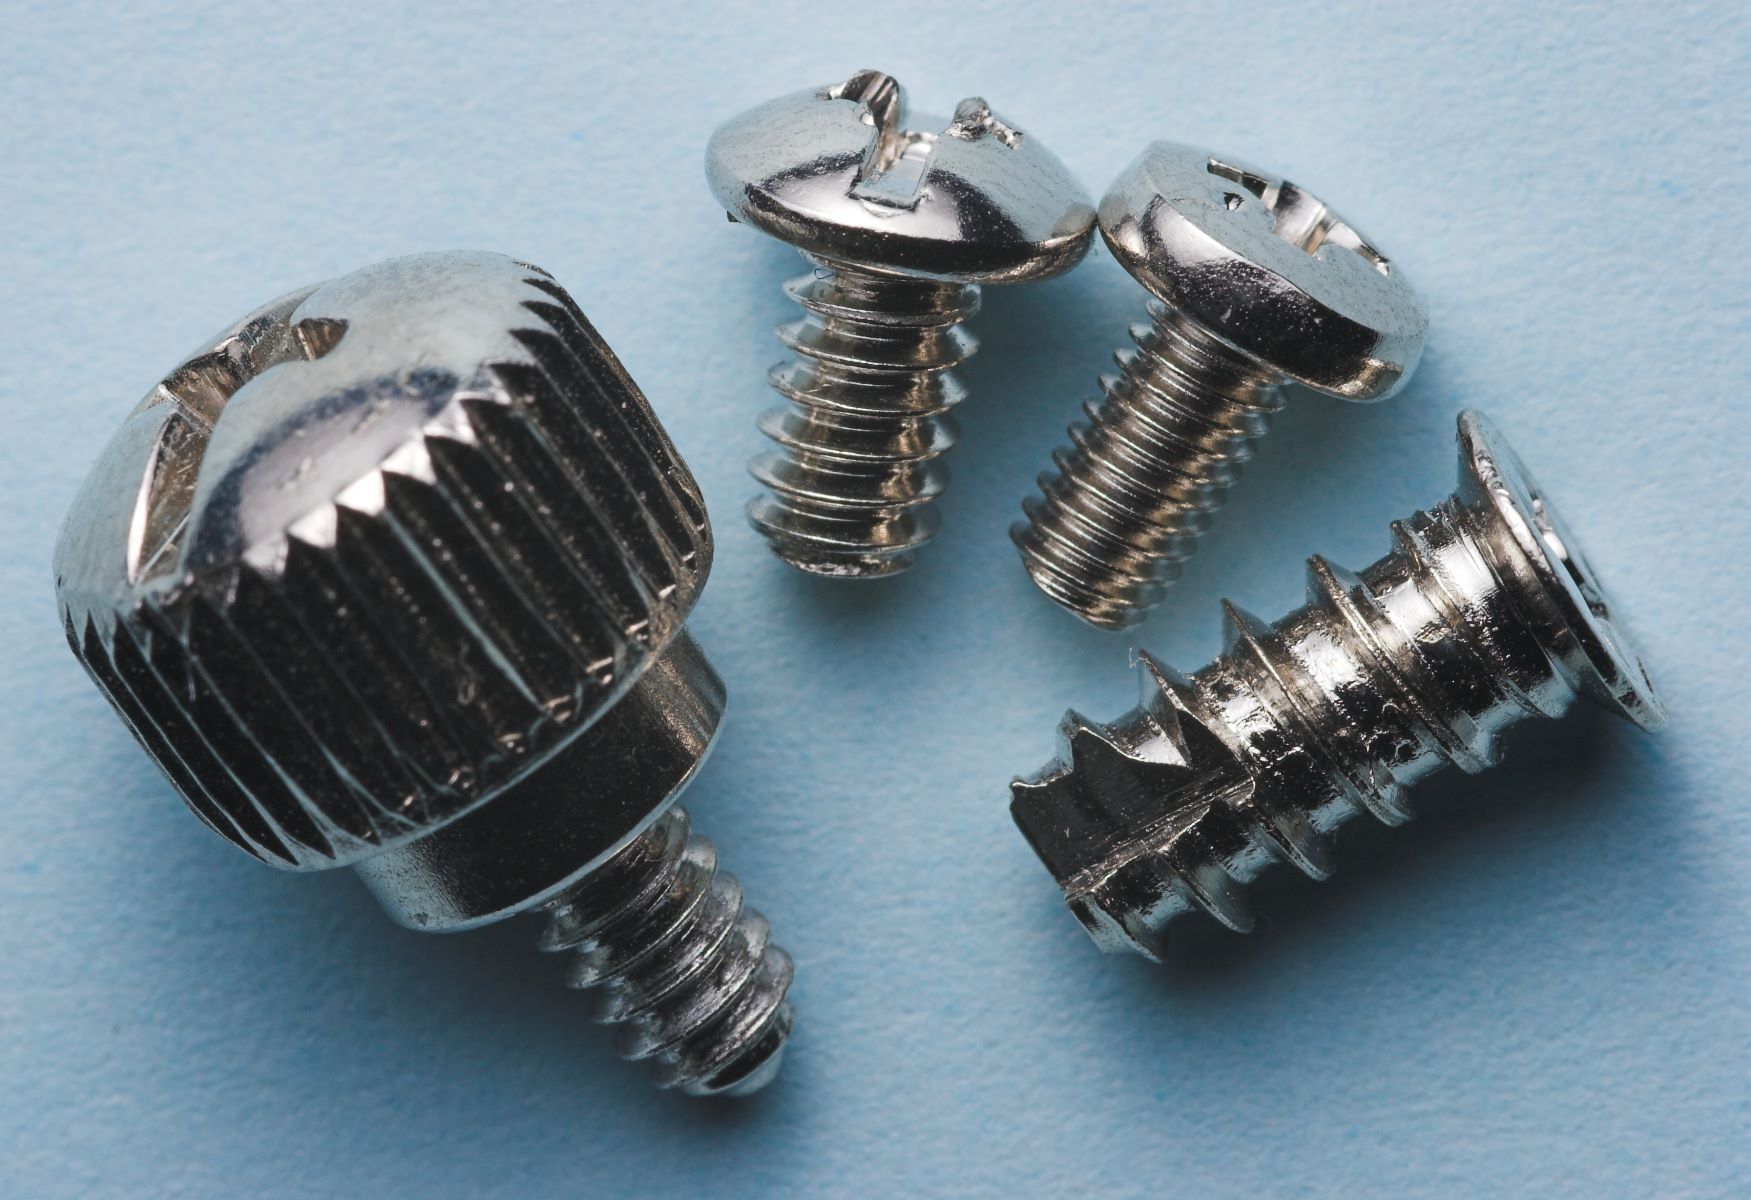
When it comes to securing a motherboard, several types of screws are commonly used. Each type has its unique characteristics and is designed to serve a specific purpose. Here are the three main types of screws you may encounter when installing a motherboard:
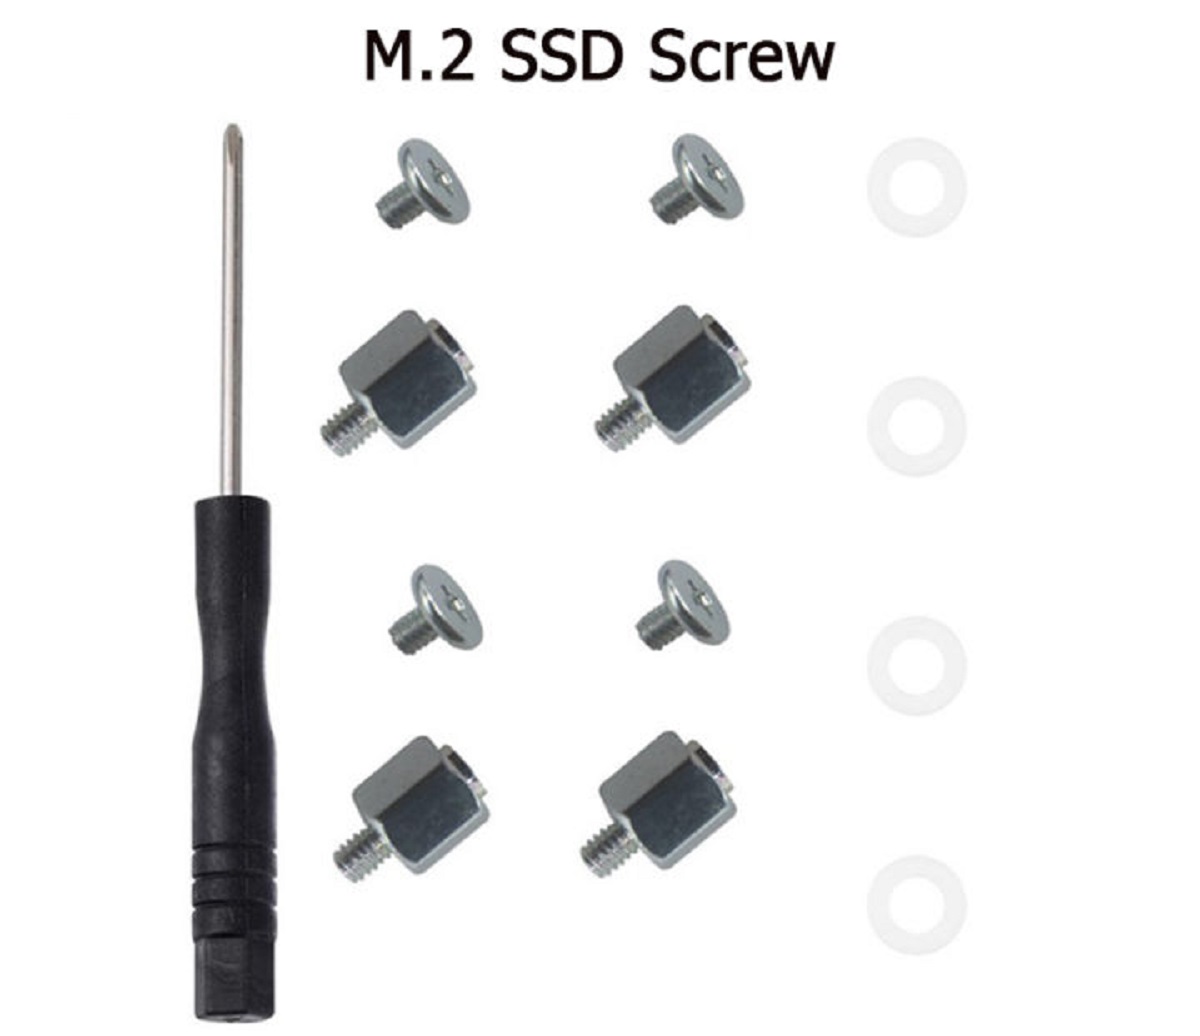
- Standoff Screws: Standoff screws are one of the most crucial components used to mount a motherboard. These screws are typically made of brass or steel and help elevate the motherboard from the case, preventing any contact between the motherboard and the case. The elevated position of the motherboard helps prevent electrical shorts and improves airflow within the system. Standoff screws often have a hexagonal or cylindrical shape and come in various heights to accommodate different motherboard sizes.
- Phillips Head Screws: Phillips head screws are the most common type of screws used in computer assembly, including securing the motherboard. These screws have a cross-shaped groove on the head, which requires a Phillips screwdriver to tighten or loosen them. Phillips head screws come in different sizes and lengths, and are typically used to secure the motherboard directly to the standoffs.
- Hex Head Screws: Hex head screws are another popular type of screws used for securing the motherboard. These screws have a hexagonal-shaped head, which requires a hex key or Allen wrench to tighten or loosen them. Hex head screws provide a more secure fit and are less likely to strip compared to Phillips head screws. They are commonly used in cases where extra stability and strength are required.
Each type of screw serves a specific purpose and may be used in conjunction with other screws to ensure proper mounting and stability of the motherboard. Understanding the different types of screws available will help you choose the right ones for your motherboard installation.
Standoff Screws
Standoff screws are an essential component when it comes to mounting a motherboard securely. These screws, typically made of brass or steel, play a vital role in elevating the motherboard from the computer case and creating a gap between the motherboard and the case.
The purpose of using standoff screws is to prevent any contact between the motherboard and the case, minimizing the risk of electrical shorts and potential damage to the motherboard. By lifting the motherboard, standoff screws also facilitate better airflow within the system, promoting effective cooling and preventing overheating.
Standoff screws come in different sizes and heights to accommodate various motherboard form factors and screw hole placements. It’s crucial to choose the correct standoff screws that match your motherboard’s specifications to ensure a proper fit.
When installing a motherboard, place the standoff screws in the corresponding screw holes on the computer case. Ensure that the standoff screws are aligned with the mounting holes on the motherboard. Once aligned, gently screw them in, securing them firmly but not overtightening.
It’s important to note that standoff screws should only be used in the designated areas of the case where motherboard installation is required. Using standoff screws in other areas may cause unnecessary stress or damage to the motherboard or surrounding components.
When installing the motherboard, ensure that all the standoff screws are in place and that the motherboard is securely attached to them. Check for any potential contact points between the motherboard and the case, and make the necessary adjustments if needed.
Overall, standoff screws are an integral part of motherboard installation. They provide the necessary elevation and separation, ensuring the stability, longevity, and proper functioning of your computer system.
Phillips Head Screws
Phillips head screws are the most commonly used type of screws in computer assembly, including the installation of a motherboard. These screws feature a cross-shaped groove on the head, requiring a Phillips screwdriver for tightening or loosening them.
Phillips head screws come in different sizes and lengths to accommodate various mounting points on the motherboard. They are typically used to secure the motherboard directly to the standoffs, ensuring a secure fit and minimizing any movement or vibration.
When using Phillips head screws to secure the motherboard, it’s important to apply the right amount of force to prevent overtightening or undertightening. Over-tightening can potentially damage the motherboard or strip the screw holes, while under-tightening may lead to a loose connection.
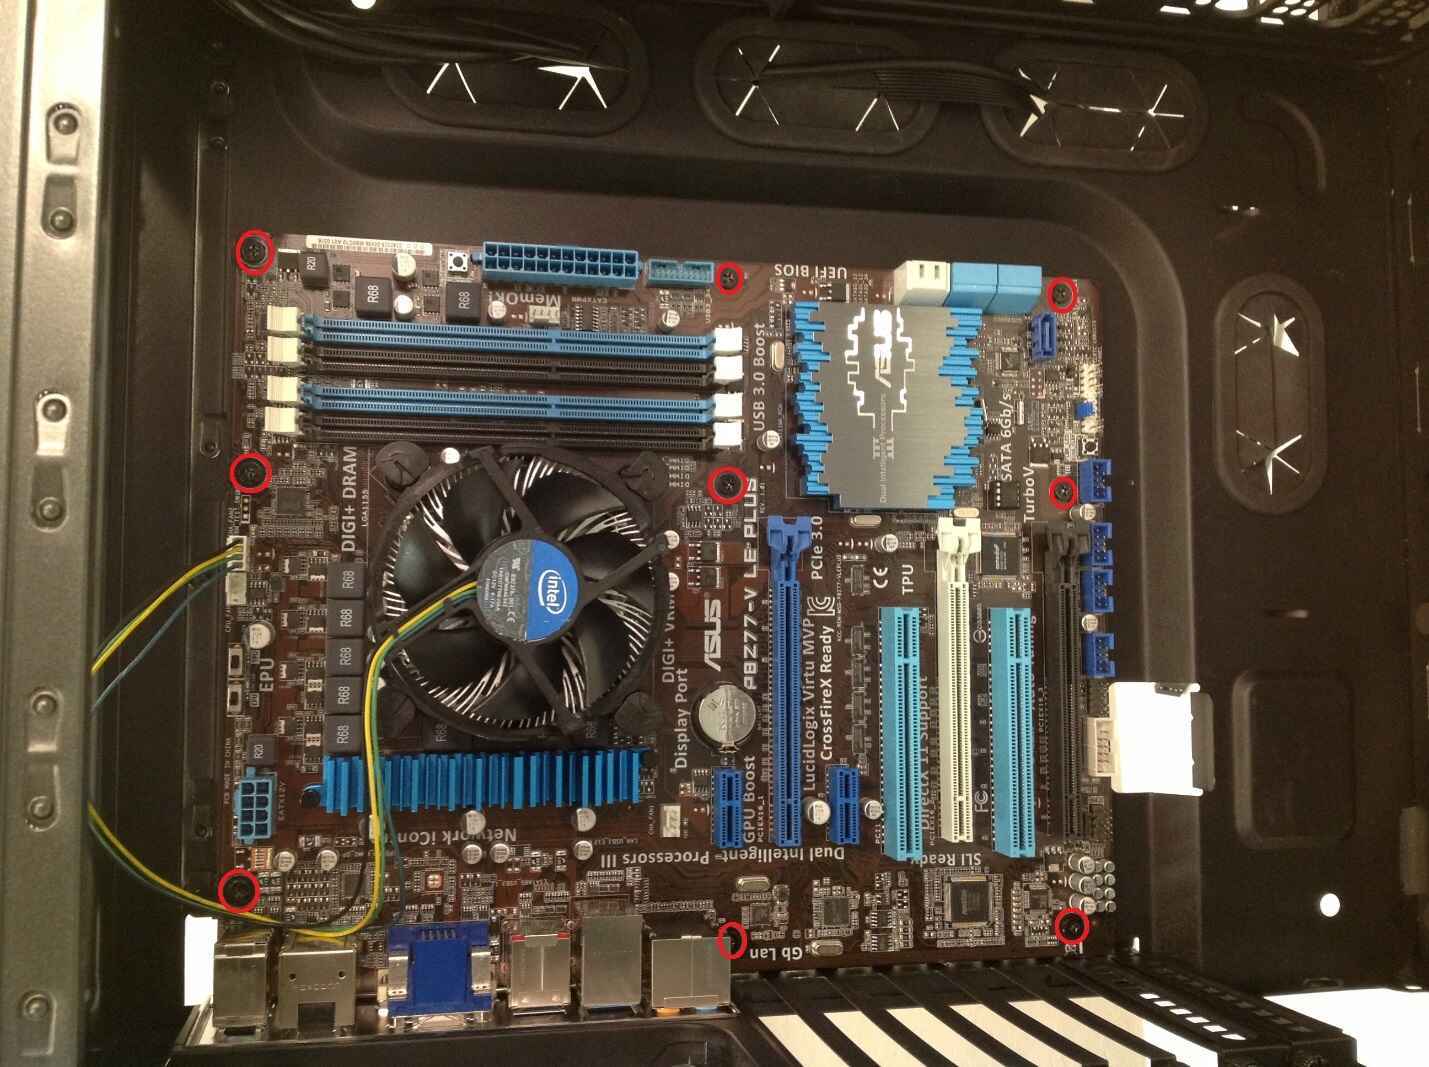
To install Phillips head screws, align the screw holes on the motherboard with the standoffs on the computer case. Insert the screws into the holes, ensuring they are properly aligned and making sure not to cross-thread them. Use a Phillips screwdriver to tighten the screws until they are secure but avoid applying excessive force.
When tightening the screws, it’s a good practice to start with the corners and work your way towards the center of the motherboard. This helps evenly distribute the pressure and ensures a balanced and secure installation.
During the installation process, it’s important to regularly check and verify that all the screws are properly tightened. This will help prevent any potential issues caused by loose connections and ensure the stability of the motherboard.
Overall, Phillips head screws are reliable and widely used in motherboard installation. They provide a secure and stable connection between the motherboard and the computer case, contributing to the overall performance and longevity of your computer system.
Hex Head Screws
Hex head screws are another commonly used type of screws for securing motherboards. These screws have a hexagonal-shaped head, which requires a hex key or Allen wrench for tightening or loosening them. Hex head screws are known for providing a more secure fit compared to Phillips head screws.
The hexagonal shape of these screws offers better resistance to stripping and allows for greater torque to be applied during installation. This makes them ideal for situations where extra stability and strength are required, such as when mounting heavier motherboards or when using larger expansion cards.
When installing a motherboard using hex head screws, first align the screw holes on the motherboard with the standoffs on the computer case. Place the hex head screws into the holes, ensuring they are properly aligned and making sure not to cross-thread them. Use a hex key or Allen wrench to tighten the screws, applying enough force to secure the motherboard in place but avoiding over-tightening.
One advantage of hex head screws is that they require a specific tool, the hex key or Allen wrench, to tighten or loosen them. This prevents accidental loosening due to vibrations or movement, ensuring a secure connection between the motherboard and the case.
It’s important to choose the correct size and length of hex head screws that match the screw holes on your motherboard and the standoffs on the computer case. Using the wrong size of screws may lead to an insecure fit or potential damage to the motherboard or case.
When installing hex head screws, it’s recommended to follow a similar approach as with Phillips head screws. Start with the corners and work your way towards the center, tightening the screws evenly to maintain a balanced installation.
Overall, hex head screws provide a reliable and secure method for fastening motherboards. Their unique shape and resistance to stripping make them an excellent choice for ensuring stability and longevity in your computer system.
Size and Length of Screws
When it comes to selecting the appropriate screws for your motherboard installation, considering the size and length of the screws is crucial. Using the correct size and length of screws ensures a secure and proper fit, preventing any potential damage to the motherboard or other components.
Most motherboards have pre-drilled screw holes that are standardized, allowing for easy installation. The size and length of screws needed for securing the motherboard depend on the motherboard’s form factor and the screw hole placements.
When determining the size of the screws, the most common sizes used for motherboards are M3, M3.5, and 6-32. These sizes refer to the diameter of the screw thread and are often labeled on the motherboard or specified in the user manual. It’s important to use screws with the correct diameter to ensure a proper fit in the screw holes.
In terms of length, it’s crucial to choose screws that are long enough to securely fasten the motherboard to the standoffs but not so long that they protrude beyond the motherboard’s surface. Using screws that are too long can cause interference with components on the motherboard or create a risk of short circuits if they come in contact with electrical traces.
When selecting the length of screws, consider the thickness of the motherboard, the height of the standoffs, and any additional components such as backplates or brackets that may require screwing into the case. It’s a good practice to measure the distance between the motherboard and the standoffs to ensure the screws are of an appropriate length.
When in doubt, referring to the motherboard’s user manual or consulting the manufacturer’s specifications is always recommended. These resources provide detailed information on the appropriate screw sizes and lengths for your specific motherboard model.
Remember, using the wrong size or length of screws can lead to an insecure fit, potential damage to the motherboard, or even functional issues. A secure and properly installed motherboard is vital for the stability and performance of your computer system.
Tips for Installing Screws on Motherboard
Installing screws on a motherboard may seem like a simple task, but paying attention to a few key tips can ensure a smooth and successful installation. Here are some useful tips to keep in mind when installing screws on your motherboard:
- Organize and plan: Before beginning the installation process, lay out all the necessary screws and identify their respective sizes and lengths. Take note of the screw holes on the motherboard and plan their placement on the computer case. This will help streamline the installation process and ensure you have the right screws for each mounting point.
- Handle with care: When handling screws, avoid dropping them onto the motherboard or other components. Dropping screws can cause damage or create a short circuit if they fall into the wrong place. It’s a good practice to hold the screws firmly between your fingers or use a magnetic screwdriver to minimize the risk of dropping them.
- Align and tighten correctly: Ensure that the screw holes on the motherboard align with the corresponding standoffs or mounting points on the computer case. Always start by gently hand-tightening each screw to align the motherboard properly. Once aligned, use the appropriate screwdriver or wrench to tighten the screws. Avoid over-tightening, as it can damage the motherboard or strip the screw holes.
- Check for clearance: Before finalizing the screw tightness, double-check for any potential contact points between the motherboard and the case. Ensure that no components or cables are obstructing the installation or causing unnecessary pressure on the motherboard. Adjustments may be needed to ensure a secure, yet clearance-friendly, installation.
- Regularly inspect for loose screws: After completing the installation, periodically check the screws to ensure they remain tight. Vibrations or movements can cause screws to loosen over time, potentially leading to instability or connectivity issues. Depending on your computer usage, it’s recommended to inspect and tighten the screws every few months.
Following these tips will help you install the screws on your motherboard correctly, ensuring a secure and stable connection. Taking your time, being attentive to details, and using the proper tools will contribute to a successful motherboard installation and the overall performance of your computer system.
Conclusion
Choosing and installing the right screws for your motherboard is a crucial step in the process of building or upgrading your computer. Understanding the different types of screws available, such as standoff screws, Phillips head screws, and hex head screws, allows for a secure and stable installation.
Standoff screws provide elevation and separation between the motherboard and the computer case, preventing electrical shorts and improving airflow. Phillips head screws, the most common type, are easy to use and provide a secure fit for mounting the motherboard. Hex head screws offer added stability and resistance to stripping, ideal for heavier motherboards or situations requiring extra strength.
When installing screws, considering the correct size and length is essential to ensure a proper fit and avoid potential damage to the motherboard or interference with other components. Planning, organizing, and handling the screws with care contribute to a smooth installation process. Double-checking for proper alignment and clearance, as well as periodically inspecting for loose screws, helps maintain the stability of the motherboard over time.
By following these guidelines and tips, you can confidently install screws on your motherboard, guaranteeing a secure and reliable connection. This attention to detail and proper installation not only ensures the longevity and performance of your computer system but also provides peace of mind knowing that your motherboard is securely fastened.