Introduction
When it comes to optimizing the cooling performance of your computer, case fans play a crucial role. They help to dissipate heat and ensure that your components run efficiently and smoothly. While most case fans are traditionally mounted vertically, there is an alternative option that can provide even better cooling – horizontal fan mounting.
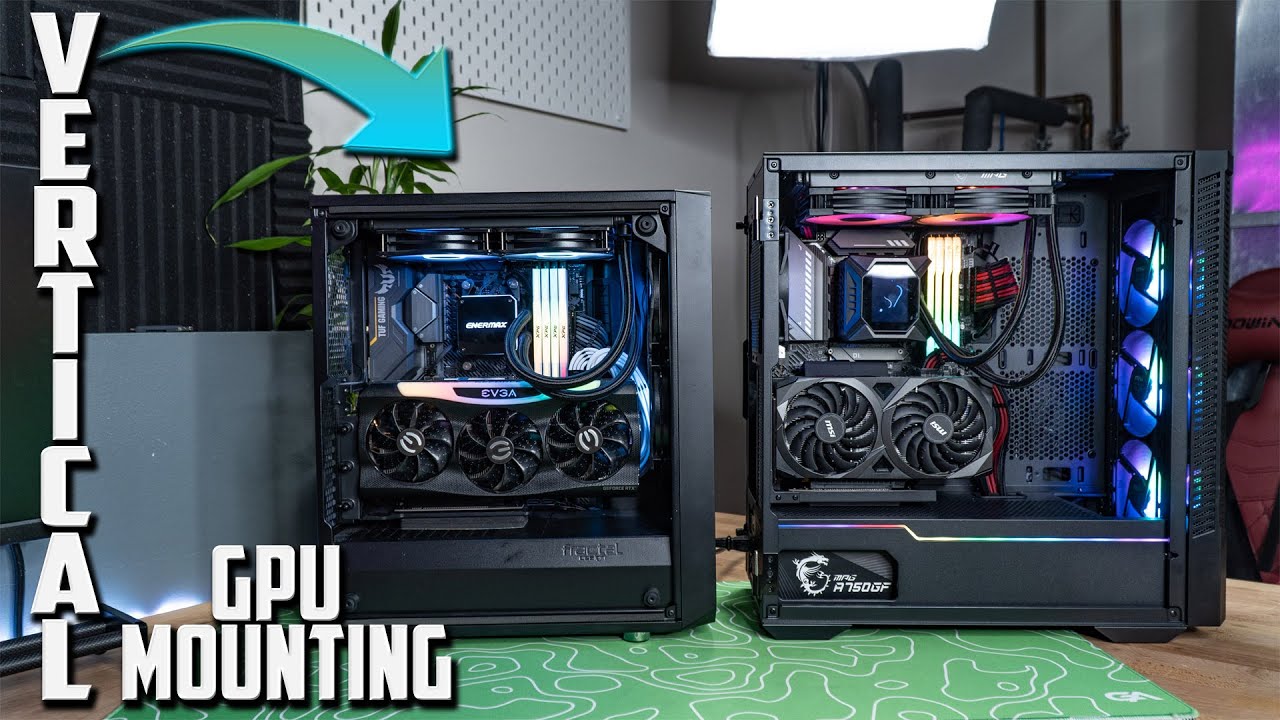
Horizontal fan mounting involves positioning the fan parallel to the ground, either on the top or side of the case. This orientation allows for better airflow across the components and improves heat dissipation, resulting in lower temperatures and enhanced overall performance.
While vertical fan mounting has been the standard method for years, it does have limitations. Vertical mounting can often create turbulent airflow, especially in cases with restricted airflow paths. In contrast, horizontal fan mounting ensures a more direct and efficient airflow through the components, promoting better cooling and reducing the risk of overheating.
In this article, we will explore the benefits of horizontal fan mounting, different types of mount options available, and provide tips for choosing the right horizontal fan mount for your specific setup. So, if you’re ready to optimize your computer’s cooling capabilities, let’s dive into the world of horizontal fan mounting!
Benefits of Horizontal Fan Mounting
Horizontal fan mounting offers several advantages over vertical fan mounting. By positioning the fan parallel to the ground, the airflow across the components is optimized, resulting in improved cooling performance and better overall system stability. Here are some key benefits of horizontal fan mounting:
- Enhanced Heat Dissipation: Horizontal fan mounting allows for more efficient heat dissipation. As the fan blows air directly over the components, it helps to carry away the heat generated by the CPU, GPU, and other heat-sensitive parts. This reduces the risk of overheating and extends the lifespan of your components.
- Improved Airflow: Horizontal fan mounting provides a more direct and unobstructed airflow path. Unlike vertical mounting, there is no interference from other components or cables that may restrict the airflow. This smooth and uninterrupted airflow helps to maintain lower temperatures throughout the system.
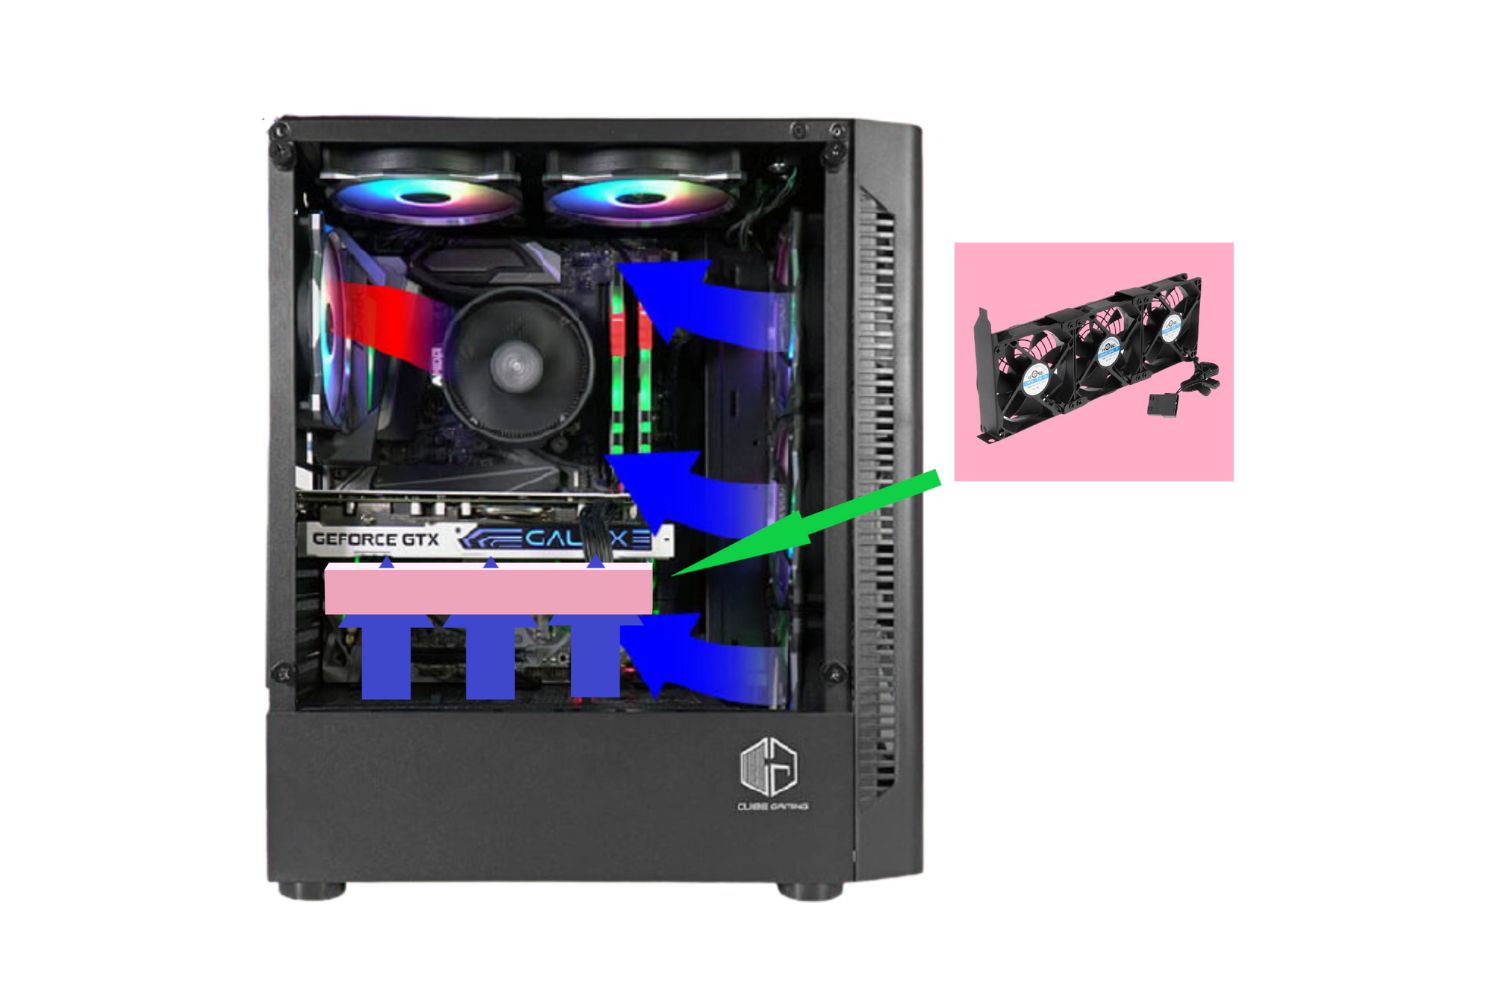
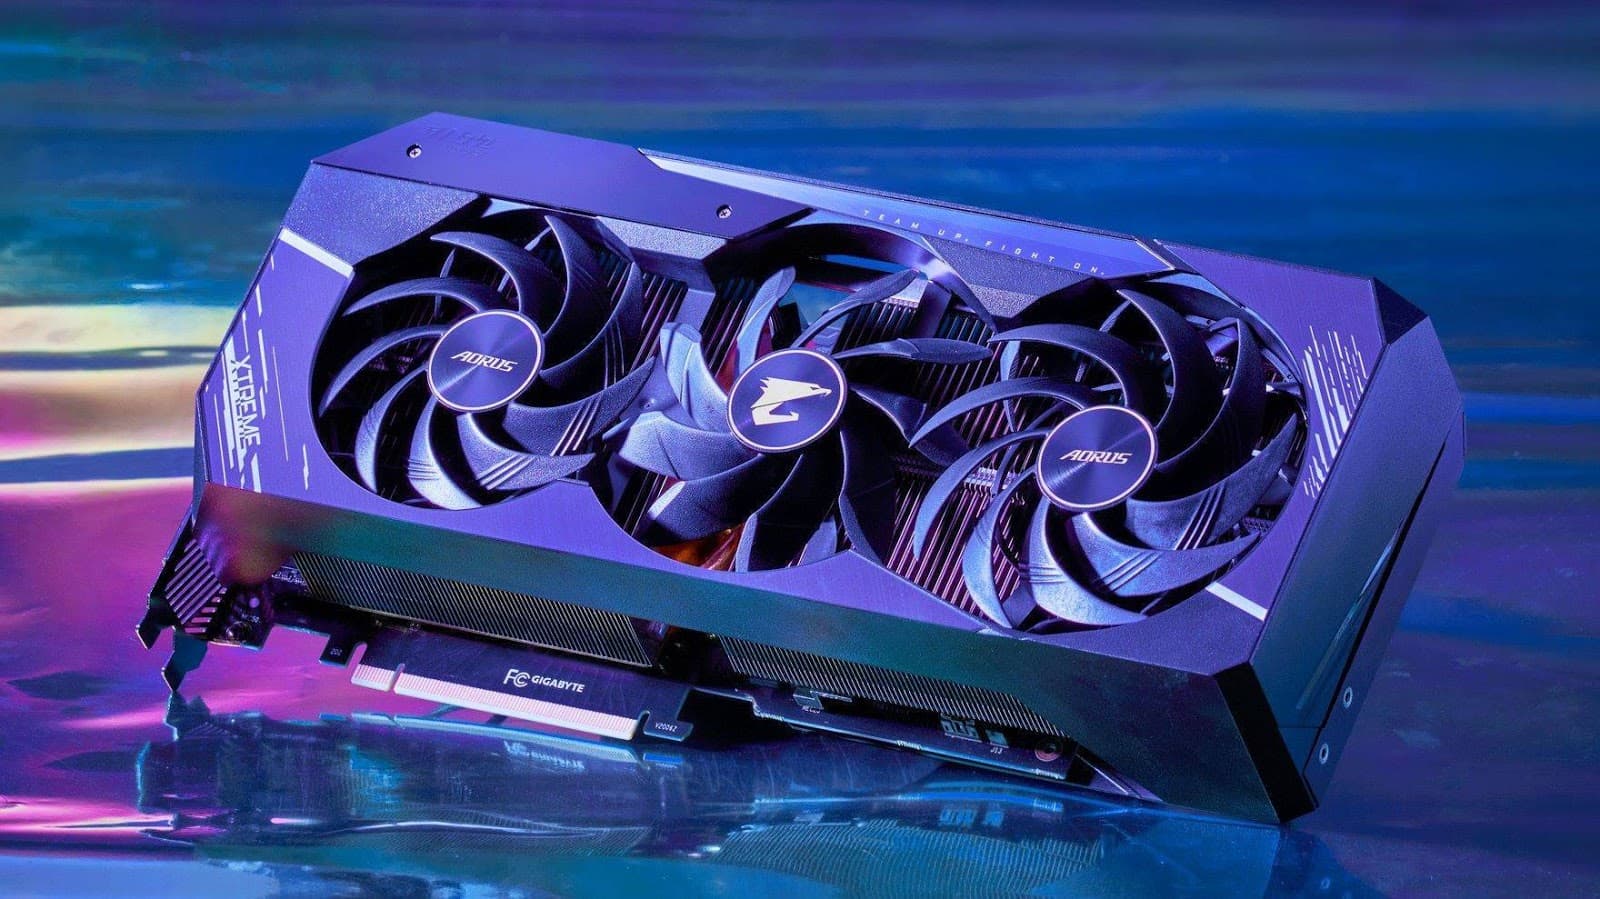
- Better Cooling for Specific Components: In some cases, certain components within the system may benefit more from horizontal fan mounting. For example, graphics cards with multi-fan designs or large heatsinks can benefit from having a dedicated horizontal fan for targeted cooling.
- No Hot Air Trapping: Vertical mounting can sometimes lead to hot air becoming trapped near the top of the case, especially when using a top-mounted or exhaust-oriented configuration. With horizontal fan mounting, this issue is minimized as the fan helps to push the hot air out of the case directly.
- Reduced Noise: The optimized airflow provided by horizontal fan mounting can result in reduced noise levels. With improved cooling efficiency, fans can operate at lower speeds while maintaining satisfactory temperatures, leading to quieter operation.
Overall, horizontal fan mounting presents a compelling alternative to traditional vertical fan mounting. It offers superior cooling performance, improved airflow, and enhanced system stability. In the next sections, we will explore the various types of horizontal fan mounts and provide insights on choosing the right one for your setup.
Types of Horizontal Fan Mounts
There are different types of mounts available for horizontal fan mounting. The type of mount you choose depends on your specific case design and cooling requirements. Let’s take a look at the most common types:
- Direct Mounting: Direct horizontal fan mounting involves attaching the fan directly to the case’s top or side panel using screws or fan mounts. This method is simple and straightforward, requiring no additional brackets or accessories. It provides a secure and stable mounting solution, but it may require some modifications to the case depending on its design.
- Bracket Mounting: Bracket mounts are specifically designed for horizontal fan mounting. These brackets are typically metal or plastic structures that attach to the case’s top or side panel. The fan is then mounted onto the bracket using screws or clips. Bracket mounts provide a convenient and secure solution, eliminating the need for case modifications. They also offer flexibility in positioning the fan at desired locations.
- Standoff Mounting: Standoff mounts involve using specially designed standoffs or spacers to mount the fan away from the case’s surface. These standoffs create a gap between the fan and the case, allowing for improved airflow and reducing vibration and noise. Standoff mounts are commonly used in combination with bracket mounts for enhanced cooling performance.
Each type of horizontal fan mount has its own advantages and considerations. Direct mounting is a cost-effective option, but it may require drilling or cutting holes in the case. Bracket mounts provide a convenient solution without the need for modifications, while standoff mounts offer additional benefits for improved airflow and reduced noise.
When selecting a horizontal fan mount, take into account your case’s compatibility, available space, and your desired cooling performance. It’s also important to consider the dimensions and specifications of the fan you plan to use, ensuring it aligns with the chosen mount and fits within your case properly.
In the next sections, we will delve deeper into each type of horizontal fan mount and provide insights on how to choose the right one for your specific needs.
Direct Mounting
Direct mounting is the simplest method of horizontal fan mounting. It involves attaching the fan directly to the case’s top or side panel using screws or fan mounts. This method provides a secure and stable mounting solution, but it may require some modifications to the case depending on its design.
Before proceeding with direct mounting, you need to ensure that your case has the necessary mounting points or slots for attaching the fan. In some cases, you may need to drill or cut holes in the case’s panel to accommodate the fan. Therefore, it’s important to carefully measure and mark the desired mounting locations to ensure a precise fit.
Once you have identified the mounting points, position the fan over the designated area and align the screw holes. Use appropriate screws or fan mounts to secure the fan in place. Ensure that the fan is tightly attached, without any wobbling or movement.
Direct mounting offers a cost-effective solution for horizontal fan mounting. It allows for direct airflow over the components, ensuring efficient heat dissipation and improved cooling performance. However, it’s crucial to note that direct mounting may not be suitable for all cases. Some cases may lack the necessary mounting points or structural support to handle the weight and vibration of the fan.
When considering direct mounting, make sure to evaluate your case’s compatibility and structural integrity. Additionally, consider the size and weight of the fan you plan to use, ensuring that the case can safely accommodate it. If necessary, consult your case manufacturer’s specifications or seek professional advice to ensure a proper and secure direct mounting installation.
In the next section, we will explore another type of horizontal fan mount – bracket mounting.
Bracket Mounting
Bracket mounting is a popular method for horizontal fan mounting due to its convenience and versatility. This method involves using specially designed brackets that attach to the case’s top or side panel, providing a secure and stable platform for mounting the fan.
Bracket mounts are typically made of metal or plastic and come in various sizes and designs to accommodate different fan sizes and case configurations. They are specifically designed to simplify the installation process and eliminate the need for case modifications.
To install a bracket mount, start by selecting an appropriate bracket that matches your case’s compatibility and fan size. Align the bracket over the desired mounting area on the case, ensuring that it fits snugly and securely. Use the provided screws or clips to attach the bracket to the case.
Once the bracket is securely in place, you can then mount the fan onto the bracket using screws or clips. Ensure that the fan is properly aligned with the bracket and positioned for optimal airflow. Tighten the screws or secure the clips to ensure a stable and reliable mounting.
The bracket mounting method offers several advantages. It provides a convenient solution that doesn’t require any modifications to the case. It also allows for flexibility in positioning the fan at desired locations, optimizing the airflow for better cooling performance. Additionally, bracket mounts often come with built-in features to minimize vibration and noise, enhancing the overall user experience.
When selecting a bracket mount, consider the size and weight of the fan you plan to use. Ensure that the bracket can support the fan’s weight without compromising stability. Also, take into account your case’s compatibility and available space, as some bracket mounts may have specific limitations.
In the next section, we will discuss another type of horizontal fan mount – standoff mounting.
Standoff Mounting
Standoff mounting is a unique method of horizontal fan mounting that introduces an additional element to enhance cooling performance. This method involves using standoffs or spacers to mount the fan away from the case’s surface, creating a gap between the fan and the case.
The standoffs are typically small metal or plastic extensions that attach to the case’s top or side panel. They provide a stable and secure platform for mounting the fan while keeping it elevated from the case’s surface. This elevation allows for improved airflow and reduces the transmission of vibrations and noise.
To install a standoff mount, start by securing the standoffs onto the case’s panel. Line them up with the desired mounting locations and use appropriate screws or fasteners to attach them securely. Once the standoffs are in place, position the fan over the standoffs, aligning the screw holes on the fan with the standoffs.
Use the provided screws to attach the fan to the standoffs, ensuring a tight and secure fit. Make sure that the fan is properly aligned and positioned for optimal airflow. The gap created between the fan and the case allows for better air circulation and reduces the risk of hot air being trapped.
Standoff mounting offers several benefits. First and foremost, it improves airflow by elevating the fan and allowing for more direct and unobstructed airflow across the components. This results in better cooling performance and temperature management. Standoff mounts also help to reduce vibrations and noise, as the elevated fan has less contact with the case’s surface.
When considering standoff mounting, it’s important to ensure that your case has the necessary mounting points or slots for attaching the standoffs. Additionally, consider the overall dimensions and weight of the fan, making sure that the standoffs can safely support the fan without compromising stability.
In the next section, we will discuss important factors to consider when choosing the right horizontal fan mount for your setup.
Choosing the Right Horizontal Fan Mount
Choosing the right horizontal fan mount is crucial to ensure effective cooling and optimal performance for your computer system. Here are some factors to consider when selecting the appropriate mount:
- Case Compatibility: Different cases have varying designs and mounting options. Ensure that the chosen fan mount is compatible with your case’s specifications, such as the available mounting points and sizes.
- Fan Size and Weight: Consider the dimensions and weight of the fan you plan to use. Ensure that the chosen mount can safely support the fan without compromising stability.
- Cooling Requirements: Evaluate your cooling needs and the components you want to cool. Determine if a specific type of mount, such as a bracket mount, offers the desired flexibility and positioning options to optimize airflow.
- Noise and Vibration: If reducing noise and vibrations are a priority, consider mounts that incorporate features to minimize these factors, such as built-in rubber padding or anti-vibration mechanisms.
- Case Modifications: Determine if you are willing to make any modifications to the case for direct mounting. Keep in mind that direct mounting may require drilling or cutting holes, which can void the warranty or impact the case’s structural integrity.
- Budget: Consider your budget when choosing a fan mount. Direct mounting may be a cost-effective solution, while bracket mounts or standoff mounts may involve additional expenses.
By carefully considering these factors, you can select the right horizontal fan mount that meets your specific requirements and ensures optimal cooling for your computer system.
In the next section, we will provide some essential tips for effective horizontal fan mounting.
Factors to Consider Before Mounting
Before proceeding with horizontal fan mounting, there are a few important factors to consider to ensure a successful installation and optimal cooling performance. Here are some factors to keep in mind:
- Case Layout: Familiarize yourself with your case’s layout and internal components. Identify potential obstacles or clearance issues that may interfere with the mounting process or airflow.
- Airflow Direction: Determine the desired airflow direction in your case. Consider whether you want to use a top-mounted intake or exhaust configuration, or a side-mounted intake or exhaust configuration.
- Cable Management: Proper cable management is essential for maintaining good airflow. Ensure that cables are neatly organized and do not obstruct the fan’s path or impede airflow.
- Component Clearance: Consider the clearance between the fan and other components, such as RAM modules, graphics cards, or CPU coolers. Ensure that there is enough space to avoid any interference or obstruction.
- Fan Control: Determine how you plan to control the fan’s speed and adjust its performance. Consider whether your motherboard supports fan control or if additional fan controller modules are necessary.
- Noise Considerations: Take into account the noise level generated by the fan. Consider using fans with lower noise ratings or investing in sound-dampening materials for quieter operation.
- Regular Maintenance: Horizontal fan mounting may require more frequent maintenance to prevent dust buildup. Ensure that you have access to the fan for easy cleaning and maintenance.
By considering these factors before mounting the fan, you can ensure a smooth installation process and optimize the cooling capabilities of your computer system.
Now that you have considered these factors, let’s move on to the next section, where we will provide some tips for effective horizontal fan mounting.
Tips for Effective Horizontal Fan Mounting
To ensure effective horizontal fan mounting and maximize the cooling performance of your computer system, here are some helpful tips to keep in mind:
- Optimal Positioning: Position the fan strategically to ensure it blows air directly over the components that require cooling, such as the CPU, GPU, or chipset. Consider the airflow direction and the hotspots within your case.
- Intake and Exhaust Balance: Balance the intake and exhaust fans in your case to maintain positive air pressure. This will help prevent dust from entering through unfiltered openings and ensure efficient airflow.
- Cable Management: Make use of cable routing options and tie-downs to keep cables organized and out of the fan’s path. This improves airflow and prevents any obstruction that may hinder cooling performance.
- Proper Fan Configuration: Consider the orientation and configuration of your fans. Using a combination of intake and exhaust fans can create a directed airflow that efficiently removes hot air from the case.
- Regular Cleaning: Horizontal fan mounting can lead to dust accumulation due to the open orientation. Regularly clean the fan and surrounding components to prevent any buildup that may impede airflow and reduce cooling effectiveness.
- Noise Reduction: If noise is a concern, use fans with lower noise ratings or invest in noise-dampening materials such as foam or rubber gaskets to reduce vibrations and fan noise.
- Temperature Monitoring: Keep an eye on your system’s temperatures using monitoring software. This will help you identify any issues with cooling performance and make necessary adjustments if required.
- Experiment and Fine-tune: Don’t be afraid to experiment with different fan configurations or positions to find the setup that works best for your specific case and components. Fine-tuning the fan speeds can also help achieve ideal cooling performance.
By following these tips, you can ensure effective horizontal fan mounting and optimize the cooling of your computer system, leading to better performance, stability, and longevity of your components.
Now that we have explored the tips for effective mounting, let’s conclude our discussion on horizontal fan mounting.
Conclusion
Horizontal fan mounting offers a compelling alternative to traditional vertical fan mounting, providing numerous benefits for optimizing the cooling performance of your computer system. By positioning the fan parallel to the ground, horizontal mounting enhances heat dissipation, improves airflow, and reduces the risk of hot air stagnation within the case.
In this article, we explored the benefits of horizontal fan mounting, the different types of mounts available (direct, bracket, and standoff), and the factors to consider when choosing the right mount for your setup. We discussed the importance of case compatibility, fan size and weight, cooling requirements, noise reduction, and budget considerations.
We also discussed the factors to consider before mounting, such as case layout, airflow direction, cable management, component clearance, fan control, and regular maintenance. Additionally, we provided tips for effective horizontal fan mounting, including optimal positioning, intake and exhaust balance, cable management, fan configuration, regular cleaning, noise reduction, temperature monitoring, and experimentation.
By carefully considering these factors and following the tips outlined in this article, you can ensure a successful horizontal fan mounting installation and achieve optimal cooling performance for your computer system.
So, if you’re looking to enhance the cooling capabilities of your system and maintain stable temperatures for your components, don’t hesitate to explore the possibilities of horizontal fan mounting. With its benefits in heat dissipation, improved airflow, and noise reduction, it’s a worthwhile consideration for any computer enthusiast or gamer seeking to maximize their system’s performance and reliability.