Introduction
Welcome to the world of 3D printing! This cutting-edge technology has revolutionized manufacturing, design, and even consumer goods. One of the key factors that determines the quality and strength of 3D printed objects is the shell thickness. In this article, we will explore what exactly the shell is in the context of 3D printing, its importance, and the factors that affect its thickness.
When it comes to 3D printing, the shell refers to the outermost layer of an object, also known as the wall. It acts as a protective covering, giving the object its structural integrity and determining its overall appearance. The shell thickness directly affects the strength, durability, and aesthetic appeal of the printed object.
While there are no strict rules when it comes to shell thickness, it is important to find the right balance. The optimal shell thickness depends on various factors, such as the size and complexity of the object, the material used, and the desired level of detail. Too thin of a shell can result in a weak and fragile object, while a shell that is too thick may lead to excessive material usage and longer print times.
As you delve into the world of 3D printing, understanding the significance of shell thickness becomes essential. By adjusting the shell thickness, you can fine-tune the strength, flexibility, and aesthetics of your prints. In the next sections, we will delve deeper into the concept of shell thickness, exploring its importance and the factors that influence it.
Definition of Shell in 3D Printing
In the world of 3D printing, the term “shell” refers to the outer surface or wall of a printed object. It is essentially the layer that surrounds and encloses the internal structure. The shell is created by depositing successive layers of material on top of each other until the desired thickness is achieved.
The shell serves multiple purposes in 3D printing. Firstly, it provides structural integrity, ensuring that the object maintains its shape and can bear external forces. Depending on the design and intended usage of the object, the shell thickness can be adjusted to achieve different levels of strength and durability.
Secondly, the shell is responsible for defining the external appearance of the printed object. It determines the smoothness and surface finish of the final product. The thickness of the shell can greatly impact the overall aesthetic quality of the object, making it an important consideration for designers and artists.
In most 3D printing processes, the shell is composed of multiple layers of material, with each layer adding to the overall thickness. The number of layers and their thickness can be controlled through the software settings of the 3D printer. The quality of the printed object can be improved by increasing the shell thickness, as it reduces the visibility of individual layers and enhances the object’s overall smoothness.
It is worth noting that the shell thickness can vary throughout the object, depending on the design and the desired properties of different regions. Some areas may require a thicker shell to provide additional strength, while others may have thinner shells for intricate details or flexibility.
By carefully adjusting the shell thickness, 3D printing enthusiasts can achieve the desired balance between structural integrity, surface finish, and overall aesthetics. It is a critical parameter that must be considered during the design and printing process to achieve the best possible results.
Importance of Shell in 3D Printing
The shell thickness plays a crucial role in the quality and performance of 3D printed objects. Understanding the importance of the shell is essential for achieving optimal results in your prints.
One of the key roles of the shell is to provide structural strength to the printed object. A thicker shell can improve the overall durability and rigidity, ensuring that the object can withstand external forces. This is particularly important for functional parts or objects that need to bear weight or withstand stress.
The shell also acts as a protective layer, shielding the internal structure from damage, moisture, and other external factors. It serves as a barrier, preventing any potential deformations or warping of the object. Additionally, a well-designed shell can help distribute forces evenly throughout the object, minimizing the risk of localized stress concentration.
Furthermore, the shell has a significant impact on the surface finish and aesthetics of the printed object. A thicker shell can smooth out the appearance by reducing the visibility of individual layers. This is especially important for objects that require a polished or professional finish, such as prototypes, architectural models, or consumer products.
Another important aspect is the dimensional accuracy of the printed object. The shell thickness can affect the overall dimensions of the object, and careful consideration must be given to ensure that the printed object matches the intended design specifications. By calibrating the shell thickness, potential issues like over-extrusion or under-extrusion can be minimized, leading to more accurate and precise prints.
Moreover, the shell thickness can impact the printing time and material usage. Thicker shells require more material to be deposited, resulting in longer print times and higher material costs. It is crucial to find the right balance between the desired strength and the time and cost constraints of the printing process.
In summary, the shell thickness is critical in 3D printing for maintaining structural integrity, enhancing surface finish, ensuring dimensional accuracy, and managing printing time and material costs. By understanding the importance of the shell and adjusting its thickness accordingly, you can achieve prints that meet your functional and aesthetic requirements.
Factors Affecting Shell Thickness
Several factors come into play when determining the optimal shell thickness for 3D printed objects. It is important to consider these factors to achieve the desired strength, surface finish, and overall functionality of the printed object.
1. Object Size and Complexity: The size and complexity of the object heavily influence the ideal shell thickness. Large objects or objects with intricate details may require thicker shells to ensure structural integrity and prevent warping or deformations.
2. Printing Technology: Different 3D printing technologies have varying limitations when it comes to shell thickness. For example, filament-based printers often achieve better results with thicker shells, while resin-based printers can produce finer details with thinner shells.
3. Material Properties: The properties of the material being used also impact the optimal shell thickness. Some materials, like PLA (polylactic acid), may require thicker shells for added strength, while others, like flexible filaments, may benefit from thinner shells to maintain flexibility.
4. Desired Functionality: The intended functionality of the printed object is a significant factor to consider. Objects that need to bear weight or withstand mechanical stress, such as mechanical parts or functional prototypes, generally require thicker shells for improved structural integrity.
5. Surface Finish: The desired surface finish also influences the shell thickness. If a smooth and polished appearance is desired, a thicker shell can help hide the layer lines and achieve a more aesthetically pleasing result.
6. Time and Cost Constraints: The time and cost of the printing process are important considerations. Thicker shells require more material and longer print times, which may not be feasible when there are time constraints or budget limitations.
It is crucial to strike a balance between these factors to determine the optimal shell thickness. Experimentation and testing can help identify the right combination of parameters and achieve the desired results. Fine-tuning the shell thickness based on these factors will ensure that the printed objects meet the desired functionality, appearance, and budgetary requirements.
Benefits of Using Thicker Shells
Optimizing the shell thickness in 3D printing involves finding a balance between strength, surface finish, and printing efficiency. While thinner shells have their advantages, there are also several benefits to using thicker shells for your 3D printed objects.
1. Enhanced Structural Integrity: One of the primary benefits of using thicker shells is the improved structural integrity of the printed object. Thicker shells provide greater stability and strength, making the object more robust and able to withstand external forces or stress. This is particularly important for functional parts or objects that will be subjected to constant use or heavy loads.
2. Increased Durability: Thicker shells contribute to a higher level of durability in 3D printed objects. They help to protect the internal structure and prevent deformations or damage. A thicker shell acts as a protective barrier, ensuring that the printed object can retain its shape and functionality over time.
3. Improved Surface Finish: Thicker shells can improve the overall surface finish of the printed object. By increasing the shell thickness, the visibility of individual layers can be minimized, resulting in a smoother and more aesthetically pleasing appearance. This is particularly beneficial for objects that require a high-quality finish, such as product prototypes or display models.
4. Better Print Accuracy: Thicker shells can help to compensate for any inconsistencies or imperfections in the printing process, resulting in improved dimensional accuracy. The additional material deposition helps to fill in gaps or compensate for any minor variations, leading to more precise and accurate prints.
5. Increased Resistance to Wear and Tear: Thicker shells offer better resistance to wear and tear, making the printed object more durable over time. This is especially important for functional parts that undergo repetitive movements or experience friction. A thicker shell can help to extend the lifespan of the printed object and reduce the need for frequent replacements.
6. Enhanced Design Flexibility: Thicker shells provide designers with more flexibility in terms of object design. With a thicker shell, it is easier to incorporate intricate details, such as embossed features or hollow sections, without compromising the overall strength or integrity of the object.
While there are trade-offs to consider, including longer print times and increased material usage, the benefits of using thicker shells often outweigh these concerns. By carefully adjusting the shell thickness, you can achieve higher-quality prints that are capable of withstanding the test of time and fulfilling their intended purpose.
Disadvantages of Using Thicker Shells
While there are several benefits to using thicker shells in 3D printing, it is important to consider the potential drawbacks as well. Thicker shells may not always be the ideal choice for every printing project, and it is essential to weigh the advantages against the disadvantages.
1. Increased Printing Time: One of the main disadvantages of using thicker shells is the longer printing time. Thicker shells require more material to be deposited layer by layer, resulting in increased print times. This can be a significant drawback, especially when there are time constraints or a need for fast production turnaround.
2. Higher Material Consumption: Thicker shells also lead to higher material consumption. As more material is needed to achieve the desired shell thickness, it translates to increased material costs. This can be a concern if you are working on a large-scale project or trying to optimize material usage to reduce expenses.
3. Reduced Level of Detail: Another disadvantage of thicker shells is the potential loss of intricate details. As the shell thickness increases, it becomes harder to capture fine details or small features in the printed object. This can be a limitation when working on projects that require precise and intricate designs.
4. Additional Post-Processing Effort: Thicker shells can also result in more post-processing effort. The additional material may lead to rough or uneven surfaces, requiring additional sanding or polishing to achieve the desired smoothness. This can add time and effort to the post-processing stage of the printing process.
5. Limited Flexibility: Thicker shells may limit the flexibility or adaptability of the printed object. If a certain level of flexibility is required, thicker shells may impede the desired movement or functionality. Objects that require a certain level of pliability or elasticity may not be suitable for thicker shells.
6. Increased Material Weight: Thicker shells can result in printed objects that are heavier due to the additional material used. This can be a concern in applications where weight is a critical factor, such as aerospace or robotics. The added weight may affect the overall performance or usability of the printed object.
It is important to carefully consider these disadvantages before deciding on the optimal shell thickness for your specific 3D printing project. Balancing the advantages and disadvantages will help you make an informed decision and achieve the desired balance between strength, detail, efficiency, and overall functionality.
Tips for Adjusting Shell Thickness
Finding the right shell thickness for your 3D printing projects can be a balancing act. Consider these tips to help you adjust and optimize the shell thickness for the best possible results:
1. Understand Your Object’s Requirements: Determine the specific requirements of your printed object. Consider factors such as its size, function, and desired level of detail. This will help you determine the appropriate level of shell thickness needed for the object to meet its intended purpose.
2. Experiment with Different Shell Thicknesses: Conduct test prints using varying shell thicknesses to evaluate their impact on the object’s strength, surface finish, and print time. By comparing the results, you can identify the optimal shell thickness that strikes the right balance for your specific needs.
3. Consider Material Properties: Different 3D printing materials have varying characteristics and requirements. Research the properties of the material you intend to use and adjust the shell thickness accordingly. Materials with higher strength may require thicker shells, while more flexible materials may work best with thinner shells.
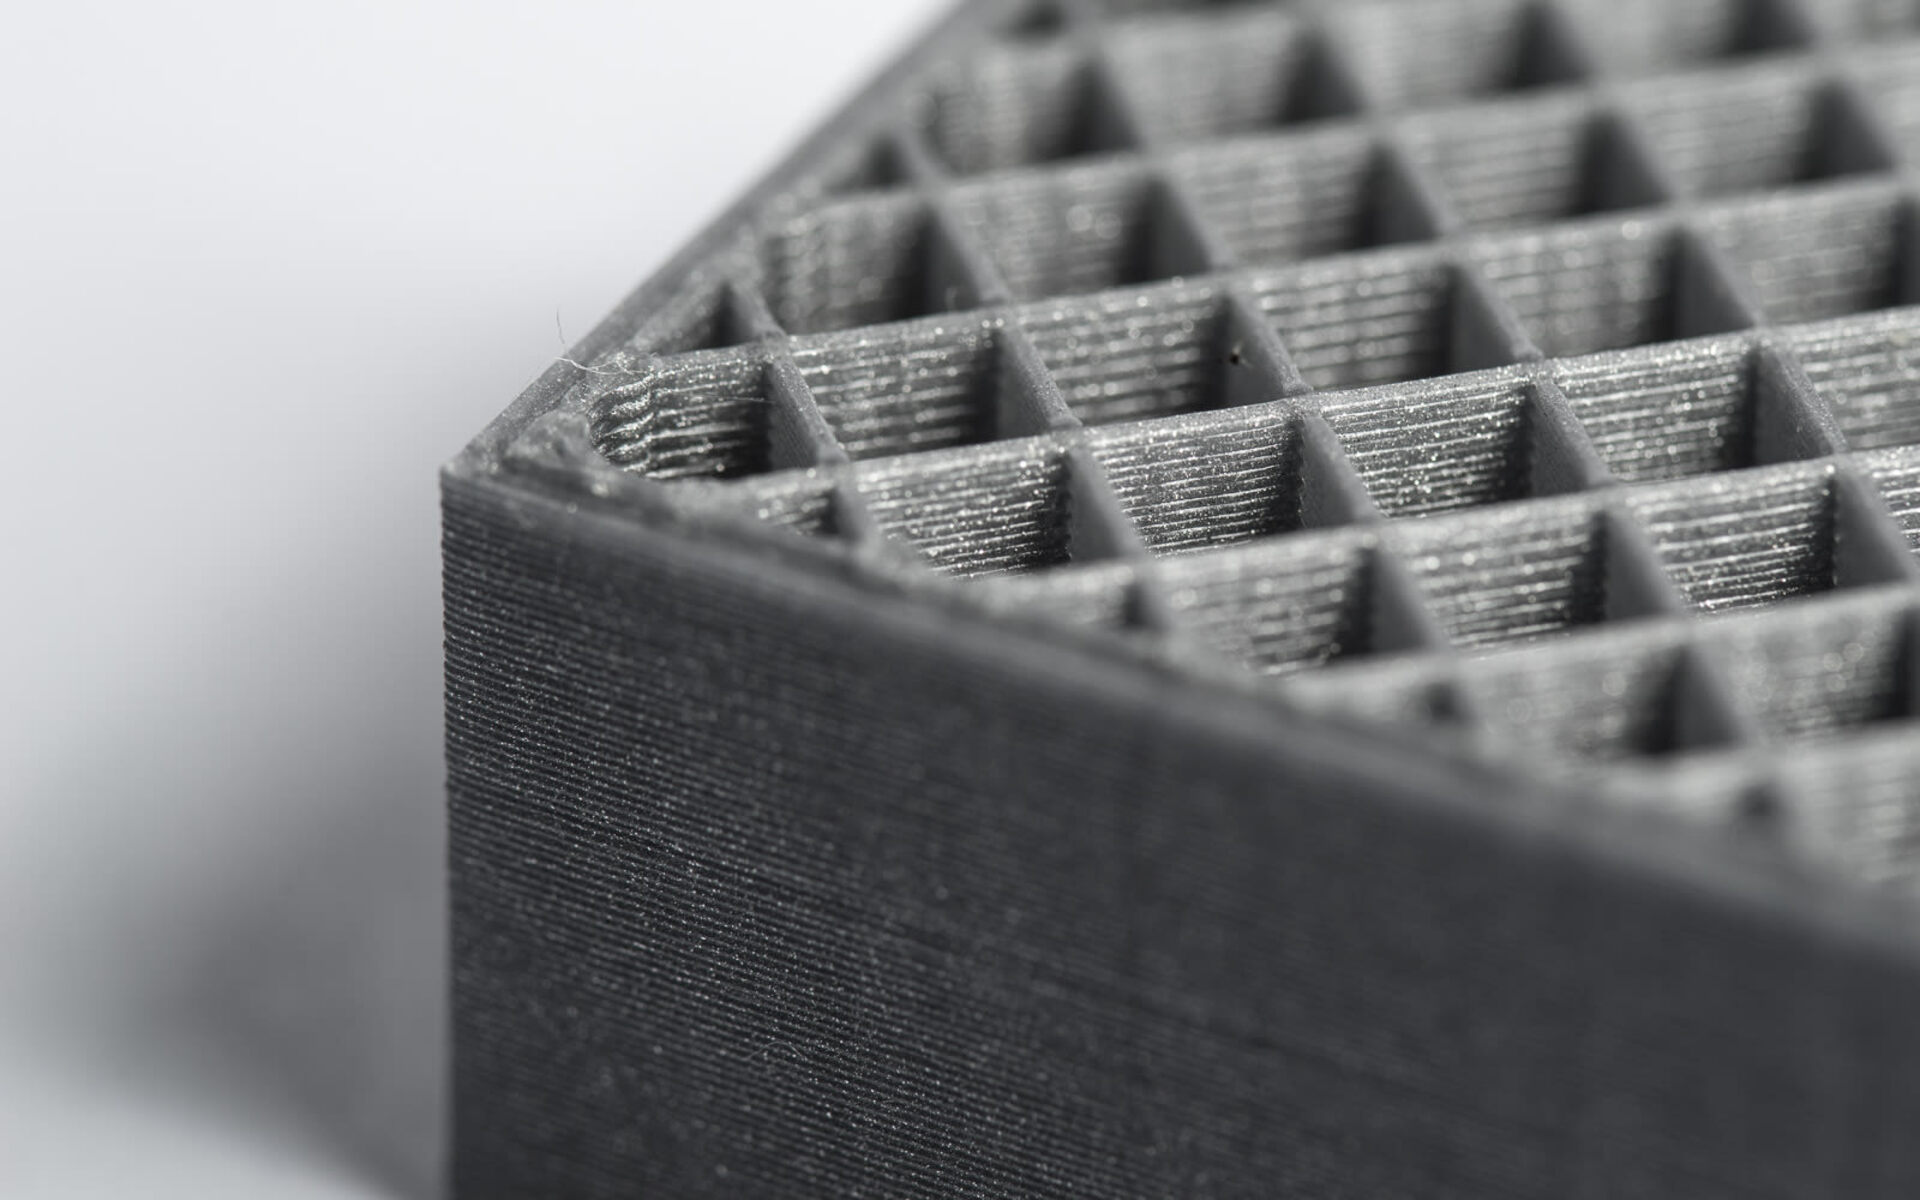
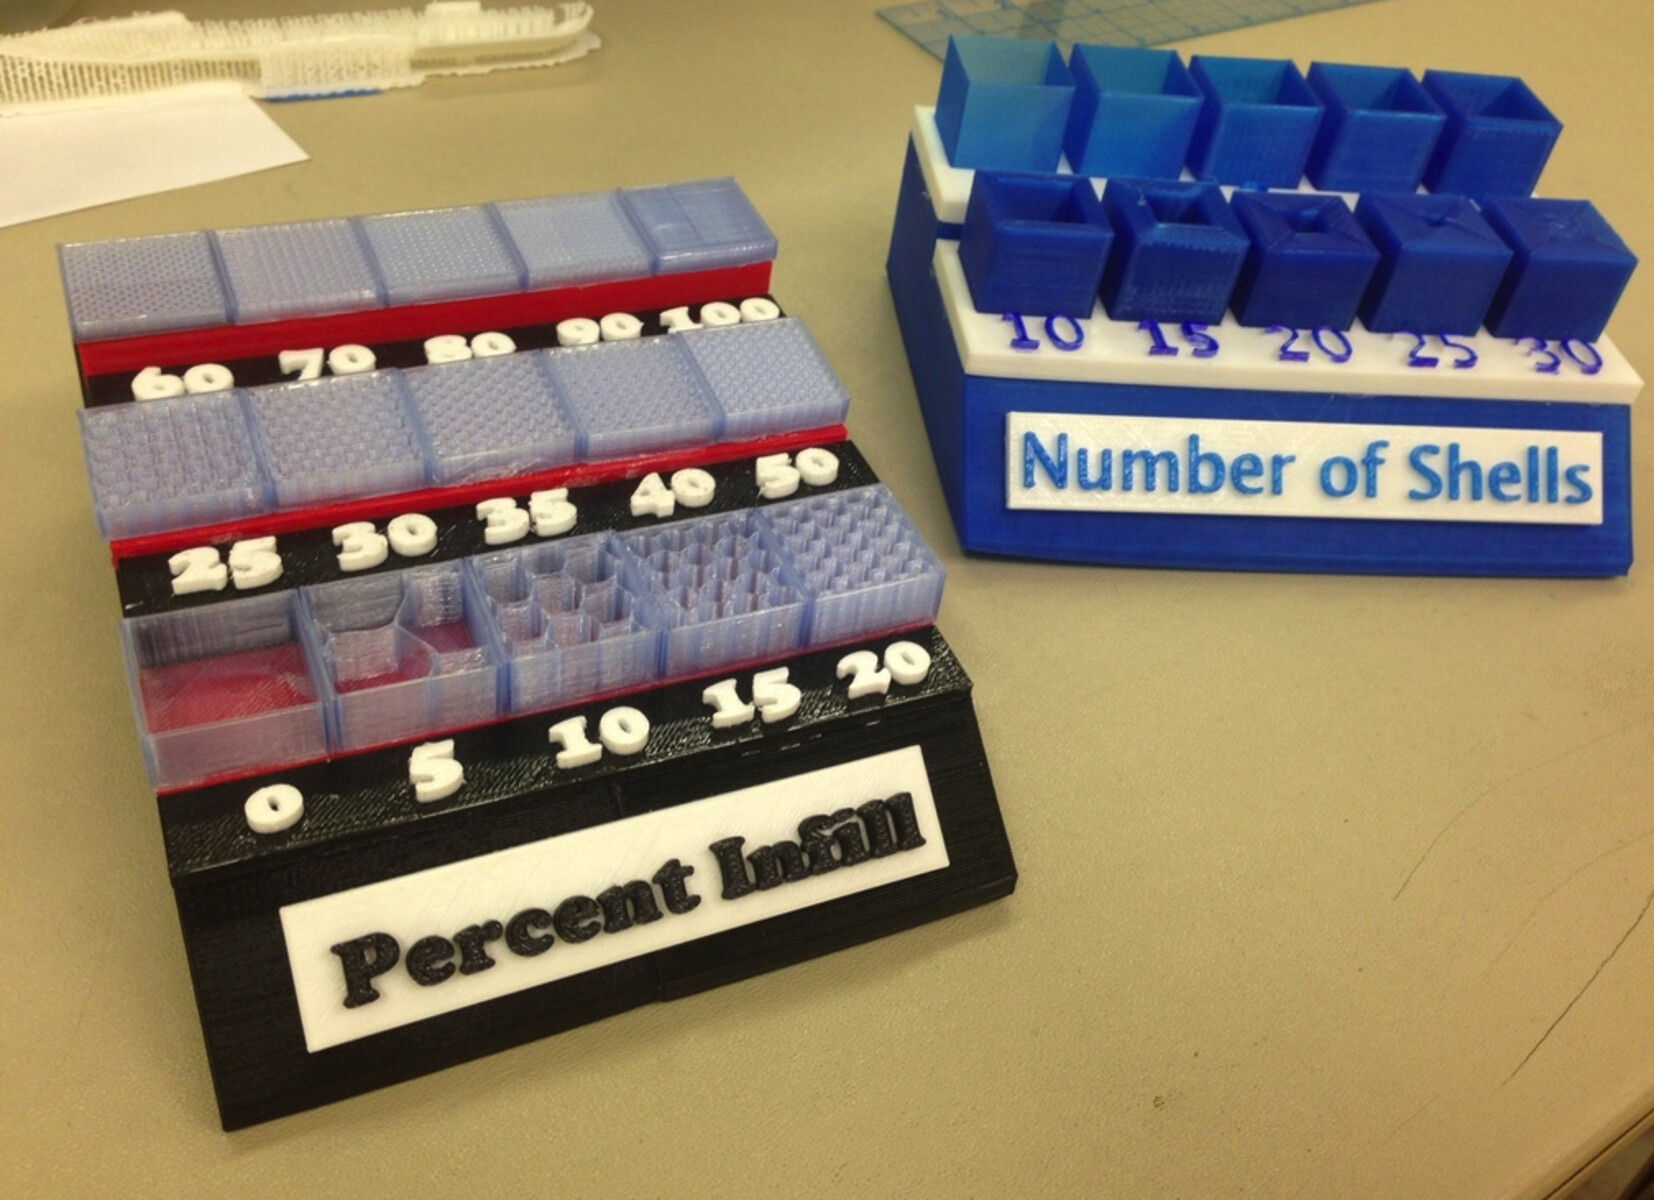
4. Adjust Infill Density: Infill density refers to the internal structure of the printed object. By adjusting the infill density, you can compensate for a thinner shell by increasing the strength and rigidity of the object’s internal structure. Experiment with different infill densities to achieve the desired balance between shell thickness and internal strength.
5. Use Design Software Parameters: Take advantage of the design software’s parameters to fine-tune the shell thickness. Most 3D modeling software allows you to adjust the wall thickness or shell settings. Utilize these features to achieve the desired structural integrity, surface finish, and print efficiency.
6. Consider Printing Resolution: Consider the resolution of your 3D printer when determining the shell thickness. Lower resolution printers may require thicker shells to improve surface finish and hide layer lines, while higher resolution printers may allow for thinner shells with sufficient detail.
7. Iterative Refinement: Don’t be afraid to iterate and refine your design. If the initial print doesn’t meet your expectations, make adjustments to the shell thickness and reprint the object. Iterative refinement can help you dial in the optimal shell thickness for your specific project.
8. Learn From Others: Research case studies and seek guidance from others in the 3D printing community. Learning from the experiences of experts and fellow enthusiasts can provide valuable insights and tips for adjusting shell thickness effectively.
By following these tips and considering the specific requirements of your object, you can effectively adjust the shell thickness to optimize the strength, surface finish, and overall performance of your 3D printed objects.
Case Studies: How Shell Thickness Impacts 3D Printed Objects
Examining case studies can provide valuable insights into how shell thickness impacts the characteristics and functionality of 3D printed objects. Let’s explore a few examples:
Case Study 1: Prototype Functional Part: In this case, a company wanted to 3D print a prototype of a functional part for a machinery component. They initially printed the part with a thinner shell thickness to save on material and printing time. However, they found that the part lacked the necessary strength and durability to withstand the operational stresses. By adjusting the shell thickness to be thicker, they achieved a printed part that had the required structural integrity and could perform as intended.
Case Study 2: Artistic Sculpture: An artist wanted to 3D print a highly detailed and visually appealing sculpture. Initially, they printed the sculpture with a thicker shell to ensure strength and stability. However, they discovered that the thicker shell resulted in a loss of fine details and made the surfaces appear less smooth. By reducing the shell thickness, they were able to preserve the intricate details and achieve the desired aesthetic quality of the sculpture.
Case Study 3: Wearable Prototype: A designer was tasked with creating a prototype for a wearable device that needed to be lightweight and flexible. They experimented with different shell thicknesses and found that a thinner shell provided the desired level of flexibility and reduced the overall weight of the device. The designer also discovered that the thinner shell allowed for better ventilation, enhancing the comfort of the wearable prototype.
Case Study 4: Architectural Model: An architect wanted to 3D print a complex architectural model with intricate details. Initially, they printed the model with a thicker shell to ensure structural stability. However, the thicker shell resulted in visible layer lines and compromised the overall appearance of the model. By reducing the shell thickness and adjusting the infill density, the architect achieved a smoother surface finish and more accurately represented the intended design.
Case Study 5: Functional Testing: A mechanical engineer was testing the functionality of a prototype for a mechanical part. They printed multiple iterations with varying shell thicknesses to examine the impact on strength and performance. They found that a slightly thicker shell improved the part’s ability to handle stress and load, resulting in a more reliable and robust final design.
These case studies illustrate how shell thickness can significantly influence the strength, aesthetics, functionality, and overall performance of 3D printed objects. By carefully considering specific project requirements, conducting iterative tests, and learning from real-world examples, you can make informed decisions to optimize your prints and achieve the desired outcomes.
Conclusion
Shell thickness is a critical parameter in 3D printing that directly impacts the strength, surface finish, and overall performance of printed objects. By understanding the concept of the shell, its importance, and the factors that influence its thickness, you can achieve optimal results in your 3D printing projects.
Adjusting the shell thickness requires a careful evaluation of various factors, including object size and complexity, printing technology, material properties, desired functionality, surface finish, time and cost constraints, and more. Finding the right balance between these factors is crucial to achieving the desired outcome.
Thicker shells offer benefits such as enhanced structural integrity, increased durability, improved surface finish, better print accuracy, increased resistance to wear and tear, and enhanced design flexibility. However, they also come with disadvantages like longer print times, higher material consumption, potential loss of detail, increased post-processing effort, limited flexibility, and increased material weight.
To optimize shell thickness, follow tips such as understanding the object’s requirements, experimenting with different thicknesses, considering material properties and printing technology, adjusting infill density, utilizing design software parameters, accounting for printing resolution, iterating and refining designs, and learning from case studies and the experiences of other practitioners.
By carefully considering these factors and tips, you can fine-tune the shell thickness to achieve the desired strength, surface finish, functionality, and efficiency in your 3D printed objects. Experimentation, testing, and iterative refinement will help you find the optimal balance and produce high-quality prints that meet your specific requirements.