What is 3D Printing?
3D printing, also known as additive manufacturing, is an innovative technology that allows the creation of three-dimensional objects by building them layer by layer. Unlike traditional manufacturing methods that involve subtracting material from a solid block or shaping materials through molds, 3D printing adds material layer by layer to form the desired object. This revolutionary process has opened up new possibilities in various industries, from healthcare and automotive to aerospace and fashion.
At its core, 3D printing starts with a digital model, which serves as the blueprint for the object to be printed. This digital model is created using computer-aided design (CAD) software or obtained from existing designs. The model is then sent to the 3D printer, which interprets the digital information and begins the printing process.
One of the key advantages of 3D printing is its ability to generate complex, intricate shapes that may be challenging or impossible to produce using traditional manufacturing techniques. The layer-by-layer approach allows for the precise control of each detail, resulting in highly customized and intricate designs. This level of customization has revolutionized industries such as healthcare, where 3D-printed prosthetics, implants, and surgical instruments can be tailored to each patient’s specific needs.
Moreover, 3D printing enables rapid prototyping, allowing designers and engineers to quickly iterate and test their ideas. The ability to generate physical prototypes efficiently has shortened product development cycles and reduced costs, making it an invaluable tool for innovation.
Throughout the years, 3D printing has expanded its range of capabilities, with advancements in material science and printer technology. It is now possible to print objects using a wide variety of materials, including plastics, metals, ceramics, and even living cells. This versatility opens up new possibilities in industries as diverse as architecture, jewelry, and food production.
In summary, 3D printing is a revolutionary technology that allows for the creation of three-dimensional objects by adding material layer by layer. Its advantages include the ability to produce complex shapes, customization, rapid prototyping, and the use of diverse materials. With its continuous advancements, 3D printing promises to reshape traditional manufacturing processes and unlock limitless possibilities in various fields.
The Basics of 3D Printing
Understanding the basics of 3D printing is essential to grasp the intricacies of this cutting-edge technology. 3D printing, also known as additive manufacturing, involves the creation of physical objects by gradually adding materials layer by layer. Here, we will explore the key components and processes involved in 3D printing.
The first important component of 3D printing is the digital model. A digital model can be created using computer-aided design (CAD) software or obtained from an existing design. The digital model serves as the blueprint for the object that will be printed.
Once the digital model is prepared, it needs to be translated into instructions that the 3D printer can understand. This is done by slicing the model, which involves dividing it into thin cross-sectional layers. Each layer is then converted into a series of instructions that the printer can follow.
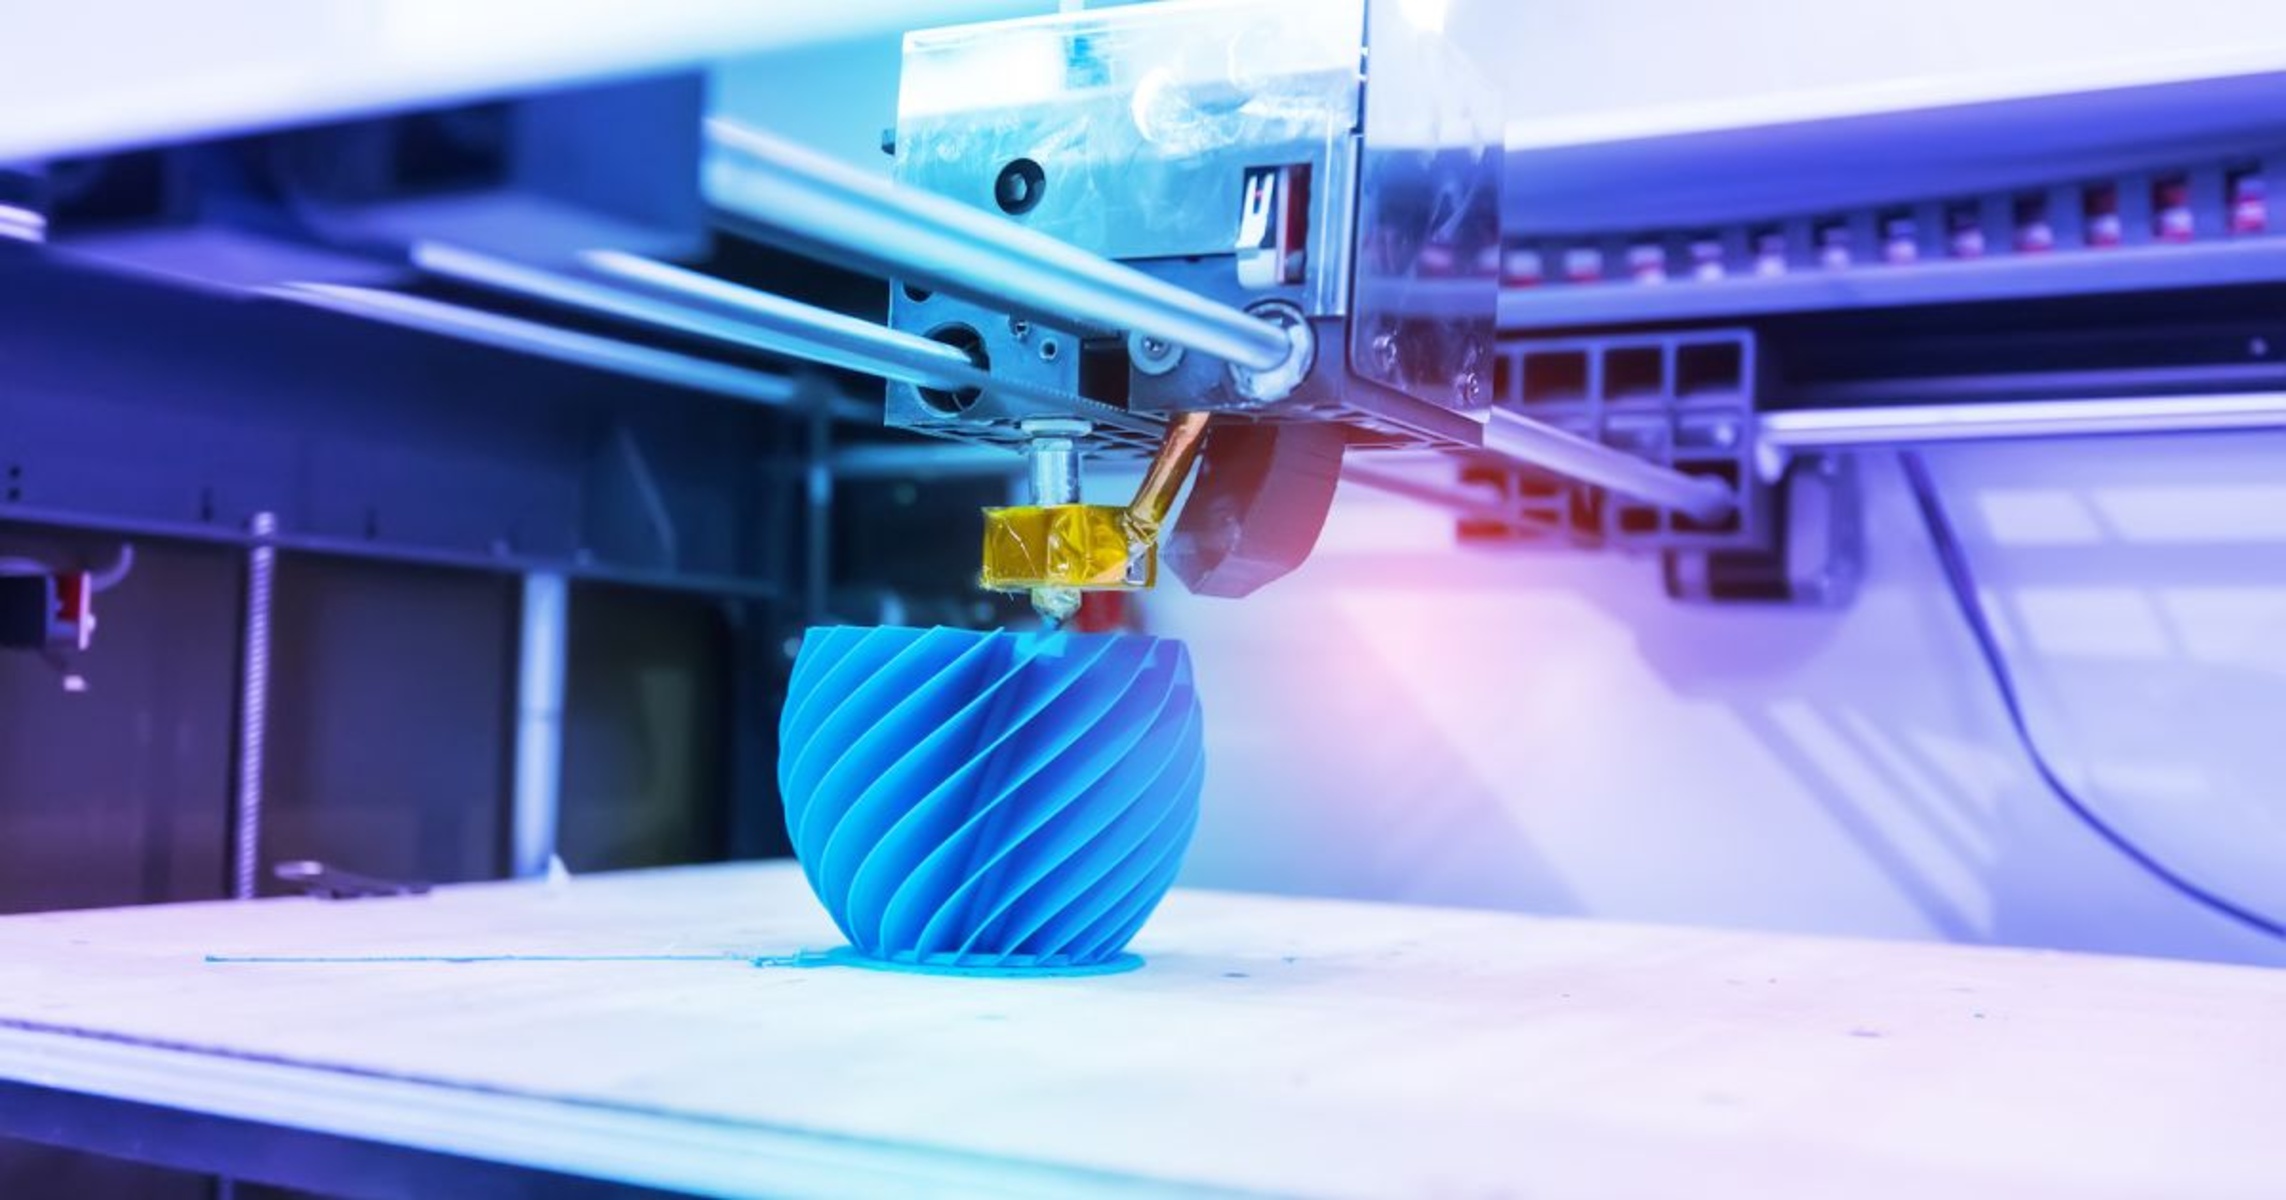
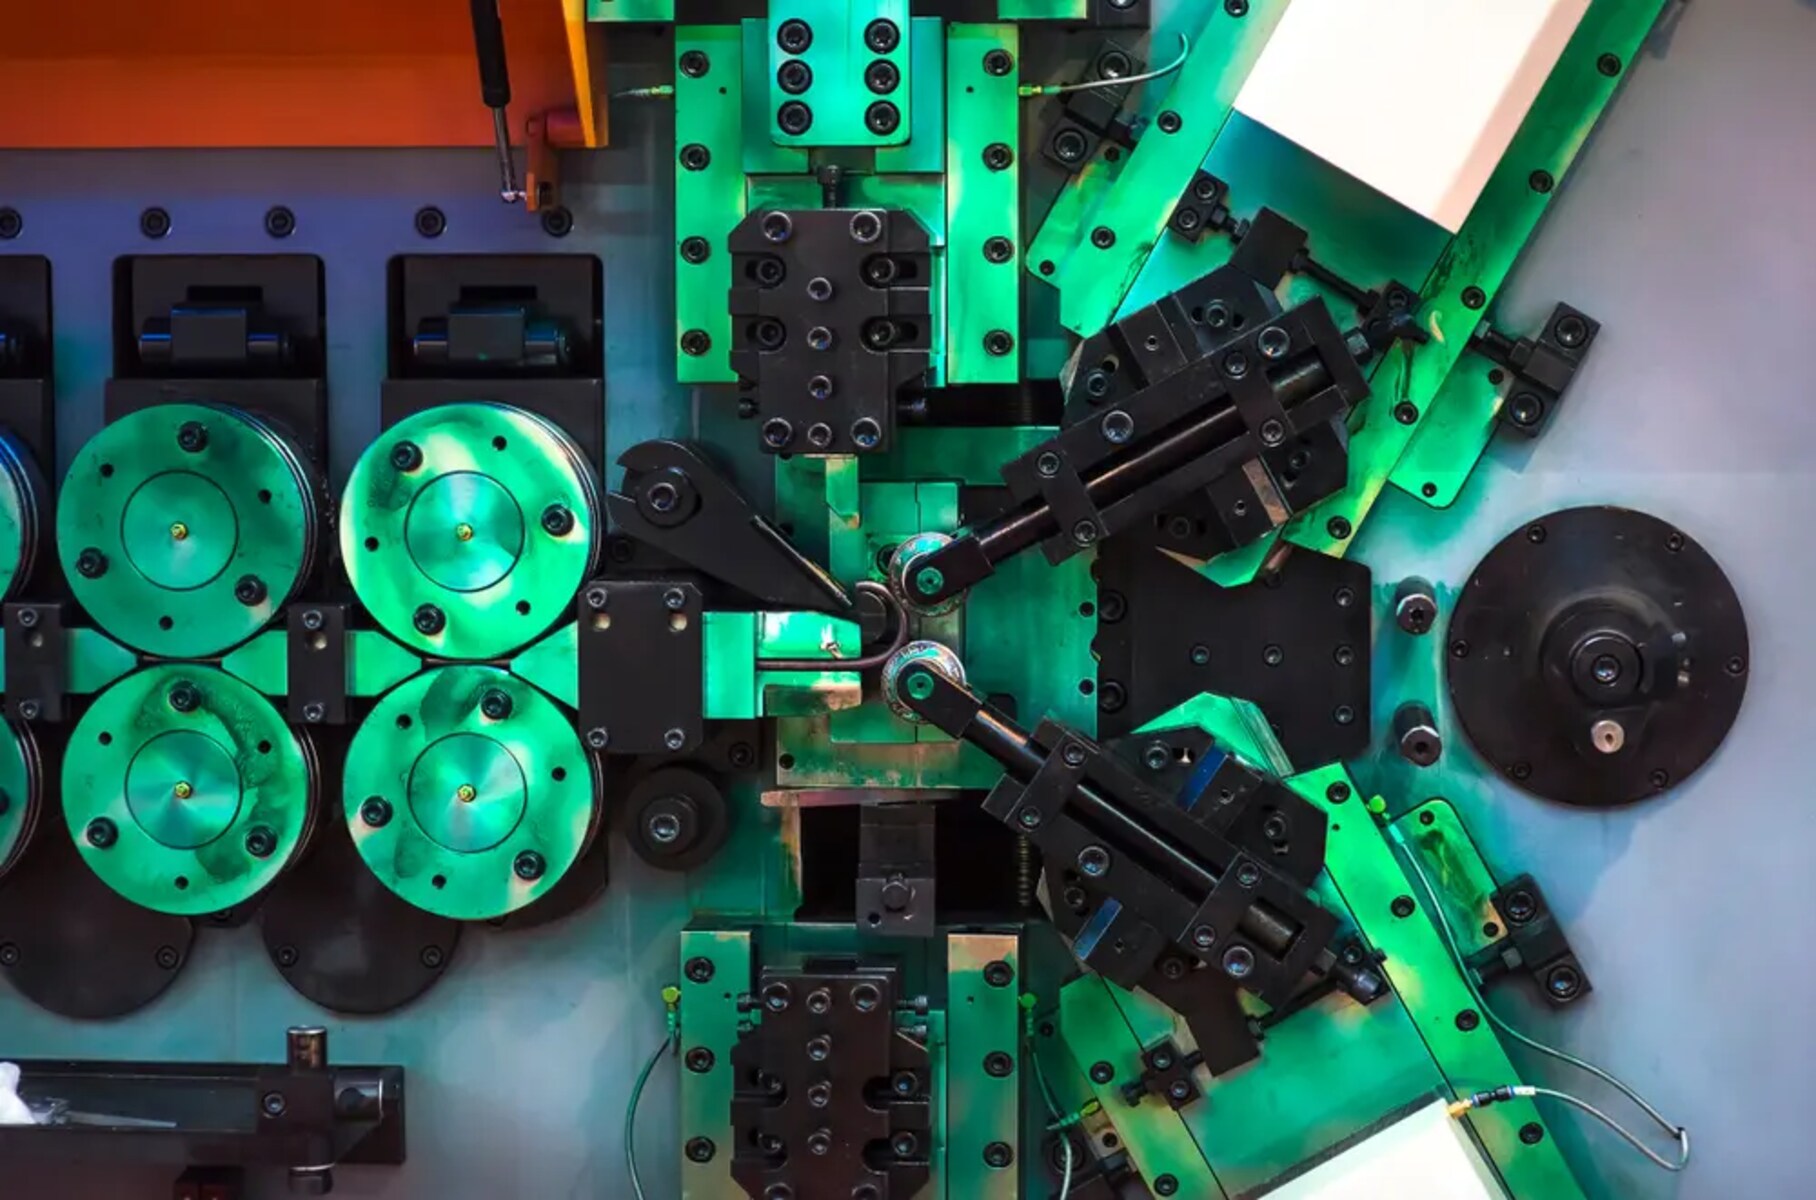
The 3D printer itself is another crucial component. There are various types of 3D printers available, each with its own technology and capabilities. Common types include fused deposition modeling (FDM), stereolithography (SLA), selective laser sintering (SLS), and digital light processing (DLP) printers.
The specific printing process depends on the type of printer being used. In FDM printers, a thermoplastic filament is heated and extruded through a nozzle. The extruded material is then deposited layer by layer, gradually building up the object. In SLA and DLP printers, a liquid resin is exposed to ultraviolet light, causing it to solidify and create the desired shape. SLS printers use a high-powered laser to selectively fuse powdered material together to form the object.
Once the printing process is complete, the printed object may require additional post-processing steps. This may involve removing any support structures that were used to stabilize the object during printing, sanding or polishing the surface for a smoother finish, or applying paints or coatings for aesthetic purposes.
It is important to note that 3D printing is not limited to a specific range of materials. Depending on the type of printer, materials such as plastics, metals, ceramics, and even food can be used. Each material requires specific printing parameters and considerations.
In summary, 3D printing involves creating physical objects by adding materials layer by layer. The process includes a digital model, slicing the model into layers, translating the instructions for the printer, selecting the appropriate printer type, initiating the printing process, and potentially performing post-processing steps. With its range of materials and printing technologies, 3D printing has transformed various industries and continues to push the boundaries of what is possible.
Types of 3D Printers
There are several types of 3D printers available, each utilizing different technologies and materials to create objects. Understanding the different types of 3D printers can help you choose the most suitable one for your specific needs. Let’s explore some of the commonly used 3D printer technologies.
1. Fused Deposition Modeling (FDM): FDM printers, also known as Fused Filament Fabrication (FFF) printers, are the most popular and affordable type of 3D printers. They work by extruding a thermoplastic filament through a heated nozzle, depositing it layer by layer to build the object. FDM printers are versatile and widely used in various applications.
2. Stereolithography (SLA): SLA printers use a process called photopolymerization, where a liquid resin is exposed to ultraviolet light, causing it to solidify and form the object. This technology offers high-resolution prints with smooth surface finishes, making it suitable for detailed and intricate designs. However, SLA printers are generally more expensive.
3. Selective Laser Sintering (SLS): SLS printers work by using a high-powered laser to selectively fuse powdered material, typically nylon or other polymers, together to create a solid object. The unbound powder surrounding the printed object acts as support, eliminating the need for additional support structures. SLS printers are known for their ability to produce functional, durable parts, making them popular in industries such as aerospace and automotive.
4. Digital Light Processing (DLP): DLP printers are similar to SLA printers in that they use liquid resin that is cured by light. However, instead of a laser, DLP printers use a digital light projector to selectively cure the resin layer by layer. This allows for faster print times compared to SLA printers. DLP printers are commonly used in applications that require high-speed, high-resolution printing.
5. Metal 3D Printers: Unlike the previously mentioned printers that primarily work with plastic or resin, metal 3D printers utilize metal powder to create objects. These printers use various technologies such as Direct Metal Laser Sintering (DMLS) and Electron Beam Melting (EBM) to melt and fuse metal powders together to build solid metal parts. Metal 3D printing is used extensively in industries such as aerospace, healthcare, and automotive.
These are just a few examples of the different types of 3D printers available in the market. Each type has its own advantages and limitations, and the choice of printer depends on the intended application, budget, and desired print quality. It’s important to evaluate your specific requirements before selecting a 3D printer to ensure it meets your expectations.
How Does 3D Printing Work?
3D printing, also known as additive manufacturing, is a process that involves building objects layer by layer using various materials. Understanding how 3D printing works can help you appreciate the intricacies of this innovative technology.
The process begins with a digital model of the object that you want to print. This digital model can be created using computer-aided design (CAD) software or obtained from existing designs. The digital model serves as the blueprint for the 3D printer to follow.
Once the digital model is prepared, it needs to be sliced into thin cross-sectional layers. Each layer is then converted into a series of instructions that the 3D printer can understand. These instructions include details such as where to deposit material, the specific movements the printer needs to make, and any necessary support structures.
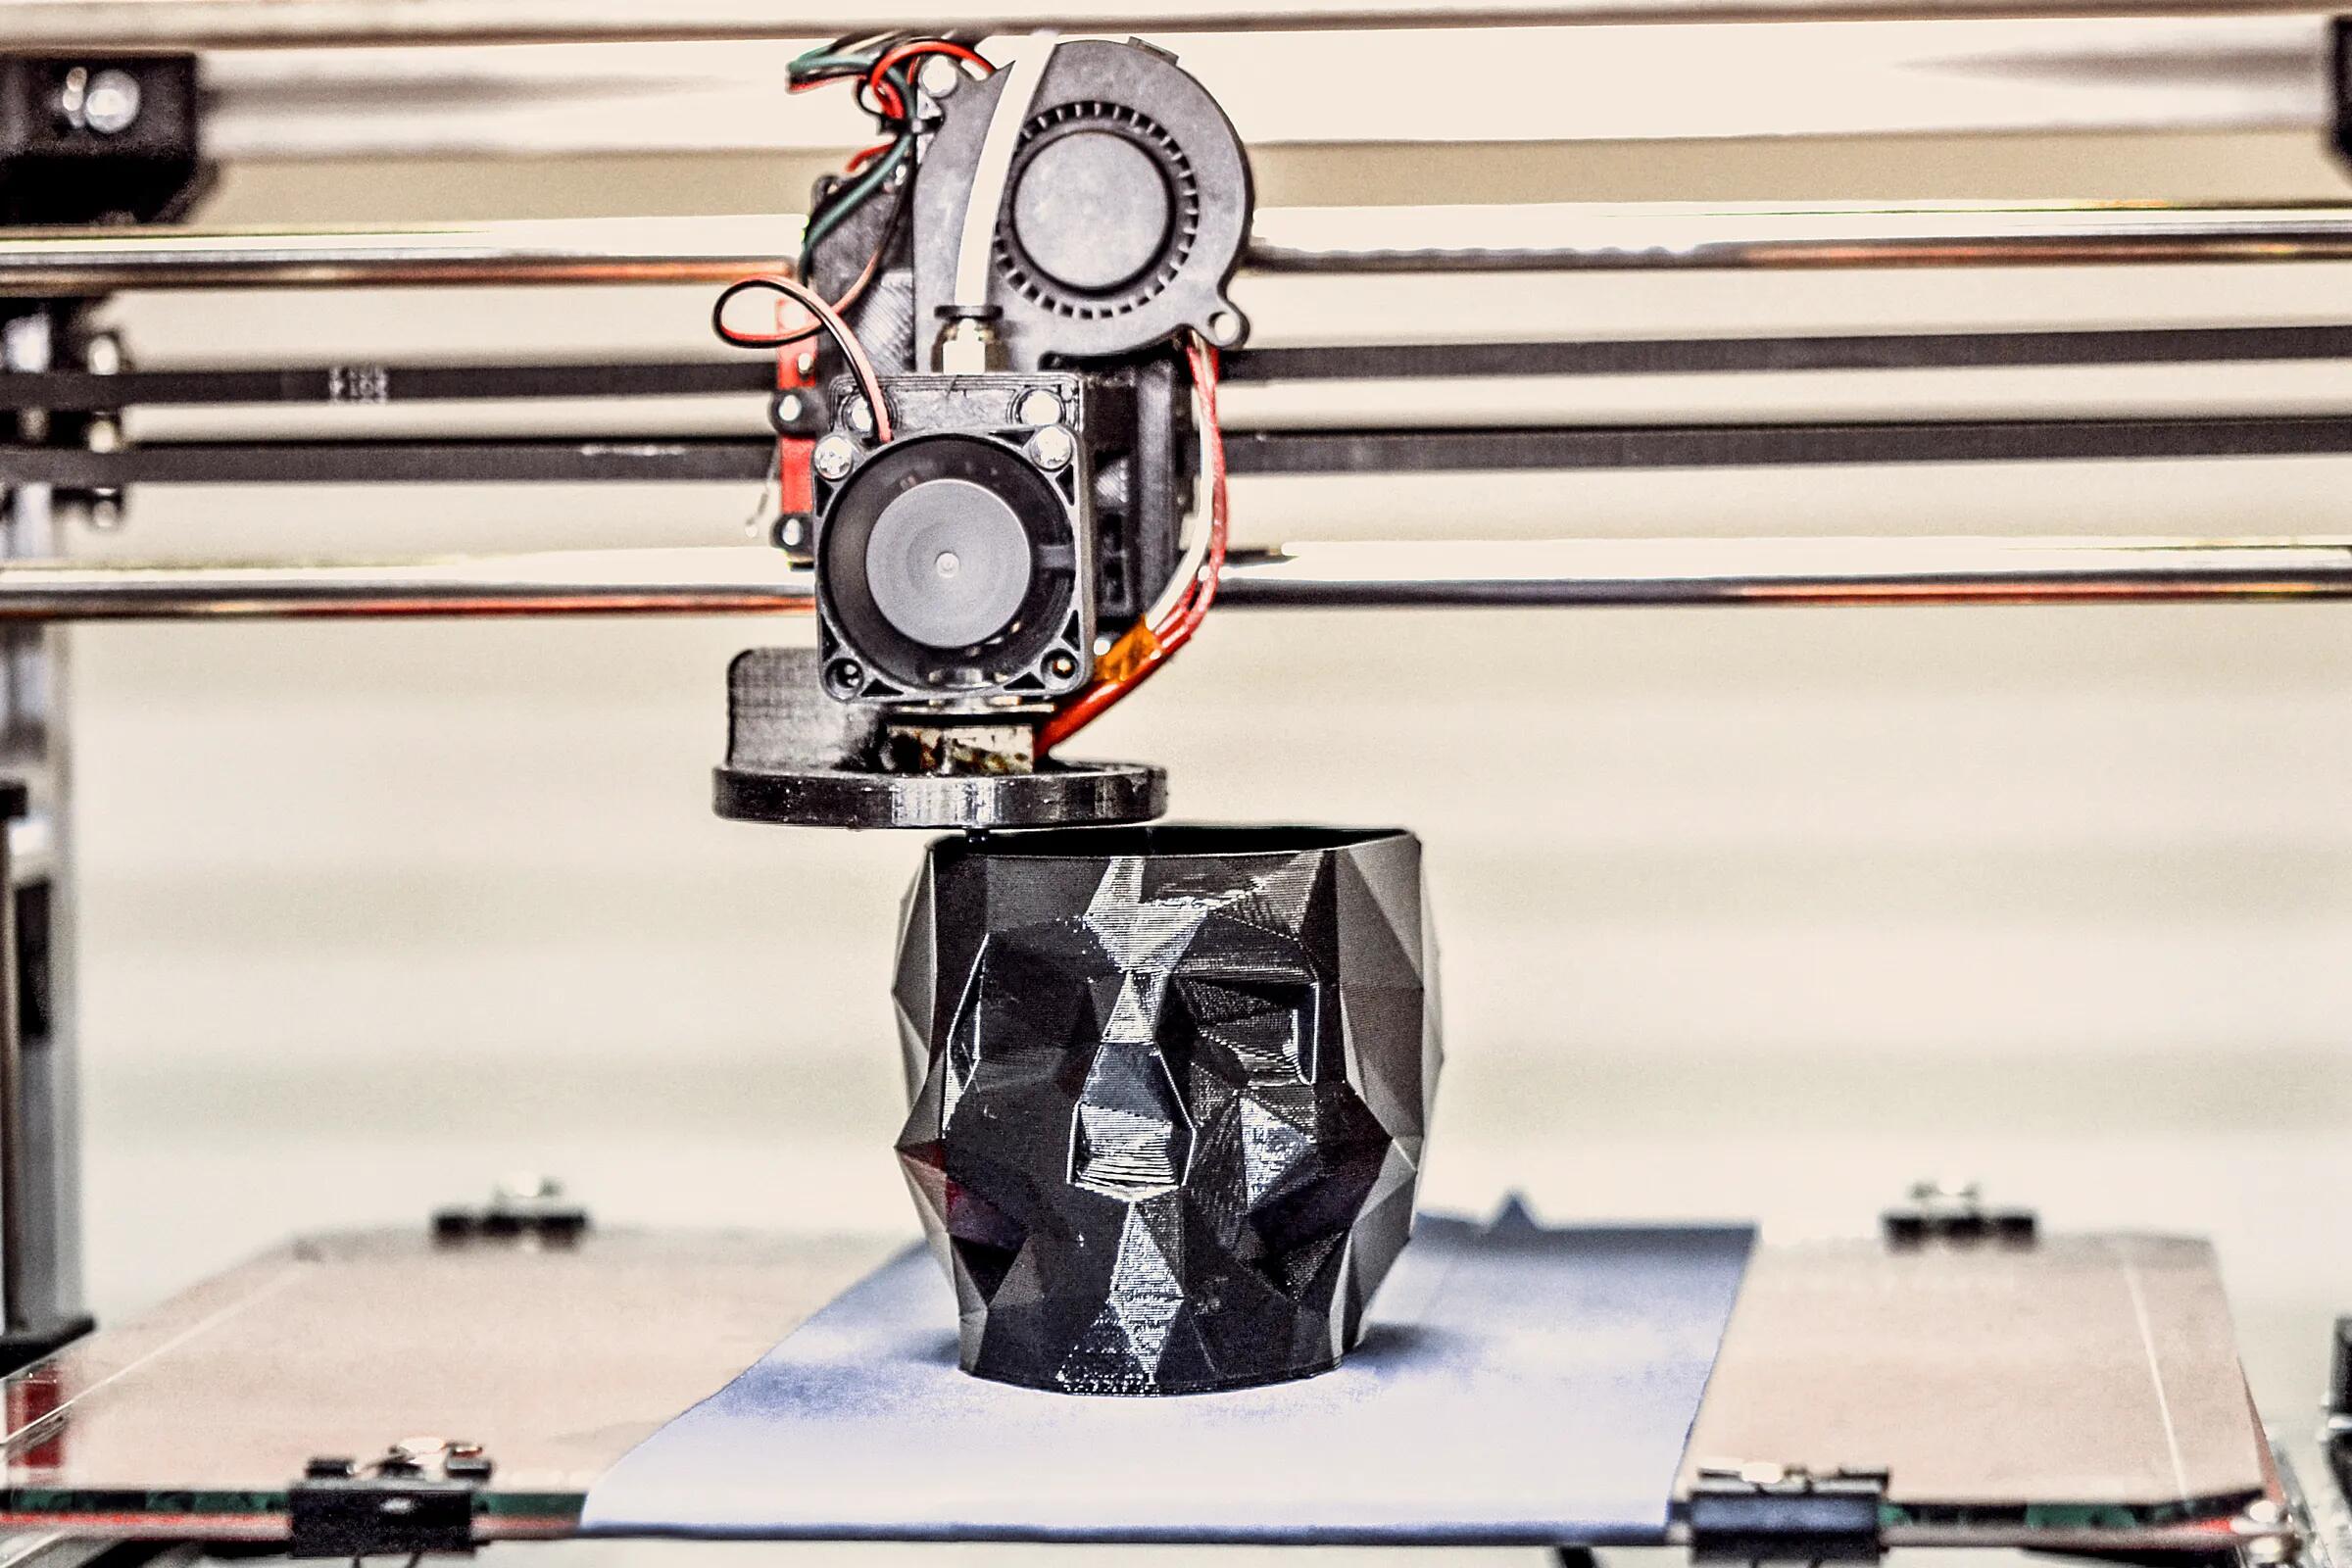
Next, the 3D printer begins the printing process. The specific process depends on the type of printer being used, but most 3D printers utilize one of two basic approaches: extrusion-based or photopolymerization-based.
In extrusion-based printing, also known as fused deposition modeling (FDM) or fused filament fabrication (FFF), a thermoplastic filament is heated and extruded through a nozzle. The nozzle moves along a predefined path, depositing the melted material layer by layer, gradually building the object from the bottom up.
In photopolymerization-based printing, such as stereolithography (SLA) or digital light processing (DLP), a liquid resin is used. The resin is selectively cured or solidified using light, typically ultraviolet, following the pattern of each layer. The cured resin layers stack upon each other to create the final object.
During the printing process, some objects may require support structures to prevent overhanging sections from sagging or collapsing. These support structures are typically printed simultaneously and can be removed once the printing process is complete.
Once the 3D printer has finished depositing material layer by layer, the printed object is typically left to cool or cure. Depending on the material and printer used, additional post-processing steps may be required. This can include removing any support structures, sanding or polishing the surface for a smoother finish, or applying paints and coatings to enhance its appearance.
3D printing offers numerous advantages over traditional manufacturing methods. It allows for the creation of complex designs with intricate details and unique geometries. It also enables rapid prototyping, allowing designers to quickly iterate and test their ideas. Furthermore, 3D printing has the potential to reduce waste and lower costs by only using the precise amount of material needed for each object.
In summary, 3D printing works by creating objects layer by layer, following a digital model. The process involves slicing the model into layers, converting them into instructions for the 3D printer, depositing material or solidifying resin layer by layer, and potentially removing support structures and performing post-processing steps. With its versatility and potential for customization, 3D printing has transformed various industries and continues to drive innovation.
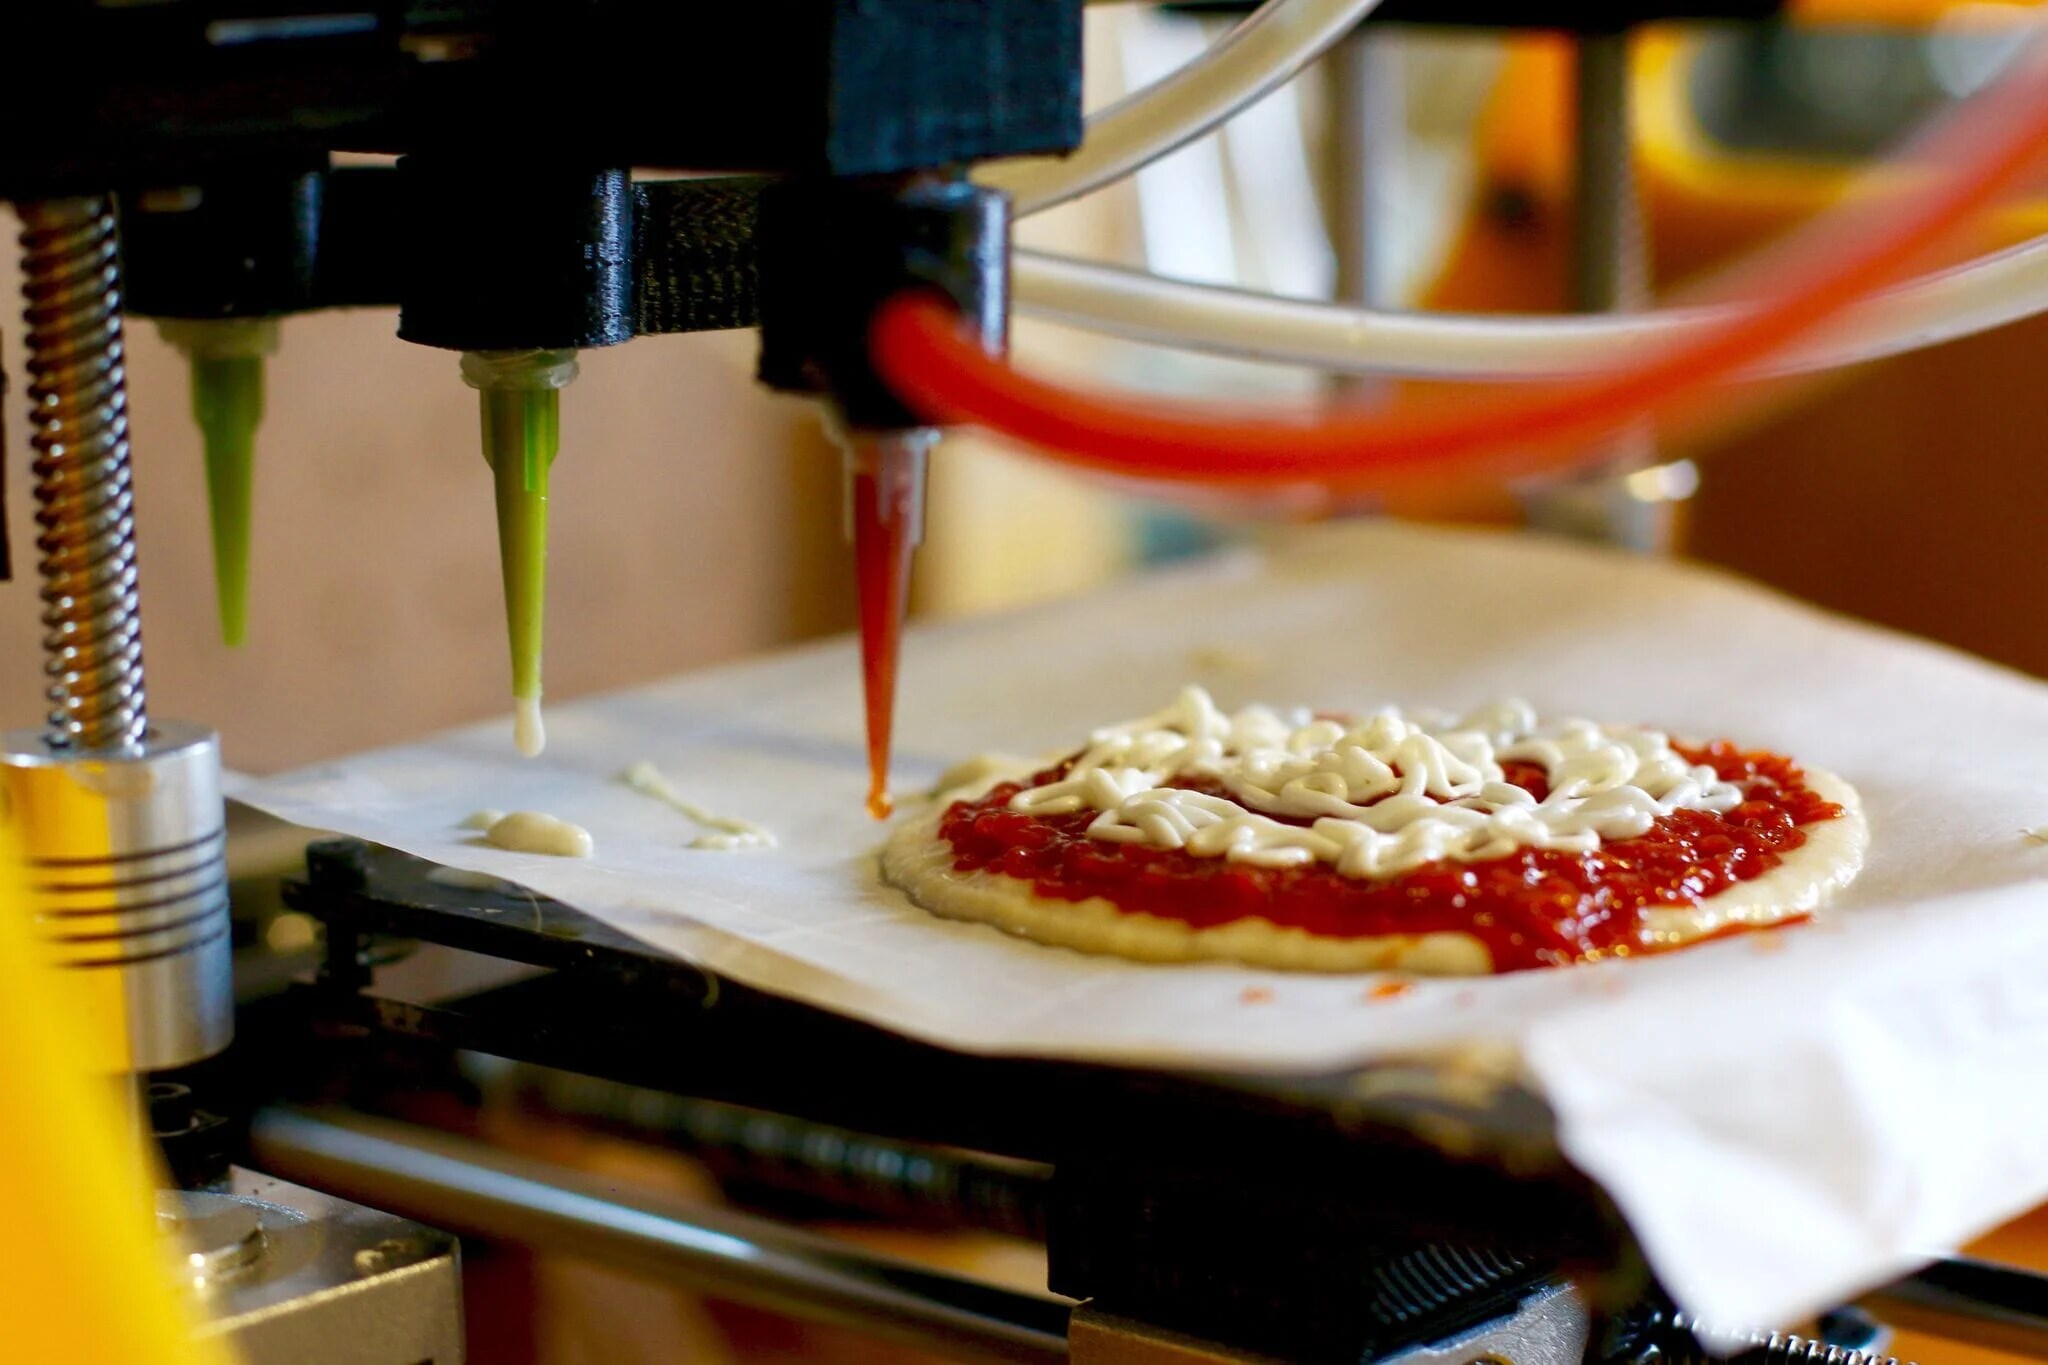
Materials Used in 3D Printing
3D printing offers a wide range of possibilities in terms of materials used—enabling the production of objects with different properties, strengths, and functionalities. Let’s explore some of the common materials used in 3D printing.
1. Thermoplastics: Thermoplastics are the most commonly used materials in 3D printing. They are versatile and offer a wide range of properties, including flexibility, strength, and durability. Polylactic Acid (PLA) and Acrylonitrile Butadiene Styrene (ABS) are popular thermoplastics used in Fused Deposition Modeling (FDM) printers. Other thermoplastics, such as Polyethylene Terephthalate Glycol (PETG) and Nylon, are also widely used.
2. Photopolymers: Photopolymers are liquid resins that solidify when exposed to light, typically ultraviolet (UV) light. They are commonly used in Stereolithography (SLA) and Digital Light Processing (DLP) printers. Photopolymers offer high resolution and produce parts with smooth surface finishes. Some common types of photopolymers include Standard Resin, Flexible Resin, and Dental Resin.
3. Metals: Metal 3D printing has gained significant popularity, especially in industries such as aerospace, automotive, and healthcare. Metals like stainless steel, titanium, aluminum, and copper can be used in various metal 3D printing techniques like Direct Metal Laser Sintering (DMLS) and Electron Beam Melting (EBM). Metal 3D printing allows for the production of strong and complex parts with excellent mechanical properties.
4. Ceramics: Ceramic materials are used in 3D printing for applications that require high temperature resistance and electrical insulation. Ceramic 3D printing involves the use of ceramic powders, which are bound together using different techniques such as binder jetting or stereolithography. Ceramics like porcelain, alumina, and zirconia are commonly used for creating custom-made ceramics, dental crowns, and implants.
5. Composite Materials: Composite materials in 3D printing consist of a combination of different materials, such as reinforced plastics with added fibers or particles. These materials provide enhanced strength, rigidity, or other specific properties. Carbon fiber-reinforced filaments, for example, offer high strength and stiffness while remaining lightweight.
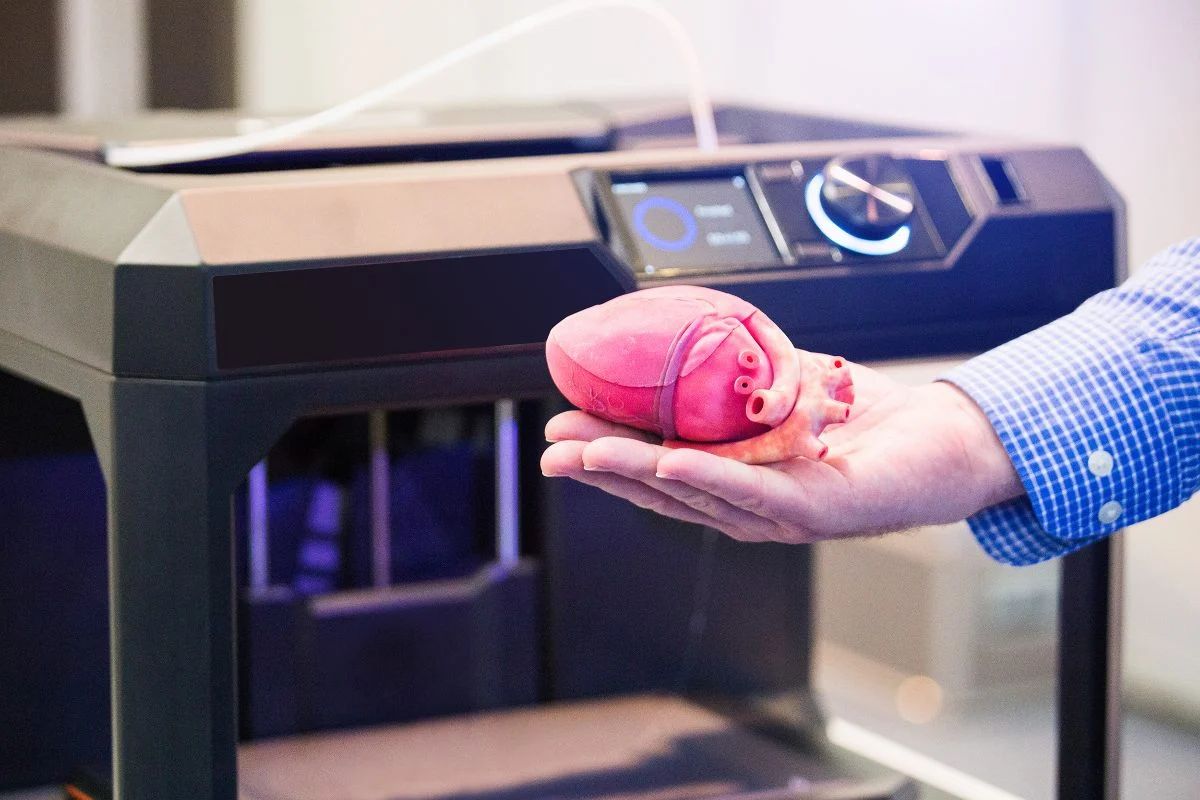
6. Biomaterials: 3D printing has also made significant advancements in the field of bioengineering and medicine. Biomaterials, such as biocompatible polymers and hydrogels, can be combined with living cells to create complex and functional biological structures. This has paved the way for applications like 3D-printed tissues, organs, and medical implants.
It’s important to note that the availability of materials may vary depending on the specific 3D printing technology and the printer’s capabilities. Some printers are designed to work with specialized materials, while others offer more versatility in terms of material compatibility.
As 3D printing technology continues to evolve, new materials are constantly being developed and introduced—offering even more possibilities for customization and innovation. Whether it’s for prototyping, manufacturing, or medical applications, the choice of material in 3D printing depends on the desired properties and requirements of the final printed object.
Creating 3D Models for Printing
Creating 3D models is a crucial step in the 3D printing process, as it serves as the foundation for manufacturing the desired object. Whether you’re designing a prototype or a complex functional part, here are some methods and tools used to create 3D models for printing.
1. Computer-Aided Design (CAD) Software: CAD software is extensively used for 3D modeling. These powerful programs allow designers to create 3D models using various tools, such as drawing and shaping tools, parametric modeling, and surface modeling. Popular CAD software options include AutoCAD, SolidWorks, Fusion 360, and Tinkercad. CAD software provides the flexibility to design objects from scratch or modify existing designs.
2. 3D Scanning: 3D scanning is an alternative method for creating 3D models. It involves using a 3D scanner to capture the physical object’s shape and appearance and convert it into a digital format. This method is often used when replicating existing objects or capturing intricate details that would be time-consuming to model manually. 3D scanning is particularly useful in industries such as art preservation, heritage reconstruction, and reverse engineering.
3. File Repositories: There are online platforms and repositories where designers can access pre-existing 3D models that are ready for printing. Websites like Thingiverse, MyMiniFactory, and Cults offer a vast library of free and paid 3D models created by users from around the world. These platforms are convenient for finding pre-made designs that can be scaled, modified, or used as inspiration for new creations.
4. Parametric Design: Parametric design is a powerful approach that allows designers to create models with adjustable parameters. By defining variables such as dimensions, angles, or proportions, the model can be easily modified or scaled. Parametric design enables flexibility in design iterations and is particularly useful when creating objects with standardized components or customizable parts.
5. Sculpting Software: Sculpting software is used to create organic and highly detailed models, often used in the entertainment, art, and jewelry industries. These software tools simulate sculpting in a digital environment, allowing artists to shape and manipulate virtual clay-like materials. ZBrush, Blender, and Mudbox are popular sculpting software options that provide intuitive and powerful tools for creating intricate models.
Once the 3D model is created, it needs to be prepared for 3D printing. This typically involves a process called slicing, where the model is divided into thin layers and converted into machine-readable instructions. Slicing software, often provided by the printer manufacturer or available as open-source programs, generates the necessary instructions, including the path and settings for the printer to follow during the printing process.
Creating 3D models for printing requires a combination of creativity, technical skills, and familiarity with the chosen design software. Whether starting from scratch, utilizing 3D scanning, or modifying existing designs, the goal is to create a digital model that accurately represents the desired object and is suitable for the chosen 3D printing technology.
Preparing the 3D Printer
Before diving into the exciting world of 3D printing, it’s essential to properly prepare the 3D printer to ensure successful and smooth print runs. Here are the key steps involved in preparing the 3D printer for a printing session.
1. Ensuring Printer Calibration: Calibration is crucial to ensure that the printer is operating accurately and consistently. This includes calibrating the printer’s build plate, nozzle height, and bed leveling. Proper calibration ensures that the print bed is the correct distance from the nozzle, promoting proper adhesion and preventing the print from failing or warping.
2. Loading Printing Materials: Depending on the type of printer and printing technology being used, the appropriate printing material needs to be loaded. For filament-based printers, like Fused Deposition Modeling (FDM) printers, the filament spool needs to be loaded into the printer’s filament feed system. Resin-based printers, such as Stereolithography (SLA) or Digital Light Processing (DLP) printers, require pouring the liquid resin into the printer’s resin tank.
3. Setting Printing Parameters: Each printing material has specific temperature, speed, and other parameters that need to be set in the printer’s software. These parameters ensure the optimal performance and quality of the print. It’s important to follow the manufacturer’s recommendations and guidelines for the specific material being used.
4. Preparing the Print Bed or Build Plate: The print bed or build plate needs to be properly prepared and cleaned before each print. This involves using cleaning agents, such as isopropyl alcohol, to remove any dirt, oils, or debris from the surface. For certain filaments, like ABS, applying a heated bed or using adhesion aids like hairspray, glue stick, or specialized print bed tapes may be necessary to improve adhesion.
5. Loading the Print File: The digital model of the object to be printed needs to be converted into a printable format, typically through slicing software. This software generates the specific instructions and tool paths for the printer to follow. The sliced file, usually in the form of a .gcode file, needs to be loaded into the printer’s software or interface.
6. Reviewing Printer Settings: Before initiating the print, it’s crucial to review and confirm the printer settings, such as layer height, infill density, print speed, and support structures. These settings vary depending on the desired print quality, strength, and specific requirements of the object being printed.
7. Verifying All Safety Precautions: It’s vital to ensure that all necessary safety precautions are in place. This includes verifying that the printer is in a well-ventilated area, far from flammable materials, and that the printer’s components are in good working order. It’s also essential to follow any additional safety guidelines provided by the printer manufacturer.
By carefully preparing the 3D printer, you can significantly increase the chances of a successful and high-quality print. Taking the time to properly calibrate the printer, load the correct materials, set the appropriate printing parameters, and ensure a clean and well-prepared print bed are all essential steps in the preparation process.
Initiating the Printing Process
Once the 3D printer is properly prepared, it’s time to initiate the printing process and bring your digital model to life. Initiating the printing process involves a few key steps to ensure a successful and efficient print. Let’s explore these steps in detail.
1. Preheating the Printer: Depending on the printing technology and material being used, preheating the printer may be necessary. This allows the printer to reach the optimal temperature for printing. For example, Fused Deposition Modeling (FDM) printers typically require heating the nozzle and the print bed to the appropriate temperatures before printing can begin.
2. Initiating the Print: With the printer properly preheated, it’s time to initiate the print. This can typically be done through the printer’s software interface or control panel. The printer will start executing the instructions provided by the sliced file to deposit material layer by layer, gradually building the object.
3. Monitoring the Print: It’s important to keep an eye on the printing process, especially during the initial layers. This allows you to ensure that the print adheres properly to the bed and that there are no issues with filament flow or resin distribution. Monitoring the print also helps detect any potential issues or errors that may occur during the print, such as layer shifting or filament clogging.
4. Maintaining Printer Conditions: Throughout the print, it’s crucial to maintain the optimal conditions for printing. This includes ensuring a stable ambient temperature, minimizing air drafts that may affect the print, and avoiding any disturbances or vibrations that could impact print quality. It’s also important to periodically check the filament or resin levels to ensure uninterrupted printing.
5. Managing Supports: Depending on the design and complexity of the object, supports may be necessary to prevent overhangs, bridges, or fragile areas from collapsing during the printing process. Properly managing supports is important to ensure the stability and accuracy of the print. In some cases, supports may need to be manually removed or dissolved after the print is complete.
6. Post-Print Monitoring: Once the printing process is complete, it’s essential to monitor the print during the cooling or curing phase. This allows you to identify any potential warping or deformation issues that may occur as the print solidifies. Monitoring the print post-printing helps prevent any defects or imperfections that may impact the final object’s quality and functionality.
7. Finishing Touches: After the print has cooled or cured, it may require additional post-processing steps, depending on the desired finish and application. This can include removing any remaining supports, sanding or polishing the surface for a smoother finish, or applying paints or coatings to enhance the appearance or functionality of the printed object.
By carefully initiating and monitoring the printing process, you can ensure that your 3D prints are successful, accurate, and of high quality. Paying attention to details, maintaining optimal printing conditions, and addressing any issues that arise during the print will help achieve the desired results and bring your digital design to tangible reality.
Post-Printing: Removing Supports and Finishing Touches
After the 3D printing process is complete, there are several important post-printing steps to take to ensure the final object achieves the desired quality and appearance. Let’s explore the key aspects of post-printing, including removing supports and adding finishing touches.
1. Removing Supports: Supports are often used during the printing process to provide stability and prevent overhangs or unsupported areas from collapsing. Once the print is complete, these supports need to be removed. This can be done by carefully breaking or cutting them away from the printed part. It’s crucial to exercise caution and use appropriate tools to avoid damaging the printed object.
2. Cleaning the Object: After the supports are removed, the printed object might require cleaning to remove any residue or debris. This can be done by using a soft brush, compressed air, or by rinsing the object with water or a cleaning solution, depending on the material. Cleaning ensures the surface is free from any leftover particles, leaving a cleaner and more refined final product.
3. Sanding or Smoothing the Surface: Depending on the desired finish and the printing technology used, the surface of the printed object may be rough or have visible layer lines. To achieve a smoother surface, sanding or polishing can be done. This can be done manually using sandpaper, files, or various grits to gradually smoothen the surface. Alternatively, automated tools like rotary tools or electric sanders can be used for faster and more efficient processing.
4. Additional Finishing Techniques: Depending on the desired appearance and functionality of the printed object, additional finishing techniques can be employed. This can include applying paints or coatings for aesthetics, adding clear coats for protection, or using specific techniques like vapor smoothing, which involves exposing printed parts to solvents to achieve a smooth and glossy finish.
5. Assembly or Post-Processing: In certain cases, post-printing might involve additional assembly steps or post-processing techniques. This can include attaching printed parts together using adhesives, fasteners, or mechanical connections. When required, post-processing techniques like heat treatment, annealing, or dyeing can also be employed to enhance the mechanical properties or add color to the final object.
6. Quality Control: Lastly, it’s important to conduct a thorough quality check of the finished printed object. This involves inspecting dimensions, examining for any defects or inconsistencies, and ensuring that the print meets the desired standards. Taking the time to perform quality control helps identify and address any issues or imperfections before the object is put to its intended use.
By carefully removing supports, cleaning, and applying finishing touches, you can refine the appearance and functionality of your 3D printed objects. Each step contributes to creating a final product that meets your desired specifications and enhances the overall quality of the print. Whether it’s achieving a smooth surface finish or adding additional coatings, post-printing processes ensure that your 3D prints are fully realized and ready for use or display.
Common Issues and Troubleshooting in 3D Printing
While 3D printing is a powerful technology, it is not without its challenges. Several common issues can arise during the printing process, affecting the quality and success of the final print. Understanding these issues and troubleshooting techniques can help overcome obstacles and achieve better results. Let’s explore some of the most common issues encountered in 3D printing.
1. Poor Adhesion: One of the primary issues in 3D printing is poor adhesion between the print and the build plate. This can lead to prints detaching mid-print or warping. To address this, ensure that the print bed is clean and level. Adjusting the bed temperature, applying adhesion aids like hairspray or glue stick, or using a heated bed for certain materials can improve adhesion.
2. Stringing and Overhangs: Stringing occurs when filament oozes or forms thin threads between printed parts or across spaces. Overhangs refer to unsupported areas where the printer struggles to accurately bridge gaps. Reducing printing temperature, increasing print speed, or enabling retraction settings can minimize stringing. Optimizing cooling settings and using support structures can help with overhangs.
3. Layer Shifts: Layer shifts occur when layers of the print do not align properly, resulting in a skewed or misshapen object. This can be caused by mechanical issues with the printer or loose belts, gears, or pulleys. Ensuring all printer components are secure and properly calibrated can help rectify layer shifts.
4. Filament Clogging or Extrusion Issues: Filament clogs or inconsistent extrusion can lead to gaps, under-extrusion, or print failures. This can be caused by a variety of factors, including a partially blocked nozzle or improper filament feeding. Clearing the nozzle, checking filament quality, and adjusting temperature or retraction settings can help resolve these issues.
5. Warping and Cracking: Deformation or warping of printed objects, particularly with materials like ABS, can occur due to uneven cooling or improper bed temperature. Ensuring a heated bed, using a brim or raft to increase the print’s footprint, or utilizing an enclosure or draft shield can help minimize warping and cracking.
6. Inconsistent Layer Adhesion: Inconsistent layer adhesion can result in weak or brittle prints. This may be caused by improper temperature settings, poor filament quality, or inadequate cooling. Adjusting temperature, using higher-quality filament, or improving cooling and fan settings can enhance overall layer adhesion.
7. Print Quality and Surface Finish: Issues such as visible layer lines, rough surface texture, or poor overall print quality can detract from the desired result. Adjusting print settings such as layer height, print speed, or adding additional post-processing steps like sanding, priming, or vapor smoothing can improve print quality and surface finish.
When troubleshooting these issues, it’s essential to make incremental changes and test prints to identify the root cause. Regular maintenance, calibration, and ensuring proper filament storage can also prevent issues from occurring. Additionally, consulting online resources, user forums, or seeking guidance from experienced 3D printing enthusiasts can provide valuable insights and solutions to common problems.
By being aware of common issues and implementing effective troubleshooting techniques, you can overcome challenges in 3D printing and achieve high-quality, successful prints.
Tips and Best Practices for Successful 3D Printing
To ensure successful and high-quality 3D prints, it’s important to follow certain tips and best practices. These practices can help optimize your printing process, improve print quality, and increase the reliability of your 3D printer. Let’s explore some of the key tips and best practices for successful 3D printing.
1. Understand Your Printer: Familiarize yourself with the specifications, capabilities, and limitations of your 3D printer. Read the user manual, attend webinars or workshops, and explore online resources specific to your printer model. This knowledge will help you optimize settings, troubleshoot issues, and make informed decisions throughout the printing process.
2. Use High-Quality Filament: The quality of filament directly impacts print quality and reliability. Invest in high-quality filaments from reputable manufacturers to minimize risks such as clogging, inconsistent extrusion, or poor layer adhesion. Use the recommended filament diameter for your printer to ensure smooth filament feeding and movement.
3. Calibrate Regularly: Proper calibration is essential for accurate prints. Regularly calibrate your printer, including bed leveling, nozzle height, and print head alignment. Use calibration tools such as feeler gauges or leveling assistants provided by the printer manufacturer to ensure precise and consistent positioning of the print bed and nozzle.
4. Optimize Print Settings: Experiment with various print settings to achieve the desired balance between print quality, speed, and material usage. Adjust parameters such as layer height, print speed, temperature, and cooling settings based on your specific needs. Fine-tuning these settings can significantly enhance print quality and optimize print times.
5. Consider Supports and Orientation: Evaluate the need for support structures based on your design. Proper support placement can prevent issues like sagging, overhangs, or collapse during printing. Orienting the object strategically can minimize the need for excessive supports, improve surface quality, and maximize print strength.
6. Practice Good Print Bed Adhesion: Ensure proper bed adhesion to prevent print failures and warping. Clean the print bed surface before each print, use adhesion aids like glue stick or hairspray if necessary, and consider using a heated bed for materials that benefit from it. Using a brim or raft can also improve bed adhesion by increasing the print’s surface area.
7. Maintain a Controlled Environment: Maintain a stable printing environment to minimize external factors that can affect print quality. Protect the printer from drafts, fluctuations in temperature, or excessive humidity that can impact material behavior. Consider using an enclosure or draft shield to create a controlled environment and improve print consistency.
8. Practice Good Filament Handling: Proper handling and storage of filament are crucial to maintain its quality. Store filament in a sealed container with desiccant to prevent moisture absorption. Avoid exposing filament to direct sunlight or extreme temperature fluctuations. Handle filament with clean hands and consider using filament dryers if moisture is a recurring issue.
9. Perform Regular Maintenance: Follow regular maintenance routines recommended by the manufacturer to keep your printer in optimal condition. This includes cleaning or lubricating moving parts, checking belt tension, inspecting electrical connections, and replacing worn-out components. Regular maintenance ensures consistent performance and extends the lifespan of your printer.
10. Learn from the Community: Engage with the vibrant 3D printing community. Join online forums, participate in user groups, and interact with experienced 3D printing enthusiasts. The community is a valuable resource for troubleshooting, sharing tips, and discovering innovative techniques to improve your 3D printing skills.
By incorporating these tips and best practices into your 3D printing workflow, you can achieve more consistent and successful prints. Experimentation, continuous learning, and attention to detail will help you unleash the full potential of your 3D printer and achieve excellent results.
Advancements and Future Trends in 3D Printing
3D printing technology has been evolving at a rapid pace, with continuous advancements and exciting prospects for the future. As the technology becomes more sophisticated and accessible, several key advancements and future trends are emerging. Let’s explore some of these advancements and what they mean for the future of 3D printing.
1. Improved Printing Speed and Efficiency: One of the ongoing goals in 3D printing is to increase printing speed and efficiency without compromising print quality. Advancements in printer hardware, software algorithms, and material formulations are enabling faster and more precise printing. High-speed continuous printing, multi-material printing, and simultaneous multi-part printing are becoming more feasible, reducing print times and boosting productivity.
2. Expanded Range of Materials: The variety of materials compatible with 3D printing continues to expand. Beyond plastics and metals, there is growing interest in printing with advanced materials such as conductive inks, biocompatible polymers, ceramics, and even graphene. These materials open up possibilities for specialized applications in industries such as electronics, healthcare, aerospace, and energy.
3. Bioprinting and Tissue Engineering: The field of bioprinting is advancing rapidly, offering exciting possibilities in regenerative medicine and tissue engineering. Researchers are working towards bioprinting organs, skin, and other complex tissues by using bioinks that consist of living cells. Bioprinting has the potential to revolutionize the healthcare industry, enabling the creation of personalized replacement organs and reducing the reliance on organ transplantation.
4. Additive Manufacturing in Industry: 3D printing is gaining significant traction in various industries, such as aerospace, automotive, and manufacturing. Additive manufacturing is being incorporated into production processes to produce functional and complex components with reduced costs and lead times. The ability to create lightweight and optimized designs, intricate geometries, and on-demand spare parts is transforming traditional manufacturing approaches.
5. Sustainable and Eco-friendly Printing: The 3D printing community is increasingly focusing on sustainability and eco-friendliness. Efforts are being made to develop more sustainable materials, improve printing efficiency, and minimize waste. Biodegradable and recycled filaments, as well as recycling programs for excess or failed prints, are becoming more prevalent. These sustainable practices contribute to minimizing the environmental impact of 3D printing.
6. Integration of Artificial Intelligence and Machine Learning: Artificial intelligence (AI) and machine learning (ML) are increasingly being integrated into 3D printing processes. AI algorithms can analyze complex designs, optimize support structures, and simulate the behavior of materials, leading to improved print quality and efficiency. ML techniques can also enhance printer calibration, error detection, and predictive maintenance, leading to more reliable and autonomous 3D printing workflows.
7. Customization and Personalization: 3D printing offers unparalleled opportunities for customization and personalization. The ability to create bespoke products tailored to individual needs and requirements is driving advancements in consumer products, healthcare devices, and fashion. Custom-fit prosthetics, dental implants, personalized fashion accessories, and unique consumer products are just a few examples of the customizable applications enabled by 3D printing.
As advancements in 3D printing technology continue to unfold, the potential for innovation in various industries becomes more apparent. The ability to rapidly prototype, customize, and manufacture complex objects on-demand is revolutionizing the way we think about design, production, and distribution. With the continuous push for speed, materials, sustainability, and integration with other technologies, the future of 3D printing holds immense promise and is set to reshape multiple industries.