Introduction
3D printing has revolutionized the way objects are created, allowing for the fabrication of complex designs with ease. Behind the scenes, a crucial player in this process is G-Code, a programming language that controls the movements of the 3D printer. Whether you’re an avid maker or just starting to explore the world of 3D printing, understanding G-Code is essential to producing high-quality prints.
G-Code, short for “Geometric Code,” is a set of instructions written in a specific format that tells the 3D printer what to do. It consists of a series of commands that dictate movements, speeds, temperatures, and other parameters necessary to create the desired object. Similar to how a recipe guides a chef, G-Code guides the 3D printer in creating each layer of the printed object.
The role of G-Code in 3D printing is critical. Without it, the printer would not know what movements to make, what temperatures to set, or how to accurately translate a 3D model into a physical object. By understanding how G-Code works and how to optimize it, you can unlock the full potential of your 3D printer and achieve better print results.
Before diving into the intricacies of G-Code, it’s essential to understand its structure and syntax. G-Code commands are written in plain text, allowing users to create or modify code using any text editor. This flexibility makes it accessible to users of all skill levels, from beginners to advanced users.
In the next sections, we’ll take an in-depth look at the anatomy of G-Code, explore its commands and syntax, discuss commonly used codes in 3D printing, and provide tips on generating and optimizing G-Code for better prints. Let’s embark on a journey into the world of G-Code and discover how it plays a vital role in the 3D printing process.
What Is G-Code?
G-Code is a programming language specific to the field of computer-aided manufacturing (CAM) that controls the movements of a 3D printer. It is a standardized format that allows users to communicate with their printers and instruct them on how to create a physical object based on a digital model.
Essentially, G-Code is a set of commands that directs the 3D printer’s movements along the X, Y, and Z axes. It provides instructions for the printer to move to specific coordinates, adjust extrusion rates, control the speed and temperature, and execute other essential functions.
Each line of G-Code contains a command, known as a G-Code command, followed by optional parameters. The commands start with a letter, such as G, M, or T, which denotes the specific function to be performed. These commands are combined to create a sequence of actions that guide the printer throughout the entire printing process.
It’s important to note that G-Code is machine-specific. Each 3D printer model may have its own variations and extensions to the standard G-Code language. Therefore, it’s crucial to refer to the printer’s documentation or manufacturer’s guidelines to ensure compatibility and optimal print results.
Mastering G-Code allows users to have more control over their 3D printers and fine-tune various parameters to achieve the desired print quality. Additionally, understanding G-Code can be beneficial when troubleshooting issues or customizing prints with advanced techniques.
In summary, G-Code is a programming language used in 3D printing that provides instructions to control the movements, speeds, and other parameters of the printer. By learning G-Code, you can unlock the full potential of your 3D printer, customize your prints, and achieve higher-quality results.
The Role of G-Code in 3D Printing
G-Code plays a crucial role in the 3D printing process, acting as the bridge between a digital model and the physical object it represents. It provides the instructions necessary for the 3D printer to accurately recreate the 3D model layer by layer. Here are some key aspects of the role that G-Code plays in 3D printing:
1. Controlling Movements: G-Code controls the movements of the 3D printer’s extruder and build plate. It specifies the paths, speeds, and accelerations for each axis, ensuring precise positioning and accurate printing of each layer.
2. Extrusion Parameters: G-Code commands control the extrusion parameters, such as extruder temperature, filament flow rate, and retraction settings. These parameters determine the flow of filament and control the amount of material deposited, influencing the overall print quality.
3. Layer Height and Print Settings: G-Code allows for customization of print settings, including layer height, infill percentage, and printing speed. These settings affect the overall print time, strength, and surface finish of the printed object.
4. Temperature Control: G-Code commands regulate the temperature of the printer’s extruder and heated bed. Different materials require specific temperature settings for optimal performance, and G-Code facilitates the control and adjustment of these temperatures during printing.
5. Advanced Functionality: G-Code enables advanced functionalities like multi-material printing, support structures, and variable layer heights. It provides the necessary commands to control these features and achieve complex prints with intricate details.
6. Error Handling: G-Code is used to handle errors during the printing process. It can pause and resume prints, perform filament changes, and detect issues such as filament runout or clogs. By including error handling commands in the G-Code, the printer can recover from various unexpected situations.
Overall, G-Code acts as the language that communicates instructions from the user to the 3D printer. It controls every aspect of the printing process, ensuring accurate positioning, proper extrusion, and optimal printing parameters. Mastery of G-Code allows users to fine-tune their prints and achieve the desired quality and level of customization in their 3D printed objects.
Anatomy of G-Code
To understand the inner workings of G-Code, it’s essential to explore its structure and components. Here is a breakdown of the key elements that make up G-Code:
1. Commands: The building blocks of G-Code are commands, which are represented by a letter followed by a number and optional parameters. Common command letters include G, M, T, and S, each denoting a specific function or action. For example, the G1 command represents a linear move, while the M104 command sets the extruder temperature.
2. Parameters: Parameters provide additional information to the G-Code commands and affect their behavior. They define settings such as coordinates, speeds, temperatures, and extrusion rates. For instance, the X and Y parameters specify the position on the build plate, while the F parameter sets the feed rate or printing speed.
3. Comments: Comments in G-Code are notes that provide information but are not executed by the printer. They are marked by a semicolon (;) at the beginning of the line. Comments are useful for documenting the G-Code and adding annotations for easier understanding and troubleshooting.
4. Blocks: G-Code is organized into blocks, which consist of a single command or a sequence of commands. Each block is typically contained on a single line, although some commands may span multiple lines for better readability. Blocks are separated by line breaks or carriage returns.
5. Code Structure: G-Code follows a specific structure to ensure proper execution. It typically starts with an initialization section that defines the printer’s settings, followed by individual blocks of commands for each specific action. The code may also include end-of-print commands or additional configurations towards the end.
6. File Extension: G-Code files are commonly saved with the .gcode file extension. These files contain the complete set of G-Code instructions necessary to reproduce a specific print. G-Code files can be generated using 3D slicing software, which converts a 3D model into a series of G-Code commands.
By understanding the anatomy of G-Code, users gain insight into how the individual commands, parameters, and structure work together to control the 3D printer. This knowledge is crucial for manually writing or modifying G-Code, as well as troubleshooting issues and optimizing prints.
G-Code Commands and Syntax
G-Code commands and their syntax form the foundation of the language that controls 3D printers. Understanding the different types of commands and their syntax is essential for effectively communicating instructions to the printer. Here is a closer look at G-Code commands and their syntax:
1. G-Code Commands: G-Code commands can be categorized into different groups based on their functionality. Common G-Code commands include:
- Movement commands (G0, G1): These commands control the movement of the printer’s extruder head or build plate along the X, Y, and Z axes, as well as the extrusion rate.
- Temperature commands (M104, M109): These commands control the temperature settings for the printer’s extruder and heated bed.
- Home commands (G28, G29): These commands instruct the printer to move to its home position or perform automated bed leveling.
- Tool change commands (T0, T1): These commands are used when switching between different extruders or tools during a print job.
- Miscellaneous commands (M106, M107): These commands control various other functions such as fan control, lighting, and filament loading/unloading.
2. Command Syntax: G-Code commands have a specific syntax that determines how they are written. The general format of a G-Code command is as follows:
Command Letter + Command Number + Parameters
The command letter specifies the type of command to be executed, followed by the command number, which further refines the specific action to be taken. Parameters are optional and provide additional information or settings for the command.
For example, the G1 command is used for linear movement, and it commonly includes parameters such as X, Y, Z for position, E for extruder distance, and F for feed rate. An example of a G1 command with parameters could be:
G1 X100 Y100 E10 F200
This command would move the extruder head to position X100 and Y100, extrude 10mm of filament, and set the feed rate to 200mm/min.
It’s important to note that the syntax can also include comments, which are marked by a semicolon (;) and provide additional information but are ignored by the printer. Comments are useful for annotating the code and making it more readable.
By understanding the various G-Code commands and their syntax, users gain the ability to write, modify, and troubleshoot G-Code to achieve the desired results in their 3D prints. It allows for greater customization and control over the printing process.
Commonly Used G-Codes in 3D Printing
There are several G-Codes that are frequently used in 3D printing to control various aspects of the printing process. Understanding these common G-Codes will enable you to have greater control and precision over your prints. Here are some of the most commonly used G-Codes in 3D printing:
- G0/G1: Linear Movement – These commands control the movement of the extruder head or build plate along the X, Y, and Z axes. G0 is used for rapid movements, while G1 is used for controlled, precise movements. Parameters such as X, Y, Z, and E (extruder position) specify the desired position and speed of the movement.
- G28: Homing – This command instructs the printer to move the extruder head and build plate to their home positions. The home position is typically a pre-defined reference point that ensures accurate positioning and a consistent starting point for each print.
- G29: Bed Leveling – Bed leveling is an essential step in optimizing print quality. The G29 command initiates an automated bed leveling process where the printer probes multiple points on the build plate, compensating for any unevenness. This helps ensure a level and properly calibrated print surface.
- M104/M109: Temperature Control – These commands control the temperature of the extruder. M104 sets the target temperature without waiting, while M109 waits for the extruder to reach the target temperature before proceeding with the print. Parameters such as S (temperature) specify the desired temperature in degrees Celsius.
- M106/M107: Fan Control – These commands control the cooling fan attached to the printer. M106 turns the fan on at a specified speed, while M107 turns it off. The fan helps with cooling the printed layers, especially for materials that require rapid cooling or have overhangs.
- T0/T1: Tool Change – When using printers with multiple extruders, these commands are used to switch between the active extruder heads. T0 selects the first extruder, while T1 selects the second, and so on. Tool changes allow for multi-color or multi-material prints.
These are just a few examples of the commonly used G-Codes in 3D printing. There are many more G-Codes available that offer advanced functionality, allowing for even greater control and customization of the printing process.
It’s important to consult your printer’s documentation or the manufacturer’s guidelines to ensure compatibility and proper usage of these G-Codes. Additionally, experimenting with different G-Codes and understanding their effects on print quality can help you fine-tune your prints and achieve the desired results.
Generating G-Code for 3D Printing
Generating G-Code for 3D printing involves converting a 3D model into a set of specific instructions that the 3D printer can understand. This process is typically done using slicing software, which takes into account various parameters and settings to generate the optimal G-Code for your print. Here’s an overview of the process of generating G-Code for 3D printing:
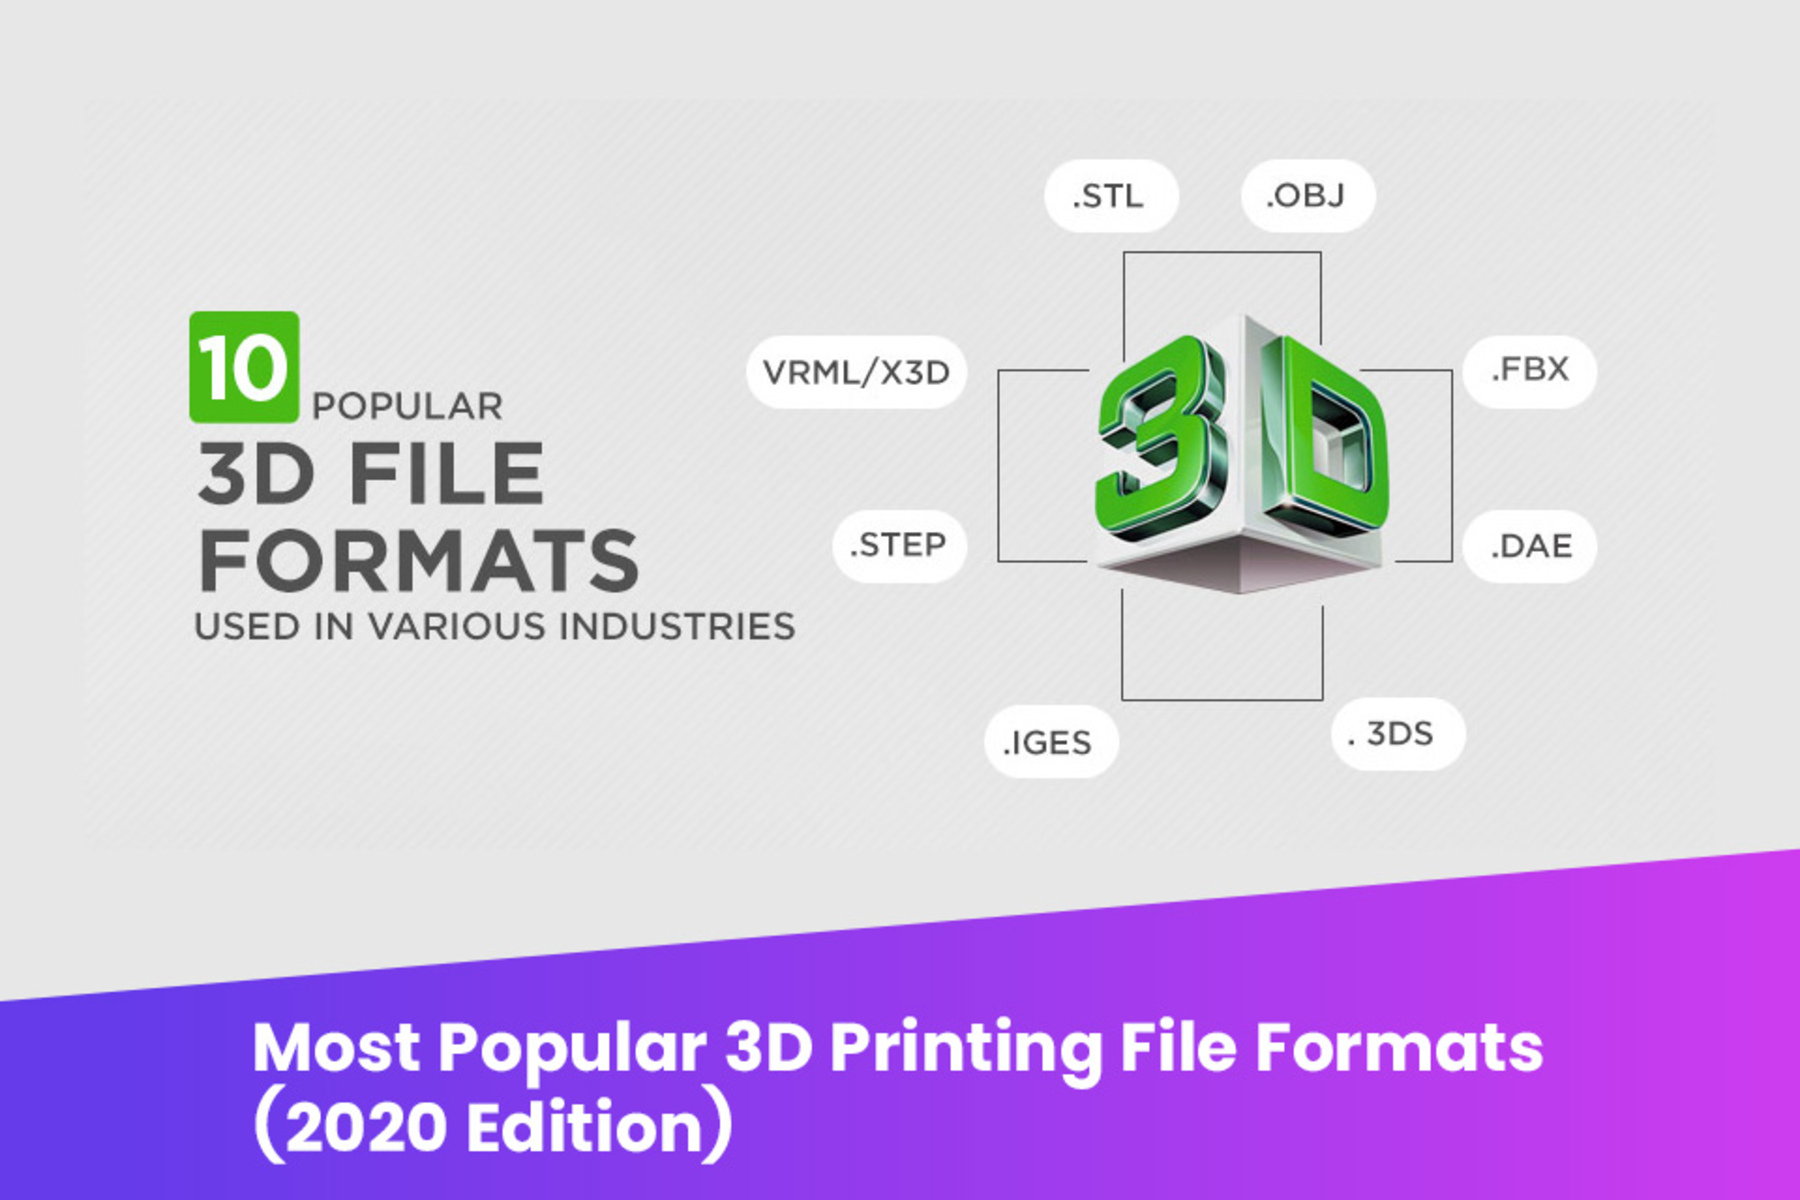
1. Slicing Software: Slicing software is the key tool used to generate G-Code. It takes a 3D model in various formats, such as .STL or .OBJ, and slices it into a series of thin layers. The software allows you to adjust settings such as layer height, print speed, infill density, and support structures to customize the print to your requirements.
2. Model Preparation: Before slicing, it’s essential to prepare the 3D model. This includes checking for errors, such as non-manifold geometry or intersecting surfaces, and making any necessary repairs. The slicing software often includes tools for model repair and optimization to ensure a clean and printable model.
3. Slicing Settings: Once the 3D model is prepared, you can configure the slicing settings. This includes selecting the appropriate print profile based on your printer and filament type, setting the desired layer height, infill density, and generating support structures if needed. These settings play a significant role in print quality and the resulting G-Code.
4. Slicing Process: After configuring the settings, you can initiate the slicing process. The slicing software analyzes the 3D model and generates a G-Code file that contains instructions for each layer, including movements, temperatures, extrusion amounts, and other printing parameters. The software then saves the G-Code file, which can be loaded onto your 3D printer.
5. G-Code Analysis: Before printing, it’s a good practice to review the generated G-Code to ensure it aligns with your expectations. You can use G-Code visualization tools or preview features within the slicing software to examine the layer-by-layer instructions and detect any potential issues or anomalies.
6. Sending G-Code to the Printer: Once the G-Code is generated and reviewed, it can be transferred to the 3D printer. This can be done by transferring the G-Code file to an SD card or directly sending it from the slicing software to the printer via USB or Wi-Fi. The printer then reads and interprets the G-Code instructions to execute the print.
Generating G-Code for 3D printing using slicing software allows for customization and optimization of print settings to achieve the desired results. It saves time by automating the process of converting a 3D model into a set of instructions that the printer can understand, making it accessible to users of all skill levels.
Tips for Optimizing G-Code for Better Prints
Optimizing G-Code can significantly enhance the quality and efficiency of your 3D prints. Here are some tips to help you optimize your G-Code and achieve better print results:
- Adjust Layer Height: Experiment with different layer heights to find the optimal balance between print time and quality. Smaller layer heights, such as 0.1mm or 0.2mm, can result in smoother surfaces and finer details, but may increase print time.
- Optimize Infill Density: Adjust the infill density based on the desired strength and weight of the print. Higher infill percentages provide greater structural integrity, while lower percentages reduce material usage and print time.
- Control Printing Speed: Fine-tune the print speed (F parameter) in the G-Code to balance speed and quality. Slower speeds generally result in better details and surface finish, whereas higher speeds can reduce print time.
- Implement Retraction: Proper retraction settings (G10, G11) can help reduce stringing and oozing during travel moves. Adjust the retraction distance and speed to minimize filament issues between printed parts.
- Consider Supports and Rafts: When printing overhangs or complex geometries, enable support structures (M106) in the slicing software. Rafts (M108) can also be beneficial for better adhesion to the build plate, especially for prints with a small contact area.
- Calibrate Steps per Unit: Ensure accurate extrusion by calibrating the steps per unit (E steps/mm) for your extruder. Adjusting this value in the printer’s firmware or using M92 commands in the G-Code can eliminate under- or over-extrusion issues.
- Use Cooling and Temperature Control: Implement appropriate cooling strategies (M106) to improve print quality, especially for small features or bridging. Additionally, fine-tune the temperature settings (M104, M109) for your filament to achieve optimal layer adhesion and reduce the likelihood of issues like warping or stringing.
- Inspect and Optimize Start/End G-Code: Customize the start and end G-Code scripts to ensure proper bed leveling, nozzle priming, and retraction behavior. These scripts can be modified in the slicing software to tailor them to your specific printer.
- Consider Post-Processing Techniques: Explore post-processing techniques such as sanding, painting, or post-curing to further enhance the aesthetic appeal and quality of your prints.
Remember that optimizing G-Code is an iterative process that involves experimentation and fine-tuning based on your specific printer, filament, and desired print outcome. By implementing these tips and analyzing the results, you can optimize your G-Code to achieve better prints with improved quality and efficiency.
Troubleshooting G-Code Issues
When encountering issues with your 3D prints, it’s important to understand that G-Code can sometimes be the culprit. Here are some common G-Code-related issues you might encounter and tips for troubleshooting them:
- Print Not Sticking to the Bed: If your print keeps detaching from the bed, verify that your initial layer height and bed leveling are properly set. Adjust the Z offset (G92) to fine-tune the nozzle’s distance from the bed. Additionally, ensure your bed surface is clean and free of any debris or residue that could hinder adhesion.
- Extrusion Problems: Issues like under-extrusion or over-extrusion can occur due to incorrect E steps/mm or improper filament diameter settings. Calibrate these settings (M92) to ensure accurate filament extrusion. Also, check for any extruder or nozzle blockages and clean or replace them as necessary.
- Misaligned Layers: If you notice gaps or shifts between layers, it may indicate a mechanical problem or incorrect movement parameters in the G-Code. Check for loose belts, pulleys, or rods that may be causing the misalignment. Adjust belt tension and confirm that the X, Y, and Z axis movements are smooth and accurate.
- Stringing and Oozing: Stringing occurs when the filament leaves unwanted strands between printed parts or during travel moves. Optimize retraction settings (G10, G11) to minimize stringing. Adjust the retraction distance and speed to find the optimal values for your filament and printer configuration.
- Overheating or Warping: Overheating and warping are common issues, especially with certain materials like ABS. Adjust the temperature settings (M104, M109) for the nozzle and heated bed to find the ideal values that prevent overheating or warping. Additionally, ensure proper cooling (M106) for small features to prevent overheating during printing.
- Print Speed Issues: If you experience inconsistent print speed or printing too slowly, check the print speed settings (F parameter) in the G-Code. Adjust the values to match your desired speed, taking care not to exceed the printer’s capabilities. Additionally, ensure that your printer’s firmware and motor drivers are up to date.
- Support Structure Problems: If your support structures are difficult to remove or causing surface defects, consider adjusting the support settings in the slicing software. Increase the support density or modify the support pattern to better suit your print. You can also try using support material optimized for easy removal, such as breakaway or soluble supports.
Remember, troubleshooting G-Code issues requires a systematic approach to identify and address the specific problem. Analyze the G-Code instructions, review printer settings, and examine the physical components of your printer for any mechanical issues. Additionally, consult forums, online communities, or the printer’s manufacturer for further assistance and guidance in resolving specific G-Code-related problems.
Conclusion
G-Code is an essential component of the 3D printing process, serving as the language that translates digital models into physical objects. Understanding G-Code allows users to have greater control over their 3D printers, customize print settings, and achieve better print results.
In this article, we explored the basics of G-Code, including its definition, role in 3D printing, anatomy, and commonly used commands. We also discussed the process of generating G-Code using slicing software and provided tips for optimizing G-Code to improve print quality and troubleshoot common issues.
By adjusting parameters such as layer height, infill density, print speed, and temperature control, users can optimize their G-Code for better prints. Additionally, understanding how to troubleshoot G-Code-related issues can help resolve problems such as print adhesion, extrusion inconsistencies, misaligned layers, and more.
It’s important to note that G-Code can vary depending on the specific 3D printer model and manufacturer. Therefore, consulting the printer’s documentation or manufacturer’s guidelines is essential for compatibility and optimal performance.
With a solid understanding of G-Code and its nuances, users can harness the full potential of their 3D printers and unlock a world of creativity and innovation. So, dive in, experiment, and enjoy the fascinating world of 3D printing powered by G-Code!