Why is iMessage not working on my iPhone?
iMessage is an incredibly useful feature on iPhone that allows you to send messages, photos, videos, and more to other iPhone users over a Wi-Fi or cellular data connection. However, there are instances where you may encounter issues with iMessage not working properly on your iPhone. Let’s explore some common reasons behind this problem:
1. Internet connectivity: One of the most common reasons for iMessage not working is a weak or unstable internet connection. Ensure that your iPhone is connected to a reliable Wi-Fi network or has a strong cellular data signal.
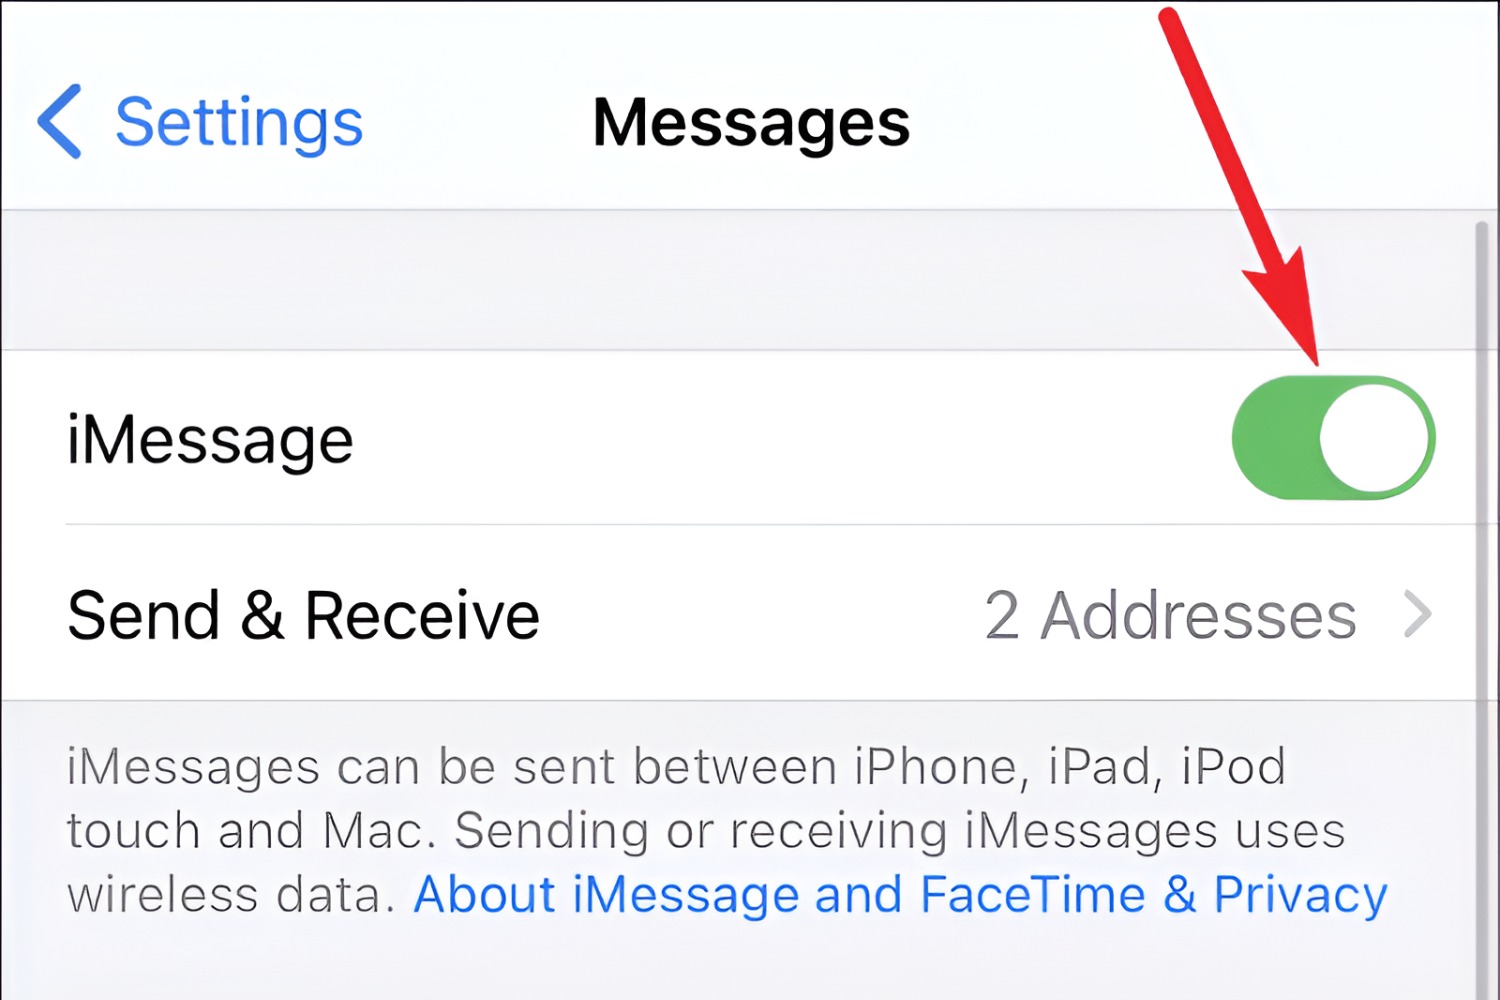
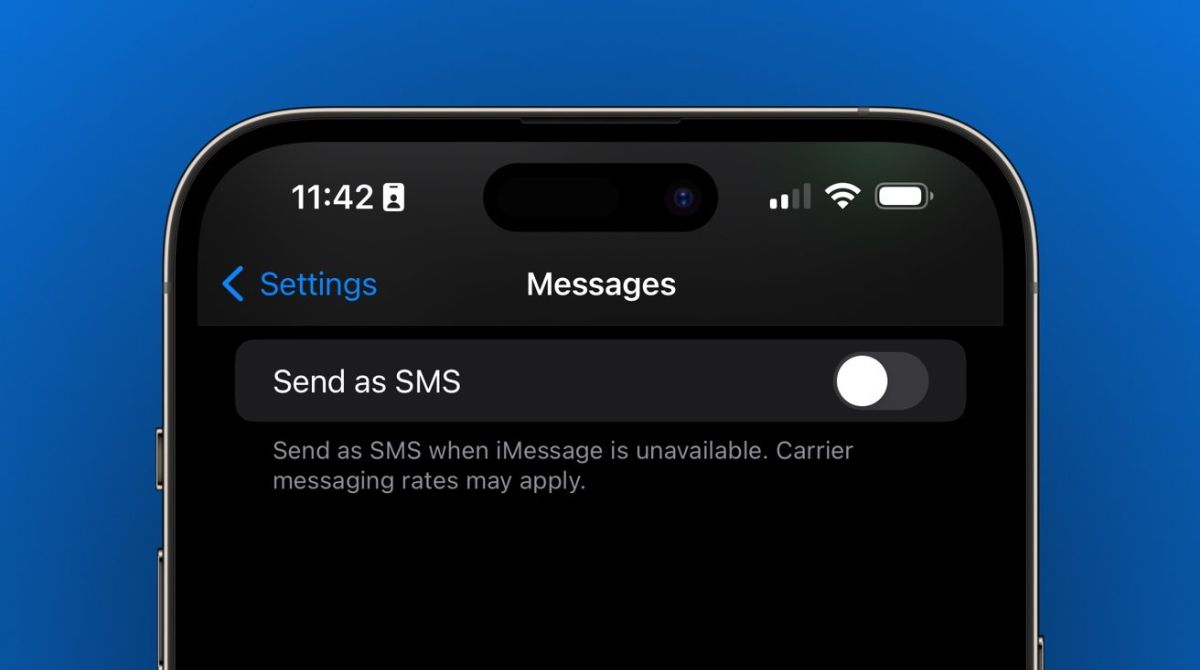
2. iMessage not enabled: If you recently purchased a new iPhone or updated your device’s software, it’s possible that iMessage was accidentally disabled. To check if iMessage is enabled, go to “Settings” > “Messages” and toggle the switch next to “iMessage” to enable it.
3. Apple ID issues: iMessage requires an active Apple ID to function properly. If there are issues with your Apple ID, such as incorrect login credentials or a disabled account, it can prevent iMessage from working. Verify that your Apple ID is correctly entered in the “Settings” > “Messages” > “Send & Receive” section.
4. Software updates: Outdated software can sometimes lead to compatibility issues with iMessage. Ensure that your iPhone is running the latest version of iOS by going to “Settings” > “General” > “Software Update” and installing any available updates.
5. Carrier restrictions: Some cellular carriers impose restrictions on iMessage usage, particularly when traveling internationally or using prepaid plans. Contact your carrier to verify if there are any limitations or restrictions on iMessage services.
6. Activation issues: Occasionally, issues may arise during the activation process of iMessage. To resolve this, go to “Settings” > “Messages” and toggle the switch next to “iMessage” off and on again. If prompted, sign in with your Apple ID to complete the activation process.
7. Network settings: Incorrect network settings can also contribute to iMessage problems. Resetting your network settings can often resolve these issues. Go to “Settings” > “General” > “Reset” > “Reset Network Settings” (note that this will also remove saved Wi-Fi passwords).
By understanding these common reasons behind iMessage not working on your iPhone, you can troubleshoot the issue and hopefully get it up and running smoothly again. In the next sections, we will discuss how to enable iMessage on different Apple devices and provide troubleshooting tips for specific iMessage problems.
How to enable iMessage on iPhone?
iMessage is a convenient feature that allows iPhone users to send messages, photos, videos, and more to other Apple device users using an internet connection. If iMessage is not enabled on your iPhone, here are the steps to enable it:
- Open the “Settings” app on your iPhone.
- Scroll down and tap on “Messages”.
- On the Messages settings page, you will see an option for “iMessage”. Toggle the switch next to it to turn it on (the switch will turn green).
- If prompted, sign in with your Apple ID. This step is necessary as iMessage is tied to your Apple ID.
- Once iMessage is enabled, you can customize the settings further. For example, you can choose to receive iMessages on your iPhone using your phone number or an email address associated with your Apple ID.
- You can also choose to enable or disable read receipts, which allow the sender to see that you have read their messages.
- If you have multiple Apple devices, such as an iPad or Mac, you can also sync iMessage across them by signing in with the same Apple ID and enabling iMessage on each device.
- Once you have made your desired changes, exit the settings app.
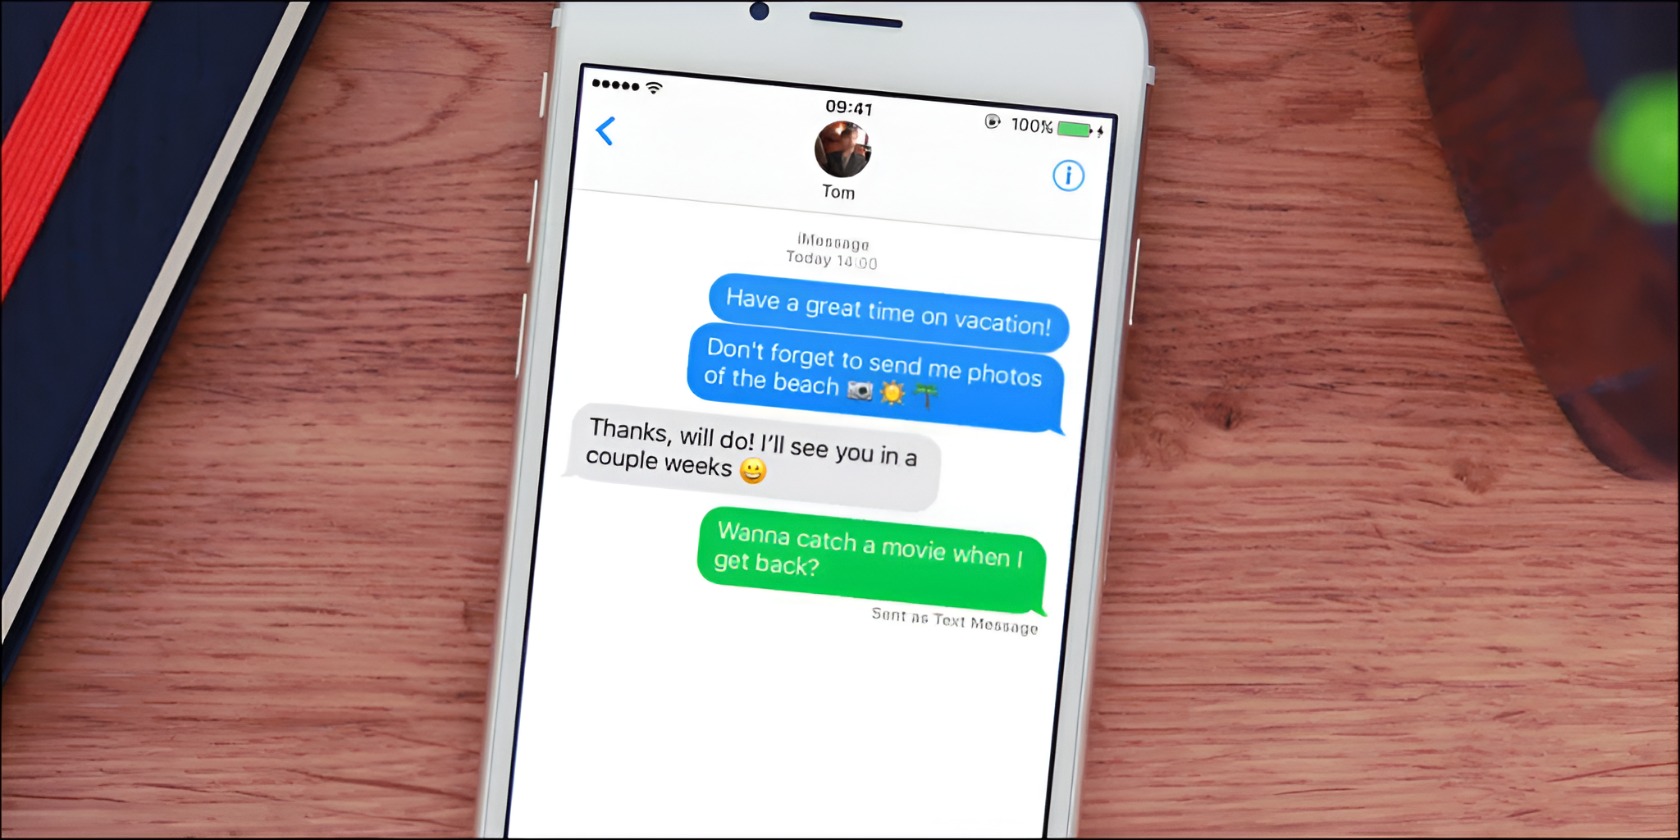
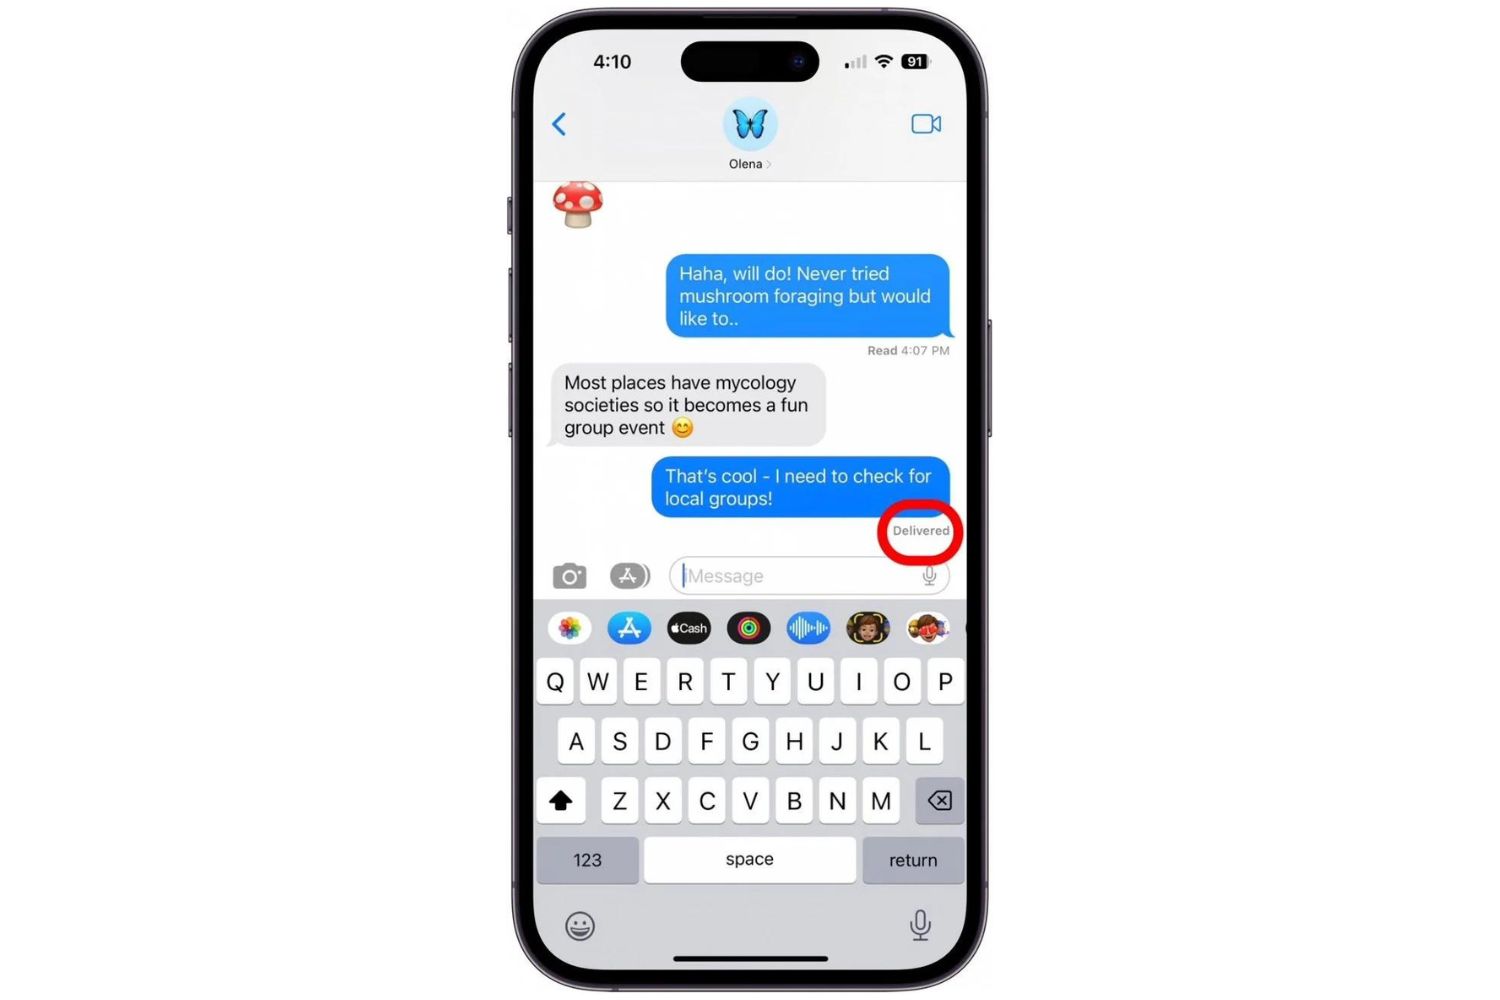
After enabling iMessage on your iPhone, you will be able to send and receive iMessages with other Apple device users. iMessage conversations will appear in blue bubbles, distinguishing them from regular SMS or MMS messages, which appear in green bubbles. It’s important to note that iMessage uses internet connectivity, so it is advisable to have a Wi-Fi connection or a strong cellular data signal for optimal performance.
By following these simple steps, you can easily enable iMessage on your iPhone and enjoy the benefits of seamless communication with fellow iOS users. If you encounter any issues, refer to the troubleshooting section or reach out to Apple Support for further assistance.
How to enable iMessage on iPad?
iMessage is a convenient messaging service that allows iPad users to send and receive messages, photos, videos, and more to other Apple device users. If iMessage is not enabled on your iPad, here are the steps to enable it:
- Open the “Settings” app on your iPad.
- Scroll down and tap on “Messages”.
- On the Messages settings page, you will see an option for “iMessage”. Toggle the switch next to it to turn it on (the switch will turn green).
- If prompted, sign in with your Apple ID. This step is necessary as iMessage is linked to your Apple ID.
- Once iMessage is enabled, you can customize the settings further. For example, you can choose to receive iMessages on your iPad using your phone number or an email address associated with your Apple ID.
- You can also choose to enable or disable read receipts, which allow the sender to see that you have read their messages.
- If you have multiple Apple devices, such as an iPhone or Mac, you can sync iMessage across them by signing in with the same Apple ID and enabling iMessage on each device.
- Once you have made your desired changes, exit the settings app.
After enabling iMessage on your iPad, you will be able to enjoy seamless messaging with other Apple device users. iMessage conversations will appear in blue bubbles, distinguishing them from regular SMS or MMS messages, which appear in green bubbles. It’s important to note that iMessage utilizes an internet connection, so it is recommended to have a Wi-Fi connection or a strong cellular data signal for optimal functionality.
By following these simple steps, you can easily enable iMessage on your iPad and stay connected with friends and family in a more engaging way. If you encounter any difficulties, refer to the troubleshooting section or reach out to Apple Support for further assistance.
How to enable iMessage on Mac?
iMessage is a convenient messaging service that allows Mac users to send and receive messages, photos, videos, and more to other Apple device users. If iMessage is not already enabled on your Mac, follow the steps below to enable it:
- Open the “Messages” app on your Mac. You can find it in the Applications folder or by using Spotlight search.
- If you have not signed in with your Apple ID, you will be prompted to do so. Sign in with your Apple ID credentials that are linked to your iMessage account.
- Once signed in, go to “Preferences” in the “Messages” menu or by pressing Command + comma (,).
- In the “Accounts” tab, you will see your Apple ID listed. Make sure the box next to your Apple ID is checked to enable iMessage for that account.
- You can also choose to add additional email addresses or phone numbers that are associated with your Apple ID for receiving iMessages.
- If you have other Apple devices, such as an iPhone or iPad, you can enable iMessage on them using the same Apple ID to sync your messages across all devices.
- After making any necessary changes, close the preferences window.
Once iMessage is enabled on your Mac, you can start sending and receiving iMessages with other Apple device users. iMessage conversations will be displayed in blue bubbles, distinguishing them from regular SMS or MMS messages, which appear in green bubbles.
It’s important to note that iMessage uses the internet to send and receive messages. Therefore, ensure that your Mac is connected to a stable Wi-Fi network or has a reliable cellular data connection for optimal use of iMessage.
By following these simple steps, you can easily enable iMessage on your Mac and enjoy seamless messaging across all your Apple devices. If you encounter any issues or have further questions, refer to the troubleshooting section or reach out to Apple Support for assistance.
How to enable iMessage on Apple Watch?
With an Apple Watch, you can conveniently send and receive messages using iMessage right from your wrist. If iMessage is not already enabled on your Apple Watch, follow the steps below to enable it:
- Open the “Settings” app on your Apple Watch by tapping its icon on the home screen.
- Scroll down and tap on “Messages”.
- On the Messages settings page, you will see an option for “iMessage”. Tap the toggle switch next to it to turn it on (the switch will turn green).
- If prompted, sign in with your Apple ID. This step is necessary as iMessage is linked to your Apple ID.
- Once iMessage is enabled, you can customize the settings further. For example, you can choose to receive iMessages on your Apple Watch using your phone number or an email address associated with your Apple ID.
- If you wish to respond to messages from your Apple Watch, make sure the “Reply with Message” option is enabled. You can create custom quick replies or dictate your response using the audio dictation feature.
- If you have multiple Apple devices, such as an iPhone or Mac, you can sync iMessage across them by signing in with the same Apple ID and enabling iMessage on each device.
- Once you have made your desired changes, press the digital crown to exit the Settings app.
After enabling iMessage on your Apple Watch, you will be able to send and receive iMessages with other Apple device users conveniently from your wrist. iMessage conversations will appear on your watch’s screen, and you can even use the handwriting or emoji features to enhance your messages.
It’s important to note that iMessage on an Apple Watch relies on a connection with your iPhone for message delivery and synchronization. Ensure that your iPhone is nearby and connected to the internet for iMessage functionality on your Apple Watch.
By following these simple steps, you can easily enable iMessage on your Apple Watch and stay connected with messages throughout the day. If you encounter any difficulties, refer to the troubleshooting section or reach out to Apple Support for further assistance.
Troubleshooting iMessage activation issues
Activation issues can occasionally occur when enabling iMessage on your Apple device. If you are experiencing difficulties with iMessage activation, try the following troubleshooting steps:
- Check internet connectivity: Ensure that your Apple device has a stable and active internet connection, either through Wi-Fi or cellular data. Poor internet connectivity can hinder the activation process.
- Update your software: Make sure your device’s software is up to date. Go to “Settings” > “General” > “Software Update” and install any available updates. An outdated software version can cause activation problems.
- Restart your device: Sometimes a simple restart can resolve activation issues. Turn off your device, wait a few seconds, then power it back on.
- Toggle iMessage off and on: Go to “Settings” > “Messages” and toggle the switch next to iMessage off and on again. This can help refresh the activation process.
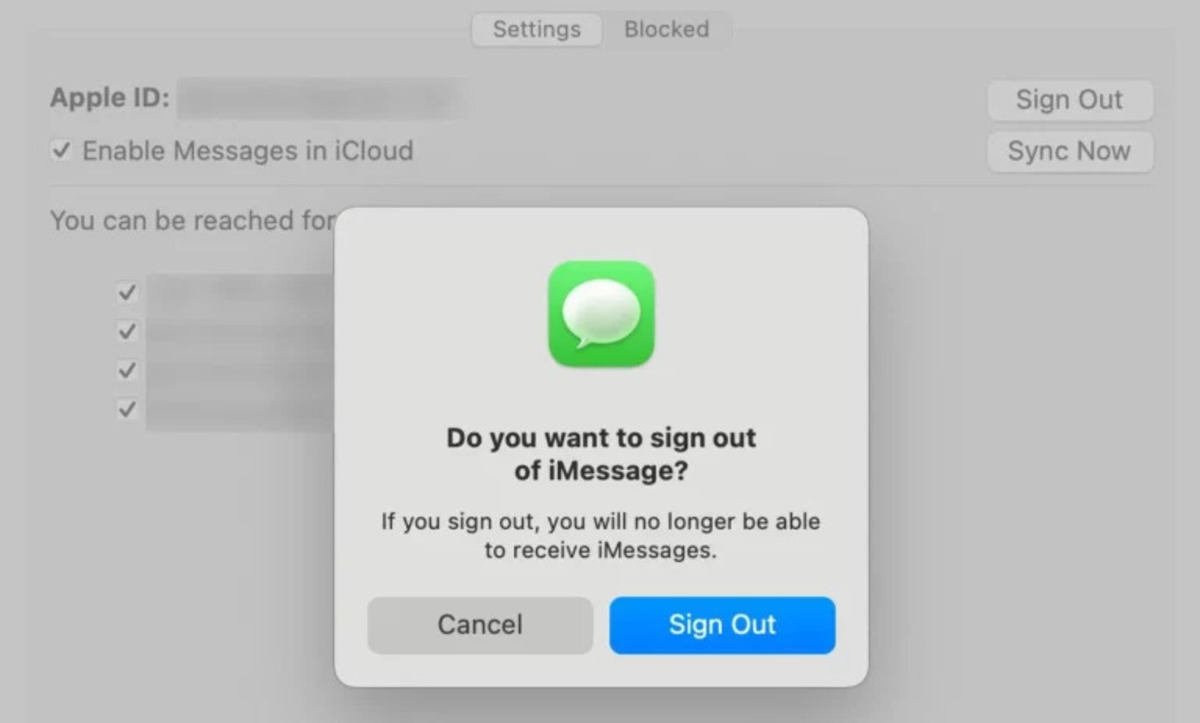
- Sign out and sign back in: If toggling iMessage doesn’t work, try signing out of your Apple ID in the “Settings” > “Messages” > “Send & Receive” section. Once signed out, sign back in with your Apple ID credentials.
- Contact your carrier: In some cases, activation issues may be related to your cellular carrier. Reach out to your carrier’s customer support to ensure there are no restrictions or problems with your account that may prevent iMessage activation.
- Reset network settings: Resetting network settings can sometimes resolve activation issues. Go to “Settings” > “General” > “Reset” > “Reset Network Settings” (note that this will also remove saved Wi-Fi passwords).
- Contact Apple Support: If none of the above steps work, it’s best to contact Apple Support for further assistance. They can provide more personalized troubleshooting guidance and help resolve any activation issues you are experiencing.
By following these troubleshooting steps, you can often resolve iMessage activation issues and enjoy the full functionality of this messaging service on your Apple device.
Remember, if you are still unable to activate iMessage after trying these steps, contacting Apple Support is your best course of action to receive personalized assistance for your specific issue.
Common problems with iMessage and their solutions
While iMessage is a reliable messaging service, occasional problems may arise. Here are some common issues that users encounter with iMessage and their solutions:
- Messages not delivering: If you experience messages that are not delivering, ensure that you have a stable internet connection. You can also try toggling iMessage off and on or restarting your device to refresh the connection.
- Message syncing issues: If your messages are not syncing across your Apple devices, verify that you are signed in with the same Apple ID on all devices and that iMessage is enabled on each device. Additionally, check that all devices are connected to the internet.
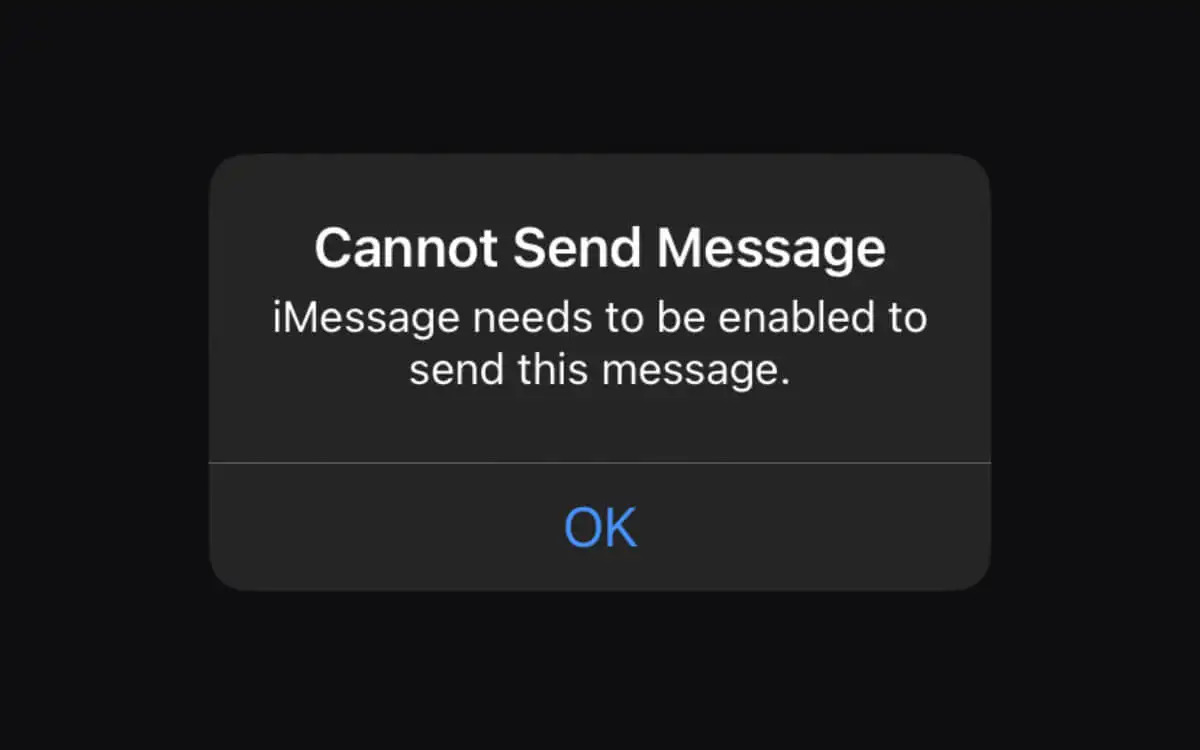
- Activation unsuccessful: If you are unable to activate iMessage, check your internet connectivity and ensure that your device’s software is up to date. You can also try signing out and back in with your Apple ID or contacting your cellular carrier for assistance.
- Messages stuck on “Sending…” or “Not delivered”: If messages are consistently getting stuck on “Sending…” or “Not delivered,” try toggling iMessage off and on or restarting your device. Additionally, make sure the recipient’s device has an active internet connection.
- Receiving messages from unknown senders: If you are receiving messages from unknown senders or unwanted spam, you can enable the “Filter Unknown Senders” option in the Messages settings. This will sort messages from unknown numbers into a separate tab.
- Message effects not working: If message effects like confetti or screen effects are not working, ensure that the “Reduce Motion” setting is disabled in your device’s accessibility settings. Additionally, check that the “Auto-play Message Effects” option is enabled in the Messages settings.
- Message notifications not appearing: If you are not receiving notifications for new iMessages, make sure that the “Allow Notifications” option is enabled for the Messages app in your device’s settings. You can also check if “Do Not Disturb” mode is enabled, as it may silence notifications.
- Issues with read receipts: If read receipts are not working properly, go to “Settings” > “Messages” and ensure that the “Send Read Receipts” option is enabled. If the issue persists, try toggling the option off and on again.
By troubleshooting these common problems with iMessage, you can resolve most issues and enjoy a smooth messaging experience. If none of these solutions work, reaching out to Apple Support can provide further assistance tailored to your specific situation.