Introduction
Welcome to this guide on how to switch text messages to iMessage. In today’s digital age, messaging has become an integral part of our lives, allowing us to stay connected with friends, family, and colleagues. While standard text messages are convenient, using iMessage brings a whole new level of functionality and benefits.
iMessage is an instant messaging service developed by Apple exclusively for their devices. It allows users to exchange text messages, photos, videos, and other media over an internet connection, rather than relying on traditional cellular network SMS.
This guide will walk you through the process of enabling and using iMessage on different Apple devices, including iPhone, iPad, and Mac. We will also cover some troubleshooting tips for common issues you might encounter along the way. Whether you’re new to iMessage or simply considering making the switch, this guide will provide you with all the information you need to get started.
By using iMessage, you can enjoy a variety of benefits. Firstly, iMessage offers a more seamless messaging experience compared to traditional text messages. You can easily send and receive messages across all your Apple devices, including iPhone, iPad, and Mac, without interruption. This synchronization ensures that your messages are always up to date, regardless of which device you’re using.
Another advantage of iMessage is its support for various multimedia formats. Unlike text messages, iMessage allows you to send not only plain text but also photos, videos, voice messages, and even animated stickers. This makes your conversations more expressive and engaging. Additionally, iMessage supports end-to-end encryption, ensuring that your messages are secure and private.
Before we dive into the specific steps of enabling iMessage on each device, it’s important to ensure that your device is compatible. iMessage is available on devices running iOS 5 or later, macOS Mountain Lion (10.8) or later, and iPadOS 13. To check if your device supports iMessage, follow the steps provided in the next section.
What is iMessage?
iMessage is an instant messaging service developed by Apple that allows users to exchange text messages, photos, videos, and other media over an internet connection. Unlike traditional SMS messages, which are sent through the cellular network, iMessage utilizes the internet to send and receive messages. This means that you can send iMessages to other Apple users using Wi-Fi or a cellular data connection, making it a versatile and convenient messaging platform.
One of the standout features of iMessage is its seamless integration across Apple devices. Whether you’re using an iPhone, iPad, or Mac, iMessage allows you to send and receive messages from any of your devices. Messages are automatically synced, ensuring that you can pick up a conversation from where you left off, regardless of the device you’re using.
With iMessage, you can not only send text messages but also enrich your conversations with various media formats. You can easily share photos, videos, voice memos, and even documents with your contacts. Additionally, iMessage supports interactive features such as stickers and emojis, allowing for more expressive and engaging conversations.
Another highlight of iMessage is its advanced security and privacy features. All iMessages are end-to-end encrypted, which means that only the sender and recipient can read the content of the messages. This ensures that your conversations remain private and secure from any potential eavesdropping or unauthorized access.
In addition to text-based messages, iMessage also supports various other features. You can send and receive read receipts, letting you know when your message has been seen by the recipient. Group chats are also available, allowing you to have conversations with multiple people simultaneously.
iMessage is not just limited to Apple devices. You can also send messages from your Apple device to non-Apple devices, but they will be sent as SMS or MMS rather than iMessage. This seamless integration between iMessage and traditional text messaging makes it easy to communicate with friends and family, regardless of the device they are using.
Now that you have an overview of what iMessage is and its key features, let’s explore how you can check if your device supports iMessage and how to enable it on your iPhone, iPad, or Mac.
Benefits of Using iMessage
Switching to iMessage offers a plethora of benefits that enhance your messaging experience and make communication more convenient and enjoyable. Here are some key advantages of using iMessage:
1. Seamlessness: With iMessage, your conversations seamlessly sync across all your Apple devices. You can start a conversation on your iPhone and continue it on your iPad or Mac without any interruptions. This synchronization ensures that you never miss a message and can always pick up where you left off.
2. Multimedia Support: iMessage allows you to go beyond plain text and send various multimedia files, including photos, videos, voice messages, and even animated stickers. This versatility enables you to express yourself and share moments with your contacts in more creative and engaging ways.
3. End-to-End Encryption: Privacy and security are paramount in today’s digital world. iMessage offers end-to-end encryption for all messages, ensuring that only the sender and intended recipient can access the content. This means that your messages and personal information remain private and secure.
4. Read Receipts: iMessage provides the option for read receipts, allowing you to know when your messages have been read by the recipient. This feature can be particularly useful in keeping track of important communications or ensuring that time-sensitive messages have been received and read.
5. Group Chats: iMessage supports group chats, enabling you to have conversations with multiple people simultaneously. You can easily create groups, name them, and customize settings such as notifications and privacy options. Group chats make it convenient to coordinate with friends, plan events, or collaborate on projects.
6. Integration with Apple Ecosystem: iMessage seamlessly integrates with other Apple services and apps. You can quickly share content from other apps, collaborate on documents, or even make payments directly within iMessage using Apple Pay.
7. Cost Savings: Utilizing iMessage reduces your reliance on traditional text messaging plans, which can be costly depending on your cellular provider and your messaging needs. By using iMessage over Wi-Fi or cellular data, you can significantly reduce these costs and enjoy unlimited messaging without worrying about overage charges.
Overall, iMessage elevates your messaging experience by providing a range of features and benefits that enhance communication, privacy, and convenience. Now let’s explore how you can check if your device supports iMessage and enable it on your specific Apple devices.
Checking if Your Device Supports iMessage
Before you can enable and use iMessage, it is essential to verify if your device supports this feature. Here’s how you can check if your device is compatible with iMessage:
1. iPhone:
- Open the Settings app on your iPhone.
- Scroll down and tap on “Messages”.
- If you see the option to enable iMessage, your iPhone supports iMessage. Ensure that the toggle switch next to iMessage is turned on.
- If you don’t see the option for iMessage, it is likely that your iPhone does not support this feature.
2. iPad:
- Go to the Settings app on your iPad.
- Tap on “Messages” in the sidebar.
- If you find the option to enable iMessage, your iPad supports iMessage. Make sure that the toggle switch is enabled.
- If iMessage is not available, it means that your iPad does not support this feature.
3. Mac:
- Click on the Apple menu icon in the top-left corner of your Mac’s screen.
- Select “System Preferences”.
- Click on “Messages”.
- If you see the option to enable iMessage, it means your Mac supports iMessage. Ensure that the checkbox next to your Apple ID is selected.
- If iMessage is not listed, it indicates that your Mac does not support iMessage.
Remember that iMessage is available on devices running iOS 5 or later, macOS Mountain Lion (10.8) or later, and iPadOS 13. If your device is not compatible, you may need to update the operating system or consider using alternative messaging platforms.
Now that you have confirmed if your device supports iMessage, let’s proceed to the next sections to learn how to enable iMessage on your specific Apple device.
Enabling iMessage on iPhone
If your iPhone supports iMessage and you want to start using this feature, here’s how you can enable iMessage:
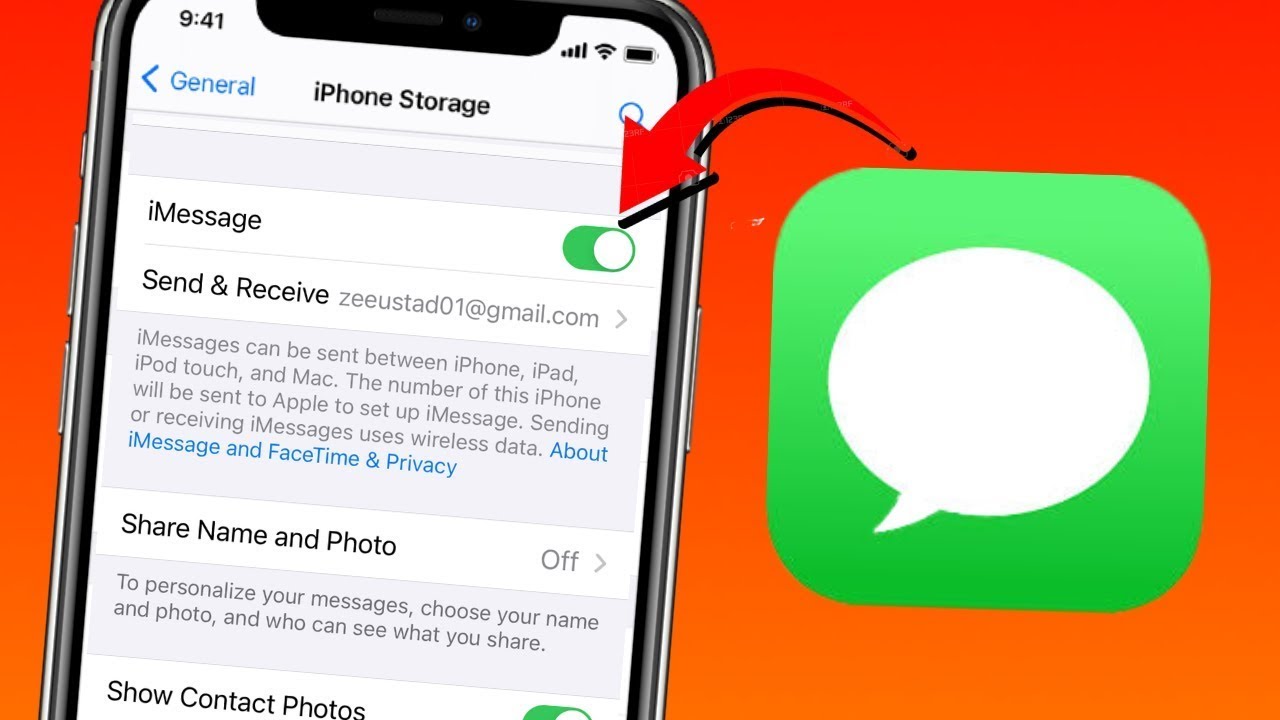
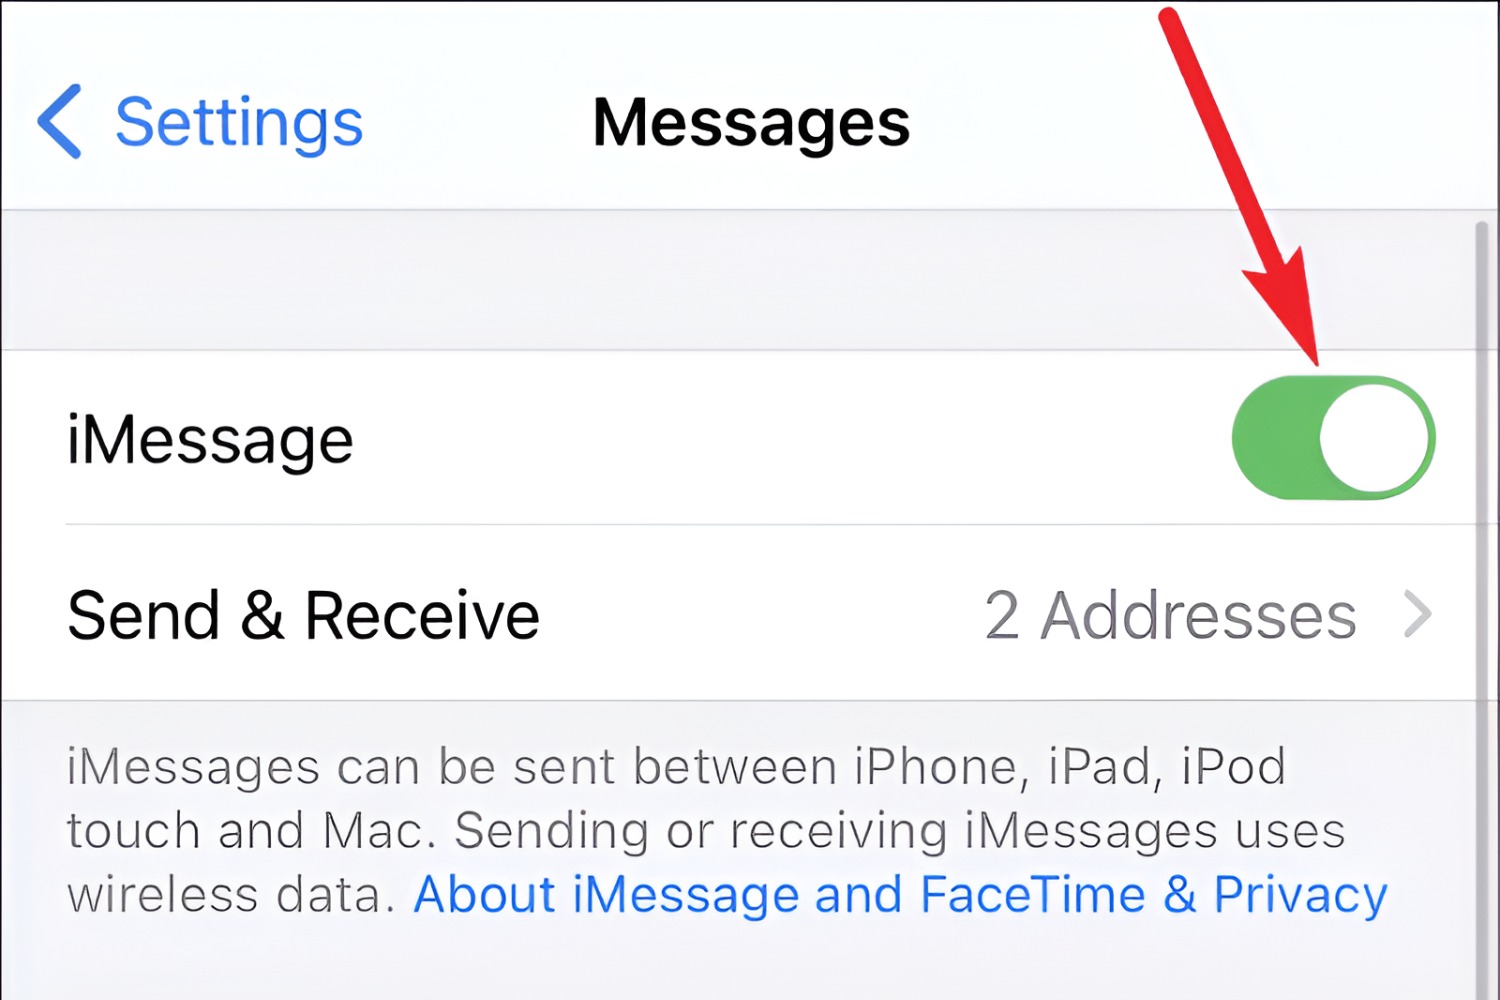
- Open the Settings app on your iPhone.
- Scroll down and tap on “Messages”.
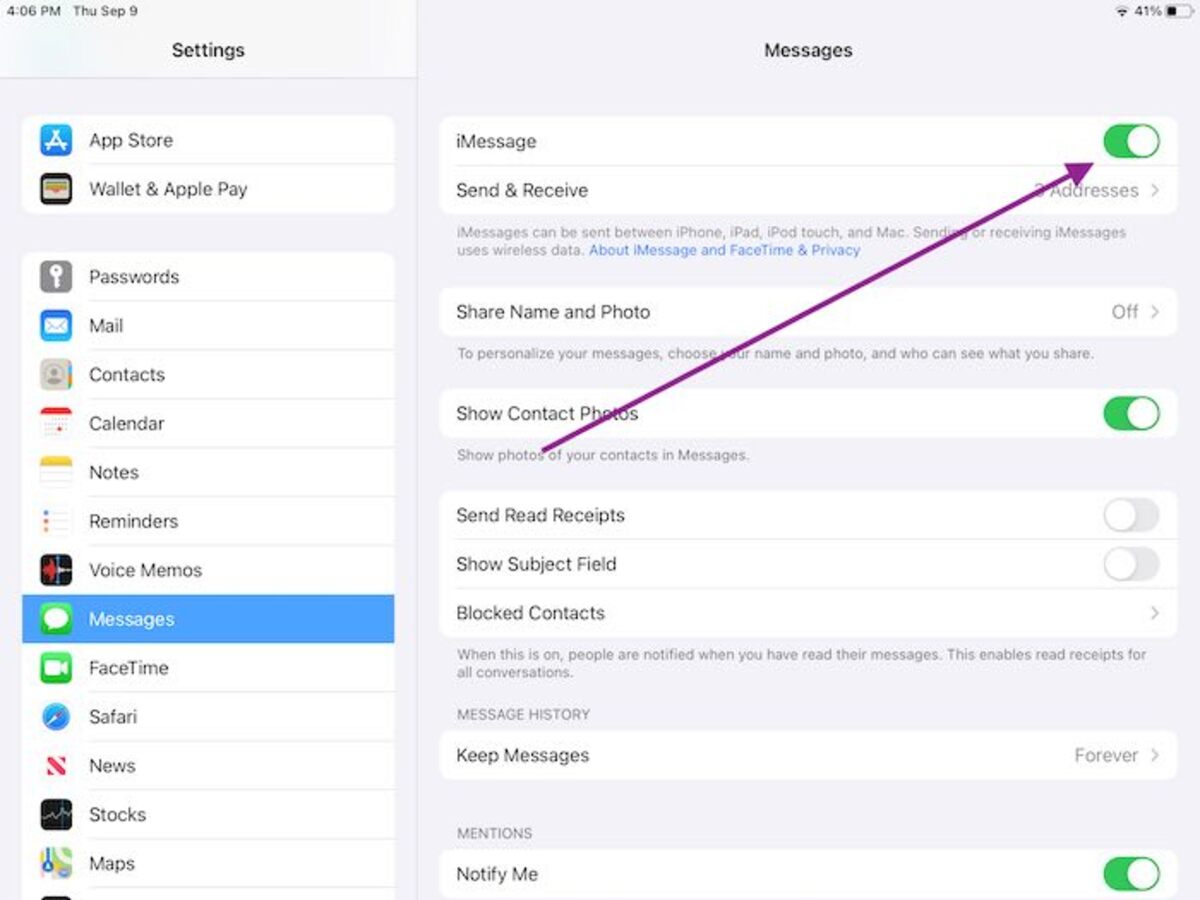
- If iMessage is not already enabled, tap on the toggle switch next to “iMessage” to turn it on. It will turn green when enabled.
- You may be prompted to enter your Apple ID and password. Provide this information to sign in to iMessage. If you don’t have an Apple ID, you can create one by following the on-screen instructions.
- Once you have signed in, you may see a message stating that your carrier may charge for SMS. This is standard and part of the process to enable iMessage.
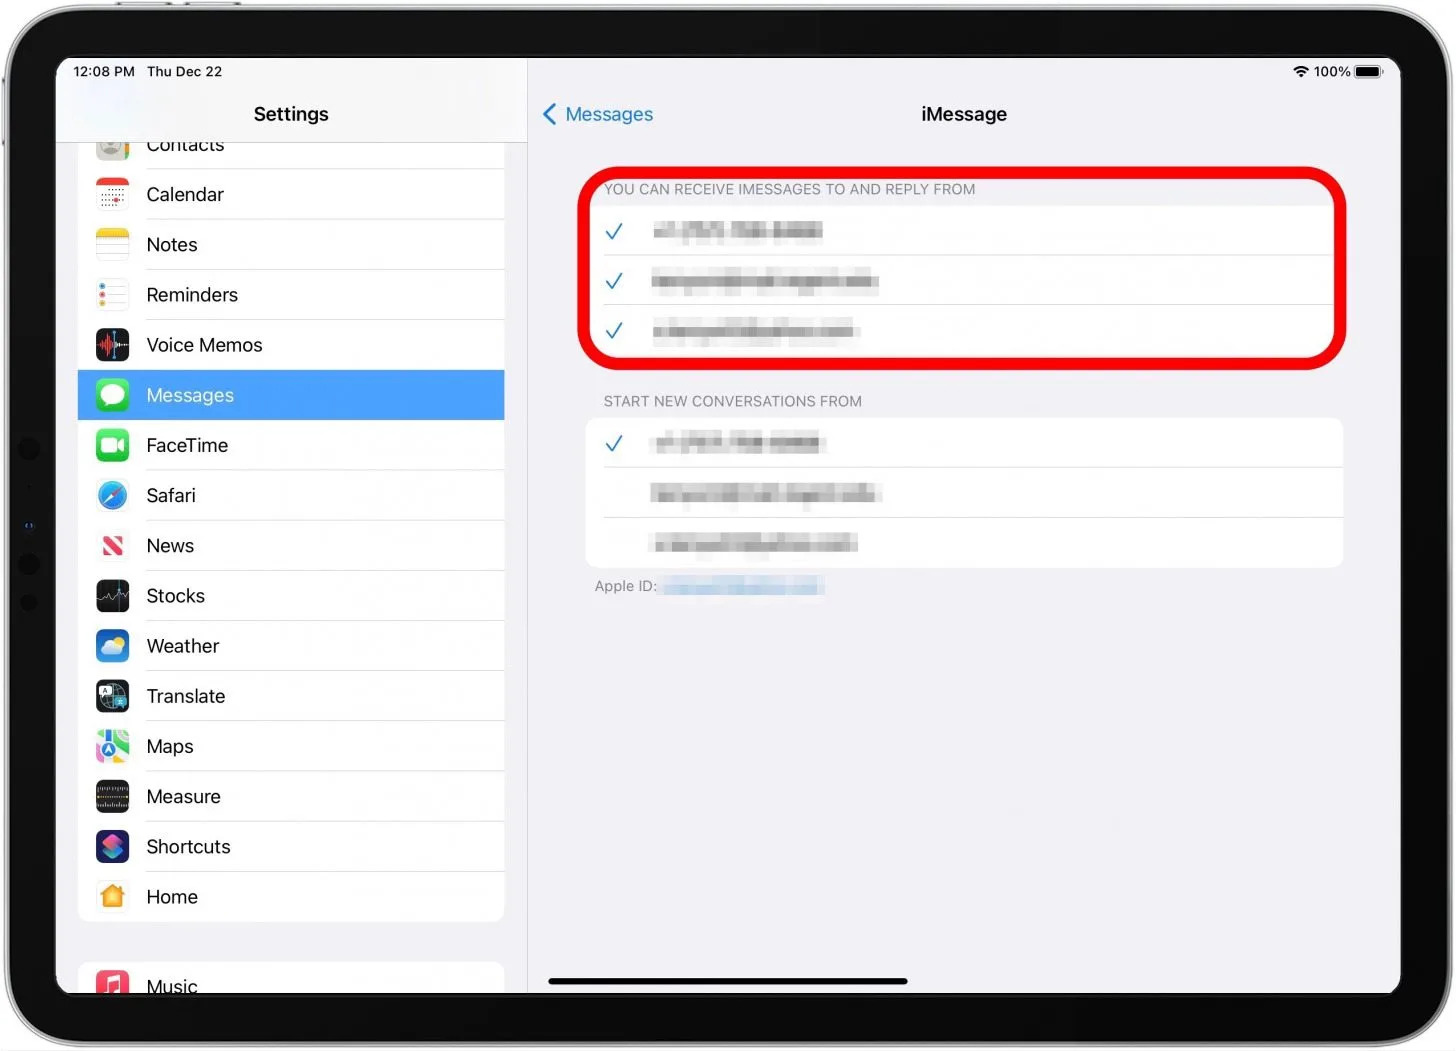
- If you want to use your phone number as the starting point for sending and receiving iMessages, ensure that it is selected under the “Send & Receive” section. You can also add or remove email addresses associated with your Apple ID for iMessage.
- Other options such as configuring read receipts, enabling iMessage effects, and customizing how you receive and manage messages are also available in the Messages settings.
- Once you have configured the desired settings, your iPhone is now ready to use iMessage. You can start sending and receiving iMessages with your contacts.
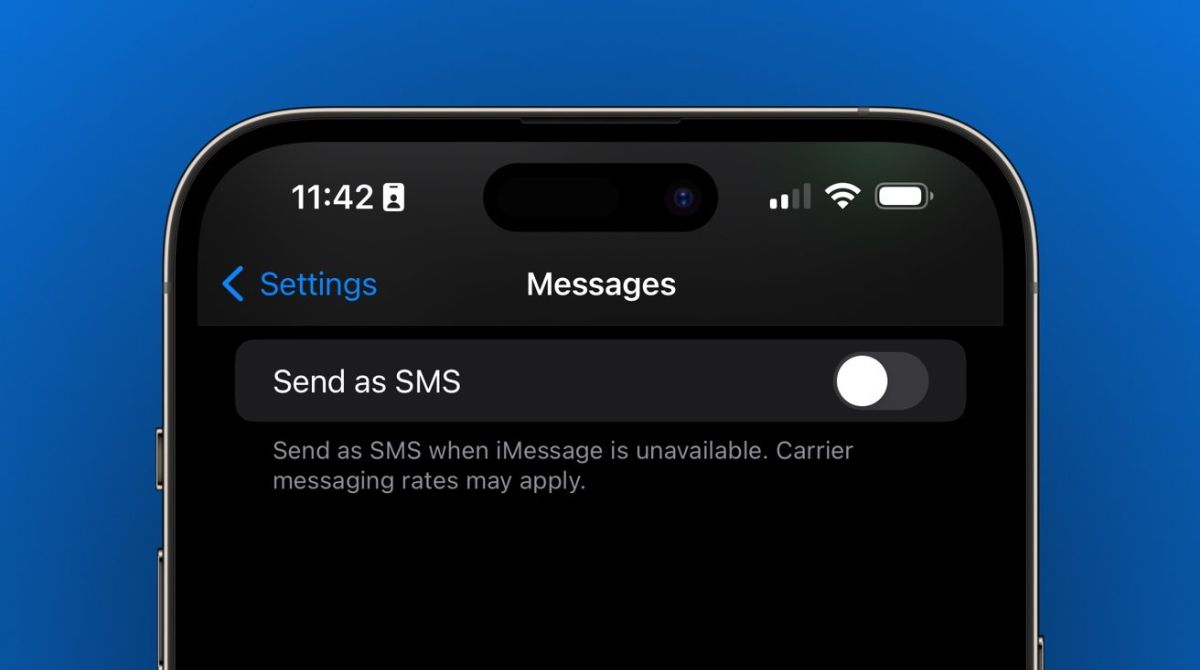
It’s worth mentioning that sending messages to non-Apple devices will still be sent as standard text messages (SMS or MMS) rather than iMessages. So make sure to keep this in mind while communicating with contacts on non-Apple devices.
With iMessage enabled on your iPhone, you can enjoy a more seamless and feature-rich messaging experience. Let’s move on to the next section to learn how to enable iMessage on your iPad.
Enabling iMessage on iPad
If you have an iPad and want to enable iMessage to enjoy the benefits of this messaging service, follow these steps:
- Unlock your iPad and open the Settings app.
- Scroll down and tap on “Messages” in the sidebar.
- If iMessage is not already enabled, tap on the toggle switch next to “iMessage” to turn it on. The switch will turn green when enabled.
- You may be prompted to sign in with your Apple ID and password. Provide the necessary details to log in to iMessage. If you don’t have an Apple ID, you can create one by following the on-screen instructions.
- After signing in, you will see a message indicating that your carrier may charge for SMS. This is normal and part of the process to enable iMessage on your iPad.
- If you want to use your phone number as the starting point for sending and receiving iMessages, ensure that it is selected under the “Send & Receive” section. Additionally, you can add or remove email addresses linked to your Apple ID for iMessage.
- Other options such as read receipts, message effects, and message forwarding settings are available in the Messages settings. Customize these settings according to your preferences.
- Once you have configured the desired settings, iMessage will be enabled on your iPad, and you can start sending and receiving iMessages with other Apple users.
It’s important to note that when sending messages from your iPad to non-Apple devices, they will be sent as regular text messages (SMS or MMS) rather than iMessages. Keep this in mind when communicating with contacts who don’t use Apple devices.
Now that iMessage is activated on your iPad, you can enjoy a seamless messaging experience across your Apple devices. Let’s move on to the next section to learn how to enable iMessage on your Mac.
Enabling iMessage on Mac
If you own a Mac and want to enable iMessage to communicate seamlessly from your computer, follow these steps:
- Open the Messages app on your Mac. You can find it in the Applications folder or by using Spotlight search.
- If you have never used iMessage on your Mac before, you may be prompted to sign in with your Apple ID. Enter your Apple ID email address and password to proceed.
- If you have used iMessage on your Mac previously, go to the Messages menu at the top-left corner of your screen and select “Preferences”.
- Click on the “Accounts” tab in the Preferences window.
- In the list of accounts, ensure that your Apple ID is selected. If it is not listed, click on the ‘+’ icon and select “iMessage” to add your Apple ID.
- Once your Apple ID is selected, make sure the checkbox next to “Enable this account” is checked.
- Under the “You can be reached for messages at” section, select the phone number and email addresses you want to associate with iMessage on your Mac.
- Additional settings such as message ordering, notifications, and message effects can be customized according to your preferences.
- Close the Preferences window, and you now have iMessage enabled on your Mac.
With iMessage activated on your Mac, you can conveniently send and receive messages from your computer, synchronize conversations with your other Apple devices, and take advantage of the various features offered by iMessage.
Remember that iMessage is designed for communication between Apple devices. When sending messages from your Mac to non-Apple devices, they will be sent as standard text messages (SMS or MMS) instead of iMessages.
Congratulations! Your Mac is now equipped with iMessage, allowing you to stay connected with your contacts through your computer. In the next section, we will explore some troubleshooting tips for common issues you may encounter while using iMessage.
Troubleshooting Common Issues with iMessage
While iMessage generally works seamlessly, there can be occasional issues that may require troubleshooting. Here are some common problems you may encounter with iMessage and their possible solutions:
1. Messages not being delivered: If your messages are not being delivered, ensure that you have a stable internet connection. If the issue persists, try disabling and re-enabling iMessage on your device. Restarting your device or signing out and signing back into your Apple ID can also help resolve this problem.
2. Messages sent as standard SMS instead of iMessage: If you notice that your messages are being sent as regular text messages (SMS) instead of iMessages, check if the recipient’s device supports iMessage or if they have iMessage enabled. Additionally, make sure that you are connected to a stable internet connection or have cellular data enabled.
3. Activation error: If you encounter an activation error when trying to enable iMessage, ensure that your device has a strong internet connection and is running the latest software update. You may need to sign out of your Apple ID, restart your device, and sign back in to resolve the activation error.
4. iMessages not syncing across devices: If your messages are not syncing across your Apple devices, make sure that you are signed in with the same Apple ID on all devices. Verify that the “Messages in iCloud” feature is enabled in the settings of each device. Additionally, ensure that your devices are connected to Wi-Fi or have cellular data enabled for syncing to work properly.
5. Not receiving iMessages on Mac or iPad: If you are not receiving iMessages on your Mac or iPad, verify that your Apple ID is configured correctly in the Messages settings on both devices. Make sure that your Mac and iPad are connected to the same Wi-Fi network and have a stable internet connection. Restarting the devices or disabling and re-enabling iMessage can also help resolve this issue.
6. Missing messages or conversations: If you are missing messages or conversations in the Messages app, double-check that you haven’t accidentally deleted them. In the Messages settings, ensure that the option to save messages is enabled. If you have recently switched to a new device, ensure that your conversations have been properly synced from your previous device.
If you continue to experience issues with iMessage after trying the troubleshooting steps mentioned above, you may need to contact Apple Support for further assistance. They can provide guidance and solutions tailored to your specific situation.
By addressing these common issues, you can optimize your iMessage experience and enjoy seamless messaging across your Apple devices. Now that we have covered troubleshooting, let’s wrap up this guide.
Conclusion
Switching to iMessage can enhance your messaging experience on Apple devices, allowing you to communicate seamlessly and enjoy a wealth of features. This guide has provided an overview of what iMessage is and its benefits, as well as instructions on how to enable iMessage on your iPhone, iPad, and Mac.
By enabling iMessage, you can take advantage of its seamless synchronization across devices, support for various multimedia formats, end-to-end encryption for privacy, and features like read receipts and group chats. Whether you’re sending a simple text, sharing photos and videos, or engaging in a group conversation, iMessage offers a versatile and convenient platform.
Throughout this guide, we have highlighted the importance of verifying device compatibility before enabling iMessage. By ensuring that your device meets the requirements for iMessage, you can avoid any potential issues or limitations.
In addition, we have discussed some common troubleshooting tips for resolving issues you may encounter with iMessage. From message delivery problems to activation errors, these troubleshooting steps can help you resolve any hiccups and get back to enjoying a seamless messaging experience.
Remember, iMessage is designed to work best when communicating with other Apple users. While you can still send messages to non-Apple devices, they will be sent as standard text messages (SMS or MMS) rather than iMessages.
Now that you have the knowledge and tools to enable and use iMessage, you can fully leverage this powerful messaging platform on your Apple devices. Stay connected, express yourself with multimedia, and enjoy the convenience and security that iMessage offers.
Thank you for reading this guide, and we hope it has been helpful in your journey to switch to iMessage. Happy messaging!