Lens
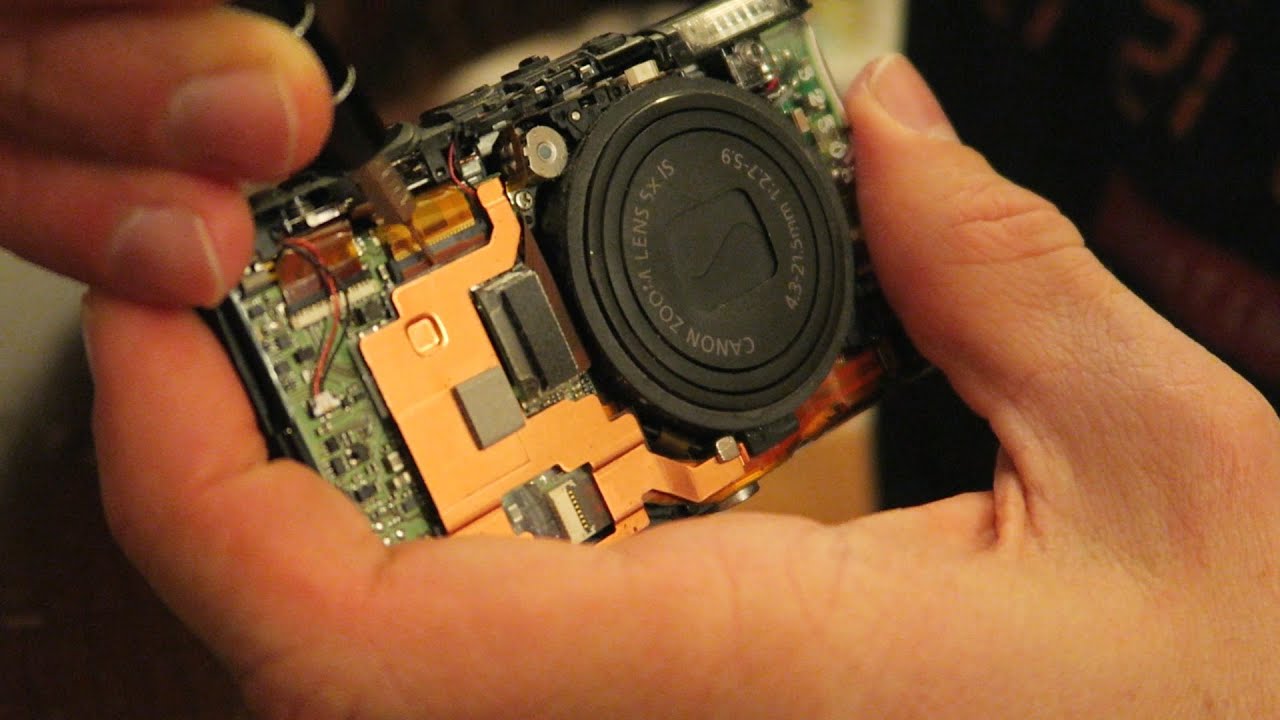
The lens is one of the basic parts of a digital camera and plays a crucial role in capturing high-quality images. It is responsible for focusing light onto the camera’s image sensor, allowing you to capture clear and detailed photographs.
Camera lenses come in various types and have different focal lengths, which determine their field of view and magnification capabilities. Wide-angle lenses have a shorter focal length and capture a wider view, making them ideal for landscape and architectural photography. Telephoto lenses, on the other hand, have a longer focal length and allow you to zoom in on distant subjects, making them perfect for sports and wildlife photography.
In addition to focal length, lenses also have aperture settings that control the amount of light entering the camera. A wider aperture (represented by a lower f-number) allows more light to pass through, which is useful in low-light situations or when you want to create a shallow depth of field with a blurred background. On the other hand, a narrower aperture (higher f-number) reduces the amount of light but increases the depth of field, keeping more of the scene in focus.
Quality lenses are typically made from multiple glass elements that correct optical distortions and minimize aberrations, resulting in sharper and more accurate images. Some lenses feature image stabilization technology, which helps reduce camera shake and allows for sharper handheld shots.
It is also important to consider the compatibility of the lens with your camera. Different camera brands have their own lens mounts, so you need to ensure that the lens you choose is compatible with your camera model.
Overall, the lens is a critical component of a digital camera that directly impacts the image quality. Choosing the right lens for your specific needs and understanding its features and capabilities will greatly enhance your photography skills and help you capture stunning photos.
Image Sensor
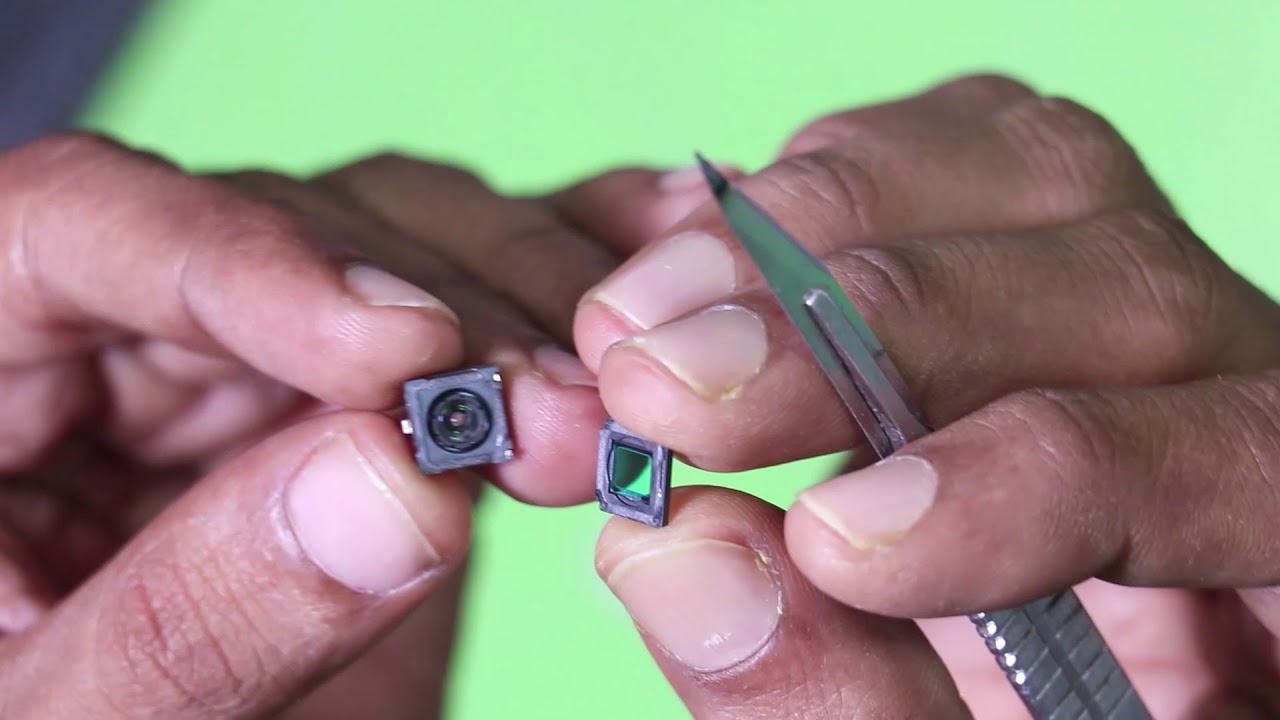
The image sensor is another essential part of a digital camera that converts incoming light into an electrical signal, ultimately creating the digital image. It works in conjunction with the camera’s lens to capture the details and colors of a scene.
There are two main types of image sensors used in digital cameras: CCD (Charge-Coupled Device) and CMOS (Complementary Metal-Oxide-Semiconductor). CCD sensors were prevalent in earlier digital cameras and offer high image quality with low noise and excellent color accuracy. CMOS sensors, on the other hand, are more commonly used today and have several advantages, including lower power consumption, faster readout speeds, and higher sensitivity in low light conditions.
The image sensor is comprised of millions of tiny photosensitive cells called pixels. Each pixel captures the intensity and color of light falling on it. The total number of pixels in an image sensor is referred to as the resolution of the camera. Higher resolution sensors allow for more detailed images and the ability to enlarge or crop photos without sacrificing quality.
The size of the image sensor also plays a significant role in image quality. Larger sensors have larger pixel sizes, which result in better light-gathering capabilities and improved dynamic range. This means that images taken with larger sensors tend to have less noise and better performance in challenging lighting situations.
When selecting a digital camera, it is essential to consider the type and size of the image sensor for the desired photography needs. Higher-end DSLR and mirrorless cameras usually have larger sensors, providing professional photographers with superior image quality. However, smaller sensors can still produce great results, especially in compact cameras and smartphones.
Understanding the role of the image sensor can help you make informed decisions when purchasing a digital camera. It is crucial to strike a balance between megapixels, sensor size, and the specific requirements of your photography style to ensure you capture stunning, high-quality images.
Viewfinder
The viewfinder is a component of a digital camera that allows you to compose and frame your shots by providing a live preview of what the camera sees. It is an essential tool for photographers to accurately capture their subjects.
There are two main types of viewfinders commonly found in digital cameras: optical viewfinders and electronic viewfinders (EVFs). Optical viewfinders use mirrors and prisms to reflect the image from the lens directly into the viewfinder, providing a real-time, through-the-lens (TTL) optical view of the scene. This type of viewfinder offers a clear and bright image, even in bright sunlight. It also has no lag, ensuring real-time composition and precise focusing.
On the other hand, electronic viewfinders (EVFs) use a high-resolution electronic display to simulate the view of the scene captured by the camera’s image sensor. EVFs have gained popularity as they offer additional benefits and features not available with optical viewfinders. They can display various shooting settings, histograms, and even a live preview of exposure changes, allowing photographers to see the effects of different settings in real-time. EVFs are especially useful when shooting in challenging lighting conditions or when using certain special effects.
Whether you prefer an optical or electronic viewfinder is a matter of personal preference. Some photographers appreciate the immediacy and clarity of the optical viewfinder, while others embrace the versatility and information-rich display of electronic viewfinders.
In addition to the main viewfinder, many digital cameras now also feature an LCD screen that can be used as an alternative or additional viewfinder. LCD screens allow you to compose shots in Live View mode, where you see a real-time digital representation of the scene. This is particularly useful for shooting at challenging angles or when the camera is mounted on a tripod.
The viewfinder is an essential tool for photographers, providing a direct and accurate representation of the scene. Whether you opt for an optical or electronic viewfinder, or use the LCD screen, mastering the art of composition and framing will greatly improve your photography skills and help you capture stunning images.
Shutter
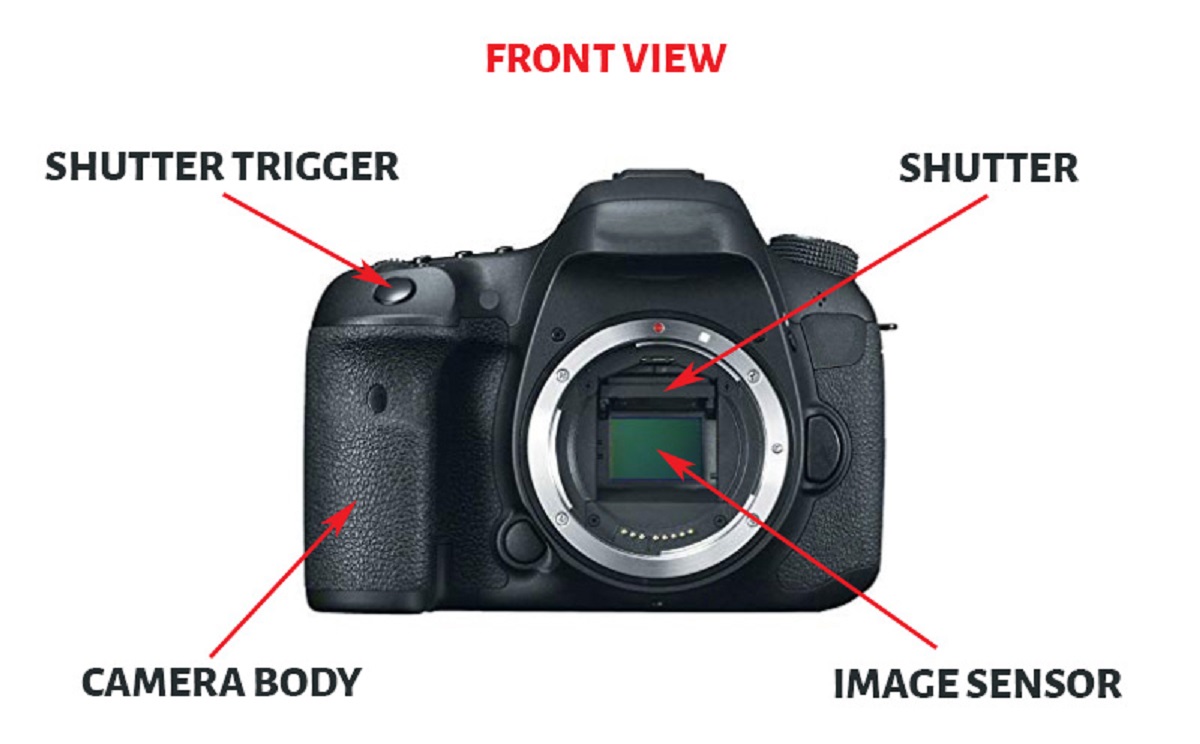
The shutter is a crucial component of a digital camera that controls the duration of time that light enters the camera and strikes the image sensor. It is responsible for capturing the desired exposure of a photograph by controlling the amount of light reaching the sensor.
The shutter consists of two curtains that open and close to expose the image sensor to light. When you press the camera’s shutter button, the first curtain moves out of the way, allowing light to reach the sensor. When the desired exposure time has passed, the second curtain follows, effectively blocking light from reaching the sensor.
The length of time the shutter remains open is referred to as the shutter speed. Shutter speeds can range from fractions of a second to several seconds or even minutes, depending on the camera model. Fast shutter speeds are ideal for freezing motion and capturing sharp images of moving subjects, such as sports or wildlife photography. On the other hand, slow shutter speeds can be used creatively to capture long exposures, producing stunning effects like light trails or smooth water in landscapes.
Some cameras also offer a bulb mode, where the shutter remains open for as long as the shutter button is pressed. This mode is useful when capturing long exposures of fireworks displays, star trails, or night photography.
In addition to controlling the exposure time, the shutter also plays a role in determining the maximum flash sync speed. This is the fastest shutter speed at which the camera can synchronize with a flash, ensuring proper exposure. It is important to note that using a shutter speed faster than the maximum flash sync speed may result in part of the frame being blacked out due to the way the shutter curtains move across the sensor.
The shutter is a critical component that contributes to the overall image quality and the creative possibilities of a digital camera. Understanding how to control and manipulate the shutter speed will allow you to capture a wide range of photographic styles and effects, giving you the flexibility to express your creativity and capture the perfect shot.
Aperture
The aperture is an essential feature of a digital camera that controls the amount of light entering the lens. It refers to the opening in the lens that can be adjusted to vary the size of the aperture.
Aperture is measured in f-stops or f-numbers, such as f/2.8, f/4, f/5.6, etc. The smaller the f-stop number, the wider the aperture, and the more light it allows to enter the camera. Conversely, a larger f-stop number represents a narrower aperture and restricts the amount of light passing through.
By adjusting the aperture, photographers can control the depth of field (DOF). Depth of field refers to the range of distance over which the image appears sharp, both in front of and behind the main subject. A wider aperture (lower f-number) creates a shallow depth of field, with the subject in focus and the background blurred, which is often used in portrait photography to isolate the subject from the surroundings. On the other hand, a narrower aperture (higher f-number) increases the DOF and keeps more of the scene in focus, making it suitable for landscape photography.
The aperture setting also affects the amount of light required for a proper exposure. In low-light situations, using a wider aperture allows more light to reach the camera’s image sensor, enabling you to capture well-exposed images without having to rely heavily on high ISO settings or slower shutter speeds. However, it’s important to find a balance as using too wide of an aperture can result in a shallow depth of field that may not be desired for certain shots.
High-quality lenses often have a wide maximum aperture, such as f/1.4 or f/2.8. These lenses are capable of capturing more light and performing well in low-light conditions. They also provide the flexibility to achieve a shallow depth of field for creative effects. However, they tend to be more expensive than lenses with narrower maximum apertures.
Understanding how to utilize the aperture effectively allows photographers to have greater control over the creative aspects of their images. The ability to control the depth of field and regulate the amount of light provides endless opportunities for artistic expression and ensures proper exposure in various lighting conditions.
ISO
ISO is an important setting in digital cameras that determines the sensitivity of the camera’s image sensor to light. It stands for International Organization for Standardization and refers to the standardized system for measuring the sensitivity of film. In digital cameras, ISO is used to adjust the sensitivity of the sensor to capture images in different lighting conditions.
ISO settings typically range from low values, such as ISO 100 or 200, to higher values, such as ISO 1600, 3200, or even higher. When shooting in low-light situations or when a faster shutter speed is needed, increasing the ISO value can help capture well-exposed images. On the other hand, in well-lit environments or when a slower shutter speed is desired, using a lower ISO value can yield better image quality with less noise.
However, it’s important to note that as the ISO value increases, so does the amount of noise or grain in the image. Higher ISO settings can introduce digital noise, which can degrade the image quality and make it appear less sharp and more grainy. Modern digital cameras handle noise better than earlier models, allowing for higher usable ISO settings without significant loss of quality.
Photographers often need to find the right balance between capturing enough light for a well-exposed image and minimizing noise. This balance depends on the available light and the desired effect for the photograph.
Many cameras offer an Auto ISO mode, where the camera automatically adjusts the ISO value based on the lighting conditions and the settings selected by the photographer. This can be a convenient option for shooting in various lighting situations, as it takes the guesswork out of setting the ISO manually.
Ultimately, the choice of ISO setting depends on the specific shooting conditions and the desired outcome. Understanding how ISO affects image sensitivity and noise levels allows photographers to make informed decisions and achieve optimal image quality in different lighting scenarios.
White Balance
White balance is a fundamental setting in digital cameras that aims to ensure accurate and true-to-life colors in your photographs. It refers to the adjustment of the camera’s color temperature to compensate for different lighting conditions, such as daylight, shade, cloudy, fluorescent, or tungsten lighting.
Different light sources emit light at different color temperatures. For example, daylight has a cooler temperature, resulting in blue tones, while tungsten light has a warmer temperature, contributing to yellowish tones. Without proper white balance, images can appear with unnatural or overly warm or cool colors.
White balance is typically adjusted using presets or manual settings on the camera. Presets include options like daylight, shade, cloudy, fluorescent, tungsten, and flash. These presets are designed to match the color temperature of the light source and provide accurate color reproduction.
Additionally, many cameras offer a custom white balance setting, where you can manually set the white balance by using a neutral white or gray card as the reference point. This method ensures precise color accuracy and is especially useful when shooting in mixed lighting conditions.
It’s important to note that certain lighting situations may require creative adjustments to the white balance. For example, setting a cooler white balance in a warm sunset scene can intensify the warm hues, creating a more dramatic effect. Similarly, adjusting the white balance to a warmer setting in a cool, cloudy scene can add a pleasing warmth to the image.
White balance can also be adjusted during post-processing using photo editing software. However, it’s best to get the white balance as accurate as possible in-camera to save time and maintain the best image quality.
Understanding and utilizing white balance effectively allows photographers to capture images with accurate and pleasing colors. Whether using presets or manually adjusting the white balance, having control over this setting ensures that the colors in your photographs reflect the true atmosphere and intention of the scene.
Autofocus
Autofocus is a key feature in digital cameras that automatically adjusts the focus of the lens to ensure sharp and accurate images. It simplifies the process of capturing well-focused shots, especially in situations where manual focusing may be challenging or time-consuming.
The autofocus system in digital cameras uses various sensors and algorithms to analyze the scene and determine the optimal focus point. It quickly adjusts the lens position to bring the subject into sharp focus. Autofocus systems have evolved over the years, becoming faster, more accurate, and capable of tracking moving subjects.
There are different autofocus modes available in cameras, including single autofocus (AF-S) and continuous autofocus (AF-C). In single autofocus mode, the camera locks focus on the subject once and remains fixed until the shutter button is pressed. This mode is ideal for stationary subjects or when you want to focus and recompose the shot.
On the other hand, continuous autofocus mode is designed for capturing moving subjects. In this mode, the camera continuously adjusts the focus as the subject moves, resulting in sharp and clear images. Continuous autofocus is particularly useful for sports, wildlife, or any fast-paced photography where the subject is in motion.
Modern autofocus systems also offer various focus points, allowing you to select a specific focus area within the frame. This gives you more control over the composition and ensures that the main subject is in focus, even if it is not in the center of the frame.
Some cameras also feature advanced autofocus capabilities, such as face detection and eye tracking. These technologies automatically identify and prioritize focusing on human faces or specifically the eyes of the subject, ensuring sharpness in portrait photography.
While autofocus is a valuable tool, it is important to note that it may not always provide the desired focus in every situation. There can be limitations in low light conditions, busy backgrounds, or when shooting through obstacles. In such cases, manual focus may be necessary to achieve precise focus.
Understanding and utilizing autofocus effectively allows photographers to focus on composition, creativity, and capturing the moment without worrying about achieving sharp focus manually. It is a powerful tool that simplifies the process of obtaining clear and well-focused images, contributing to the success of every shot.
Image Processor
The image processor is a vital component within a digital camera that plays a significant role in handling and optimizing the captured image data. It processes and enhances the raw image data received from the camera’s image sensor to produce high-quality photographs.
As technology continues to advance, digital cameras are equipped with increasingly powerful image processors that offer a variety of functions and capabilities. The image processor performs tasks such as noise reduction, color correction, image sharpening, and compression, among others, to enhance the overall image quality.
Noise reduction is an essential function of the image processor, especially when shooting at higher ISO settings. It helps to minimize the unwanted grain or digital noise that can affect the clarity and sharpness of the image. By applying advanced algorithms, the image processor analyzes and reduces noise while aiming to retain as much detail as possible.
Color correction is another critical function of the image processor. It ensures that the colors reproduced in the image appear accurate and true to real-life. The image processor adjusts the white balance, saturation, and hue to deliver well-balanced colors that match the original scene.
Image sharpening is yet another task performed by the image processor. It enhances the overall sharpness and details in the image, so the subject appears clear and well-defined. The image processor applies edge enhancement techniques to enhance the fine details while avoiding a false and oversharpened appearance.
Additionally, the image processor handles image compression, which is the process of reducing the file size of the captured image without significant loss of quality. This compression allows more images to be stored on the camera’s memory card and enables faster transfer to a computer or other devices.
The performance and capabilities of the image processor can vary among different camera models. High-end cameras generally have more advanced image processors, which enable faster continuous shooting, better noise reduction, and improved overall image quality.
As a photographer, it is important to understand the capabilities of your camera’s image processor and how it can affect the final output. Familiarize yourself with the various settings and options available in your camera’s menu related to image processing to optimize your photographs according to your preferences.
Overall, the image processor is a crucial component that ensures the quality and accuracy of the captured images. Its ability to handle complex tasks and optimize the image data plays a vital role in producing visually pleasing and professional-grade photographs.
Memory Card
A memory card is an essential accessory for a digital camera that provides storage for all the captured photos and videos. It serves as a portable and removable storage medium, allowing photographers to easily transfer and store their digital files.
There are several types of memory cards available, including Secure Digital (SD), CompactFlash (CF), microSD, and XQD, among others. The specific type of memory card your camera uses will depend on its compatibility and the card slot available.
The capacity of a memory card is measured in gigabytes (GB) and determines the amount of data it can store. Memory cards with larger capacities allow photographers to capture more photos and videos without needing to frequently transfer or replace the card.
Memory cards also come with different speed classes, indicating the data transfer rate between the memory card and the camera. Speed is particularly important when shooting in burst mode or capturing high-resolution videos. Faster speed classes ensure smooth and consistent data transfer, allowing for fast consecutive shots and seamless video recording.
It is crucial to ensure that your camera supports the type and capacity of the memory card you are using. Some cameras have specific requirements or limitations in terms of compatibility and maximum storage capacity. Refer to the camera’s user manual or manufacturer’s specifications to determine the recommended memory card for your camera model.
Additionally, it is important to handle memory cards with care and avoid exposing them to extreme temperatures, moisture, or physical damage. Regularly formatting the memory card in the camera ensures reliable performance and prevents data corruption.
To transfer the data from the memory card to a computer or other devices, a memory card reader or a USB cable is typically used. This allows for easy and convenient access to the photos and videos stored on the memory card.
Having additional memory cards is beneficial, especially for professional photographers or those who frequently capture a large number of photographs. It provides the flexibility to continue shooting without interruption and ensures that precious moments are never missed due to insufficient storage space.
Overall, the memory card is an essential accessory for digital cameras, providing a portable and reliable storage solution for all the captured images and videos. Choosing the right type and capacity of memory card is crucial to ensure compatibility and sufficient storage space for your photography needs.
Battery
The battery is a critical component in a digital camera that provides the necessary power to operate and capture photos and videos. It allows photographers to use their cameras without the need for a constant external power source, providing portability and freedom to capture images on the go.
Most digital cameras use rechargeable lithium-ion batteries due to their high energy density, long lifespan, and ability to hold a charge when not in use. These batteries offer a reliable power source and can be recharged multiple times before needing to be replaced.
The battery life of a camera can vary depending on several factors, such as the camera model, shooting settings, use of the LCD screen, and the frequency of flash usage. Higher-end professional cameras often have larger batteries and longer battery life to meet the demands of continuous shooting and extended use.
It is important to monitor the battery level and carry a spare or additional fully charged battery when shooting for extended periods or on important occasions. This ensures that you never miss a photo opportunity due to a drained battery.
When not in use, it is recommended to store the camera with the battery partially charged, as leaving it completely drained for extended periods can reduce its overall lifespan. Lithium-ion batteries tend to have a longer life when maintained at a moderate charge level.
Extreme temperatures can affect battery performance and lifespan. It is advisable to avoid exposing the camera and battery to excessive heat or cold, as this can decrease the battery’s efficiency and overall longevity. It is best to keep the battery at moderate temperatures for optimal performance.
Proper battery care and maintenance are essential for maximizing its lifespan. Regularly cleaning the battery contacts and ensuring a secure and proper connection to the camera’s battery compartment can help maintain consistent power delivery. Additionally, following the manufacturer’s recommendations for charging and storage helps ensure safe and effective battery use.
When traveling with camera equipment, it is important to check the airline regulations regarding lithium-ion batteries. Some airlines may have specific restrictions on the number and capacity of batteries that can be carried onboard or in checked luggage.
The battery is a crucial component of a digital camera, providing the power necessary to capture stunning images. It is essential to select quality batteries, monitor their charge levels, and carry spare batteries to ensure uninterrupted shooting and to capture every precious moment.
LCD Screen
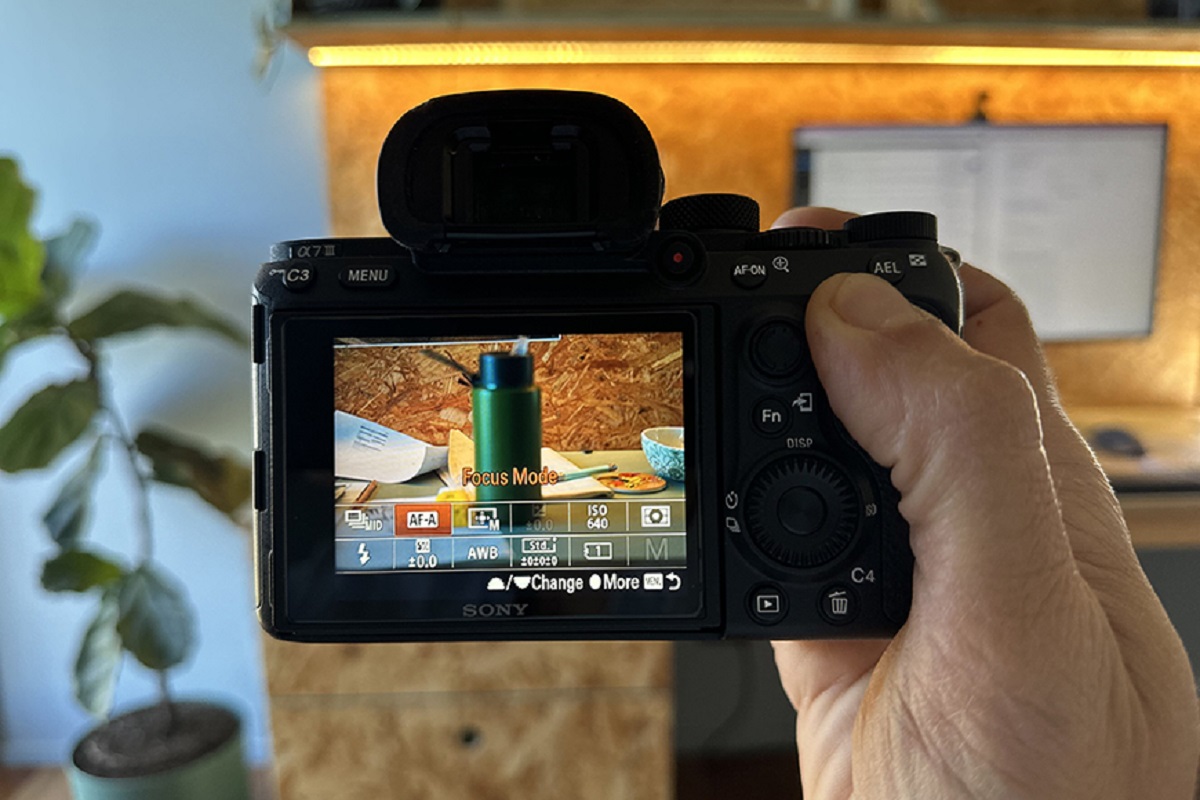
The LCD (Liquid Crystal Display) screen is an integral part of a digital camera that serves as the primary means of viewing and reviewing images and videos. It provides a clear and convenient way to compose shots, preview images, and navigate through the camera’s menu settings.
The size of the LCD screen can vary among different camera models, ranging from compact screens to larger, more detailed displays. The size and resolution of the screen greatly influence the viewing experience and the ability to assess image quality and composition accurately.
The LCD screen allows photographers to compose shots using Live View mode. This means that the screen displays a real-time digital representation of the scene, giving a preview of how the final image will appear. This is particularly useful for composing shots from challenging angles or when the camera is mounted on a tripod.
In addition, the LCD screen provides a platform to review and assess images immediately after they have been captured. This allows photographers to check for focus, exposure, and composition, as well as delete any unwanted or low-quality shots to free up space on the memory card.
The touchscreen LCD screens available in many cameras offer intuitive and user-friendly functionality. They allow for easy navigation through menu settings, quick access to various functions, and even the ability to select the focus point or adjust settings by simply touching the screen.
However, it’s important to note that excessive use of the LCD screen can drain the camera’s battery more quickly. Monitoring the LCD screen’s brightness and using power-saving features can help conserve battery life while still enjoying the benefits of the screen.
Some cameras also feature a tilting or articulating LCD screen. This design allows the screen to be tilted, rotated, or even flipped out from the camera body, providing greater flexibility in composing shots from various angles, including low to the ground or above eye level.
However, despite the advantages of the LCD screen, it may be challenging to view in bright outdoor lighting conditions. In such situations, using the camera’s viewfinder or seeking shaded areas can help overcome this limitation.
The LCD screen is a valuable tool that enhances the usability and convenience of a digital camera. It offers real-time previewing, image review, and quick menu navigation, allowing photographers to have better control over their shots and ensure optimal composition and quality.
Flash
The flash is an essential feature in a digital camera that provides artificial illumination to supplement or enhance the existing lighting conditions. It allows photographers to capture well-exposed images in low-light situations or when the natural lighting is insufficient.
When lighting conditions are dim, the camera’s flash unit emits a burst of bright light to illuminate the subject. This helps to freeze motion, reduce blur, and properly expose the image, resulting in a clear and detailed photograph.
Flash units can be built-in or external, depending on the camera model. Built-in flashes are compact and convenient, making them ideal for everyday photography. External flashes, also known as speedlights or strobes, offer more power and flexibility, allowing photographers to control the direction and intensity of the light.
Automatic flash mode is the default setting in most cameras. In this mode, the camera’s built-in light sensor determines the amount of light needed and fires the flash accordingly. While convenient, this mode may not always produce the desired results and can sometimes result in harsh or overexposed images.
Advanced photographers often prefer to use the flash in manual mode or in combination with other lighting techniques. Manual mode allows for precise control over the flash output, enabling more creative lighting effects and balanced exposures.
Some cameras also offer features such as red-eye reduction, which uses a pre-flash to minimize the reflection of light from the subject’s eyes, reducing the appearance of red eye in portraits.
It is important to note that the range and effectiveness of the flash may vary depending on the camera model. The flash range refers to the maximum distance at which the flash can effectively illuminate the subject. Understanding this range and the camera’s capabilities ensures that the flash is used appropriately and provides the desired lighting results.
In certain situations, it may be necessary to diffuse or soften the light emitted by the flash to reduce harsh shadows or to create a more pleasing and natural-looking illumination. Accessories such as diffusers, bounce cards, and light modifiers can be used to achieve this effect.
It’s worth mentioning that relying solely on the camera’s flash may not always produce the most desired lighting conditions. In some cases, ambient lighting or using additional light sources, such as reflectors or continuous lighting, can help achieve more flattering and professional-looking results.
The flash is a valuable tool in a digital camera that provides additional lighting when needed. Understanding the different flash modes, effective range, and complementary lighting techniques allows photographers to use the flash effectively and creatively, ensuring well-exposed images in a variety of lighting conditions.
Mode Dial
The mode dial is a prominent feature on most digital cameras that allows photographers to easily select different shooting modes to suit various shooting conditions and creative preferences. It serves as a convenient way to control the camera’s settings and adapt to different photography situations.
The mode dial typically features a range of pre-set shooting modes, each optimized for specific scenarios or styles of photography. These modes may include Auto, Program (P), Shutter Priority (S or Tv), Aperture Priority (A or Av), Manual (M), and various scene modes such as Portrait, Landscape, Sports, and more.
In Auto mode, the camera handles most of the settings automatically, making it a great choice for beginners or when quick and simple shooting is desired. The camera analyzes the scene and selects the appropriate exposure settings, focus mode, and other parameters to produce a well-exposed image.
Program mode (P) allows photographers to have more control while still relying on the camera to set the exposure settings. This mode provides flexibility to adjust certain parameters such as ISO, white balance, and flash settings, while maintaining a balanced overall exposure.
Shutter Priority mode (S or Tv) enables photographers to manually set the desired shutter speed, while the camera adjusts the aperture for proper exposure. This mode is useful when you want to control the motion blur or freeze action in a scene.
Aperture Priority mode (A or Av) gives control over the aperture setting, while the camera automatically adjusts the shutter speed for proper exposure. This mode is often used when photographers want to control the depth of field, creating a shallow or wide area of focus.
In Manual mode (M), photographers have complete control over both the aperture and shutter speed settings, allowing for precise and fine-tuned exposure adjustments. Manual mode is popular among advanced photographers who want full control over the creative process.
In addition to these main shooting modes, the mode dial may also include various scene modes that optimize the camera’s settings for specific types of photography. For example, Portrait mode enhances skin tones and blurs the background for pleasing portraits, while Landscape mode increases sharpness and saturation to capture vibrant landscape scenes.
Some cameras also feature custom modes (C1, C2, etc.) on the mode dial that allow users to save and recall their preferred settings for quick access.
Understanding the function and purpose of each shooting mode on the mode dial helps photographers select the most appropriate settings for different photography scenarios. It allows for greater flexibility and creativity in capturing images that best represent the desired artistic vision or accurately depict the scene.
Menu Button
The menu button on a digital camera is a crucial control that provides access to a range of settings, functions, and customization options. It serves as a gateway to the camera’s extensive menu system, allowing photographers to adjust various parameters, fine-tune settings, and access additional features.
When the menu button is pressed, it typically opens up an on-screen menu display on the camera’s LCD screen. This menu system is divided into different categories, such as shooting settings, image quality, white balance, autofocus, exposure compensation, and many others.
The menu display is navigated using the camera’s directional control buttons or, in some cases, a touch interface on the screen. The specific layout and organization of the menu system can vary among camera models, but the purpose is to provide easy access to the camera’s settings and features.
The menu button is especially useful when photographers need to adjust advanced settings that are not directly accessible through dedicated buttons or dials. It allows for customization and fine-tuning of the camera’s settings, giving photographers full control over their photography experience.
Common settings that can be adjusted through the menu system include image quality (JPEG or RAW), ISO sensitivity, metering modes, white balance, autofocus settings, image stabilization, drive modes, flash settings, and more. Additionally, the menu may provide access to additional features like Wi-Fi connectivity, interval shooting, multiple exposure mode, and various image effects.
It is important for photographers to familiarize themselves with their camera’s menu system to harness the full potential of their device. Spending time exploring the various menu options and experimenting with different settings allows for customization based on personal shooting preferences and specific photography needs.
The layout and organization of the menu system may vary between camera brands and models. Some cameras offer customizable menus, allowing users to arrange the menu items according to their preferences for quick and easy access.
In addition to the menu button, some cameras also have a quick menu or customizable function buttons that provide direct access to frequently used settings, which can expedite changes and reduce the need to navigate through the entire menu system.
The menu button is a powerful tool that unlocks the camera’s potential by offering a wide range of settings and customization options. Understanding how to navigate the menu system and utilize these settings enables photographers to fine-tune their camera to suit their shooting style and achieve their desired photographic results.
Control Buttons
Control buttons on a digital camera provide quick and convenient access to specific functions and settings, allowing photographers to make adjustments on the fly. These buttons are strategically placed on the camera body, often around the LCD screen or on the rear panel, for easy reach and intuitive operation.
Each control button is assigned to a particular function or setting, which can vary depending on the camera model. Common control buttons include the shutter button, mode dial, exposure compensation button, playback button, and navigation buttons.
The shutter button is the most prominent and crucial control button on a camera. It is used to capture the image when pressed halfway to activate autofocus and then fully to capture the photo. The sensitivity and responsiveness of the shutter button greatly affect the timing and accuracy of capturing the desired moment.
The mode dial, which is usually located on the top of the camera, allows for quick selection of different shooting modes, such as Manual, Aperture Priority, Shutter Priority, and Scene Modes. Turning the mode dial enables photographers to effortlessly switch between various modes to adapt to different shooting conditions.
The exposure compensation button is used to override the camera’s automatic exposure settings. It allows for adjustments to the exposure value (+/-) to make the image brighter or darker without changing the selected shooting mode. This feature is particularly useful in challenging lighting situations or when photographers want to intentionally enhance or reduce exposure.
The playback button provides instant access to view captured images on the camera’s LCD screen. This allows photographers to review, delete, or zoom in on images to check for focus and composition. The playback button is an essential tool for reviewing and assessing the quality of the captured photos.
Navigation buttons consist of a directional pad or joystick that allows photographers to navigate through menus, scroll through images, and select various settings. These buttons often include an OK or Enter button in the center, which confirms a selection or chooses a menu option.
In addition to these primary control buttons, cameras may have additional buttons that provide direct access to specific features or settings. These buttons can include ISO control, white balance adjustment, autofocus mode selection, flash settings, and more, depending on the camera model.
Familiarizing oneself with the location and function of the control buttons is essential for fluid and efficient camera operation. Memorizing the button layout and their corresponding functions allows photographers to make quick adjustments to settings without having to navigate through menus, enabling them to capture the decisive moment effortlessly.
Photographers should also consider customizing certain buttons if the camera allows it, assigning specific functions to suit their individual shooting style and preferences. Customization provides a personalized shooting experience and helps streamline the workflow.
The control buttons on a digital camera are designed to provide convenient and efficient access to various functions and settings. Mastering their functions and utilizing them effectively helps photographers take full advantage of their camera’s capabilities and allows for seamless operation in any photography situation.
USB Port
The USB (Universal Serial Bus) port is a standard feature found on digital cameras that provides a convenient method for transferring data between the camera and other devices. It allows for fast and efficient data transfer, making it easy to offload images and videos to a computer or other compatible devices.
The USB port on a camera serves as both an input and output port, enabling various functions and capabilities:
Transfer Images: The primary purpose of the USB port is to transfer images and videos from the camera’s memory card to a computer or other storage devices. By connecting the camera to a computer using a USB cable, photographers can easily transfer their files for viewing, editing, and archiving.
Tethered Shooting: Some cameras support tethered shooting, allowing them to be connected to a computer via USB. This enables direct control of the camera settings, live view display on the computer screen, and the ability to capture and save images directly to the computer’s hard drive.
Firmware Updates: Manufacturers often release firmware updates to improve camera performance or add new features. These updates can be installed by connecting the camera to a computer through the USB port and running the firmware update software provided by the manufacturer.
PictBridge Printing: PictBridge is a technology that enables direct printing from a digital camera to a compatible printer. By connecting the camera to the printer using a USB cable, photographers can select and print their images without the need for a computer.
USB Charging: Some cameras support USB charging, allowing them to be charged directly from a computer or a USB power source using the USB port. This feature is particularly useful when traveling or when an electrical outlet is not readily available.
It’s important to note that the USB port on cameras typically follows a specific standard, such as USB 2.0 or USB 3.0. The USB standard determines the transfer speed capabilities, with USB 3.0 offering faster data transfer rates compared to USB 2.0. When transferring large image or video files, using a USB 3.0 connection can significantly reduce transfer times.
When connecting the camera to a computer using the USB port, it is important to follow proper procedures to prevent data loss or corruption. Always ensure that the camera is turned off before connecting or disconnecting the USB cable, and use the “eject” or “safely remove hardware” option on the computer before unplugging the cable.
The USB port on a digital camera serves as a versatile and essential tool for image transfer, tethered shooting, firmware updates, direct printing, and USB charging. Understanding and utilizing the capabilities of the USB port allows photographers to easily manage their images, stay up to date with firmware improvements, and conveniently connect their camera to various devices and accessories.
Tripod Mount
The tripod mount is a standardized feature found on the bottom of most digital cameras that allows them to be securely attached to a tripod or other camera support systems. It provides stability and eliminates camera shake, enabling photographers to capture sharp and steady images, especially in low-light situations or when using longer exposure times.
The tripod mount typically consists of a threaded hole, often with a metal ring surrounding it called the tripod socket. This socket is designed to accommodate the screw or mounting plate on a tripod or other camera support system.
Attaching a camera to a tripod offers several advantages:
Stability: One of the main benefits of using a tripod is its ability to provide a stable platform for the camera. By securing the camera to a tripod, photographers can eliminate or greatly reduce unwanted camera movement caused by handholding, resulting in sharp and blur-free images.
Long Exposures: When capturing long exposures, such as during nighttime or low-light photography, even the slightest camera movement can cause blur. Using a tripod allows for precise composition and stability, allowing photographers to capture the desired exposure without any disturbances.
Multiple Exposures: In certain photography techniques, such as HDR (High Dynamic Range) or panoramas, it is important to keep the camera in the exact same position for multiple exposures. A tripod ensures consistency and alignment between images, making it easier to merge or stitch them together seamlessly later during post-processing.
Macro Photography: When shooting close-up subjects, such as in macro photography, even the slightest movement can cause the subject to go out of focus. By using a tripod, photographers can maintain a steady position and achieve precise focus on the subject, enhancing the overall quality of the image.
The tripod mount is typically located on the bottom of the camera. It is designed with a universal standard, allowing compatibility with various tripod models and other camera support systems. The socket’s size and threading are standardized, typically using 1/4″ or 3/8″ threads.
When selecting a tripod, it is important to check the compatibility between the tripod’s mounting system and the camera’s tripod mount. Most tripods come with a detachable quick-release plate that attaches to the camera’s tripod mount, allowing for easy attachment and detachment.
Using a tripod mount is not limited to traditional tripods alone. It can also be utilized with other camera support systems, such as monopods, sliders, and stabilizers, providing stability and versatility for a wide range of photography and videography needs.
Properly attaching the camera to the tripod mount is essential for stability and safety. Ensuring that the camera is securely tightened onto the tripod, checking for any wobbling or looseness, and confirming that the weight is evenly distributed contributes to a stable setup and prevents accidents.
The tripod mount is a valuable feature that enhances the stability and functionality of a digital camera. Utilizing it in conjunction with a tripod or other camera support systems allows photographers to capture clear and sharp images while exploring creative possibilities and pushing the boundaries of their photography.
Video Recording Button
The video recording button on a digital camera is a dedicated control that allows photographers to easily start and stop video recording without navigating through menus or changing shooting modes. It provides quick access to video recording capabilities, making it convenient to capture motion and tell stories through moving images.
The video recording button is usually positioned on the top or back of the camera body for easy reach. It is distinguished from other buttons by a recognizable symbol that represents video recording, such as a red dot or a video camera icon.
When the video recording button is pressed, the camera switches from still photo mode to video mode, and the recording begins. This allows photographers to seamlessly transition between capturing photos and recording videos, making it effortless to capture dynamic footage in real-time.
Using the dedicated video recording button offers several advantages:
Convenience: Having a dedicated button specifically for video recording eliminates the need to switch shooting modes or navigate through menus, providing instant access to record videos. Photographers can quickly react to action, capturing memorable moments without hesitation.
Stability and Control: Holding down the video recording button ensures a steady grip on the camera, minimizing camera shake. This allows for smoother video footage, especially when compared to activating the video recording function through other means.
Creative Expression: The ability to easily switch between photo and video modes encourages photographers to explore new creative possibilities. With the video recording button readily accessible, they can experiment with cinematic techniques, capture movement and sound, and tell compelling visual stories through videos.
Specialized Functions: Many cameras offer additional features and controls in video mode, such as manual exposure and focus adjustments, frame rates, resolution options, and built-in microphones or external audio input. The video recording button allows photographers to take advantage of these functions and unleash their creativity in video recording.
It is worth noting that the availability and functionality of the video recording button may vary among digital camera models. While most cameras have a dedicated button, some entry-level models or compact cameras may require accessing the video recording function through the camera’s menu system or a different control button.
When using the video recording button, it is important to consider the camera’s memory card capacity and battery life. Video recording consumes more storage space and power compared to capturing still images. Monitoring these factors ensures uninterrupted recording and prevents unexpected interruptions in longer video clips.
By utilizing the video recording button, photographers can easily capture high-quality videos with their digital cameras. This convenient control allows for quick access to video mode, providing the flexibility to capture and document life’s moments with motion, sound, and a new dimension of visual storytelling.