Introduction
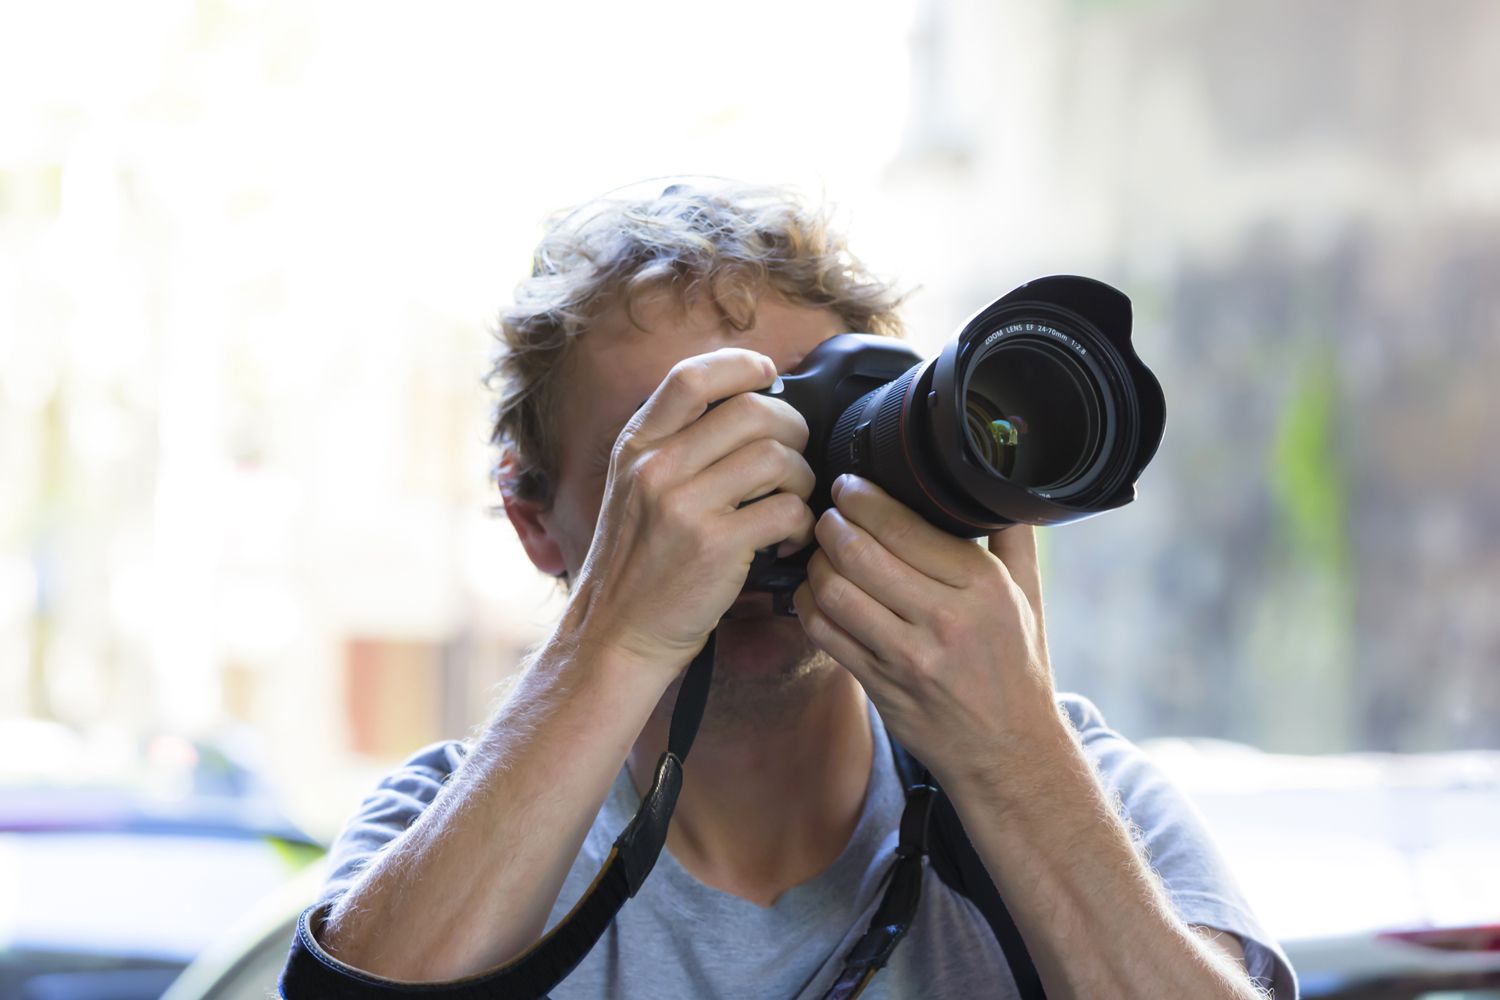
Welcome to our guide on how to narrow focus on a digital SLR camera. As a photographer, understanding and controlling focus is paramount to capturing stunning images. Whether you’re a beginner or a seasoned pro, mastering focus techniques can greatly enhance the quality of your photographs.
Focus in photography refers to the sharpness and clarity of the subject within an image. It is what draws the viewer’s attention and brings the photo to life. Digital SLR cameras offer a variety of focus modes and settings, allowing you to have full control over where the camera focuses and how sharp the subject appears.
This guide will walk you through the different focus modes, techniques, and tools available to help you narrow your focus and create images that truly stand out. By understanding the basics of focus, choosing the right focus mode, and using various focus techniques, you can take your photography skills to the next level.
Whether you’re shooting portraits, landscapes, or macro close-ups, the ability to narrow your focus and selectively focus on specific subjects can make a world of difference. It allows you to isolate your subject from the background, create a shallow depth of field, and draw attention to the most important elements in your composition.
Throughout this guide, we will explore different focus techniques such as single point autofocus, manual focus, and focus lock. We will also delve into more advanced techniques like focus stacking and utilizing focus peaking and focus assist tools. These techniques will empower you to not only narrow your focus but also achieve greater creative control over the sharpness and depth of field in your photographs.
Whether you’re photographing a breathtaking sunset, a delicate flower, or a captivating portrait, mastering the art of narrowing focus will allow you to capture the beauty and essence of your subject in a way that leaves a lasting impression.
Understanding the Basics of Focus in Photography
Focus is a fundamental concept in photography that determines the sharpness and clarity of your images. When your subject is in focus, it appears crisp and well-defined, capturing the attention of the viewer. Understanding the basics of focus will enable you to achieve the desired level of sharpness in your photographs.
In photography, focus is achieved by aligning the optical elements of the camera to bring the subject into clear focus on the image sensor or film. The camera’s autofocus system works by detecting contrast or phase differences within the image and adjusting the lens to achieve the sharpest focus.
One of the essential aspects of focus is the depth of field (DOF). DOF refers to the zone of acceptable focus in an image, both in front of and behind the subject. It is affected by several factors, including the lens aperture, focal length, and distance between the camera and the subject. Understanding DOF allows you to control how much of your image appears in focus.
It’s important to note that achieving perfectly sharp focus can be challenging in certain situations, such as low light conditions or when photographing moving subjects. However, by understanding the basics of focus and employing the right techniques, you can overcome these challenges and capture stunning, sharp images.
When shooting, it’s crucial to consider your intended subject and the effect you want to achieve. For example, in portrait photography, you may want to create a shallow depth of field to isolate the subject and blur the background. On the other hand, landscape photography often requires a larger DOF to keep the entire scene in focus.
As a photographer, you have control over the focus point or area in your frame. Most digital SLR cameras offer different focus modes, such as single point autofocus (AF-S) and continuous autofocus (AF-C), allowing you to choose the appropriate focus mode based on the subject and shooting conditions.
Understanding the basics of focus in photography is the foundation for capturing sharp, striking images that leave a lasting impression. By mastering focus techniques and exploring the various tools available, you can take your photography skills to new heights and create images that truly stand out.
Choosing the Right Focus Mode
When it comes to achieving precise focus in your photography, selecting the right focus mode is essential. Digital SLR cameras offer various focus modes that cater to different shooting scenarios. Understanding these modes and when to use them will greatly enhance your ability to capture sharp, well-focused images.
One of the most commonly used focus modes is Single Point Autofocus (AF-S). In this mode, the camera focuses on a specific point selected by the photographer. It is ideal for situations where you want to have full control over the point of focus, such as when photographing a single subject in a portrait or a still life composition. By selecting the desired focus point, you can ensure that your subject is sharp and the background is pleasingly blurred.
Continuous Autofocus (AF-C), also known as servo autofocus, is another focus mode that is particularly useful for capturing moving subjects. This mode constantly adjusts the focus as the subject moves, ensuring that it remains sharply focused. Continuous autofocus is commonly used in sports photography, wildlife photography, and any other situation where the subject is in motion.
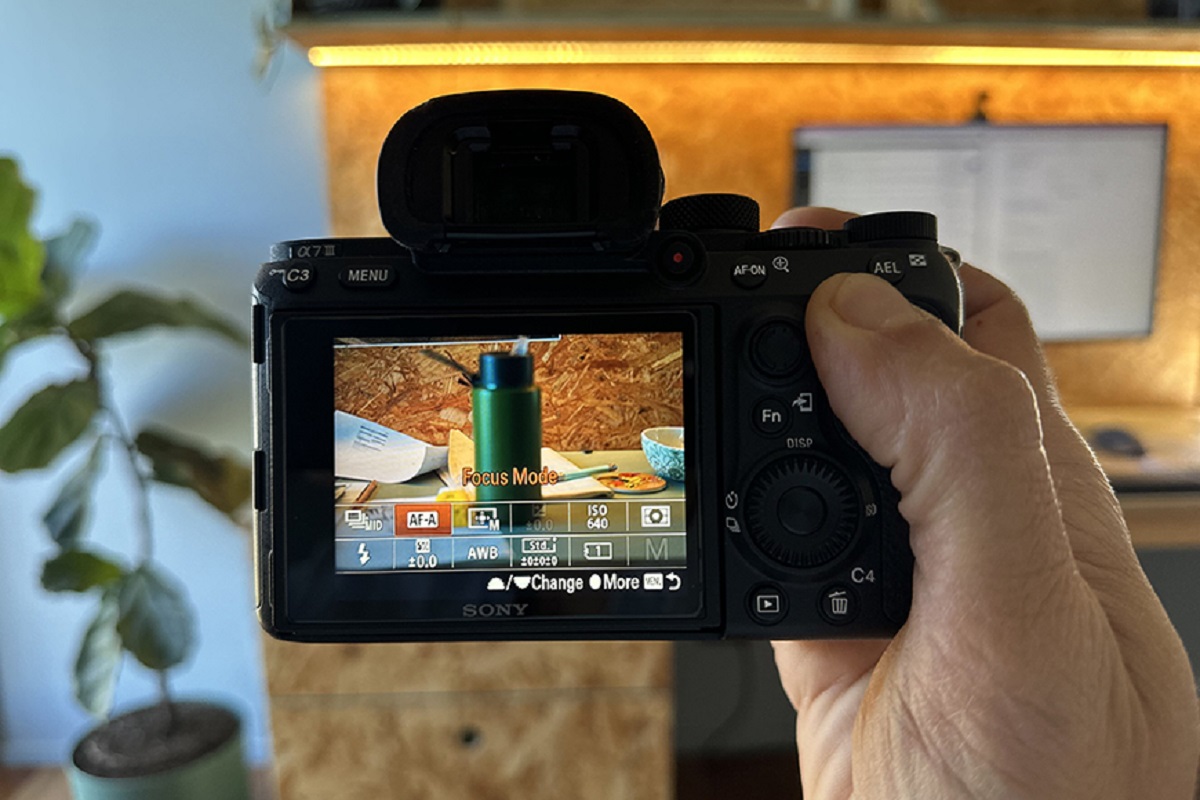
Another focus mode to consider is Automatic Autofocus (AF-A) or Automatic Selection autofocus. This mode allows the camera to automatically switch between Single Point autofocus and Continuous autofocus depending on the movement of the subject. It is a versatile option that provides flexibility in situations where the subject’s movement is unpredictable.
Some digital SLR cameras also offer additional focus modes such as Zone AF, which focuses on a group of points within a selected zone, and Wide Area AF, which covers a larger area of focus points. These modes can be beneficial in scenarios where you want to track a subject that is moving within a specific zone or when you need to capture a broader area in focus.
When choosing the right focus mode, consider the subject you are photographing and the shooting conditions. For static subjects, Single Point autofocus is often the preferred choice. If your subject is in motion, Continuous autofocus will help you maintain sharp focus throughout. Automatic autofocus can be a reliable option when you are unsure about the subject’s movement.
Experimenting with different focus modes and understanding their strengths and limitations will help you improve your ability to capture well-focused images in various situations. Remember to select the focus mode that best suits your subject and shooting environment to achieve optimal results.
Utilizing Single Point Autofocus
Single Point Autofocus (AF-S) is a focus mode that allows you to manually select a specific focus point in your camera’s viewfinder. This mode gives you precise control over the focus area, enabling you to ensure that your subject is sharp and well-defined.
When using Single Point autofocus, it is important to first assess your composition and determine where you want your main subject to be placed within the frame. Once you have chosen the desired focus point, you can use the directional buttons or the touch screen (if available) on your camera to move the focus point to the desired location.
Utilizing Single Point autofocus is particularly useful in situations where you want to isolate a specific subject from the background. For example, in portrait photography, you may want to ensure that the subject’s eyes are in sharp focus, while the rest of the face and background are softly blurred. By selecting a single focus point over the eyes, you can achieve this desired effect.
Another scenario where Single Point autofocus proves valuable is when photographing still life compositions or macro subjects. By selecting a focus point on the most important element of the scene, such as a flower or a small object, you can ensure that it is perfectly sharp and draws the viewer’s attention.
When using Single Point autofocus, it is important to consider the depth of field (DOF) and the aperture setting. A wider aperture (lower f-number) will create a shallow DOF, resulting in a more pronounced background blur and increased emphasis on the focused subject. Experimenting with different aperture settings in conjunction with Single Point autofocus will allow you to achieve various creative effects.
Keep in mind that when using Single Point autofocus, it is essential to reposition the focus point for each shot if your subject or composition changes. This gives you full control over where the camera focuses and ensures that your main subject remains in sharp focus.
Overall, utilizing Single Point autofocus gives you incredible precision and control over focus in your images. By selecting the exact point of focus, you can create visually striking photographs that draw attention to your subject and separate it from the background. Experiment with this focus mode in different shooting scenarios to take your photography skills to the next level.
Mastering Manual Focus
While autofocus is convenient and accurate in many situations, there are times when mastering manual focus can give you even more control over the sharpness and creative vision of your photographs. Manual focus allows you to have complete control over where you want to focus by adjusting the focus ring on your lens.
To effectively use manual focus, start by setting your camera to manual focus mode. Locate the focus ring on your lens, which is typically a textured ring that can be rotated to adjust the focus. As you turn the focus ring, you will notice the image in your viewfinder or on your camera’s LCD screen becoming sharper or softer depending on the direction.
Manual focus can be particularly beneficial in situations where the autofocus may struggle, such as low light conditions or when photographing subjects with low contrast. It can also be useful when capturing scenes with multiple elements at varying distances, where you want to specifically focus on a particular subject rather than relying on the camera’s autofocus system.
When using manual focus, it’s important to rely on visual cues in your viewfinder or LCD screen, such as focus peaking or magnification, to ensure precise focus. Focus peaking is a feature commonly found in digital cameras that highlights the areas in focus, making it easier to determine the exact point of sharpness. Magnification allows you to zoom in on a specific area to check focus accuracy.
Practice is key to mastering manual focus. Experiment with different subjects, distances, and apertures to understand how depth of field impacts focus. Take your time when focusing manually, making small adjustments and checking focus frequently to ensure you achieve the desired sharpness.
Manual focus also provides an opportunity to explore creative techniques like intentional soft focus or selective focus. By deliberately focusing slightly in front of or behind the subject, you can create a dreamy or ethereal effect. This technique can be particularly effective in portrait or still life photography, adding a unique touch to your images.
Remember that using manual focus requires patience, practice, and a good understanding of your camera’s viewfinder or LCD display. Take the time to familiarize yourself with these tools and develop a sense of how to accurately judge focus manually. With practice, manual focus can become second nature, allowing you to achieve precise, intentional focus in your photography.
Utilizing Focus Lock
Focus lock is a powerful technique that allows you to effectively control the focus point and composition of your images. By utilizing focus lock, you can ensure that your desired subject remains in focus even when the camera’s autofocus system might otherwise be easily distracted.
The focus lock function can be particularly useful in situations where your subject is off-center or when shooting through obstacles, such as a fence or branches. It enables you to take greater control over the focus and composition of your photographs.
To utilize focus lock, you first need to position your desired subject in the center of the frame or align the focus point over your subject. Press the shutter button halfway down to initiate autofocus. The camera will then lock the focus on the subject, indicated by a beep or visual confirmation in the viewfinder.
While the focus is locked, you can then recompose the composition without worrying about losing the focus on your subject. Simply keep the shutter button pressed halfway down, recompose your shot, and then fully press the shutter button to take the photograph.
Focus lock can also be combined with other focus techniques, such as using single point autofocus or manual focus. By first locking the focus on your subject, you can then switch to manual focus or select a different focus point to further enhance the composition or creative effect.
It’s important to note that focus lock may not be suitable for every situation. If your subject is continuously moving, you may need to reapply focus lock as needed to maintain sharp focus. Additionally, in low light conditions or with subjects lacking contrast, autofocus may struggle to lock onto the subject, requiring you to use alternative focus methods.
Practice using focus lock in various shooting scenarios to become comfortable with the technique. Experiment with different subjects, compositions, and shooting conditions to understand how focus lock can benefit your photography. With time and experience, you will develop a greater ability to utilize focus lock effectively and capture images with precise focus and compelling compositions.
Understanding Depth of Field and Aperture Settings
Depth of field (DOF) plays a crucial role in photography, as it determines the range of sharpness in an image. Manipulating DOF allows you to control the focus and visual impact of your photographs. One of the key factors that affect DOF is the aperture setting on your camera.
Aperture refers to the opening in the lens that controls the amount of light entering the camera. It is measured in f-numbers, denoted as f/1.4, f/2.8, f/5.6, etc. Each f-number represents a different aperture setting, with lower numbers indicating a wider aperture and higher numbers indicating a narrower aperture.
Understanding aperture settings is essential to comprehend DOF. A wide aperture (small f-number) such as f/1.4 or f/2.8 results in a shallow DOF, with a limited area of sharp focus. This is commonly used when you want to isolate your subject from the background, such as in portrait photography or when capturing close-up shots of flowers or objects.
On the other hand, a narrow aperture (larger f-number) such as f/8 or f/16 produces a greater DOF, meaning a larger area of the image will be in focus. This is often used in landscape photography or situations where you want to keep the entire scene sharp from foreground to background.
It is essential to note that the chosen aperture setting also affects the amount of light reaching the camera’s sensor. A wider aperture (lower f-number) allows more light to enter, which is beneficial in low light conditions. A narrower aperture (higher f-number) reduces the amount of light, necessitating longer exposure times or higher ISO settings.
When it comes to controlling DOF and choosing the right aperture setting, consider your creative vision and the effect you want to achieve. If you want to emphasize a specific subject, use a wide aperture to create a shallow DOF. Conversely, if you want to capture a broader scene in sharp focus, use a narrow aperture to achieve a greater DOF.
Experiment with different aperture settings in various shooting scenarios to understand their impact on DOF. It’s also important to consider the focal length of your lens, as it can affect DOF. Generally, longer focal lengths, such as telephoto lenses, tend to have a narrower DOF compared to wider lenses.
Understanding DOF and how to manipulate it using aperture settings offers you greater control over the creative outcome of your photographs. It allows you to guide the viewer’s attention, create depth in your images, and convey your artistic vision in a powerful way.
Using Focus Peaking and Focus Assist Tools
Focus peaking and focus assist tools are invaluable features available in many digital cameras that help you achieve precise focus and enhance the overall sharpness of your images. They provide visual aids and feedback to assist you in accurately determining the areas of sharp focus in your composition.
Focus peaking is a popular tool that highlights the areas in focus by overlaying a colored outline on the edges of sharp subjects. This makes it easier to see and differentiate the areas of greatest sharpness, particularly when manually focusing. By adjusting the focus ring on your lens, you can observe the changes in the focus peaking display and ensure that your subject is perfectly sharp.
Focus peaking is especially useful in scenarios where autofocus may struggle, such as low-light conditions or scenes with low contrast. It allows you to visually confirm the critical focus area and make adjustments as needed to achieve the desired sharpness.
Another focus assist tool commonly found in digital cameras is magnification. When enabled, this feature zooms in on a specific area of the frame, allowing you to closely inspect the details and sharpness of your subject. It is particularly useful when using manual focus or for situations that require precise focus, such as macro photography or product close-ups.
In addition to focus peaking and magnification, some cameras also offer features like focus area enlargement or a focus check option that temporarily displays a magnified view of the focus point while composing your shot. These tools allow you to inspect the focus accuracy and make necessary adjustments before capturing the final image.
Using focus peaking and other focus assist tools can significantly improve your ability to achieve accurate focus in challenging shooting conditions. By taking advantage of these features, you can ensure the critical elements of your composition are tack sharp and enhance the overall impact and quality of your photographs.
It’s important to consult your camera’s manual to familiarize yourself with the specific focus assist tools available and how to activate them. Experiment with focus peaking and magnification in different shooting scenarios to understand their strengths and limitations. Incorporating these tools into your workflow will ultimately enhance your precision and control over focus, resulting in sharper and more visually engaging images.
Exploring Back-button Focus
Back-button focus is a technique that separates the autofocus function from the shutter button, assigning it to a different button on the camera’s rear. Instead of half-pressing the shutter button to focus, back-button focus allows you to initiate autofocus with a dedicated button, typically located near the thumb rest on the back of the camera.
This method offers several advantages for photographers who want more control over their focus. By using back-button focus, you can separate the autofocus function from the shutter button, enabling you to focus once and then recompose without the risk of accidentally refocusing when taking the shot.
One of the significant benefits of back-button focus is its ability to track moving subjects. With the autofocus initiated by the dedicated button, you can continuously track the subject’s movement while easily capturing images without having to refocus for every shot. This is particularly beneficial in fast-paced situations, such as sports or wildlife photography.
Back-button focus also allows you to achieve more precise focus in certain scenarios, such as low-light conditions or in situations where the camera’s autofocus may struggle to lock onto the subject. By independently controlling the focus, you can fine-tune the sharpness and ensure critical details are captured with precision.
It’s worth noting that implementing back-button focus may require changing your camera’s settings. Consult your camera manual to locate the dedicated button for autofocus and learn how to assign it. Additionally, you may need to deactivate the autofocus function from the shutter button by adjusting the camera’s custom functions or settings menu.
Once back-button focus is set up, it may take some time to get accustomed to the new technique. Practice using it in various shooting situations to become comfortable and proficient. You may find that it becomes an essential part of your photographic workflow, offering greater flexibility and control over your focus.
Not all photographers may find back-button focus necessary for their shooting style, and it may take time to adjust to the new method. However, for those who prioritize precision, consistent focus, and tracking moving subjects, exploring and implementing back-button focus can significantly enhance their photography experience.
Utilizing Focus Stacking Techniques
Focus stacking is a technique used to achieve maximum sharpness and depth of field in a photograph by combining multiple images with different focus distances. This technique is particularly helpful in situations where a single image cannot capture the entire scene in sharp focus, such as in macro photography or landscape shots with close foreground elements.
To utilize focus stacking, you first need to set up your camera on a stable tripod to ensure that the composition remains consistent throughout the series of shots. Start by focusing on the closest point of your desired subject and capturing the first image. Then, adjust the focus slightly towards the background and take subsequent images with the same composition.
Once you have captured all the necessary images with different focus distances, you can use image editing software, such as Adobe Photoshop or specialized focus stacking software, to combine the images into a single photograph. The software aligns and blends the focused areas from each image, creating a final image that appears tack sharp from the foreground to the background.
The key to successful focus stacking is to capture enough images with varying focus distances to ensure that every part of the scene is covered. The number of images required depends on factors such as the depth of field, the distance between the camera and the subject, and the desired level of sharpness.
Focus stacking can be particularly useful in macro photography, where capturing a sharp subject along with detailed background elements can be challenging due to the shallow depth of field. By combining multiple images with different focus points, you can achieve a final image that is sharp and well-defined throughout the entire subject.
Additionally, focus stacking can enhance landscape photography by allowing you to capture a scene with both a sharp foreground and background. By blending images focused at different distances, you can create a visually striking photograph with excellent depth and detail.
While focus stacking requires some additional effort in capturing and post-processing, the results can be truly remarkable. It allows you to overcome the limitations of a limited depth of field and create images with exceptional sharpness and depth. Mastery of focus stacking can take your photography to new heights, enabling you to capture scenes and subjects with exceptional detail and clarity.