Introduction
When you pick up a digital SLR camera, you may have noticed that there is a letter ‘M’ displayed on the screen. This ‘M’ is not just any random letter; it actually represents the various shooting modes available on the camera. Each mode has its own unique benefits and purposes, allowing photographers to have more control over their images.
Understanding the different shooting modes is crucial for maximizing the potential of your digital SLR camera. Whether you’re a professional photographer or an enthusiast looking to dive deeper into the world of photography, knowing how to utilize these modes will help you capture stunning and well-exposed images.
In this article, we will explore the different shooting modes available on a digital SLR camera and their functionalities. From manual mode to auto mode, we’ll discuss the advantages and scenarios where each mode excels. So, let’s delve into the world of camera modes and unlock the true potential of your digital SLR!
Mode Selection
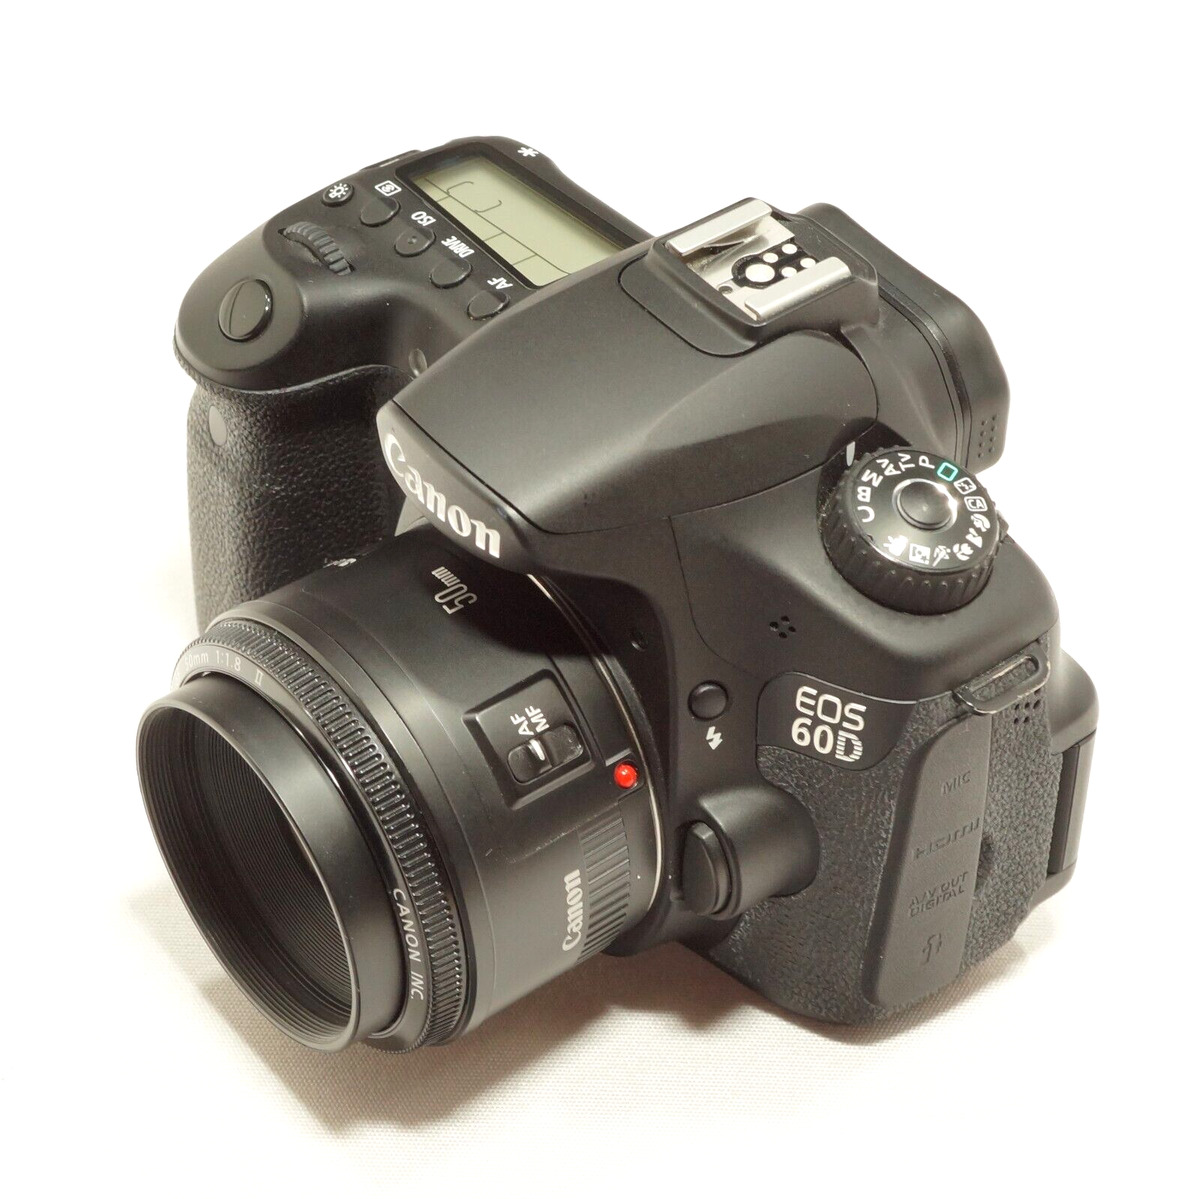
Before we dive into the specific shooting modes, it’s important to understand how to select the mode on your digital SLR camera. Typically, you can find a mode dial on the top of the camera body, which allows you to switch between different shooting modes with ease.
The mode dial usually consists of the following options: Manual (M), Aperture Priority (A or Av), Shutter Priority (S or Tv), Program (P), and Auto (A). Some cameras may also offer additional modes like Scene modes or Custom modes, providing even more flexibility and control.
When selecting a mode, consider the shooting conditions and your desired level of control. In situations where you want complete control over every aspect of the exposure, such as in a studio or for creative purposes, Manual mode is the ideal choice. On the other hand, if you’re looking for a more automated approach, Auto mode can take care of the settings for you.
Now that we understand how to select the mode, let’s explore the specific shooting modes and their functionalities on a digital SLR camera.
Manual Mode
Manual mode, indicated by the letter ‘M’ on the camera’s mode dial, gives photographers complete control over the exposure settings. In this mode, you have the freedom to adjust the aperture, shutter speed, and ISO according to your specific requirements.
Using manual mode can be intimidating for beginners, but it offers unparalleled flexibility and creative freedom. It is especially useful in situations where you want to achieve a specific depth of field, capture long-exposure shots, or control the lighting conditions precisely.
When shooting in manual mode, you’ll need to manually adjust the aperture, which controls the amount of light entering the camera, the shutter speed, which determines the length of time the shutter is open, and the ISO, which affects the camera’s sensitivity to light. By mastering these three elements, you can achieve optimal exposure and create stunning images.
Manual mode is particularly beneficial in tricky lighting conditions, such as low light or backlit scenes, where the camera’s automatic settings may not render the desired results. It also allows you to experiment and push the boundaries of your creativity by intentionally over or underexposing images for artistic effect.
While manual mode requires more knowledge and practice, it empowers photographers to have full control over their images, enabling them to bring their creative vision to life. So, if you’re ready to take your photography to the next level, don’t be afraid to explore the endless possibilities of manual mode!
Aperture Priority Mode
Aperture Priority mode, often represented by the letter ‘A’ or ‘Av’ on the camera’s mode dial, is a semi-automatic shooting mode that allows photographers to control the aperture while the camera automatically adjusts the shutter speed for proper exposure.
In this mode, you have the freedom to select the desired aperture value, which controls the depth of field in your images. A wider aperture (lower f-number) creates a shallow depth of field, effectively blurring the background and isolating the subject. Conversely, a narrower aperture (higher f-number) results in a greater depth of field, keeping more elements in focus.
Aperture Priority mode is especially useful in situations where you want to prioritize depth of field control. For example, when shooting portraits, using a wide aperture can help you create a soft and dreamy background, while a narrow aperture ensures that all the details in a landscape are sharp and in focus.
By letting the camera automatically adjust the shutter speed based on the selected aperture, Aperture Priority mode offers a balance between creative control and ease of use. This mode is particularly beneficial for photographers who want to experiment with depth of field while still maintaining a consistent exposure.
In Aperture Priority mode, you can also take advantage of exposure compensation to fine-tune the exposure. This allows you to make adjustments if the camera’s metering system misinterprets the scene, ensuring that your images are correctly exposed.
Overall, Aperture Priority mode is a versatile shooting mode that gives photographers the freedom to control the depth of field in their images while maintaining a good balance between manual control and automated exposure settings. Whether you’re a beginner or an advanced photographer, this mode is worth exploring to expand your creative possibilities.
Shutter Priority Mode
Shutter Priority mode, denoted by the letter ‘S’ or ‘Tv’ on the mode dial, is another semi-automatic shooting mode available on digital SLR cameras. In this mode, photographers have control over the shutter speed while the camera automatically adjusts the aperture for proper exposure.
Shutter speed refers to the length of time that the camera’s shutter remains open, determining how motion is captured in an image. A faster shutter speed freezes action, while a slower shutter speed allows for motion blur, creating a sense of movement in the photo.
In Shutter Priority mode, you can select the desired shutter speed based on the specific situation and creative vision. This mode is particularly useful for capturing fast-moving subjects, such as sports events or wildlife, where you want to freeze the action to avoid motion blur.
Conversely, if you want to convey a sense of motion or capture long-exposure shots, you can use a slower shutter speed. This technique works well for photographing waterfalls, light trails at night, or any other subject where you want to create a dynamic and visually appealing effect.
By having control over the shutter speed while allowing the camera to adjust the aperture, Shutter Priority mode offers a great balance between manual control and automated exposure. It allows you to focus on capturing the desired motion while ensuring that the exposure is properly adjusted by the camera.
In addition to selecting the shutter speed, you can also use exposure compensation in Shutter Priority mode to fine-tune the exposure if needed. This feature comes in handy when shooting in challenging lighting conditions or when you want to deliberately under or overexpose your images.
Whether you’re freezing fast action or creating stunning motion blur, Shutter Priority mode provides photographers with the flexibility to control the shutter speed and capture dynamic images. It is a valuable tool to have in your photography arsenal and should be explored to expand your creative possibilities.
Program Mode
Program mode, commonly labeled as ‘P’ on the camera’s mode dial, is a semi-automatic shooting mode that offers a balance between control and convenience. In this mode, the camera automatically selects both the aperture and the shutter speed based on the scene’s lighting conditions.
Unlike full auto mode, where the camera determines all the exposure settings, Program mode allows photographers to make certain adjustments while maintaining a level of automation. This makes it an ideal choice for situations where you want some control over the settings but still want the camera to handle the technical aspects.
In Program mode, the camera typically selects a balanced combination of aperture and shutter speed for a correct exposure. However, you have the flexibility to adjust certain settings like exposure compensation, ISO, and white balance to fine-tune the image according to your preferences.
This shooting mode is particularly useful when you need to quickly capture shots in changing lighting conditions. It can be helpful during events, photojournalism, or situations where you want to focus more on capturing the moment rather than spending time adjusting individual exposure settings.
One of the advantages of Program mode is that it allows photographers to switch to full manual control if desired. By simply rotating the command dial, you can shift into manual mode while retaining the initially selected aperture and shutter speed setting.
Program mode offers a good balance between creative control and automation, making it a versatile choice for photographers who want flexibility without the complexity of full manual control. It’s an excellent mode to consider when you need a quick and reliable shooting option while having the opportunity to make adjustments to suit your preferences.
Auto Mode
Auto mode, denoted by the letter ‘A’ on the camera’s mode dial, is the most beginner-friendly shooting mode. In this mode, the camera takes care of all the exposure settings, including the aperture, shutter speed, ISO, and other variables, to ensure a properly exposed image.
Auto mode is designed for those who are less familiar with camera settings or simply want a hassle-free shooting experience. It is perfect for situations where you want to quickly capture the moment without worrying about adjusting the technical parameters.
In Auto mode, the camera analyzes the scene and determines the optimal settings based on its built-in algorithms. It takes into account factors such as lighting conditions, subject distance, and other variables to deliver a well-exposed image.
This shooting mode is particularly useful for beginners who are still learning the ins and outs of photography. It allows them to focus on framing the shot and capturing the subject without the need to worry about technical details.
While auto mode is convenient for beginners, it does have limitations in terms of creative control. The camera makes all the decisions, so you won’t have the ability to intentionally over or underexpose images for artistic effect.
However, it’s worth noting that many modern digital SLR cameras have advanced auto modes that provide additional options. For example, some cameras offer a scene recognition feature, where the camera will analyze the scene and automatically select the appropriate scene mode, such as portrait, landscape, or sports.
Auto mode can be a useful tool in certain shooting scenarios, such as quick snapshots or when you don’t have time to adjust the settings manually. However, as you grow as a photographer, it’s important to explore and experiment with the other shooting modes to unlock your true creative potential.
Conclusion
Understanding the different shooting modes available on a digital SLR camera is key to unlocking its full potential. From Manual mode, where you have complete control over the exposure settings, to semi-automatic modes like Aperture Priority, Shutter Priority, and Program, photographers have options to suit their specific shooting needs.
Manual mode excels in situations where precise control over aperture, shutter speed, and ISO is crucial. This mode allows photographers to customize every aspect of the exposure, opening up creative possibilities and ensuring optimal control in challenging lighting conditions.
Aperture Priority mode is ideal for those looking to have control over depth of field. By adjusting the aperture, you can determine how much of the image is in focus, creating stunning portraits with blurred backgrounds or capturing landscapes with intricate details from foreground to background.
Shutter Priority mode provides control over shutter speed, allowing you to freeze action or create motion blur effects. It is especially useful in capturing fast-moving subjects or adding a sense of dynamism to your images.
In Program mode, the camera automatically selects the aperture and shutter speed, giving you a balance between control and convenience. It is a great mode for situations where you want to quickly capture shots without worrying about too many technical details, while still having the freedom to adjust certain settings if needed.
Lastly, the Auto mode is designed for beginners or situations where you prefer a fully automated shooting experience. The camera takes care of all the exposure settings, allowing you to focus on composition and capturing the moment without getting bogged down by technicalities.
Ultimately, the shooting modes on a digital SLR camera serve as tools to help you achieve your desired creative vision. By exploring and experimenting with these modes, you can improve your photography skills and enhance your ability to capture stunning images in a variety of shooting conditions.
So, whether you’re a beginner just starting out or an experienced photographer wanting to push your limits, don’t be afraid to switch between shooting modes and embrace the versatility they offer. With practice and a good understanding of these modes, you’ll be well on your way to capturing breathtaking photos with your digital SLR camera.