Benefits of Wiring Your Ethernet Cable
Wiring your Ethernet cable is a smart decision that can offer numerous advantages and greatly improve your internet experience. Whether you are setting up a new home network or upgrading an existing one, here are some of the key benefits you can expect:
- Increased Speed and Reliability: By wiring your Ethernet cable directly to your devices, you can achieve faster and more stable internet connections. Unlike Wi-Fi connections that can be affected by interference or signal loss, wired connections provide a dedicated pathway for data transmission, resulting in minimal interruptions and maximum speed.
- Improved Security: Wired connections offer enhanced security compared to wireless networks. With a wired connection, you can eliminate the risk of unauthorized access or potential hacking attempts that are more common with wireless connections. This is particularly important for sensitive activities such as online banking, file sharing, and accessing private information.
- Reduced Latency: Wired connections minimize latency, also known as network delay. This is crucial for online gaming, video streaming, and other real-time applications where even a minor delay can significantly impact the user experience. By reducing latency, a wired Ethernet connection ensures smooth and seamless online activities.
- Consistent Speed for Multiple Devices: If you have multiple devices in your home or office that require a stable and high-speed internet connection, wiring your Ethernet cable is the way to go. With a wired network, each device can have its own dedicated connection, ensuring consistent speed for all devices simultaneously.
- Flexibility and Scalability: Wired networks are highly scalable, allowing you to easily expand your network as needed. Whether you need to connect additional devices or extend your network to a larger area, Ethernet cables offer the flexibility to do so without compromising speed or performance. Additionally, wired connections are compatible with different devices, making it easy to connect a variety of devices to your network.
By wiring your Ethernet cable, you can take advantage of these benefits and enjoy a seamless internet experience that is faster, more secure, and more reliable. Whether you are working from home, streaming your favorite shows, or engaging in online gaming, a wired connection can make a significant difference in overall performance and user satisfaction.
Tools and Materials Required
Before you start wiring your Ethernet cable, it is important to gather the necessary tools and materials. Here is a list of items you will need:
- Ethernet Cable: Start by selecting the right type of Ethernet cable for your needs. The most commonly used cable is Category 5e (Cat 5e), which is suitable for most home and small office networks. If you require higher speeds, consider upgrading to Category 6 (Cat 6) or Category 6a (Cat 6a) cables.
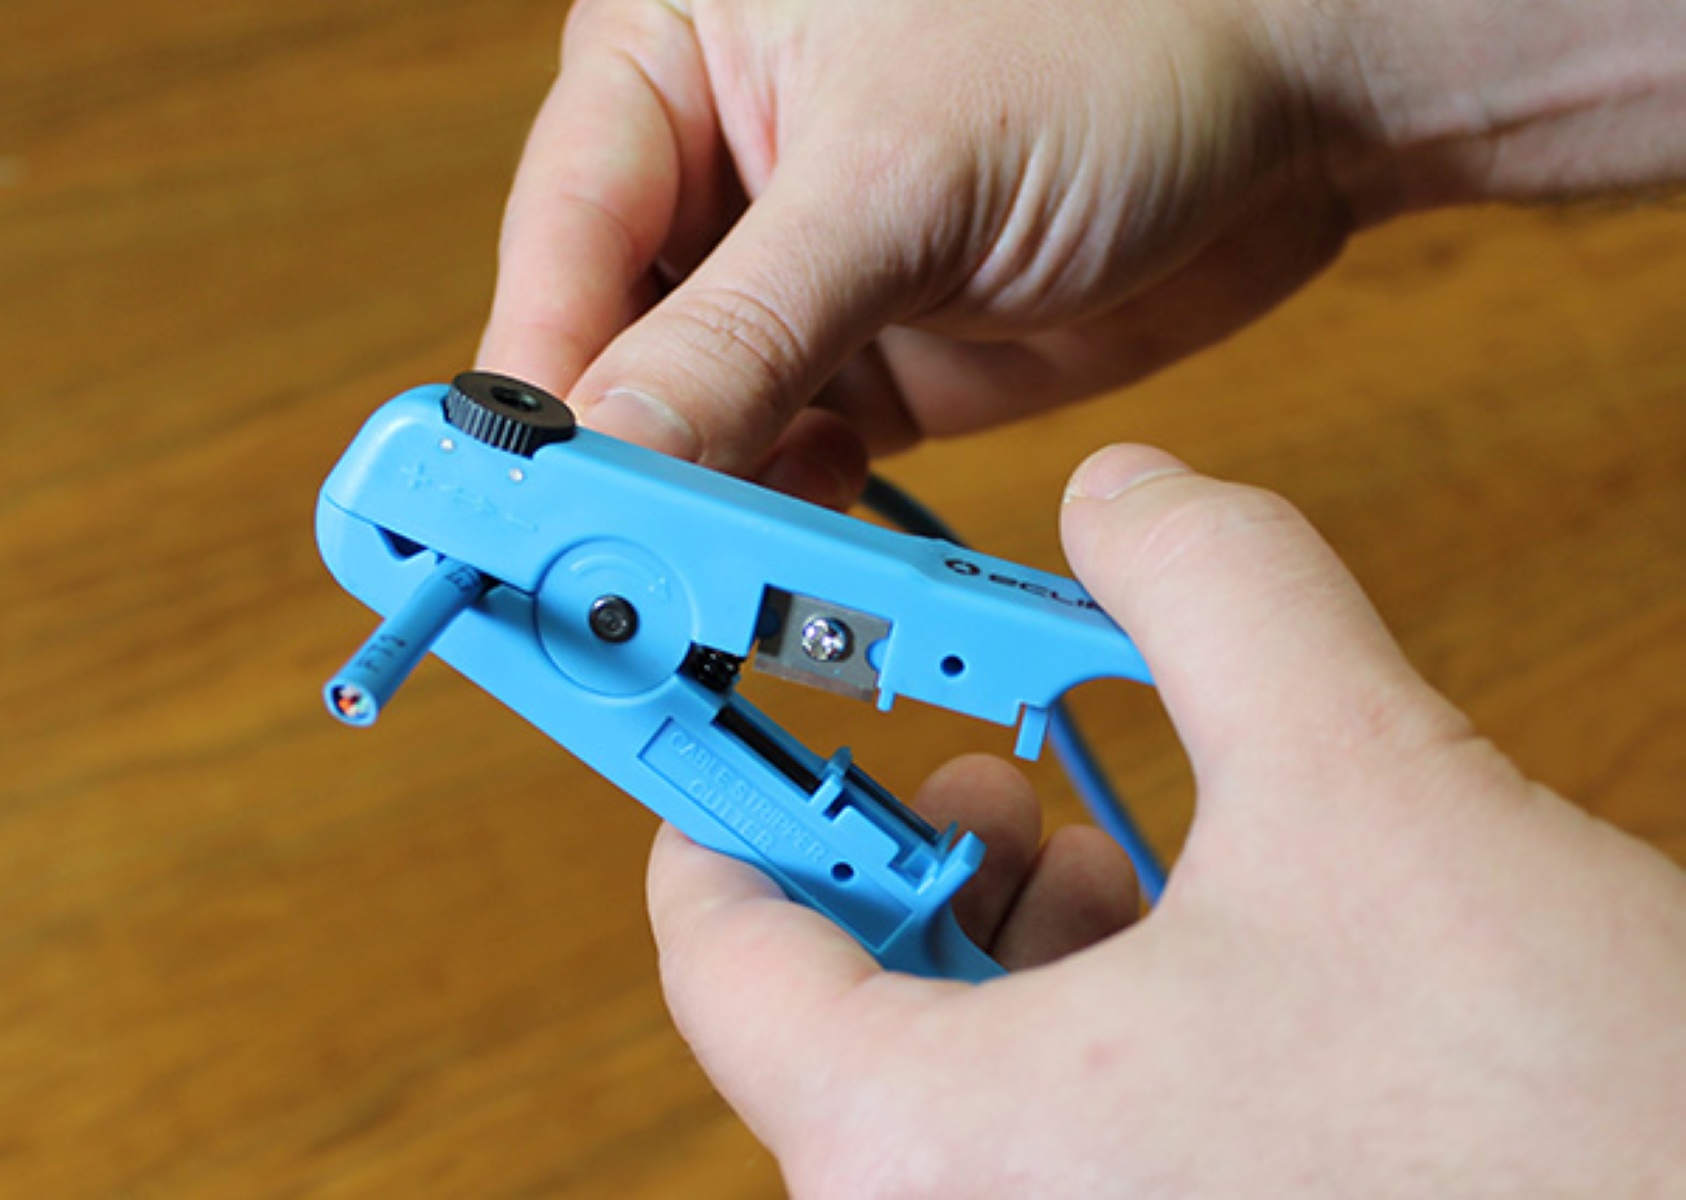
- Wire Cutters: You will need wire cutters to trim the Ethernet cable to the desired length. Make sure to use a high-quality pair of wire cutters to ensure clean and precise cuts.
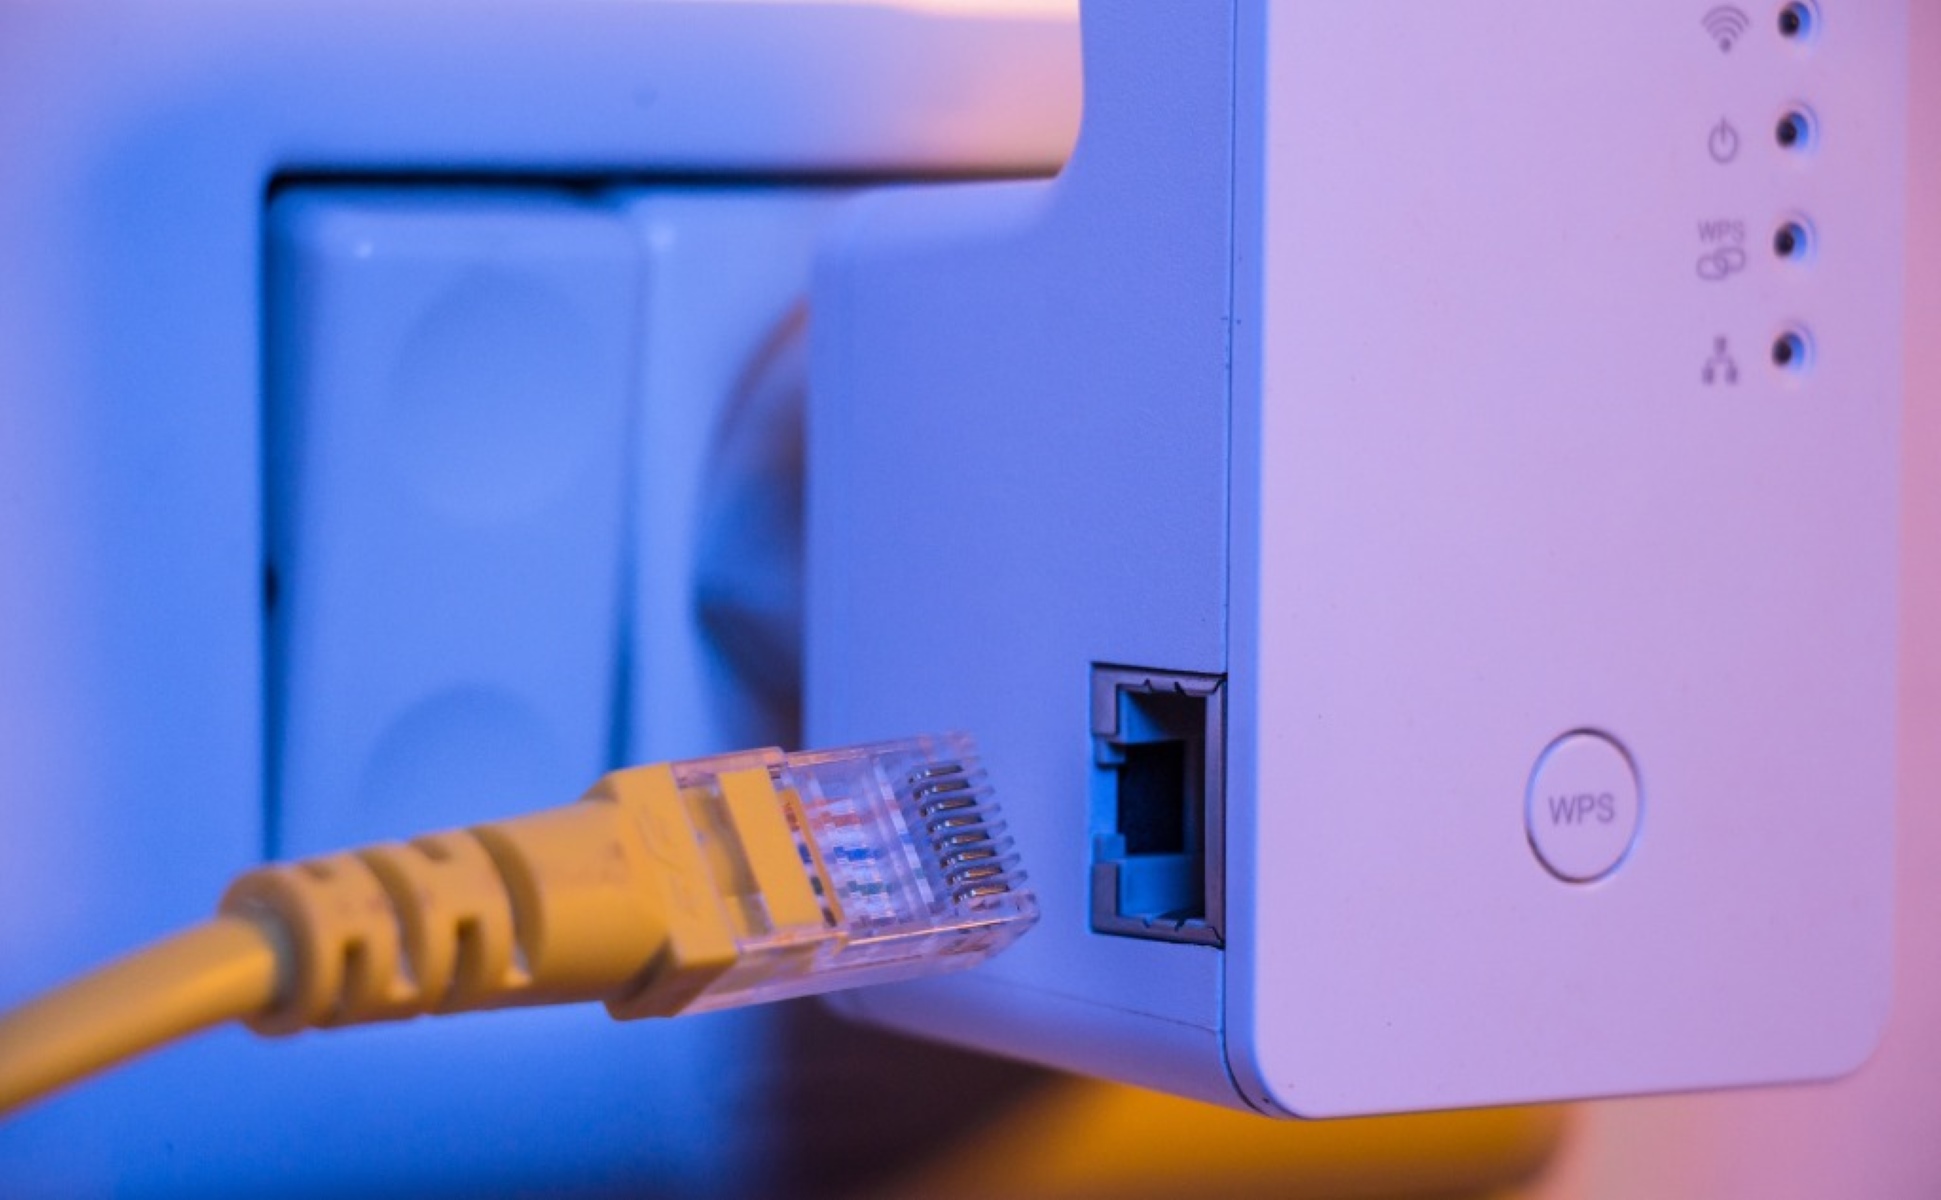
- RJ45 Connectors: RJ45 connectors are used to terminate the ends of the Ethernet cable. These connectors have eight pins that need to be connected properly for the cable to function correctly. It is recommended to use high-quality connectors to ensure a secure and reliable connection.
- Crimping Tool: A crimping tool is essential for securing the RJ45 connectors onto the Ethernet cable. This tool will ensure a tight and secure connection, preventing the connectors from slipping off or causing signal loss.
- Cable Tester: While not required, a cable tester can be extremely useful for ensuring that your Ethernet cable is wired correctly and functioning properly. This tool will help you identify any wiring issues or faults, allowing you to troubleshoot and fix them easily.
- Labeling Materials: To keep your network organized, consider using labeling materials such as tags or markers. Labeling each end of the Ethernet cable will help you easily identify and connect the cables to the appropriate devices.
Having these tools and materials ready before you start wiring your Ethernet cable will save you time and ensure a smooth installation process. It is always recommended to invest in high-quality materials to ensure a reliable and long-lasting network connection.
Understanding Ethernet Cable Categories
When it comes to Ethernet cables, there are different categories that denote their capabilities and performance. Understanding these categories will help you choose the right cable for your networking needs. Here are the main Ethernet cable categories:
- Category 5 (Cat 5): Cat 5 cables were one of the earliest Ethernet cable standards. They are capable of transmitting data at speeds up to 100 Mbps and have a bandwidth of 100 MHz. While Cat 5 cables are still compatible with many networks, they have been largely replaced by newer and faster cable categories.
- Category 5e (Cat 5e): Cat 5e cables are an enhanced version of Cat 5 cables. They offer improved performance and can transmit data at speeds up to 1 Gbps (1,000 Mbps) with a bandwidth of 100 MHz. Cat 5e cables are suitable for most home and small office networks, providing ample speed and reliability for everyday internet use.
- Category 6 (Cat 6): Cat 6 cables are designed for networks that require faster speeds and higher bandwidth. They can transmit data at speeds up to 10 Gbps (10,000 Mbps) with a bandwidth of 250 MHz. Cat 6 cables are often used in demanding applications such as gaming, video streaming, and large file transfers.
- Category 6a (Cat 6a): Cat 6a cables are an improved version of Cat 6 cables. They offer even higher performance and can transmit data at speeds up to 10 Gbps (10,000 Mbps) with a bandwidth of 500 MHz. Cat 6a cables are suitable for professional environments that require maximum performance and future-proofing.
- Category 7 (Cat 7): Cat 7 cables are the latest standard in Ethernet cables. They provide exceptional speed and performance, capable of transmitting data at speeds up to 10 Gbps (10,000 Mbps) with a bandwidth of 600 MHz. Cat 7 cables are often used in data centers, server rooms, and other high-demand environments.
When selecting an Ethernet cable, it is important to consider the specific requirements of your network. For most home and small office networks, Cat 5e or Cat 6 cables are sufficient. However, if you require higher speeds or plan to future-proof your network, Cat 6a or Cat 7 cables may be worth considering.
Remember that the performance of your Ethernet cable is also dependent on other factors, such as the quality of connectors, the length of the cable, and the overall network setup. It is always recommended to consult with a professional or do thorough research to ensure you choose the right Ethernet cable for your specific needs.
Choosing the Right Ethernet Cable
When it comes to choosing the right Ethernet cable for your networking needs, there are several factors to consider. Here are some key points to keep in mind:
- Speed Requirements: Determine the speed requirements of your network. If you have basic internet usage, such as web browsing and email, a Cat 5e cable will suffice. However, if you need to support high-bandwidth activities like gaming and streaming, consider a Cat 6 or higher cable to ensure faster and more reliable connections.
- Cable Length: Consider the distance between your devices and the network switch or router. Ethernet cables have maximum length limitations, and exceeding these limits can result in signal degradation. If you need to cover longer distances, opt for a higher category cable that can maintain optimal speeds over greater lengths.
- Compatibility: Ensure that the Ethernet cable you choose is compatible with your devices and networking equipment. Most devices and routers are backward compatible, meaning they can work with lower category cables. However, using a higher category cable will future-proof your network and provide better performance as technology advances.
- Budget: Consider your budget when selecting an Ethernet cable. Higher category cables tend to be more expensive but offer better performance. Assess your needs and find a balance between cost and performance that fits your budget.
- Quality: Invest in high-quality Ethernet cables and connectors from reputable manufacturers. Poor-quality cables may not perform as advertised and can lead to connectivity issues. Make sure the cables meet industry standards and have good reviews from customers.
- Shielding: Depending on your specific requirements, you may need to consider shielded or unshielded Ethernet cables. Shielded cables provide additional protection against electromagnetic interference, making them suitable for environments with high levels of electrical noise or interference.
By considering these factors, you can choose the right Ethernet cable that meets the needs of your network. It’s always a good idea to consult with professionals or do thorough research to ensure you make an informed decision and achieve the optimal performance and reliability for your network setup.
Understanding Wire Color Codes
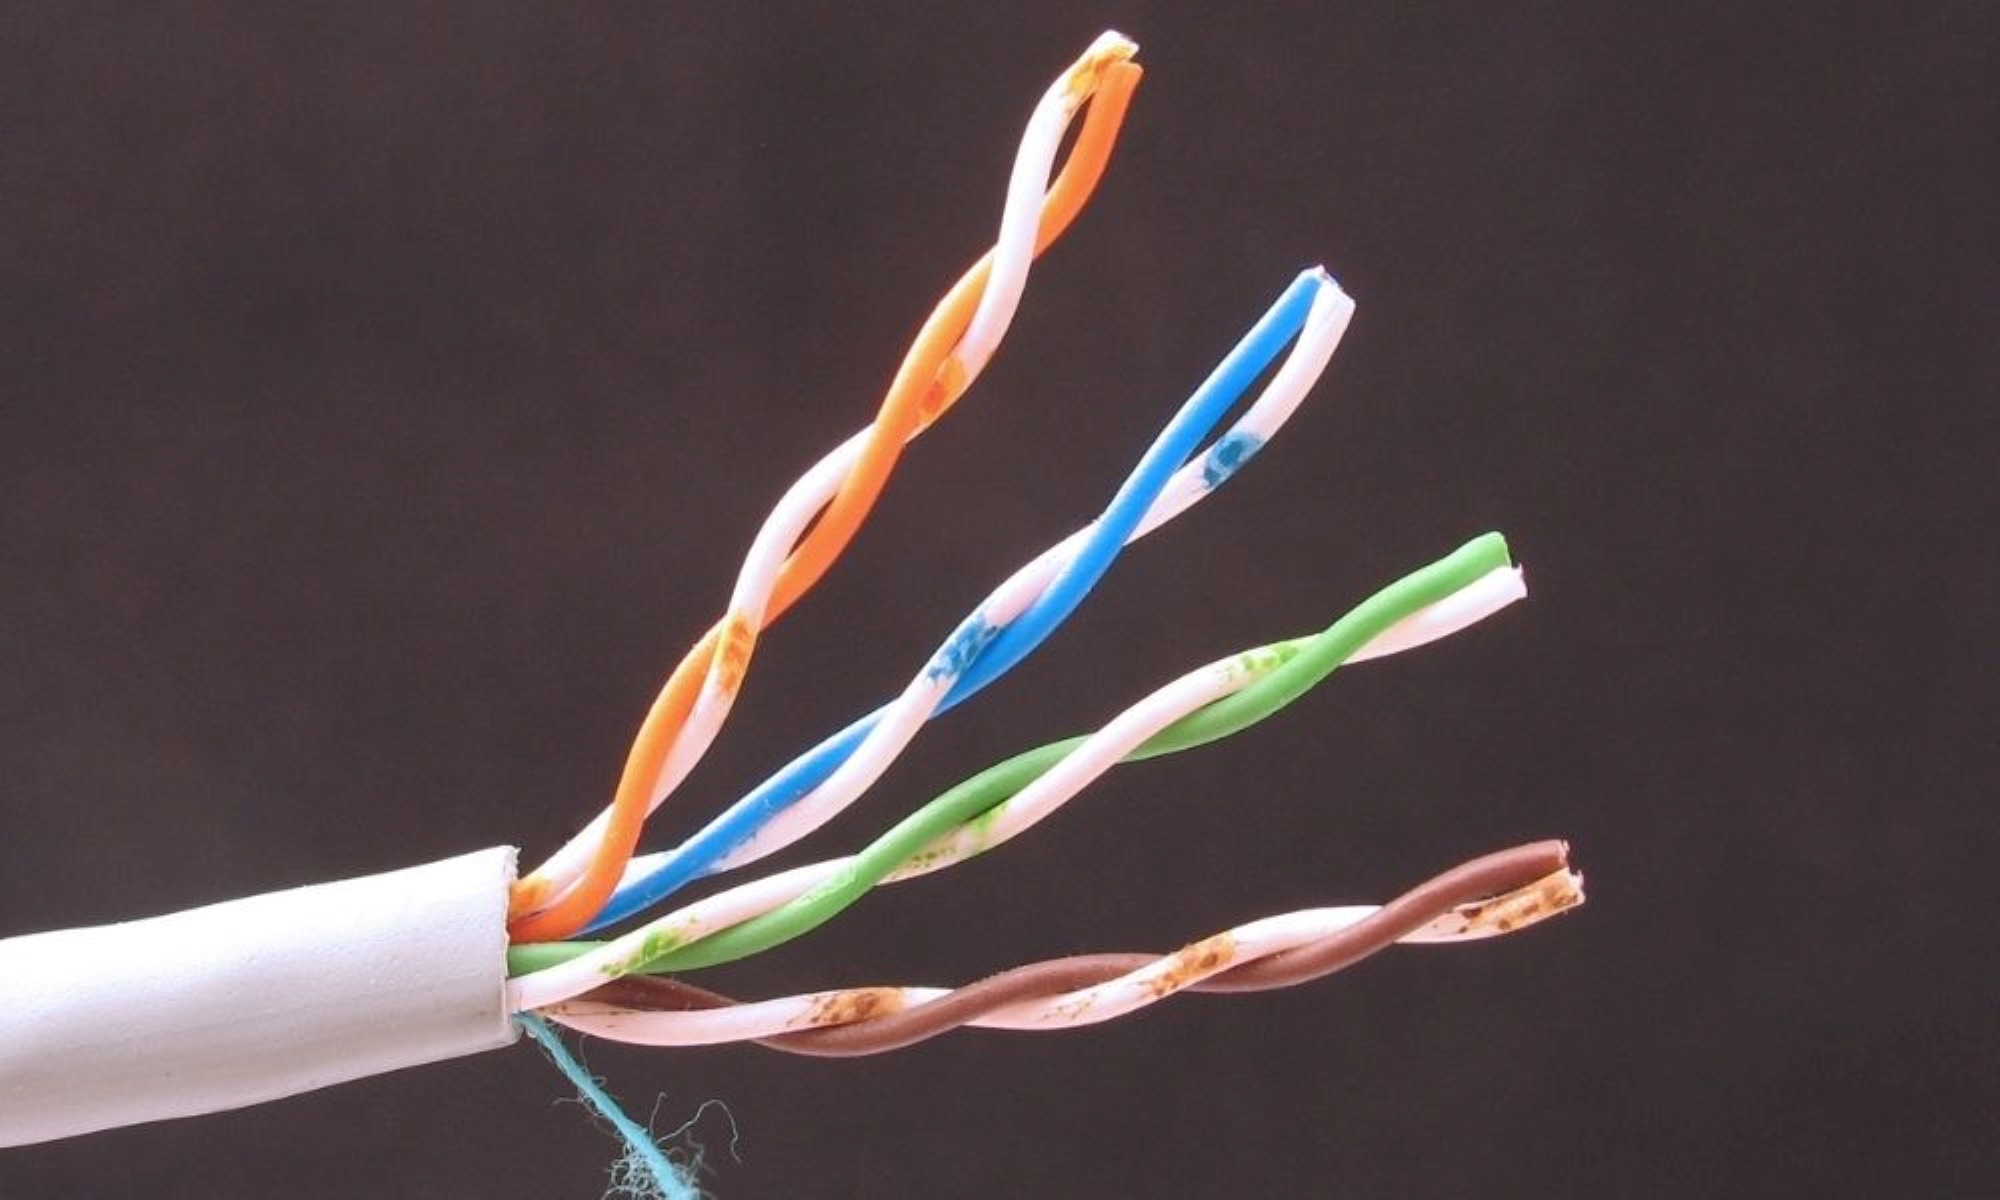
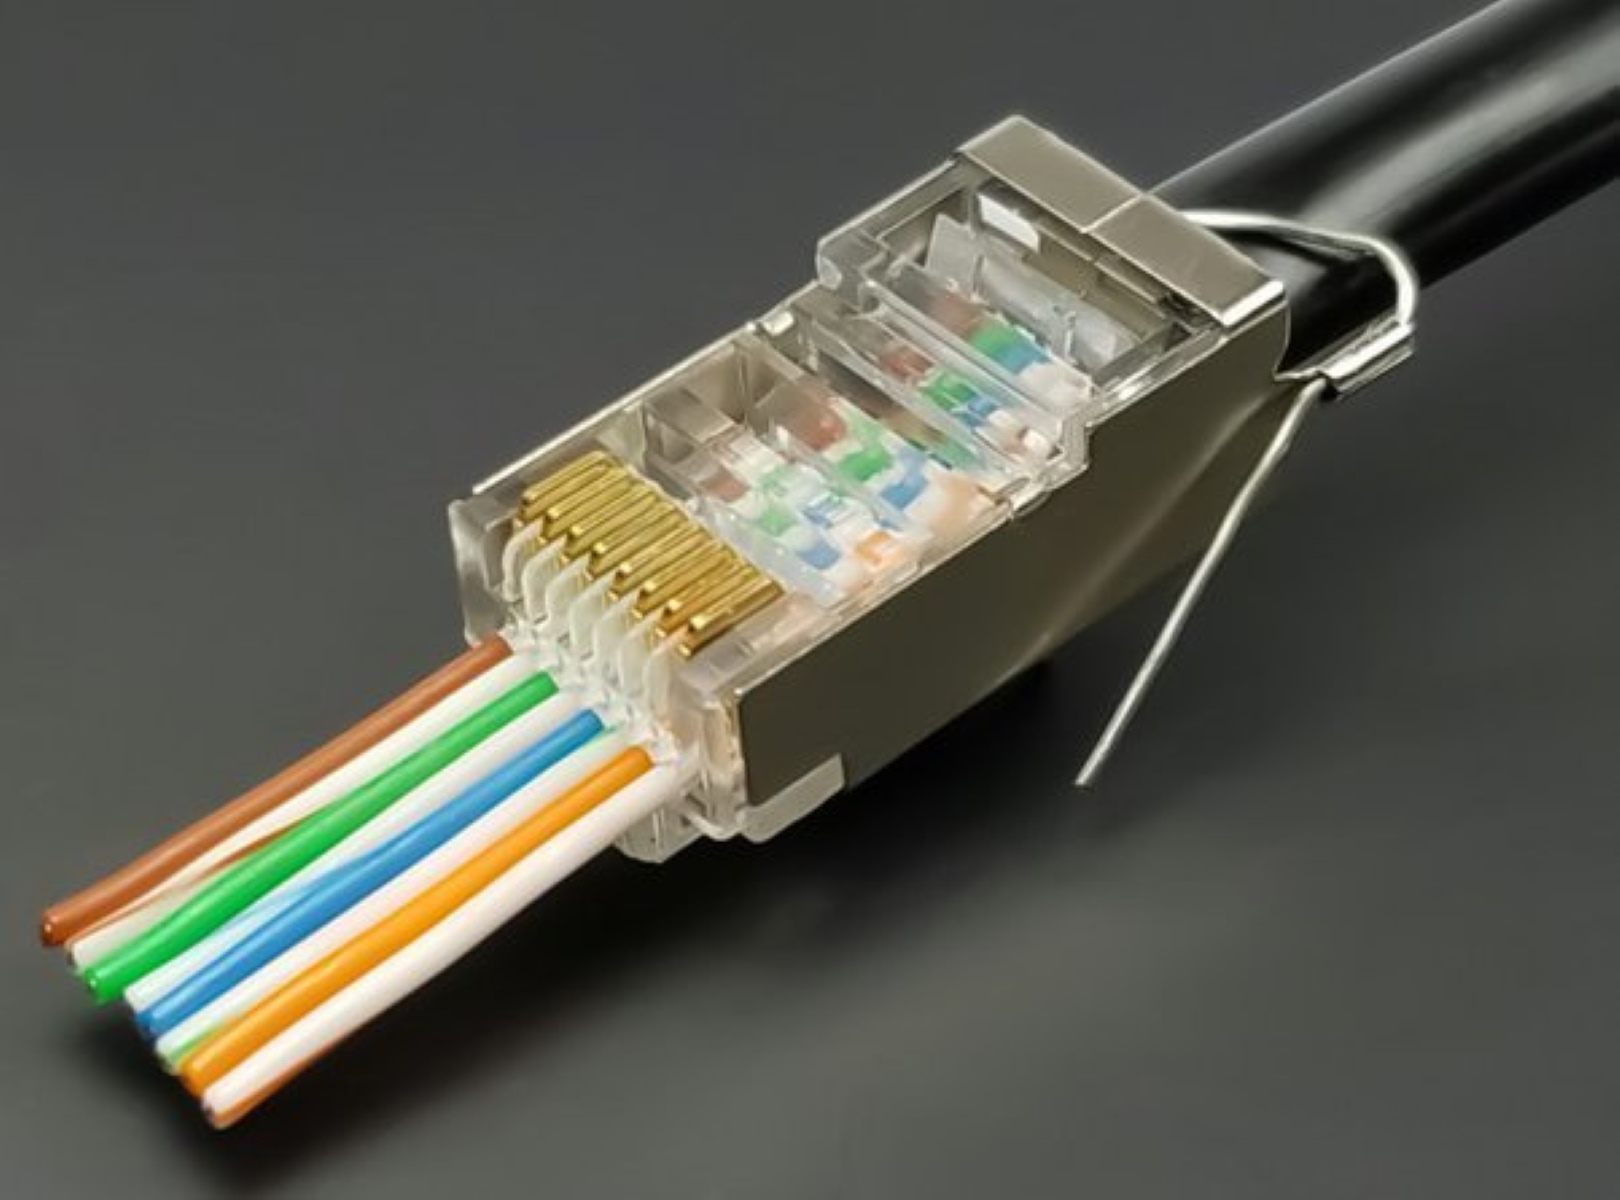
When wiring an Ethernet cable, it is important to understand the wire color codes used for proper connectivity. Ethernet cables typically consist of four pairs of twisted wires, each with a specific color code. Here is a breakdown of the wire color codes:
- Pairs 1 and 2: The wires in pair 1 are typically solid blue and striped blue, while the wires in pair 2 are solid orange and striped orange. These wire pairs are used for transmitting and receiving data signals.
- Pairs 3 and 6: Pair 3 consists of solid green and striped green wires, while pair 6 consists of solid brown and striped brown wires. These wire pairs are typically used for power over Ethernet (PoE) applications. PoE allows devices to receive power over the Ethernet cable, eliminating the need for separate power outlets.
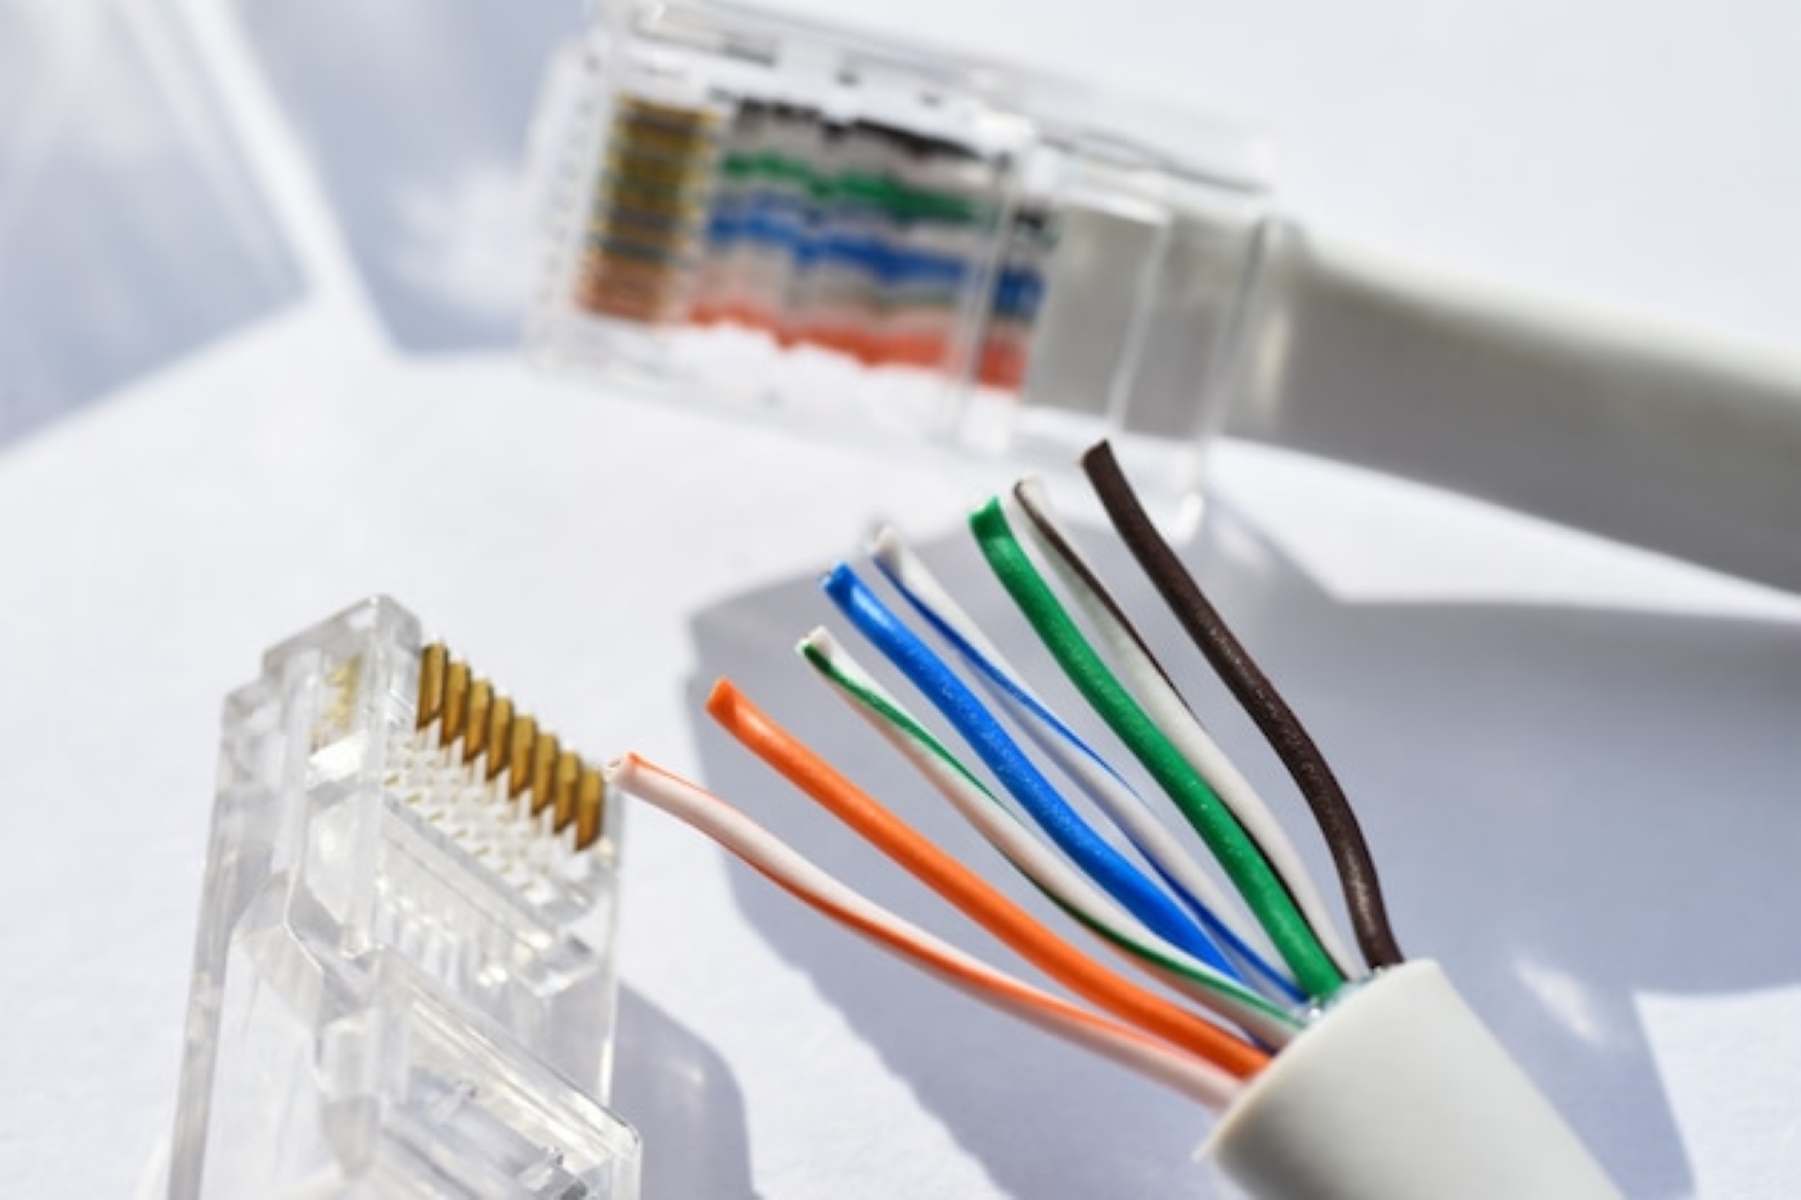
- Connector Pin Assignments: The wire color codes correspond to specific pins on the Ethernet connector. Pair 1 is connected to pins 1 and 2, pair 2 is connected to pins 3 and 6, pair 3 is connected to pins 4 and 5, and pair 6 is connected to pins 7 and 8. Properly aligning the wire pairs with the correct pins is crucial for establishing a successful connection.
When wiring an Ethernet cable, it is important to follow the T568A or T568B wiring standards. These standards provide consistency and ensure compatibility between different devices and networks. The T568B standard is the most commonly used and is recommended for new installations.
To wire the cable correctly, follow this pattern:
- Pair 1 (blue) wires: Connect the solid blue wire to pin 5 and the striped blue wire to pin 4.
- Pair 2 (orange) wires: Connect the solid orange wire to pin 2 and the striped orange wire to pin 1.
- Pair 3 (green) wires: Connect the solid green wire to pin 3 and the striped green wire to pin 6.
- Pair 6 (brown) wires: Connect the solid brown wire to pin 7 and the striped brown wire to pin 8.
It is important to note that consistency is key when wiring Ethernet cables. Both ends of the cable should be wired in the same manner to ensure proper connectivity. Incorrect wiring can result in connection issues or complete failure of the cable.
By understanding the wire color codes and following the appropriate standards, you can wire your Ethernet cable correctly and establish a reliable connection between devices.
Step-by-Step Guide to Wiring an Ethernet Cable
Wiring your own Ethernet cable may seem intimidating, but with the right tools and a step-by-step approach, it can be a straightforward process. Here is a guide to help you wire an Ethernet cable:
- Gather the tools and materials: Before you begin, make sure you have all the necessary tools and materials, including an Ethernet cable, wire cutters, RJ45 connectors, a crimping tool, and a cable tester (optional but recommended).
- Strip the outer jacket: Use wire cutters to strip approximately 1-2 inches of the outer jacket from the Ethernet cable, exposing the individual wire pairs.
- Straighten the pairs: Carefully separate and straighten the wire pairs, ensuring that none of the wires are tangled or twisted together.
- Arrange the wires in the correct order: Referencing the T568A or T568B wiring standards, arrange the wires in the correct order for the chosen standard. Typically, this involves aligning the wires in pairs, starting with pair 1 (blue and striped blue), followed by pair 2 (orange and striped orange), pair 3 (green and striped green), and finally pair 6 (brown and striped brown).
- Trim the wires to the proper length: Use wire cutters to trim the excess wire, ensuring that all wires are approximately the same length and properly aligned.
- Insert the wires into the RJ45 connector: Carefully insert the wires into the corresponding slots in the RJ45 connector, making sure each wire reaches the end of the connector. Double-check that the wire order matches the chosen wiring standard.
- Secure the RJ45 connector: Use a crimping tool to firmly crimp the RJ45 connector onto the Ethernet cable. Apply enough pressure to ensure a secure connection, but be careful not to damage the connector or wires.
- Repeat the process for the other end: Follow the same steps to wire and crimp the other end of the Ethernet cable, ensuring consistency in wire order and connector placement.
- Test the Ethernet cable: If you have a cable tester, use it to test the continuity and functionality of the Ethernet cable. This will help identify any wiring issues or faults that need to be addressed.
By following this step-by-step guide, you can confidently wire your own Ethernet cable. Remember to take your time, double-check the wire order, and ensure a secure connection with the RJ45 connectors. With a properly wired cable, you can enjoy fast and reliable data transfer between your devices.
Testing and Troubleshooting Your Ethernet Cable
After wiring your Ethernet cable, it is crucial to test it to ensure proper connectivity. Testing helps identify any potential issues and allows you to troubleshoot and fix them. Here are some steps to test and troubleshoot your Ethernet cable:
- Use a cable tester: If you have a cable tester, connect both ends of the Ethernet cable to the tester and run a continuity test. The tester will check if all the wires are properly connected and if there are any short circuits or open connections. If the cable passes the test, it indicates that the wiring is correct.
- Check for physical damage: Inspect the cable for any visible damage, such as cuts, frayed wires, or loose connectors. Even slight damage can affect the cable’s performance or cause connectivity issues. If you notice any damage, consider replacing the cable.
- Verify proper cable termination: Check both ends of the Ethernet cable to ensure that the RJ45 connectors are securely crimped and that the wires are properly inserted into the connector slots. A loose or improperly terminated connection can result in poor or no connectivity.
- Swap with a known-working cable: If possible, test the Ethernet cable by replacing it with a known-working cable. Connect the known-working cable between the same devices to see if the issue persists. This can help determine if the problem lies with the cable or with other components in the network.
- Test with different devices: Connect the Ethernet cable to different devices to determine if the issue is device-specific. Sometimes, compatibility issues between devices can cause connectivity problems. Testing the cable with different devices helps isolate the root cause.
- Check network settings: Ensure that the network settings on your devices are properly configured. Incorrect settings, such as using static IP addresses or conflicting network configurations, can cause connectivity issues. Verify that the devices are set to obtain IP addresses automatically and check for any conflicting settings.
- Reset network equipment: If you are experiencing connectivity issues, try resetting your network equipment, including routers, switches, and modems. Power cycling the equipment can resolve temporary glitches and refresh the network connection.
- Seek professional assistance: If you have exhausted troubleshooting methods and are still experiencing issues with your Ethernet cable, it may be beneficial to consult with a professional. Network technicians have the expertise and tools to diagnose and resolve complex connectivity problems.
By following these testing and troubleshooting steps, you can identify and resolve any issues with your Ethernet cable. Proper testing ensures that the cable is functioning correctly, providing reliable connectivity for your network-enabled devices. If you encounter persistent issues or are unsure of the problem, don’t hesitate to seek professional assistance for a thorough diagnosis and resolution.
Frequently Asked Questions about Ethernet Cable Wiring
Here are answers to some frequently asked questions about Ethernet cable wiring:
- Can I make my own Ethernet cable?
Yes, you can make your own Ethernet cable by following the appropriate wiring standards and using the necessary tools and materials. It allows you to customize the length of the cable to fit your specific needs. - Do I need special tools to wire an Ethernet cable?
While you can technically wire an Ethernet cable with basic tools like a utility knife and pliers, it is highly recommended to use specialized tools such as wire cutters, RJ45 connectors, and a crimping tool. These tools ensure proper termination and a reliable connection. - What is the difference between Cat 5e and Cat 6 cables?
Cat 5e cables and Cat 6 cables differ in terms of speed and bandwidth capabilities. Cat 5e cables can support speeds up to 1 Gbps (1,000 Mbps) with a bandwidth of 100 MHz, while Cat 6 cables can handle speeds up to 10 Gbps (10,000 Mbps) with a bandwidth of 250 MHz. Cat 6 cables are better suited for high-demand applications that require faster and more reliable connections. - Can I use a Cat 5e or Cat 6 cable for a PoE (Power over Ethernet) connection?
Yes, both Cat 5e and Cat 6 cables can be used for PoE connections. However, it is important to ensure that the cable is capable of handling the power requirements of the devices. Cat 6 cables are typically recommended for higher power PoE applications. - Can I use an Ethernet cable that is longer than the recommended maximum length?
It is generally not recommended to use an Ethernet cable longer than the recommended maximum length. Doing so can lead to signal degradation and reduced performance. If you need to cover longer distances, consider using a network switch or an Ethernet extender to maintain optimal signal quality. - What is the maximum length for an Ethernet cable?
The maximum length for an Ethernet cable is typically 100 meters (328 feet) for most wired Ethernet standards. Exceeding this length can result in data loss or poor network performance. - Can I use different wiring standards for Ethernet cables?
It is best to use consistent wiring standards for Ethernet cables to ensure compatibility and proper connectivity. The two most common wiring standards are T568A and T568B. It is recommended to choose one standard and use it consistently throughout your network. - Why is it important to test Ethernet cables?
Testing Ethernet cables helps identify wiring issues, faults, or connectivity problems. It ensures that the cable is properly wired, allowing for reliable data transmission and optimal network performance.
These are just a few of the many questions that arise when it comes to Ethernet cable wiring. If you have specific concerns or uncertainties, it is always advisable to consult with professionals or refer to reliable resources to ensure a successful and efficient installation.
Conclusion
Wiring an Ethernet cable may seem daunting at first, but with the right knowledge and tools, it is a manageable task that can greatly enhance your internet experience. By wiring your Ethernet cable, you can enjoy increased speed, improved security, reduced latency, and consistent connections for multiple devices.
Understanding Ethernet cable categories is essential for choosing the right cable for your specific needs. Factors such as speed requirements, cable length, compatibility, budget, and quality should be considered when making your selection. Following the appropriate wire color codes and using the correct wiring standards ensure proper connectivity.
By following a step-by-step guide, you can wire your own Ethernet cable confidently. Remember to test the cable using a cable tester, check for any physical damage, and verify proper cable termination. Troubleshooting techniques such as swapping cables, testing with different devices, and resetting network equipment can help address connectivity issues.
Having answers to frequently asked questions about Ethernet cable wiring can further assist you in understanding the process and addressing common concerns you may have.
With the knowledge and skills gained from this guide, you are well-equipped to wire your Ethernet cable and enjoy a seamless and reliable network connection. So go ahead, give it a try, and experience the benefits of wired connectivity in your home or office.