Introduction
Welcome to this guide on how to use an HDMI Audio Extractor. In the ever-evolving world of technology, audio plays a crucial role in enhancing our entertainment experiences. Whether you are watching a movie, playing video games, or streaming music, having high-quality audio is essential. That’s where an HDMI Audio Extractor comes into play. In this article, we will explore what an HDMI Audio Extractor is, why you might need one, how to choose the right device, and a step-by-step guide on how to use it effectively.
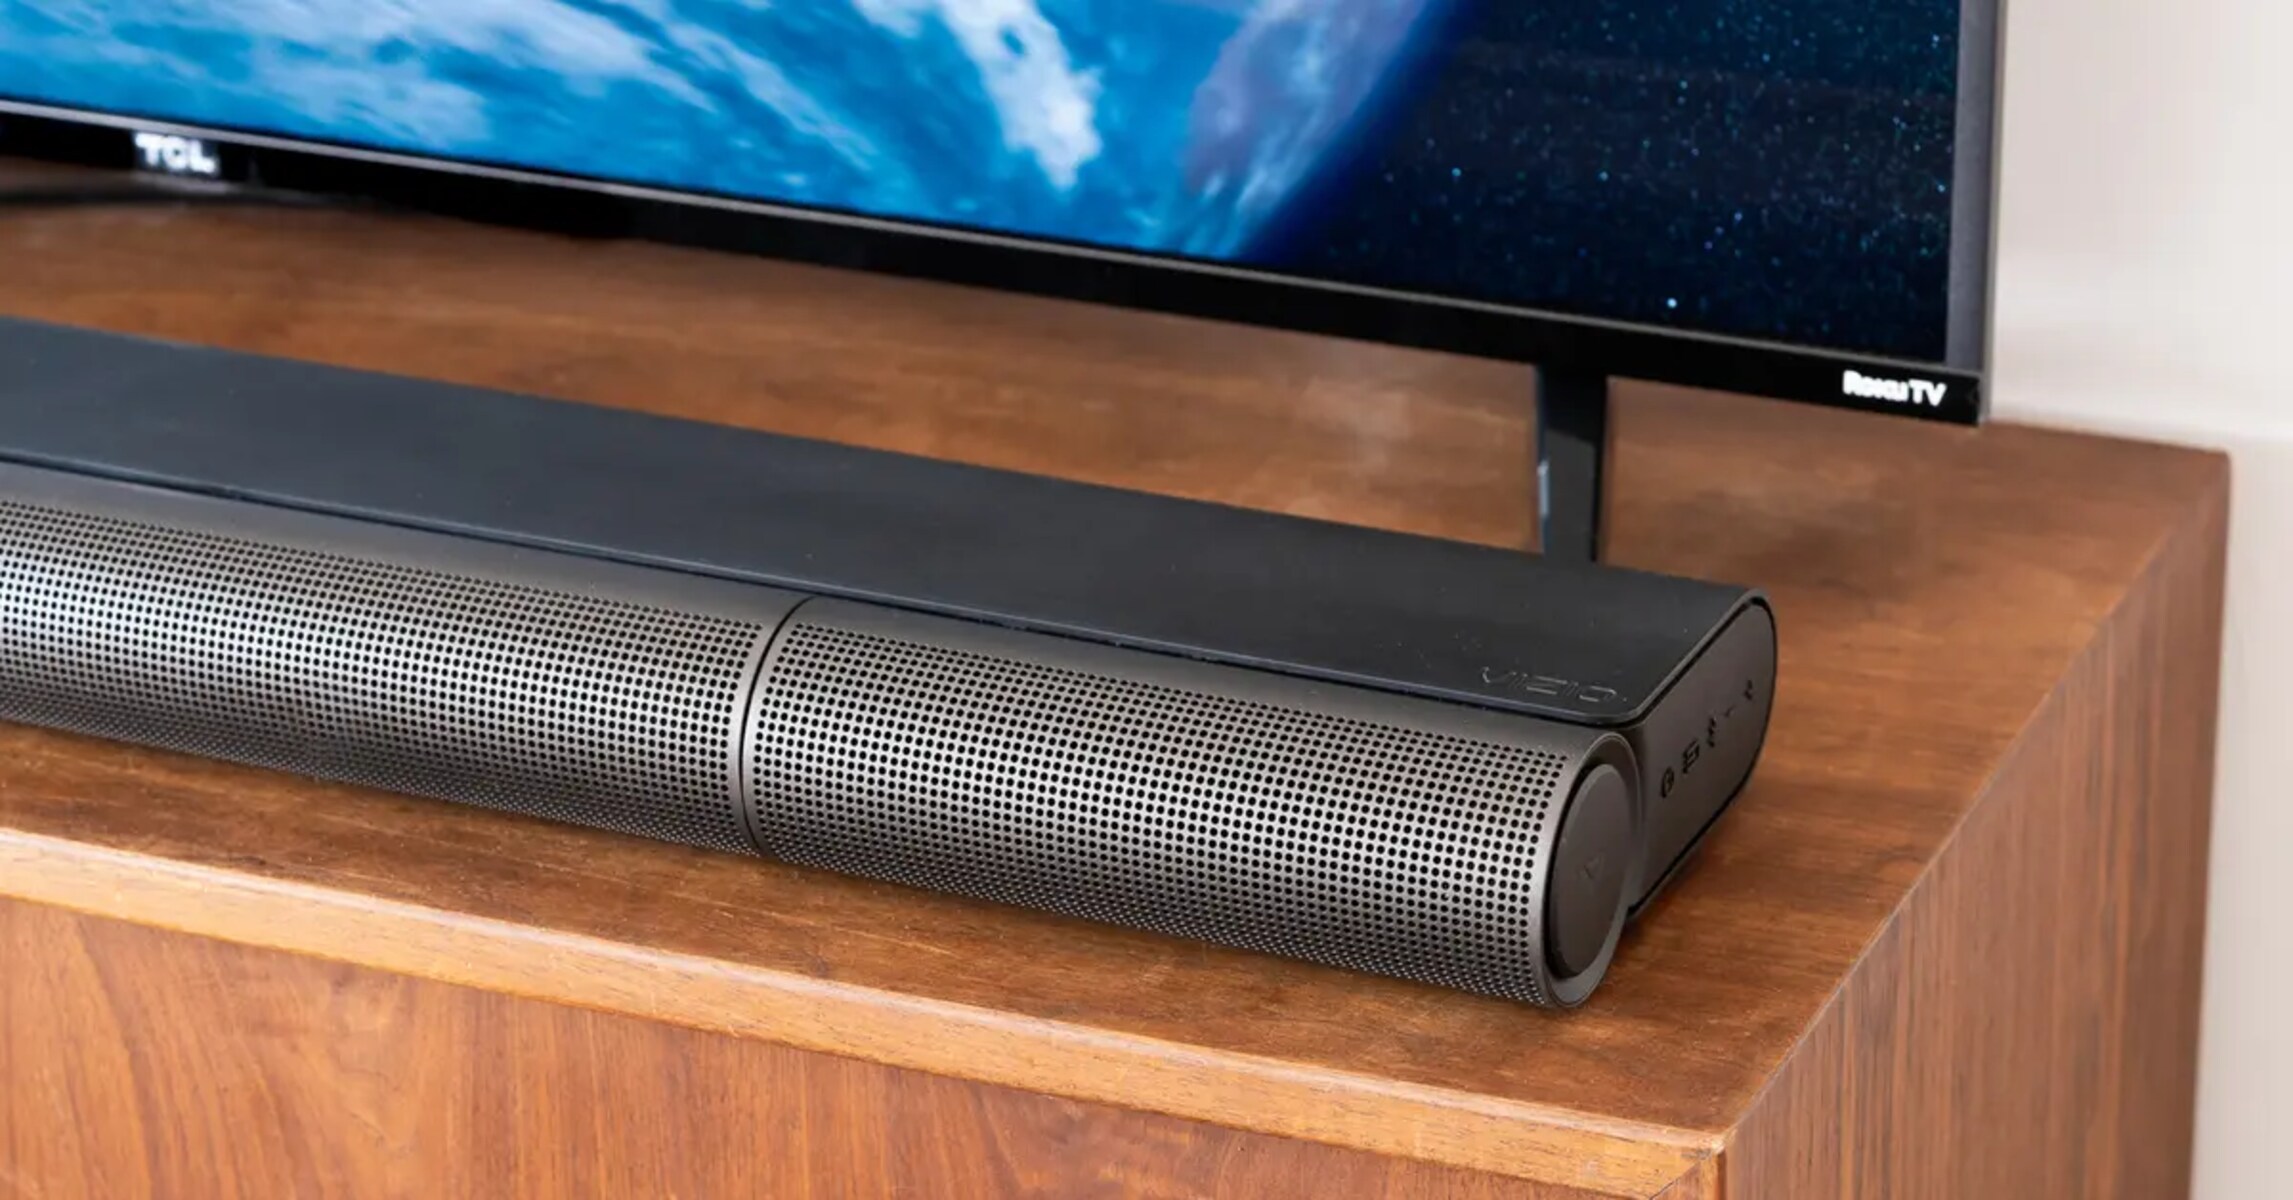
An HDMI Audio Extractor is a device that allows you to separate the audio signal from an HDMI source and route it to an external audio system, such as a soundbar, speaker system, or headphones. This can be particularly useful when your HDMI source, such as a gaming console or streaming device, is connected to a display or TV that may not have the best audio output capabilities.
So, why might you need an HDMI Audio Extractor? Well, many displays, especially older models, may have limited audio output options or poor sound quality. By using an HDMI Audio Extractor, you can bypass the display’s built-in speakers and connect your audio to a more powerful external audio system for a richer and more immersive audio experience.
Choosing the right HDMI Audio Extractor can be a daunting task with the multitude of options available on the market. Factors such as audio quality, compatibility, number of input/output ports, and ease of use should all be considered. We will delve into these factors in detail to help you make an informed decision when selecting the best HDMI Audio Extractor for your needs.
Now that we have a basic understanding of what an HDMI Audio Extractor is and why it’s important, let’s dive into a step-by-step guide on how to use this handy device. Whether you are a tech-savvy individual or a beginner, this guide will walk you through the process of connecting your devices, setting up the HDMI Audio Extractor, adjusting audio settings, and troubleshooting common issues along the way.
So, if you’re ready to take your audio experience to the next level, continue reading to unlock the full potential of your HDMI-enabled devices with an HDMI Audio Extractor.
What is an HDMI Audio Extractor?
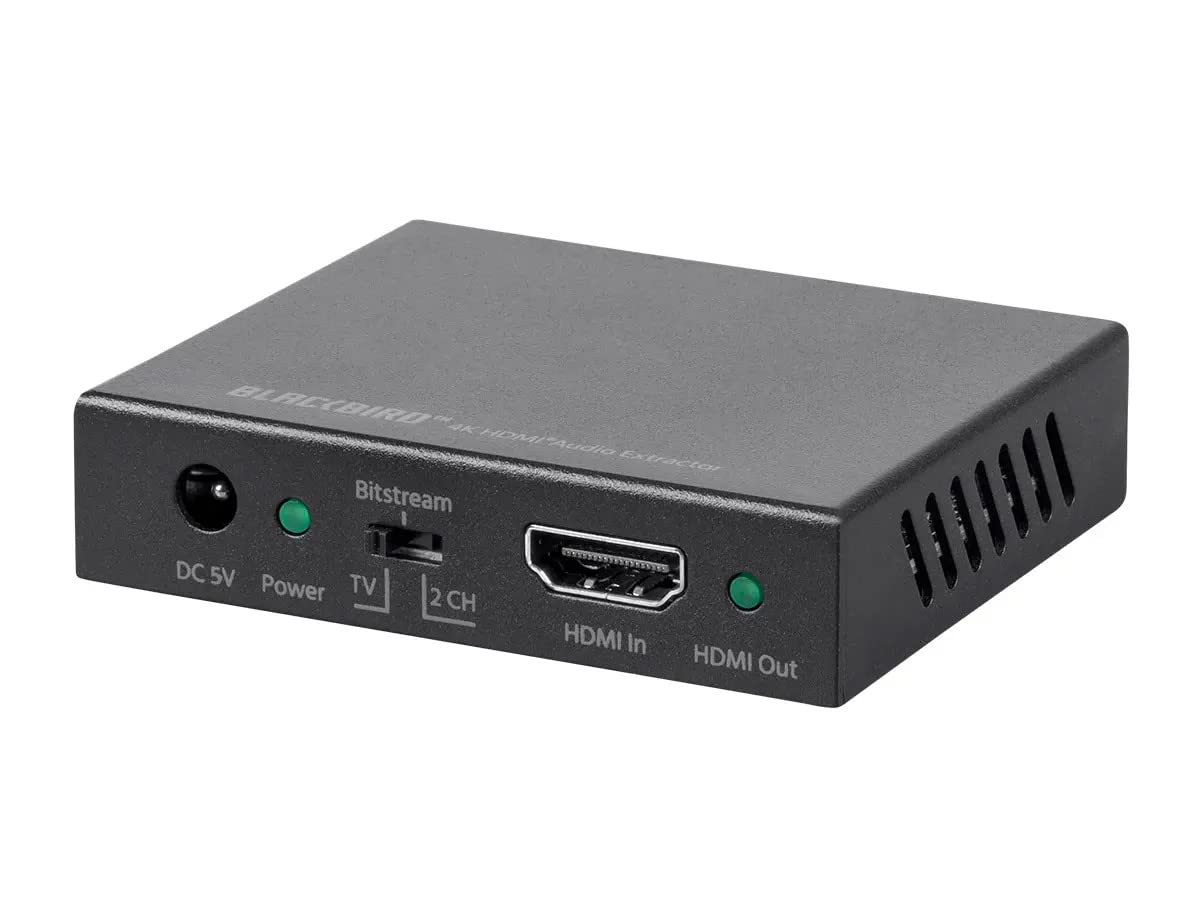
An HDMI Audio Extractor is a device that allows you to extract and separate the audio signal from an HDMI source and route it to an external audio system. HDMI stands for High-Definition Multimedia Interface, and it is the standard for transmitting high-quality audio and video signals over a single cable. However, many displays, such as TVs or monitors, may have limited audio output options or poor sound quality. That’s where an HDMI Audio Extractor comes in handy.
When you connect an HDMI source, such as a gaming console, Blu-ray player, streaming device, or set-top box, to your display, the audio is typically sent and played through the built-in speakers of the display. While this may suffice for casual viewing, it may not provide the immersive audio experience you desire.
An HDMI Audio Extractor allows you to bypass the display’s built-in speakers and extract the audio signal, sending it to an external audio system of your choice. This could be a soundbar, speaker system, headphones, or even a home theater system. By doing so, you can enjoy high-quality audio that complements the stunning visuals provided by your HDMI source.
One important feature of an HDMI Audio Extractor is the ability to support various audio formats, including Dolby Digital, DTS, and PCM. This ensures that you can enjoy surround sound or high-resolution audio formats, depending on your audio system’s capabilities.
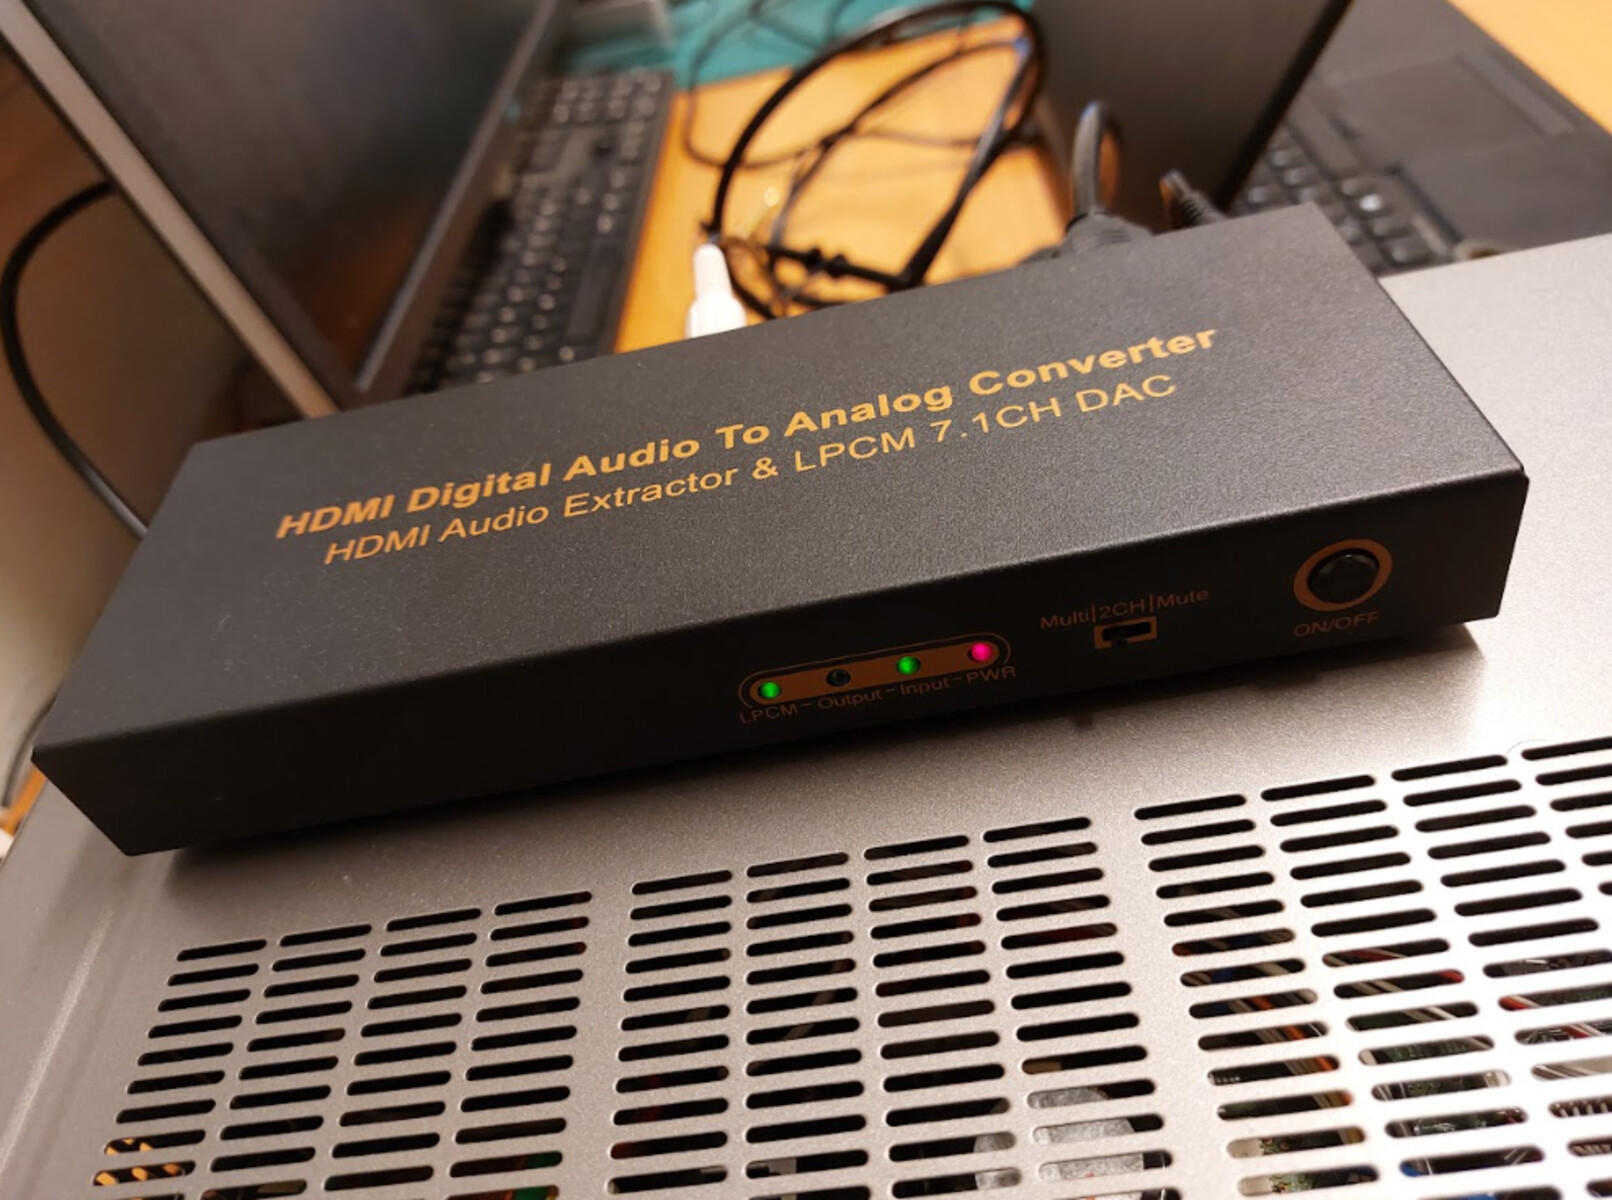
In addition to extracting the audio signal, some HDMI Audio Extractors also have the functionality to convert the digital audio signal to analog format. This can be useful if you have older audio systems that do not have HDMI inputs or if you want to connect your HDMI source to non-HDMI devices, such as traditional amplifiers or older speakers.
Overall, an HDMI Audio Extractor is a versatile device that allows you to enhance your audio experience by separating the audio signal from your HDMI source and connecting it to an external audio system. Whether you want to enjoy immersive gaming, watch movies with cinematic sound, or listen to your favorite music in high quality, an HDMI Audio Extractor can be a valuable addition to your entertainment setup.
Why do you need an HDMI Audio Extractor?
There are several reasons why you might need an HDMI Audio Extractor to enhance your audio experience. Let’s explore some of the key advantages and scenarios where an HDMI Audio Extractor can be beneficial.
1. Improved Audio Quality: Many displays, particularly older models, may have limited audio output options or subpar sound quality. By using an HDMI Audio Extractor, you can bypass the display’s built-in speakers and connect your audio to a more powerful external audio system. This allows for a richer, more immersive audio experience, whether you’re watching movies, playing video games, or listening to music.
2. Compatibility: HDMI is the standard interface for audio and video transmission, but not all devices support different audio formats or output options. An HDMI Audio Extractor ensures compatibility by allowing you to connect various HDMI sources, such as gaming consoles, Blu-ray players, or set-top boxes, to a wide range of audio systems, regardless of their connection types or supported formats.
3. Multiple Audio Outputs: With an HDMI Audio Extractor, you have the flexibility to connect your HDMI source to multiple audio devices simultaneously. For example, you can send the audio signal to a soundbar or a speaker system for immersive audio in your living room while also routing it to headphones for private listening.
4. Surround Sound Experience: If you have a surround sound system or home theater setup, an HDMI Audio Extractor is essential for delivering the full potential of immersive audio formats, such as Dolby Digital or DTS. It allows you to extract and transmit the audio signal in its original format, ensuring that you can enjoy the cinematic experience with dynamic sound effects and precise audio positioning.
5. Legacy Device Support: If you have older audio equipment that does not have HDMI inputs, an HDMI Audio Extractor can bridge the gap. It can convert the digital HDMI audio signal to analog format, making it compatible with non-HDMI devices, such as amplifiers, speakers, or older audio systems. This way, you can still utilize your existing audio equipment while enjoying the convenience and benefits of HDMI connectivity.
In summary, an HDMI Audio Extractor is a valuable tool for enhancing your audio setup. It improves the audio quality, provides compatibility across devices, offers multiple audio outputs, supports surround sound formats, and enables connectivity with legacy audio equipment. By incorporating an HDMI Audio Extractor into your entertainment system, you can elevate your audio experience and enjoy immersive, high-quality sound that complements your visual content.
How to choose the right HDMI Audio Extractor?
When it comes to selecting the right HDMI Audio Extractor for your needs, there are a few key factors to consider. Taking these factors into account will ensure that you choose a device that is compatible with your existing setup and provides the features you require. Here are some essential factors to consider when choosing an HDMI Audio Extractor:
1. Audio Format Support: Make sure the HDMI Audio Extractor supports the audio formats you need. The most common formats are Dolby Digital and DTS, but you may also want to consider options that support higher-quality formats like Dolby Atmos or DTS:X if you have a compatible audio system. Ensure that the extractor can decode and pass through these formats without any loss in audio quality.
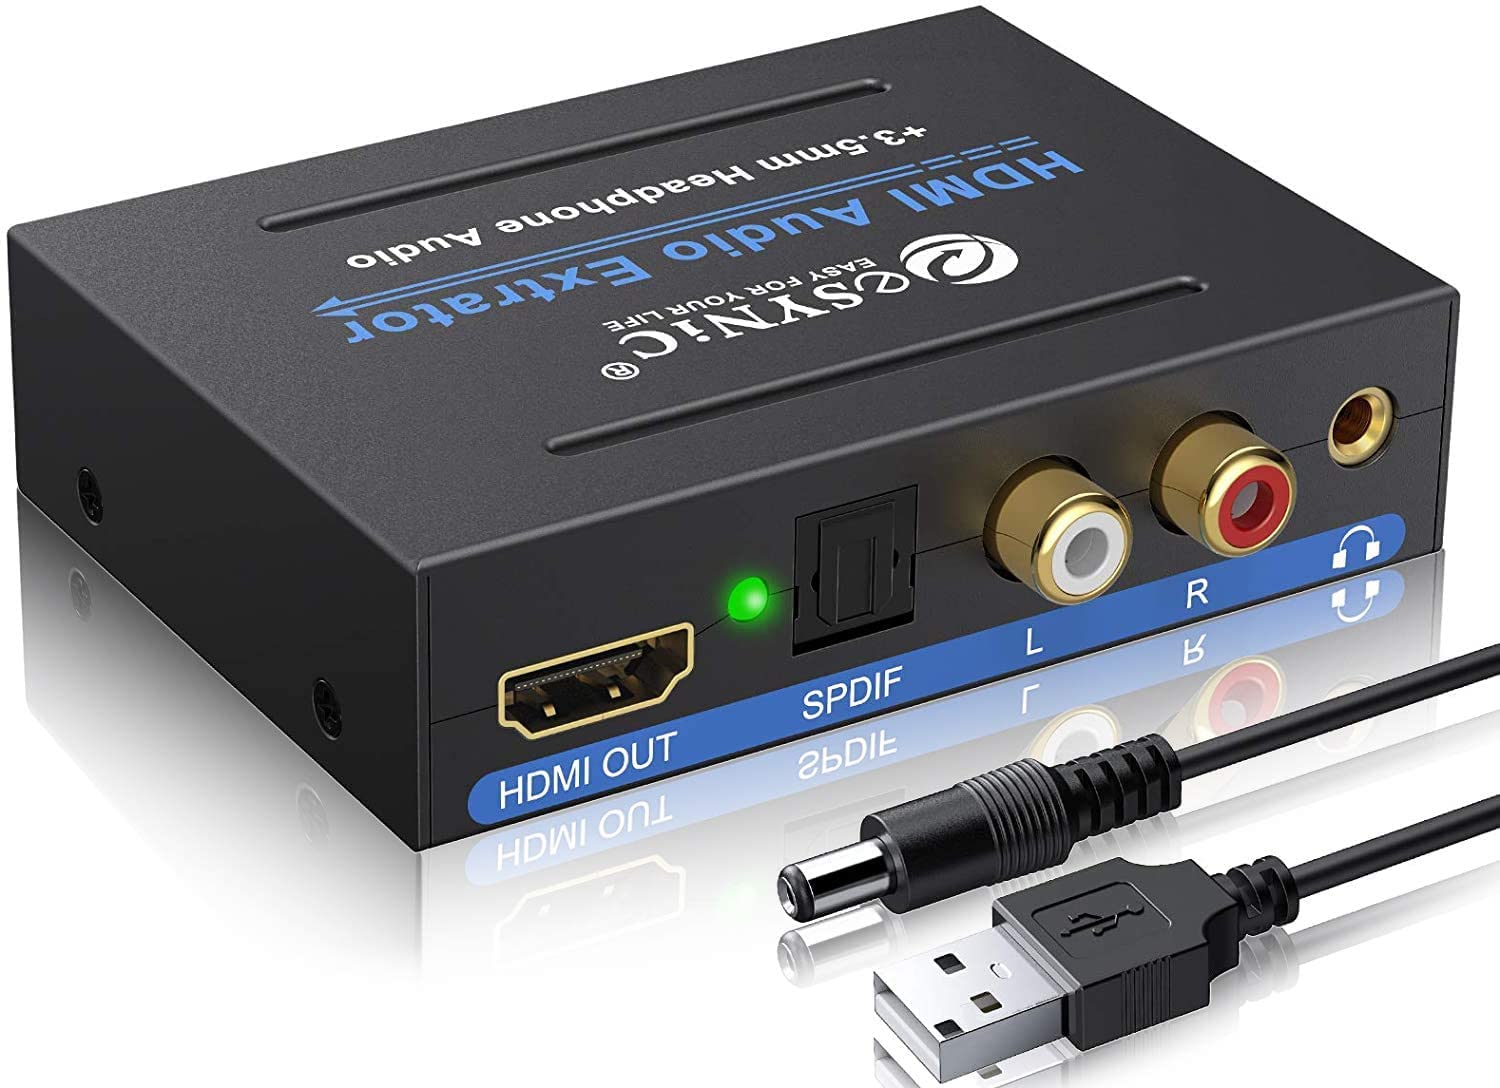
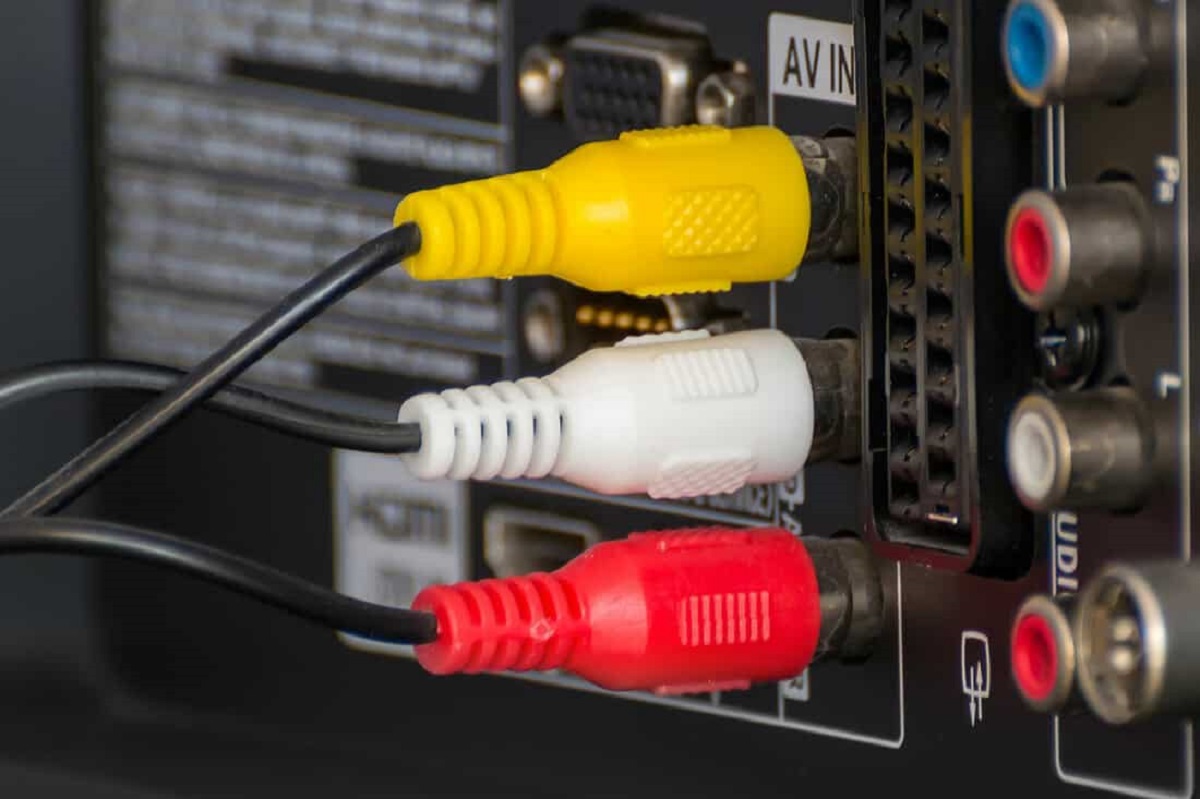
2. Input and Output Ports: Consider the number and type of input and output ports on the HDMI Audio Extractor. Ensure that it has enough HDMI inputs to accommodate all your connected devices, such as gaming consoles, Blu-ray players, or streaming devices. Additionally, check if it has the desired output options for connecting to your audio system, such as optical, RCA, or 3.5mm audio jacks, depending on the inputs supported by your audio equipment.
3. HDMI Version and HDCP Compliance: It’s important to check if the HDMI Audio Extractor supports the HDMI version used by your devices. Most modern devices use HDMI 2.0 or higher for better video and audio quality. Additionally, verify that the extractor is HDCP (High-bandwidth Digital Content Protection) compliant, as this ensures compatibility with protected content from sources like Blu-ray discs or streaming services.
4. Ease of Use and Setup: Look for an HDMI Audio Extractor that is user-friendly and straightforward to set up. Consider options with clear and intuitive on-screen menus or physical controls for adjusting audio settings. Also, check if it comes with a remote control for convenient operation from a distance.
5. Build Quality and Durability: Pay attention to the build quality of the HDMI Audio Extractor. It should be sturdy and well-constructed to withstand regular use. Look for devices with reputable brands or positive customer reviews that indicate reliability and durability.
6. Additional Features: Some HDMI Audio Extractors may offer additional features that can enhance your audio experience. For example, some extractors have audio delay adjustment options to sync the audio with the video, especially useful when connecting to a display with delayed audio output. Others may offer volume control or audio equalizer settings to fine-tune the sound according to your preferences.
By considering these factors, you can find an HDMI Audio Extractor that best suits your needs and integrates seamlessly into your audio setup. Take your time to research different models, read customer reviews, and compare specifications to make an informed decision.
Step-by-Step Guide on Using an HDMI Audio Extractor
Using an HDMI Audio Extractor is a straightforward process that allows you to enhance your audio experience by connecting your HDMI source to an external audio system. Follow this step-by-step guide to get started:
Step 1: Gather your equipment
Make sure you have all the necessary equipment, including the HDMI Audio Extractor, HDMI cables, and any additional audio cables for your audio system, such as optical or RCA cables.
Step 2: Identify your HDMI source
Locate the HDMI source that you want to connect to the HDMI Audio Extractor, such as a gaming console, Blu-ray player, or streaming device. Take note of the HDMI port that the source is currently connected to on your display or TV.
Step 3: Connect the HDMI cables
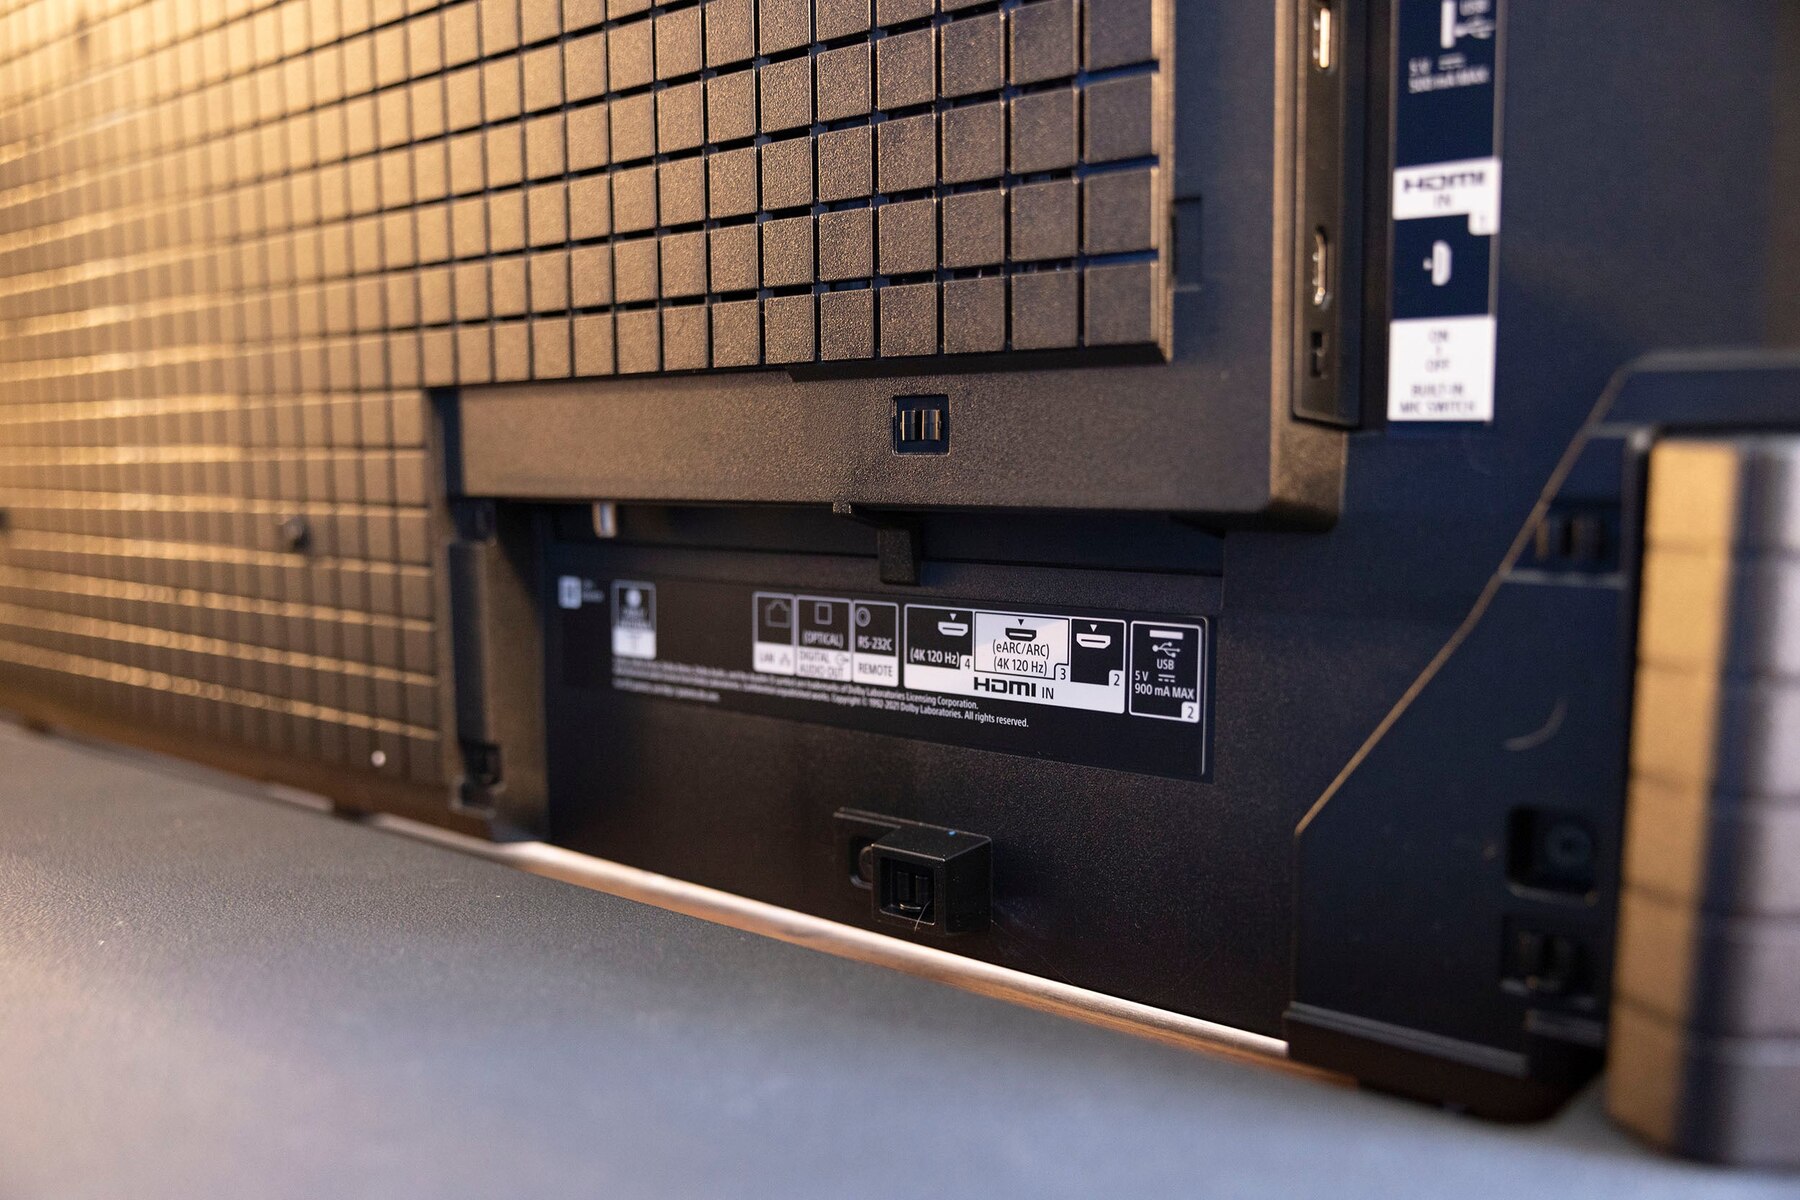
Take one end of an HDMI cable and connect it to the HDMI output port of your HDMI source device. Then, connect the other end of the HDMI cable to the HDMI input port on the HDMI Audio Extractor.
Step 4: Connect the audio cables
Depending on the audio output options of your HDMI Audio Extractor and your audio system, connect the appropriate audio cables. For example, if you are using an optical audio connection, connect one end of the optical cable to the optical output port of the HDMI Audio Extractor and the other end to the optical input of your audio system. If you are using RCA cables, connect the corresponding red and white cables to the respective audio output ports of the HDMI Audio Extractor and the audio input of your audio system.
Step 5: Connect the HDMI output
Take another HDMI cable and connect one end to the HDMI output port of the HDMI Audio Extractor. Then, connect the other end to the HDMI input port of your display or TV. This will ensure that both audio and video signals are transmitted to your display.
Step 6: Power on the devices
Turn on your HDMI source device, HDMI Audio Extractor, and your audio system. Make sure all devices are powered on and properly connected.
Step 7: Adjust the audio settings
Using the remote control or on-screen menu of the HDMI Audio Extractor, navigate to the audio settings. Here, you can choose the desired audio output format, adjust volume levels, and configure any additional audio settings the device offers.
Step 8: Test the audio
Play audio from your HDMI source device and test if the sound is properly coming through your connected audio system. Adjust the audio settings as needed to achieve the desired sound quality and volume.
Step 9: Troubleshoot if necessary
If you encounter any issues, such as no audio or distorted sound, double-check all your connections, ensure that your audio system is set to the correct input source, and verify that the audio settings on the HDMI Audio Extractor are properly configured.
Step 10: Enjoy enhanced audio
With your HDMI Audio Extractor properly set up and connected, you can now enjoy enhanced audio quality through your external audio system. Sit back, relax, and immerse yourself in the immersive sound experience.
By following these steps, you can maximize the potential of your HDMI Audio Extractor and elevate your audio experience to new heights. Experiment with different audio settings and configurations to find the setup that best suits your preferences and audio system capabilities.
Connecting your devices
Connecting your devices properly is an essential step in using an HDMI Audio Extractor to enhance your audio experience. Follow these guidelines to ensure a seamless connection between your HDMI source, HDMI Audio Extractor, and external audio system:
1. Identify the HDMI source:
Locate the HDMI source device that you want to connect to the HDMI Audio Extractor. This can be a gaming console, Blu-ray player, streaming device, or any other HDMI-enabled device.
2. Check the HDMI ports:
Identify the HDMI port on your HDMI source device. Take note of the specific port used, as you will need to match it with the corresponding input on the HDMI Audio Extractor.
3. Connect the HDMI cables:
Take one end of an HDMI cable and plug it into the HDMI output port of your HDMI source device. Then, connect the other end of the HDMI cable to the HDMI input port of the HDMI Audio Extractor. Ensure that the cables are securely inserted into the respective ports.
4. Connect the audio cables:
Based on your audio system’s input options and the output ports available on the HDMI Audio Extractor, connect the appropriate audio cables. This can be optical, RCA, or 3.5mm audio cables. Connect one end of the audio cable to the audio output port of the HDMI Audio Extractor and the other end to the corresponding input port on your audio system.
5. Connect the HDMI output:
Take another HDMI cable and plug one end into the HDMI output port of the HDMI Audio Extractor. Connect the other end to the HDMI input port of your display, such as a TV or monitor. This ensures that both audio and video signals are transmitted to your display.
6. Power on the devices:
Make sure all connected devices, including the HDMI source device, HDMI Audio Extractor, audio system, and display, are powered on. Check that they are receiving the required power supply and are properly connected to electrical outlets.
7. Set the input source:
On your display, select the HDMI input source that corresponds to the HDMI port connected to the HDMI Audio Extractor. This allows the display to receive the audio and video signals from the HDMI source device through the HDMI Audio Extractor.
8. Adjust audio settings:
Depending on the capabilities of your HDMI Audio Extractor, you may need to adjust the audio settings. Use either the remote control or the on-screen menu of the HDMI Audio Extractor to navigate through the settings and configure options such as audio format, volume levels, or any additional audio enhancements.
9. Test the audio:
Play audio content on your HDMI source device and ensure that the sound is properly coming through your connected audio system. Check if the volume levels are satisfactory and make any necessary adjustments using the audio settings on the HDMI Audio Extractor or your audio system.
10. Troubleshoot if necessary:
If you encounter any issues, such as no audio or distorted sound, check all the connections and settings once again. Ensure that the HDMI cables, audio cables, and power cables are securely plugged in. Also, verify that the input and output settings on the HDMI Audio Extractor and your audio system are correctly configured.
By following these steps, you can successfully connect your devices, including the HDMI source, HDMI Audio Extractor, and external audio system. Take your time to ensure that each connection is secure and that the audio settings are properly adjusted. Once everything is set up correctly, you can sit back, relax, and enjoy improved audio quality through your chosen audio system.
Setting up the HDMI Audio Extractor
Setting up the HDMI Audio Extractor is a crucial step in making sure that it functions properly and delivers the desired audio output. Follow these steps to ensure a successful setup of your HDMI Audio Extractor:
1. Unpack and inspect:
Begin by unpacking your HDMI Audio Extractor and examining its contents. Ensure that you have all the necessary components, including the device itself, power adapter, remote control, and any accompanying audio cables.
2. Choose a suitable location:
Select a suitable location for your HDMI Audio Extractor near your audio system or AV setup. Ensure that the device is easily accessible for making connections and adjusting settings if needed.
3. Connect power:
Connect the power adapter to the HDMI Audio Extractor. Plug the adapter into a power outlet, ensuring that the voltage matches the device’s requirements. Once connected, the HDMI Audio Extractor should power on and display a power indicator light.
4. Connect HDMI cables:
Take an HDMI cable and connect one end to the HDMI output port on the HDMI Audio Extractor. Connect the other end to the HDMI input port on your display, such as a TV or monitor. This connection ensures that the audio and video signals can pass through the HDMI Audio Extractor to your display device.
5. Connect audio cables:
Depending on your audio setup and available ports on the HDMI Audio Extractor, connect the appropriate audio cables. This can include optical, RCA, or 3.5mm audio cables. Connect one end of the audio cable to the audio output ports on the HDMI Audio Extractor and the other end to the corresponding input ports on your audio system or speakers.
6. Adjust audio settings (if necessary):
Using either the remote control or the on-screen menu of the HDMI Audio Extractor, navigate to the audio settings. Adjust the audio output format, volume levels, and any additional audio settings based on your preferences and audio system capabilities. Take note of any specific instructions provided in the device’s user manual.
7. Test the audio:
Play audio content through your HDMI source device and ensure that the sound is coming through your audio system as expected. Adjust the volume levels using the controls on the HDMI Audio Extractor or your audio system if needed. Pay attention to any potential issues like audio delay or distortion, and make necessary adjustments to improve the audio quality.
8. Troubleshoot if necessary:
If you encounter any issues, such as no audio or poor sound quality, double-check all the connections made to the HDMI Audio Extractor, the display, and your audio system. Ensure that all cables are securely plugged in and that the appropriate input and output settings are selected. Refer to the device’s user manual or troubleshooting guide for further assistance.
9. Enjoy enhanced audio:
Once the HDMI Audio Extractor is set up and functioning correctly, you can enjoy enhanced audio quality. Sit back and enjoy movies, music, or gaming with improved sound through your external audio system.
By following these steps, you can effectively set up your HDMI Audio Extractor and ensure that it is properly connected to your display and audio system. Take your time to verify all the connections and adjust the audio settings to optimize your audio experience. With the HDMI Audio Extractor in place, you can enjoy high-quality audio that complements your visual content.
Adjusting the audio settings
Adjusting the audio settings on your HDMI Audio Extractor is an important step to ensure optimal sound quality and compatibility with your audio system. By customizing the audio settings, you can fine-tune the output to match your preferences and take full advantage of the capabilities of your audio equipment. Here are the key aspects to consider when adjusting the audio settings:
1. Audio Output Format:
Check the available audio output formats on your HDMI Audio Extractor. Most devices support common formats like stereo, Dolby Digital, and DTS, but you may also have additional options like Dolby Atmos or PCM. Choose the format that best matches your audio system’s capabilities and the content you will be playing.
2. Volume Control:
Adjusting the volume level is essential to ensure balanced and enjoyable audio playback. Some HDMI Audio Extractors have built-in volume controls that allow you to adjust the output volume directly from the device. Alternatively, you may need to adjust the volume using the controls on your audio system or speakers.
3. Audio Delay:
If you experience a mismatch between the audio and video, you may need to adjust the audio delay setting. This can happen when there is a delay in the audio signal reaching your audio system. Use the audio delay option on your HDMI Audio Extractor or in your display settings to synchronize the audio and video playback for optimal viewing experience.
4. Audio Equalizer:
Some HDMI Audio Extractors offer an equalizer feature that allows you to fine-tune the audio frequencies to your liking. This can be useful for adjusting bass levels, treble, or other sound characteristics to achieve a personalized audio experience. Experiment with the equalizer settings to find the balance that best suits your preferences.
5. Additional Audio Enhancements:
Depending on the model of your HDMI Audio Extractor, there may be additional audio enhancements available. These enhancements could include options such as virtual surround sound, dialogue enhancement, or dynamic range control. Explore the available options and adjust them according to your listening preferences and the content you are playing.
6. Test with Different Content:
To ensure that the audio settings are adjusted optimally, test them with different types of content. Play movies, music, or games that have different audio characteristics. This will help you gauge how well the HDMI Audio Extractor delivers the desired audio quality across different genres and formats.
7. Fine-Tune as Needed:
Don’t hesitate to make further adjustments to the audio settings if you feel that the audio output can be improved. Fine-tuning is a personal preference, and everyone’s audio setup and preferences differ. Take the time to experiment and find the best settings that suit your specific audio equipment and listening environment.
By adjusting the audio settings on your HDMI Audio Extractor, you can optimize the sound output and tailor it to your liking. Take advantage of the available options such as audio output format selection, volume control, audio delay adjustment, equalizer settings, and other enhancements. These adjustments will help you achieve the best possible audio experience and make the most out of your HDMI Audio Extractor and audio system.
Troubleshooting common issues
While using an HDMI Audio Extractor can greatly enhance your audio experience, you may encounter some common issues along the way. Understanding these issues and knowing how to troubleshoot them can help you resolve any audio-related problems promptly. Here are some tips for troubleshooting common issues with an HDMI Audio Extractor:
1. No Audio:
If you’re not hearing any sound from your audio system, double-check the following:
– Ensure that the HDMI Audio Extractor is powered on and properly connected to both the HDMI source and the audio system.
– Verify that the audio cables are securely plugged into the correct audio input/output ports on the HDMI Audio Extractor and the audio system.
– Make sure that the audio output format on the HDMI Audio Extractor matches the capabilities of your audio system.
– Test the audio with a different HDMI source or audio cable to rule out any potential issues with the devices or cables.
2. Distorted or Poor Quality Audio:
If the audio quality is compromised, consider the following troubleshooting steps:
– Ensure that the HDMI cables and audio cables are in good condition and securely connected. Loose or damaged cables can result in audio distortion.
– Check the audio settings on the HDMI Audio Extractor and adjust the volume levels if needed.
– Verify that the audio input settings on your audio system are correctly configured to match the output settings of the HDMI Audio Extractor.
– If using an audio converter function on the HDMI Audio Extractor, ensure that it is functioning properly and set to the desired analog audio format.
3. Audio and Video Out of Sync:
If you notice a delay between the audio and video, try the following troubleshooting steps:
– Adjust the audio delay setting on the HDMI Audio Extractor or in your display settings. Start with small increments until the sync issue is resolved.
– If possible, connect the HDMI Audio Extractor directly to your display rather than passing the audio signal through an AV receiver or other external devices which may introduce additional latency.
4. Device Compatibility:
If you encounter compatibility issues, consider the following steps:
– Verify that your HDMI source device, HDMI cables, and audio cables are compatible with the HDMI Audio Extractor.
– Check if there are any firmware updates available for your HDMI Audio Extractor, as these can often resolve compatibility issues.
– Consult the user manual or manufacturer’s website for the HDMI Audio Extractor to ensure that your devices are listed as compatible.
5. Inconsistency between HDMI Inputs:
If you experience issues with different HDMI inputs on the HDMI Audio Extractor, try these steps:
– Make sure that the HDMI cables and audio cables are properly connected to the correct input/output ports on the HDMI Audio Extractor and your devices.
– Check if specific audio settings or configurations are required for each HDMI input. Refer to the user manual or contact the manufacturer for guidance.
6. Power and Connectivity Issues:
If you encounter power or connectivity-related issues, troubleshoot as follows:
– Ensure that the HDMI Audio Extractor is receiving power from the correct power adapter and that the power outlet is functioning correctly.
– Check all cable connections to ensure they are securely plugged in. Loose or damaged cables can affect the performance of the HDMI Audio Extractor.
– Test the HDMI Audio Extractor with a different power outlet and HDMI source to rule out any issues with the power supply or HDMI device.
If you have attempted these troubleshooting steps and still experience problems with your HDMI Audio Extractor, refer to the device’s user manual or contact the manufacturer’s customer support for further assistance. They can provide tailored guidance based on the specific model and offer potential solutions to resolve any persistent issues you may encounter.
Conclusion
Using an HDMI Audio Extractor can greatly enhance your audio experience by allowing you to connect your HDMI source to an external audio system. Whether you want to enjoy immersive gaming, watch movies with cinematic sound, or listen to your favorite music in high quality, an HDMI Audio Extractor is a valuable tool. By following the step-by-step guide on how to use an HDMI Audio Extractor, you can seamlessly connect your devices, set up the extractor, adjust the audio settings, and troubleshoot common issues that may arise.
An HDMI Audio Extractor separates the audio signal from an HDMI source and routes it to an external audio system, providing a richer and more immersive audio experience. It is particularly useful when your display or TV has limited audio output options or poor sound quality. By connecting your HDMI source to an HDMI Audio Extractor, you can bypass the display’s built-in speakers and enjoy high-quality audio through a soundbar, speaker system, headphones, or other external audio devices.
When choosing an HDMI Audio Extractor, consider factors such as audio format support, input/output ports, HDMI version compatibility, ease of use, and additional features. It is important to ensure that the extractor meets your specific needs and is compatible with your existing devices and audio system.
Adjusting the audio settings on your HDMI Audio Extractor allows you to tailor the sound output according to your preferences and the capabilities of your audio equipment. Fine-tune the audio output format, volume levels, audio delay, and explore additional audio enhancements to achieve the best audio experience possible.
In the event of any issues, troubleshooting common problems such as no audio, distorted sound, audio-video sync, compatibility, or power/connectivity can help you identify and resolve the problem promptly. Refer to the user manual or contact the manufacturer for assistance if needed.
By following these guidelines and maximizing the benefits of an HDMI Audio Extractor, you can elevate your audio experience to new heights. Enjoy immersive sound quality, enhanced audio formats, and the flexibility to connect various devices to your preferred audio system. Upgrade your entertainment setup with an HDMI Audio Extractor and unlock the full potential of your audiovisual content.