Introduction
Welcome to the world of Instagram, where millions of users share their photos, stories, and experiences every day. With the growing concerns about online security, it is crucial to take steps to protect your Instagram account from unauthorized access. One effective way to secure your account is by enabling two-factor authentication (2FA), and one of the popular authentication methods is using Google Authenticator.
Google Authenticator is a free app developed by Google that provides an extra layer of security for your online accounts. It generates time-based one-time passwords (TOTP) that need to be entered along with your password during the login process. This adds an extra layer of protection, making it more difficult for hackers to gain access to your account.
Using Google Authenticator for Instagram can help keep your account safe from hackers and malicious activities. By setting up 2FA and linking it to your Instagram account through Google Authenticator, you can ensure that only you can access your account, even if someone manages to obtain your password.
In this article, we will guide you through the process of setting up Google Authenticator for your Instagram account. We will walk you through the steps and provide tips for a smooth setup. By the end of this guide, you will have a stronger and more secure Instagram account, giving you peace of mind and confidence in your online presence.
What is Google Authenticator?
Google Authenticator is a popular two-factor authentication app developed by Google. It provides an additional layer of security for your online accounts by generating unique time-based one-time passwords (TOTP) that you need to enter along with your password during the login process.
The app works on your mobile device and generates these passwords for various online services, including social media platforms, email providers, financial institutions, and more. It uses the open standard called Time-based One-Time Password Algorithm (TOTP) to generate these codes, ensuring compatibility with a wide range of websites and services.
Google Authenticator is different from other authentication methods, such as SMS codes or email verification. While those methods are susceptible to interception or phishing attacks, Google Authenticator’s codes are generated offline on your device, making it more secure. Additionally, the codes have a short validity period, usually 30 seconds, ensuring that they cannot be reused or predicted.
The app is available for both iOS and Android devices and can be easily downloaded from the respective app stores. Once installed, you can set up your accounts by scanning a QR code or manually entering the provided code. Google Authenticator can store multiple accounts, enabling you to manage and secure various online platforms from a single app.
One notable feature of Google Authenticator is its simplicity and ease of use. The app does not require an internet connection for generating the codes, making it accessible even in areas with limited network coverage. Furthermore, it provides an additional layer of security for your accounts without relying on potentially vulnerable methods like SMS or email.
Overall, Google Authenticator is a reliable, secure, and user-friendly app that helps protect your online accounts from unauthorized access. Whether you use it for your social media profiles, email accounts, or banking services, it adds an extra layer of security to prevent identity theft and data breaches.
Why Use Google Authenticator for Instagram?
Instagram has become one of the most popular social media platforms, with millions of users sharing their lives, passions, and memories. However, the growing number of cyberattacks and account breaches emphasizes the need for added security measures. Enabling two-factor authentication (2FA) with Google Authenticator for your Instagram account offers numerous benefits, ensuring the safety and privacy of your profile.
1. Enhanced Account Security: By enabling 2FA, you add an extra layer of protection to your Instagram account. Even if someone manages to obtain your password, they would still need access to the unique time-based one-time password (TOTP) generated by Google Authenticator. This greatly reduces the risk of unauthorized access to your profile.
2. Protection Against Phishing Attempts: Phishing attempts are one of the most common methods employed by hackers to gain access to sensitive information. By using Google Authenticator, you protect yourself from falling victim to phishing attacks. The TOTP codes generated by the app are unique and time-dependent, making it nearly impossible for hackers to replicate or intercept them.
3. Mobile Security: Instagram is primarily accessed through mobile devices. With Google Authenticator installed on your mobile phone, you can conveniently generate codes to verify your identity while accessing your Instagram account. The app works offline and does not rely on an internet connection, ensuring that you can authenticate even in areas with limited or no network coverage.
4. Multiple Account Support: If you manage multiple Instagram accounts, Google Authenticator handles them all seamlessly. The app can store and generate unique TOTP codes for multiple accounts, allowing you to protect all your profiles efficiently from a single application.
5. Compatibility with Multiple Services: Google Authenticator is not limited to Instagram; it can be used with a wide range of online services and platforms. If you already use the app for other accounts, such as email services, banking platforms, or other social media networks, you can enjoy the convenience of having all your 2FA codes in one place.
6. User-Friendly Interface: Google Authenticator offers a simple and user-friendly interface. The process of scanning QR codes or manually inputting codes is straightforward and easy to understand, making it accessible to both tech-savvy individuals and those less experienced with mobile applications.
By utilizing Google Authenticator for your Instagram account, you take proactive steps towards safeguarding your personal information, photos, and interactions on the platform. With the ever-increasing risk of cybersecurity threats, it is essential to prioritize the security of your online presence.
Setting up Google Authenticator for Instagram
To enhance the security of your Instagram account, you can enable two-factor authentication (2FA) using Google Authenticator. The setup process is quick and easy, and we’ll guide you through the steps below:
Step 1: Download the Google Authenticator app
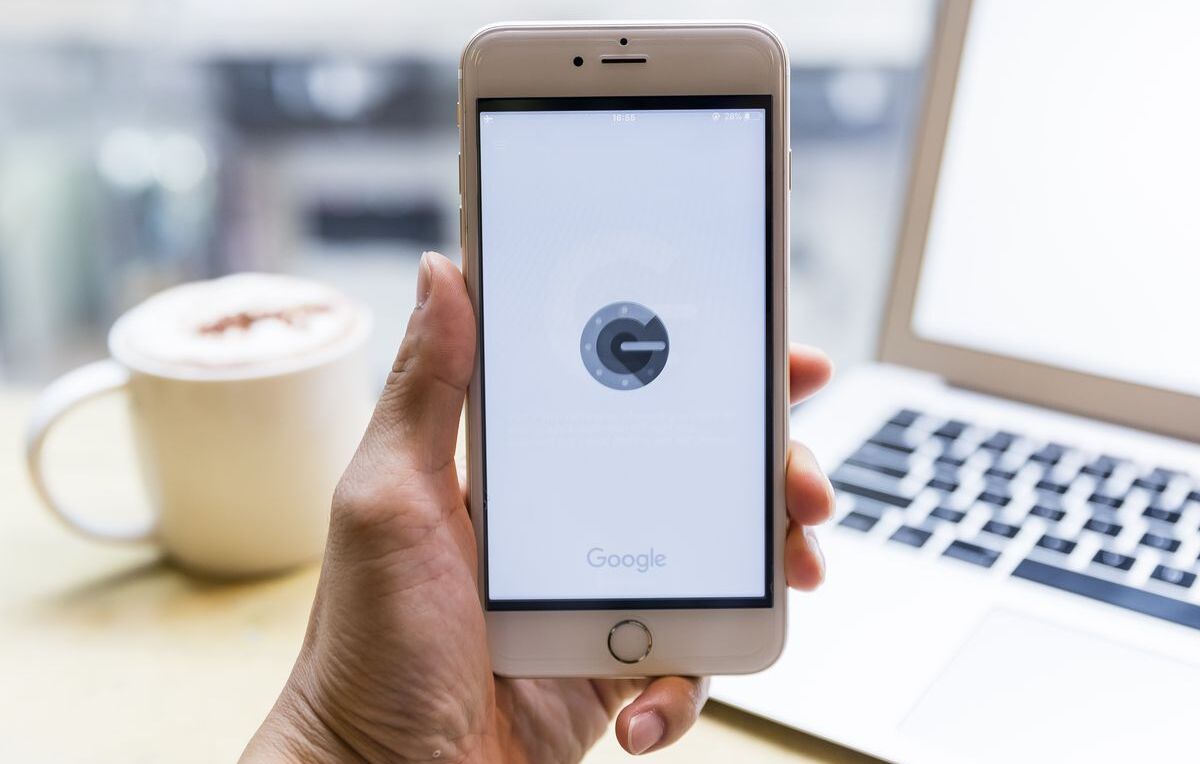
Start by downloading the Google Authenticator app from the App Store (for iOS) or Google Play Store (for Android). Once installed, open the app.
Step 2: Open Instagram and go to the settings
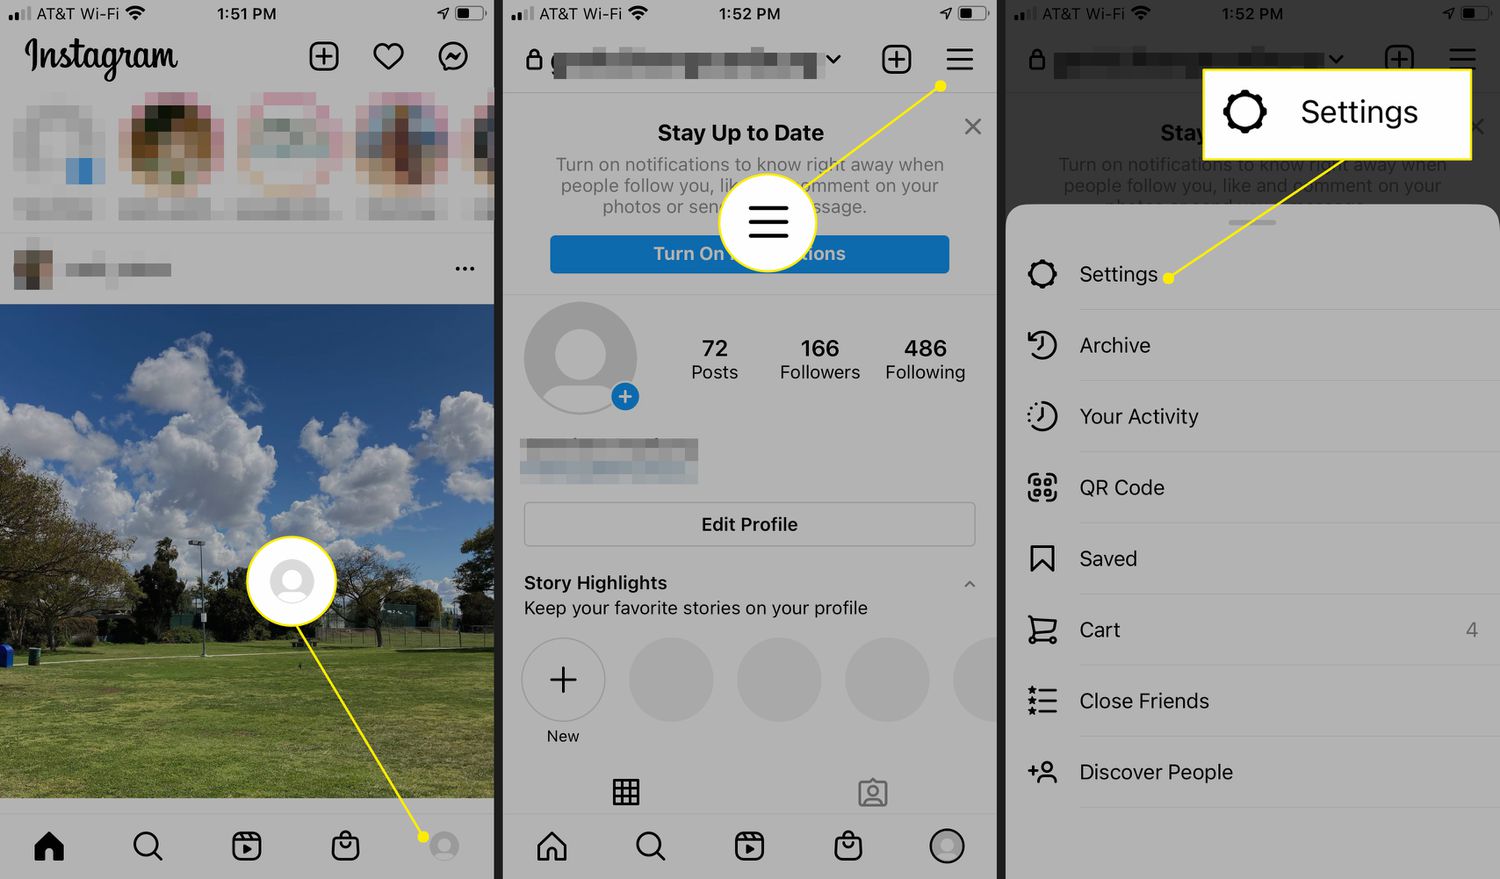
Open the Instagram app on your mobile device and navigate to your profile. Tap on the menu icon in the top-right corner, then choose “Settings.”
Step 3: Enable two-factor authentication
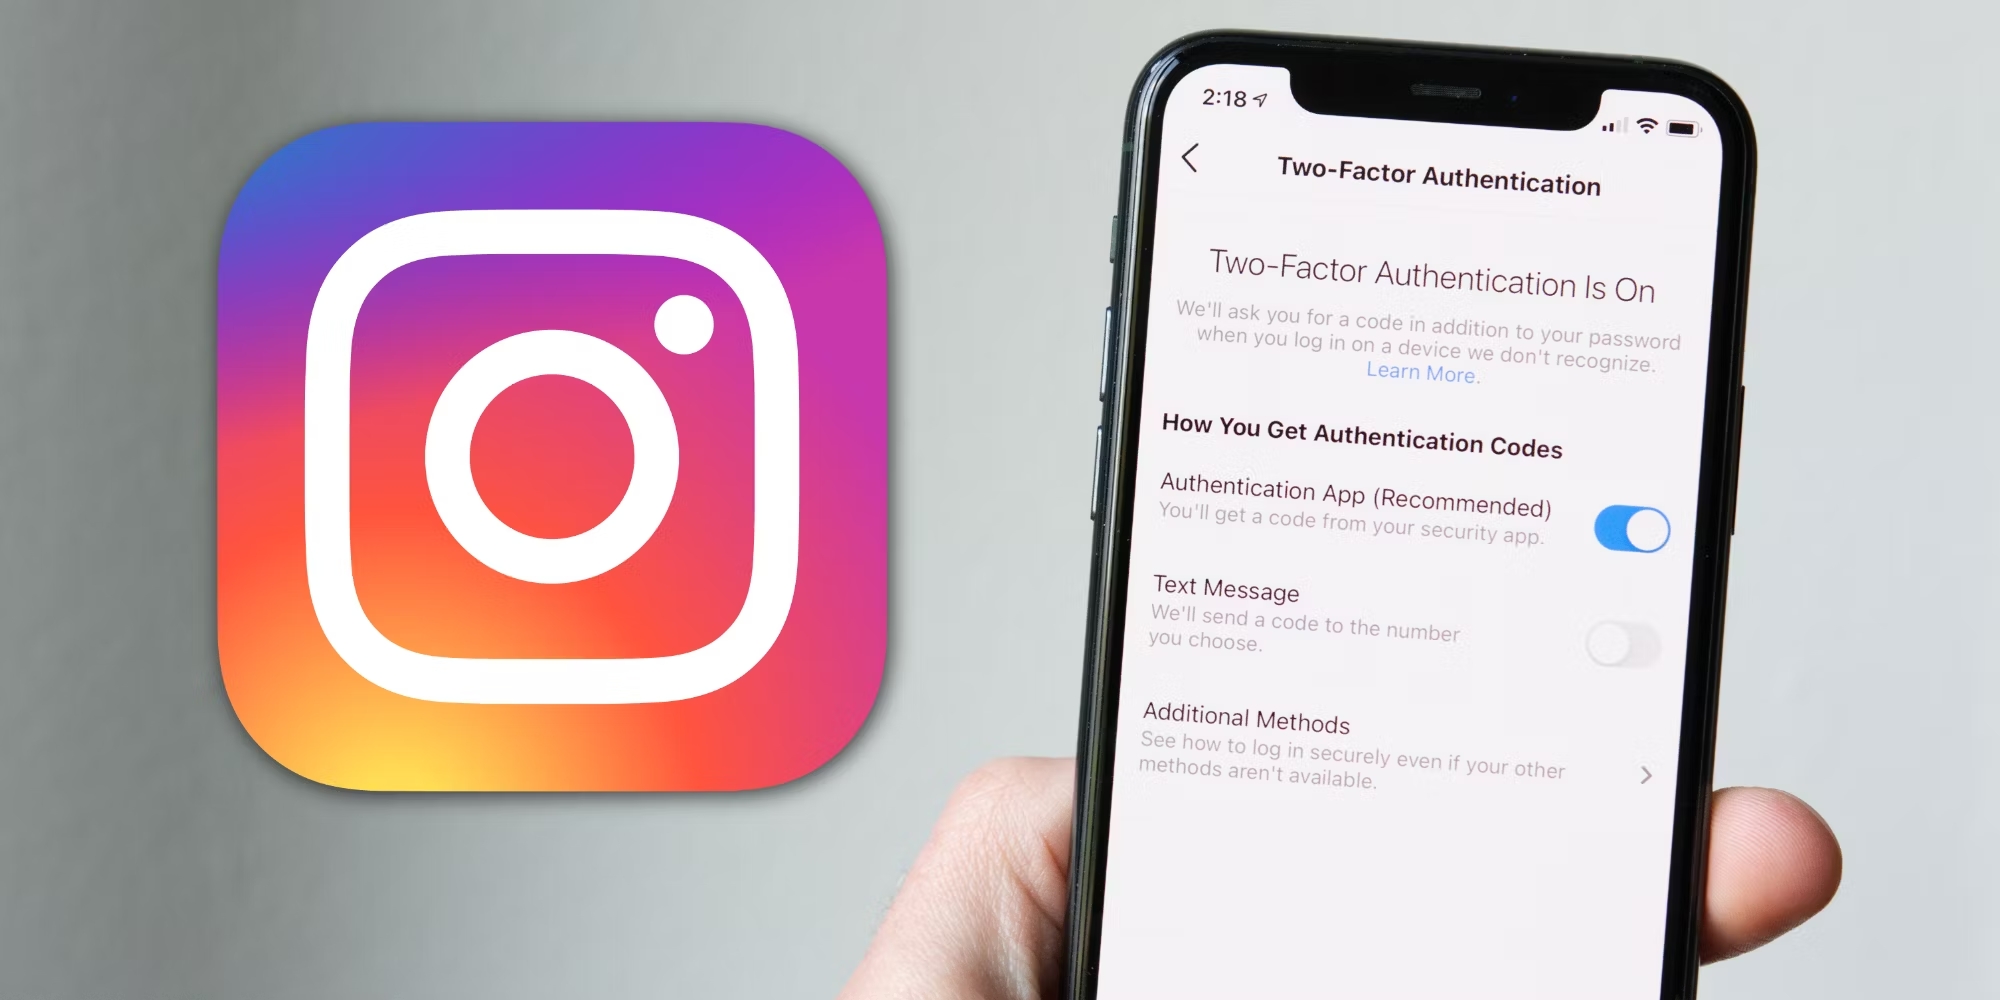
In the “Settings” menu, select “Security,” and then tap on “Two-Factor Authentication.” Toggle the switch to enable 2FA for your Instagram account.
Step 4: Link Google Authenticator to your Instagram account
Under the 2FA settings, select “Authentication App” as your preferred method. This will allow you to link Google Authenticator to your Instagram account.
Step 5: Scan the QR code or enter the manually generated code
Open the Google Authenticator app and click on the “+” symbol to add a new account. You can scan the QR code displayed on your Instagram screen or manually enter the provided code into the app.
Step 6: Verify the setup on Instagram and Google Authenticator
Once you have successfully linked Google Authenticator to your Instagram account, a verification code will be generated in the app. Enter the code on the Instagram screen to verify the setup.
Step 7: Back up your backup codes
Instagram will provide you with a set of backup codes. These codes are crucial in case you lose access to your device or cannot generate codes through Google Authenticator. Make sure to store these codes in a safe place. You can choose to write them down or take a screenshot for future reference.
With these steps completed, you have successfully set up Google Authenticator for your Instagram account. From now on, each time you log in to Instagram, you will need to open the Google Authenticator app and enter the generated code along with your password to access your account.
Note: If you ever switch to a new phone or need to reinstall the Google Authenticator app, make sure to deactivate the old device before activating it on the new one. This will ensure a seamless transition and prevent any issues with accessing your Instagram account.
Step 1: Download the Google Authenticator app
The first step in setting up Google Authenticator for Instagram is to download the app on your mobile device. Here’s how:
1. Launch the App Store (for iOS) or the Google Play Store (for Android) on your mobile device.
2. In the search bar, type “Google Authenticator” and tap the search button.
3. Locate the official Google Authenticator app and tap on it to open the app page.
4. Look for the “Install” or “Get” button and tap on it.
5. If prompted, authenticate your app store account (e.g., enter your Apple ID password for iOS devices) to start the download process.
6. Wait for the app to download and install on your device. The app is relatively small in size and should only take a few moments to complete the process.
7. Once the download is complete, you will see the Google Authenticator icon on your device’s home screen or app drawer. Tap on it to launch the app.
It’s important to note that there may be other apps with similar names in the app stores, but it is crucial to download the official app developed by Google. This ensures that you are getting a secure and reliable authentication solution for your Instagram account.
Google Authenticator is compatible with both iOS and Android devices, so you can easily find and install it on a wide range of smartphones and tablets. The app is free to download, and there are no hidden costs or in-app purchases associated with its use.
Once you have successfully downloaded and installed the Google Authenticator app on your device, you’re ready to move on to the next step of setting up Google Authenticator for your Instagram account.
Step 2: Open Instagram and go to the settings
After downloading and installing the Google Authenticator app on your mobile device, the next step is to open Instagram and navigate to the settings menu. Here’s how:
1. Locate the Instagram app icon on your device’s home screen or app drawer and tap on it to open the app.
2. If you’re not already logged in, enter your Instagram username and password to access your account. If you are already logged in, you will be directed to your Instagram home feed.
3. Tap on the profile icon, usually located in the bottom right corner of the screen. This will take you to your Instagram profile page.
4. Once on your profile page, look for the menu icon, which is typically represented by three horizontal lines or dots in the top-right corner of the screen. Tap on this icon to open the Instagram settings menu.
5. In the settings menu, you will find various options and features related to your Instagram account. Scroll through the list until you find the “Settings” option and tap on it to proceed.
6. Within the settings menu, you may see several sections and options. Look for the “Security” or “Privacy & Security” section, as this is where you’ll find the two-factor authentication settings for your Instagram account.
7. Tap on the “Security” or “Privacy & Security” section to access the security settings for your Instagram account.
By following these steps, you will be able to open the Instagram app on your mobile device and navigate to the settings menu. This is an essential step in the process of setting up Google Authenticator for your Instagram account, as it allows you to access the necessary options for enabling two-factor authentication.
It’s worth mentioning that the exact layout and naming of menus and options may vary slightly depending on the version of the Instagram app and the operating system of your device. However, the general steps provided here should guide you in the right direction to locate the settings menu within the app.
Once you have successfully accessed the settings menu in Instagram, you’re ready to proceed to the next step of enabling two-factor authentication and linking Google Authenticator to your Instagram account.
Step 3: Enable two-factor authentication
After navigating to the settings menu in the Instagram app, the next step in setting up Google Authenticator for Instagram is to enable two-factor authentication. Here’s how:
1. Within the settings menu, locate the “Security” or “Privacy & Security” section, as this is where you will find the options related to your account’s security settings.
2. Look for the option to enable two-factor authentication. It may be labeled as “Two-Factor Authentication,” “Two-Step Verification,” or something similar. Tap on this option to proceed.
3. You may be asked to verify your identity with your Instagram password or through other means, such as your fingerprint or Face ID, depending on your device’s settings. Provide the necessary verification to access the two-factor authentication settings.
4. Once you have accessed the two-factor authentication settings, you will see a toggle switch or a similar control to enable or disable it. Toggle the switch to the “On” position to enable two-factor authentication for your Instagram account.
5. Instagram may provide you with a brief description or overview of what two-factor authentication offers and how it strengthens the security of your account. Take the time to read through this information to understand the benefits of enabling this feature.
6. After enabling two-factor authentication, you may be prompted to enter your phone number as an additional security measure. This step is optional but highly recommended, as it allows Instagram to send you text messages with login codes in case you cannot access the Google Authenticator app.
7. Once the two-factor authentication is enabled, tap on the “Done” or “Save” button to apply the changes to your Instagram account.
By following these steps, you will successfully enable two-factor authentication for your Instagram account. This additional layer of security will help protect your account from unauthorized access, even if someone manages to obtain your account password.
It’s important to note that by enabling two-factor authentication, you will need to provide a verification code from Google Authenticator every time you log in to your Instagram account. This ensures that only you can access your account, even if someone has your password. The Google Authenticator app will generate these codes, providing an extra layer of security for your Instagram login process.
Now that you have enabled two-factor authentication, you’re ready to move on to the next step of linking Google Authenticator to your Instagram account.
Step 4: Link Google Authenticator to your Instagram account
After enabling two-factor authentication in the Instagram app, the next step is to link Google Authenticator to your Instagram account. This will allow you to generate the necessary codes for the authentication process. Follow these steps to link the two:
1. Open the Google Authenticator app on your mobile device. If this is your first time using the app, you may need to grant the necessary permissions for it to function properly.
2. In the Google Authenticator app, tap on the “+” symbol or the “Add an account” button to begin adding a new account.
3. You will have two options to link your Instagram account to Google Authenticator: scanning a QR code or entering a manually generated code. Choose the option that is most convenient for you.
– To scan the QR code: In the Instagram settings, look for the option to “Scan a QR code.” Tap on it, and your device’s camera will open. Align the camera with the QR code displayed on your Instagram screen until it is successfully scanned. The Google Authenticator app will automatically detect the code and add the Instagram account to its list.
– To enter the manually generated code: If you are unable to scan the QR code, you can manually enter the code provided below the code on the Instagram screen. In the Google Authenticator app, select the option to “Enter a provided key” or something similar. Type in the code as seen on Instagram, making sure to enter it accurately.
4. Once you have scanned the QR code or entered the code in the Google Authenticator app, a new Instagram account will be added to your list in the app. You will see a six-digit code generated specifically for your Instagram account.
5. Complete the process by tapping on the “Save” or “Done” button in the Google Authenticator app to ensure that the changes are applied and the Instagram account is linked successfully.
By linking Google Authenticator to your Instagram account, you now have a reliable method for generating the unique verification codes required during the login process. It strengthens the security of your Instagram account and adds an extra layer of protection against unauthorized access.
Remember to keep your mobile device with the Google Authenticator app handy whenever you need to log in to your Instagram account, as you will need to enter the verification code generated by the app along with your password. This ensures that only you can access your Instagram account, even if someone else obtains your password.
With Google Authenticator properly linked to your Instagram account, you can proceed to the next step of scanning the QR code or entering the manually generated code to complete the setup process.
Step 5: Scan the QR code or enter the manually generated code
After linking Google Authenticator to your Instagram account, the next step is to either scan the QR code or enter the manually generated code into the Google Authenticator app. This will allow the app to generate the unique verification codes required for the authentication process. Follow these steps to complete this step:
1. Open the Google Authenticator app on your mobile device. Ensure that you have already added your Instagram account to the app by following the previous steps.
2. In the Google Authenticator app, look for the Instagram account that you added. You will see a six-digit code generated specifically for your Instagram account.
3. In the Instagram settings on your mobile device, you should see a screen with a QR code or a manually generated code. The QR code may be labeled as “Scan a QR code” or something similar. The manually generated code is usually located below the QR code.
4. If you have chosen to scan the QR code, tap on the option in the Instagram settings and point your device’s camera at the QR code displayed on the screen. The Google Authenticator app will automatically detect the code and link it to your Instagram account.
5. If scanning the QR code is not possible, or if you prefer to enter the code manually, select the option in the Google Authenticator app to “Enter a provided key” or something similar. Type in the code exactly as it appears in the Instagram settings, ensuring that you enter it accurately.
6. Verify that the code you entered matches the code displayed in the Google Authenticator app for your Instagram account. This step is crucial to ensure that the app is generating the correct verification codes.
7. Once you have scanned the QR code or entered the code manually, the Google Authenticator app will start generating the unique verification codes required for the authentication process of your Instagram account.
By completing this step, you have successfully linked the Google Authenticator app to your Instagram account. The app will now generate time-based one-time passwords (TOTP) specifically for your Instagram account, adding an extra layer of security to the login process.
Remember to keep your mobile device with the Google Authenticator app accessible whenever you need to log in to your Instagram account. You will need to enter the verification code generated by the app, along with your password, to authenticate and gain access to your account.
With the QR code scanned or the code entered, you are now ready to proceed to the verification steps to confirm the setup of Google Authenticator for your Instagram account.
Step 6: Verify the setup on Instagram and Google Authenticator
After scanning the QR code or entering the manually generated code in the Google Authenticator app, the next step is to verify the setup on both Instagram and Google Authenticator. This ensures that the two applications are properly linked and that the generated codes match. Follow the steps below to complete the verification process:
1. Return to the Instagram settings on your mobile device where you initially linked Google Authenticator to your account.
2. Look for the option to “Verify” or “Confirm” setup. This option may be labeled differently, depending on the version of Instagram app you are using.
3. Tap on the “Verify” or “Confirm” setup option, and Instagram will prompt you to enter the current verification code that is being displayed in the Google Authenticator app for your Instagram account.
4. Switch back to the Google Authenticator app on your device, and locate the six-digit verification code that is generated specifically for your Instagram account.
5. Enter the current verification code from Google Authenticator into the corresponding field in the Instagram app. Ensure that you enter the code accurately to complete the verification process successfully.
6. Tap on the “Verify” or “Confirm” button within the Instagram app to submit the code and confirm that the setup is verified.
7. Instagram will process the verification code, and if it matches with the code generated by Google Authenticator, you will receive a confirmation message indicating that your setup is successful.
By completing this step, you have verified the setup of Google Authenticator for your Instagram account. The app is now fully linked and synchronized with Instagram, ensuring that the codes generated by Google Authenticator will match the ones required during the login process.
Remember to keep your Google Authenticator app up to date and synced with the correct time to ensure that the verification codes are accurate and valid. If your device’s clock is out of sync, it may result in codes being rejected during the authentication process.
With the verification process complete, you can now proceed to back up your backup codes, which will be essential in case your device is lost, damaged, or you cannot access the Google Authenticator app for any reason.
Step 7: Back up your backup codes
After verifying the setup of Google Authenticator for your Instagram account, it is important to back up your backup codes. These backup codes are essential in case you lose access to your device or cannot generate codes through the Google Authenticator app. Follow the steps below to back up your backup codes:
1. In the Instagram settings, navigate to the section related to two-factor authentication or security settings. Look for the option labeled “Backup Codes” or something similar.
2. Tap on the “Backup Codes” option to access the backup codes that Instagram provides.
3. Instagram will generate a set of backup codes for you to use in emergencies. These codes are unique and can be used as an alternative authentication method when you are unable to use the Google Authenticator app.
4. It’s essential to keep these backup codes in a secure location. You have a few options when it comes to storing them:
– Write them down: Use a pen and paper to write down each backup code. Keep the paper in a safe place, such as a locked drawer or a secure digital password manager.
– Take a screenshot: Capture a screenshot of the backup codes and store it securely on your device or in a cloud storage service with proper encryption and password protection.
– Print them out: If you prefer a physical copy, you can print the backup codes and store them in a safe and secure location.
5. It’s important to ensure that your backup codes are kept safe and accessible only to you. Treat them with the same level of care as your passwords and other sensitive information.
6. Once you have securely stored your backup codes, ensure that you can easily access them when needed. You may want to test accessing your account with one of the backup codes to ensure they work as expected.
By backing up your backup codes, you are prepared for potential scenarios where you may not have access to the Google Authenticator app. This precautionary measure ensures that you can still access your Instagram account using one of the generated backup codes.
Remember to refresh and generate new backup codes periodically to maintain security. You can do this by revisiting the backup codes section in the Instagram settings and generating a new set of codes to replace the previous ones.
With your backup codes securely stored, you have completed the final step in setting up Google Authenticator for your Instagram account. Your account is now protected with an extra layer of security that enhances its overall safety and privacy.
Accessing Your Instagram Account with Google Authenticator
Now that you have set up Google Authenticator for your Instagram account, it’s important to understand how to use it to access your account. Follow these steps to log in to your Instagram account using Google Authenticator:
1. On your mobile device, open the Instagram app.
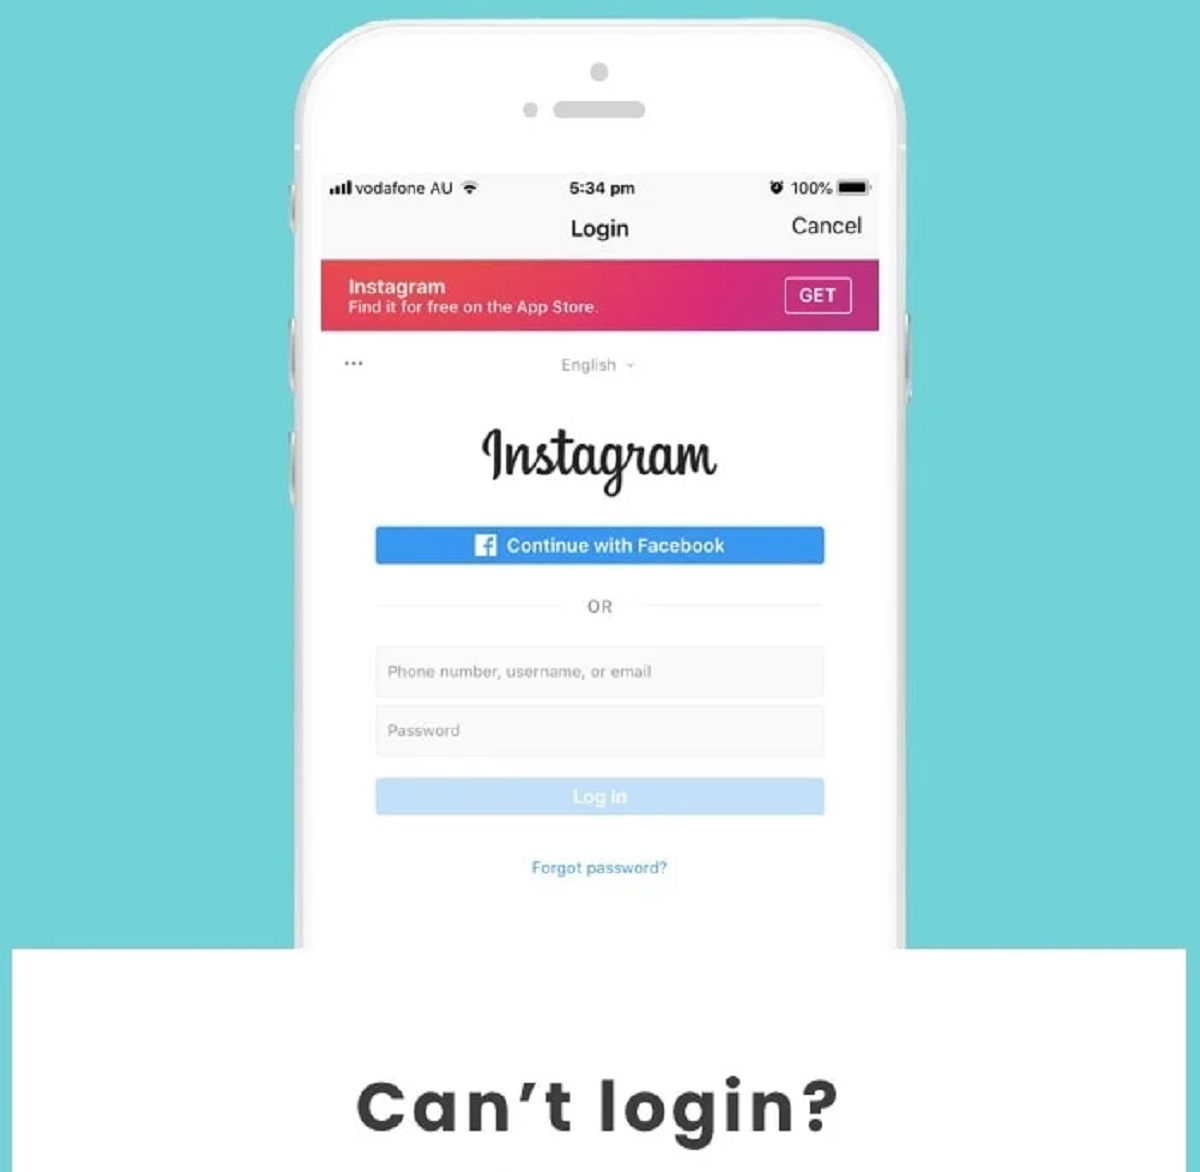
2. Tap on the “Log In” button to begin the login process.
3. Enter your Instagram username and password in the respective fields.
4. After entering your login credentials, you will be prompted to enter the verification code generated by the Google Authenticator app.
5. Open the Google Authenticator app on your device to retrieve the current verification code for your Instagram account.
6. Enter the verification code from the Google Authenticator app into the provided field on the Instagram login screen. Make sure to enter the code accurately.
7. Tap on the “Log In” or “Continue” button to proceed with the login process.
8. If the verification code you entered matches the one generated by Google Authenticator for your Instagram account, you will be successfully logged in to your Instagram account.
It’s important to note that the verification code generated by the Google Authenticator app is time-sensitive and typically expires after a short period, usually 30 seconds. Ensure that you enter the code promptly to avoid any login issues.
If you have difficulty accessing your Instagram account using Google Authenticator, ensure that your device’s time is synchronized correctly. Inaccurate time settings can cause the generated codes to be rejected during the authentication process.
Additionally, make sure to keep your mobile device secure and protect it with a passcode or biometric authentication (e.g., fingerprint or Face ID). This helps prevent unauthorized access to your Instagram account and the Google Authenticator app itself.
By following these steps, you can securely access your Instagram account using the verification codes generated by Google Authenticator. This additional layer of security ensures that only you can log in to your account, providing greater protection against unauthorized access.
Always remember to keep your login credentials and the device with the Google Authenticator app safe and secure to maintain the integrity and privacy of your Instagram account.
Troubleshooting Common Issues with Google Authenticator
While Google Authenticator is generally a reliable and secure app for two-factor authentication, there can be occasional issues that users may encounter. Here are some common problems that users might face with Google Authenticator and potential solutions:
1. Incorrect Time Synchronization: One of the most common issues with Google Authenticator is when the time on your device is out of sync. This misalignment can cause the generated verification codes to be rejected. To solve this problem, ensure that your device’s time is set to update automatically or manually synchronize it with an accurate time source.
2. Lost or Damaged Device: If you lose your device or it gets damaged, you may lose access to the Google Authenticator app and its generated codes. To prevent being locked out of your accounts, it is essential to backup your accounts and codes. Store backup codes securely or consider using an authentication app that supports device transfer or recovery.
3. Inaccessible Backup Codes: Backup codes are essential for accessing your account when you cannot generate codes through the Google Authenticator app. If you cannot access your backup codes, reach out to the relevant service’s support team for assistance. They may be able to provide alternative methods for account recovery.
4. Multiple Devices: If you have Google Authenticator set up on multiple devices, make sure the time is correctly synchronized across all devices. Inconsistencies in time settings can cause discrepancies in the generated codes, leading to login issues. Keep all devices updated and ensure they are using the same time source.
5. Transferring Accounts: If you need to transfer your accounts from one device to another, you will need to disable Google Authenticator on the old device and set it up again on the new device. Make sure to follow the correct transfer process outlined by the service you are using to avoid any issues with accessing your accounts.
6. Reinstalling Google Authenticator App: If you need to reinstall the Google Authenticator app, ensure that you have a backup of your accounts and codes. Restoring the app without a backup may result in the loss of your accounts, requiring you to set them up again on the app.
7. Code Generation Issues: If you experience consistent issues with code generation in Google Authenticator, make sure you are using the latest version of the app. If the problem persists, try clearing the app cache or reinstalling the app. If none of these actions resolve the issue, contact the app developer for further assistance.
Remember, it is crucial to follow the specific instructions provided by the service or platform you are using Google Authenticator with, as their setup processes and troubleshooting steps may vary in some cases. When in doubt, consult the relevant service’s support documentation or reach out to their customer support for assistance.
By being aware of these common issues and their potential solutions, you can effectively troubleshoot problems that may arise when using Google Authenticator for two-factor authentication and ensure the smooth and secure operation of your accounts.
Conclusion
Enabling Google Authenticator for your Instagram account is a proactive step towards enhancing the security and privacy of your online presence. By following the step-by-step guide outlined in this article, you have learned how to set up and link Google Authenticator to your Instagram account, ensuring that only you can access your account, even if someone obtains your password.
Through the use of two-factor authentication, specifically with Google Authenticator, you have added an extra layer of security that helps protect your Instagram account from unauthorized access, phishing attempts, and identity theft. The time-based one-time passwords (TOTP) generated by Google Authenticator ensure that the authentication process is secure and highly reliable.
Additionally, we explored the importance of backing up your backup codes, which play a crucial role in case you cannot access the Google Authenticator app or your device is lost or damaged. By securely storing your backup codes, you can ensure that you can still access your Instagram account in emergency situations.
Remember to keep your mobile device, the Google Authenticator app, and your login credentials secure. Regularly update the app, check for time synchronization, and follow best practices for device security to maximize the effectiveness of Google Authenticator in protecting your Instagram account.
While Google Authenticator is a popular and reliable authentication method, it is important to note that there are alternative methods available. Some services offer their own authentication apps or may support other authentication protocols. Consider exploring different options and selecting the method that best suits your needs and preferences.
By taking the necessary steps to secure your Instagram account with Google Authenticator, you can have peace of mind knowing that your personal information, photos, and interactions are protected. Stay vigilant and continue practicing good security habits to maintain the confidentiality and integrity of your online presence.