Introduction
The Elmo Projector is a powerful tool that facilitates interactive presentations and document camera applications. With its advanced features and user-friendly interface, it offers a seamless experience for educators, business professionals, and individuals who require visual aids to enhance their content delivery.
In this guide, we will explore how to effectively use the Elmo Projector and make the most out of its capabilities. Whether you are a teacher looking to engage your students with dynamic visuals, a presenter wanting to deliver impactful slideshows, or someone needing a reliable document camera solution, this article is for you.
By understanding the fundamental aspects of the Elmo Projector and following the step-by-step instructions provided, you will be able to set up, configure, and utilize this device with ease. We will also address common troubleshooting issues that may arise, ensuring smooth and uninterrupted usage.
Whether you are new to using an Elmo Projector or want to further enhance your knowledge and proficiency, this guide serves as a comprehensive resource to help you unlock the full potential of this remarkable tool.
Understanding the Elmo Projector
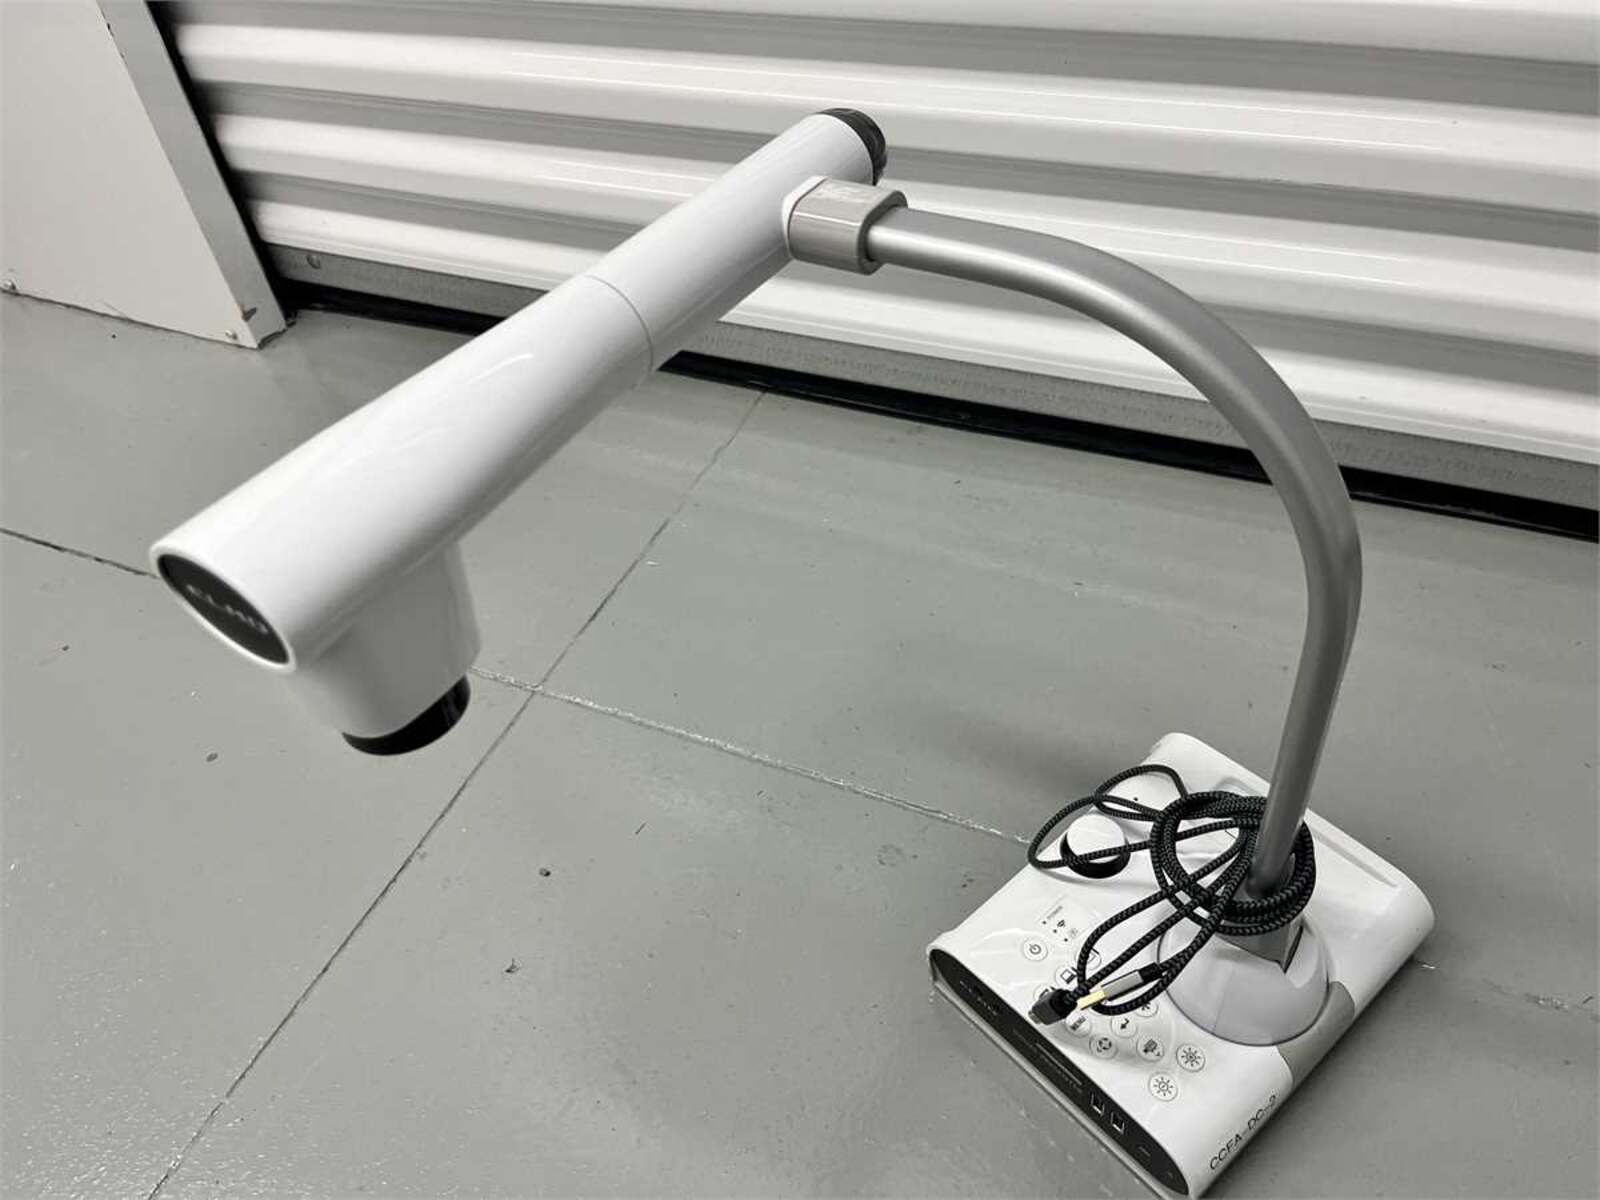
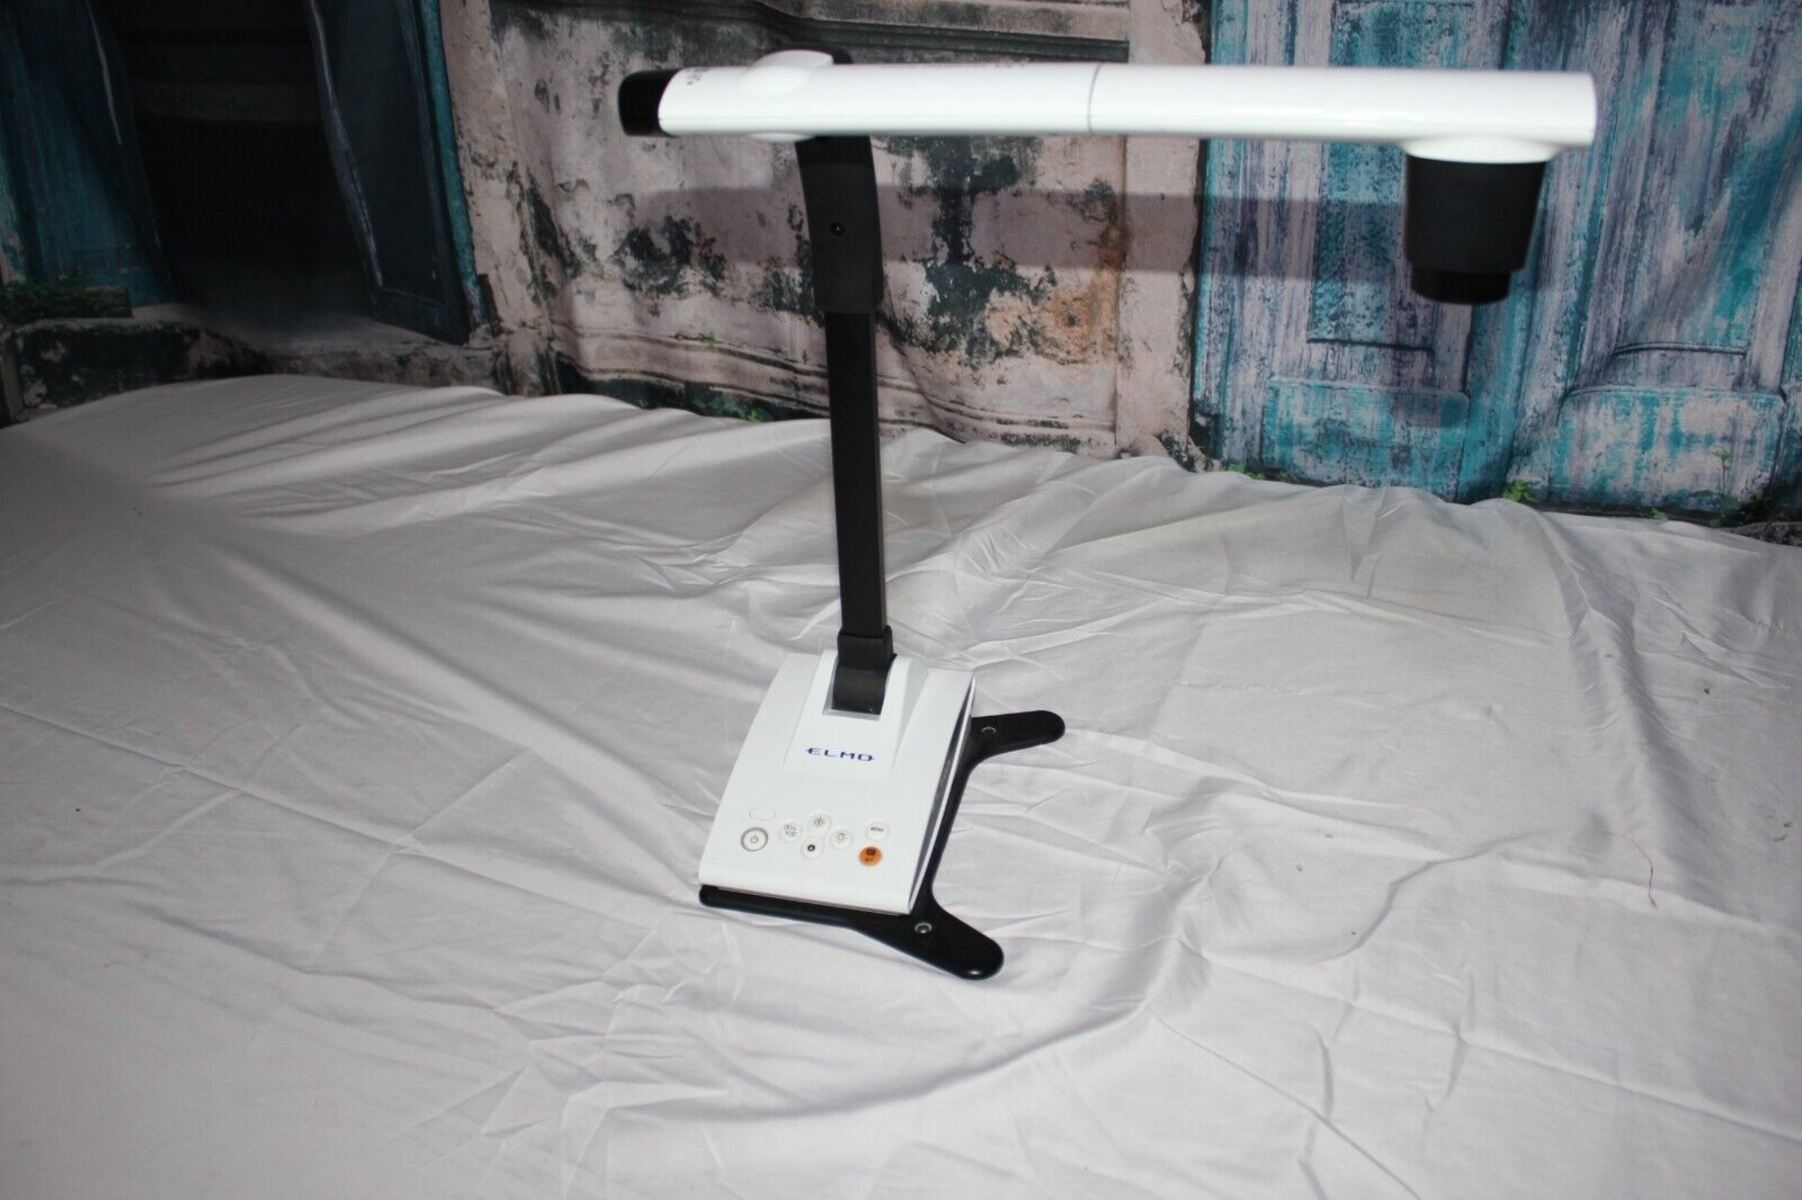
The Elmo Projector is a versatile device designed to display images, slides, and documents on a larger screen. It combines the functionalities of a digital projector and a document camera, providing users with the ability to project physical documents, 3D objects, and even live demonstrations. By using an Elmo Projector, users can capture and share visuals with a broader audience in classrooms, boardrooms, or any other setting that requires a visual presentation.
One of the key features of the Elmo Projector is its high-resolution camera, which allows for detailed image capturing. The camera is positioned above a stage area, where documents or objects can be placed for projection. This positioning enables a clear and focused image, ensuring that every detail is visible to the audience.
Furthermore, the Elmo Projector offers various connectivity options, allowing users to connect it to computers, laptops, smartphones, or tablets. This versatility ensures compatibility with different devices and operating systems, making it a flexible solution for various presentation needs.
In addition to its document camera capabilities, the Elmo Projector also functions as a traditional digital projector, capable of displaying slides, videos, and other multimedia content. This makes it a handy tool for creating engaging presentations with a combination of dynamic visuals and live demonstrations.
Understanding the components and functionalities of the Elmo Projector is essential to make the most of this versatile device. As we dive deeper into this guide, we will explore how to set up the Elmo Projector, connect it to different devices, adjust settings, and troubleshoot common issues. By gaining a comprehensive understanding of the Elmo Projector, you will be equipped to utilize it effectively for your specific needs.
Setting Up the Elmo Projector
Before you can start using the Elmo Projector, it’s crucial to ensure that the device is properly set up. Follow these steps to get your Elmo Projector ready for use:
- Find a suitable location: Choose a stable surface or mount for the Elmo Projector that provides an optimal viewing angle for your audience. Make sure there is enough space to place documents or objects on the stage area.
- Connect the power source: Plug in the power cord of the Elmo Projector to a power outlet. Ensure that the power source is stable and accessible.
- Set up the projection surface: If using a traditional projector screen, extend the screen to the desired height and position it appropriately. If projecting onto a wall or whiteboard, ensure that it is clean and free of any obstructions.
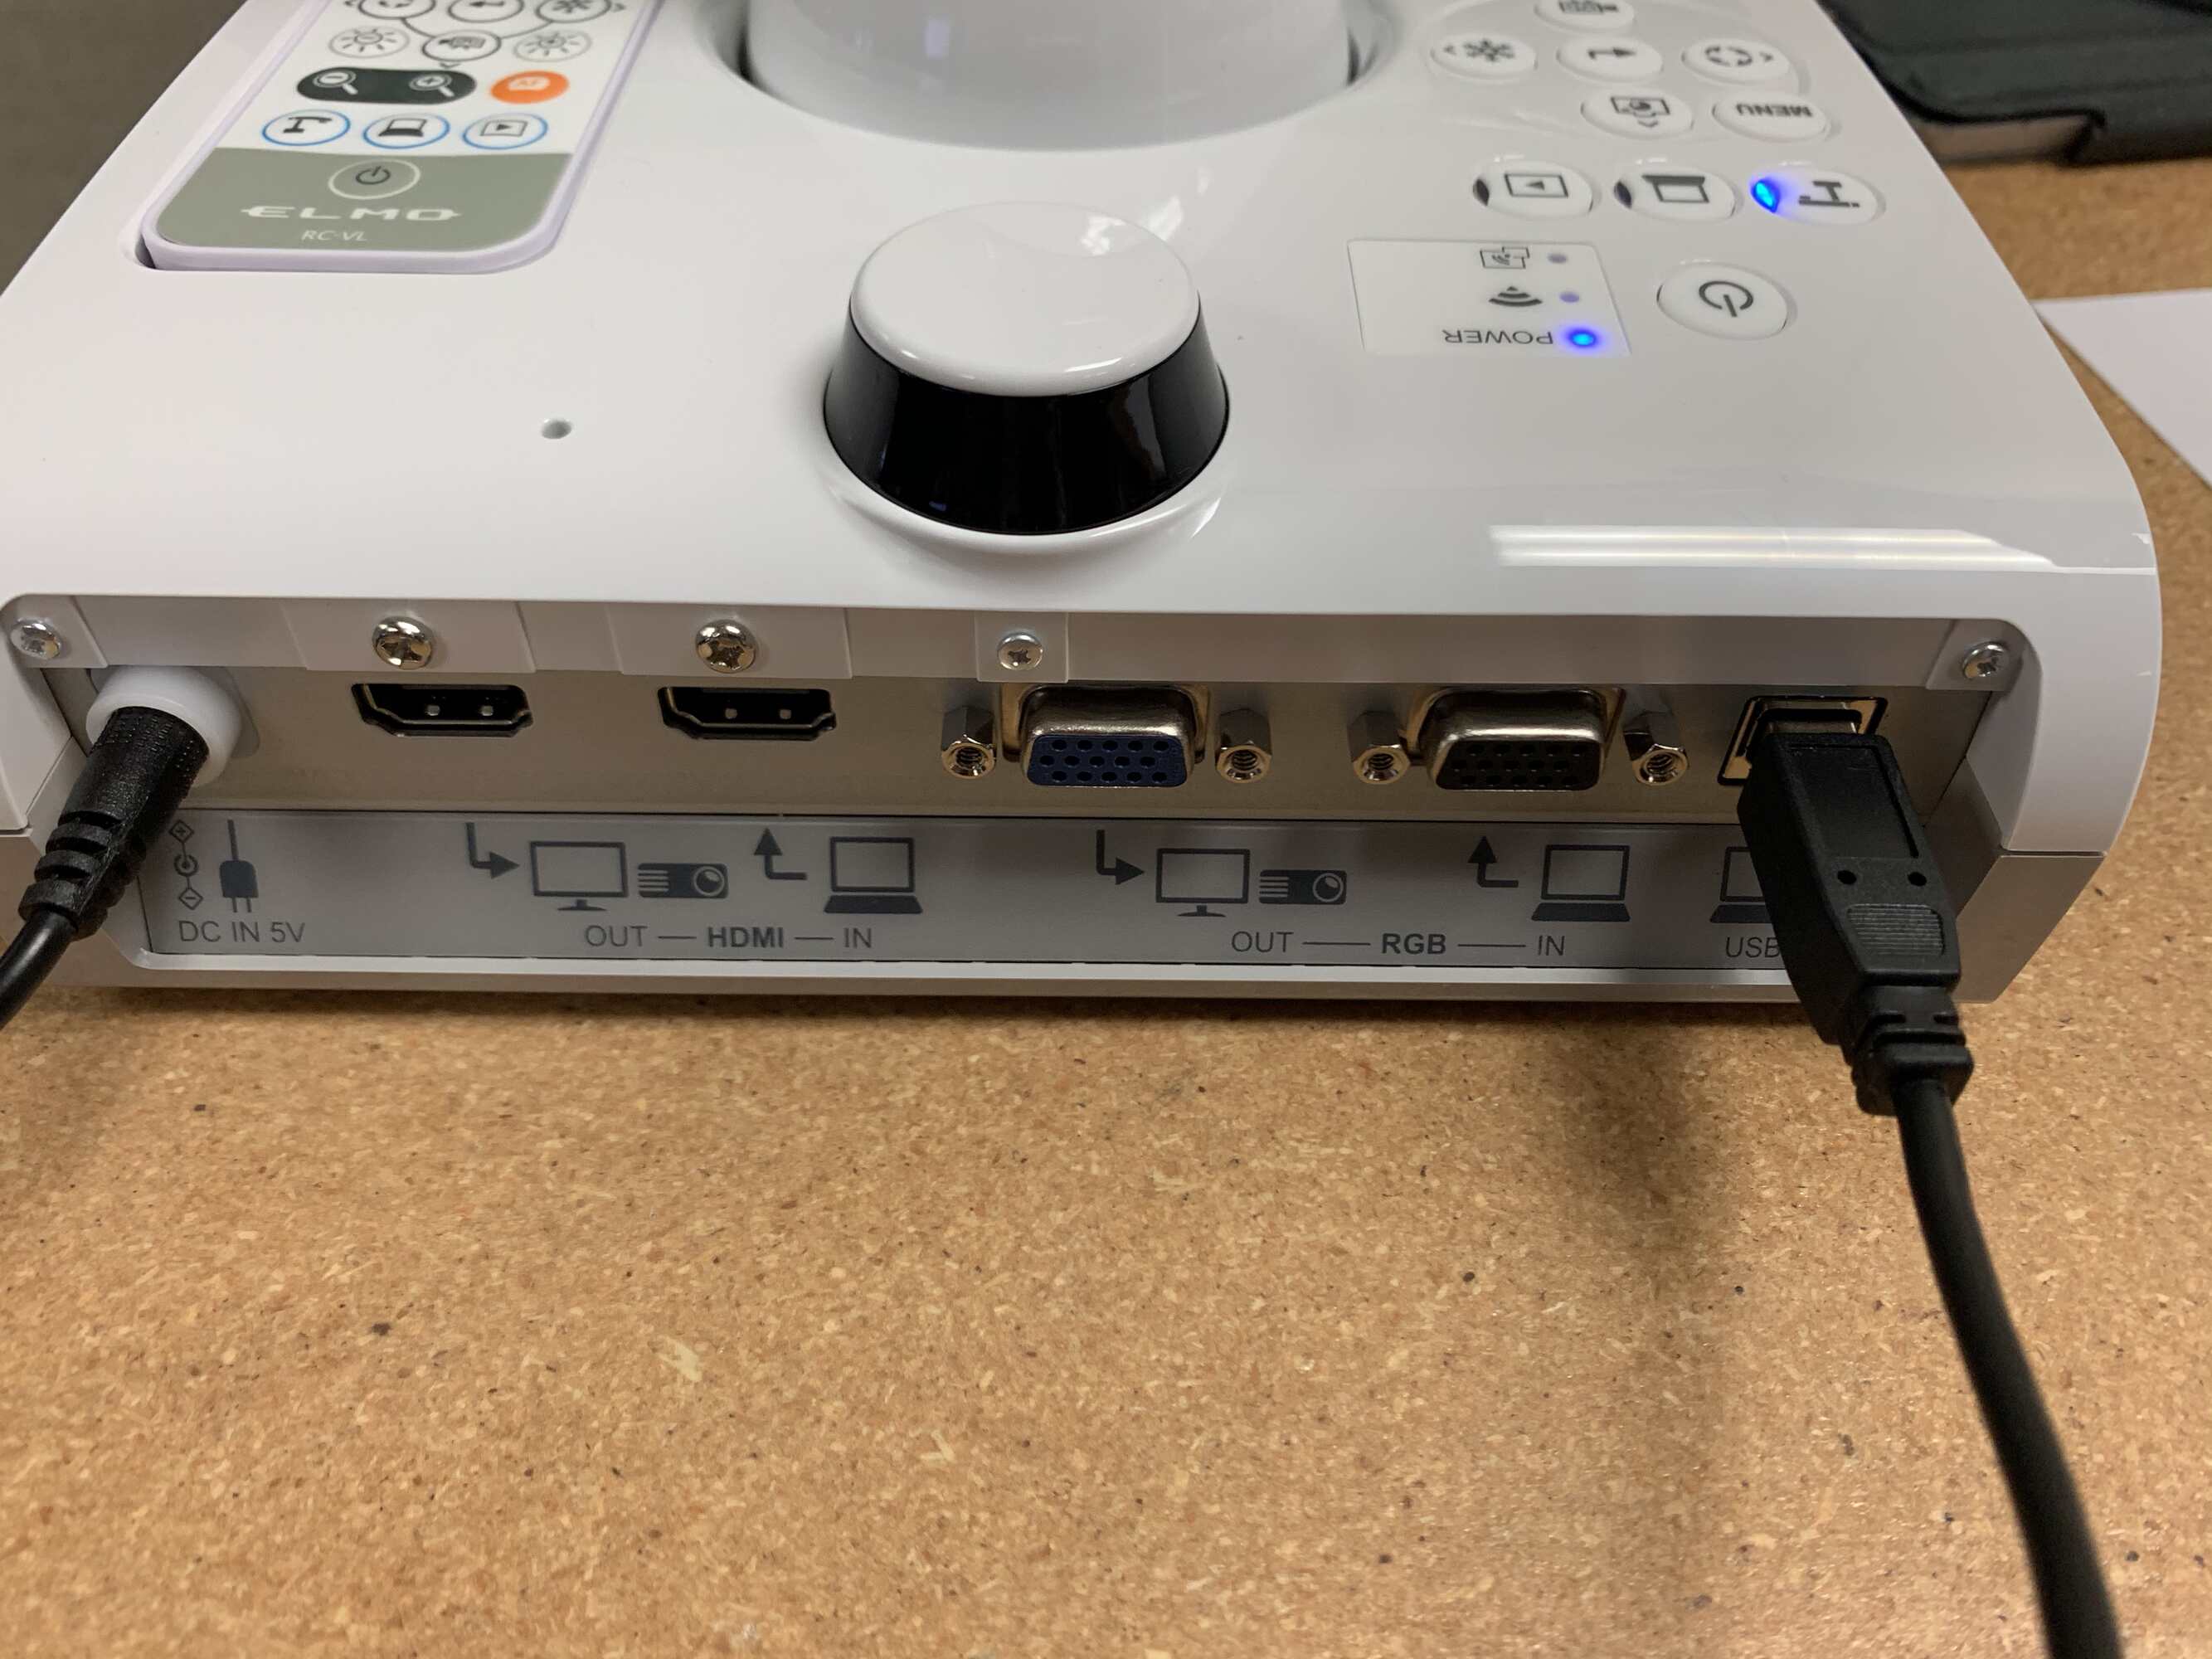
- Connect the necessary cables: Depending on your setup, connect the appropriate cables to the Elmo Projector. This may include HDMI, VGA, or USB cables to connect to a computer or other devices. Refer to the user manual for specific instructions.
- Power on the Elmo Projector: Press the power button on the projector or use the remote control to turn on the device. Wait for the projector to warm up and initialize.
- Adjust the focus and settings: Use the focus knob or buttons on the Elmo Projector to adjust the sharpness and clarity of the projected image. Navigate through the settings menu using the projector’s control panel or remote control to configure brightness, contrast, and other display settings.
- Test the projection: Place a document or object on the stage area of the Elmo Projector and check if the image is projected clearly onto the screen or wall. Make any necessary adjustments to the positioning or settings to achieve the desired projection.
By following these steps, you can quickly and effectively set up the Elmo Projector for your presentation needs. Remember to refer to the user manual for specific instructions tailored to your model of the Elmo Projector.
Connecting the Elmo Projector to a Computer or Device
To utilize the full capabilities of the Elmo Projector, you need to connect it to a computer or device. Follow these steps to establish a connection:
- Identify the appropriate ports: Depending on the model of your Elmo Projector and the device you want to connect, identify the relevant ports or connectors. These may include HDMI, VGA, USB, or other video/audio ports.
- Connect the cables: Use the corresponding cables to connect the Elmo Projector to your computer or device. If using HDMI, plug one end of the HDMI cable into the HDMI port on the Elmo Projector and the other end into the HDMI port on your computer or device. For VGA connections, use a VGA cable and connect it to the VGA ports on both the projector and the device.
- Ensure proper audio connections: If you want to include audio in your presentation, connect the audio output of your computer or device to the audio input of the Elmo Projector. This can be done through an audio cable or by using the HDMI cable, which carries both video and audio signals.
- Power on the Elmo Projector and the connected device: Once the cables are securely connected, power on both the Elmo Projector and the device you are connecting. The projector should detect the input source automatically.
- Select the appropriate input source: On the Elmo Projector or its remote control, navigate to the input/source menu and select the corresponding input source (e.g., HDMI, VGA) that matches the connection you made.
- Adjust the display settings (if necessary): Depending on your computer or device, you may need to adjust the display settings to ensure optimal projection. This can include setting the screen resolution, aspect ratio, or extending the display to the Elmo Projector.
- Test the connection: Open a document or media file on your computer or device and verify that it is properly projected through the Elmo Projector onto the screen or wall. Make any necessary adjustments to the positioning or settings to achieve the desired outcome.
By following these steps, you can easily connect the Elmo Projector to your computer or device, enabling you to project your content with ease. Keep in mind that the specific steps and options may vary depending on the model of your Elmo Projector and the device you are connecting.
Adjusting Settings and Configurations
Once you have connected the Elmo Projector to your computer or device, you may need to adjust certain settings and configurations to optimize your projection. Here are the key settings and configurations you can adjust:
- Brightness and Contrast: Depending on the lighting conditions and the projected content, you may need to adjust the brightness and contrast settings on the Elmo Projector. Use the projector’s control panel or remote control to access the settings menu and make the necessary adjustments.
- Aspect Ratio: The aspect ratio of your projected content should match the aspect ratio of your display device. Use the settings menu to select the appropriate aspect ratio (e.g., 16:9, 4:3) to ensure there are no distortions in the projected image.
- Keystone Correction: If the projector is not positioned at the optimal angle to project a rectangular image, you can use the keystone correction feature to adjust the image and make it appear rectangular. This correction can be done manually using the projector’s control panel or automatically through the settings menu.
- Image Orientation: If you need to project in a specific orientation, such as portrait or landscape, you can adjust the image orientation settings on the Elmo Projector. This ensures that the projected image is aligned correctly with your display surface.
- Image Freeze: The Elmo Projector may have a freeze function that allows you to pause or freeze the projected image. This can be useful when you want to discuss a specific portion of the content without it changing on the screen.
- Zoom and Focus: Depending on the size and distance of your projection surface, you may need to adjust the zoom and focus settings on the Elmo Projector. This ensures that the image is clear and well-defined, regardless of the distance between the projector and the screen.
- Audio Settings: If you are using audio in your presentation, make sure to adjust the volume level and audio output settings on the Elmo Projector. This ensures that the audience can hear the audio clearly during your presentation.
Take some time to explore the settings and configurations menu on your specific model of the Elmo Projector. Familiarize yourself with the available options and adjust them accordingly to meet your specific projection requirements. By fine-tuning these settings, you can enhance the visual and auditory experience of your audience during your presentation or document camera applications.
Using the Elmo Projector for Presentations
The Elmo Projector is an excellent tool for delivering engaging and impactful presentations. Here are some tips and techniques for effectively using the Elmo Projector in your presentations:
- Organize your content: Before your presentation, arrange your slides or documents in a logical order to ensure a smooth flow of information. Consider using a presentation software like PowerPoint or Keynote to create visually appealing slides.
- Use visuals and multimedia: Take advantage of the Elmo Projector’s capabilities by incorporating visuals and multimedia elements into your presentation. This may include images, videos, charts, or graphs. These visual aids can help reinforce your message and make it more engaging for your audience.
- Utilize the document camera: If you have physical documents or objects that you want to showcase during your presentation, make use of the document camera feature of the Elmo Projector. Place the document or object on the stage area and project it onto the screen for everyone to see clearly.
- Highlight key points: Use the Elmo Projector to emphasize important points on your slides or documents. You can use the built-in pointer feature or draw attention to specific areas of a document using the Elmo Projector’s annotation tools.
- Engage with your audience: The Elmo Projector allows you to interact with your audience effectively. Use the live demonstration feature to perform experiments, showcase product demos, or work through examples in real-time. This helps create an interactive and immersive experience for your attendees.
- Incorporate interactive activities: With the Elmo Projector, you can engage your audience by incorporating interactive activities during your presentation. This may include quizzes, polls, or group discussions that encourage participation and collaboration.
- Practice and rehearse: Before your actual presentation, practice using the Elmo Projector to familiarize yourself with its features and functionality. Rehearse your presentation to ensure a smooth delivery and make any necessary adjustments or refinements.
- Engage with your audience: Maintain eye contact with your audience and use effective body language to keep them engaged. Speak clearly and confidently, and encourage questions or feedback from the audience.
By following these tips and utilizing the features of the Elmo Projector effectively, you can deliver dynamic and captivating presentations that leave a lasting impression on your audience. Experiment with different techniques and incorporate your personal style to make your presentations memorable and impactful.
Using the Elmo Projector for Document Camera Applications
The Elmo Projector’s document camera feature makes it an ideal tool for various document camera applications. Here are some ways you can utilize the Elmo Projector for document-related tasks:
- Displaying documents: Place physical documents, such as textbooks, worksheets, or handouts, on the stage area of the Elmo Projector and project them onto the screen or wall. This allows everyone in the room to have a clear view of the document, making it easier to follow along or discuss the content.
- Zooming and panning: Make use of the Elmo Projector’s zooming and panning capabilities to focus on specific parts of a document. This helps in highlighting important details or explanations, ensuring that everyone understands the content being presented.
- Annotating documents: Use the Elmo Projector’s annotation tools to draw or write on the projected documents in real-time. This allows you to highlight key points, make additional notes, or underline important details, making the content even more engaging and interactive.
- Live demonstrations: The Elmo Projector can be used for live demonstrations of various subjects, such as science experiments, artwork, or product demonstrations. Place the objects or materials on the stage area and project them onto the screen, allowing the audience to observe each step or detail clearly.
- Capturing and saving images: The Elmo Projector typically allows you to capture images of documents or objects being projected. This enables you to save snapshots of important content for future reference, sharing with others, or archiving purposes.
- Document collaboration: The Elmo Projector can facilitate collaborative document-related activities. Multiple users can contribute by placing their documents or materials on the stage area, and the projector can display each item in sequence, promoting teamwork and engagement.
- Using different document modes: Depending on the Elmo Projector model, there may be different document modes available, such as split-screen or picture-in-picture. These modes allow you to display multiple documents or contents simultaneously, making it easier to compare or analyze different materials.
- Integration with digital tools: Some Elmo Projectors offer integration with digital tools or software, enabling further enhancements to document camera applications. This may include features like optical character recognition (OCR), text-to-speech conversion, or cloud storage integration.
By exploring these document camera applications and harnessing the capabilities of the Elmo Projector, you can make your document-related tasks more efficient, interactive, and visually appealing. Utilize the features mentioned above to enhance your teaching, training, or any other application that involves working with physical documents.
Troubleshooting Common Issues with the Elmo Projector
While the Elmo Projector is a reliable device, you may encounter occasional issues during setup or operation. Here are some common problems you may come across and steps to troubleshoot them:
- No power or projection: If the Elmo Projector is not powering on or there is no projection, ensure that the power cord is properly connected and that the power outlet is working. Check the power button on the projector and the remote control to make sure it is switched on. Also, verify that the input source is correctly selected.
- No display or distorted image: If the projected image is not visible or appears distorted, check the connections between the Elmo Projector and your device. Make sure that the cables are securely plugged into the correct ports. Adjust the focus, zoom, and image settings of the projector to ensure a clear and properly aligned display.
- No audio: If there is no audio or low audio volume, verify the audio connections between your device and the Elmo Projector. Ensure that the audio cables are properly plugged in and that the audio source is set correctly. Adjust the volume settings on both the projector and your device. Also, check if the audio output on your device is not muted or set to a very low volume.
- Keystone distortion: If the projected image appears distorted with trapezoidal shapes, adjust the keystone correction settings on the Elmo Projector. Use the keystone correction feature to align and straighten the image. Refer to the user manual for specific instructions on how to perform keystone correction on your particular model.
- Overheating: If the Elmo Projector becomes excessively hot or shuts down unexpectedly due to overheating, make sure that it is placed in a well-ventilated area. Check if the fans or cooling vents are blocked by any obstructions. Clean the air filters of the projector regularly to ensure proper airflow and prevent overheating.
- Remote control issues: If the remote control is not functioning, check if the batteries are inserted correctly and have sufficient power. Ensure that there are no obstructions between the remote control and the projector. Try resetting the remote control or replacing the batteries if necessary.
- Slow response or freezing: If the Elmo Projector experiences slow response or freezes during operation, try unplugging it from the power source and then reconnecting it after a few minutes. This can help reset the projector and resolve temporary issues. If the problem persists, contact the Elmo support team for further assistance.
Remember to consult the user manual specific to your Elmo Projector model for detailed troubleshooting steps and instructions. If you encounter persistent issues or require further assistance, it is recommended to reach out to the Elmo customer support for expert guidance.
Conclusion
The Elmo Projector is a versatile and powerful tool that enhances presentations and document camera applications. With its high-resolution camera, various connectivity options, and user-friendly interface, it provides a seamless experience for educators, business professionals, and individuals in need of visual aids.
In this guide, we have explored how to effectively use the Elmo Projector, from understanding its components to setting it up, connecting it to devices, adjusting settings, and troubleshooting common issues. By following the step-by-step instructions and implementing the suggested tips and techniques, you can optimize the use of the Elmo Projector for your specific needs.
Whether you are delivering presentations or utilizing the document camera feature, the Elmo Projector offers a range of functionalities to engage your audience. You can showcase physical documents, zoom in on important details, annotate content, perform live demonstrations, and even collaborate on document-related tasks.
Remember to consult the user manual specific to your Elmo Projector model for further guidance and detailed instructions. In case of any issues or questions, do not hesitate to reach out to the Elmo customer support team for assistance.
Make the most out of your Elmo Projector by incorporating visuals, multimedia, and interactive activities into your presentations. With its capabilities, you can captivate your audience, deliver impactful content, and create an immersive learning or presentation experience.
Embrace the possibilities offered by the Elmo Projector and unleash your creativity to deliver engaging presentations and enhance document camera applications. By effectively utilizing this remarkable tool, you can elevate your teaching, training, and presentation skills to new heights.