Introduction
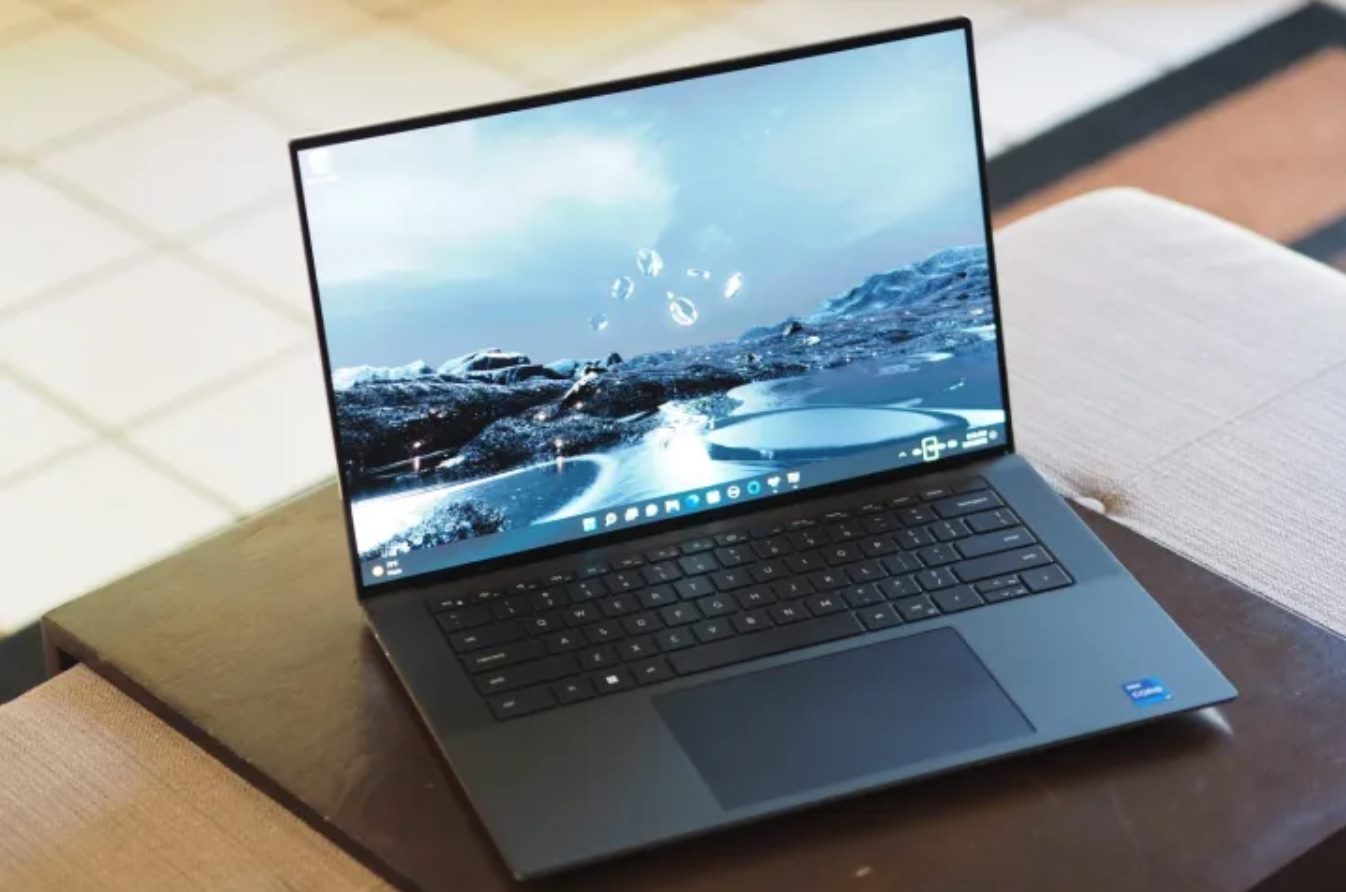
Welcome to this comprehensive guide on how to upgrade the SSD (Solid State Drive) of your XPS 13 laptop. If you’ve been experiencing slower performance or running out of storage space, upgrading your SSD can breathe new life into your device and improve its overall functionality.
The XPS 13 is a popular choice among professionals and tech enthusiasts due to its compact design, powerful performance, and impressive battery life. However, over time, the limited capacity of the original SSD may become a limiting factor. By upgrading to a larger and faster SSD, you can enjoy faster boot times, quicker file transfers, and ample storage space for all your multimedia and work-related files.
Before diving into the upgrade process, it’s important to note that upgrading the SSD requires some technical knowledge and careful handling of computer components. If you’re not comfortable with hardware upgrades or feel unsure about following the steps outlined in this guide, it’s always best to consult a professional or seek assistance from an authorized service center.
In this guide, we will walk you through the necessary steps to ensure a successful SSD upgrade for your XPS 13. We will cover everything from backing up your important data to the actual installation of the new SSD. So, let’s get started on this exciting journey of enhancing the performance and storage capacity of your XPS 13!
Backup Important Data
Before proceeding with any hardware upgrade, it is crucial to backup all your important data to prevent any potential loss or corruption during the SSD upgrade process. This step ensures that even if something unexpected happens during the upgrade, your valuable files will remain safe and accessible.
To begin the backup process, identify the files and folders that are essential to you. This may include documents, photos, videos, music, and any other personal or work-related files. Consider using an external storage device such as a USB drive or an external hard drive to store your backup.
If you prefer a cloud-based backup solution, there are various platforms available, such as Dropbox, Google Drive, or OneDrive, that offer convenient and secure storage options. These platforms typically provide a certain amount of free storage, but you may need to upgrade to a paid plan if you have a large amount of data to backup.
Once you have chosen your backup method, it’s time to start the process. Copy and paste or drag and drop the files and folders you want to backup to the selected storage device or upload them to the cloud storage platform of your choice.
It’s important to double-check that all your files have been successfully backed up before proceeding to the next step. Open and ensure that you can access your files from the backup device or verify that they are visible in your chosen cloud storage platform.
By taking the time to backup your important data, you can have peace of mind knowing that your files are safe and secure during the SSD upgrade process. Now that your data is properly backed up, let’s move on to the next step: determining the compatible SSD for your XPS 13.
Determine Compatible SSD
When upgrading the SSD of your XPS 13, it is essential to choose a compatible SSD that meets the specifications and requirements of your laptop. This ensures that the new SSD will work seamlessly with your device and provide optimal performance. Here are the steps to determine the compatible SSD for your XPS 13:
- Check your XPS 13 model: Start by identifying the specific model of your XPS 13. You can usually find this information on the bottom of your laptop or in the system settings. Make note of the exact model number for reference.
- Research compatibility: Visit the official Dell website or manufacturer’s documentation to access the specifications and recommended upgrades for your XPS 13 model. Look for information about compatible SSDs and any specific requirements or limitations.
- Consider storage capacity: Determine how much storage space you require for your needs. SSDs come in various capacities, ranging from 128GB to terabytes of storage. Consider factors like your budget, usage requirements, and future storage needs when choosing the capacity of your new SSD.
- Choose the right interface: Check the interface type supported by your XPS 13. Most modern laptops, including the XPS 13, use the M.2 interface for SSDs. However, it’s essential to confirm this information to ensure compatibility.
- Consider performance: Take note of the performance specifications of different SSD options. Look for factors like read and write speeds, as well as the type of memory (e.g., TLC, MLC, or SLC) used in the SSD. Higher-performance SSDs will provide faster data transfer speeds and improved overall performance.
By following these steps, you will be able to determine the compatible SSD for your XPS 13 and make an informed choice when selecting the new SSD. Once you have identified the suitable SSD, it’s time to move on to the next step: gathering the necessary tools for the upgrade.
Gather Necessary Tools
Before you begin the SSD upgrade process for your XPS 13, it is essential to gather the necessary tools to ensure a smooth and successful installation. Having the right tools will make the process easier and help prevent any damage to your laptop or components. Here are the tools you will need:
- Small Phillips screwdriver: This tool is necessary for removing the screws that secure the bottom cover of your XPS 13. Ensure that it is small enough to fit the screws without causing any damage.
- Anti-static wrist strap: An anti-static wrist strap is recommended to protect your laptop from any electrostatic discharge that could potentially damage sensitive components. This strap helps to ground any static electricity to prevent it from causing harm during the upgrade process.
- Plastic spudger or opening tool: A plastic spudger or opening tool is useful for prying open the bottom cover of your XPS 13 without scratching or damaging the casing.
- Clean cloth or microfiber cloth: A clean cloth or microfiber cloth is handy for wiping away any dust or fingerprints that may accumulate during the disassembly and assembly process.
- Optional: External drive enclosure or adapter: If you want to clone your existing SSD onto the new one, an external drive enclosure or adapter will allow you to connect both SSDs to your computer and transfer the data.
It is important to have these tools readily available before starting the upgrade process to avoid any unnecessary delays or interruptions. Having the right tools will ensure that you can effectively and safely perform the necessary steps to upgrade your SSD. Now that you have gathered the necessary tools, it is time to prepare for the upgrade process on your XPS 13.
Prepare for Upgrade
Now that you have gathered the necessary tools for the SSD upgrade of your XPS 13, it’s time to prepare for the actual upgrade process. Proper preparation ensures a smooth and seamless experience and minimizes the risk of damaging any components. Follow these steps to prepare for the upgrade:
- Choose a clean and well-lit workspace: Find a clean and well-lit area where you can comfortably work on your XPS 13. This helps prevent any dust or debris from getting inside your laptop and provides better visibility during the upgrade process.
- Power off and unplug your XPS 13: Before proceeding, make sure to power off your laptop and unplug it from any power source. This precautionary step ensures your safety and prevents any accidental damage during the upgrade.
- Remove any peripherals or accessories: Disconnect any external devices or accessories connected to your XPS 13, such as USB drives, headphones, or external monitors. This allows for easier access to the necessary components and reduces the risk of accidentally damaging any of these peripherals.
- Ground yourself and wear an anti-static wrist strap: To prevent any electrostatic discharge that could damage sensitive components, put on an anti-static wrist strap and connect it to a grounded surface. This ensures that you and your laptop are at the same electrical potential, reducing the risk of static electricity damaging any internal components.
- Refer to the manufacturer’s documentation: Take some time to refer to the manufacturer’s documentation or online resources specific to your XPS 13 model. This will provide additional guidance or precautions that you need to be aware of during the upgrade process.
By following these preparation steps, you will be well-prepared to embark on the SSD upgrade process for your XPS 13. Taking the time to set up your workspace, power off and unplug your laptop, and ground yourself will ensure a safer and more efficient upgrade experience. Now that you are fully prepared, it’s time to proceed with the disassembly of your XPS 13 to access the current SSD.
Disassemble Your XPS 13
Now that you have prepared for the SSD upgrade, it’s time to disassemble your XPS 13 to access the current SSD. Follow these steps carefully to ensure a successful disassembly:
- Flip your XPS 13: Gently flip your XPS 13 over so that the bottom cover is facing upwards. Place it on a soft surface to prevent any scratches or damage to the laptop’s exterior.
- Remove the screws: Use a small Phillips screwdriver to remove the screws that secure the bottom cover. Typically, there are several screws located around the edges of the laptop’s bottom cover. Keep these screws in a safe place for reassembly later.
- Pry open the bottom cover: Once the screws are removed, use a plastic spudger or opening tool to carefully pry open the bottom cover. Start at one corner and work your way around the edges, gently separating the clips that hold the cover in place.
- Remove the bottom cover: Once the clips are released, carefully lift and remove the bottom cover. It may be necessary to use a little force, but be careful not to damage any internal components.
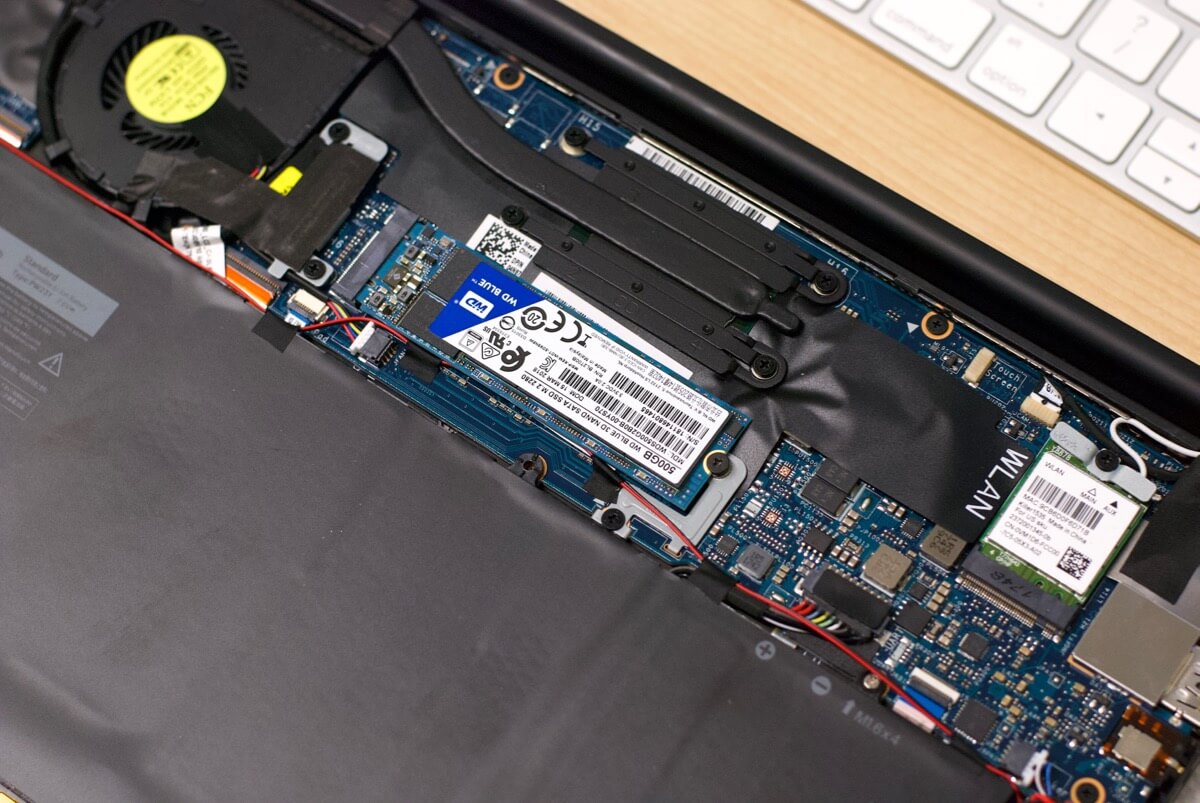
- Locate the existing SSD: With the bottom cover removed, locate the existing SSD, which is usually a small rectangular board connected to the motherboard. Take note of how it is positioned and connected to prepare for its removal.
It’s important to exercise caution when disassembling your XPS 13 to avoid causing any damage. If you encounter any resistance or difficulty, double-check the manufacturer’s documentation or seek assistance from a professional.
With the bottom cover removed and the existing SSD located, you are now ready to proceed with removing the current SSD. In the next section, we will cover the step-by-step process of removing the existing SSD from your XPS 13.
Remove the Current SSD
Now that you’ve successfully disassembled your XPS 13 and located the existing SSD, it’s time to remove the current SSD from your laptop. Follow these steps carefully to ensure a smooth removal:
- Disconnect the SSD cable: Locate the cable connected to the existing SSD. Gently disconnect the cable by carefully pulling it straight out from the SSD. Be cautious not to apply excessive force to avoid damaging the cable or the SSD connector.
- Remove the mounting screw: In some cases, the SSD may be secured to the laptop with a mounting screw. If you see a screw holding the SSD in place, use a small Phillips screwdriver to remove it. Set aside the screw in a safe place for later use.
- Carefully remove the SSD: Once the cable is disconnected and any mounting screw is removed, the current SSD should be free to be taken out. Hold the SSD by the edges and gently lift it out of its slot. Be cautious not to touch or handle the sensitive circuitry on the SSD.
After removing the current SSD, take a moment to inspect it for any physical damage or signs of wear. If you notice any issues, it’s recommended to contact the manufacturer or a professional for further assistance.
With the old SSD successfully removed, you are now ready to install the new SSD into your XPS 13. In the next section, we will guide you through the step-by-step process of installing the new SSD to enhance the performance of your laptop.
Install the New SSD
Now that you have removed the current SSD from your XPS 13, it’s time to install the new SSD and upgrade your laptop’s storage capacity and performance. Follow these steps carefully to ensure a successful installation:
- Align the new SSD: Take the new SSD and align it with the slot where the previous SSD was located. Make sure that the connectors on the SSD line up with the slot on the motherboard.
- Insert the new SSD: Gently slide the new SSD into the slot, applying even pressure until it is fully inserted. Take care not to force the SSD into place, as it should slide in smoothly if aligned correctly.
- Secure the SSD: If your new SSD requires a mounting screw, align the mounting holes on the SSD with the holes on the laptop chassis. Then, insert and tighten the mounting screw using a small Phillips screwdriver.
- Connect the SSD cable: Locate the cable that was disconnected from the previous SSD. Carefully connect it to the appropriate connector on the new SSD. Ensure that the connection is secure and the cable is inserted fully.
Double-check that all connections are secure and that the new SSD is properly seated in its slot. This will help prevent any issues or performance problems once your XPS 13 is reassembled and powered on.
Congratulations! You have successfully installed the new SSD in your XPS 13. In the next section, we will guide you through the process of reassembling your laptop to complete the upgrade process.
Reassemble Your XPS 13
With the new SSD installed in your XPS 13, it’s time to reassemble your laptop to complete the upgrade process. Follow these steps carefully to ensure a smooth reassembly:
- Replace the bottom cover: Take the bottom cover that you removed earlier and align it with the laptop’s chassis. Carefully snap the clips back into place and ensure that all edges are flush.
- Secure the bottom cover screws: Using a small Phillips screwdriver, reinsert and tighten the screws that secure the bottom cover. Follow the reverse order of how you removed them to ensure proper alignment.
- Give the laptop a visual inspection: Check the laptop’s body for any remaining screws or loose components. Ensure that all connections are intact and that the laptop’s exterior is clean and free from debris.
Once you have reassembled your XPS 13 and secured the bottom cover, take a moment to appreciate your work. You’re now one step closer to enjoying the enhanced performance and storage capacity of your upgraded laptop.
In the next section, we will guide you through the final steps of testing and verifying the success of the SSD upgrade for your XPS 13.
Test and Verify the Upgrade
After reassembling your XPS 13, it’s important to test and verify the success of the SSD upgrade to ensure that everything is functioning correctly. Follow these steps to complete the testing process:
- Power on your XPS 13: Connect your laptop to a power source and press the power button to turn it on. Wait for the operating system to load.
- Check BIOS and system information: Access the BIOS by pressing the designated key during the boot-up process (usually F2 or Del). Confirm that the new SSD is recognized and listed in the system information. This indicates that the upgrade was successful.
- Check storage capacity: Open your file explorer or operating system’s storage management settings to verify that the new SSD’s storage capacity is properly recognized.
- Perform a speed test: You can use software tools such as CrystalDiskMark or AS SSD Benchmark to measure the read and write speeds of your new SSD. Compare the results with the specifications of the SSD to ensure it’s performing as expected.
- Transfer files and benchmark performance: Copy a few files to and from the SSD to test the speed and responsiveness of the new drive. Run any performance tests or benchmarks to evaluate the overall performance improvement compared to the previous SSD.
If everything is functioning as expected and you notice significant improvements in speed and storage capacity, then the upgrade has been successful. However, if you encounter any issues or the new SSD is not recognized, it’s advisable to double-check the installation and consult professional assistance if needed.
Congratulations on completing the testing phase! Your XPS 13 is now upgraded with a new SSD, providing faster performance and increased storage capacity. In the final section, we will briefly summarize the key steps and importance of the SSD upgrade for your XPS 13.
Conclusion
Upgrading the SSD of your XPS 13 can significantly enhance its performance and storage capacity, allowing you to enjoy faster boot times, quicker file transfers, and ample space for all your files and applications. Throughout this guide, we have covered the essential steps to successfully upgrade the SSD in your XPS 13.
We began by emphasizing the importance of backing up your important data to prevent any loss or corruption during the upgrade process. Then, we walked you through determining the compatible SSD for your specific XPS 13 model and gathering the necessary tools for the upgrade.
Next, we guided you through the process of preparing for the upgrade, including choosing a suitable workspace and wearing an anti-static wrist strap for added protection. We then provided detailed instructions for disassembling your XPS 13, removing the current SSD, and installing the new SSD.
Once the new SSD was installed, we explained how to reassemble your XPS 13, ensuring that all connections were secure and proper alignment was achieved. Following that, we emphasized the importance of testing and verifying the success of the upgrade by checking BIOS, system information, storage capacity, and performing speed tests.
By following this guide and successfully completing the SSD upgrade, you have unlocked the full potential of your XPS 13. Embrace the improved performance, increased storage capacity, and faster data access that your upgraded SSD brings.
Remember, if you encounter any issues or are unsure about any step of the upgrade process, it’s always wise to consult the manufacturer’s documentation, seek professional assistance, or contact the manufacturer directly.
Enjoy your upgraded XPS 13 and make the most of its enhanced capabilities! Whether you’re using it for work, entertainment, or both, the SSD upgrade will undoubtedly elevate your overall computing experience.