Introduction
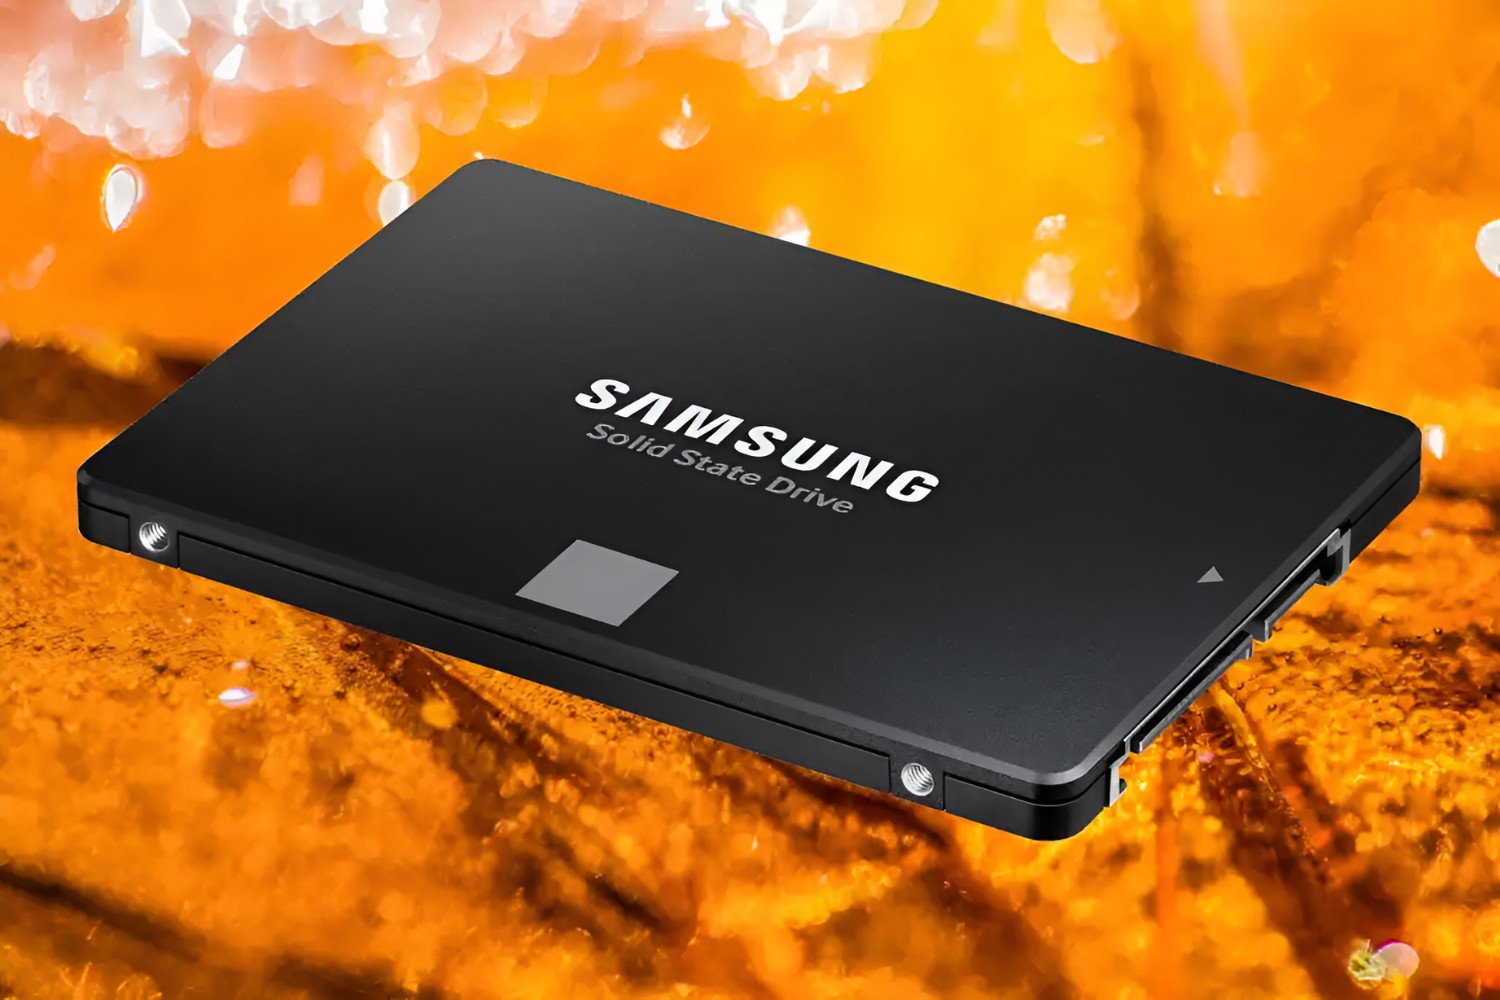
Welcome to the ultimate guide on how to upgrade your Windows 10 operating system with a solid state drive (SSD). If you’re tired of sluggish performance or long boot times, upgrading to an SSD can make a world of difference. SSDs offer faster response times, improved data transfer rates, and enhanced overall system performance.
In this article, we will take you through the step-by-step process of upgrading your Windows 10 system with an SSD. Whether you’re a tech-savvy enthusiast or a novice user, this guide has got you covered.
Upgrading to an SSD is not just about installing the drive physically – it involves backing up your data, selecting the right SSD, creating a system image, cloning your hard drive, configuring the BIOS settings, and transferring your data. We will walk you through each stage of the process, sharing valuable tips and tricks along the way.
The benefits of an SSD upgrade are not limited to speed alone. You’ll notice improved overall system responsiveness, reduced application load times, and quicker access to your files and programs. However, it’s essential to prepare yourself adequately and familiarize yourself with the steps involved before proceeding with the upgrade.
So, if you’re ready to turbocharge your Windows 10 experience and enjoy the lightning-fast performance that an SSD offers, let’s get started!
Preparing for the Upgrade
Before diving into the process of upgrading your Windows 10 system with an SSD, it’s crucial to prepare yourself and your computer for the transition. Following these steps will ensure a smooth and successful upgrade:
- Back up Your Data: Before making any changes to your system, it’s essential to back up all your important data. This will safeguard your files in case of any unforeseen issues during the upgrade process. You can use external storage options like USB drives or cloud storage services to create a backup of your files.
- Check System Requirements: Ensure that your system meets the requirements for installing an SSD. Check the manufacturer’s specifications for compatibility and consider any additional hardware or software requirements.
- Select the Right Solid State Drive: Choose an SSD that matches your needs in terms of capacity and performance. Consider factors such as storage space, speed, and budget. Research different models and read customer reviews to make an informed decision.
- Acquire the Necessary Tools: To successfully install the SSD, you may need specific tools like screwdrivers or mounting brackets. Check the specifications of your SSD and consult the manufacturer’s instructions to identify any additional tools required.
- Create a System Image: Creating a system image ensures that you have a full backup of your existing Windows installation. This allows you to restore your computer to its previous state if anything goes wrong during the upgrade process. You can use built-in Windows tools like “Backup and Restore” or third-party software for this task.
By taking these preparatory steps, you’ll be ready to embark on the exciting journey of upgrading your Windows 10 system with an SSD. Remember to have a backup plan in place and research thoroughly before proceeding with the upgrade. With the right preparation, you can avoid potential pitfalls and enjoy a seamless transition to a faster and more efficient computing experience.
Backing up Your Data
Before proceeding with the upgrade to a solid state drive (SSD), it is crucial to back up all your important data. While the chances of data loss during the upgrade process are minimal, it is always better to be safe than sorry. Follow these steps to ensure a secure backup:
- Identify Important Files: Determine which files and folders are essential for you. This typically includes personal documents, photos, videos, music, and any other files that you cannot afford to lose.
- Select a Backup Method: There are various options available to backup your data. You can use external storage devices like USB flash drives or external hard drives. Alternatively, you can take advantage of cloud storage services like Google Drive, Microsoft OneDrive, or Dropbox.
- Create a Backup Schedule: It is a good practice to establish a regular backup schedule to ensure that your data is always protected. Set a reminder to perform backups periodically to keep your files up to date.
- Copy Files to External Storage: Copy the identified important files to the selected backup method. If using an external storage device, simply connect it to your computer and drag and drop the files to the device. If using cloud storage, upload the files to the corresponding service.
- Verify the Backup: Once the backup process is complete, double-check that all the files have been successfully copied to the external storage or cloud storage. Take some time to compare the original files with the backup to ensure their integrity.
Remember, the goal of backing up your data is to have a copy of all your important files in a separate location. This ensures that even if something unexpected happens during the upgrade process, your data will remain safe and accessible.
By following these steps, you can have the peace of mind knowing that your data is adequately backed up before proceeding with the SSD upgrade. With your files securely stored, you can confidently move on to the next stages of the upgrade process.
Checking System Requirements
Before upgrading your computer with a solid state drive (SSD), it is crucial to ensure that your system meets the necessary requirements. This step will help you determine if your computer is compatible with an SSD and if any additional hardware or software updates are necessary. Let’s dive into the key aspects of checking system requirements:
By thoroughly checking your system’s requirements, you can ensure a smooth transition to an SSD without encountering any compatibility issues. This step is crucial for a successful upgrade and guarantees that you will fully benefit from the speed and performance advantages that an SSD offers.
Selecting the Right Solid State Drive
Choosing the right solid state drive (SSD) for your Windows 10 upgrade is a critical decision that can greatly impact the overall performance and storage capacity of your computer. Consider the following factors when selecting the perfect SSD for your needs:
Additionally, it’s helpful to read reviews and customer feedback on specific SSD models to gain insights into the performance, reliability, and compatibility of the drives you’re considering. This information can aid in making an informed decision.
By carefully selecting the right SSD for your Windows 10 upgrade, you can ensure that your system achieves optimal performance, storage capacity, and reliability. Take your time, compare different options, and consider your specific needs before making a decision.
Acquiring the Necessary Tools
Before you begin the process of upgrading your Windows 10 system with a solid-state drive (SSD), it’s important to make sure you have all the necessary tools. Having the right tools on hand will not only simplify the installation process but also help ensure that everything goes smoothly. Here are the essential tools you’ll need:
Before starting the upgrade process, ensure that you have all the necessary tools readily available. It’s frustrating to get halfway through the process and realize you’re missing a critical tool. Take the time to gather all the tools beforehand to avoid any unnecessary delays or complications.
Having the right tools will make the entire upgrade process smoother and more efficient, giving you peace of mind and confidence as you upgrade your Windows 10 system with a solid-state drive.
Creating a System Image
Creating a system image is an essential step before upgrading your Windows 10 system with a solid-state drive (SSD). A system image is a complete backup of your entire operating system, including the Windows installation, settings, drivers, and installed applications. It allows you to restore your computer to its previous state if anything goes wrong during the upgrade process. Follow these steps to create a system image:
- Open Backup Options: In Windows 10, go to the Control Panel and search for “Backup and Restore.” Click on the “Create a system image” option to begin the process.
- Select Destination: Choose a location where you want to save the system image. This can be an external hard drive, a network drive, or a set of DVD discs. Make sure the selected destination has enough storage space to accommodate the system image.
- Select Drives to Include: Select the drives that you want to include in the system image. Typically, this will be the drive where your Windows installation is located. You may also choose to include other drives if they contain important system-related files or data.
- Start the Backup: Review the selected drives and destination, and click on the “Start backup” button to begin the system image creation process. The time required for the backup process will depend on the size of the selected drives and the speed of your computer.
- Verify the System Image: Once the system image creation is complete, take a moment to verify the integrity of the image. You can do this by locating the system image file in the selected destination and verifying that its size matches the size of the selected drives.
By creating a system image, you ensure that you have a complete backup of your current Windows installation. This backup will prove invaluable if any issues arise during the upgrade process or if you ever need to restore your system to its previous state.
Remember to regularly update your system image as you make significant changes to your computer, such as installing new software or modifying important settings. This will ensure that you always have an up-to-date and reliable system backup at your disposal.
Cloning Your Hard Drive
Cloning your hard drive is a crucial step in upgrading your Windows 10 system with a solid-state drive (SSD). Cloning allows you to transfer all the data from your old hard drive to the new SSD, including the operating system, applications, and files. This ensures a seamless transition and saves you the hassle of reinstalling everything from scratch. Follow these steps to clone your hard drive:
- Install and Launch Cloning Software: Download and install the cloning software of your choice, such as Acronis True Image, Macrium Reflect, or EaseUS Todo Backup. Launch the software and familiarize yourself with its interface.
- Select Source and Destination Drives: In the cloning software, select your old hard drive (the source drive) and the new SSD (the destination drive). Make sure you choose the correct drives to avoid accidentally overwriting any important data.
- Choose Cloning Method: Select the cloning method that suits your needs. There are generally two options available: “Clone” and “Disk Imaging.” A clone duplicates the entire contents of the source drive onto the destination drive, while disk imaging creates an image file that can be restored to the destination drive. Choose the method that aligns with your preferences.
- Configure Cloning Options: Depending on the cloning software, you may have additional options to configure, such as partition resizing, sector-by-sector cloning, or excluding specific files or folders. Review these options and adjust them according to your requirements.
- Start the Cloning Process: Double-check the source and destination drives, as well as the cloning settings. Once you’re ready, initiate the cloning process. This may take some time, depending on the size of your hard drive and the speed of your computer.
- Verify the Cloning Process: Once the cloning process is complete, the software should provide a confirmation message. Take a moment to verify that all the data from the old hard drive has been successfully cloned to the new SSD.
Upon successful completion of the cloning process, you’ll have an exact replica of your old hard drive on the new SSD. This means that all your files, applications, and settings will be preserved, allowing you to pick up right where you left off.
Remember to keep your old hard drive intact until you’ve tested and verified that the cloning process was successful. Once everything is in working order on the new SSD, you can safely remove the old hard drive from your system.
Physically Installing the Solid State Drive
Now that you have successfully cloned your hard drive, the next step in upgrading your Windows 10 system with a solid-state drive (SSD) is to physically install the SSD into your computer. Follow these steps to ensure a proper installation:
- Power Off and Unplug: Power down your computer and unplug it from the wall outlet. This ensures your safety and prevents any accidental damage to the computer’s components.
- Open the Computer Case: Depending on your computer, you may need to remove a side panel or top cover to access the internal components. Refer to your computer’s manual or do some research online to determine the proper method for opening the case.
- Find an Available Drive Bay: Locate an available drive bay where you can install the SSD. This may be a 2.5-inch drive bay or an M.2 slot on your motherboard, depending on the form factor of your SSD.
- Mount the SSD: If you are using a 2.5-inch SSD, mount it securely in the drive bay using mounting screws or brackets. If you are using an M.2 SSD, insert it into the M.2 slot on the motherboard, taking care to align the notches correctly.
- Connect Data and Power Cables: Connect a SATA data cable from the SSD to an available SATA port on the motherboard. If you are using a 2.5-inch SSD, also connect a SATA power cable from the power supply unit (PSU) to the SSD. Make sure the connections are secure and properly seated.
- Close the Computer Case: After confirming that all the connections are secure, gently close the computer case and fasten any screws or latches to secure it in place.
- Plug in and Power On: Plug your computer back into the power outlet and power it on. The computer should detect the new SSD and recognize it as a storage device.
It’s important to note that the physical installation process may vary depending on your computer’s make and model. Always consult your computer’s manual or manufacturer’s website for specific instructions tailored to your system.
By properly installing the solid-state drive into your computer, you are one step closer to enjoying the improved speed and performance that an SSD offers. Now, let’s move on to configuring the BIOS settings to ensure the SSD is recognized and functions correctly.
Connecting the Solid State Drive
After physically installing the solid-state drive (SSD) into your computer, the next step in upgrading your Windows 10 system is to connect the SSD properly. This involves establishing the necessary data and power connections to ensure the SSD is recognized and functions correctly. Follow these steps for a successful connection:
- Data Connection: Locate an available SATA port on your motherboard. Connect one end of a SATA data cable to this port and the other end to the corresponding data port on the SSD. Ensure the connection is firmly seated on both ends.
- Power Connection: Identify an available SATA power connector from your power supply unit (PSU). Connect one end to the power port on the SSD. Make sure the connection is secure to avoid any power-related issues.
- Cable Management: Organize the cables neatly and ensure they are safely routed away from any fans or moving parts to avoid any potential interferences or damage.
- Verify Connections: Double-check that both the data and power connections are securely in place. A loose connection can result in improper functioning or failure to detect the SSD. Take a moment to ensure everything is tightly connected.
Once you have completed these steps, the SSD is properly connected to your computer. The next step is to configure the Basic Input/Output System (BIOS) settings to ensure that the SSD is recognized during system startup.
Remember, the process of connecting the SSD may vary depending on your computer’s make and model. Always refer to your computer’s manual or consult the manufacturer’s website for specific instructions.
By establishing the correct data and power connections, you have ensured that the SSD is ready to function as part of your Windows 10 system. Now, let’s move on to configuring the BIOS settings for proper recognition of the SSD.
Configuring the BIOS Settings
Configuring the Basic Input/Output System (BIOS) settings is an essential step in upgrading your Windows 10 system with a solid-state drive (SSD). This involves adjusting the BIOS settings to ensure that the SSD is recognized and set as the primary boot device. Follow these steps to configure the BIOS settings correctly:
- Access the BIOS: Restart your computer and access the BIOS by pressing the key specified by your computer’s manufacturer. Common keys to access the BIOS include Del, F2, F10, or Esc. Refer to your computer’s manual or manufacturer’s website for the exact key.
- Navigate to the Boot Menu: Once you are in the BIOS, navigate to the Boot tab or menu using the arrow keys on your keyboard.
- Change Boot Device Priority: Locate the Boot Device Priority or Boot Order section. Set the SSD as the first boot device by moving it to the top of the list. This ensures that the computer will boot from the SSD.
- Disable Legacy Boot Options (if applicable): If your computer uses Legacy Boot mode, look for the option to enable UEFI Boot or disable Legacy Boot. This ensures that the SSD is recognized in UEFI mode, which is typically the recommended mode for modern systems.
- Save and Exit: Once you have made the necessary changes, save the settings and exit the BIOS. Look for the Exit tab or the option to save changes and exit.
It’s important to note that the exact steps and options in the BIOS may vary depending on your computer’s make and model. Refer to your computer’s manual or manufacturer’s website for specific instructions tailored to your system.
By correctly configuring the BIOS settings, you ensure that the SSD is recognized as the primary boot device for your Windows 10 system. This allows your computer to boot up from the SSD, delivering the performance benefits of faster boot times and improved overall system responsiveness.
After configuring the BIOS, it’s time to transfer your data to the new SSD. In the next section, we will discuss how to transfer your Windows installation and other data from the old hard drive to the SSD.
Transferring Your Data
Once you have successfully installed and configured your solid-state drive (SSD), the next step in upgrading your Windows 10 system is to transfer your data from the old hard drive to the new SSD. This process involves migrating your Windows installation, applications, and files to ensure a seamless transition. Follow these steps to transfer your data:
- Migrate Your Windows Installation: Use the cloning software you previously installed to migrate your Windows installation from the old hard drive to the new SSD. Launch the cloning software and follow the instructions to select the source (old hard drive) and the destination (SSD) drives. Start the migration process and wait for it to complete.
- Transfer Your Files and Applications: After migrating the Windows installation, you will need to transfer your personal files and applications from the old hard drive to the new SSD. Manually copy your important files and folders to the appropriate locations on the SSD. Reinstall any necessary applications by downloading and installing them directly onto the SSD.
- Update File Paths (if necessary): If you had files or applications that referenced specific file paths on the old hard drive, you may need to update those file paths to point to the new SSD. This ensures that everything functions correctly on the SSD.
- Verify the Data Transfer: Once you have transferred your data, take some time to verify that everything has been successfully transferred to the SSD. Double-check that your personal files, applications, and settings are intact and functioning as expected.
It’s important to note that while cloning your Windows installation will transfer most of your data, there may be some applications or settings that do not get transferred over. In these cases, manually reinstalling the applications and reconfiguring the settings may be necessary.
By successfully transferring your data to the new SSD, you can now enjoy the improved speed, responsiveness, and reliability that SSDs offer. Your Windows 10 system is ready to deliver optimal performance with faster boot times and quicker access to your files and applications.
Now that your data has been successfully transferred, it’s important to configure the SSD properly for optimal performance. In the next section, we’ll discuss how to configure the solid-state drive to ensure it operates at its best.
How to Migrate Your Windows Installation
Migrating your Windows installation from the old hard drive to the new solid-state drive (SSD) is a crucial step in upgrading your Windows 10 system. This process ensures that your operating system and all its settings are transferred to the faster and more efficient SSD. Follow these steps to migrate your Windows installation:
- Launch Cloning Software: Start the cloning software that you installed earlier on your computer. Ensure that both the old hard drive (source) and the new SSD (destination) are connected and recognized by the cloning software.
- Select Source and Destination: In the cloning software, choose the old hard drive as the source drive and the new SSD as the destination drive. Pay close attention to selecting the correct drives to avoid accidentally overwriting any data.
- Choose Cloning Method: Select the appropriate cloning method offered by the software. You may have options such as “Clone Disk,” “Clone System Disk,” or “Migrate OS.” Choose the method that specifically targets the Windows installation and associated system files.
- Clean Up the Destination Drive (Optional): If the new SSD has existing data, you can choose to clean up the destination drive before proceeding with the cloning process. This will ensure a clean installation of the Windows operating system.
- Configure Cloning Options: Depending on the cloning software, you may have additional options to configure, such as resizing partitions, excluding certain files or folders, or performing a sector-by-sector clone. Review and adjust these options based on your preferences and needs.
- Start the Cloning Process: Double-check all the settings and configurations before proceeding. When you are ready, start the cloning process. This will initiate the transfer of your Windows installation, system files, and settings from the old hard drive to the new SSD.
- Monitor the Cloning Progress: Depending on the size of your Windows installation, the cloning process may take some time. Monitor the progress bar or estimated time remaining provided by the software and ensure that the process completes successfully.
- Verify the Cloned Windows Installation: Once the cloning process is complete, verify the cloned Windows installation on the new SSD. Restart your computer, and it should boot into Windows from the SSD. Check that all your files, settings, and applications are intact and functioning as expected.
By successfully migrating your Windows installation to the new SSD, you have optimized your system for faster boot times, improved responsiveness, and enhanced overall performance. Enjoy the benefits of a Windows 10 system running on an SSD.
Now that your Windows installation has been migrated, it’s important to configure the SSD properly to ensure optimal performance. In the next section, we’ll discuss how to configure the solid-state drive for the best results.
Configuring the Solid State Drive
Configuring the solid-state drive (SSD) properly is important to ensure optimal performance and longevity. Although SSDs generally come pre-configured for plug-and-play use, there are a few considerations to keep in mind to maximize their potential. Follow these steps to configure your SSD:
- Verify Drive Recognition: Once your Windows system is booted from the SSD, check if the drive is properly recognized by the operating system. Open the Disk Management utility (search “disk management” in the Start menu) and verify that the SSD is listed.
- Enable TRIM (if applicable): TRIM is a command that helps maintain SSD performance by optimizing the way data is stored. To enable TRIM, open the Command Prompt as an administrator, enter the command “fsutil behavior set DisableDeleteNotify 0”, and press Enter.
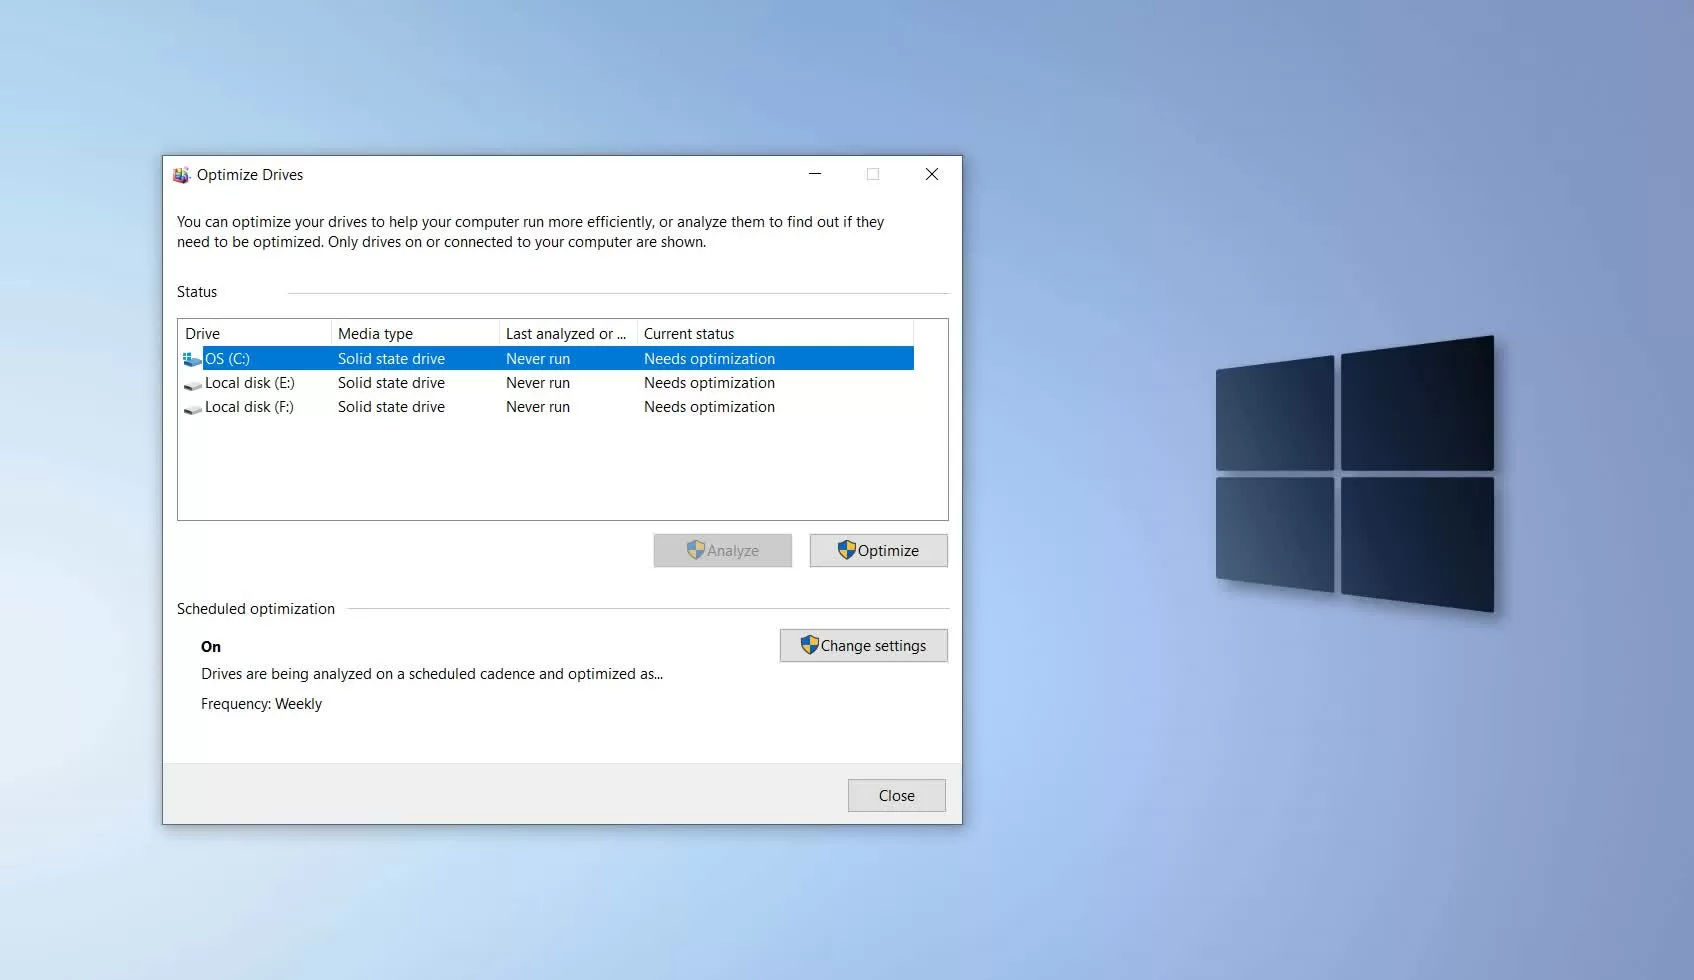
- Disable Disk Defragmentation: Unlike traditional hard drives, SSDs do not benefit from disk defragmentation and it can potentially reduce the lifespan of the drive. Disable automatic disk defragmentation in the Windows settings to prevent unnecessary wear on the SSD.
- Enable AHCI Mode (if applicable): If your SSD supports Advanced Host Controller Interface (AHCI), ensure that your BIOS settings are configured to use this mode. AHCI allows for enhanced performance and features specific to SSD technology.
- Update Firmware (if necessary): Check the manufacturer’s website for any firmware updates for your SSD. Updating the firmware can address known issues, improve compatibility, and potentially enhance performance.
- Monitor Drive Health: Use SMART monitoring tools or dedicated software provided by the SSD manufacturer to keep track of the drive’s health. Monitoring the SSD’s health can provide early warnings of potential issues and allow you to take appropriate action.
- Regularly Back up Your Data: Regularly back up your data to ensure that you have a copy of important files and minimize the risk of data loss. While SSDs are generally reliable, unforeseen circumstances can still occur.
By configuring your SSD properly, you can maximize its performance, reliability, and lifespan. These steps will help ensure that your SSD performs optimally and provides a seamless computing experience.
Remember to check the manufacturer’s documentation or website for specific recommendations and software provided for configuring and managing your specific SSD model.
With your SSD properly configured, you can now enjoy the full potential and benefits of your upgraded Windows 10 system. Take advantage of the increased speed, responsiveness, and efficiency that an SSD brings to your computing experience.
Verifying the Upgrade Was Successful
After completing the upgrade of your Windows 10 system with a solid-state drive (SSD), it’s important to verify that the upgrade was successful. This will give you peace of mind and ensure that your system is running optimally. Here are several steps you can take to verify the success of the upgrade:
- Boot Times: Pay attention to the boot times of your computer. With an SSD, your system should boot up significantly faster compared to the old hard drive. If you notice a notable decrease in boot time, it indicates a successful upgrade.
- System Responsiveness: Check the overall responsiveness of your system. Applications should launch quicker, files should open faster, and general system navigation should feel smoother. If you notice a noticeable improvement in responsiveness, it is a positive sign that the upgrade was successful.
- Drive Recognition: Confirm that the new SSD is recognized correctly in the Windows operating system. Open the Disk Management utility (search “disk management” in the Start menu) and ensure that the SSD is listed with the expected storage capacity.
- System Stability: Monitor the stability of your system. Ensure that you are not experiencing any frequent crashes, unexpected freezes, or compatibility issues with applications. A stable system indicates a successful upgrade with proper hardware and software integration.
- SMART Monitoring: Utilize SMART monitoring tools to check the health and performance statistics of your SSD. This allows you to monitor the SSD’s reliability and identify any potential issues early on.
- File Accessibility: Ensure that all your files and applications are accessible and functioning properly from the new SSD. Open critical files, use various applications, and test different functionalities to confirm everything is working as expected.
- Run Benchmark Tests: Conduct benchmark tests to measure the performance of your new SSD. These tests assess the read and write speeds, random access times, and overall performance of the drive. Compare the results with the specifications provided by the manufacturer to confirm that your SSD is performing as expected.
By going through these verification steps, you can ensure that the upgrade to an SSD was successful and that your Windows 10 system is running optimally. In case you encounter any issues or notice any abnormalities, refer to the manufacturer’s documentation or seek assistance from their support channels for further guidance.
Enjoy the enhanced speed, responsiveness, and reliability that your newly upgraded Windows 10 system with an SSD provides!
Troubleshooting Common Issues
While upgrading your Windows 10 system with a solid-state drive (SSD) generally goes smoothly, you may encounter some common issues along the way. Understanding these issues and how to troubleshoot them can help ensure a successful upgrade. Here are some common problems and their potential solutions:
- SSD Not Recognized: If the new SSD is not recognized in the operating system, first check if it is properly connected. Ensure the data and power cables are securely attached. If the issue persists, try connecting the SSD to a different SATA port on the motherboard.
- Boot Issues: If you experience boot issues after the upgrade, make sure the SSD is set as the first boot device in the BIOS settings. Verify that the cloning process was successful and that the Windows installation was migrated correctly. If necessary, repeat the cloning process or perform a clean Windows installation on the SSD.
- Driver Incompatibility: In some cases, certain drivers may not be compatible with the new hardware configuration. Make sure all drivers are up to date, especially for the motherboard and chipset. Check the manufacturer’s website for the latest driver updates and install them accordingly.
- System Stability Issues: If you experience stability issues, such as frequent crashes or freezes, ensure that all components are properly seated and connected. Check for any hardware conflicts or compatibility issues. Additionally, make sure that your power supply unit (PSU) is sufficient to handle the new hardware configuration.
- Slow Performance: If the SSD is not performing as expected, ensure that it is running in AHCI mode in the BIOS settings, as this mode optimizes SSD performance. Update the SSD firmware to the latest version provided by the manufacturer. Check for any background programs or processes that may be impacting performance.
- Cloning Issues: If you encounter errors or incomplete cloning during the migration process, try using different cloning software. Make sure the source and destination drives are properly selected, and check the drive health to ensure there are no issues with either drive.
- Data Corruption: In rare cases, data corruption may occur during the cloning or transfer process. Before proceeding with the upgrade, ensure that you have a recent backup of your data. If data corruption occurs, restore your files from the backup.
If you encounter any of these issues or encounter any other problems during the upgrade process, consult the manufacturer’s documentation, online forums, or customer support for further assistance. They can provide specific troubleshooting steps based on your hardware and software configuration.
By being prepared and equipped with troubleshooting knowledge, you can overcome common issues and ensure a successful upgrade to a Windows 10 system with an SSD.
Conclusion
Congratulations! You have successfully completed the upgrade of your Windows 10 system with a solid-state drive (SSD). By following the step-by-step process outlined in this guide, you have unlocked the full potential of your computer, enjoying faster boot times, improved responsiveness, and enhanced overall system performance.
Throughout this guide, you learned how to prepare for the upgrade by backing up your data, checking system requirements, and selecting the right SSD. You acquired the necessary tools, created a system image, cloned your hard drive, and physically installed the SSD. You also configured the BIOS settings, transferred your data, and verified that the upgrade was successful. Lastly, you gained insights into troubleshooting common issues that may arise during the upgrade process.
Now that your Windows 10 system is powered by an SSD, remember to maintain good SSD hygiene. Regularly update your firmware, enable TRIM, and avoid disk defragmentation. It’s also crucial to keep regular backups of your data to ensure its safety and minimize the risk of data loss.
As technology continues to evolve, the upgrade process may change. Stay up to date with the latest recommendations from product manufacturers and software developers. By staying informed and adapting to new practices, you can continue to optimize and enhance your Windows 10 system.
We hope this guide has been informative and helped you successfully upgrade your Windows 10 system with an SSD. Enjoy the remarkable speed and performance of your new SSD, and happy computing!


