Introduction
Are you looking to improve the performance of your iMac? One of the most effective ways to do so is by upgrading the RAM. Upgrading the RAM (Random Access Memory) in your iMac can significantly enhance its speed and multitasking capabilities, allowing you to seamlessly run multiple applications and handle memory-intensive tasks.
In this guide, we will walk you through the step-by-step process of upgrading the RAM in your iMac. Whether you’re a tech-savvy enthusiast or a novice user, don’t worry – the process is relatively straightforward and doesn’t require advanced technical skills.
Before we get started, it’s important to note that the RAM upgrade process can vary slightly depending on the model and year of your iMac. Therefore, it’s essential to determine the specific upgrade steps for your iMac model by consulting the official Apple documentation or seeking assistance from Apple Support.
By the end of this guide, you’ll be equipped with the knowledge and confidence necessary to successfully upgrade the RAM in your iMac, unleashing its full potential and providing a significant performance boost.
Now, let’s gather the tools and materials needed for this upgrade.
Tools and Materials Needed
Before diving into the RAM upgrade process, make sure you have the necessary tools and materials. Here’s a list of what you’ll need:
- Screwdriver: Most iMac models require a Phillips screwdriver for removing the access panel.
- Anti-static wristband (optional): While not mandatory, an anti-static wristband can prevent static electricity from damaging sensitive electronic components.
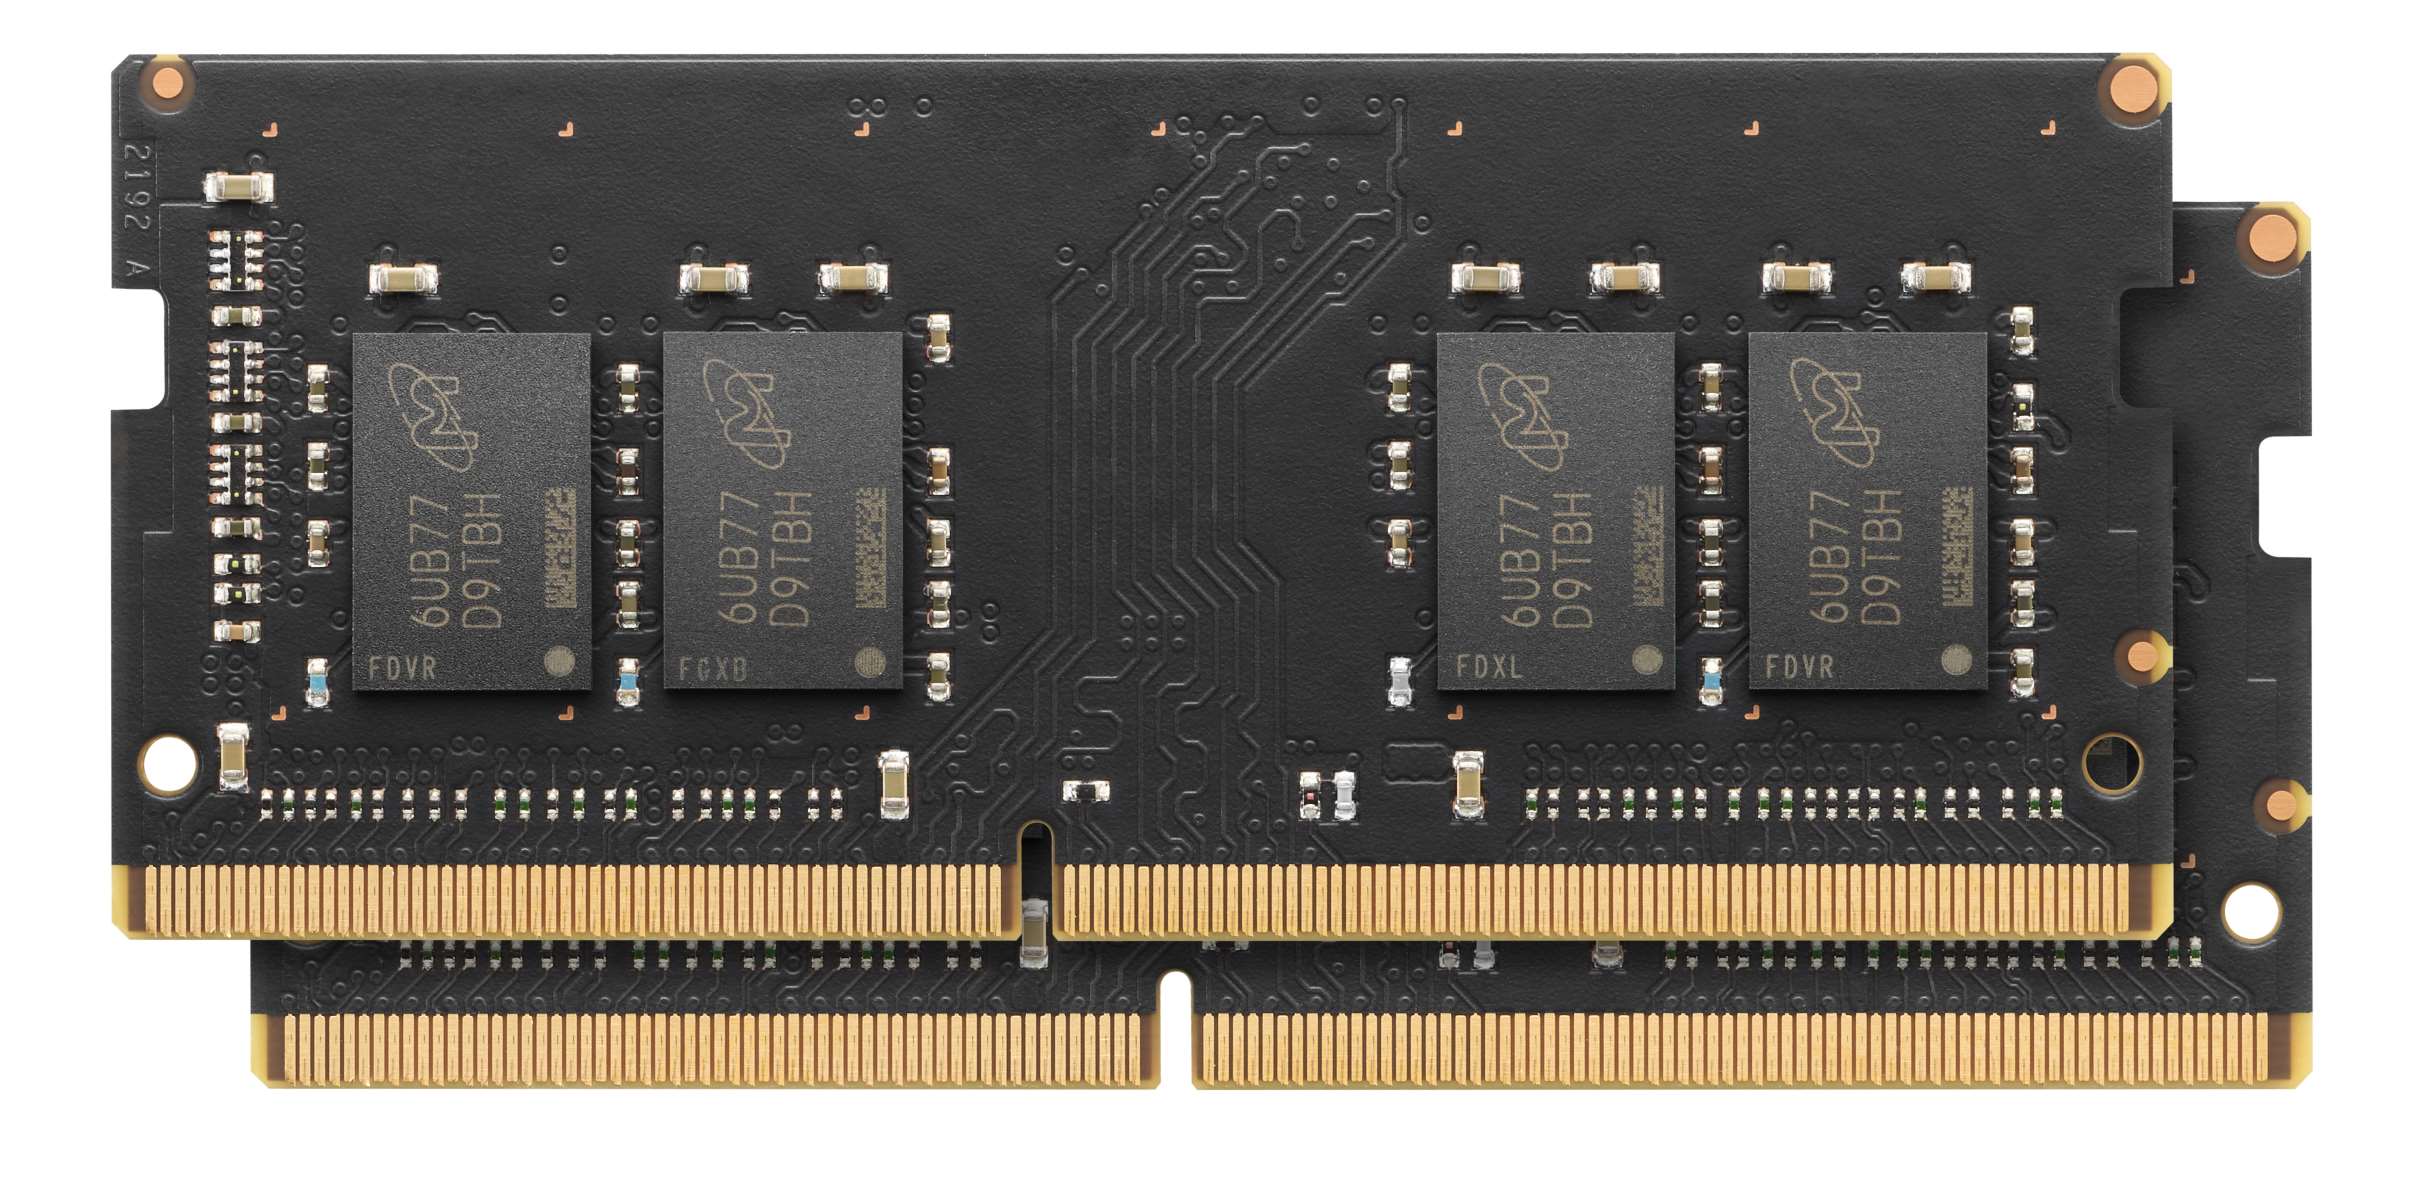
- New RAM modules: Depending on your iMac model, you may need DDR3, DDR4, or another specific RAM type. Ensure that the new RAM is compatible with your iMac’s specifications.
- Soft cloth or microfiber cloth: This will come in handy for cleaning the inside of your iMac and handling the RAM modules without leaving any fingerprints or smudges.
- iMac user manual or online resource: It’s recommended to have the official iMac user manual or access to online resources specific to your iMac model. This will provide detailed instructions and specifications for your particular iMac.
Make sure you have all the necessary tools and materials readily available before proceeding with the RAM upgrade. This will help ensure a smooth and efficient process without any unnecessary interruptions.
In the next section, we will discuss how to determine the compatibility of the new RAM modules with your iMac.
Step 1: Determine the Compatibility
Before purchasing new RAM modules for your iMac, it’s crucial to ensure that they are compatible with your specific iMac model. Here’s how to determine the compatibility:
- Check the iMac model: Identify the model and year of your iMac. You can find this information by clicking on the Apple menu in the top left corner of your screen, selecting “About This Mac,” and noting down the model and year details.
- Research the RAM specifications: Visit the Apple website or consult your iMac’s user manual to find the RAM specifications for your model. Look for information such as the maximum supported RAM capacity, RAM type (DDR3, DDR4, etc.), and the number of RAM slots available.
- Consider the operating system requirements: Keep in mind the operating system requirements of your iMac. Some newer versions of macOS may require a minimum amount of RAM to function optimally. Ensure that the new RAM modules meet or exceed these requirements.
- Take note of any special considerations: Certain iMac models may have specific requirements or limitations when it comes to upgrading the RAM. Check for any special recommendations or restrictions outlined in the user manual or Apple’s official documentation.
By carefully determining the compatibility of the new RAM modules, you can avoid purchasing incompatible RAM that might not work with your iMac. This step is crucial to ensure a successful RAM upgrade and optimal performance.
Next, we will discuss the importance of backing up your data before proceeding with the RAM upgrade.
Step 2: Back up Your Data
Before you start the RAM upgrade process, it’s essential to back up all your important data. Although the risk of data loss during a RAM upgrade is low, it’s always better to be safe than sorry. Follow these steps to back up your data:
- Use Time Machine: If you have an external hard drive connected to your iMac, consider using Apple’s Time Machine feature to create a full system backup. This will allow you to restore your entire system in case anything goes wrong during the RAM upgrade process.
- Backup important files: If you don’t use Time Machine or have specific files that you want to back up separately, manually copy them to an external storage device. This can include documents, photos, videos, and any other vital files you want to keep safe.
- Verify the backup: Once you have completed the backup process, double-check that all your important files are successfully backed up and accessible. This ensures that you can easily retrieve them if needed.
Backing up your data not only provides peace of mind during the RAM upgrade but also serves as a good general practice to protect your valuable files from unexpected data loss scenarios.
After you have successfully backed up your data, it’s time to shut down your iMac in preparation for the RAM upgrade. This will be covered in the next section.
Step 3: Shut Down and Unplug Your iMac
Before you begin the RAM upgrade, it’s crucial to shut down your iMac and disconnect it from any power sources. Follow these steps:
- Save and close all applications: Make sure to save any open documents or projects and close all running applications. This will prevent any data loss or errors during the shutdown process.
- Shut down your iMac: Click on the Apple menu in the top left corner of your screen and choose the “Shut Down” option. Wait until your iMac completely powers off before proceeding to the next step.
- Unplug all cables and accessories: Disconnect all peripherals, such as external hard drives, keyboards, and mice, from your iMac. Additionally, unplug the power cord from both the iMac and the wall outlet.
- Ground yourself: To prevent static electricity from damaging your iMac’s internal components, it’s advisable to ground yourself. You can do this by wearing an anti-static wristband or by touching a grounded metal object.
Ensuring that your iMac is completely shut down and disconnected from power sources is essential for your safety and to protect your iMac from any electrical damage during the upgrade process.
Now that your iMac is prepared, the next step is to locate the RAM compartment, which we will cover in the following section.
Step 4: Locate the RAM Compartment
Once your iMac is shut down and disconnected, it’s time to locate the RAM compartment. The location of the RAM compartment may vary depending on the iMac model. Follow these general steps to find it:
- Refer to the official documentation: Consult your iMac’s user manual or visit the Apple support website to find specific instructions for locating the RAM compartment.
- Remove the iMac stand (if applicable): If you have a model with a detachable stand, carefully remove it by releasing the latch or loosening the screws located at the back of the stand.
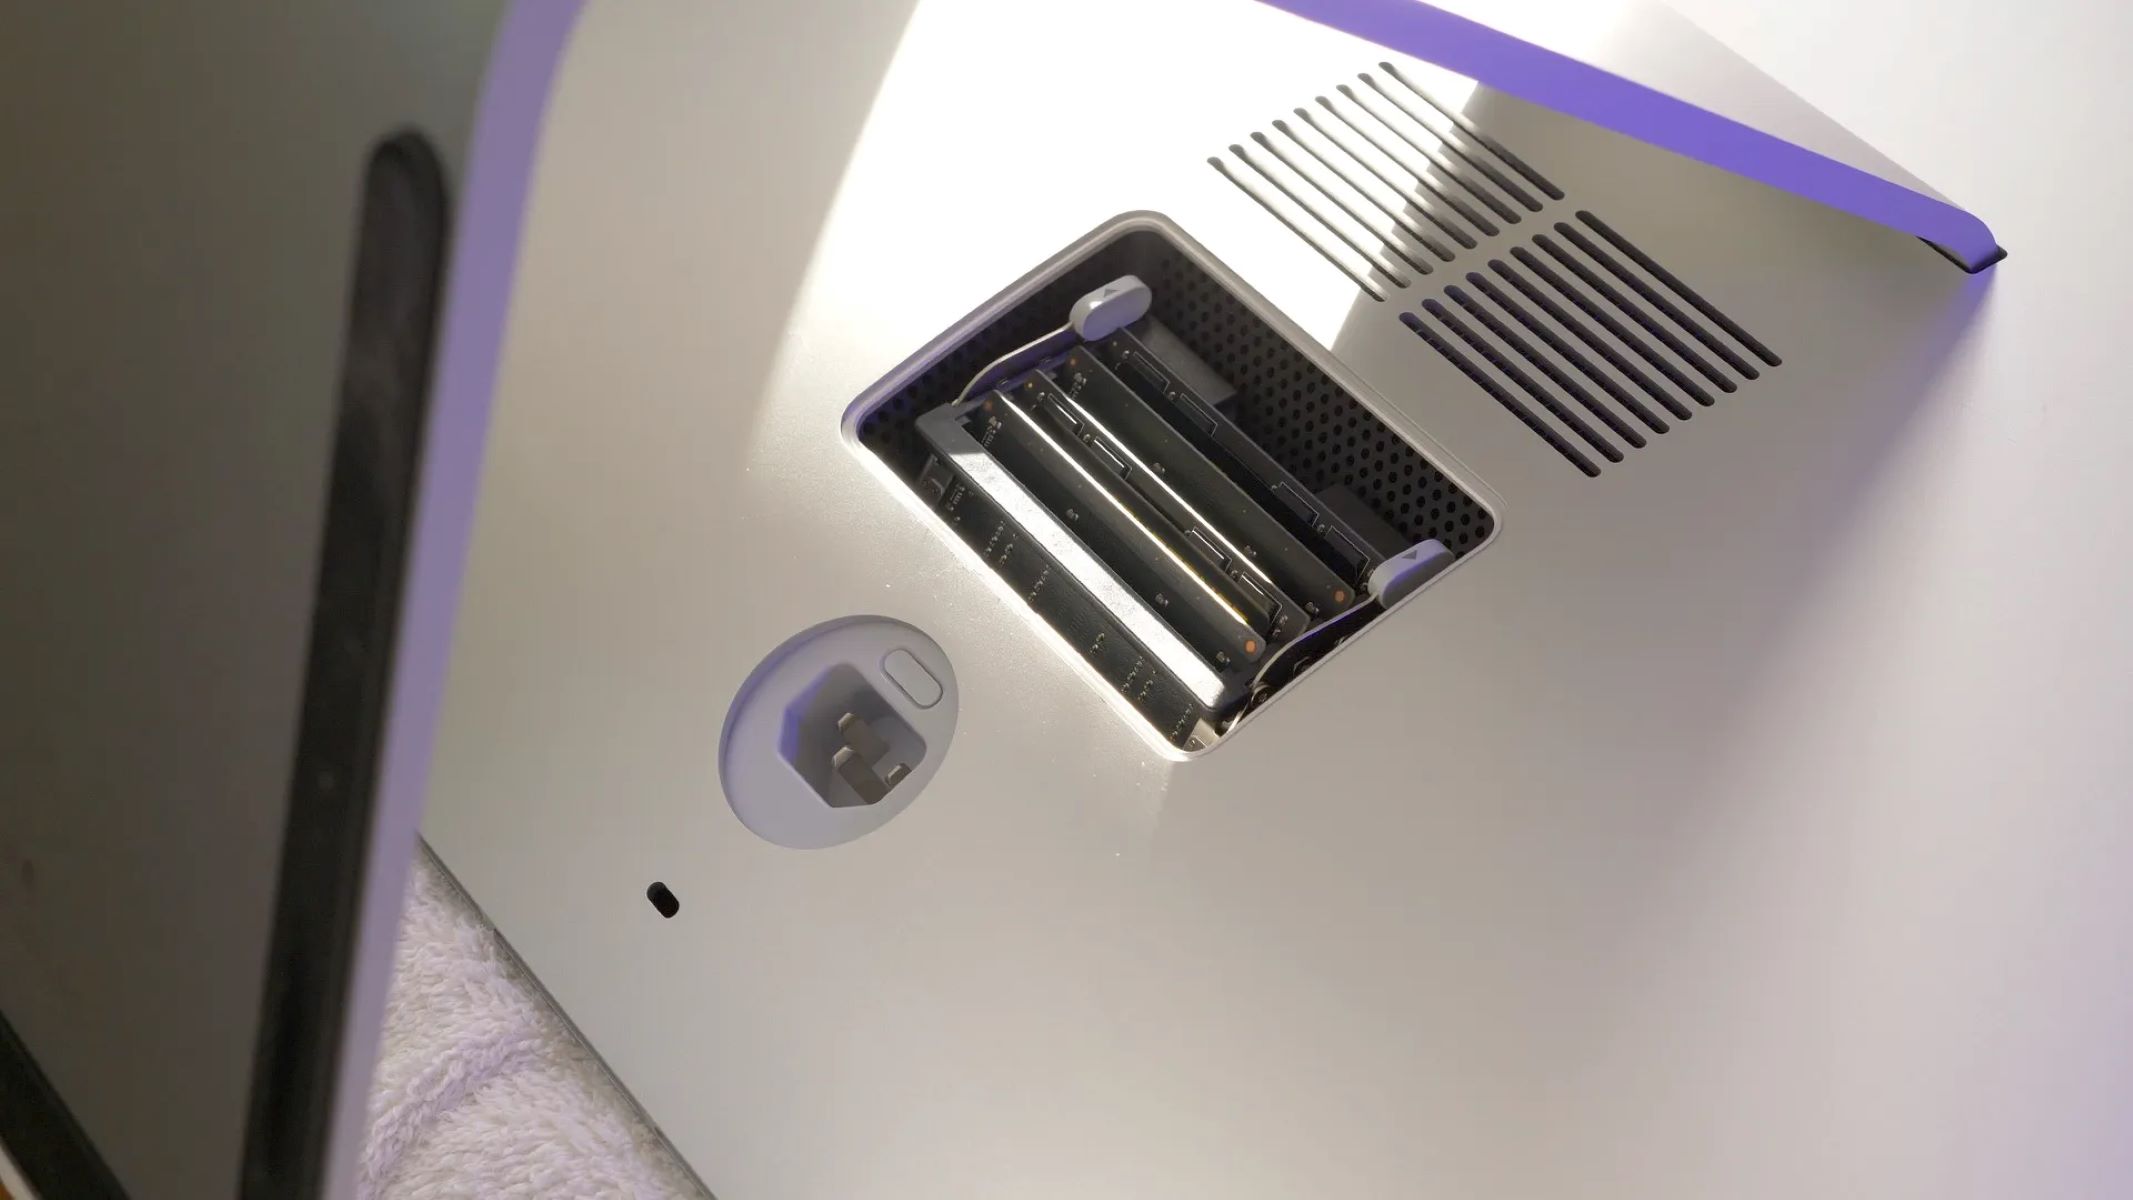
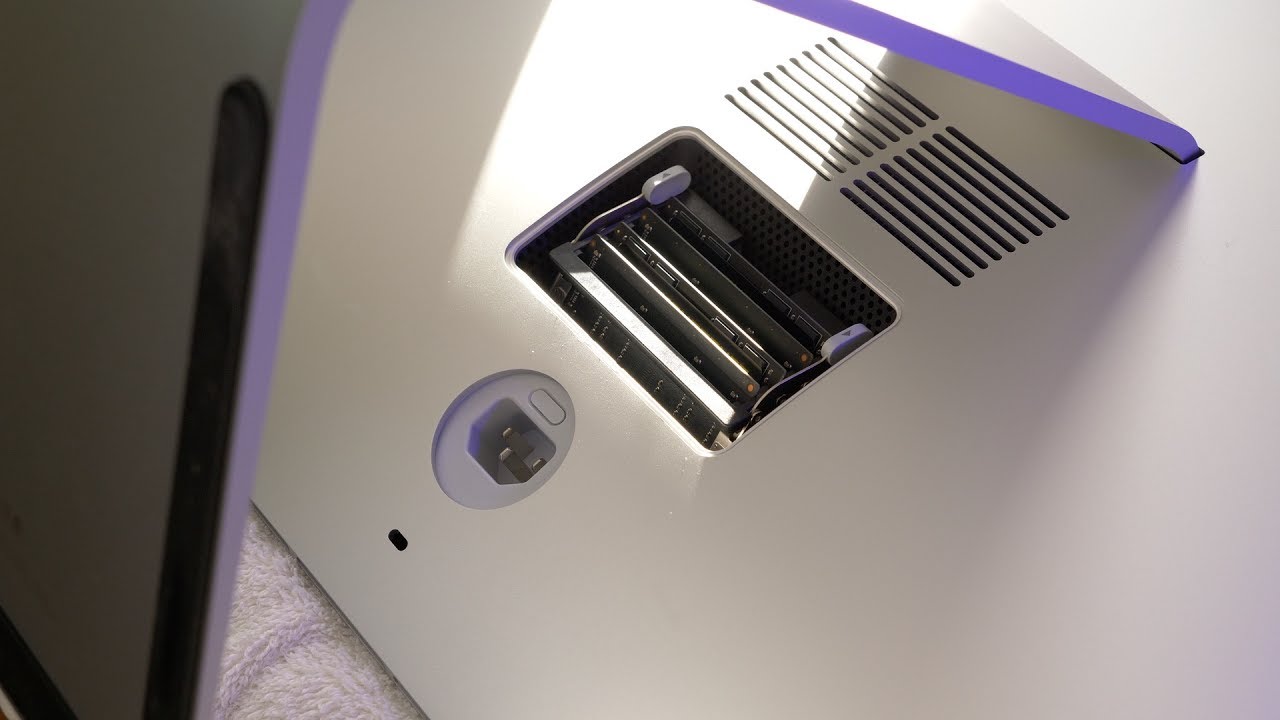
- Identify the access panel: Look for a removable panel or hatch on the back or bottom of your iMac. This panel is designed to provide access to the internal components, including the RAM.
- Use your screwdriver: If the access panel is secured with screws, use the appropriate screwdriver to remove them. Take note of the screw size and placement for reassembly later.
- Locate the RAM compartment: Once the access panel is removed, you should be able to locate the RAM compartment inside your iMac. It is typically a rectangular slot or slots where the RAM modules are inserted.
Remember, it’s important to be gentle when handling your iMac and its components. Avoid applying excessive force or bending any parts during the process.
Now that you have located the RAM compartment, it’s time to move on to the next step, which is removing the existing RAM modules.
Step 5: Remove the Existing RAM
With the RAM compartment located, it’s time to remove the existing RAM modules from your iMac. Follow these steps carefully:
- Handle the RAM modules with care: Before touching the RAM modules, discharge any static electricity by touching a grounded metal object or wearing an anti-static wristband.
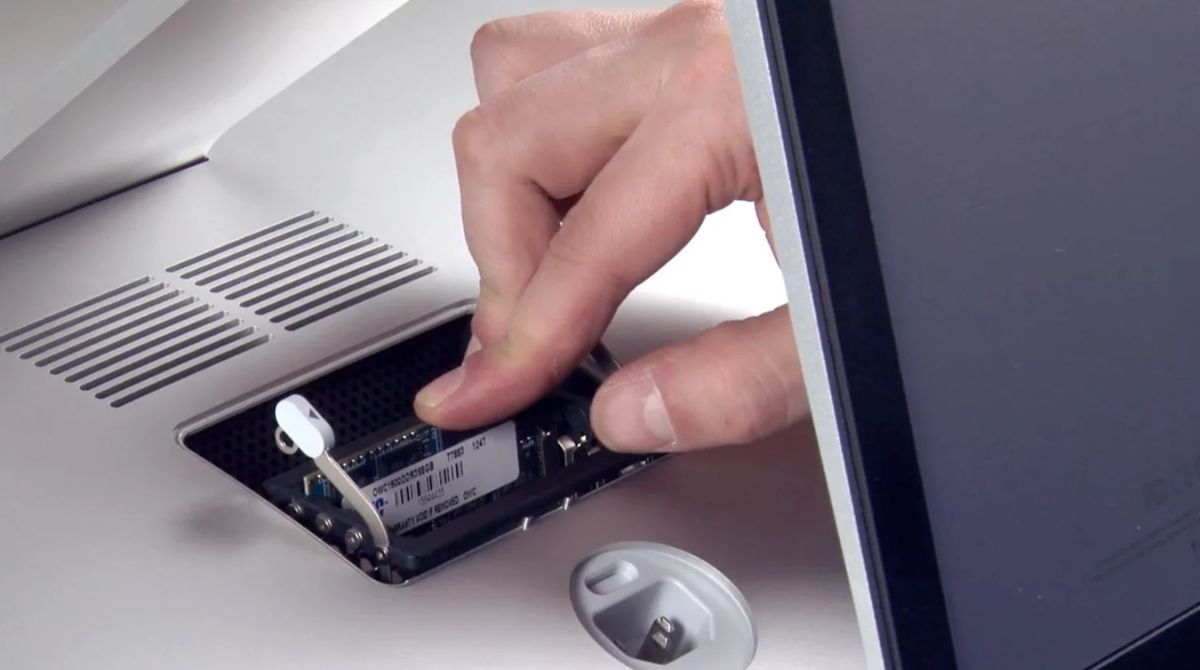
- Release the latches or clips: Most iMac models have latches or clips on either side of the RAM modules. Gently push them outward to release the modules from their locked position.
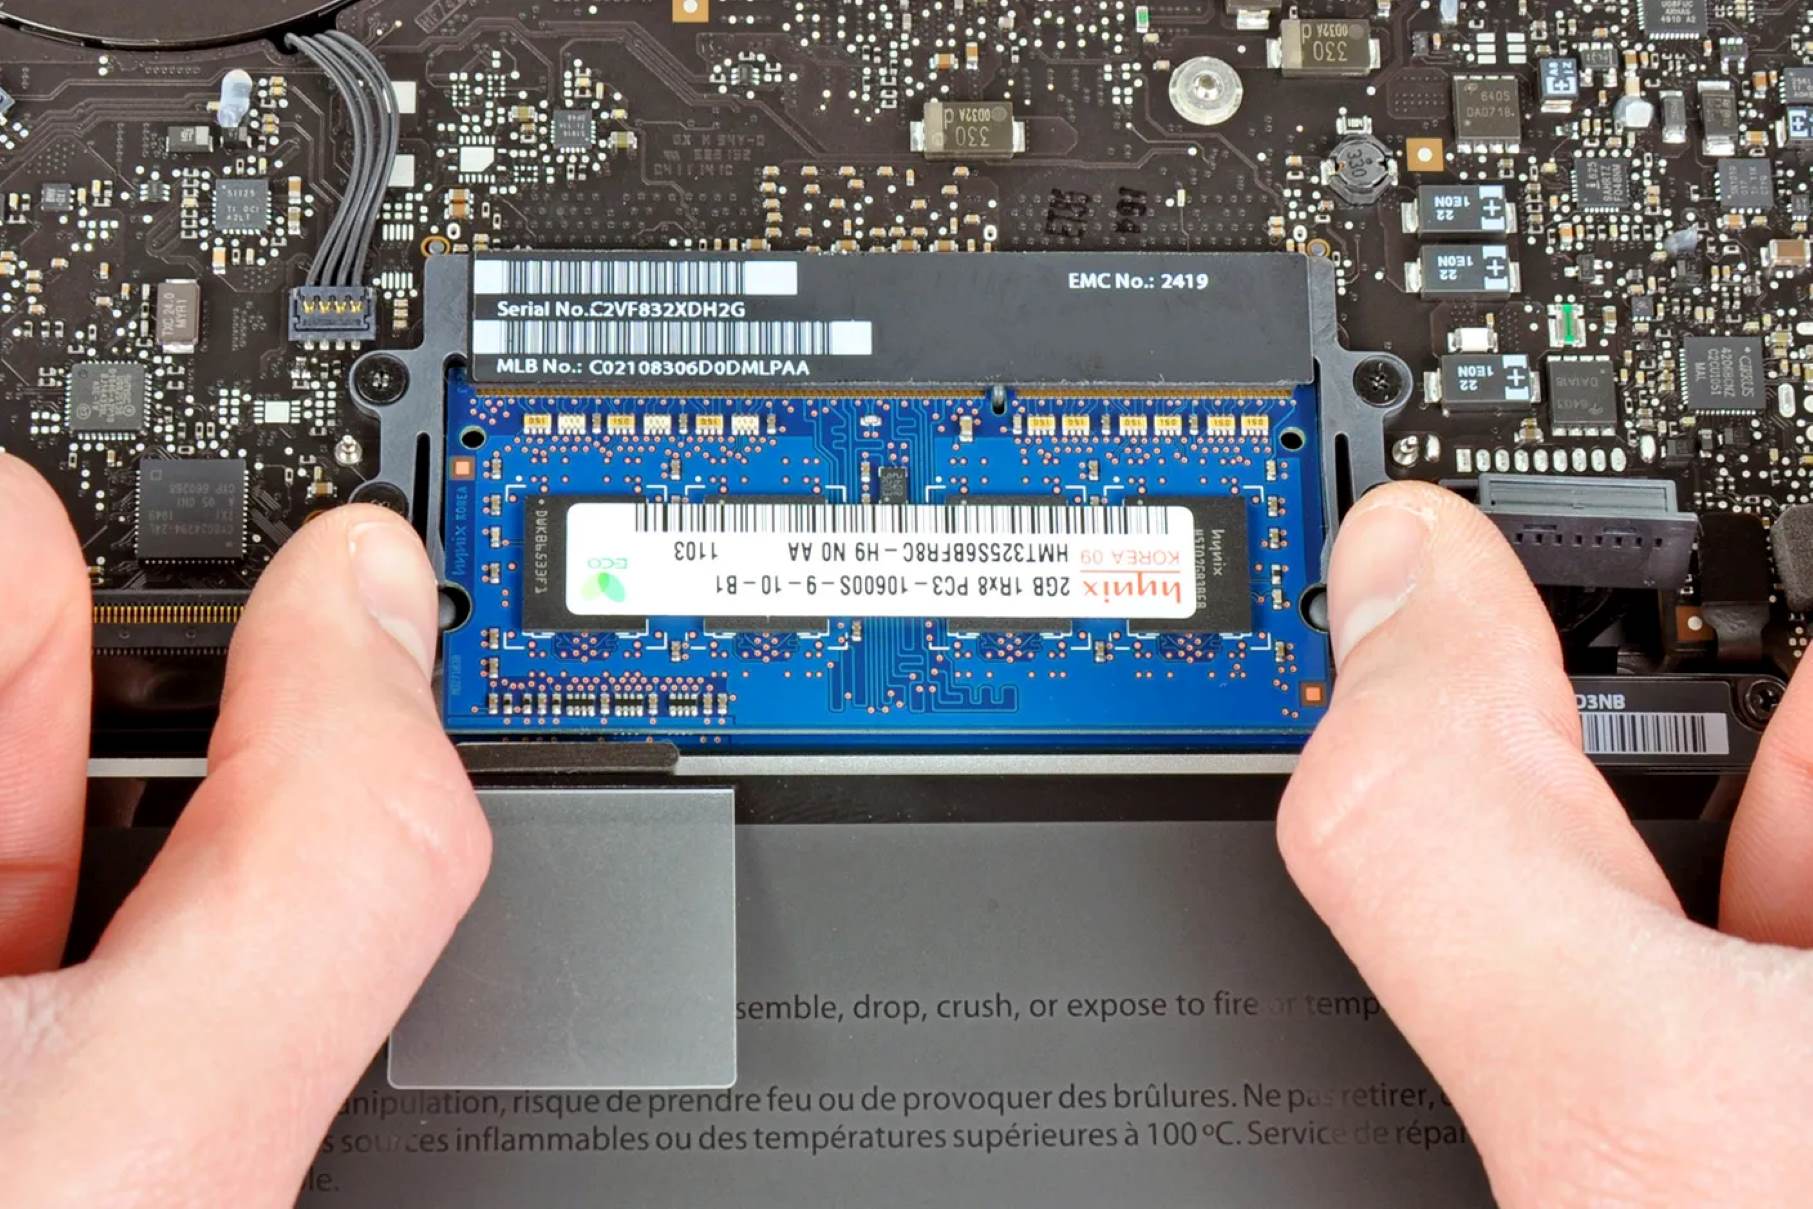
- Remove the RAM modules: Once the latches are released, carefully pull the tabs on the sides of the RAM modules to remove them from the slot(s). Hold them by the edges and avoid touching the gold contacts.
- Set aside the removed RAM modules: Place the removed RAM modules on an anti-static surface or on a soft cloth to keep them safe and prevent any damage. These modules may serve as a backup or for future use.
Always remember to be gentle when removing the RAM modules and avoid applying excessive force. Take your time and ensure that the modules are properly released before attempting to remove them to avoid any accidental damage to your iMac.
Now that the existing RAM modules have been removed, it’s time to install the new RAM modules, which will be covered in the next section.
Step 6: Install the New RAM
Now that you have removed the old RAM modules, it’s time to install the new RAM modules into your iMac. Follow these steps to ensure a successful installation:
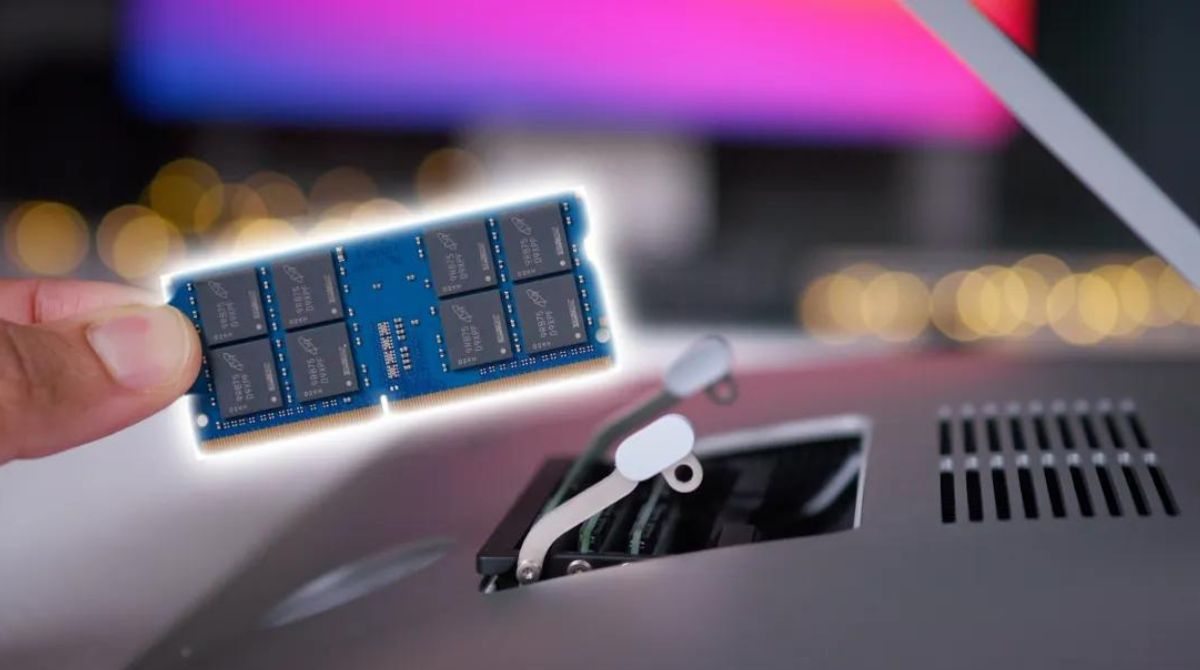
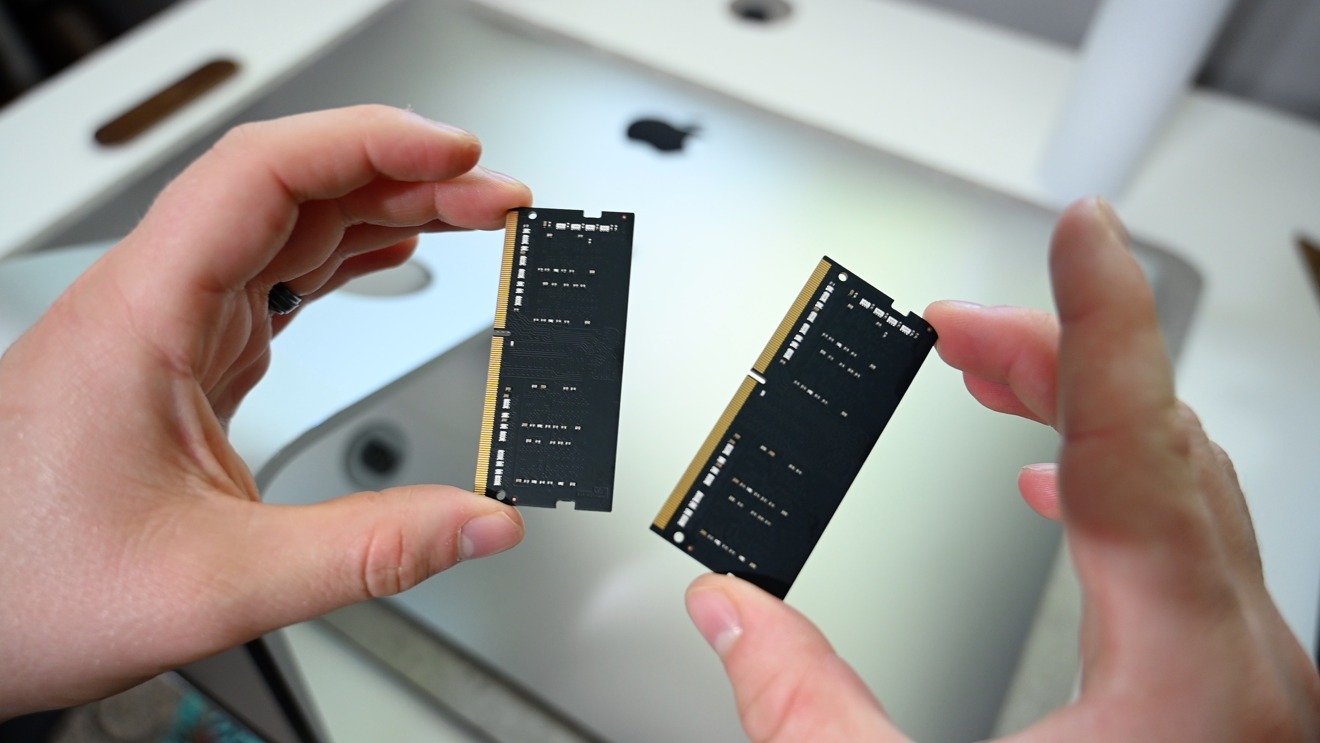
- Check the orientation: Ensure that the new RAM modules are properly oriented before inserting them into the RAM slots. The notch on the module should align with the notch in the slot.
- Insert the RAM modules: Gently slide the new RAM modules into the RAM slots, aligning the notch with the slot. Apply even pressure on both sides until the modules click into place. Make sure they are securely seated.
- Secure the modules: If your iMac has latches or clips, use them to secure the new RAM modules in place. Press them inward until they lock the modules into position.
- Double-check the installation: After installing the new RAM modules, visually inspect them to ensure they are properly seated and locked in place. They should be level and aligned within the RAM slots.
It’s important to handle the new RAM modules with care and avoid touching the gold contacts. Any contact with the contacts can cause damage and affect the performance of the modules.
Now that the new RAM modules are successfully installed, let’s move on to the next step, which is putting everything back together.
Step 7: Put Everything Back Together
Now that you have installed the new RAM modules, it’s time to put everything back together in your iMac. Follow these steps to ensure a proper reassembly:
- Reattach the access panel: Align the access panel with the slot on your iMac and secure it in place using the screws you removed earlier. Tighten the screws gently, but be careful not to overtighten.
- Reconnect the iMac stand (if applicable): If your iMac has a detachable stand, reattach it by aligning it with the mounting point and secure it using the latch or screws.
- Reconnect peripherals: Plug in any peripherals, such as keyboards, mice, and external drives, that you disconnected earlier during the RAM upgrade.
- Connect the power cord: Plug the power cord back into your iMac and ensure it is securely connected to both the iMac and the wall outlet.
Once you have completed these steps, take a moment to ensure that all connections are secure and that everything is properly reassembled. Double-check that the access panel is flush with the rest of the iMac’s casing.
Now, it’s time to move on to the final step: powering on your iMac and testing the newly upgraded RAM.
Step 8: Power On and Test the New RAM
Now that you have completed the RAM upgrade and reassembled your iMac, it’s time to power it on and test the new RAM modules. Follow these steps to ensure everything is functioning correctly:
- Plug in your iMac: Ensure that your iMac is connected to a power source by plugging it into a wall outlet.
- Press the power button: Locate the power button on your iMac and press it to turn on the computer. Wait for the startup chime or the Apple logo to appear on the screen.
- Monitor the startup process: As your iMac starts up, pay attention to any error messages or abnormal behavior. If everything appears normal, proceed to the next step.
- Check system information: Click on the Apple menu in the top left corner of the screen and select “About This Mac.” Verify that the newly installed RAM is recognized and displayed with the correct capacity.
- Test performance and stability: Open multiple applications or perform memory-intensive tasks to gauge the performance and stability of your iMac with the upgraded RAM. Monitor for any improvements and ensure there are no crashes or slowdowns.
If you encounter any issues or your iMac does not recognize the new RAM modules, double-check their installation and compatibility. If necessary, consult official documentation or seek assistance from Apple Support.
Congratulations! You have successfully upgraded the RAM in your iMac, enhancing its performance and multitasking capabilities.
Before we wrap up, let’s briefly summarize the steps we have covered in this guide.
Conclusion
Upgrading the RAM in your iMac is a great way to boost its performance and improve multitasking capabilities. By following the step-by-step process outlined in this guide, you have successfully learned how to upgrade the RAM in your iMac.
We started by determining the compatibility of the new RAM modules with your iMac model. Then, we emphasized the importance of backing up your data to prevent any loss during the upgrade process. Next, we discussed the steps to shut down and unplug your iMac, followed by locating the RAM compartment and removing the existing RAM modules.
After that, we covered the steps to install the new RAM modules, ensuring they are properly seated. We then discussed how to put everything back together, reassembling your iMac. Lastly, we powered on your iMac and tested the newly upgraded RAM to ensure its proper functionality.
Remember, each iMac model may have specific instructions and requirements, so it’s always wise to consult the official Apple documentation or seek assistance if needed.
With the upgraded RAM, you can expect significant improvements in the speed and performance of your iMac, allowing you to handle more demanding tasks and run multiple applications seamlessly.
Now that you have successfully completed the RAM upgrade, enjoy using your iMac with its enhanced capabilities. Happy computing!