Introduction
Upgrading the Graphics Processing Unit (GPU) in a laptop can be a game-changer when it comes to improving gaming performance, enhancing graphic design capabilities, or even boosting overall system speed. While desktop computers offer more flexibility in terms of GPU upgrades, upgrading the GPU in a laptop can still be a viable option for those seeking an enhanced visual experience.
A GPU is a dedicated processor responsible for handling and rendering graphics, making it an integral component for any visually demanding task. Laptops typically come with integrated graphics, which can be sufficient for everyday tasks, but may struggle when it comes to running graphics-intensive software or playing the latest games at high settings.
However, before you embark on the journey of upgrading the GPU in your laptop, there are several important factors to consider. The process is more complex than simply buying a new GPU and plugging it in. Compatibility, power limitations, and physical space constraints within the laptop chassis must all be taken into account.
In this guide, we will explore the steps involved in successfully upgrading the GPU in a laptop. We will discuss how to choose the right GPU, check compatibility, prepare your laptop for the upgrade, remove the old GPU, install the new GPU, update drivers and BIOS, test the new GPU, and troubleshoot any potential issues that may arise.
It is important to note that upgrading the GPU in a laptop may void the warranty and requires technical expertise. If you are not comfortable with the process or are unsure about your laptop’s compatibility, it is recommended to seek professional assistance.
With that said, if you are up to the challenge and eager to unleash the full potential of your laptop, let’s dive into the world of GPU upgrades and discover how you can take your laptop’s graphical performance to new heights!
Choosing the Right GPU
Selecting the right GPU for your laptop upgrade is crucial. Different GPUs offer varying levels of performance, power consumption, and compatibility. Here are some key factors to consider when choosing a GPU for your laptop:
- Performance: Determine the level of performance you require based on your specific needs. If you primarily use your laptop for gaming or graphic design work, you’ll want a high-performance GPU that can handle demanding tasks. Research benchmarks and reviews to find GPUs that meet your performance requirements.
- Power Consumption: Laptop GPUs are designed to operate within tight power constraints. When choosing a GPU, ensure it falls within the power limitations of your laptop’s power supply. Exceeding the power limit can cause stability issues and potentially damage your hardware.
- Thermal Considerations: As laptops have limited space for cooling, it’s important to consider the GPU’s thermal characteristics. GPUs with efficient cooling solutions and lower thermal profiles will ensure your laptop doesn’t overheat during intensive tasks.
- Compatibility: Check the compatibility of the GPU with your laptop’s motherboard and form factor. Not all laptops have upgradeable GPUs, so ensure your laptop has an MXM or Thunderbolt port that allows for GPU upgrades. Additionally, consider the physical dimensions of the GPU to ensure it fits within your laptop’s chassis.
- Manufacturer Support: Research the manufacturer’s support for GPU upgrades. Some laptop manufacturers may provide official upgrade options or compatibility lists, which can help in choosing a GPU that they officially support.
By taking these factors into consideration, you can choose a GPU that not only meets your performance needs but also ensures compatibility and stability with your laptop. It’s advisable to do thorough research and consult forums or experts who have experience with laptop GPU upgrades to make an informed decision.
Checking Compatibility
Before purchasing a new GPU for your laptop, it’s crucial to ensure compatibility between the GPU and your laptop’s hardware and software. Here are the key steps to check compatibility:
- Research Your Laptop Model: Start by researching your laptop’s make and model to determine if it supports GPU upgrades. Not all laptops have this capability, so it’s important to verify this information.
- Check the Slot Type or Port: Identify the type of slot or port used for connecting the GPU. The most common types are MXM (Mobile PCI Express Module) and Thunderbolt. Ensure that the GPU you plan to purchase is compatible with the slot or port on your laptop.
- Check Power Requirements: Laptops have limited power supplies, so it’s critical to check the power requirements of the new GPU. Ensure that the power supply in your laptop can handle the power demands of the GPU without causing stability issues.
- Check Physical Dimensions: Verify that the new GPU will physically fit within your laptop’s chassis. Some laptops have strict space limitations, and a GPU that is too large may not fit or may obstruct other components.
- Consider Operating System Compatibility: Ensure that the GPU you choose is compatible with your laptop’s operating system. Check the manufacturer’s website or support documentation for driver availability and compatibility with your specific OS version.
- Check BIOS Compatibility: Upgrading the GPU may require a BIOS update for proper compatibility. Access your laptop’s BIOS settings and check for any available updates or compatibility requirements specified by the manufacturer.
By thoroughly checking compatibility, you can avoid purchasing a GPU that may not work with your laptop. It’s essential to consult your laptop’s manufacturer documentation, forums, or expert resources to ensure you have the most accurate information regarding compatibility.
Preparing Your Laptop for the Upgrade
Before diving into the physical installation of the new GPU, it’s important to prepare your laptop to ensure a smooth upgrade process. Here are the key steps to follow when preparing your laptop for a GPU upgrade:
- Backup Your Data: Prior to making any hardware changes, it’s always wise to back up your important data. This ensures that if anything goes wrong during the upgrade process, you can restore your laptop to its previous state without losing any valuable information.
- Disconnect and Power Off Your Laptop: Shut down your laptop completely and disconnect it from any power sources. This includes the power cord and any external peripherals such as USB devices or external monitors. Safety precautions like wearing an anti-static wristband can also help prevent accidental damage to your laptop’s internal components.
- Refer to the Manufacturer’s Documentation: Consult the laptop’s user manual or the manufacturer’s website for specific instructions on accessing and upgrading the GPU. Each laptop model may have different procedures, so it’s crucial to follow the manufacturer’s guidelines.
- Gather the Required Tools: Depending on your laptop model, you may need specific tools to open up the laptop and access the GPU. Common tools include screwdrivers, pry tools, and thermal paste for reapplying after the upgrade. Make sure you have all the necessary tools readily available before proceeding.
- Create a Clean and Organized Workspace: Find a clean and well-lit area to work on your laptop. Use an anti-static mat or work on a non-static surface to prevent potential static discharge that could damage sensitive components. Organize your workspace by having containers or trays to hold screws and small parts to avoid misplacing them.
- Review Installation Steps: Familiarize yourself with the installation process by reading through the manufacturer’s documentation or watching tutorial videos. Understanding the steps involved will help you navigate the upgrade process more confidently.
By following these preparation steps, you will ensure that your laptop is ready for a smooth GPU upgrade. Take your time and exercise caution to avoid any accidental damage to your laptop or its internal components during the process. Once you have completed the preparation, you can move on to removing the old GPU and installing the new one.
Removing the Old GPU
Before you can install a new GPU in your laptop, you need to remove the existing one. Here are the steps to safely remove the old GPU from your laptop:
- Power Off and Disconnect Your Laptop: Shut down your laptop completely and unplug it from any power sources. This is crucial to avoid any electrical mishaps during the removal process.
- Access the GPU Compartment: Consult your laptop’s user manual or manufacturer’s website to determine how to access the GPU compartment. In some cases, you may need to remove a bottom panel or keyboard, while in others, there may be a dedicated access panel.
- Ground Yourself: To protect sensitive electronic components from electrostatic discharge, it is important to ground yourself properly. You can do this by wearing an anti-static wrist strap or by touching a grounded object (e.g., a metal table) before handling any internal components.
- Locate the GPU: Once you have accessed the GPU compartment, locate the old GPU. It will be connected to the laptop’s motherboard via a heat sink and possibly secured with screws or clips.
- Disconnect Cables and Remove Heat Sink: Carefully disconnect any cables or connectors attached to the GPU. These may include power cables, thermal sensors, or display connectors. Then, remove the heat sink by unscrewing any screws securing it to the GPU.
- Remove and Replace the GPU: Once the heat sink is removed, you can gently detach the old GPU from its slot. Be sure to handle the GPU with care to avoid any damage. Store the old GPU in an anti-static bag for safekeeping, especially if you plan to keep it as a backup.
- Clean and Inspect the GPU Slot: Before installing the new GPU, take a moment to clean the GPU slot and remove any dust or debris. Inspect the slot for any visible damage or obstructions that could hinder the installation of the new GPU.
By following these steps, you can safely remove the old GPU from your laptop in preparation for the installation of the new GPU. Remember to exercise caution when handling electronic components and always follow the manufacturer’s guidelines for your specific laptop model.
Installing the New GPU
Now that you have successfully removed the old GPU from your laptop, it’s time to install the new one. Here are the steps to install the new GPU in your laptop:
- Make Sure the New GPU is Compatible: Double-check that the new GPU you have purchased is compatible with your laptop in terms of slot type, power requirements, and physical dimensions. Refer to the manufacturer’s documentation for specific details.
- Prepare the GPU Slot: Ensure that the GPU slot is clean and free from any dust or debris. If necessary, use compressed air or a soft brush to remove any particles that may obstruct the installation.
- Align the GPU and Insert: Carefully align the new GPU with the slot on your laptop’s motherboard. The GPU will have alignment notches or pins that correspond to the slot. Gently insert the GPU, making sure it is properly seated and secure.
- Connect Cables and Attach Heat Sink: Reconnect any cables or connectors that were disconnected from the old GPU. These may include power cables, thermal sensors, or display connectors. Once the cables are connected, attach the heat sink to the new GPU, ensuring that it is securely fastened.
- Replace the GPU Compartment Cover: If you removed any panels or covers to access the GPU compartment, carefully reattach them. Ensure that they are properly aligned and all screws or clips are securely tightened.
- Reconnect and Power On Your Laptop: Plug in your laptop to a power source and reconnect any external peripherals. Power on your laptop and enter the BIOS settings to verify that the new GPU is detected and properly recognized. Make any necessary changes to ensure proper functionality.
It’s important to note that each laptop model may have specific installation requirements. Therefore, it’s crucial to consult your laptop’s user manual or the manufacturer’s website for detailed instructions tailored to your specific model.
By following these steps, you can confidently install the new GPU in your laptop, unlocking its potential for improved graphics performance and enhanced visual capabilities.
Updating Drivers and BIOS
After installing a new GPU in your laptop, it’s essential to update the drivers and BIOS to ensure optimal performance and compatibility. Here’s what you need to do:
- Download the Latest Drivers: Visit the manufacturer’s website for your new GPU and download the latest drivers for your specific operating system. It’s recommended to uninstall the previous GPU drivers before installing the new ones to avoid any conflicts.
- Install the GPU Drivers: Once the drivers are downloaded, run the installer and follow the on-screen instructions to install the new GPU drivers. Restart your laptop to complete the installation process.
- Update the BIOS: Check the manufacturer’s website for any available BIOS updates for your laptop. Newer BIOS versions often provide improved compatibility and performance for upgraded hardware. Follow the instructions provided by the manufacturer to update the BIOS. Take caution during this process, as incorrect BIOS updates can cause irreparable damage to your laptop.
- Verify Driver and BIOS Compatibility: After updating the drivers and BIOS, ensure that the new GPU and laptop hardware are recognized correctly. Go to the Device Manager in your operating system and check if the new GPU is listed under “Display Adapters.” Additionally, check the BIOS settings to confirm that the new GPU is correctly identified.
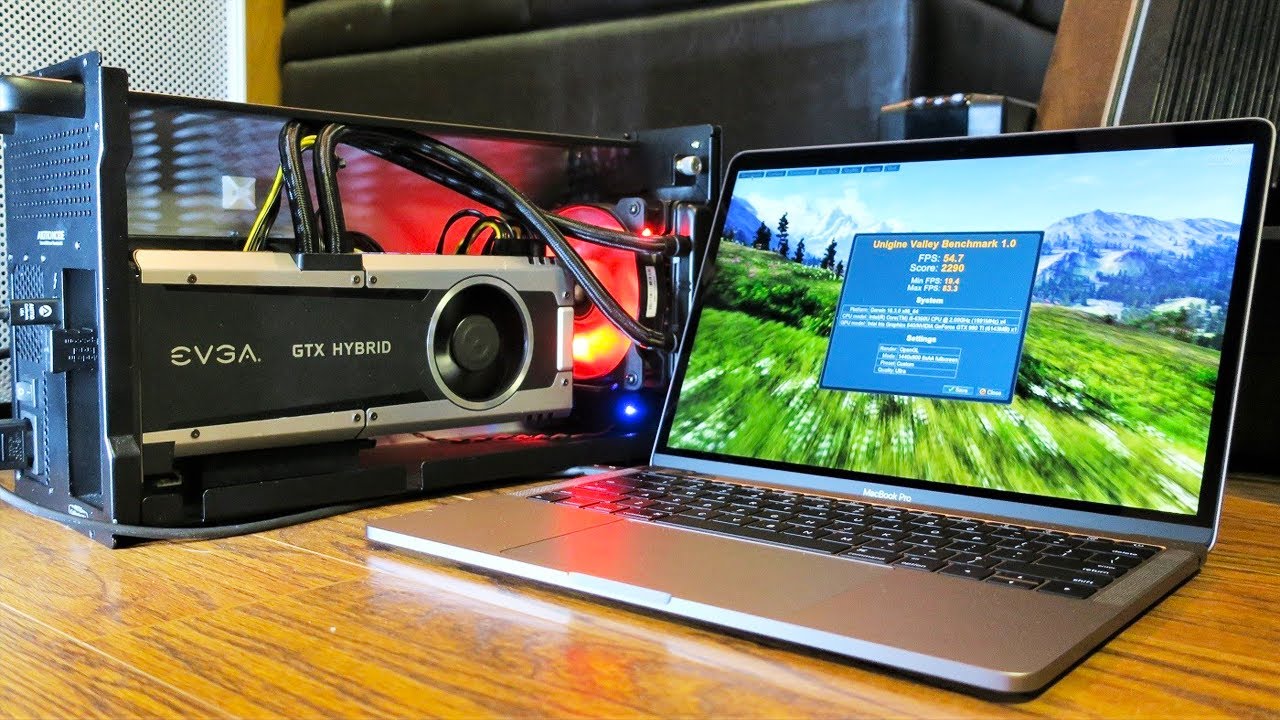
- Test Graphics Performance: Run benchmarking software or perform graphic-intensive tasks to evaluate the improved performance of your upgraded GPU. Monitor the temperature and stability of the GPU during these tests to ensure it is functioning properly.
- Troubleshoot Any Issues: If you encounter any issues during or after the driver and BIOS updates, consult the manufacturer’s support documentation or online forums for troubleshooting steps. It’s also a good idea to contact technical support if you are unable to resolve any compatibility or performance issues.
Regularly check for driver updates for your GPU to ensure you have the latest software optimizations and bug fixes. Keeping your drivers up to date is crucial for maintaining optimal performance and stability.
By updating the drivers and BIOS, you can ensure that your new GPU is properly recognized, compatible, and performing at its best. This step is crucial for getting the most out of your GPU upgrade and enjoying a seamless graphical experience on your laptop.
Testing and Troubleshooting
Once you have installed the new GPU and updated the drivers and BIOS, it’s time to test and troubleshoot to ensure everything is functioning as expected. Here are the steps to follow:
- System Boot and Display: Power on your laptop and ensure that it boots up properly with no errors. Check that the display is working correctly and that the resolution and color settings are accurate.
- Performance Testing: Run benchmarks and stress tests to gauge the performance of the new GPU. This will help you assess if the upgrade has provided the expected boost in graphics performance. Compare the results to benchmarks of similar systems to ensure that your laptop is performing at an optimal level.
- Software Compatibility: Test various software applications, especially those that are graphically demanding or have previously encountered issues with the old GPU. Make sure they run smoothly and without any glitches or crashes. If you encounter any compatibility issues, check for software updates or consult the software manufacturer’s support resources.
- Temperature Monitoring: Monitor the temperature of the new GPU during intensive tasks. Use monitoring software or the manufacturer’s provided tools to ensure that the GPU is operating within safe temperature ranges. If temperatures are excessively high, consider adjusting the laptop’s cooling system or applying new thermal paste.
- Troubleshoot Issues: If you encounter any issues such as artifacts, driver crashes, or system instability, first try reinstalling the GPU drivers. If the problem persists, consult the manufacturer’s support resources or reach out to their technical support for further assistance. They may be able to provide specific troubleshooting steps based on your laptop model.
- Backup and Restore: If you experience severe issues that cannot be resolved, such as a non-booting system or continuous crashes, having a backup of your data will come in handy. Consider reverting to your previous GPU or seeking professional assistance if necessary.
Testing and troubleshooting are important steps to ensure that the new GPU is functioning optimally and that any potential issues are addressed promptly. By thoroughly assessing the performance and compatibility of your upgraded GPU, you can have a smooth and enjoyable experience with your laptop.
Final Thoughts
Upgrading the GPU in a laptop can be a rewarding experience that breathes new life into your machine and enhances your visual experience. However, it’s important to approach the process with careful consideration and follow the necessary steps to ensure a successful upgrade.
Before embarking on a GPU upgrade, thoroughly research your laptop’s compatibility and ensure that you choose the right GPU for your needs. Take the time to understand the installation process and prepare your laptop accordingly. Removing the old GPU and installing the new one must be done with precision and caution.
After completing the physical upgrade, updating the GPU drivers and BIOS is crucial for optimal performance and compatibility. Regularly checking for driver updates and troubleshooting any issues that arise will help maintain a smooth and stable system.
It’s important to note that upgrading the GPU in a laptop can void warranty and may be challenging for those without technical expertise. If you are uncertain or uncomfortable with the process, it’s advisable to seek professional assistance to ensure a successful upgrade.
Ultimately, upgrading the GPU in a laptop can unlock the true potential of your machine, allowing you to enjoy improved gaming performance, better graphics capabilities, and enhanced overall system speed. By carefully following the steps outlined in this guide and with proper research, you can confidently upgrade your laptop’s GPU and elevate your computing experience.