Introduction
Updating PHP on Ubuntu is an essential task for maintaining the security and performance of your website or application. PHP is a widely used programming language that powers the dynamic content of websites and web applications. Regular updates are released to fix bugs, add new features, and improve overall performance. In this tutorial, you will learn how to update PHP on your Ubuntu server.
By keeping your PHP installation up to date, you can benefit from the latest security patches, improved functionality, and enhanced compatibility with various frameworks and libraries. It is recommended to regularly update PHP to ensure optimal performance and protect your website from potential vulnerabilities.
Before we dive into the steps of updating PHP, it is important to note that this guide assumes you already have a working Ubuntu installation. Additionally, you should have root or sudo access to perform the necessary commands.
Now that we understand the importance of updating PHP and the prerequisites required, let’s move on to the first step: checking the current PHP version on your Ubuntu system.
Prerequisites
Before updating PHP on your Ubuntu server, there are a few prerequisites that you need to have in place. These include:
- An Ubuntu server with a working installation. If you haven’t set up your server yet, make sure to do so before proceeding with the PHP update.
- Root or sudo access to run commands with administrative privileges. This is necessary for executing the necessary commands to update PHP.
- An active internet connection to download and install the required packages.
It is important to ensure that you have a backup of your server files and databases before performing any major update, including the PHP update. In case anything goes wrong during the update process, having a backup will help you restore your system to its previous state without losing any data.
Additionally, it is recommended to review the release notes or documentation of the PHP version you plan to update to. This will give you an overview of any potential compatibility issues, deprecated features, or new enhancements that you should be aware of before updating.
Lastly, it is advisable to check the system requirements of the software or applications running on your server. Sometimes, newer PHP versions may introduce changes that could impact the compatibility of certain applications or frameworks. Make sure to verify that the software you are using is compatible with the PHP version you intend to update to.
Once you have verified that you have met the necessary prerequisites and have a backup of your server, you can proceed with updating PHP on your Ubuntu system. In the following steps, we will guide you through the process of checking the current PHP version, adding the necessary repositories, and updating PHP to the latest version.
Step 1: Check Current PHP Version
Before updating PHP on your Ubuntu server, it’s important to determine the current PHP version running on your system. This will help you identify the specific version you need to update and ensure that the update process is successful.
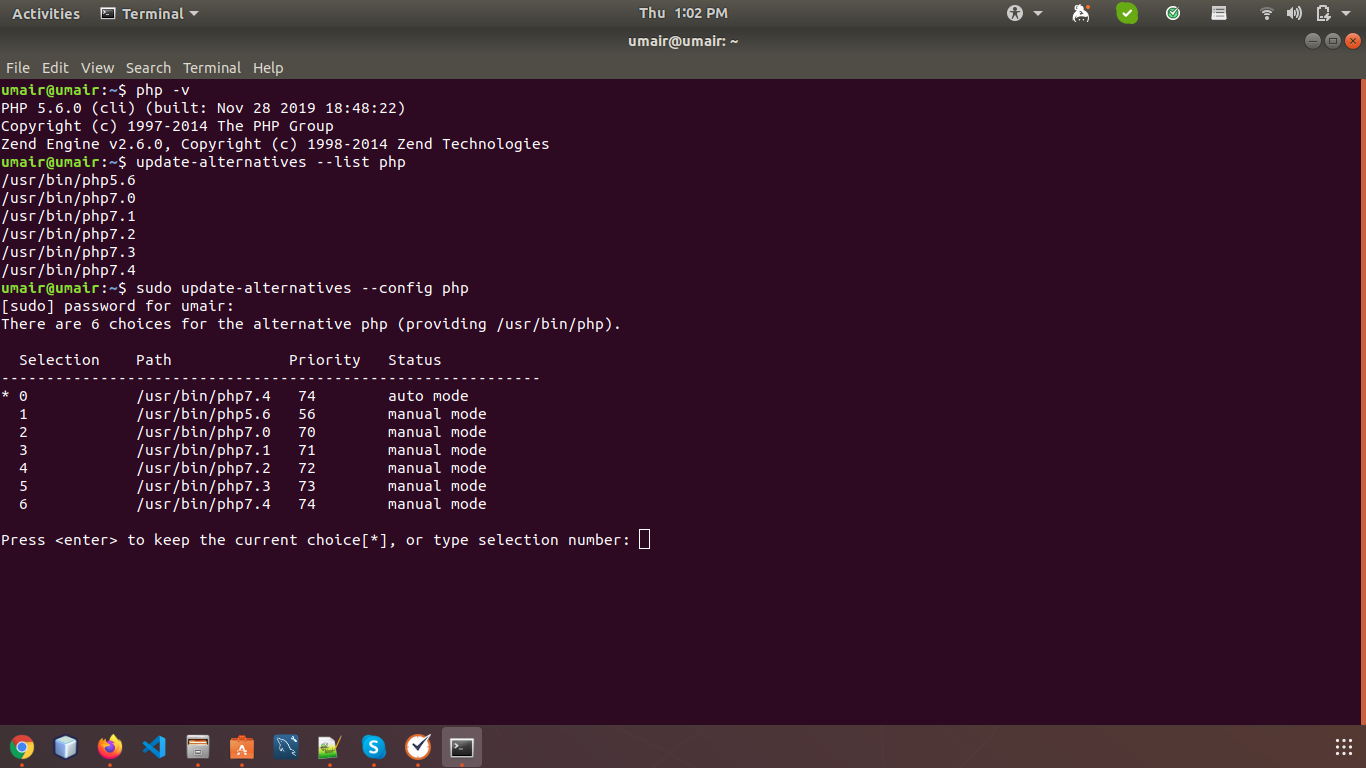
To check the current PHP version, you can use the command line. Simply open a terminal or SSH into your Ubuntu server and enter the following command:
php -v
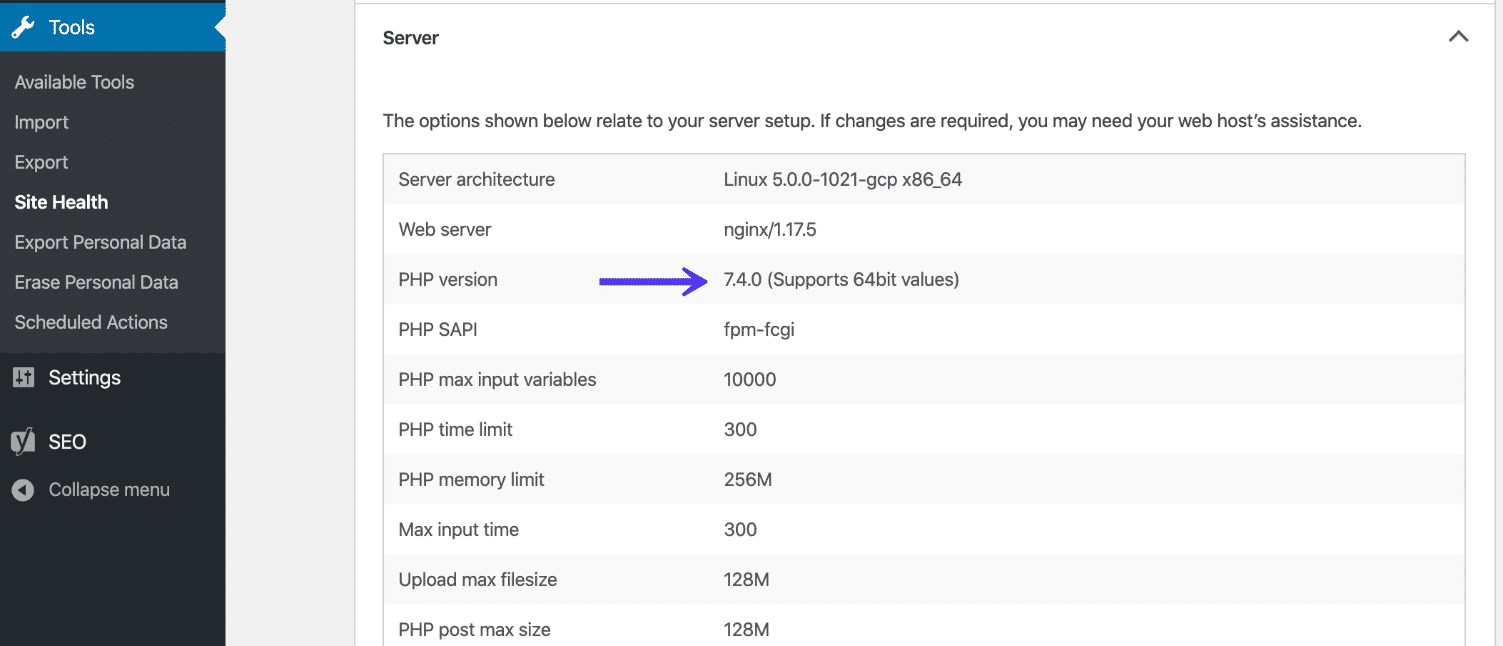
This command will display detailed information about the installed PHP version, including the version number and additional details such as the PHP build date, compilation options, and more.
After executing the command, you will see the PHP version displayed in the output. For example, if you see something like:
PHP 7.4.16 (cli) (built: Mar 10 2022 12:38:06) ( NTS )
The output indicates that your server is currently running PHP version 7.4.16.
Knowing the current PHP version is essential for the next steps, as it will help you determine the appropriate package repository to use for the PHP update.
Now that you have confirmed the current PHP version running on your Ubuntu server, you can proceed to the next step: updating the apt package manager to ensure you have the latest package information.
Step 2: Update apt Package Manager
Before updating PHP, it’s important to ensure that your system’s package manager, apt, is up to date. This will ensure that you have the latest package information and can install the updated PHP version without any issues.
To update the apt package manager, open a terminal or SSH into your Ubuntu server and run the following command:
sudo apt update
This command will refresh the package lists and retrieve the latest information about available software updates from the configured repositories.
The output of the command will display details about the packages being updated, including any new package versions that are available for installation.
It is recommended to perform this step regularly to keep your system updated with the latest software versions and security patches.
Once the apt package manager is updated, you are ready to proceed to the next step: adding the Ondřej Surý PPA repository.
Note: The above command requires root or sudo access. If prompted, enter your password to proceed with the package manager update.
Step 3: Add Ondřej Surý PPA Repository
To update PHP to the latest version on Ubuntu, we will utilize the Ondřej Surý PPA (Personal Package Archive) repository. This repository provides updated PHP packages that are not available in the default Ubuntu repositories.
To add the Ondřej Surý PPA repository, follow these steps:
- Open a terminal or SSH into your Ubuntu server.
- Run the following command to add the repository:
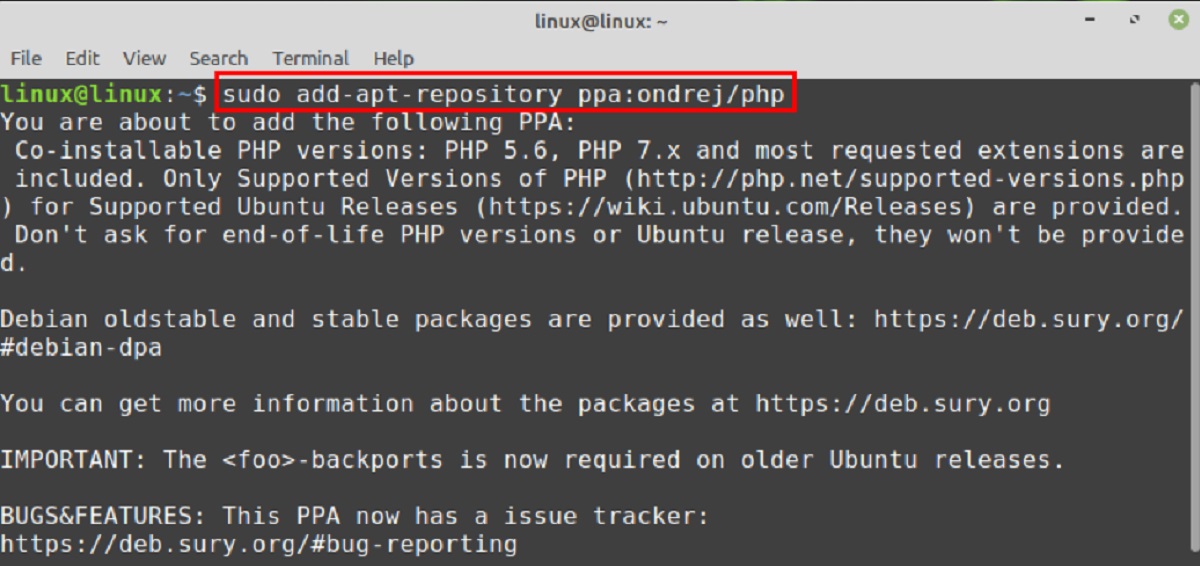
sudo add-apt-repository ppa:ondrej/php
This command will add the repository to your system’s package sources.
- After successfully adding the repository, update the apt package lists by running the following command:
sudo apt update
This command will retrieve the latest package information from the newly added repository.
By adding the Ondřej Surý PPA repository, you gain access to the latest PHP versions and updates not provided by the default Ubuntu repositories.
Now that you have added the Ondřej Surý PPA repository, you can proceed to the next step: updating the repository packages.
Note: The above commands require root or sudo access. If prompted, enter your password to add the repository and update the package lists.
Step 4: Update Repository Packages
After adding the Ondřej Surý PPA repository, it’s important to update the repository packages to sync with the latest available PHP versions. This will ensure that you have access to the most up-to-date PHP packages when you proceed with the update.
To update the repository packages, follow these steps:
- Open a terminal or SSH into your Ubuntu server.
- Run the following command to update the package lists from the newly added repository:
sudo apt update
This command will retrieve the latest package information from all enabled repositories, including the Ondřej Surý PPA repository.
- After the package lists are updated, you can upgrade the repository packages by running the following command:
sudo apt upgrade
This command will install any available updates for the packages installed on your system, including PHP-related packages.
If prompted, type ‘Y’ and press Enter to proceed with the upgrade. Depending on the number of packages that need to be updated, this process may take some time.
Once the upgrade process is completed, the repository packages will be updated to the latest versions. This ensures that you have access to the latest PHP packages available in the Ondřej Surý PPA repository.
Now that the repository packages are updated, you can proceed to the next step: upgrading PHP to the latest version
Note: The above commands require root or sudo access. If prompted, enter your password to update the repository packages.
Step 5: Upgrade PHP Version
Now that you have updated the repository packages, it’s time to upgrade your PHP version to the latest available release. Follow the steps below to perform the PHP upgrade:
- Open a terminal or SSH into your Ubuntu server.
- Run the following command to initiate the PHP upgrade:
sudo apt install php
This command will install the latest available PHP version from the Ondřej Surý PPA repository.
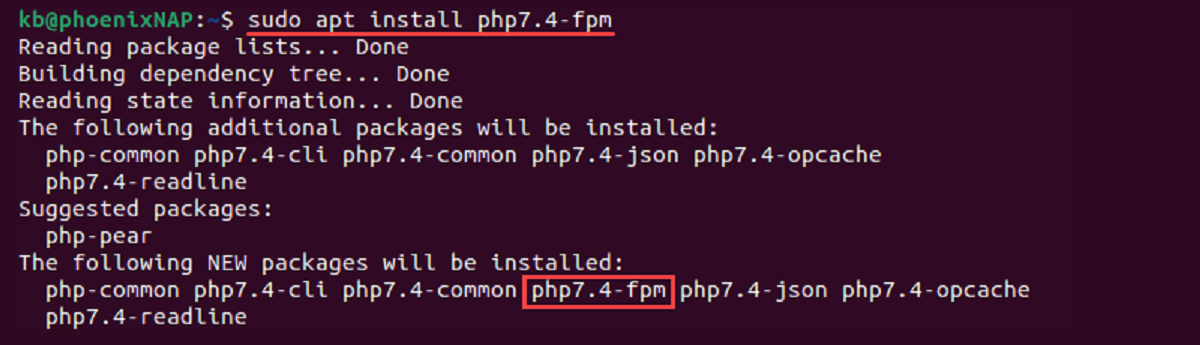
If you have a specific PHP version in mind that you want to install, you can specify it in the command. For example, to install PHP 7.4, you would run:
sudo apt install php7.4
The installation process will download and install the necessary PHP packages and dependencies. Depending on the size of the packages and your internet connection, this process may take a few minutes.
During the installation, you may be prompted to confirm or configure certain options. Follow the instructions provided on the screen to proceed with the installation.
Once the installation is complete, your PHP version will be upgraded to the latest available version.
It’s important to note that upgrading PHP may also upgrade or install additional PHP extensions or libraries. These extensions provide additional functionality and are essential for certain applications or frameworks. Ensure that any custom configurations or extensions you have installed are compatible with the new PHP version.
With the PHP upgrade complete, you can now verify the updated PHP version to ensure the successful update.
Note: The above commands require root or sudo access. If prompted, enter your password to install the updated PHP version.
Step 6: Verify Updated PHP Version
After upgrading PHP on your Ubuntu server, it’s crucial to verify that the update was successful and that you are now running the desired PHP version. This step will help confirm that your system is using the updated PHP installation.
To verify the updated PHP version, follow these steps:
- Open a terminal or SSH into your Ubuntu server.
- Run the following command to display the PHP version:
php -v
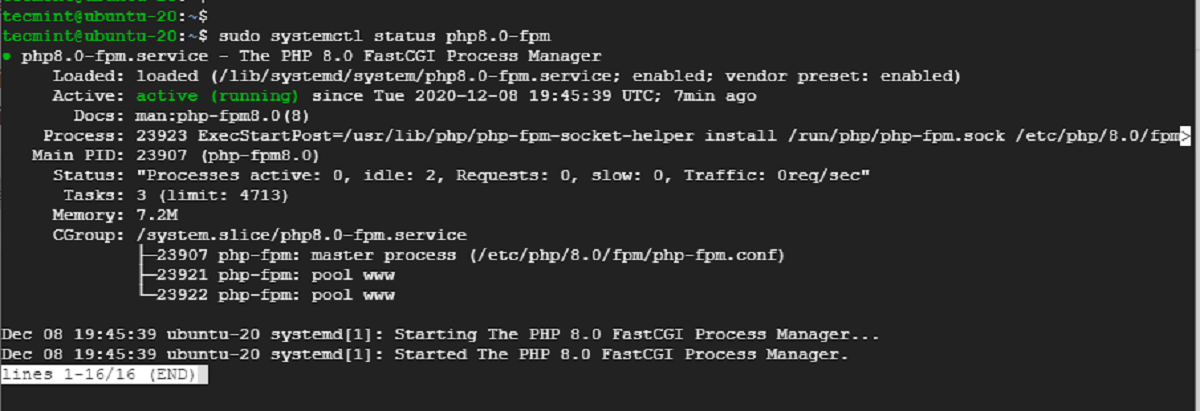
This command will display detailed information about the installed PHP version, including the version number and additional details about the PHP build and configuration.
Compare the output with the PHP version you intended to install. If the version displayed matches the one you expected, congratulations! Your PHP update was successful.
Additionally, you can create a simple PHP script to display the PHP version in the browser. Create a new file, such as `info.php`, in your web server’s document root directory (usually ‘/var/www/html/’) with the following contents:
php
Save the file and access it through a web browser. The PHP version will be displayed along with other information about your PHP installation.
By confirming the updated PHP version, you can ensure that your server and applications are utilizing the latest features and security enhancements provided by the new PHP version.
With the updated PHP version verified, you have successfully completed the process of updating PHP on your Ubuntu server.
It is important to regularly check for new PHP updates and stay up to date with the latest releases to benefit from improved performance, security patches, and new features.
Note: The above command requires root or sudo access. If prompted, enter your password to check the PHP version.
Conclusion
Updating PHP on your Ubuntu server is a necessary task to ensure the security, performance, and compatibility of your website or web application. By following the steps outlined in this tutorial, you can successfully update PHP to the latest version and benefit from the improvements and enhancements it offers.
We started by checking the current PHP version on your Ubuntu system to have a clear understanding of the starting point for the update process. Then, we updated the apt package manager to ensure that we have the latest package information.
Next, we added the Ondřej Surý PPA repository, which provides updated PHP packages that are not available in the default Ubuntu repositories. This allowed us to access the latest PHP versions and updates.
After updating the repository packages, we proceeded to upgrade the PHP version to the latest available release. This step involved installing the updated PHP packages from the added repository.
Finally, we verified the updated PHP version to ensure the successful completion of the update process. Confirming the PHP version is crucial to ensure your system is utilizing the updated PHP installation.
Regularly updating PHP is essential for the security and performance of your server, as well as to stay up to date with the latest features and enhancements. Don’t forget to regularly check for new PHP updates and follow the necessary steps to keep your PHP installation current.
By following this tutorial, you have successfully updated PHP on your Ubuntu server and can continue to enjoy the benefits of the latest PHP version.