Introduction
Updating PHP on your cPanel hosting is an important task that can greatly impact the performance, security, and compatibility of your website. PHP is a widely used scripting language that powers millions of websites and web applications. As PHP evolves, new features are added, and security vulnerabilities are patched. Therefore, keeping your PHP version up to date is crucial.
In this article, we will explore how to update PHP on cPanel, a popular web hosting control panel. You will learn two methods to update PHP: using the “MultiPHP Manager” in cPanel and updating via SSH command. We will also address common issues that may arise during the update process and provide troubleshooting tips.
Before we dive into the update process, it’s important to understand why updating PHP is necessary. Updating PHP not only ensures that your website benefits from the latest features and improvements but also helps to maintain the security of your website. Outdated PHP versions may have vulnerabilities that hackers can exploit to gain unauthorized access to your site.
Additionally, updating PHP allows your website to take advantage of the improved performance and increased efficiency of newer PHP versions. This can lead to faster page load times, better overall website performance, and a smoother user experience.
Now that you understand the importance of updating PHP, let’s proceed to the next section, where we will check the current PHP version on your cPanel hosting.
Checking the Current PHP Version
Before updating PHP, it’s essential to determine the current PHP version running on your cPanel hosting. This information will help you decide whether an update is necessary and will provide a baseline for comparison after the update.
To check the PHP version, you can follow these steps:
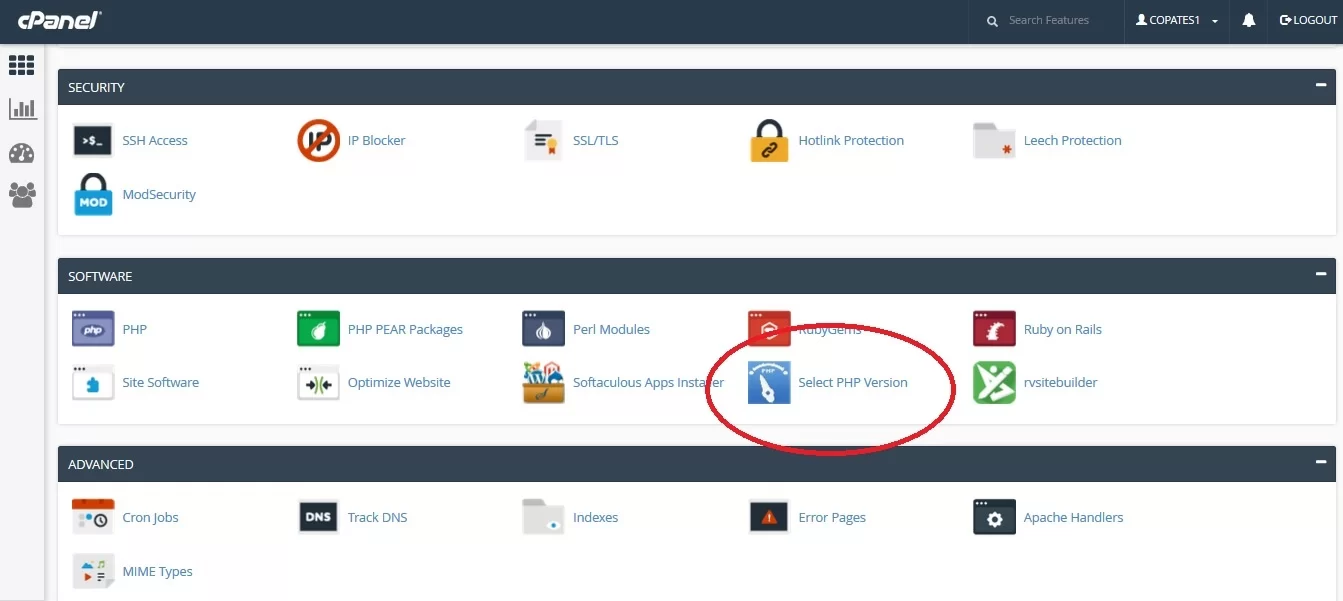
- Login to your cPanel account. If you are unsure how to access cPanel, reach out to your hosting provider for guidance.
- Once logged in, scroll down to the “Software” section and look for the “Select PHP Version” icon or a similar option. Click on it to access the PHP settings.
- In the PHP settings page, you will find the current PHP version displayed at the top. Make a note of the version number or take a screenshot for reference.
If you prefer a simpler method, you can create a file called “phpinfo.php” with the following code:
<?php
phpinfo();
?>
Upload this file to your website’s root directory (public_html) using an FTP client or the cPanel File Manager. Then, access the file via a web browser by visiting “http://yourdomain.com/phpinfo.php”. This will display a detailed output of PHP information, including the current PHP version.
Once you have successfully checked the PHP version, you are now ready to proceed with updating PHP on your cPanel hosting. In the next section, we will explore two methods to carry out the update: using the “MultiPHP Manager” in cPanel and updating via SSH command.
Understanding the Importance of Updating PHP
Updating PHP is not merely a matter of keeping up with the latest trends or technological advancements. It is a critical step in maintaining the security, stability, and performance of your website. Let’s delve into why updating PHP is of utmost importance:
Enhanced Security: PHP updates often include security fixes, patches, and improvements. By updating PHP, you ensure that your website is protected against potential vulnerabilities and exploits. Outdated PHP versions can leave your website exposed to hackers who constantly search for weaknesses to exploit. Updating PHP safeguards your website and reduces the risk of security breaches.
Better Performance: PHP updates introduce performance enhancements, bug fixes, and optimizations. As the PHP developers identify and address performance issues, updating PHP allows your website to benefit from these improvements. This results in faster page load times, improved responsiveness, and overall better performance for your visitors.
Compatibility: As PHP evolves, it introduces new functionalities and features. However, these features may not be backward compatible with older PHP versions. By updating PHP, you ensure that your website remains compatible with the latest web technologies and frameworks. This eliminates the possibility of compatibility issues and allows you to take advantage of the latest web development advancements.
Access to Latest Features: PHP updates often come with new features, functions, and syntax enhancements. These features can simplify development tasks, improve code efficiency, and provide opportunities for greater innovation in your website or web application. Updating PHP ensures that you have access to these new features, allowing you to enhance the functionality and user experience of your website.
Support: When you update PHP to the latest version, you benefit from ongoing support from the PHP development community. If you encounter any issues or difficulties while using PHP, having the latest version installed increases the likelihood of finding support from forums, documentation, and online communities. Staying updated means having access to a wealth of resources to help you troubleshoot and resolve any problems.
By understanding the importance of updating PHP, you can make informed decisions regarding the maintenance and upkeep of your website. Now that we’ve explored the significance of PHP updates, let’s move on to the practical steps of updating PHP using the “MultiPHP Manager” in cPanel.
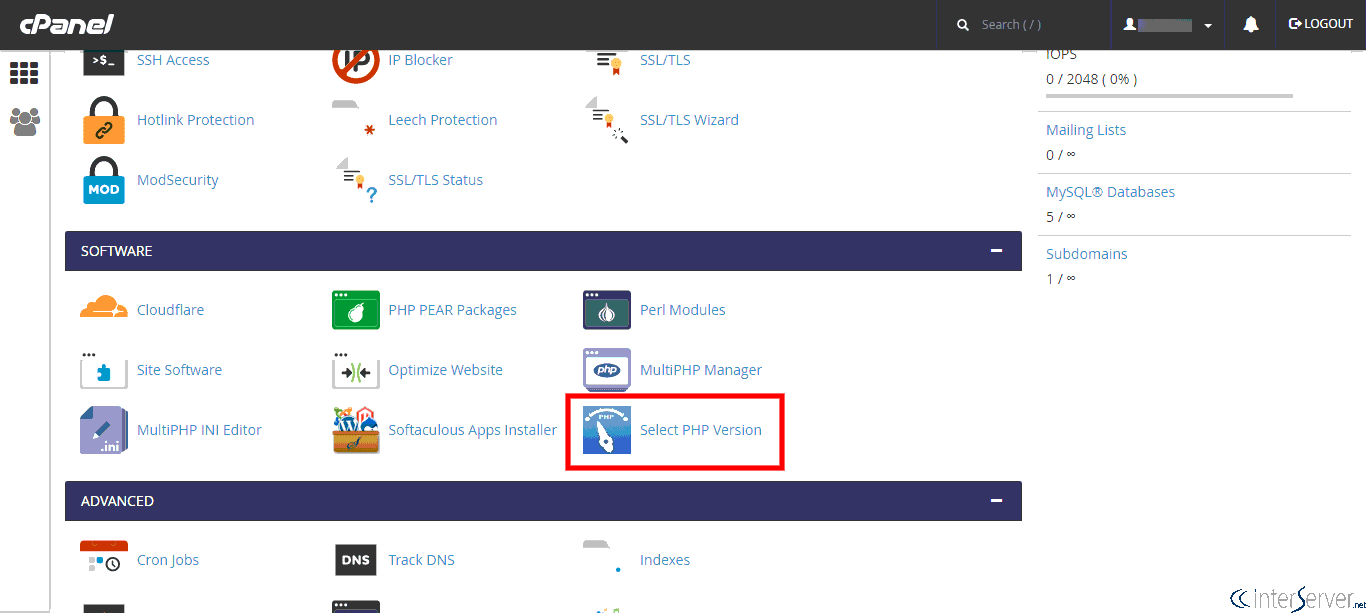
Updating PHP using “MultiPHP Manager” in cPanel
cPanel provides a convenient graphical interface called “MultiPHP Manager” that allows you to update PHP versions for individual domains or the entire cPanel account. Follow the steps below to update PHP using “MultiPHP Manager”:
- Login to your cPanel account. If you are unfamiliar with accessing cPanel, reach out to your hosting provider for assistance.
- In the cPanel home dashboard, locate and click on the “MultiPHP Manager” icon under the “Software” section.
- In the “MultiPHP Manager” interface, you will see a list of domains associated with your cPanel account. Select the domain for which you want to update PHP.
- Choose the desired PHP version from the drop-down menu that appears next to the selected domain.
- Once you have selected the PHP version, click the “Apply” button to save the changes.
- cPanel will then initiate the PHP update process. Depending on the size of your website and the PHP version you are updating to, it may take a few moments to complete.
- After the update is finished, you will receive a notification indicating the successful update of the PHP version for the selected domain.
It’s worth noting that updating PHP using the “MultiPHP Manager” only changes the PHP version for individual domains. If you want to update the PHP version for your entire cPanel account, you can select the “System Default” option in the “MultiPHP Manager” interface.
Remember to thoroughly test your website after updating PHP to ensure that all functionalities are working as expected. In the next section, we will explore an alternative method to update PHP using SSH command.
Updating PHP through SSH Command
If you prefer a command-line approach or have advanced technical knowledge, updating PHP through SSH (Secure Shell) allows for more flexibility and control. Here’s a step-by-step process to update PHP through SSH:
- Establish an SSH connection to your server using an SSH client like PuTTY (Windows) or Terminal (Mac/Linux). Consult your hosting provider’s documentation or support for SSH connection details.
- Once connected, navigate to your website’s root directory using the “cd” command.
- Next, execute the following SSH command to update PHP:
sudo yum install ea-phpXXReplace “XX” with the desired PHP version number (e.g., 74 for PHP 7.4). If you are using a different package manager like apt-get (Ubuntu/Debian), adjust the command accordingly.
- Press enter to initiate the command. The system will begin installing the selected PHP version.
- During the installation process, you might be prompted to confirm the changes or enter your server’s password if you do not have root access.
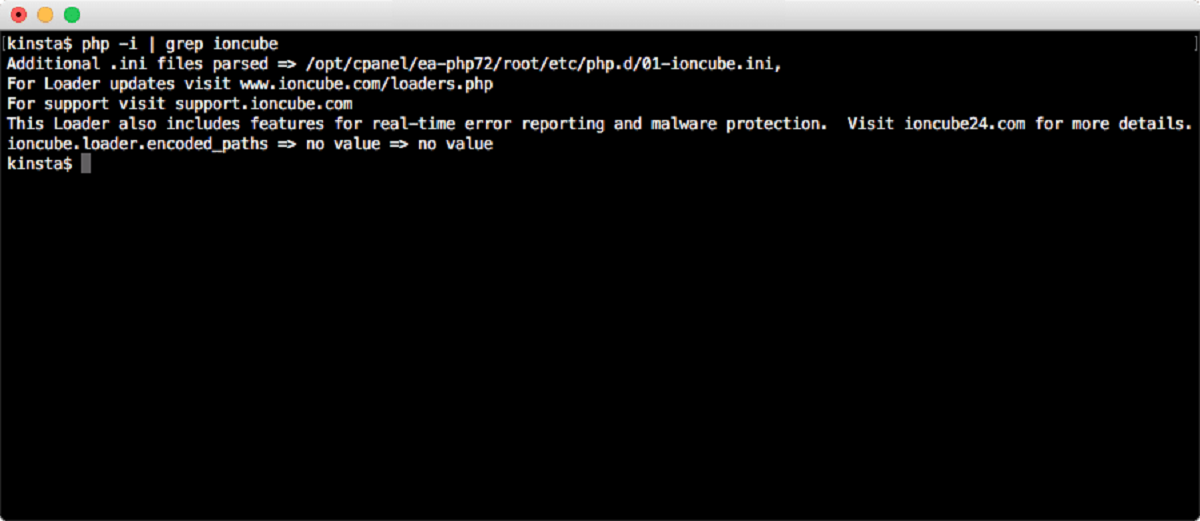
- Once the installation is complete, verify the PHP version by running the following command:
php -v - The terminal will display the PHP version installed on your server.
Updating PHP through SSH gives you greater control and flexibility, especially when managing multiple websites or if you prefer command-line operations. However, it’s crucial to exercise caution while working in the command line, as any incorrect commands can have adverse effects on your server.
After updating PHP via SSH, make sure to test your website thoroughly to ensure that all functionalities are working correctly. In the next section, we will discuss how to verify the PHP version after the update.
Verifying the PHP Version after Update
After updating PHP on your cPanel hosting, it’s important to verify that the update was successful and that the correct PHP version is now in use. There are a few ways you can verify the PHP version on your website:
Method 1: PHP Info Page
Create a file called “phpinfo.php” in your website’s root directory (public_html) and insert the following code:
<?php
phpinfo();
?>
Save the file, and then access it using a web browser by visiting “http://yourdomain.com/phpinfo.php”. This will display a detailed PHP information page, including the PHP version at the top of the page.
Method 2: Command Line
If you have SSH access to your server, you can use the command line to verify the PHP version. Connect to your server via SSH, navigate to your website’s root directory, and run the following command:
php -vThe command will display the PHP version installed on your server.
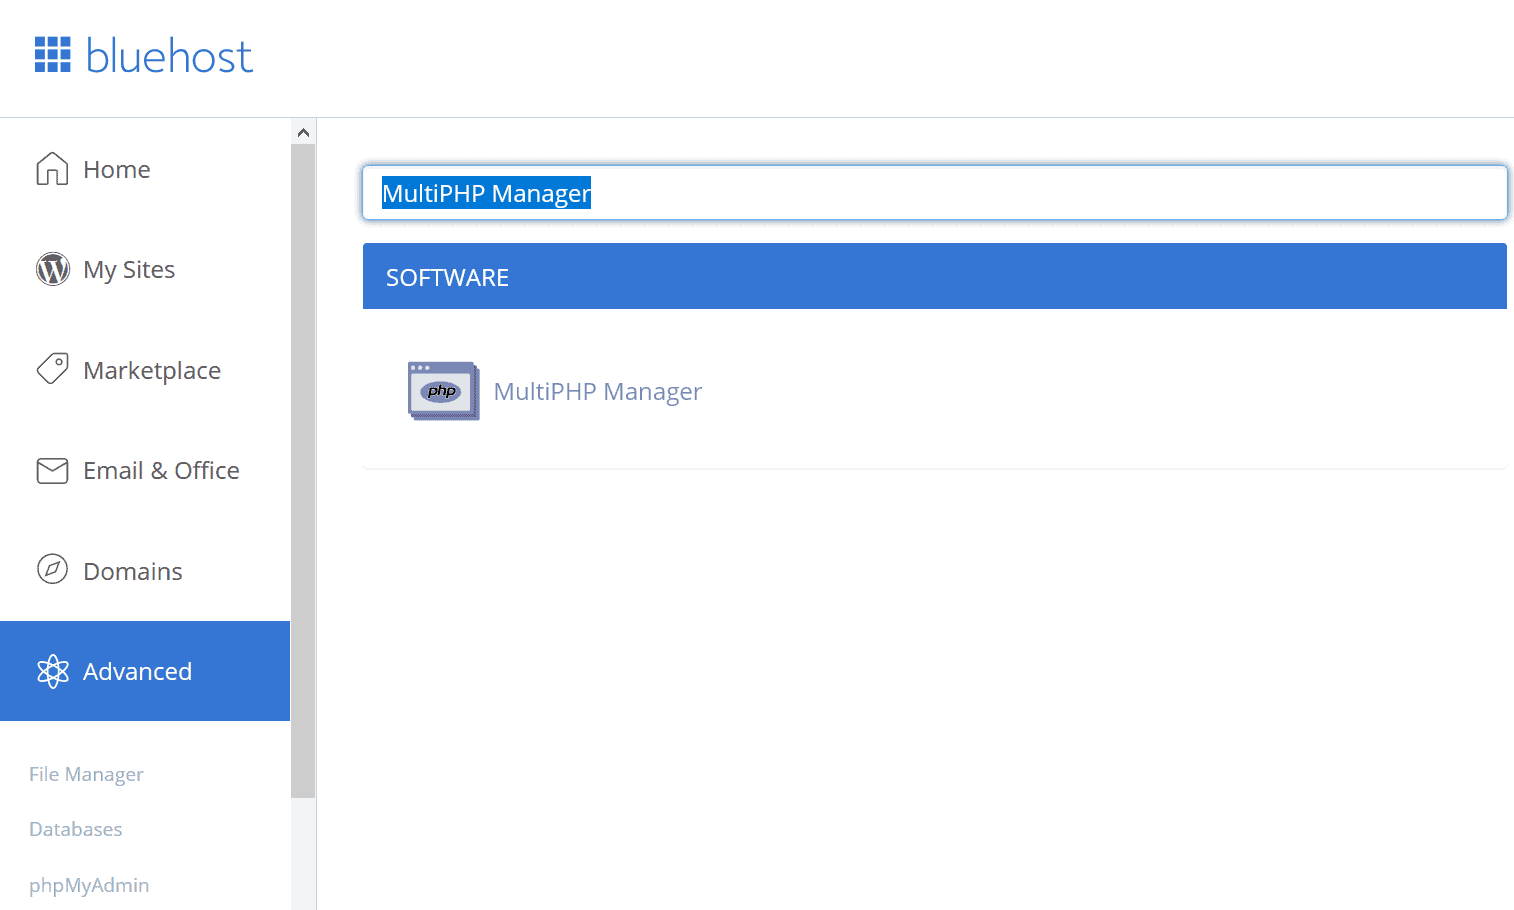
Method 3: cPanel MultiPHP Manager
If you prefer a graphical interface, you can check the PHP version through the “MultiPHP Manager” in cPanel. Simply log in to your cPanel account, locate and click on the “MultiPHP Manager” icon under the “Software” section. In the interface, you will see the current PHP version displayed for each domain.
Whichever method you choose, make sure that the displayed PHP version matches the desired PHP version you updated to. This confirmation ensures that the PHP update was successful.
Verifying the PHP version after the update is crucial as it allows you to confirm that your website is now running on the desired PHP version with the latest features, security patches, and performance improvements.
In the next section, we will address common issues that may arise during the PHP update process and provide troubleshooting tips to help you overcome them.
Common Issues and Troubleshooting
While updating PHP on cPanel is usually a smooth process, there are some common issues that may arise. Let’s explore these issues and provide troubleshooting tips to help you overcome them:
1. Compatibility Issues: After updating PHP, certain plugins, themes, or scripts on your website may not be compatible with the new PHP version. This can result in errors or broken functionality. To troubleshoot compatibility issues, check for updates or patches for your plugins, themes, or scripts. If available, install them to ensure compatibility with the updated PHP version. If compatibility updates are not available, consider reaching out to the plugin/theme/script developers for assistance or look for alternative solutions.
2. White Screen of Death: Sometimes, after updating PHP, you may encounter a blank white screen instead of your website’s content. This is commonly known as the “White Screen of Death.” To resolve this issue, access your cPanel File Manager or connect via FTP and navigate to the root directory of your website. Look for a file named “.htaccess” and temporarily rename it (e.g., “.htaccess_old”). Refresh your website, and if it loads correctly, the issue may be related to a misconfiguration in the .htaccess file. You can then investigate the problematic code or consult with a developer to fix it.
3. Error Messages: Error messages can occur during or after the PHP update process. These messages provide valuable insights into the root cause of the issue. If you encounter error messages, note down the error details and search for solutions online using the specific error message as a keyword. Community forums, developer documentation, and support resources can be helpful in finding fixes for specific error messages.
4. Memory Limit Issues: Updating PHP may lead to memory limit issues, especially if your website’s traffic or resource demands have increased. This can result in “out of memory” errors. To troubleshoot memory limit issues, you can try increasing the PHP memory limit by editing the “php.ini” file or adding the following code to your site’s wp-config.php file for WordPress sites:
define( 'WP_MEMORY_LIMIT', '256M' );You can adjust the memory limit value as per your requirements. If the issue persists, reach out to your hosting provider for further assistance.
5. Backup and Rollback: Before updating PHP, it’s always recommended to take a full backup of your website. In case any issues arise after the update, you can roll back to the previous PHP version and restore your website from the backup. This ensures minimal downtime and allows you to investigate and fix any problems before attempting the update again.
If you encounter issues that you are unable to resolve, consider seeking professional assistance from a web developer or contacting your hosting provider’s support team. They can offer specialized guidance and help you tackle any intricate problems that may arise during the PHP update process.
With a better understanding of common issues and troubleshooting tips, you can address any challenges that come your way during the PHP update. In the concluding section, we will summarize the key takeaways from this article.
Conclusion
Updating PHP on your cPanel hosting is essential for maintaining the security, performance, and compatibility of your website. By following the methods mentioned in this article, you can easily update PHP and ensure that your website is running on the latest version.
We started by emphasizing the importance of updating PHP, highlighting its role in enhancing security, improving performance, and providing access to new features. Understanding the significance of PHP updates helps you make informed decisions about keeping your website up to date.
We then explored two methods to update PHP on cPanel: using the “MultiPHP Manager” and updating through SSH command. The “MultiPHP Manager” provides a graphical interface to update PHP for individual domains or your entire cPanel account, while updating through SSH offers more control and flexibility for advanced users.
After updating PHP, it is crucial to verify the PHP version to ensure the update was successful. We discussed methods such as creating a PHP info page, using the command line, or checking through cPanel’s “MultiPHP Manager”. Verification ensures that your website is running on the desired PHP version, with all the benefits of the update.
We also addressed common issues that may arise during the PHP update process, including compatibility problems, the “White Screen of Death,” error messages, memory limit issues, and the importance of backing up your website. Troubleshooting tips were provided to help you overcome these challenges and seek further assistance if needed.
By staying vigilant and regularly updating PHP, you can ensure the security, performance, and compatibility of your website are optimized. In case you encounter difficulties during the update process, always remember to reach out to your hosting provider or seek professional guidance.
Keep your website up to date and embrace the benefits that the latest PHP versions offer. Start by checking your current PHP version, evaluating the significance of the update, choosing the appropriate method, and verifying the update’s success. With these steps, you can stay ahead in the ever-evolving web landscape.