Introduction
When it comes to optimizing the performance and functionality of your Dell computer, updating the BIOS is a crucial step that should not be ignored. BIOS, short for Basic Input/Output System, is responsible for initializing and controlling the hardware components of your computer when it boots up. It acts as the interface between the underlying hardware and the operating system, ensuring smooth communication between the two.
Updating BIOS can provide several benefits, including improved system stability, enhanced compatibility with new hardware or software, and access to new features and bug fixes. It is essential to keep your BIOS up to date to make the most out of your Dell computer.
However, updating BIOS is not a process to be taken lightly. It requires careful attention and adherence to specific precautions to avoid potential risks. A failed or improper BIOS update can lead to system instability or even render your computer unusable.
In this guide, we will walk you through the step-by-step process of updating the BIOS on your Dell computer. We will cover various methods, including using the Dell Command Update utility and updating BIOS using a USB device. Additionally, we will discuss how to check the current BIOS version on your Dell system and provide solutions to common issues that may arise during the update process.
Before we delve into the details, it is important to note that updating the BIOS should be approached with caution. It is recommended to create a backup of your essential files and documents before proceeding, in case any issues arise during the update. Additionally, ensure that your Dell computer is connected to a stable power source throughout the process to avoid any interruptions or power failures.
What is BIOS?
BIOS, which stands for Basic Input/Output System, is a firmware that is embedded in the motherboard of a computer. It is responsible for initiating and controlling the hardware components of the computer when it starts up. Think of it as the bridge between the underlying hardware and the operating system.
The primary function of BIOS is to perform the power-on self-test (POST) during boot-up. This test checks the hardware components of the computer, ensuring that they are functioning properly. If any issues are detected, BIOS will display error messages or emit beep codes, indicating the problem.
Furthermore, BIOS provides the necessary instructions to the operating system for booting up and initializing the hardware. It is responsible for configuring various hardware settings, such as the CPU clock speed, system memory timings, and drive settings. These settings play a vital role in determining the overall performance and stability of the computer.
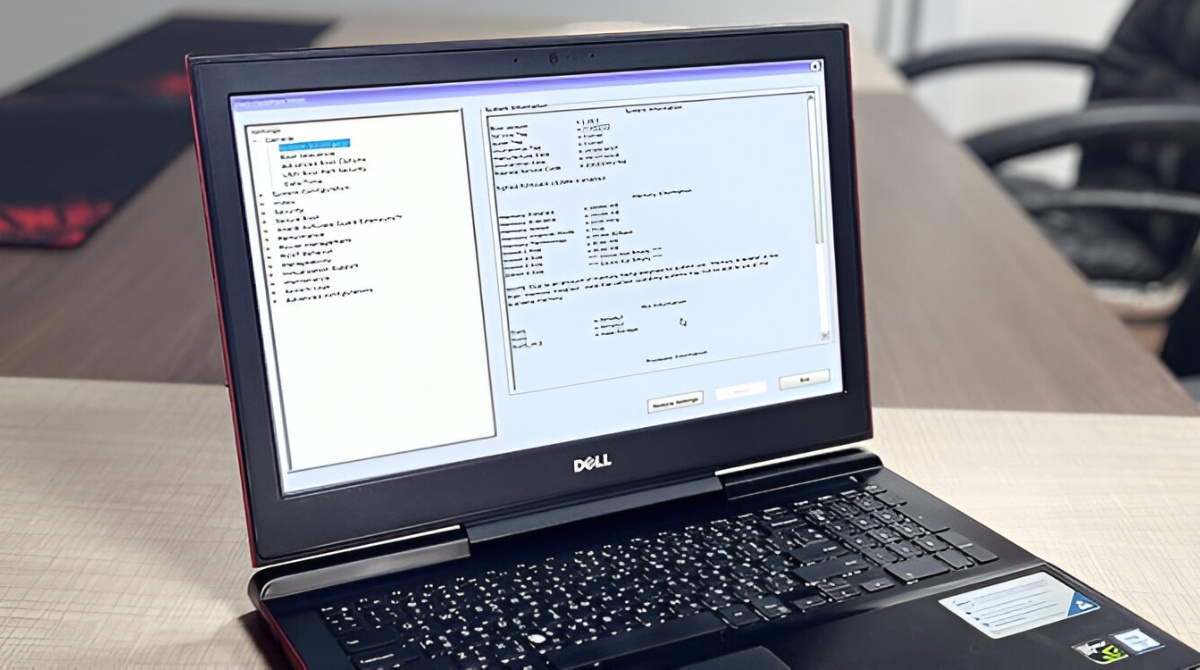
BIOS also serves as a platform for various low-level system functions. It provides a user interface, commonly known as the BIOS Setup Utility or BIOS Configuration Utility, which allows users to configure hardware settings and perform basic maintenance tasks on their computer. Users can access the BIOS Setup utility by pressing a specific key, usually indicated during the boot-up process.
It is important to note that BIOS is separate from the computer’s operating system, such as Windows or macOS. While the operating system handles higher-level functions, BIOS focuses on the initialization and management of the hardware components.
Over time, as technology advances and new hardware features are introduced, BIOS updates become necessary. Manufacturers release BIOS updates to enhance system performance, improve hardware compatibility, and address potential security vulnerabilities. Updating the BIOS ensures that your computer is running optimally and taking advantage of the latest advancements.
In the next sections, we will explore why it is important to update BIOS and provide a step-by-step guide to updating the BIOS on Dell computers, along with precautions and common issues that may arise during the process.
Why is it important to update BIOS?
Updating the BIOS on your Dell computer is essential for several reasons. Let’s take a closer look at why it is important to keep your BIOS up to date:
1. Improved System Stability: BIOS updates often include bug fixes and optimizations that enhance the stability of your computer. These updates can resolve issues related to system crashes, freezes, or unexpected restarts, resulting in a smoother and more reliable computing experience.
2. Enhanced Hardware Compatibility: As new hardware components are released, BIOS updates are issued to ensure compatibility between the hardware and the computer. Updating your BIOS allows your Dell computer to work seamlessly with the latest processors, graphics cards, and other peripherals.
3. Security Patches: BIOS updates often address security vulnerabilities that may be present in the previous versions. By regularly updating your BIOS, you can ensure that your computer is protected against potential security threats. This is especially crucial in today’s digital landscape where cyber threats continue to evolve.
4. Access to New Features: BIOS updates sometimes introduce new features and functionalities to your Dell computer. These features can include improved power management options, advanced overclocking settings, or additional customization options. By updating your BIOS, you can take advantage of these new features and enhance your overall user experience.
5. Bug Fixes and Performance Enhancements: BIOS updates often address known bugs and performance issues reported by users. These updates can optimize system performance, improve memory compatibility, or enhance the efficiency of certain hardware components. By keeping your BIOS up to date, you can ensure that your Dell computer is running at its best.
It is important to note that updating the BIOS should be approached with caution. It is recommended to perform regular backups of your important files and documents before proceeding with the update, as there is a small risk of data loss or system instability. Additionally, ensure that your Dell computer is connected to a stable power source to prevent any issues during the update process.
In the next section, we will discuss the precautions you should take before updating the BIOS on your Dell computer.
Precautions before updating BIOS
Before proceeding with the BIOS update on your Dell computer, it is important to take certain precautions to ensure a smooth and successful process. These precautions will help to minimize the risk of encountering issues and ensure the safety of your data. Here are some key considerations to keep in mind:
1. Backup your data: Before updating the BIOS, it is recommended to create a backup of all your important files, documents, and any other data stored on your computer. While the risk of data loss during the update process is low, it is always better to be safe than sorry.
2. Ensure stability of power supply: During the BIOS update, it is crucial to have a stable power supply to avoid any interruptions. Sudden power loss or fluctuations can cause the update process to fail, potentially resulting in system issues. Ensure that your Dell computer is connected to a reliable power source or use a UPS (Uninterruptible Power Supply) for added protection.
3. Have a fully charged battery (for laptops): If you are updating the BIOS on a Dell laptop, make sure that the battery is fully charged. In case of a power outage or accidental disconnection from the power source, a fully charged battery will ensure that the update process can continue without interruptions.
4. Disconnect unnecessary peripherals: Before starting the BIOS update, it is advisable to disconnect any unnecessary peripherals or devices connected to your Dell computer. This includes external hard drives, printers, USB devices, and any other hardware that is not essential for the update. By removing these devices, you minimize the chances of compatibility issues or any interference during the update process.
5. Use a reliable internet connection: If you are updating the BIOS using the Dell Command Update utility, ensure that you have a stable and reliable internet connection. A poor or unreliable connection can cause the update process to fail or result in incomplete downloads of the necessary files.
6. Follow the manufacturer’s instructions: It is crucial to carefully follow the instructions provided by Dell for updating the BIOS. Each computer model may have specific requirements or steps to be followed. Refer to the Dell documentation or support website for detailed instructions and guidelines for your specific model.
7. Take note of your current BIOS settings: Before updating the BIOS, it is recommended to take note or capture screenshots of your current BIOS settings. This will help you revert to your previous settings if needed or assist in troubleshooting, should any issues arise after the update.
By taking these precautions, you can minimize the risks associated with updating the BIOS on your Dell computer. In the next section, we will provide a step-by-step guide to updating the BIOS, covering various methods available for Dell systems.
Step-by-step guide to updating BIOS on Dell
Updating the BIOS on your Dell computer can be done through several methods. In this section, we will provide a comprehensive step-by-step guide to updating the BIOS, covering different options available for Dell systems. Let’s get started:
Method 1: Using the Dell Command Update utility
- Ensure that your Dell computer is connected to the internet.
- Download and install the Dell Command Update utility from the Dell Support website.
- Launch the Dell Command Update utility.
- The utility will automatically detect and scan your system for available updates.
- Select the BIOS update from the list of available updates.
- Review the details of the BIOS update, including any release notes or additional instructions.
- Click on the “Install” or “Update” button to start the BIOS update process.
- Follow the on-screen prompts to complete the update process.
- After the update is complete, restart your Dell computer to apply the changes.
Method 2: Updating BIOS using a USB device
- Visit the Dell Support website and navigate to the Drivers & Downloads section.
- Enter your Dell computer’s Service Tag or select the appropriate model from the list.
- Locate and download the latest BIOS update file for your Dell computer.
- Once the download is complete, insert a USB flash drive into your computer.
- Format the USB drive to FAT32 file system.
- Copy the downloaded BIOS update file to the USB drive.
- Restart your Dell computer and access the BIOS Setup utility by pressing the specified key during boot-up (usually F2 or Del).
- Navigate to the “Boot” or “Advanced” tab in the BIOS setup.
- Set the USB drive as the primary boot device.
- Save the changes and exit the BIOS setup.
- The computer will boot from the USB drive and initiate the BIOS update process.
- Follow the on-screen instructions to complete the BIOS update.
- Once the update is finished, remove the USB drive and restart your Dell computer.
It is important to note that the steps provided may vary slightly depending on the specific model and BIOS version of your Dell computer. It is recommended to refer to the Dell documentation or support website for model-specific instructions and guidelines.
In the next section, we will discuss how to check the current BIOS version on your Dell system.
How to check the current BIOS version on Dell
Before updating the BIOS on your Dell computer, it is important to know the current BIOS version installed. This information helps ensure that you download and apply the correct BIOS update. Here’s how you can check the current BIOS version on your Dell system:
- Start your Dell computer and wait for it to fully boot up.
- Open the Start menu or press the Windows key to access the Windows search bar.
- Type “System Information” and click on the corresponding result to launch the System Information utility.
- In the System Information window, navigate to the “System Summary” section.
- Look for the field labeled “BIOS Version/Date” or similar.
- The BIOS version will be listed next to this field.
- Make a note of the BIOS version for reference.
Alternatively, you can also check the BIOS version during the computer’s startup process:
- Restart your Dell computer.
- During the boot-up sequence, pay attention to the screen.
- Look for a message that displays the BIOS version, such as “Press [key] to enter setup” or “BIOS revision [version number]”.
- Take note of the BIOS version displayed on the screen.
Once you have obtained the BIOS version, you can compare it with the available BIOS updates on the Dell support website. If a newer version is available, you can proceed with downloading and updating the BIOS following the instructions provided by Dell.
It is important to ensure that you download the correct BIOS update for your specific Dell model and its corresponding BIOS version. Using an incorrect BIOS update can result in system instability or other issues. If you are unsure about which BIOS update to download, it is recommended to consult the Dell support website or reach out to Dell customer support for assistance.
In the next section, we will explore the process of downloading the latest BIOS update for your Dell computer.
Downloading the latest BIOS update for Dell
To update the BIOS on your Dell computer, you need to download the latest BIOS update file provided by Dell. Here’s a step-by-step guide to help you download the latest BIOS update:
- Open a web browser on your Dell computer.
- Go to the Dell Support website (support.dell.com).
- In the search bar on the support page, enter the model name or Service Tag of your Dell computer and press Enter.
- Select the “Drivers & Downloads” section or similar on the Dell Support page.
- Select “BIOS” or “Firmware” from the available dropdown menu or category list.
- Review the list of available BIOS updates for your Dell model.
- Click on the download button next to the latest BIOS update file.
- Choose a location on your computer to save the downloaded file, and click Save.
- Wait for the BIOS update file to finish downloading. The file is usually in ZIP or EXE format.
- Once the download is complete, locate the downloaded BIOS update file on your computer.
- If the file is in ZIP format, extract its contents using a file extraction utility such as WinRAR or 7-Zip.
After downloading the latest BIOS update file, you are now ready to proceed with updating the BIOS on your Dell computer. Remember to follow the instructions provided by Dell for your specific model to ensure a successful update process.
In the next section, we will discuss two common methods for updating the BIOS on Dell computers: using the Dell Command Update utility and updating via a USB device.
Updating BIOS using the Dell Command Update utility
The Dell Command Update utility is a convenient tool that automates the process of updating drivers, firmware, and BIOS on Dell computers. Here’s a step-by-step guide on how to update the BIOS using the Dell Command Update utility:
- Ensure that your Dell computer is connected to the internet.
- Open a web browser and visit the Dell Support website (support.dell.com).
- Search for the “Dell Command Update” utility in the Downloads section.
- Download and install the Dell Command Update utility on your computer.
- Launch the Dell Command Update utility from the Start menu or desktop shortcut.
- The utility will automatically scan your Dell computer for available updates.
- Once the scan is complete, a list of available updates will be displayed.
- Look for the BIOS update from the list of available updates.
- Review the details of the BIOS update, including any release notes or additional instructions.
- Select the checkbox next to the BIOS update to include it in the installation.
- Click on the “Install” or “Update” button to start the BIOS update process.
- Follow the on-screen prompts and agree to any terms and conditions.
- Wait for the Dell Command Update utility to download and install the BIOS update.
- Once the installation is complete, restart your Dell computer to apply the changes.
During the update process, it is important not to interrupt or power off your computer. Allow the Dell Command Update utility to complete the update, as interrupting the process can lead to system issues.
The Dell Command Update utility offers a convenient and automated way to update the BIOS on Dell computers. However, note that this utility may not be available for all Dell models. If you cannot find or use the Dell Command Update utility, you can still update the BIOS using other methods, such as updating via a USB device.
In the next section, we will explore the process of updating the BIOS using a USB device.
Updating BIOS using a USB device
If you are unable to use the Dell Command Update utility or prefer an alternative method, you can update the BIOS on your Dell computer using a USB device. Here’s a step-by-step guide to help you update the BIOS using a USB device:
- Visit the Dell Support website (support.dell.com) using a web browser on another computer.
- Enter your Dell computer’s Service Tag or choose the appropriate model from the list.
- Navigate to the “Drivers & Downloads” section or similar on the Dell Support page.
- Choose your operating system from the available options.
- Look for the latest BIOS update file compatible with your Dell computer.
- Download the BIOS update file to the other computer.
- Insert a USB flash drive into the other computer.
- Format the USB drive to the FAT32 file system.
- Copy the downloaded BIOS update file onto the USB drive.
- Safely eject the USB drive from the other computer.
- Insert the USB drive into the Dell computer you want to update.
- Restart your Dell computer and enter the BIOS setup by pressing the designated key during boot-up (usually F2 or Del).
- Navigate to the “Boot” or “Advanced” tab in the BIOS setup.
- Set the USB drive as the primary boot device.
- Save the changes and exit the BIOS setup.
- The Dell computer will boot from the USB drive and initiate the BIOS update process.
- Follow the on-screen instructions carefully to complete the BIOS update.
- After the update is finished, remove the USB drive and restart your Dell computer.
During the BIOS update process, it is crucial not to interrupt or power off your computer. Let the update complete to avoid any potential system issues.
Keep in mind that the steps mentioned above may vary slightly depending on the specific model and BIOS version of your Dell computer. It is recommended to refer to the Dell documentation or support website for model-specific instructions to ensure a successful BIOS update process.
In the next section, we will discuss common issues that may occur during the BIOS update and provide solutions to resolve them.
Common issues during BIOS update and how to resolve them
During the BIOS update process, certain issues may arise that can interrupt or disrupt the update. Here are some common issues that you may encounter during a BIOS update and suggested solutions to resolve them:
1. Power loss or interruption: If the power supply is interrupted during the BIOS update, it can cause the update to fail or corrupt the BIOS. To avoid this, ensure that your Dell computer is connected to a stable power source and use a UPS (Uninterruptible Power Supply) if available.
Solution: If a power loss occurs during the update, try restarting your Dell computer and repeating the BIOS update process. If the issue persists, you may need to perform a BIOS recovery procedure, which typically involves using a specific key combination or recovering the BIOS from a backup.
2. System crashes or freezes: In some cases, the computer may crash or freeze during the BIOS update, preventing the update from completing successfully. This can occur due to various factors, such as incompatible hardware or software conflicts.
Solution: Restart your Dell computer and attempt the BIOS update again. Before starting the update process, it is advisable to close all unnecessary applications and disable any security software temporarily. Additionally, ensure that your computer meets the minimum requirements for the BIOS update, such as having enough free disk space or memory.
3. Incorrect BIOS update file: Using the wrong BIOS update file or an incompatible version can result in errors during the update process and can potentially damage the BIOS or render the computer inoperable.
Solution: Double-check the Dell support website to ensure that you have downloaded the correct BIOS update file for your specific Dell model and its corresponding BIOS version. Carefully read the instructions provided by Dell before proceeding with the BIOS update to avoid any mistakes.
4. BIOS update stuck or taking too long: Occasionally, the BIOS update can appear to be stuck or take an unusually long time to complete. This can be caused by system slowdowns, hardware issues, or compatibility problems.
Solution: Patience is key in this situation. It is recommended to wait for at least 30 minutes to see if the update process continues. If no progress is observed, force shutting down the computer can result in system instability. It is advisable to reach out to Dell customer support for further assistance during this scenario.
If you encounter any other issues during the BIOS update process, it is recommended to consult the Dell documentation or support website for specific troubleshooting steps or contact Dell customer support for assistance. They will be able to provide guidance specific to your Dell model and help resolve any issues that may arise during the update process.
In the next section, we will conclude our guide on updating the BIOS on Dell computers.
Conclusion
Updating the BIOS on your Dell computer is an important step to optimize system performance, enhance compatibility, and address security vulnerabilities. While the process may seem complex, following the steps and precautions outlined in this guide can help ensure a successful BIOS update.
We discussed the significance of BIOS and why it is important to keep it up to date. We also covered the precautions you should take before updating the BIOS, such as backing up your data and ensuring a stable power supply.
Furthermore, we provided a step-by-step guide to updating the BIOS on Dell computers using two different methods: the Dell Command Update utility and updating via a USB device. We also explained how to check the current BIOS version on your Dell system and download the latest BIOS update from the Dell Support website.
Additionally, we addressed common issues that may arise during a BIOS update, including power interruptions, system crashes, incorrect update files, and update stalls. For each issue, we suggested solutions to help resolve them.
Remember to always refer to the Dell documentation or support website for model-specific instructions and consult Dell customer support if you encounter any difficulties or require further assistance during the BIOS update process.
By keeping your BIOS up to date, you can ensure optimal performance, improved hardware compatibility, and enhanced security for your Dell computer. Regularly checking for BIOS updates and following the recommended practices will help you maximize the potential of your Dell system.