Introduction
Welcome to our troubleshooting guide on why your Dell laptop won’t turn on. Dealing with a laptop that refuses to power up can be incredibly frustrating, especially when you rely on it for work, communication, or entertainment. However, understanding the potential reasons behind this issue can help you diagnose and resolve the problem.
A Dell laptop not turning on can be caused by various factors, including power-related issues, battery problems, faulty AC adapters, display issues, overheating, hardware problems, BIOS issues, or software errors. By exploring each of these possibilities and following the suggested troubleshooting steps, you can increase the chances of getting your laptop up and running again.
In this guide, we’ll walk you through the most common reasons why your Dell laptop may not be turning on and provide step-by-step instructions to help you troubleshoot the issue. Whether you are an experienced user or a novice, we aim to offer clear and concise guidance to resolve the problem.
It’s important to note that while these troubleshooting steps are generally applicable to Dell laptops, individual laptop models may have specific differences. Therefore, if you encounter any discrepancies between our instructions and your particular Dell laptop model, always follow the manufacturer’s recommendations and refer to your laptop’s user manual for specific guidance.
Now, let’s dive into the various reasons why your Dell laptop may refuse to turn on and explore the solutions to get your laptop back in working order.
Common reasons why a Dell laptop won’t turn on
When faced with a Dell laptop that won’t turn on, there are several common causes to consider. Identifying these potential issues can help you pinpoint the underlying problem and take appropriate steps towards resolving it.
1. Power-related issues: Sometimes, a simple power issue can be responsible for the laptop not turning on. Make sure the power button is properly pressed, and check if there are any loose power connections.
2. Battery problems: If your Dell laptop has a removable battery, ensure it is correctly inserted and not depleted. A faulty or dead battery may prevent the laptop from powering on. Try removing the battery and connecting directly to the power source.
3. Faulty AC adapter or power cord: A damaged or malfunctioning AC adapter or power cord can prevent the laptop from receiving a proper power supply. Inspect the adapter and cord for any signs of damage, and consider testing with a different adapter or power cord.
4. Display issues: It’s possible that the laptop turns on, but the screen remains blank. Check if the display brightness is set too low or if an external monitor is properly connected. Additionally, pressing the appropriate display function key (e.g., Fn+F8) may switch the display output to the laptop screen.
5. Overheating: In some cases, a Dell laptop won’t turn on due to overheating. Overheating can trigger internal safety mechanisms that prevent the laptop from powering on. Ensure that the laptop is placed on a flat and ventilated surface to allow proper airflow and consider cleaning the cooling vents to remove any dust or debris.
6. Hardware problems: Faulty or malfunctioning hardware components, such as a faulty RAM module or a damaged motherboard, can cause the laptop to refuse to turn on. If you suspect a hardware issue, it’s best to consult a professional technician for further diagnosis and repair.
7. BIOS issues: Problems with the Basic Input/Output System (BIOS) can prevent the laptop from starting. Resetting the BIOS settings or updating the BIOS firmware may help in resolving startup issues related to BIOS.
8. Software or operating system errors: Software conflicts, corrupted operating system files, or malware infections can disrupt the startup process and prevent the laptop from turning on. Try booting into safe mode or using system recovery options to troubleshoot and resolve software-related issues.
By understanding these common reasons, you can take targeted steps to resolve the issue and get your Dell laptop back up and running. In the following sections, we’ll guide you through the troubleshooting process for each of these potential causes.
Power-related issues
When your Dell laptop refuses to turn on, power-related issues should be among the first factors to consider. Here are some steps you can take to identify and resolve power-related problems:
– Check the power button: Ensure that you are pressing the power button correctly and holding it for a few seconds. Sometimes, a faulty or incorrectly pressed power button can give the impression that the laptop is not turning on.
– Check the power source: Make sure that the power outlet you are using is functioning properly. Plug in a different device, like a lamp or cellphone charger, to verify if the outlet is providing power.
– Remove and reinsert the battery: If your Dell laptop has a removable battery, try removing it and then reinserting it. This can help reset the connection and resolve any temporary power-related issues.
– Verify the power indicator: Check if the power indicator lights up when you connect the laptop to a power source. If the power indicator does not light up, it could indicate a problem with the power supply or the laptop’s power circuitry.
– Check for loose connections: Ensure that all power connections are secure. Check both ends of the AC adapter and power cord to make sure they are properly plugged in. Also, inspect the connection between the AC adapter and the laptop to ensure it is not loose.
– Try a different power cord or AC adapter: If you have access to another compatible power cord or AC adapter, try using it to test if the issue lies with the power cord or adapter. Sometimes, a faulty power cord or adapter can cause power-related problems.
– Reset the power settings: In some cases, resetting the power settings on your Dell laptop can resolve power-related issues. To do this, disconnect the laptop from the power source, remove the battery (if removable), and then hold the power button down for about 10-15 seconds. Reconnect the power source and battery, and then try powering on the laptop.
By following these steps, you can address common power-related issues and increase the chances of resolving the problem. If the power-related troubleshooting steps do not resolve the issue, move on to the next potential cause and continue the troubleshooting process.
Battery problems
One of the common reasons why a Dell laptop may not turn on is due to battery-related issues. If you’re experiencing problems with your laptop battery, consider the following troubleshooting steps:
– Check the battery indicator: Look for the battery indicator on your laptop. If it is indicating a low charge or is completely drained, it may be preventing the laptop from turning on. Connect the laptop to a power source and allow the battery to charge for a while before attempting to power it on again.
– Remove and reinsert the battery: If your Dell laptop has a removable battery, try removing it and then reinserting it. This can help establish a solid connection and overcome any temporary issues that may be preventing the laptop from turning on.
– Test the laptop without the battery: If your laptop has both an external power source and a removable battery, try removing the battery and connecting the laptop directly to the power source. This test can help determine if the battery is faulty or causing any issues with the power supply.
– Replace the battery: If the battery fails to hold a charge or is significantly worn out, it may need to be replaced. Contact Dell support or check their official website to order a new battery that is compatible with your specific laptop model.
– Reset the battery settings: Some Dell laptops have built-in battery management software that allows you to reset the battery settings. Consult your laptop’s user manual or Dell’s support website for instructions on how to perform a battery reset.
– Perform a battery calibration: Battery calibration can help recalibrate the battery and improve its accuracy in reporting the remaining charge. Follow the instructions provided by Dell to perform a battery calibration for your specific laptop model.
It’s worth noting that while some Dell laptops have removable batteries, others have built-in batteries that cannot be easily removed. In such cases, you may need to contact Dell support or a qualified technician for assistance with battery-related issues.
By troubleshooting battery-related problems, you can identify and resolve potential issues that may be preventing your Dell laptop from turning on. If the battery troubleshooting steps do not resolve the issue, proceed to the next potential cause and continue the troubleshooting process.
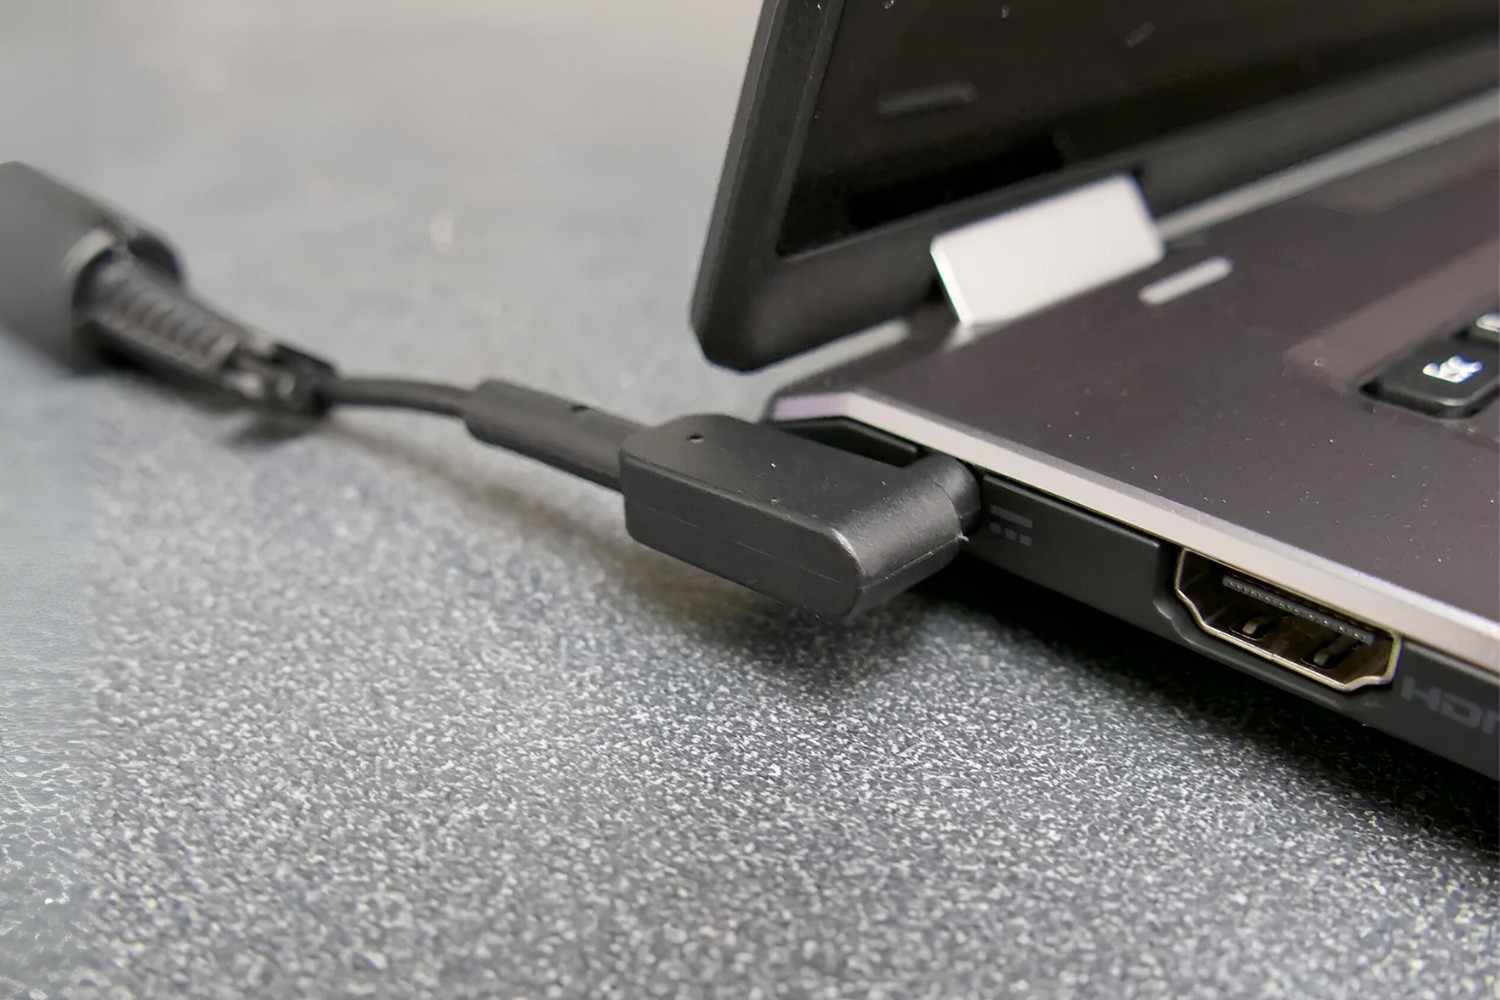
Faulty AC adapter or power cord
If your Dell laptop is not turning on, it’s crucial to investigate the possibility of a faulty AC adapter or power cord. Here are some steps to help you address this potential cause:
– Inspect the AC adapter and power cord: Carefully examine the AC adapter and power cord for any signs of damage, such as frayed wires, bent pins, or a loose connection. If you notice any issues, it’s recommended to replace the AC adapter or power cord with a new, compatible one.
– Test with another AC adapter or power cord: If possible, try using a different AC adapter or power cord that is compatible with your Dell laptop model. This will help determine if the issue lies with the AC adapter or power cord itself.
– Check the LED indicator on the AC adapter: Many Dell AC adapters have LED indicators to indicate whether they are receiving power. If the LED does not light up when the adapter is connected to a power source, it may suggest a problem with the adapter. Consider purchasing a replacement adapter to resolve the issue.
– Check the connection between the AC adapter and laptop: Ensure that the AC adapter is securely connected to the laptop. Sometimes, a loose connection or a faulty DC jack can prevent the laptop from receiving power. If the connection feels loose, it may require professional repair or replacement.
– Verify the power source: Confirm that the power outlet you are using is functional. Plug in another electronic device to determine if the outlet is providing power. Additionally, try plugging the AC adapter into a different outlet to rule out any issues with the power source.
– Contact Dell support: If you have followed these steps and are still experiencing power-related issues, it is recommended to contact Dell support for further assistance. They can provide specific guidance based on your laptop model and help you determine if a replacement AC adapter or power cord is necessary.
By addressing potential issues with the AC adapter or power cord, you can eliminate power-related problems as the cause for your Dell laptop not turning on. If the AC adapter or power cord troubleshooting does not resolve the issue, move on to the next potential cause and continue the troubleshooting process.
Display issues
If your Dell laptop’s power lights turn on but the screen stays blank, the issue may lie in the display. Here’s a step-by-step guide to troubleshooting display-related problems:
– Adjust the display brightness: Your laptop’s display brightness may be turned down too low, making it appear as if the screen is blank. Use the function keys on your keyboard (usually labeled with a sun icon) to increase the display brightness. Check your laptop’s user manual for specific instructions.
– Connect an external monitor: Connect your laptop to an external monitor using the appropriate cable. If the external monitor displays the laptop’s content, it suggests a problem with the laptop’s built-in display. In such cases, you may need to consult a professional technician for further diagnosis and repair.
– Press the display function key: Some Dell laptops have function keys dedicated to changing display output modes. Press the corresponding key (e.g., Fn+F8) to cycle through display options such as laptop screen only, external monitor only, or both laptop screen and external monitor. You may have inadvertently switched to an incorrect display mode.
– Check for physical damage: Inspect the laptop’s display for any signs of physical damage, such as cracks or water damage. If the display is physically damaged, it will likely require professional repair or replacement.
– Perform a soft reset: Occasionally, the display may freeze or become unresponsive due to software issues. Perform a soft reset by pressing and holding the power button until the laptop turns off. Wait for a few seconds, then press the power button again to turn on the laptop and see if the display issue is resolved.
– Update graphics drivers: Outdated or corrupted graphics drivers can cause display problems. Visit the official Dell support website and download the latest graphics drivers for your specific laptop model. Install the updated drivers and restart the laptop to see if the display issue is resolved.
– Boot into safe mode: Booting the laptop into safe mode can help determine if the display issue is caused by third-party software or conflicting drivers. Restart the laptop and continuously press the F8 key or another designated key (consult your laptop’s user manual) until the Advanced Boot Options menu appears. Select “Safe Mode” and see if the display works properly in safe mode.
If the above steps do not resolve the display issue, there may be a more complex problem with the laptop’s display hardware. Contact Dell support or consult a professional technician for further assistance.
Overheating
Overheating can be a common issue that prevents your Dell laptop from turning on. Excessive heat can trigger internal safety mechanisms, causing the laptop to shut down or refuse to power on. Here’s how you can address overheating problems:
– Check for blocked air vents: Inspect the laptop’s air vents to ensure they are not obstructed by dust, debris, or any other objects. Blocked vents can impede the cooling airflow, leading to overheating. Use a canister of compressed air or a soft brush to gently clean the vents and remove any accumulated dust.
– Use a laptop cooling pad: Investing in a laptop cooling pad helps increase airflow and dissipate heat more effectively. These pads typically have built-in fans that keep the laptop cool during prolonged use. Place the laptop on the cooling pad when in use to prevent overheating.
– Elevate the laptop: When using your laptop, ensure it is placed on a flat and stable surface. Elevating the laptop slightly allows for better air circulation and helps prevent heat buildup. Avoid using your laptop on soft surfaces like beds or couches, as these can block the vents and trap heat.
– Adjust power settings: Modify your laptop’s power settings to prevent it from running at maximum performance all the time. Using the “Power Saver” mode or customizing the power settings to reduce CPU usage can help reduce heat output. Navigate to the Power Options in the Control Panel to make these adjustments.
– Use a cooling pad or external fan: If you frequently use your laptop for resource-intensive tasks like gaming or video editing, consider using additional cooling methods. A cooling pad with extra fans or an external USB-powered fan can provide additional cooling and help prevent overheating.
– Monitor CPU usage: Keep an eye on the laptop’s CPU usage and close any unnecessary background applications or processes that are putting an excessive load on the CPU. Monitoring and managing CPU usage can help prevent the laptop from overheating.
– Apply new thermal paste: Over time, the thermal paste between the CPU and the heatsink can dry out or become less effective. If you’re comfortable doing so, consider applying a fresh layer of thermal paste to improve heat transfer and prevent overheating. Consult your laptop’s user manual or seek professional assistance for this procedure.
If overheating continues to be a problem even after taking these measures, there may be internal hardware issues causing the excessive heat. In such cases, it’s advisable to contact Dell support or a professional technician for further diagnosis and repair.
Hardware problems
If your Dell laptop won’t turn on, hardware problems could be the culprit. Physical components within the laptop may be malfunctioning or damaged. Here are some steps you can take to troubleshoot and address hardware-related issues:
– Check RAM and other hardware components: Ensure that the RAM modules, hard drive, and other internal components are properly seated in their respective slots. Sometimes, loose connections or improperly installed hardware can prevent the laptop from powering on. Carefully remove and reseat these components to ensure a secure connection.
– Test individual hardware components: If you suspect a specific hardware component is causing the issue, try disconnecting it and testing the laptop without it. For example, if your laptop has multiple RAM modules, try booting it with only one module at a time to identify if one of the modules is faulty.
– Perform a diagnostics test: Many Dell laptops come with built-in diagnostic tools that can help identify hardware issues. Restart your laptop and press the designated key (e.g., F12) to enter the diagnostics menu. Select the appropriate diagnostic test for hardware components such as the CPU, memory, or hard drive, and follow the on-screen instructions to perform the test.
– Consult a professional technician: If you’re uncomfortable working with hardware components or the above steps do not resolve the issue, it’s best to seek assistance from a professional technician. A trained technician can diagnose and repair any hardware problems more effectively and safely.
– Inspect for physical damage: Carefully examine the laptop for any signs of physical damage, such as cracks, dents, or liquid spills. Physical damage can affect the internal components and prevent the laptop from turning on. If you notice any physical damage, it’s advisable to seek professional assistance for repair or replacement.
– Contact Dell support: If you’re unable to resolve the hardware issue on your own, reach out to Dell support for further assistance. They can provide specific troubleshooting steps based on your laptop model and guide you through the process of getting your hardware repaired or replaced.
Hardware problems can be complex and may require specialized knowledge to diagnose and fix. It’s essential to take necessary precautions or seek professional help to avoid further damage to your Dell laptop.
BIOS issues
Issues with the Basic Input/Output System (BIOS) can prevent a Dell laptop from starting up properly. The BIOS is responsible for initializing hardware components and initiating the boot process. If you suspect BIOS-related problems, try the following troubleshooting steps:
– Reset the BIOS settings: Sometimes, incorrect BIOS settings can cause startup issues. Resetting the BIOS to its default settings can help resolve the problem. To reset the BIOS, restart your laptop and look for a key or combination of keys (such as F2 or Del) to access the BIOS setup utility during the boot process. Once in the BIOS setup, look for the option to “Reset to default,” “Load Default Settings,” or a similar option. Save the changes and exit the BIOS setup, then see if the laptop turns on.
– Update the BIOS firmware: Outdated or corrupted BIOS firmware can also cause startup problems. Visit the official Dell support website and check if there are any available BIOS updates for your specific laptop model. Follow the instructions provided by Dell to download and install the updated BIOS firmware.
Note: Updating the BIOS requires caution and should only be done if necessary. Improper BIOS updates can potentially render your laptop inoperable. Follow the instructions provided by Dell carefully and ensure that your laptop is connected to a stable power source throughout the update process.
– Clear the CMOS memory: Clearing the CMOS memory can help resolve certain BIOS-related issues. To clear the CMOS, follow the instructions in your laptop’s user manual or consult Dell’s support website for specific guidance. It typically involves locating the CMOS battery, removing it for a few seconds, and then reinserting it. This will reset the CMOS memory to its default state.
If you’re unsure about making BIOS-related changes or are uncomfortable performing these troubleshooting steps, it’s recommended to reach out to Dell support or consult a professional technician for assistance. They can provide specific guidance based on your laptop model and help you resolve any BIOS-related issues safely.
Remember that proper care and caution should be exercised when working with BIOS settings or firmware updates. Any incorrect changes or errors during the process can cause irreversible damage to your laptop’s functionality.
Software or operating system errors
Software conflicts, corrupted operating system files, or malware infections can cause your Dell laptop to experience startup issues. Addressing software or operating system errors can help resolve the problem. Here are some troubleshooting steps to consider:
– Boot into safe mode: Safe mode allows your laptop to start with only essential system files and drivers. This can help determine if the issue is caused by third-party software or conflicting drivers. Restart your laptop and continuously press the F8 key (or another designated key, depending on your laptop model) until the Advanced Boot Options menu appears. Select “Safe Mode” and see if the laptop starts up successfully.
– Use system recovery or repair options: If safe mode doesn’t resolve the issue, you can try using system recovery or repair options. Depending on your laptop, this may involve accessing the Advanced Boot Options menu, using a recovery partition, or using a bootable USB or DVD with your operating system installation media. Follow the on-screen instructions and select the appropriate repair or recovery option to troubleshoot and fix software-related issues.
– Run antivirus and malware scans: Malware infections can cause severe disruptions to your laptop’s functioning. Run a thorough scan using reputable antivirus software to detect and remove any malware. It’s recommended to use up-to-date antivirus definitions for better protection against the latest threats.
– Update software and drivers: Outdated software or incompatible drivers can cause conflicts and prevent your Dell laptop from turning on. Update your operating system, drivers, and other software to the latest versions. Visit Dell’s support website or the respective software manufacturer’s website for the most recent updates.
– Perform a system restore: If your laptop was working correctly before but suddenly stopped turning on, performing a system restore can be beneficial. Restore your laptop to a previous point in time when it was functioning properly. This will help reverse any recent changes that may have caused the startup issue.
– Reinstall the operating system: If all else fails, reinstalling the operating system can resolve persistent software-related problems. Back up your important files before proceeding, as reinstalling the operating system will erase all data on the laptop. Follow the instructions provided by Dell for a clean installation or recovery of the operating system.
Remember to back up your important files regularly to minimize the risk of data loss in the event of software or operating system errors. If you’re unsure about performing these troubleshooting steps or need further assistance, contact Dell support or consult a professional technician for guidance.
How to troubleshoot a Dell laptop that won’t turn on
When facing the frustrating issue of a Dell laptop that won’t turn on, it’s essential to follow a systematic troubleshooting approach to identify and resolve the problem. Here is a step-by-step guide to help you troubleshoot your Dell laptop:
1. Check the power source: Ensure that the laptop is properly connected to a functioning power outlet. Verify that the power cord and AC adapter are securely plugged in. If using a power strip, try plugging the adapter directly into the wall outlet to rule out any issues with the power source.
2. Test the battery: If your laptop has a removable battery, remove it and then reinsert it. Make sure it is properly seated. If the battery is low or depleted, connect the laptop to a power source and allow it to charge for a while before attempting to power it on.
3. Inspect the AC adapter and power cord: Examine the AC adapter and power cord for any signs of damage. Replace the adapter or cord if necessary. Consider testing with a different AC adapter or power cord to rule out any problems with those components.
4. Troubleshoot display issues: If the laptop appears to be running but the display remains blank, adjust the display brightness using the function keys on the keyboard. Connect an external monitor to test if the issue lies with the laptop’s built-in display. Press the appropriate display function key (e.g., Fn+F8) to switch the display output.
5. Ensure proper ventilation: Overheating can prevent a laptop from turning on. Check the laptop’s cooling vents for any blockages and clean them if necessary. Use a laptop cooling pad or elevate the laptop to allow for better airflow and prevent overheating.
6. Check hardware components: Verify that all hardware components, such as RAM modules and hard drives, are properly seated in their respective slots. Test individual components if necessary. Inspect for any physical damage that may be preventing the laptop from turning on.
7. Reset BIOS settings: Reset the BIOS to its default settings if incorrect configurations are suspected. Restart the laptop and access the BIOS setup utility using the designated key. Look for the option to reset to default settings or load default values, save the changes, and exit the BIOS.
8. Address software or operating system errors: Boot the laptop into safe mode to determine if third-party software or conflicting drivers are causing the issue. Additionally, perform system recovery, update software and drivers, run antivirus scans, or consider reinstalling the operating system if necessary.
By following these troubleshooting steps, you can work through the potential causes of a Dell laptop not turning on, identify the underlying issue, and take the appropriate actions to resolve it. If you continue to experience difficulties, it’s recommended to contact Dell support or consult a professional technician for further assistance.
Check the power source
When your Dell laptop refuses to turn on, the first and most straightforward step is to check the power source. Several factors related to the power source can cause the laptop to appear unresponsive. Here’s what you should do:
– Ensure the laptop is properly connected: Double-check that the laptop’s AC adapter is securely plugged into both the laptop and the power outlet. Sometimes, a loose connection can prevent the laptop from receiving power. Additionally, verify if any additional power cables or docking stations are properly connected if you’re using them.
– Check the power outlet: Ensure that the power outlet you are using is functioning correctly. Plug in another electronic device, such as a lamp or phone charger, to check if there is power. If the outlet is not working, try plugging the laptop into a different outlet or trying a different power source altogether.
– Verify the power cord and AC adapter: Inspect the power cord and AC adapter for any signs of damage like frayed wires or bent connectors. If you notice any visible damage, replace the power cord or AC adapter with a new, compatible one. In case you have access to another power cord or AC adapter, test the laptop with those components to rule out any issues with the current ones.
– Check for LED indicators: Many Dell laptops have LED lights that indicate the presence of power. With the laptop connected to the power source, check if any LED lights up. If there are no power indicators, it might suggest a problem with either the power supply or the laptop itself.
– Remove unnecessary peripherals: Disconnect any unnecessary peripherals, such as external monitors, USB devices, or docking stations. Sometimes, a faulty peripheral can cause power-related issues and prevent the laptop from turning on. Try starting the laptop without any external devices connected to see if the issue persists.
– Reset the laptop’s battery (if applicable): If your Dell laptop has a removable battery and it’s experiencing power-related issues, try removing the battery, holding down the power button for about 10-15 seconds to discharge any residual power, reinserting the battery, and then attempting to turn on the laptop again.
By thoroughly checking the power source and ensuring that the laptop is properly connected to it, you can eliminate any potential power-related problems. If the laptop still doesn’t turn on after following these steps, proceed to the next potential causes and continue the troubleshooting process.
Verify the battery is functioning
If your Dell laptop won’t turn on, the battery could be the culprit. Checking the status and functionality of the battery can help you determine if it’s the cause of the issue. Here’s how to proceed:
– Check the battery indicator: Look for a battery indicator on the laptop, usually located on the front or side. If the indicator shows a low charge or is completely empty, it could prevent the laptop from turning on. Connect the laptop to a power source and allow the battery to charge for some time before attempting to power it on again.
– Remove and reinsert the battery: If your Dell laptop has a removable battery, carefully remove it and then reinsert it. Make sure it is properly seated in its compartment. Sometimes, a loose connection or an inconsistent connection can interrupt the power flow, causing the laptop not to start.
– Test the laptop without the battery: If your laptop has both a removable battery and an external power source, try removing the battery and connecting the laptop directly to the power source. This test can help determine if the battery is faulty or causing any issues with the power supply to the laptop itself.
– Replace the battery: If the battery fails to hold a charge or is significantly worn out, it may need to be replaced. Dell offers genuine replacement batteries that are compatible with your specific laptop model. Contact Dell support or visit their official website to order a new battery and ensure it is installed correctly.
– Reset the battery settings: Some Dell laptops include built-in battery management software that allows you to reset the battery settings. Refer to your laptop’s user manual or Dell’s support website for instructions on performing a battery reset. This process can recalibrate the battery and potentially resolve any software-related issues.
– Perform a battery diagnostics test: Many Dell laptops have built-in diagnostic tools that can help assess the battery’s health and performance. Restart your laptop and access the diagnostics menu by pressing the designated key (usually F12) during the boot process. Select the appropriate battery diagnostics tests and run them to identify any issues with the battery.
By conducting these battery-related checks, you can determine if the battery is causing the startup problem in your Dell laptop. If the battery troubleshooting steps do not resolve the issue, proceed to the next potential causes and continue the troubleshooting process.
Test the AC adapter and power cord
If your Dell laptop is not turning on, it’s important to examine the AC adapter and power cord for any potential issues. Problems with these components can result in a lack of power supply to the laptop. Here’s how you can test the AC adapter and power cord:
– Inspect the AC adapter and power cord: Carefully examine the AC adapter and power cord for any signs of physical damage, such as frayed or exposed wires, bent connectors, or loose connections. If you notice any visible damage, it’s crucial to replace the AC adapter or power cord with a new, compatible one.
– Test with another AC adapter or power cord: If possible, borrow or use another compatible AC adapter and power cord to check if the issue lies with your current ones. Connect the alternative AC adapter and power cord to your laptop and attempt to power it on. This test will help determine whether the problem is related to the AC adapter or power cord.
– Check the LED indicator on the AC adapter: Many Dell AC adapters have LED indicators to indicate whether they are receiving power. When you plug in the AC adapter without the laptop connected, check if the LED lights up. If the LED does not light up, it could indicate a problem with the adapter. In such cases, consider purchasing a replacement adapter from Dell or an authorized dealer.
– Check the connection between the AC adapter and laptop: Ensure that the AC adapter is securely connected to the laptop. Sometimes, a loose connection or a faulty DC jack can prevent the laptop from receiving power. Gently wiggle the connection to check if it feels loose. If it does, it may require professional repair or replacement.
– Verify the power source: Confirm that the power outlet you are using is functional. Plug in another device, such as a lamp or phone charger, to check if the outlet is providing power. Additionally, try plugging the AC adapter into a different outlet to rule out any issues with the power source.
– Contact Dell support: If the AC adapter or power cord troubleshooting steps do not resolve the issue, or if you require further assistance, it’s recommended to reach out to Dell support. They can provide specific guidance based on your laptop model and help you determine if a replacement AC adapter or power cord is necessary.
By testing and troubleshooting the AC adapter and power cord, you can determine if they are the cause of your Dell laptop not turning on. If the issue persists, continue to explore the next potential causes and follow the troubleshooting steps accordingly.
Troubleshoot display problems
If your Dell laptop appears to power on but the screen remains blank, the issue may lie with the display. Troubleshooting display problems can help you identify and resolve the issue. Here are steps to troubleshoot display-related issues:
– Adjust the display brightness: Check if the display brightness is set too low. Using the keyboard function keys (usually labeled with a sun icon), increase the display brightness to see if the screen becomes visible. Additionally, ensure that any automatic brightness settings are turned off as they may be dimming the screen unnecessarily.
– Connect to an external monitor: Use an HDMI, VGA, or other compatible cable to connect your laptop to an external monitor or TV. If the external monitor displays the laptop’s content, it suggests a problem with the laptop’s built-in display. Press the appropriate display function key (e.g., Fn+F8) to switch to the laptop’s display if necessary.
– Check for loose connections: Verify that all cables and connectors associated with the display are securely connected. A loose or disconnected cable can result in a blank screen. This includes checking the video cable connecting the motherboard to the display panel.
– Use the display function key: Some Dell laptops have dedicated function keys for changing display output modes. Press the corresponding function key (e.g., Fn+F8) to cycle through the display options, such as laptop screen only, external monitor only, or both laptop screen and external monitor. You may have inadvertently switched to an incorrect display mode.
– Perform a power cycle: Shut down the laptop, unplug all power sources (including the AC adapter and battery), and press and hold the power button for about 15 seconds. This will discharge any residual power and may help resolve display-related issues caused by static charges or minor glitches.
– Check for physical damage: Inspect the laptop’s display for any visible physical damage, such as cracks or liquid spills. Physical damage can interfere with the display’s functionality. If you identify any damage, professional repair or screen replacement may be necessary.
– Update graphics drivers: Outdated or corrupted graphics drivers can cause display problems. Visit the official Dell support website and download the latest graphics drivers specific to your laptop model. Install the updated drivers and restart the laptop to see if the display issue is resolved.
– Boot in safe mode: Booting the laptop into safe mode can help determine if the display issue is caused by third-party software or conflicting drivers. Restart the laptop and continuously press the F8 key (or another designated key) until the Advanced Boot Options menu appears. Select “Safe Mode” and see if the display works properly in safe mode.
If the above steps do not resolve the display issue, consider contacting Dell support or consulting a professional technician for further assistance. They can provide specific guidance based on your laptop model and help diagnose and fix any display-related problems.
Ensure proper ventilation to prevent overheating
Overheating can be a common issue that prevents a Dell laptop from turning on or staying powered on for prolonged periods. Taking steps to ensure proper ventilation can help prevent overheating and keep your laptop running smoothly. Here’s what you can do:
– Keep the laptop on a flat, hard surface: When using your Dell laptop, avoid placing it on soft surfaces like beds, couches, or cushions. These surfaces can block the air vents and restrict airflow, leading to overheating. Instead, opt for a flat and hard surface, such as a desk or table, to allow optimal airflow around the laptop.
– Elevate the laptop: Elevating the back of the laptop slightly can improve the airflow underneath, promoting better heat dissipation. Laptop cooling pads with built-in fans can also help elevate and cool the laptop during use.
– Clean the air vents: Regularly clean the air vents on your Dell laptop to remove dust, debris, and other obstructions that can accumulate over time. Use a can of compressed air or a soft brush to carefully clean the vents. Ensure the laptop is powered off and disconnected from any power sources before cleaning.
– Avoid blocking the ventilation grilles: When using the laptop, make sure not to cover or block the ventilation grilles. These grilles are specifically designed to allow air to flow in and out of the laptop to cool the internal components. Blocking them can limit airflow and contribute to overheating.
– Use cooling pads or external fans: Consider using cooling pads with built-in fans or external USB-powered fans to cool your Dell laptop during intensive tasks or prolonged usage. These additional cooling solutions can help dissipate heat and maintain optimal temperatures.
– Monitor and manage CPU usage: Excessive CPU usage can generate more heat, contributing to overheating. Keep an eye on CPU usage and close any unnecessary programs or processes that are putting a strain on the CPU. Task Manager or third-party monitoring tools can help you identify which applications consume the most resources.
– Check for software issues: Sometimes, excessive CPU usage or processes running in the background can be caused by software-related issues. Ensure your operating system and applications are up to date by regularly installing the latest updates and patches. Running reliable antivirus software can also help identify and manage any malware or resource-consuming processes.
By taking these measures to ensure proper ventilation, you can significantly reduce the risk of overheating and increase the performance and longevity of your Dell laptop. However, if you continue to experience overheating issues despite these precautions, it’s advisable to contact Dell support or consult with a professional technician for further assistance.
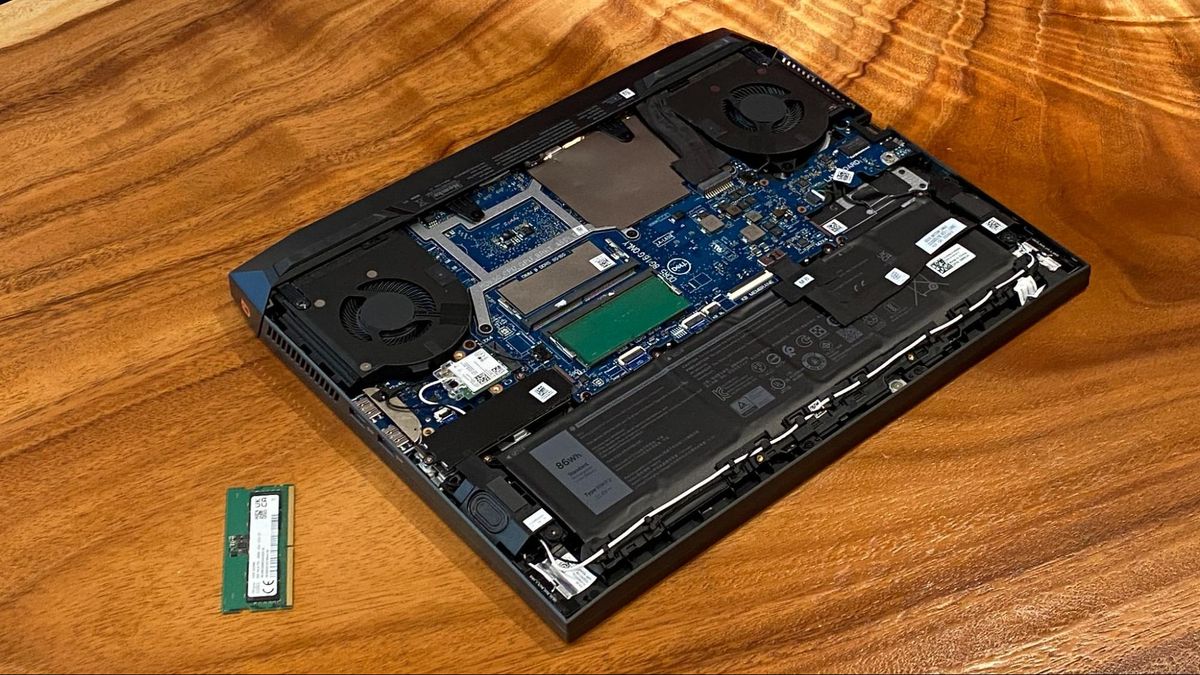
Check hardware components
If your Dell laptop won’t turn on, it’s important to check the hardware components as they could be causing the issue. Here’s what you can do to troubleshoot potential hardware problems:
– Verify proper seating of hardware components: Ensure that all hardware components, such as RAM modules, hard drives, and expansion cards, are properly seated in their respective slots. Sometimes, loose connections can prevent the laptop from starting up. Carefully remove and reseat these components to establish a secure connection.
– Test individual hardware components: If you suspect a specific hardware component is causing the issue, try testing the laptop without that component. For example, if you have multiple RAM modules, try booting the laptop with only one module at a time to identify if one of the modules is faulty. This process can help identify the problematic component.
– Visually inspect for physical damage: Examine the laptop for any visible signs of physical damage, such as cracks, dents, or liquid spills. Physical damage to internal components can prevent the laptop from turning on. If you notice any damage, it may require professional repair or replacement.
– Listen for unusual sounds: Power on the laptop and listen for any unusual sounds coming from the hardware. Rattling, grinding, or clicking noises could indicate a problem with the hard drive or cooling fan. If you hear any alarming sounds, it’s advisable to contact Dell support or consult a qualified technician for further assistance.
– Consult Dell support documentation: Dell provides comprehensive support documentation, including user manuals and online resources, specific to your laptop model. Review the support documentation for your laptop to ensure you are following the correct procedures for checking and troubleshooting hardware components.
– Contact Dell support or a professional technician: If you are unsure about checking the hardware components or are unable to resolve the issue by yourself, contact Dell support or consult with a professional technician. They can provide specific guidance based on your laptop model and help diagnose and repair any hardware-related problems.
By checking and examining the hardware components, you can determine if they are the cause of your Dell laptop not turning on. If the issue persists after checking the hardware components, move on to the next potential causes and continue the troubleshooting process.
Reset BIOS settings
If your Dell laptop is not turning on, resetting the BIOS settings can potentially resolve issues related to incorrect configurations. The BIOS (Basic Input/Output System) is responsible for initializing hardware components during the startup process. Here’s how you can reset the BIOS settings:
– Power off the laptop: Make sure the laptop is powered off completely. If necessary, hold down the power button for a few seconds to force it to turn off.
– Access the BIOS setup utility: Turn on the laptop and look for the key or key combination to access the BIOS setup utility. The key to enter the BIOS varies depending on the specific laptop model. Common keys include Del, F2, F12, or Esc. Consult the laptop’s user manual or Dell’s support website for the correct key to enter the BIOS.
– Reset the BIOS settings: Once inside the BIOS setup utility, navigate to the appropriate menu or tab (such as “Exit” or “Setup Defaults”) that offers the option to reset the BIOS settings. The exact location and terminology may differ depending on the laptop model. Select the option to reset the settings to their default values.
– Save changes and exit: After resetting the BIOS settings, save the changes and exit the BIOS setup utility. Look for the option to save changes or press the appropriate key (commonly F10) to save the changes and exit the BIOS.
– Restart the laptop: Let the laptop restart normally after resetting the BIOS settings. Check if the laptop now powers on and functions as expected.
Note: Resetting the BIOS settings may revert any customizations or changes you made previously. Take note of any custom settings or configurations you may need to reapply after the reset.
If resetting the BIOS settings does not resolve the issue, it’s advisable to contact Dell support or consult a professional technician. They can provide specific guidance based on your laptop model and help diagnose and fix any BIOS-related problems.
Remember, tampering with the BIOS settings can have consequences, so exercise caution and ensure that you follow instructions carefully. If you are unsure about performing these steps, it’s best to seek assistance from Dell support or a professional technician.
Address software or operating system errors
Software conflicts, corrupted operating system files, or malware infections can cause startup issues with your Dell laptop. Addressing software or operating system errors can help resolve the problem. Here are some steps to consider:
– Boot into safe mode: Booting your laptop into safe mode allows it to start with only essential system files and drivers. This can help determine if the issue is caused by third-party software or conflicting drivers. Restart your laptop and repeatedly press the F8 key (or another designated key) until the Advanced Boot Options menu appears. Select “Safe Mode” and observe if the laptop starts up properly.
– Use system recovery or repair options: If safe mode doesn’t resolve the issue, consider using system recovery or repair options. Depending on your specific Dell laptop model, you can access these options through the Advanced Boot Options menu or a dedicated recovery partition. Follow the on-screen instructions to repair or recover your operating system.
– Run antivirus and malware scans: Malware infections can disrupt normal system operations and cause startup problems. Run a comprehensive scan using reliable antivirus software to detect and remove any malware. Ensure that your antivirus software is up to date for the best protection against the latest threats.
– Update software and drivers: Outdated or incompatible software and drivers can create conflicts and prevent your Dell laptop from starting up correctly. Check for and install updates for your operating system, drivers, and other software. Visit Dell’s support website or the respective software manufacturer’s website for the latest updates.
– Perform a system restore: If your laptop was functioning properly before and suddenly stopped turning on, performing a system restore may be beneficial. Restore your laptop to a previous point in time when it was working correctly. This process can help reverse any recent system changes or updates that may have caused the startup issue.
– Reinstall the operating system: If all else fails, reinstalling the operating system can resolve persistent software-related problems. Before proceeding, ensure that you have backed up your important files, as reinstalling the operating system will erase all data on the laptop. Follow the instructions provided by Dell to perform a clean installation or recovery of the operating system.
By addressing software or operating system errors, you can resolve many startup issues with your Dell laptop. However, if the problem persists or you require further assistance, contact Dell support or consult with a professional technician for specialized guidance.
Conclusion
Dealing with a Dell laptop that won’t turn on can be frustrating, but with the right troubleshooting approach, you can identify and resolve the underlying issue. In this guide, we have explored common reasons why a Dell laptop may not turn on, including power-related issues, battery problems, faulty AC adapters or power cords, display issues, overheating, hardware problems, BIOS issues, and software or operating system errors.
By systematically troubleshooting each potential cause, you can work towards resolving the problem. Steps such as checking the power source, verifying the battery’s functionality, testing the AC adapter and power cord, troubleshooting display problems, ensuring proper ventilation to prevent overheating, checking hardware components, resetting BIOS settings, and addressing software or operating system errors can help you narrow down the issue and take appropriate action.
Remember, each Dell laptop model may have specific differences, so always consult your laptop’s user manual and follow manufacturer recommendations for best results. If you are unsure, it’s advisable to contact Dell support or consult with a professional technician for assistance.
By taking a patient and informed approach to troubleshooting, you can increase the chances of resolving the problem and getting your Dell laptop back up and running.
We hope this guide has provided you with valuable insights and assistance in troubleshooting your Dell laptop. Good luck in resolving the issue and enjoying the full functionality of your device once again!