Introduction
As video conferencing has become an integral part of our lives, platforms like Zoom have gained immense popularity in facilitating virtual meetings, interviews, and social gatherings. During these meetings, it may be necessary to turn off your camera for various reasons. Whether you want to preserve your privacy, conserve bandwidth, or simply take a break from being on camera, Zoom provides a straightforward feature to disable the camera.
In this guide, we will walk you through the process of turning off your camera on Zoom, both before joining a meeting and during a meeting. We will also explore an alternative option for those who still want to maintain a visual presence but prefer not to show their physical surroundings. Additionally, we will address some common camera issues and provide troubleshooting tips to help you ensure a smooth video conferencing experience on Zoom.
So, whether you are new to Zoom or just looking to navigate its camera settings more efficiently, this article will provide you with all the information you need to make the most of your Zoom meetings while controlling your camera.
Understanding the Zoom camera settings
Prior to turning off your camera on Zoom, it’s important to understand the different camera settings and options available to you. Zoom offers a range of features to customize your video experience and ensure optimal video quality.
By default, Zoom accesses your device’s default camera and displays your video feed during meetings. However, you have the flexibility to switch between different cameras if your device has multiple options. This can be useful if you want to use an external webcam or switch to a different built-in camera.
In addition to choosing the camera source, you can also adjust settings such as video resolution, aspect ratio, and frame rate. These settings determine the quality of your video and can be configured according to your preferences and available network bandwidth.
Furthermore, Zoom provides options for customizing your video background. You can use the default background, blur your surroundings, or even replace your background with a virtual image or video. This feature can be particularly helpful if you want to maintain privacy or create a professional appearance while on camera.
Understanding these camera settings will empower you to make informed decisions about when and how to disable your camera on Zoom. Whether you want to turn off your camera completely or explore alternative options, having this knowledge will enable you to adapt your video settings to suit your needs.
How to turn off your camera before joining a meeting
If you prefer to join a Zoom meeting without your camera active from the start, you can easily disable it before joining the meeting. Follow these simple steps:
- Open the Zoom application or website on your device.
- Log in to your Zoom account, if necessary.
- Click on the “Settings” icon, usually located in the top right corner of the app or website.
- In the settings menu, navigate to the “Video” tab.
- Under the “Video” tab, locate the “Camera” section.
- Select the option to turn off your camera. This may be a checkbox, a toggle switch, or a drop-down menu.
- Ensure that the camera is successfully disabled by checking the preview or the status indicator in the settings menu.
- Exit the settings menu and proceed to join the meeting.
By following these steps, you can easily turn off your camera before joining a meeting. This allows you to control when your camera is active and gives you the flexibility to enable it later if needed.
Keep in mind that if there are specific requirements for the meeting, such as having cameras turned on, it’s best to consult with the meeting organizer or follow any guidelines provided.
Now that you know how to disable your camera before joining a meeting, let’s explore how you can turn off your camera during a meeting if the need arises.
How to turn off your camera during a meeting
If you find yourself in a Zoom meeting and want to temporarily turn off your camera, perhaps to attend to something privately or conserve bandwidth, Zoom provides a simple method to accomplish this. Here’s how you can disable your camera during a meeting:
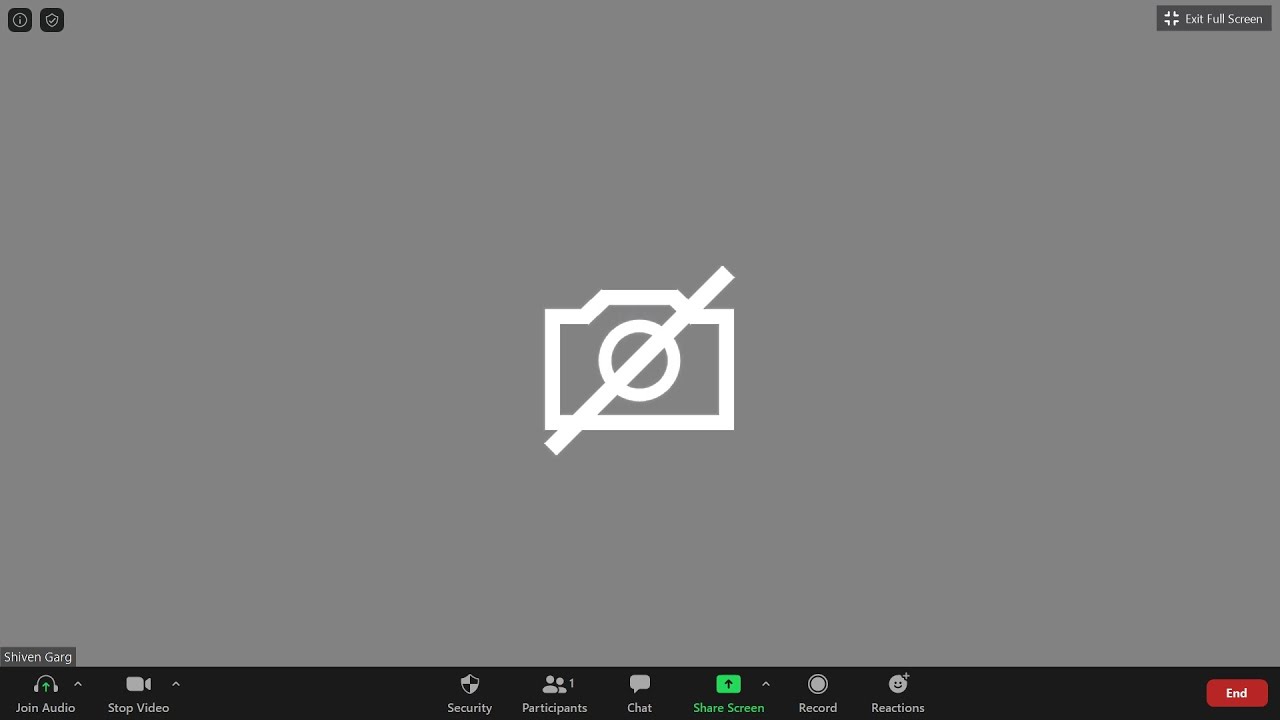
- While in the meeting, locate the toolbar or control panel at the bottom of the Zoom window.
- Click on the “Stop Video” button, usually represented by a camera icon.
- Once clicked, your video feed will be turned off, and your camera icon may change to indicate that the video is no longer being transmitted.
- If you want to turn your camera back on, simply click the “Start Video” button.
By using this method, you can easily control whether your video feed is being shared during a meeting. It’s important to note that while your camera is turned off, other participants will not be able to see your video, but you will still be able to see the ongoing video from other participants.
This feature is particularly handy when you want to maintain privacy or reduce distractions during a meeting while still actively participating in discussions or presentations.
Now that you know how to turn off your camera during a meeting, let’s explore an alternative option that allows you to maintain a visual presence without sharing your physical surroundings.
Using the virtual background feature as an alternative to turning off your camera
If you prefer not to turn off your camera completely but still want to maintain privacy or create a professional appearance, Zoom offers a virtual background feature. This feature allows you to replace your physical surroundings with a virtual image or video, providing an alternative to turning off your camera.
Here’s how you can use the virtual background feature on Zoom:
- Make sure you have a compatible device and a stable internet connection.
- Open the Zoom application on your device and go to the settings menu.
- Navigate to the “Virtual Background” tab, usually located under the “Video” settings.
- Choose from the available virtual backgrounds provided by Zoom, or click the “+” button to upload your own image or video as a background. Ensure that your chosen background is appropriate for the meeting context.
- Once you have selected a virtual background, you will see a preview of how it will appear during the meeting.
- Ensure that the “I have a green screen” option is unchecked if you do not have a physical green screen setup.
- Close the settings menu and return to your meeting.
By using the virtual background feature, you can maintain a visually engaging presence while keeping your physical surroundings private. This is particularly useful if you are working from home or joining meetings from a public space.
It’s important to note that for the best virtual background experience, it is recommended to have proper lighting and use a plain, solid-colored background. This helps ensure that the virtual background is applied smoothly and accurately.
Now that you are familiar with using the virtual background feature, let’s address some common camera issues you may encounter and provide troubleshooting tips to help you overcome them.
Troubleshooting common camera issues on Zoom
While Zoom provides a reliable and user-friendly platform for video conferencing, it’s not uncommon to encounter camera issues from time to time. Here are some common camera issues you may face during your Zoom meetings and troubleshooting tips to help you resolve them:
1. No video feed: If you are unable to see your own video or the video of others, ensure that your camera is properly connected and functioning. Check the physical connections and make sure the camera is not being used by any other applications on your device. If the issue persists, try restarting your device or reinstalling the Zoom application.
2. Poor video quality: If your video quality appears blurry, pixelated, or lagging, check your internet connection speed. A stable and high-speed internet connection is crucial for optimal video quality. Close any bandwidth-consuming applications, switch to a wired network connection if possible, or upgrade your internet plan. Additionally, ensure that your camera lens is clean and unobstructed.
3. Camera not recognized: If Zoom is unable to detect your camera, go to the settings menu and select the correct camera source. If you have multiple cameras connected to your device, make sure you have selected the appropriate one. If the issue persists, update your camera drivers or contact the manufacturer for further assistance.
4. Camera freezing or lagging: If your camera feed freezes or lags during a meeting, it can be due to a slow network connection or limited processing power on your device. Try closing other applications that may be consuming resources, reduce the number of participants in the meeting, or switch to audio-only mode if video is not essential.
5. Privacy concerns: If you are concerned about privacy and want to ensure that your camera is truly disabled, consider covering the camera lens with a physical cover or using privacy stickers. This provides an extra layer of assurance that your camera is not inadvertently activated.
If you have tried these troubleshooting tips and the camera issues persist, reach out to Zoom support for further assistance. They can provide specific guidance based on your device and software configuration.
By addressing common camera issues and taking necessary troubleshooting steps, you can ensure a smoother and more enjoyable video conferencing experience on Zoom.
Conclusion
As we conclude this guide on how to turn off your camera on Zoom, it is essential to remember that having control over your camera settings allows you to participate in meetings on your own terms. Whether you need to preserve privacy, conserve bandwidth, or simply take a break from being on camera, Zoom offers straightforward options to disable your camera.
We explored how to turn off your camera before joining a meeting as well as during a meeting. Additionally, we discussed the virtual background feature as an alternative to completely turning off your camera, providing an opportunity to maintain a visual presence without sharing your physical surroundings.
Furthermore, we addressed common camera issues on Zoom and provided troubleshooting tips to help you resolve them. By understanding and troubleshooting these issues, you can ensure a smooth video conferencing experience.
Remember, technology can occasionally present challenges, but with a little troubleshooting and knowledge, you can overcome them and make the most of your Zoom meetings. So, don’t hesitate to explore and adjust the camera settings to suit your preferences and needs.
Now that you are well-equipped with the knowledge to control your camera on Zoom, you can confidently participate in meetings, interviews, and social gatherings with ease. Enjoy your Zoom experience while having complete control over your camera, ensuring a productive and comfortable video conferencing experience.


