Introduction
A CPU cooler is an essential component in a computer system as it helps dissipate the heat generated by the central processing unit (CPU) during its operation. Over time, it is not uncommon for air bubbles to form within the CPU cooler, compromising its cooling efficiency. These bubbles can hamper the flow of thermal paste or coolant, resulting in increased temperatures and potentially leading to performance issues or even hardware damage. Therefore, it is crucial to be able to identify if a CPU cooler has bubbles in it.
Bubbles can occur in a CPU cooler due to a variety of reasons. One common cause is improper installation, which can lead to air pockets getting trapped. Another possibility is the degradation of thermal paste or coolant, causing the formation of bubbles. Moreover, physically moving or shaking the computer can also result in the introduction of air into the cooler system. Regardless of the cause, it is important to address the issue promptly to ensure the longevity and optimal functioning of your computer.
In this article, we will explore different methods to help you determine if a CPU cooler has bubbles. These methods include visual inspection, feeling for bubbles, shaking the CPU cooler, and listening for the presence of bubbles. By learning how to detect bubbles, you can take the necessary steps to rectify the issue and ensure that your CPU cooler operates effectively.
What Causes Bubbles in a CPU Cooler?
Understanding the causes of bubbles in a CPU cooler can help you prevent their formation and maintain optimal cooling performance.
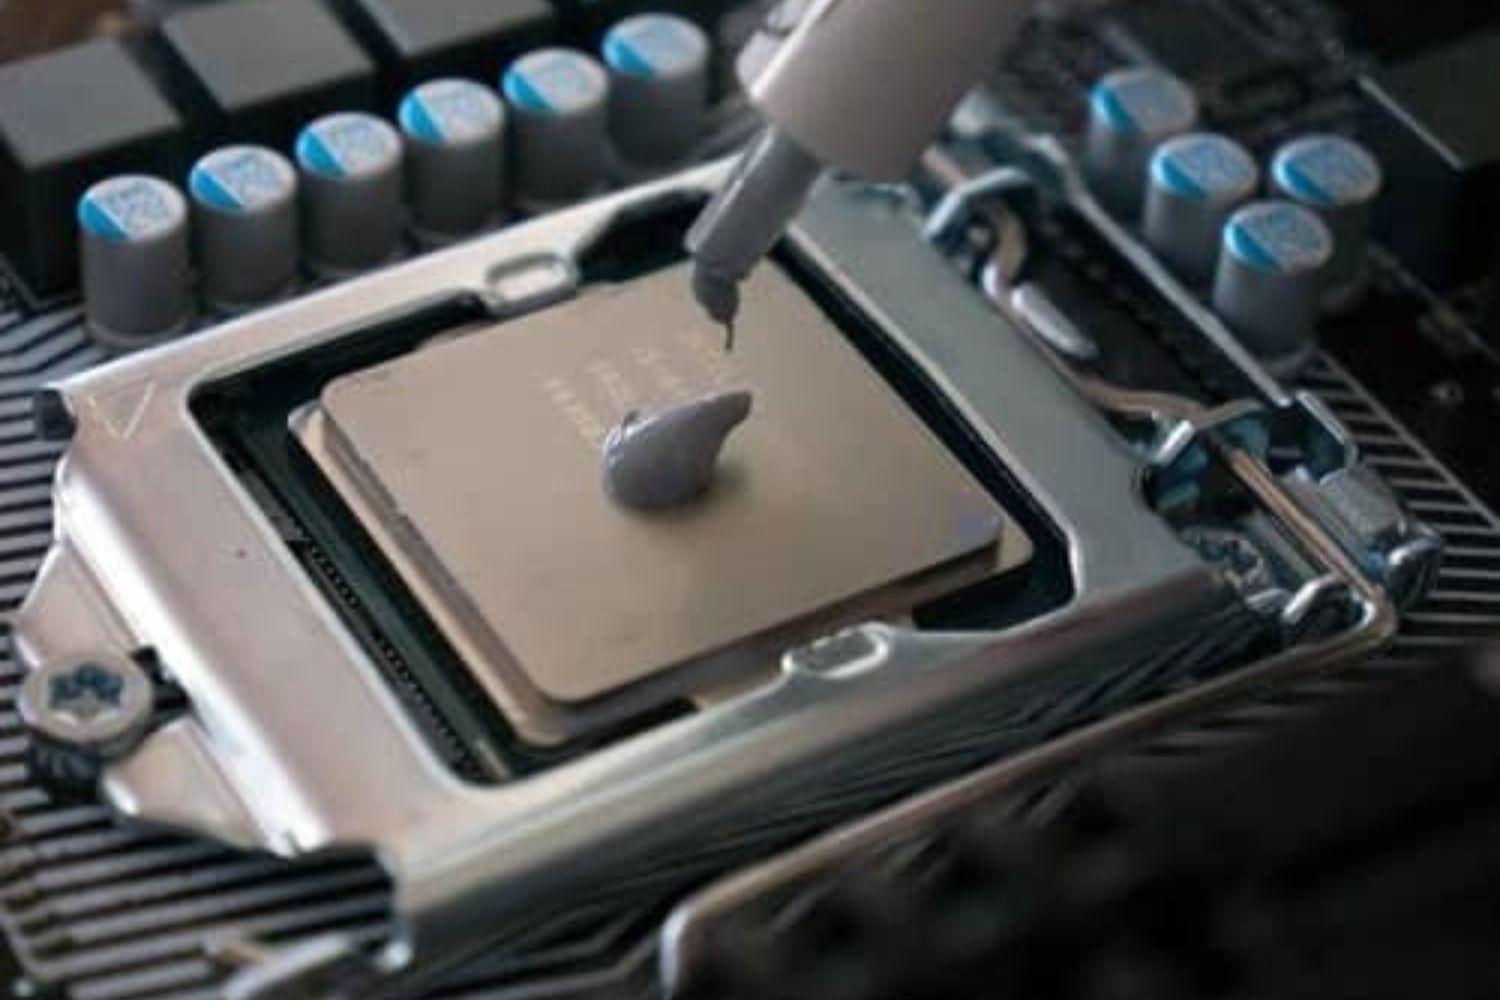
1. Improper Installation: One of the primary reasons for bubbles in a CPU cooler is improper installation. During the installation process, if the cooler is not properly seated on the CPU, air pockets can get trapped between the CPU and the cooler base. These air pockets can impede the efficient transfer of heat, leading to elevated temperatures and reduced cooling performance.
2. Degraded Thermal Paste: Thermal paste acts as a conduit for heat transfer between the CPU and the cooler. Over time, thermal paste can degrade due to factors such as high temperatures and age. When the thermal paste loses its effectiveness, it can create gaps between the CPU and the cooler, allowing air to enter and form bubbles. It is important to regularly monitor and replace the thermal paste to maintain efficient cooling.
3. Deteriorated Coolant: For liquid cooling systems, coolant is used to absorb and dissipate heat from the CPU. However, coolant can degrade over time due to oxidation or evaporation. When the coolant deteriorates, it can form bubbles within the cooling system, hindering proper heat transfer. Regular maintenance and replacement of the coolant can help prevent bubble formation.
4. Movement and Agitation: Physical movement or agitation of the computer can introduce air into the CPU cooler system, leading to the formation of bubbles. This can occur when transporting or relocating the computer system or even during routine cleaning. It is important to handle the computer with care and ensure that all connections are secure to avoid introducing air into the cooler system.
By understanding the causes of bubbles in a CPU cooler, you can take preventive measures and maintain optimal cooling performance for your computer system. Regular maintenance, proper installation, and replacement of thermal paste and coolant are key to preventing bubble formation. In the next sections, we will explore different methods to help you check if your CPU cooler has bubbles and address the issue accordingly.
Why Bubbles in a CPU Cooler are a Problem
Bubbles in a CPU cooler can have detrimental effects on the overall performance and lifespan of your computer system. It is important to understand why these bubbles should be addressed promptly.
1. Reduced Cooling Efficiency: The primary function of a CPU cooler is to dissipate heat generated by the CPU. When bubbles form within the cooler, they disrupt the flow of thermal paste or coolant, reducing the cooler’s ability to transfer heat effectively. This results in higher CPU temperatures, which can lead to thermal throttling, decreased performance, and potentially even hardware damage.
2. Increased Risk of Overheating: Bubbles in a CPU cooler can lead to inefficient heat dissipation, causing the CPU temperatures to rise. If the CPU reaches critical temperatures, it may trigger automatic shutdowns, resulting in data loss or system instability. Continuous exposure to high temperatures due to poor cooling can also shorten the lifespan of the CPU and other components.
3. Impact on System Stability: When a CPU operates at higher temperatures, it can impact the stability of the entire system. Increased heat can cause system instability, leading to frequent crashes, freezes, or unexpected shutdowns. These issues can disrupt your work or gaming experience and potentially result in data loss if not addressed in a timely manner.
4. Potential for Component Damage: Excessive heat due to poor cooling can cause long-term damage to various components within the computer system. High temperatures can degrade the lifespan of sensitive electronic components, such as the CPU, motherboard, and graphics card. Over time, these components may become more prone to failure, resulting in costly repairs or replacements.
By understanding the problems associated with bubbles in a CPU cooler, you can realize the importance of identifying and addressing the issue promptly. Regular maintenance, proper installation, and monitoring of cooling performance can help prevent the formation of bubbles and ensure the longevity and optimal functioning of your computer system.
How to Check for Bubbles in a CPU Cooler
Checking for bubbles in a CPU cooler is crucial to detect any potential issues and ensure efficient cooling performance. Here are several methods you can use to check for bubbles:
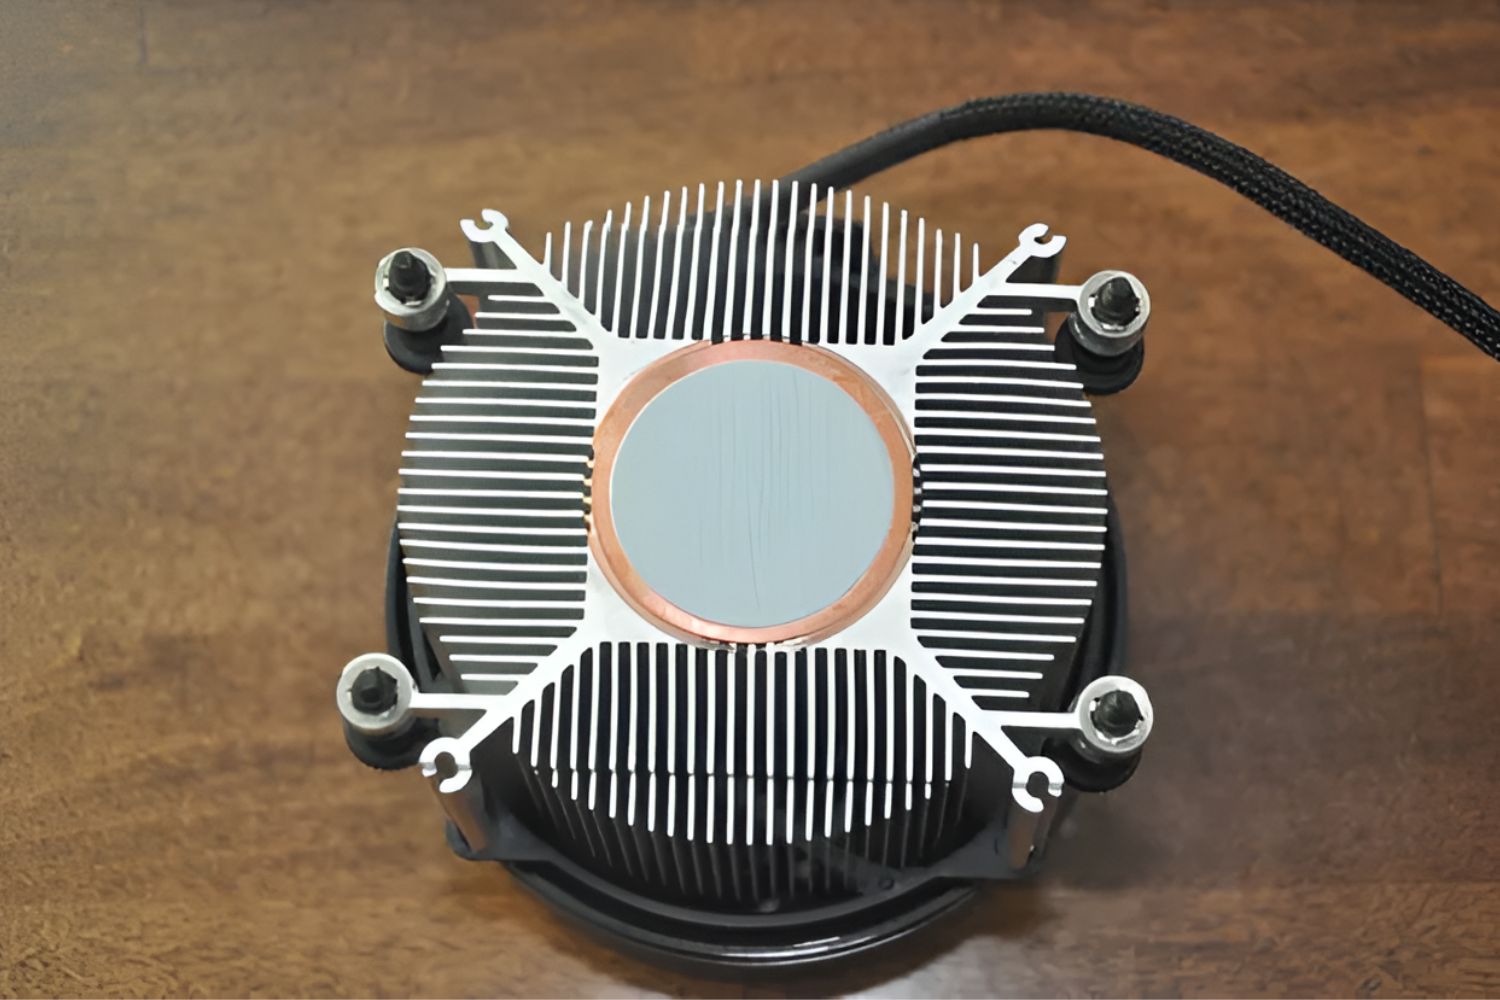
1. Visual Inspection: The first and most straightforward method is a visual inspection. Carefully examine the CPU cooler and look for any air bubbles that may be visible through the transparent parts of the cooler. Pay particular attention to areas such as the contact surface between the CPU and the cooler, as well as any tubing or liquid cooling channels.
2. Feeling for Bubbles: Gently run your fingers over the cooler’s surface, paying attention to any irregularities or areas where there may be trapped air. Bubbles can sometimes be felt as small, raised areas or pockets. Be cautious not to apply too much pressure, as this can damage the cooler or the CPU.
3. Shaking the CPU Cooler: Another method is to gently shake the CPU cooler. This can help dislodge any trapped bubbles and allow them to move freely within the cooler system. Listen for a sloshing or bubbling sound, which can indicate the presence of bubbles. However, exercise caution and avoid excessive shaking that could potentially damage the cooler or other components.
4. Listening for Bubbles: By placing your ear close to the CPU cooler, you can listen for any unusual sounds that suggest the presence of bubbles. Pay attention to any hissing or bubbling noises, as this may indicate that air is trapped within the cooling system.
Remember to perform these checks carefully and with caution to avoid causing any damage to the CPU cooler or other components. If you discover any bubbles or suspect a problem with the cooling system, it is important to take appropriate action to rectify the issue and restore efficient cooling performance.
In the next section, we will discuss what steps to take if bubbles are detected in your CPU cooler.
Method 1: Visual Inspection
One of the simplest and most effective methods to check for bubbles in a CPU cooler is through visual inspection. By carefully examining the cooler, you can identify any visible signs of trapped air. Here’s how to perform a visual inspection:
1. Look for Transparent Components: Some CPU coolers have transparent elements, such as liquid cooling tubes or the top cover. Examine these components closely and check for any air bubbles inside. Bubbles may appear as small pockets of air that are visible through the transparent material.
2. Inspect the Contact Surface: Check the contact surface between the CPU and the cooler. Ensure there are no gaps or spaces where air bubbles could be trapped. The thermal paste should form a thin, consistent layer across the entire surface. Any irregularities or discontinuities in the thermal paste could indicate the presence of bubbles.
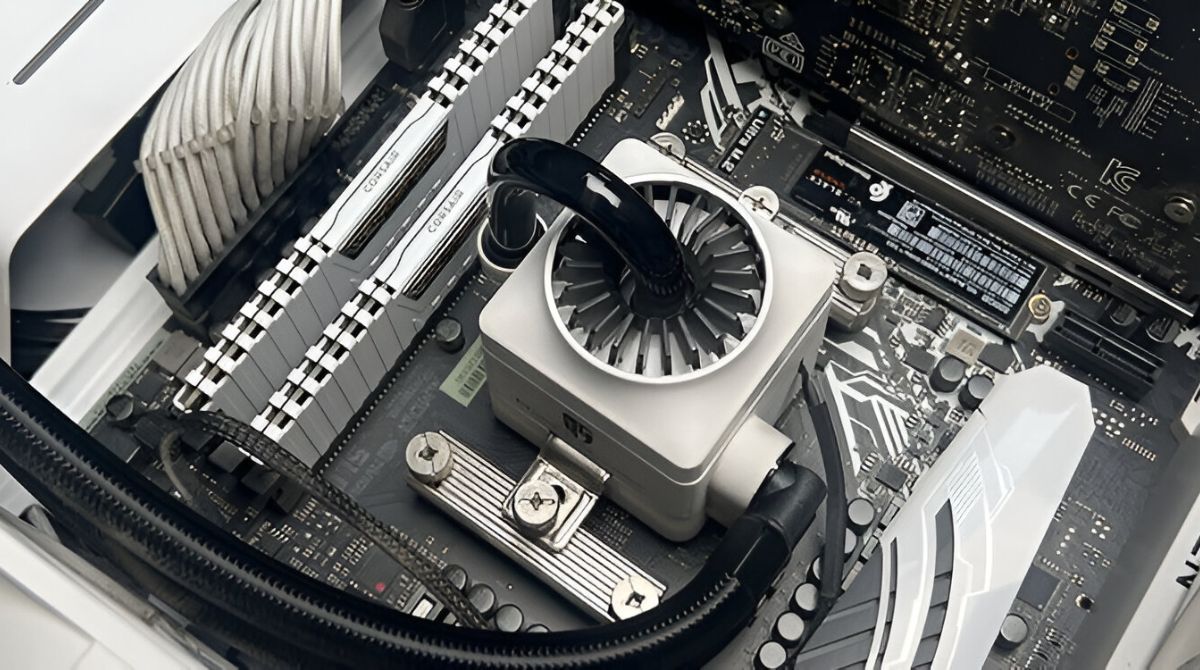
3. Check Liquid Cooling Channels: For liquid cooling systems, inspect the tubing and liquid channels. Look for any bulges, kinks, or areas where air might be trapped. Air bubbles can sometimes get stuck in these areas, obstructing the flow of coolant and reducing cooling efficiency.
4. Pay Attention to Reservoirs: Some liquid cooling systems have reservoirs that store and circulate coolant. Check the reservoir for any air bubbles that might be visible. Bubbles in the reservoir can indicate air getting into the cooling system, so it’s essential to address the issue promptly.
During the visual inspection, take your time to thoroughly examine the CPU cooler, focusing on the areas mentioned above. If you detect any bubbles or other irregularities, it is necessary to take further action to resolve the issue and restore optimal cooling performance.
In the next sections, we will explore additional methods to check for bubbles in a CPU cooler, allowing you to assess the situation more comprehensively.
Method 2: Feeling for Bubbles
Another method to check for bubbles in a CPU cooler is by feeling for any irregularities or pockets of air. This tactile approach can help detect bubbles that may not be visible to the naked eye. Follow these steps to perform a “feeling” inspection:
1. Gently Run Your Fingers: With clean hands, lightly run your fingers over the surface of the CPU cooler, paying close attention to any areas where air bubbles might be trapped. Apply gentle pressure to feel for any raised or uneven spots on the cooler’s surface.
2. Sensitive Areas: Focus on key areas, such as the contact surface between the CPU and the cooler, as well as any tubing or liquid cooling channels. These areas are more prone to bubble formation and can impact the cooling performance.
3. Look for Inconsistencies: While feeling the cooler, keep an eye out for any inconsistencies in the surface texture. Bubbles might create slight irregularities or soft spots. Pay attention to these variations as they may indicate the presence of trapped air.
4. Exercise Caution: Be gentle and avoid applying excessive pressure, as this can damage the CPU cooler or the CPU itself. Use your sense of touch to detect any subtle differences, but always handle the components with care.
The “feeling” method can complement the visual inspection, providing another layer of assessment for bubble detection. If you notice any unusual or suspicious sensations while running your fingers over the cooler, it might be an indicator of trapped bubbles.
Keep in mind that this method requires a gentle touch and a careful approach to avoid causing accidental damage. If bubbles are detected, it is important to address the issue and take appropriate measures to restore proper cooling efficiency.
In the following sections, we will explore additional methods to check for bubbles in a CPU cooler, offering a comprehensive approach to identifying and resolving this issue.
Method 3: Shaking the CPU Cooler
An effective method to check for bubbles in a CPU cooler is to gently shake it. This method helps dislodge any trapped bubbles within the cooler system, allowing you to detect their presence. Here’s how you can use the “shaking” method:
1. Prepare for Shaking: Before proceeding, ensure that your computer is turned off and unplugged. You don’t want to risk any accidental damage to the system or its components. Also, make sure to ground yourself by touching a grounded metal surface to prevent any static discharge.
2. Hold the CPU Cooler Securely: Hold the CPU cooler firmly and avoid touching any delicate parts, such as the fins or the fan blades. It’s important to handle the cooler with care to prevent any damage.
3. Apply Gentle Shaking: Gently shake the CPU cooler back and forth, side to side, or in a circular motion. The aim is to create slight movement that can dislodge any trapped bubbles. Be cautious not to shake it too vigorously, as this can damage the cooler or loosen its connections. A few gentle shakes should be sufficient.
4. Listen for Sounds: While shaking the CPU cooler, listen closely for any sloshing or bubbling sounds. These audible indicators can suggest the presence of bubbles within the cooler system. Remember, a quiet environment can enhance your ability to hear these sounds more clearly.
By shaking the CPU cooler, you disturb the air inside the cooler, allowing any trapped bubbles to move around. The presence of audible sounds or the absence of such sounds can help you identify whether bubbles are present.
Note that this method should be performed with caution to prevent any damage to the CPU cooler or other components. If bubbles are detected during the shaking process, it is essential to take appropriate action to address the issue and restore the optimal cooling performance of your CPU.
In the next sections, we will explore additional methods to check for bubbles in a CPU cooler, providing a comprehensive approach for bubble detection.
Method 4: Listening for Bubbles
Listening for bubbles in a CPU cooler is another method to help detect any trapped air within the cooling system. By paying close attention to the sounds emitted during system operation, you can identify the presence of bubbles. Follow these steps to utilize the “listening” method:
1. Prepare a Quiet Environment: Find a quiet and noise-free location to listen for any subtle sounds. This will enhance your ability to detect even the faintest of noises that may indicate the presence of bubbles.
2. Turn On the Computer: Power on your computer and allow it to run as you normally would. The CPU cooler will start operating, and the movement of air and fluid within the cooling system may produce audible sounds.
3. Listen Closely: Position yourself near the computer and listen attentively for any unusual sounds. Pay particular attention to the CPU cooler and the surrounding area. Bubbles within the cooler system may produce hissing or bubbling sounds as they move or interfere with the flow of coolant or thermal paste.
4. Isolate Potential Sounds: As you listen, try to determine the source of any noises you hear. Focus on the CPU cooler itself, the liquid cooling tubing, or any other components in the cooling system. This will help pinpoint the location and potential cause of the bubbles.
By listening carefully for any anomalous sounds, you can identify potential bubble formation within the CPU cooler. It’s important to note that properly functioning coolers may also emit slight operational noises, so it’s crucial to distinguish between normal sounds and those indicative of bubbles.
If you hear persistent hissing or bubbling sounds that cannot be attributed to normal cooler operation, it may be a sign of trapped air. In such cases, it is recommended to perform a closer inspection or explore other methods to confirm the presence of bubbles.
In the following sections, we will discuss the necessary steps to take if bubbles are detected, enabling you to address the issue and restore optimal cooling performance.
What to Do If Bubbles Are Detected
If you detect the presence of bubbles in your CPU cooler, it is important to take immediate action to address the issue. Ignoring or neglecting the problem can lead to reduced cooling efficiency and potential risks to your computer system. Here are the steps to follow if bubbles are detected:
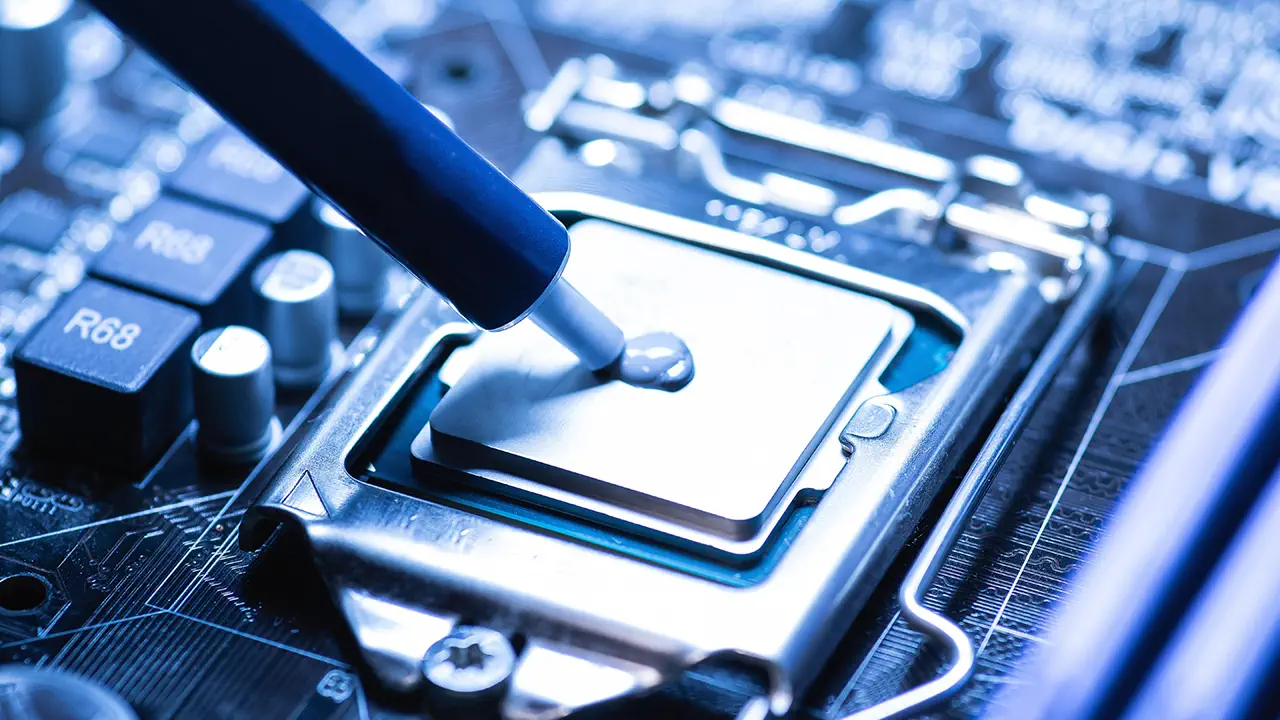
1. Ensure Proper Installation: Check if the CPU cooler is properly installed. Verify that it is firmly connected to the CPU, with even and adequate pressure applied. If necessary, remove the cooler, clean off the existing thermal paste, and reapply a fresh layer before reinstalling. This can help eliminate any air pockets and provide better thermal conductivity.
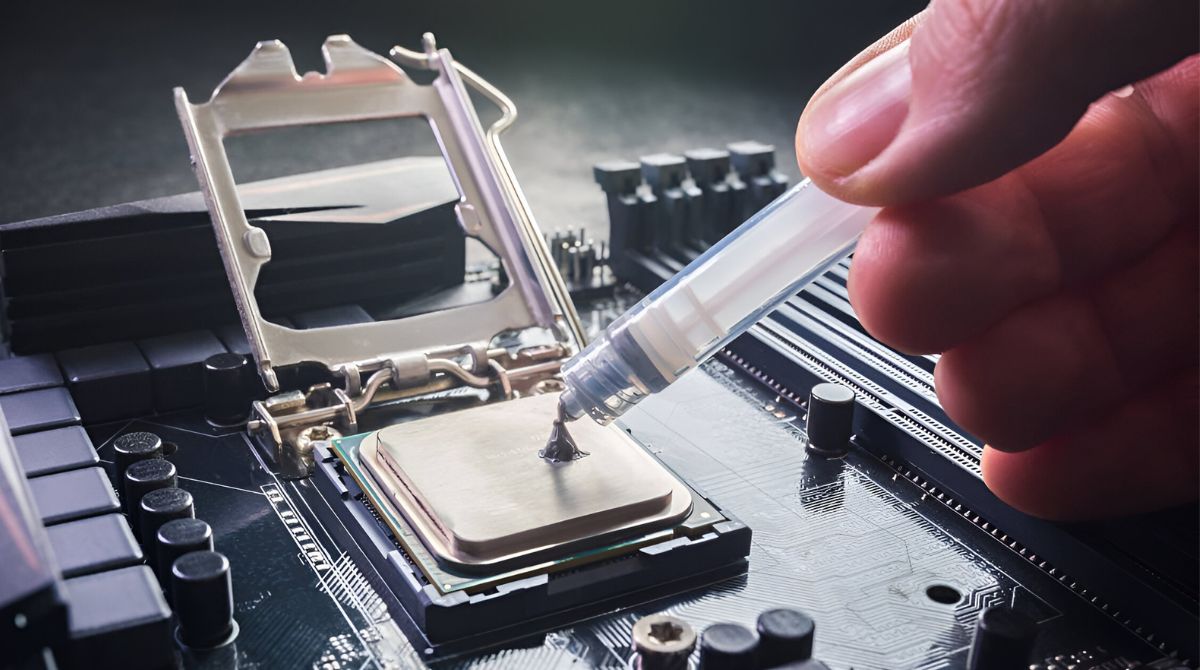
2. Inspect and Replace Thermal Paste: If the thermal paste appears dry, cracked, or degraded, it is essential to replace it. Carefully clean off the old thermal paste from both the CPU and the cooler using isopropyl alcohol. Once cleaned, apply a thin and even layer of fresh thermal paste to ensure proper heat transfer between the CPU and the cooler.
3. Clear Air Bubbles in Liquid Cooling Systems: For liquid cooling systems, it might be necessary to bleed or purge the system to remove trapped air bubbles. Consult the manufacturer’s instructions or user manual for the specific steps to follow. It typically involves loosening a fitting or using a bleed valve to release air from the system until only coolant flows through.
4. Consider Professional Help: If you are unsure about the correct procedure or lack the confidence to address the issue yourself, it is advisable to seek professional help. Consult a computer technician or contact the manufacturer’s support for guidance and assistance in resolving the bubble problem.
5. Maintain Regular Maintenance: To prevent further bubble formation in the future, establish a regular maintenance routine for your CPU cooler. This includes periodic cleaning, replacement of thermal paste, and monitoring the condition of the coolant (if applicable). Regular maintenance helps ensure optimal cooling performance and reduces the chances of bubble formation.
Remember, addressing the presence of bubbles in your CPU cooler promptly can help maintain efficient cooling and prevent potential damage to your computer system. By following these steps and implementing proper maintenance practices, you can optimize the longevity and performance of your CPU cooler.
In the final section, we will conclude the article, summarizing the importance of bubble detection and the necessary steps for maintaining an effective CPU cooling system.
Conclusion
Detecting and addressing bubbles in a CPU cooler is crucial for maintaining optimal cooling performance and protecting your computer system. By using methods such as visual inspection, feeling for bubbles, shaking the CPU cooler, and listening for sounds, you can identify the presence of bubbles and take appropriate action.
Bubbles in a CPU cooler can lead to reduced cooling efficiency, increased risk of overheating, system instability, and potential damage to components. It is important to address the issue promptly to prevent these complications.
If bubbles are detected, steps such as ensuring proper installation, replacing degraded thermal paste, purging air from liquid cooling systems, and seeking professional help if needed can help rectify the problem. Regular maintenance, including cleaning, replacing thermal paste, and monitoring the coolant, can also prevent bubble formation in the future.
Maintaining an efficiently operating CPU cooler is vital for the longevity and performance of your computer system. By following the methods and steps outlined in this article, you can detect and resolve bubble issues, ensuring that your CPU operates at optimal temperatures and minimizing the risk of hardware damage.
Remember to exercise caution when performing any actions on your CPU cooler to avoid accidental damage. If you are uncertain or uncomfortable with addressing the issue yourself, it is always wise to seek professional assistance or guidance.
By being proactive and attentive to bubble detection in your CPU cooler, you can enhance the overall performance and longevity of your computer system, allowing you to continue enjoying a reliable computing experience.