Introduction
Welcome to the digital age, where capturing moments has become an integral part of our lives. Whether it’s a hilarious meme, a stunning landscape, or an important conversation, we want to save and share it all. In the world of smartphones, taking screenshots has become the go-to method for capturing and preserving these moments. And if you’re an Android user, you’re in luck because taking a screenshot on an Android phone is remarkably easy and convenient.
Android devices offer various methods to capture screenshots, giving you the flexibility to choose the option that works best for you. In this guide, we will walk through five different methods to take a screenshot on your Android phone. From using the power and volume down buttons to using an intuitive palm swipe gesture, we’ve got you covered, no matter your device or preference.
Whether you want to capture a funny conversation with a friend, save an important piece of information, or document a software bug, being able to take a screenshot quickly and effortlessly is a valuable skill. So, without further ado, let’s dive into the different methods and discover how you can become a pro at taking screenshots on your Android phone.
Method 1: Using the Power & Volume Down Buttons
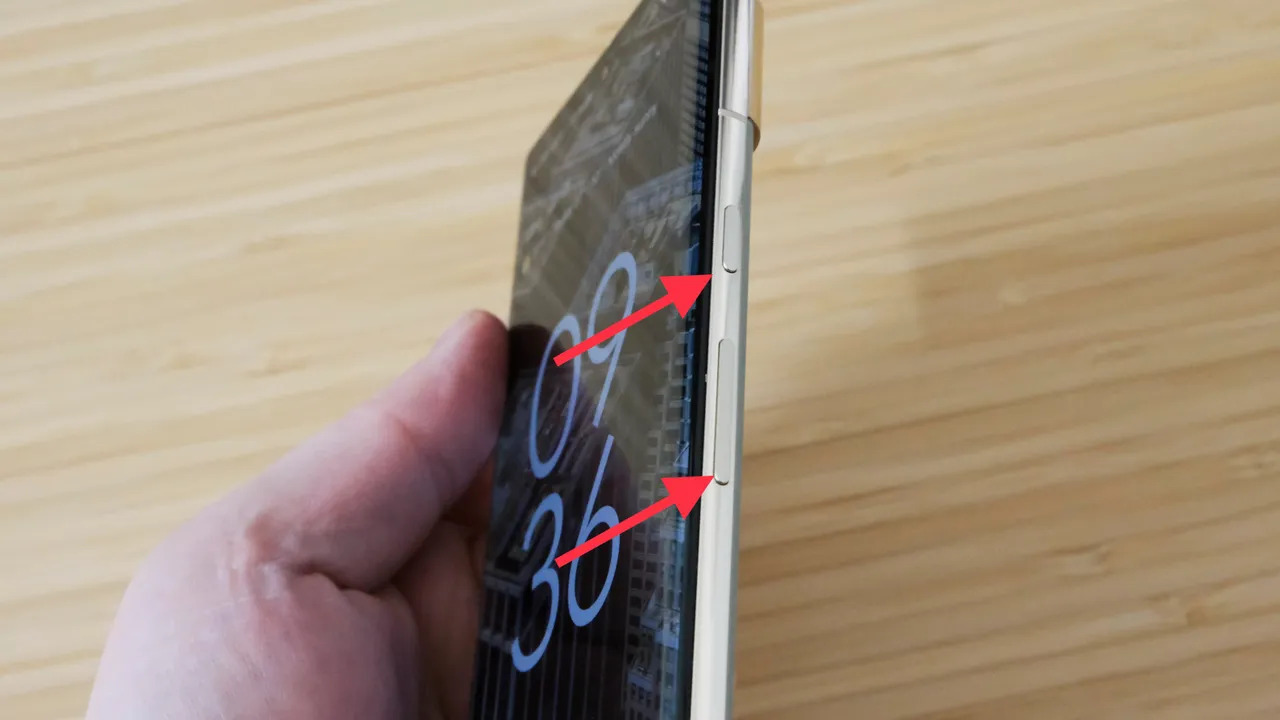
One of the simplest and most commonly used methods to capture a screenshot on an Android phone is by using the power and volume down buttons. This method works across different Android devices and versions, making it a reliable option for taking screenshots.
To take a screenshot using this method, follow the step-by-step guide below:
- Open the screen or app that you want to capture.
- Locate the power button and volume down button on your phone. The power button is usually found on the right or top-right side, while the volume down button is often located on the right or left side.
- Simultaneously press and hold the power button and volume down button for a few seconds.
- You will hear a shutter sound or see a flash on the screen, indicating that the screenshot has been successfully captured.
- Access your screenshot by going to the “Screenshots” folder in your device’s gallery app or by swiping down the notification panel and tapping on the screenshot notification.
Using the power and volume down buttons is a straightforward and reliable method, making it ideal for quickly capturing screenshots. Whether you’re capturing a funny meme, saving an important document, or documenting a software issue to share with tech support, this method can be your go-to option.
Now that you know how to use the power and volume down buttons to take a screenshot, let’s explore another method that offers a more convenient and hassle-free approach.
Method 2: Using the Notification Panel
If you prefer a more convenient and quick way to capture screenshots on your Android phone, using the notification panel is the way to go. This method allows you to take screenshots with just a few taps, making it ideal for capturing spontaneous moments or quickly saving important information.
Follow the steps below to take a screenshot using the notification panel:
- Open the content or screen that you want to screenshot.
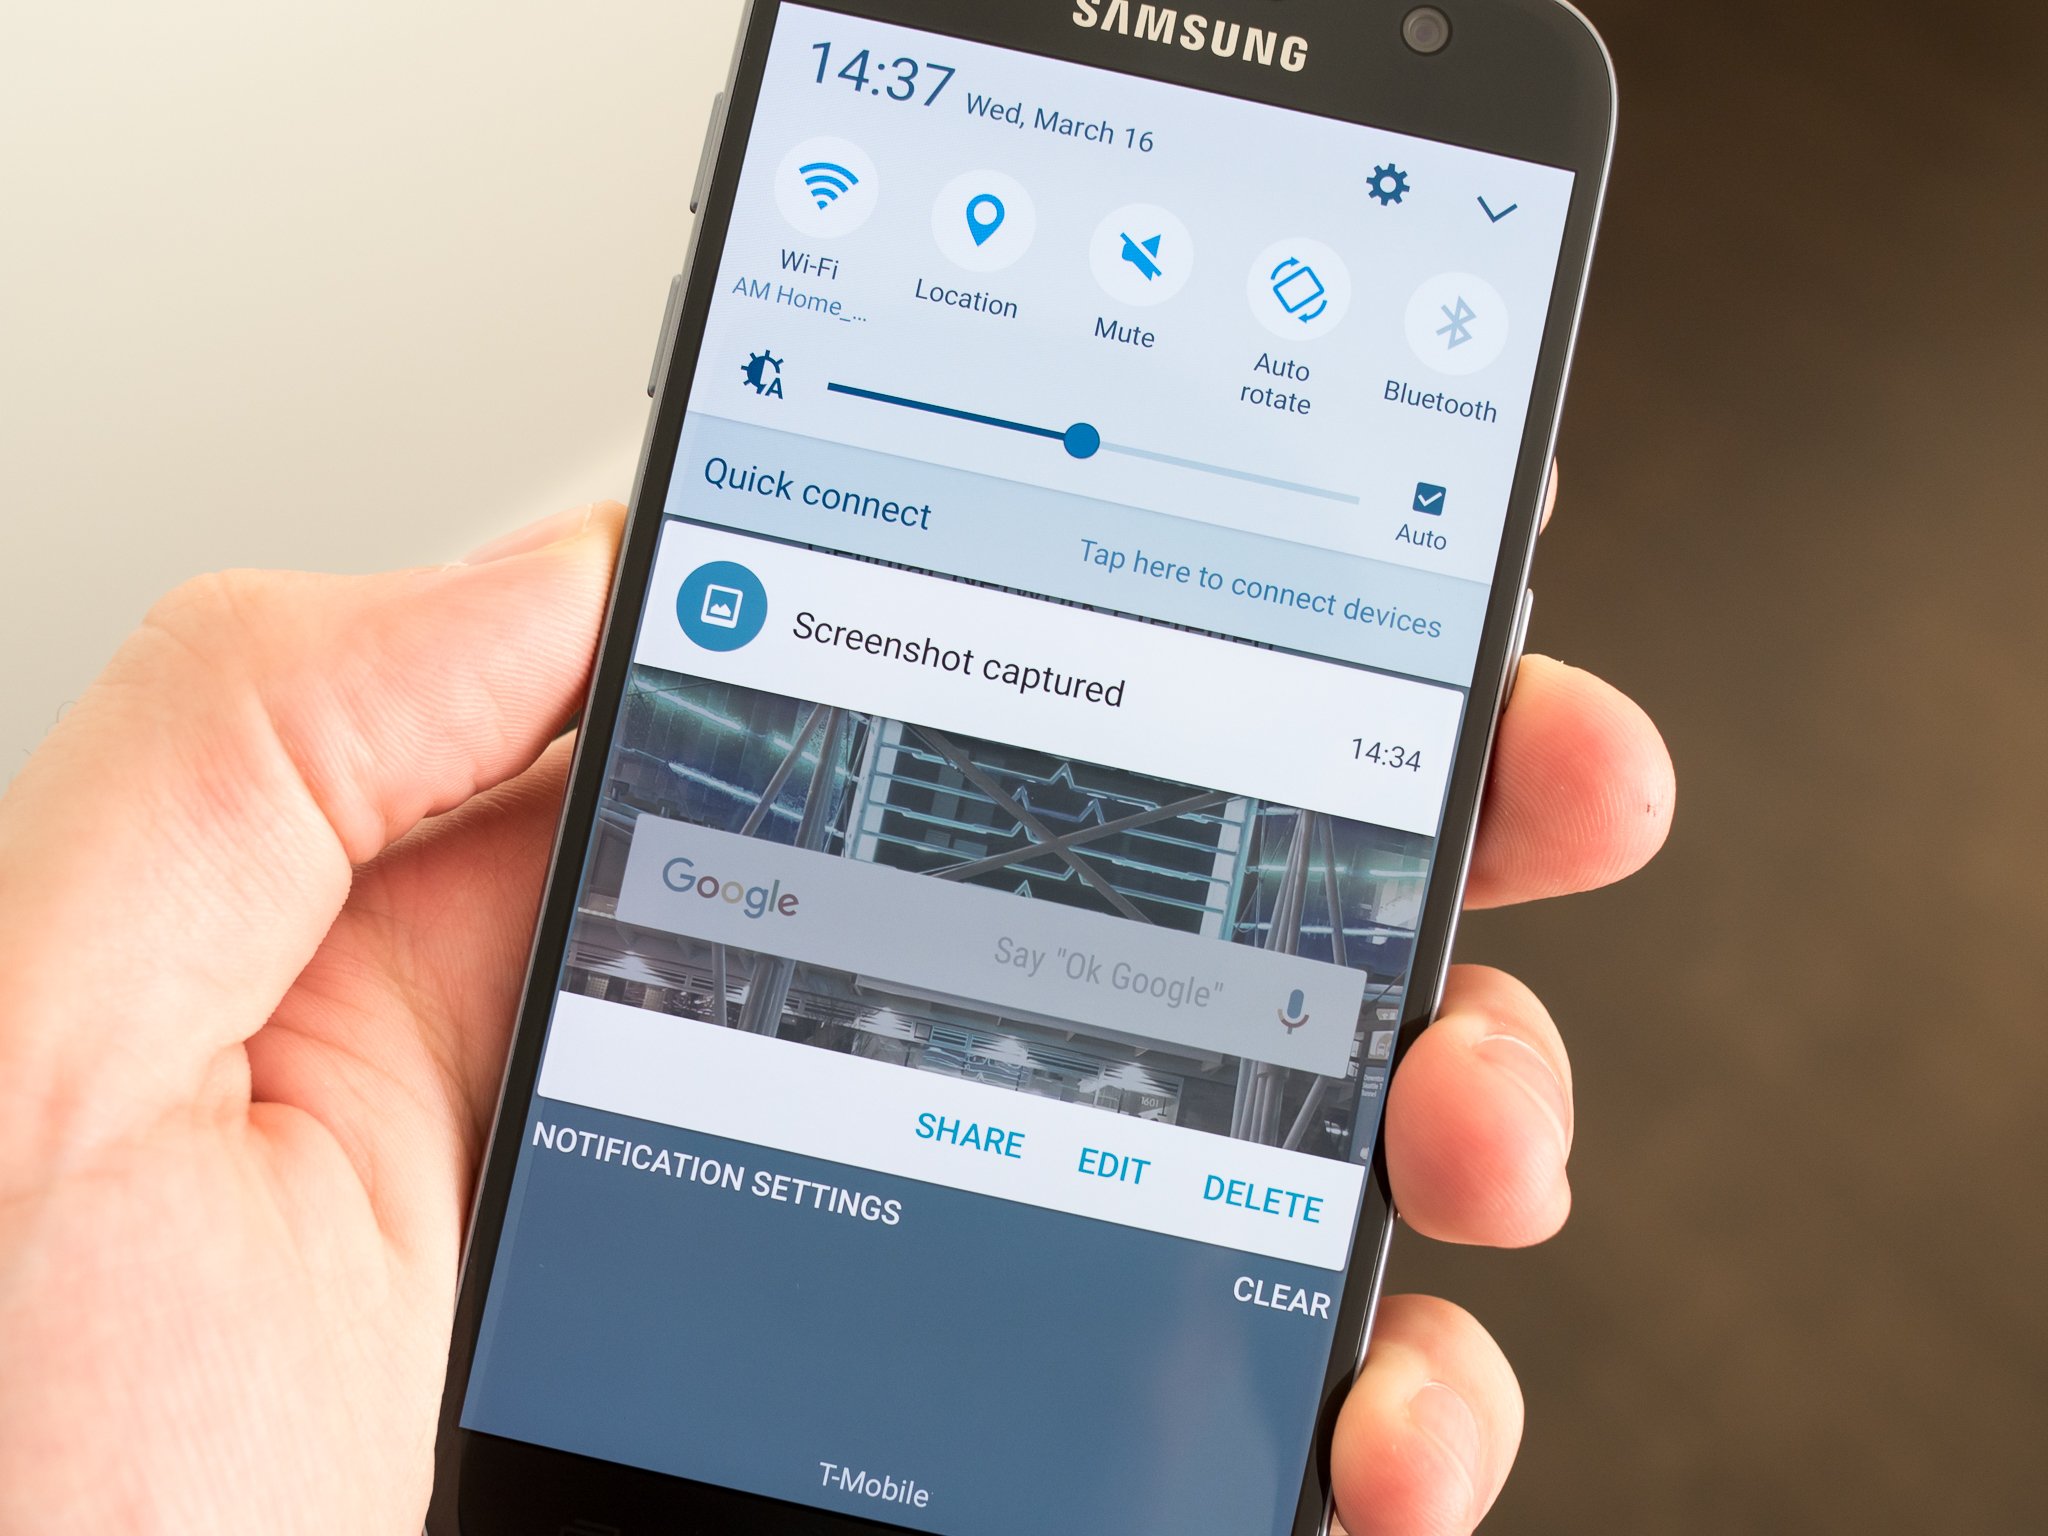
- Swipe down from the top of your screen to access the notification panel. Depending on your device, you may need to swipe down once or twice to fully open the panel.
- Look for the “Screenshot” icon or option. It is usually represented by a small phone with a dotted line, indicating the area that will be captured.
- Tap on the “Screenshot” icon or option.
Once you tap on the “Screenshot” option, your Android phone will capture the screen instantly, without the need to press any physical buttons. You will see a notification indicating that the screenshot has been taken, and it will also appear in the notification panel for quick access.
To view your captured screenshot, simply swipe down the notification panel and tap on the screenshot notification. You can also find the screenshot in the “Screenshots” folder in your device’s gallery app.
The option to take screenshots from the notification panel provides a convenient and hassle-free way to capture those memorable moments or save important information without fumbling around with physical buttons. Whether you need to save a recipe, keep track of important emails, or capture a funny social media post, this method offers simplicity and ease of use.
Now that you’ve mastered using the notification panel to take screenshots, let’s explore another method that involves using Google Assistant.
Method 3: Using Google Assistant
If you’re looking for a hands-free approach to taking screenshots on your Android phone, Google Assistant can be your handy assistant. With a simple voice command, you can instruct Google Assistant to capture the screen for you, making it a convenient method, especially when your hands are occupied or when you’re unable to use physical buttons.
To take a screenshot using Google Assistant, follow these steps:
- Open the screen or content that you want to capture.
- Activate Google Assistant by using the “Hey Google” phrase or by long-pressing the home button (if enabled).
- Once Google Assistant is activated, say “Take a screenshot” or “Capture the screen.”
- Google Assistant will execute the command and capture the screen for you.
- The screenshot will be saved in the “Screenshots” folder in your device’s gallery app.
Using Google Assistant to take screenshots provides a hands-free and effortless experience. It’s perfect for situations where you need to quickly capture a screen while your hands are occupied or if you prefer to interact with your device through voice commands.
It’s worth noting that the availability and functionality of Google Assistant may vary depending on your device and the version of Android you’re using. However, on most modern Android devices, you can easily access and utilize Google Assistant to take screenshots without any hassle.
Now that you’ve learned how to use Google Assistant to capture screenshots, let’s explore another method that involves a unique gesture for snapping screenshots on your Android phone – the palm swipe gesture.
Method 4: Using Palm Swipe Gesture
For those who enjoy using gestures to navigate and interact with their Android phone, the palm swipe gesture method offers a unique and intuitive way to capture screenshots. With a simple swipe of your palm across the screen, you can quickly take a screenshot without the need to press any buttons or access additional menus.
To use the palm swipe gesture and capture a screenshot, follow the steps below:
- Ensure that the palm swipe gesture feature is enabled on your device. You can usually find this option in the “Motions and Gestures” or “Advanced Features” section of your device’s settings.
- Open the screen or content that you want to capture.
- Position your hand with your palm touching the edge of the screen.
- Swipe your entire hand horizontally across the screen, from one edge to the other, while maintaining contact with the screen.
- You will see a visual animation or hear a shutter sound, indicating that the screenshot has been captured.
- The screenshot will be saved in the “Screenshots” folder in your device’s gallery app.
The palm swipe gesture method offers a convenient and natural way to take screenshots on your Android phone. It eliminates the need for physical buttons and allows for a seamless one-handed operation. Whether you’re capturing a funny conversation, saving an important image, or documenting a web page, this method can enhance your screenshot-taking experience.
Keep in mind that the availability and functionality of the palm swipe gesture feature may vary depending on your device and Android version. Some older or budget devices may not have this feature, while others may have different settings or variations of the palm swipe gesture.
Now that you’ve mastered the palm swipe gesture method, let’s explore an alternative option for taking screenshots by using third-party apps.
Method 5: Using Third-Party Apps
If you’re looking to expand your screenshot-taking capabilities or customize the process to align with your specific needs, using third-party apps can offer a wealth of additional features and options. These apps provide an alternative way to take screenshots with added functionality, such as annotating, editing, and sharing options.
To use third-party apps for taking screenshots, follow these general steps:
- Visit the Google Play Store on your Android phone.
- Search for “screenshot app” or similar keywords to find various screenshot apps available for download.
- Read reviews, check ratings, and choose an app that suits your requirements and preferences.
- Download and install the chosen app onto your device.
- Launch the app and follow any setup instructions or permissions required.
- Once the app is set up, refer to its user interface or documentation to learn how to take screenshots using the app’s specific features and controls.
- Enjoy the added functionality of the app, such as editing options, customizable capture methods, and easy sharing to social media or other platforms.
Using third-party apps for taking screenshots allows you to personalize your screenshot-taking experience. Whether you need advanced editing tools, instant sharing options, or innovative capture methods, these apps can provide a tailored solution.
Some popular third-party screenshot apps include Snagit, Screenshot Easy, and Screen Master, among others. Remember to choose an app from a reputable developer and ensure that it is compatible with your Android phone’s version and specifications.
It’s important to note that while third-party apps can offer additional features for capturing screenshots, they may require additional permissions and could impact system performance or privacy. Be sure to review the app’s permissions and user reviews to make an informed decision before downloading and using any app.
Now that you’re familiar with various methods to capture screenshots on your Android phone, it’s time to put your knowledge into practice and start capturing those memorable moments, important information, or anything else you want to preserve!
Conclusion
Taking screenshots on an Android phone is a simple yet invaluable skill that allows you to capture and preserve important moments, conversations, information, and more. We’ve explored five different methods that cater to various preferences and needs, ensuring that you have the flexibility to choose the option that works best for you.
Using the power and volume down buttons offers a reliable and universal method for capturing screenshots. It’s a go-to option that works across different Android devices and versions.
The notification panel method provides a convenient and quick way to capture screenshots with just a few taps, eliminating the need to press physical buttons.
Google Assistant offers a hands-free approach, allowing you to use voice commands to instruct your Android phone to capture screenshots, making it ideal when your hands are occupied or when physical buttons are not easily accessible.
The palm swipe gesture method introduces a unique and intuitive way to capture screenshots by simply swiping your hand across the screen, offering a seamless and natural one-handed operation.
Lastly, using third-party apps expands your screenshot-taking capabilities by providing additional features, such as editing options, customizable capture methods, and easy sharing to social media or other platforms.
By mastering these methods, you can easily capture screenshots on your Android phone, ensuring that you never miss out on saving those significant moments or important information.
Remember to explore the different options and find the method that suits your preferences and device capabilities. Whether you prefer the simplicity of physical buttons, the convenience of the notification panel, the hands-free approach with Google Assistant, the intuitive palm swipe gesture, or the additional features offered by third-party apps, there’s a method for everyone.
So, go ahead and unleash your screenshot-taking skills. Capture those funny conversations, save critical information, or document software issues effortlessly. The world of Android is at your fingertips, ready to be captured with a simple screenshot.