Introduction
Welcome to the exciting world of 3D printing! With the rapid advancement of technology, 3D printing has become more accessible to individuals and businesses alike. This revolutionary technology has the potential to transform various industries, from manufacturing and healthcare to art and design.
At its core, a 3D printer is a device that can create three-dimensional objects by adding layers of material, such as plastic or metal, based on a digital design. Instead of traditional manufacturing methods that involve subtracting material from a solid block, 3D printers enable the building of objects layer by layer, offering precision and versatility.
In this guide, we will take you through the process of getting started with a 3D printer. Whether you’re a hobbyist, entrepreneur, or simply curious about this cutting-edge technology, this guide will provide you with the essential information you need to embark on your 3D printing journey.
Throughout this guide, we will explore different types of 3D printers, delve into the underlying technology, and provide step-by-step instructions on how to set up and operate your own 3D printer. Additionally, we will discuss common troubleshooting issues and provide tips for successful 3D printing.
As you dive into the fascinating world of 3D printing, it’s important to keep in mind that while 3D printers are becoming increasingly user-friendly, they still require a certain level of technical knowledge and patience to master. However, with the right tools, mindset, and a bit of practice, you’ll soon be creating amazing three-dimensional objects that were once only imaginable.
So, let’s get started on this 3D printing adventure! By the end of this guide, you will have the knowledge and confidence to unleash your creativity and bring your ideas to life using a 3D printer.
What is a 3D Printer?
A 3D printer is a unique machine that can transform digital designs into physical objects. It operates on the principle of additive manufacturing, which means it builds objects layer by layer using various materials, such as plastic, metal, or even food and biological substances.
In the past, manufacturing involved subtractive processes, where materials were cut, drilled, or carved from a larger block to create the desired shape. 3D printing revolutionizes this process by allowing objects to be built up from scratch, resulting in greater efficiency and flexibility.
At the heart of a 3D printer is the ability to interpret digital designs, usually created using computer-aided design (CAD) software. These designs can be downloaded from online repositories or crafted from scratch, giving individuals and businesses the freedom to bring their ideas to life.
Once a digital design is prepared, it is sent to the 3D printer, which then uses its specialized printing technology to produce the physical object. The printer follows the instructions provided by the design, depositing thin layers of material one on top of the other until the entire object is created.
3D printing offers numerous advantages over traditional manufacturing methods. It allows for greater customization, as each layer of the object can be precisely tailored to the desired specifications. This level of precision makes it ideal for creating intricate and complex geometries that would be challenging or impossible to achieve using traditional methods.
In addition, 3D printing reduces material waste, as it only uses the necessary amount of material to create the object, minimizing scraps and leftovers. This efficiency makes it a more sustainable manufacturing solution compared to traditional methods.
Furthermore, 3D printing opens up opportunities for rapid prototyping and iteration. Designers and engineers can quickly produce prototypes of their products and make modifications on the go, saving time and costs associated with traditional prototyping methods.
Overall, 3D printing represents a groundbreaking technology that is revolutionizing the manufacturing landscape. Its ability to transform digital creations into physical objects provides endless possibilities for innovation, creativity, and problem-solving across various industries.
Types of 3D Printers
There are several different types of 3D printers available, each utilizing a unique technology to create objects layer by layer. Understanding the different types can help you choose the right 3D printer for your specific needs. Here are some of the most common types:
- Fused Deposition Modeling (FDM): This is one of the most popular types of 3D printers for beginners and enthusiasts. FDM printers work by heating and extruding a filament of thermoplastic material, which is then deposited layer by layer to create the object. FDM printers are affordable, user-friendly, and can produce objects with good accuracy.
- Stereolithography (SLA): SLA printers use a liquid resin that is hardened using a UV laser or projector. The resin is selectively cured layer by layer to create the object. SLA printers can produce highly detailed and smooth objects, making them suitable for applications that require intricate designs or high-quality surface finishes.
- Selective Laser Sintering (SLS): SLS printers use a powerful laser to selectively fuse powdered materials, such as plastic or metal. The laser sinters the powder together layer by layer, creating solid objects. SLS printers are known for their ability to produce durable and functional parts, making them popular in industries like aerospace and automotive.
- PolyJet: PolyJet printers work by jetting tiny droplets of liquid photopolymer onto a build tray. The material is then cured by UV light to solidify each layer. PolyJet printers can produce objects with high detail and multiple materials or color options. They are commonly used for prototyping, product design, and dental applications.
- Digital Light Processing (DLP): DLP printers use a digital projector to cure an entire layer of liquid resin at once. The projector displays a pattern that solidifies the resin layer by layer. DLP printers can produce objects with high resolution and accuracy, making them suitable for jewelry making, dental applications, and other industries that require fine detail.
- Multi-material 3D Printers: Some 3D printers have the ability to print with multiple materials or colors in a single print job. These printers often use a combination of extruders or printheads to deposit different materials simultaneously, resulting in more complex and visually appealing objects.
These are just a few examples of the various types of 3D printers available in the market. Each type has its own advantages and limitations, so it’s important to consider your specific requirements and budget when choosing a 3D printer. By selecting the right type of printer, you can maximize your creative potential and achieve the desired results for your 3D printing projects.
Understanding 3D Printing Technology
3D printing technology, also known as additive manufacturing, is a process that allows for the creation of three-dimensional objects by building them layer by layer. To understand how 3D printing works, it’s important to grasp the key components and steps involved:
- Digital Design: The first step in 3D printing is creating or obtaining a digital design. This can be done using computer-aided design (CAD) software, which allows you to design a 3D model from scratch or modify an existing one. Alternatively, you can also find ready-made designs in online repositories.
- Slicing: Once you have a digital design, it needs to be sliced into thin layers that the 3D printer can understand. Slicing software takes the 3D model and generates a set of instructions, known as G-code, which guides the printer on how to build each layer of the object.
- Material Preparation: 3D printers use various materials for printing, such as plastics, metals, resins, or even food and biological substances. The chosen material is prepared in a suitable format for the specific printer, such as a filament for FDM printers or a powdered form for SLS or MJF printers.
- Printing Process: Once the material is ready, the 3D printer starts building the object layer by layer. The printer follows the instructions from the sliced file and begins depositing or curing the material to create the desired shape. The deposition or curing method depends on the type of printer technology being used.
- Post-Processing: After the printing process is complete, the object may require some post-processing. This can involve removing support structures, cleaning excess materials, sanding, polishing, or applying additional treatments to achieve the desired finish.
3D printing technology offers numerous benefits and applications. It allows for rapid prototyping, enabling designers and engineers to quickly iterate and test their ideas. It also enables customization and personalization, as 3D printers can produce unique objects tailored to specific requirements.
Furthermore, 3D printing has found applications in various industries, including manufacturing, healthcare, aerospace, automotive, fashion, and art. From creating functional prototypes and spare parts to crafting intricate jewelry and architectural models, the possibilities with 3D printing are limitless.
As the technology continues to evolve, we can expect advancements in printing speed, resolution, and the range of printable materials. This will further expand the horizons of 3D printing and enable new and innovative applications in the future.
Steps to Get Started with a 3D Printer
If you’re ready to embark on your 3D printing journey, here are the essential steps to get started with a 3D printer:
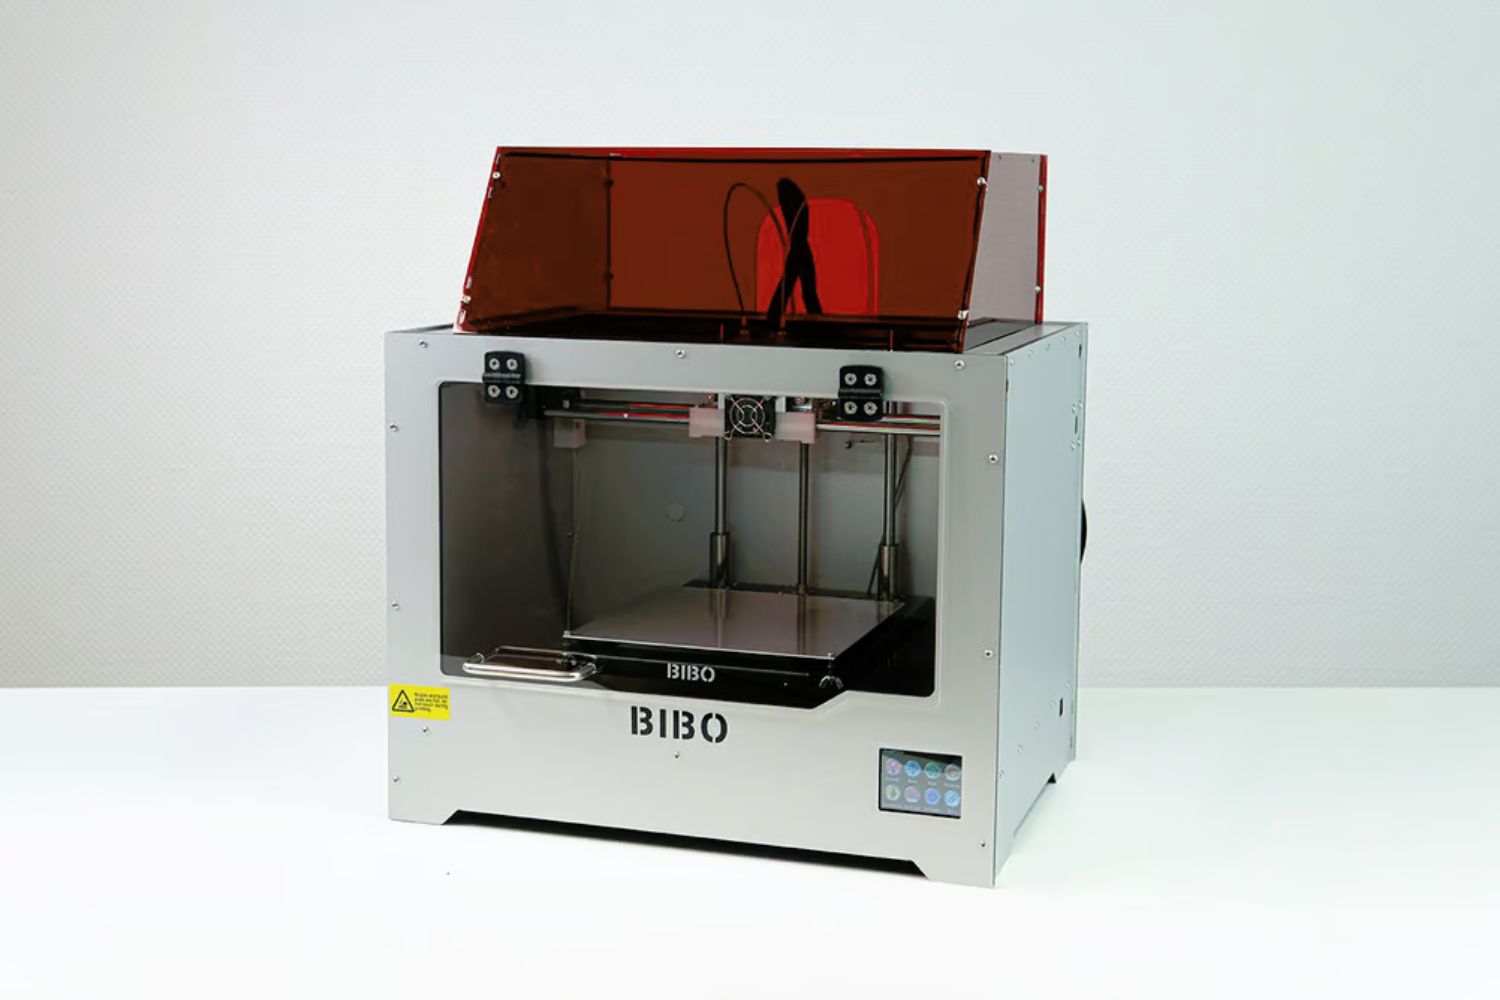
- Choose the Right 3D Printer: Research and select a 3D printer that best fits your needs, budget, and skill level. Consider factors such as print quality, build volume, supported materials, and user-friendly features.
- Set Up Your 3D Printer: Follow the manufacturer’s instructions to assemble and set up your 3D printer. This usually involves attaching components, leveling the print bed, and connecting to power and possibly a computer or network.
- Prepare the 3D Printer Software: Install the necessary software for your 3D printer, such as slicing software and printer firmware. Slicing software allows you to import 3D models and generate the G-code instructions that the printer understands. Configure the software settings to match your printer’s specifications.
- Familiarize Yourself with the Software: Take the time to learn the software’s features and functions. Learn how to import or create 3D models, adjust print settings like layer height and infill density, and generate the G-code for printing. Practice navigating the software’s interface and become comfortable with its workflow.
- Find or Create 3D Models: You can find ready-made 3D models in online repositories like Thingiverse, MyMiniFactory, or YouMagine. Browse through the extensive collections and choose models that interest you. Alternatively, you can unleash your creativity by designing your own models using CAD software.
- Prepare the 3D Model: Use the slicing software to import the chosen 3D model. Orient the model, scale it if needed, and apply any necessary modifications or supports. Adjust other printing parameters like print speed and layer height to achieve the desired results.
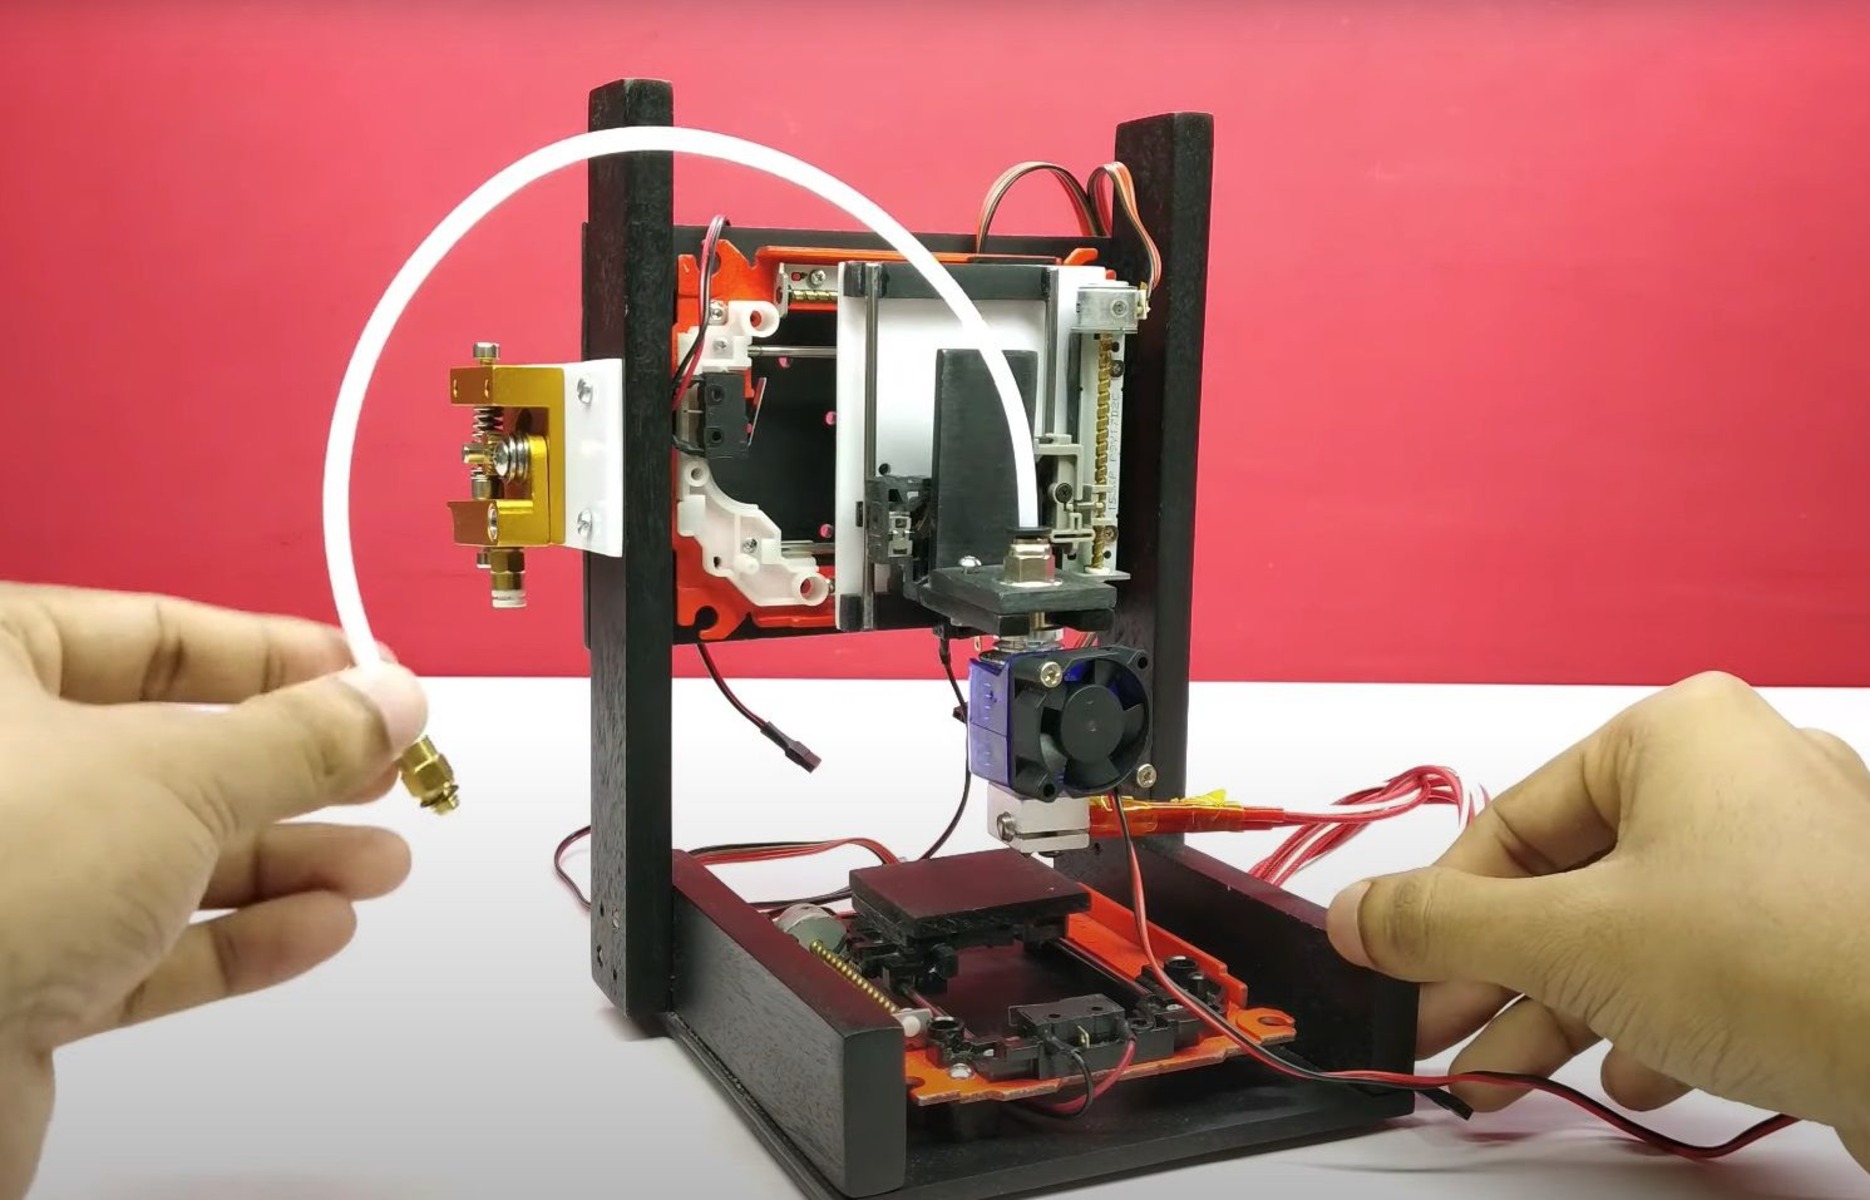
- Load the Printing Material: Depending on your printer type, load the appropriate printing material. For FDM printers, this involves feeding a filament through the extruder mechanism. For resin-based printers, pour the liquid resin into the designated reservoir.
- Calibrate and Preheat the Printer: Perform any necessary calibration according to your printer’s instructions. This may include leveling the print bed, adjusting the nozzle height, or calibrating the extrusion flow rate. Preheat the printer to the recommended temperature for your chosen material.
- Initiate the 3D Print: Set up the print parameters in the slicing software and send the G-code to the printer. Start the print job and monitor the progress closely during the initial layers to ensure successful adhesion. Avoid disturbances and keep the printer in a stable environment.
- Post-Processing: After the 3D print is complete, carefully remove the object from the print bed or resin tray. Remove any support structures if necessary and post-process the object according to your desired finish, such as sanding, painting, or smoothing. Take precautions when handling sharp or delicate objects.
- Experiment and Learn: As you gain experience with your 3D printer, don’t be afraid to experiment with different settings, materials, and designs. Learn from each print and adjust your techniques to improve the quality and reliability of your prints.
By following these steps and gaining hands-on experience, you’ll become more proficient with your 3D printer and unlock the limitless possibilities of this exciting technology.
Choose the Right 3D Printer for Your Needs
Choosing the right 3D printer is a crucial step in your 3D printing journey. With a wide range of options available in the market, it’s important to consider your specific needs and requirements. Here are some key factors to consider when selecting a 3D printer:
- Print Quality: Assess the print quality of the 3D printer by examining sample prints or researching user reviews. Look for printers that can achieve the level of detail and accuracy necessary for your intended applications.
- Build Volume: Evaluate the build volume of the printer, which refers to the maximum size of the objects it can produce. Consider the size of the objects you plan to 3D print and ensure that the printer can accommodate your desired dimensions.
- Supported Materials: Different 3D printers have varying material compatibility. Ensure that the printer you choose supports the type of material you intend to use, whether it’s plastics, metals, resins, or specialized filaments like flexible or conductive materials.
- Ease of Use: Consider the user-friendliness of the printer, especially if you’re a beginner. Look for printers with intuitive interfaces, clear instructions, and easy-to-navigate software. Some printers also offer features like auto-bed leveling, which simplifies the setup process.
- Printing Speed: Assess the printing speed of the printer, as it can influence the time it takes to complete a print job. Keep in mind that faster printing speeds may sacrifice print quality, so strike a balance between speed and accuracy depending on your priorities.
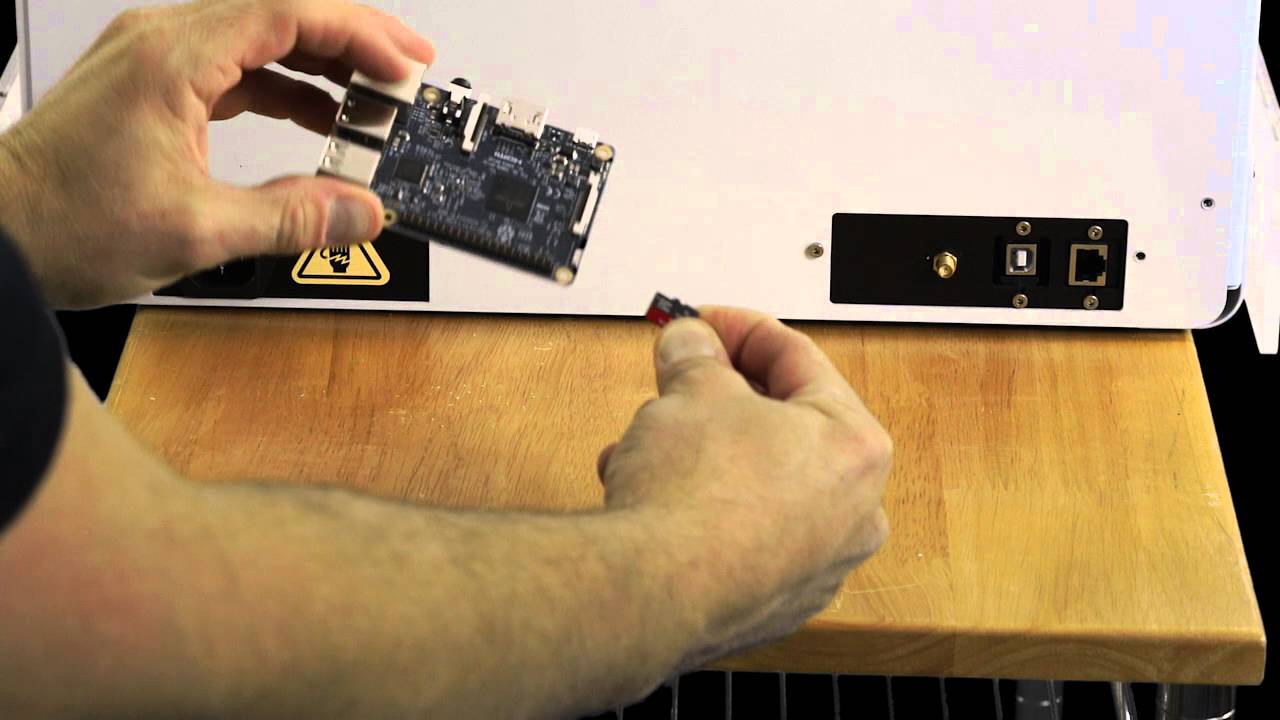
- Connectivity Options: Determine the connectivity options the printer offers. Some printers can be connected to a computer via USB or Wi-Fi, while others may have standalone capabilities with built-in memory or the ability to print directly from an SD card.
- Support and Community: Research the availability of customer support and the presence of an active user community for the printer you’re considering. Having access to resources like forums, tutorials, and troubleshooting guides can be valuable in the learning process.
- Budget: Determine your budget for a 3D printer and consider the costs of not only the printer itself but also the maintenance, materials, and potential upgrades. Set realistic expectations based on your budget and prioritize features that align with your requirements.
- Reviews and Recommendations: Read reviews and seek recommendations from other 3D printing enthusiasts or professionals. Their experiences and insights can help you make an informed decision and avoid potential issues.
Remember that selecting the right 3D printer is a balance between your needs, budget, and desired level of expertise. Take the time to research and compare models, and if possible, attend trade shows or maker fairs where you can see the printers in action and ask questions. By thoroughly evaluating your options, you can choose a 3D printer that will meet your expectations and enable you to bring your ideas to life.
Setting Up Your 3D Printer
Once you have chosen the right 3D printer for your needs, it’s time to set it up and get it ready for printing. Properly setting up your 3D printer is crucial to ensure optimal performance and successful print results. Here are the essential steps to guide you through the setup process:
- Unboxing: Carefully unpack the 3D printer and ensure that all components, accessories, and cables are accounted for. Refer to the manufacturer’s manual or online resources for any specific instructions related to unboxing.
- Assembly: If your printer requires assembly, follow the manufacturer’s instructions to put it together. This may involve attaching the frame, motors, extruder, or other components using screws or clamps. Ensure that all connections are secure.
- Leveling the Print Bed: Properly leveling the print bed is essential for achieving good adhesion and print quality. Follow the printer’s instructions to level the bed, which may involve adjusting screws or knobs to ensure an even distance between the nozzle and bed at all points.
- Connecting Power and Cables: Plug in the power cable of the printer, ensuring a secure connection to the power source. Connect any necessary cables, such as USB or Ethernet, to establish a connection between the printer and your computer or network.
- Calibration: Some printers may require additional calibration steps, including calibrating the extruder, nozzle height, or temperature settings. Consult the manufacturer’s instructions to perform any necessary calibrations specific to your printer model.
- Installing Software: Install the necessary software for your 3D printer. This typically includes slicing software, which converts your 3D models into instructions for the printer to follow. Follow the software installation instructions provided by the manufacturer.
- Updating Firmware: Check if there are any firmware updates available for your 3D printer model. Firmware updates often provide bug fixes, performance enhancements, and new features. Follow the manufacturer’s instructions to update the firmware if necessary.
- Testing and Heat-Up: Before attempting your first print, run a test print or perform a “cold extrusion” to ensure that all components are functioning properly. Heat up the printer if required, allowing it to reach the recommended temperature for the chosen printing material.
- Preheating the Print Bed: If your printer has a heated bed, preheat it to the recommended temperature for the selected material. This helps with adhesion and prevents warping. Some printers have manual temperature adjustments, while others have automated settings in the software.
- Performing a Calibration Print: To verify that the printer is properly set up and calibrated, consider performing a calibration print. This involves printing a test model with precise dimensions to see how accurately the printer follows the slicing instructions.
Each 3D printer may have specific setup instructions, so it’s important to refer to the manufacturer’s manual and online resources for detailed guidance. Take your time to carefully follow the steps and ensure that everything is in proper working order before moving on to your first official print.
Remember, the setup process may vary depending on your specific printer model, so it’s important to familiarize yourself with the manufacturer’s instructions and consult any available online resources or customer support if you encounter any difficulties. With a fully set up 3D printer, you’re ready to dive into the exciting world of 3D printing.
Preparing the 3D Printer Software
To unleash the full potential of your 3D printer, it’s important to properly prepare and configure the software that controls it. Preparing the 3D printer software involves installing the necessary programs, configuring settings, and familiarizing yourself with the features. Here are the essential steps to get your software up and running:
- Install Slicing Software: The first step is to install the slicing software, which converts your 3D models into instructions (G-code) that the printer can understand. Popular slicing software options include Ultimaker Cura, PrusaSlicer, and Simplify3D. Visit the software’s official website and download the appropriate version for your operating system.
- Configure Printer Settings: Once the software is installed, you need to configure it to match your specific printer. Go to the printer settings and select the correct printer model or enter custom settings if necessary. Ensure that the build volume, filament diameter, and nozzle size are set correctly for your printer.
- Choose Printing Parameters: Adjust the printing parameters to achieve the desired print quality and performance. This includes settings such as layer height, print speed, infill density, support structures, and cooling options. These parameters can significantly impact the final print, so take time to understand their effects.
- Import or Create Models: Use the software’s interface to import the 3D models you want to print. Supported file formats typically include .STL or .OBJ. Position and orient the models on the virtual build plate as desired. Scaling and rotating options are available to ensure the models fit within your printer’s build volume.
- Generate Supports (if needed): If your model requires support structures to print successfully, enable the support generation feature in the software. Adjust the support settings, such as density, pattern, and placement. The software will automatically generate supports where necessary to ensure proper printability.
- Preview and Validate: Before sending the print job to the printer, take advantage of the software’s preview feature. This allows you to visualize the layers and examine potential issues. Carefully review the preview to ensure supports are correctly placed, there are no gaps or missing layers, and the overall geometry appears as intended.
- Generate G-code: Once you are satisfied with the model and its settings, generate the G-code file. This file contains the instructions that the printer will follow to create your object. Save the G-code file to your computer or directly to an SD card or USB drive if your printer supports offline printing.
- Load G-code to the Printer: Transfer the G-code file to the 3D printer. This can be done by inserting an SD card or connecting the printer to your computer via USB. Follow the printer’s instructions to load the G-code file and initiate the print job.
- Monitor the Print: While the print is in progress, it’s important to monitor the printer closely, especially during the initial layers. Ensure that the print adheres properly to the bed and there are no signs of filament jams or other issues. Pay attention to any error messages or abnormalities that may require adjustments or troubleshooting.
- Save Settings and Profiles: Once you achieve satisfactory print results, save your settings and profiles in the software. This allows for quick and easy setup for future prints and ensures consistency. Having pre-configured profiles can save time and reduce the chances of errors in the future.
Remember, each slicing software may have slightly different features and interfaces, so it’s important to refer to the specific software’s documentation and online resources for detailed guidance. Take the time to explore the software’s capabilities and experiment with different settings to achieve the best results with your 3D printer.
By properly preparing the 3D printer software, you can unleash the full potential of your printer and fully realize your creative visions through the world of 3D printing.
Finding or Creating 3D Models
When it comes to 3D printing, the success and creativity of your prints heavily rely on the 3D models you choose. Whether you’re looking to print functional objects or artistic designs, here are some ways to find or create 3D models for your printing projects:
Finding Ready-Made 3D Models:
- Online Repositories: Explore popular online platforms like Thingiverse, MyMiniFactory, and Cults3D, which host a vast collection of ready-to-print 3D models. These platforms often include user ratings, reviews, and customizable designs, allowing you to find models that best suit your needs.
- Search Engines: Conduct specific searches using search engines like Google or Bing, looking for “3D models” in combination with the object or theme you want to print. This can lead you to various websites and communities dedicated to sharing 3D models.
- Designers and Artists: Follow 3D designers and artists on social media platforms like Instagram, Twitter, and ArtStation. Many designers share their creations and may even have exclusive models available for download or purchase.
- Stock 3D Marketplaces: Explore stock 3D marketplaces like TurboSquid or CGTrader, which offer a wide range of high-quality 3D models. While most models on these platforms are intended for animation or visual effects, they can often be modified and prepared for 3D printing.
Creating Your Own 3D Models:
- Computer-Aided Design (CAD) Software: Learn to use CAD software like Tinkercad, Fusion 360, or Blender, which offer powerful tools for creating 3D models from scratch. These software options vary in complexity, offering both beginner-friendly and advanced features.
- Parametric Design Software: Explore parametric design software like OpenSCAD or Grasshopper, which allow you to generate models using algorithms and equations. This approach offers the flexibility to create complex geometries and customize designs effortlessly.
- Scan and Capture Technology: Utilize 3D scanning devices or photogrammetry software to create 3D models from real-world objects. These technologies capture the physical object’s shape and convert it into a digital model that can be modified or printed as is.
- Online 3D Design Tools: Take advantage of browser-based design tools like Tinkercad or SculptGL, offering intuitive and accessible interfaces for designing 3D models without the need for complex software installations.
Regardless of whether you’re finding ready-made models or creating your own, it’s important to consider the licensing terms of the models you use. Many platforms offer models under Creative Commons licenses or have specific usage restrictions, so be sure to check and adhere to the licensing requirements.
Additionally, practice proper attribution and give credit to the original designers when using their models. This fosters a collaborative and supportive community within the 3D printing world.
By exploring various sources and tools, you can find an extensive collection of ready-made 3D models or embark on the exciting journey of creating your own unique designs. With an abundance of possibilities, let your imagination run wild and bring your ideas to life through the power of 3D printing.
Preparing the 3D Printer for Printing
Before you start your 3D printing journey, it’s essential to properly prepare your 3D printer for printing. This involves a series of steps to ensure that everything is in order and ready to produce high-quality prints. Here’s a guide to preparing your 3D printer:
- Clean the Print Bed: Ensure that the print bed is clean and free from any dust, debris, or leftover filament. Wipe the surface with isopropyl alcohol or other recommended cleaning solutions to remove any residues that may hinder adhesion.
- Apply Adhesive (if needed): Depending on the print bed material and filament used, you may need to apply adhesive for better print adhesion. Common options include using a thin layer of glue stick, hairspray, or specialized 3D printing bed adhesives. Follow the manufacturer’s recommendations for best practices.
- Check Filament Availability: Ensure that you have enough filament available for your print job. Check the filament spool or cartridge to verify its condition, making sure it is not tangled or damaged. If necessary, load a new spool or swap out empty ones.
- Load Filament: Load the filament into the printer’s extruder mechanism. Feed the filament through the feeding tube and into the extruder until it reaches the nozzle. Follow the manufacturer’s instructions for proper loading techniques specific to your printer.
- Perform Extruder Calibration (if needed): Depending on your printer, you may need to calibrate the extruder to ensure accurate filament feeding. This involves adjusting the extruder’s steps per millimeter (E-steps) or adjusting the tension of the extruder’s spring-loaded lever. Consult your printer’s manual or online resources for guidance.
- Preheat the Printer: Preheat the printer to the recommended temperature for your chosen filament. This allows the printer to reach a stable temperature before starting the print job, ensuring consistent printing conditions and preventing thermal fluctuations during the print process.
- Check Nozzle Height: Verify that the nozzle height is appropriately adjusted for the desired printing settings. This is particularly important for achieving proper first-layer adhesion. Follow your printer’s instructions to adjust the nozzle height, ensuring that it is not too close to the bed or too far away.
- Perform Bed Leveling (if needed): If your printer does not have an automatic bed leveling feature, manually level the bed by adjusting the leveling screws or knobs. Use a piece of paper or a feeler gauge to ensure the appropriate gap between the nozzle and the bed at different points. Aim for a consistent, slight resistance when moving the paper or gauge.
- Check Z-Offset (if applicable): For printers with a feature called Z-offset adjustment, fine-tune the distance between the nozzle and the bed’s surface. This helps compensate for variations in the bed or to achieve optimal first-layer adhesion. Consult your printer’s manual or online resources for instructions on adjusting the Z-offset.
- Let the Hotend Stabilize: Allow a few minutes for the hotend to stabilize at the desired temperature after preheating. This ensures that the extruded filament maintains a consistent and accurate temperature during printing, improving print quality and minimizing temperature-related issues.
- Conduct a Test Print: Consider running a test print or performing a small calibration print to verify that everything is functioning as expected. This allows you to identify any potential issues or misalignments before starting more significant print jobs, saving time and materials.
By following these steps and performing the necessary preparations, you can optimize the printing conditions of your 3D printer for successful and high-quality prints. Properly preparing your printer ensures that it is in optimal working condition, maximizing your chances of achieving the desired results for each print job.
Troubleshooting Common Issues
While 3D printers have become more user-friendly, it’s still common to encounter certain issues during the printing process. Knowing how to identify and troubleshoot these common problems will help you overcome obstacles and achieve better results. Here are some common issues and their possible solutions:
- Poor Adhesion: If your print is not sticking to the print bed or has areas that are detached, ensure that the bed is clean and properly leveled. Consider using adhesive aids like glue sticks or hairspray. Adjust the first layer height and increase the bed temperature to improve adhesion.
- Layer Shifting or Misalignment: If you notice that layers shift or the print becomes misaligned during the printing process, check that the belts and pulleys are properly tensioned. Ensure that the mechanism is well lubricated and that there are no obstructions or loose connections.
- Extrusion Problems: If the printer struggles to extrude or leaves gaps in the print, ensure that the filament is loaded correctly and that there are no blockages in the extruder. Check the nozzle for clogs and clean it if necessary. Adjust the extrusion temperature and feed rate if filament flow issues persist.
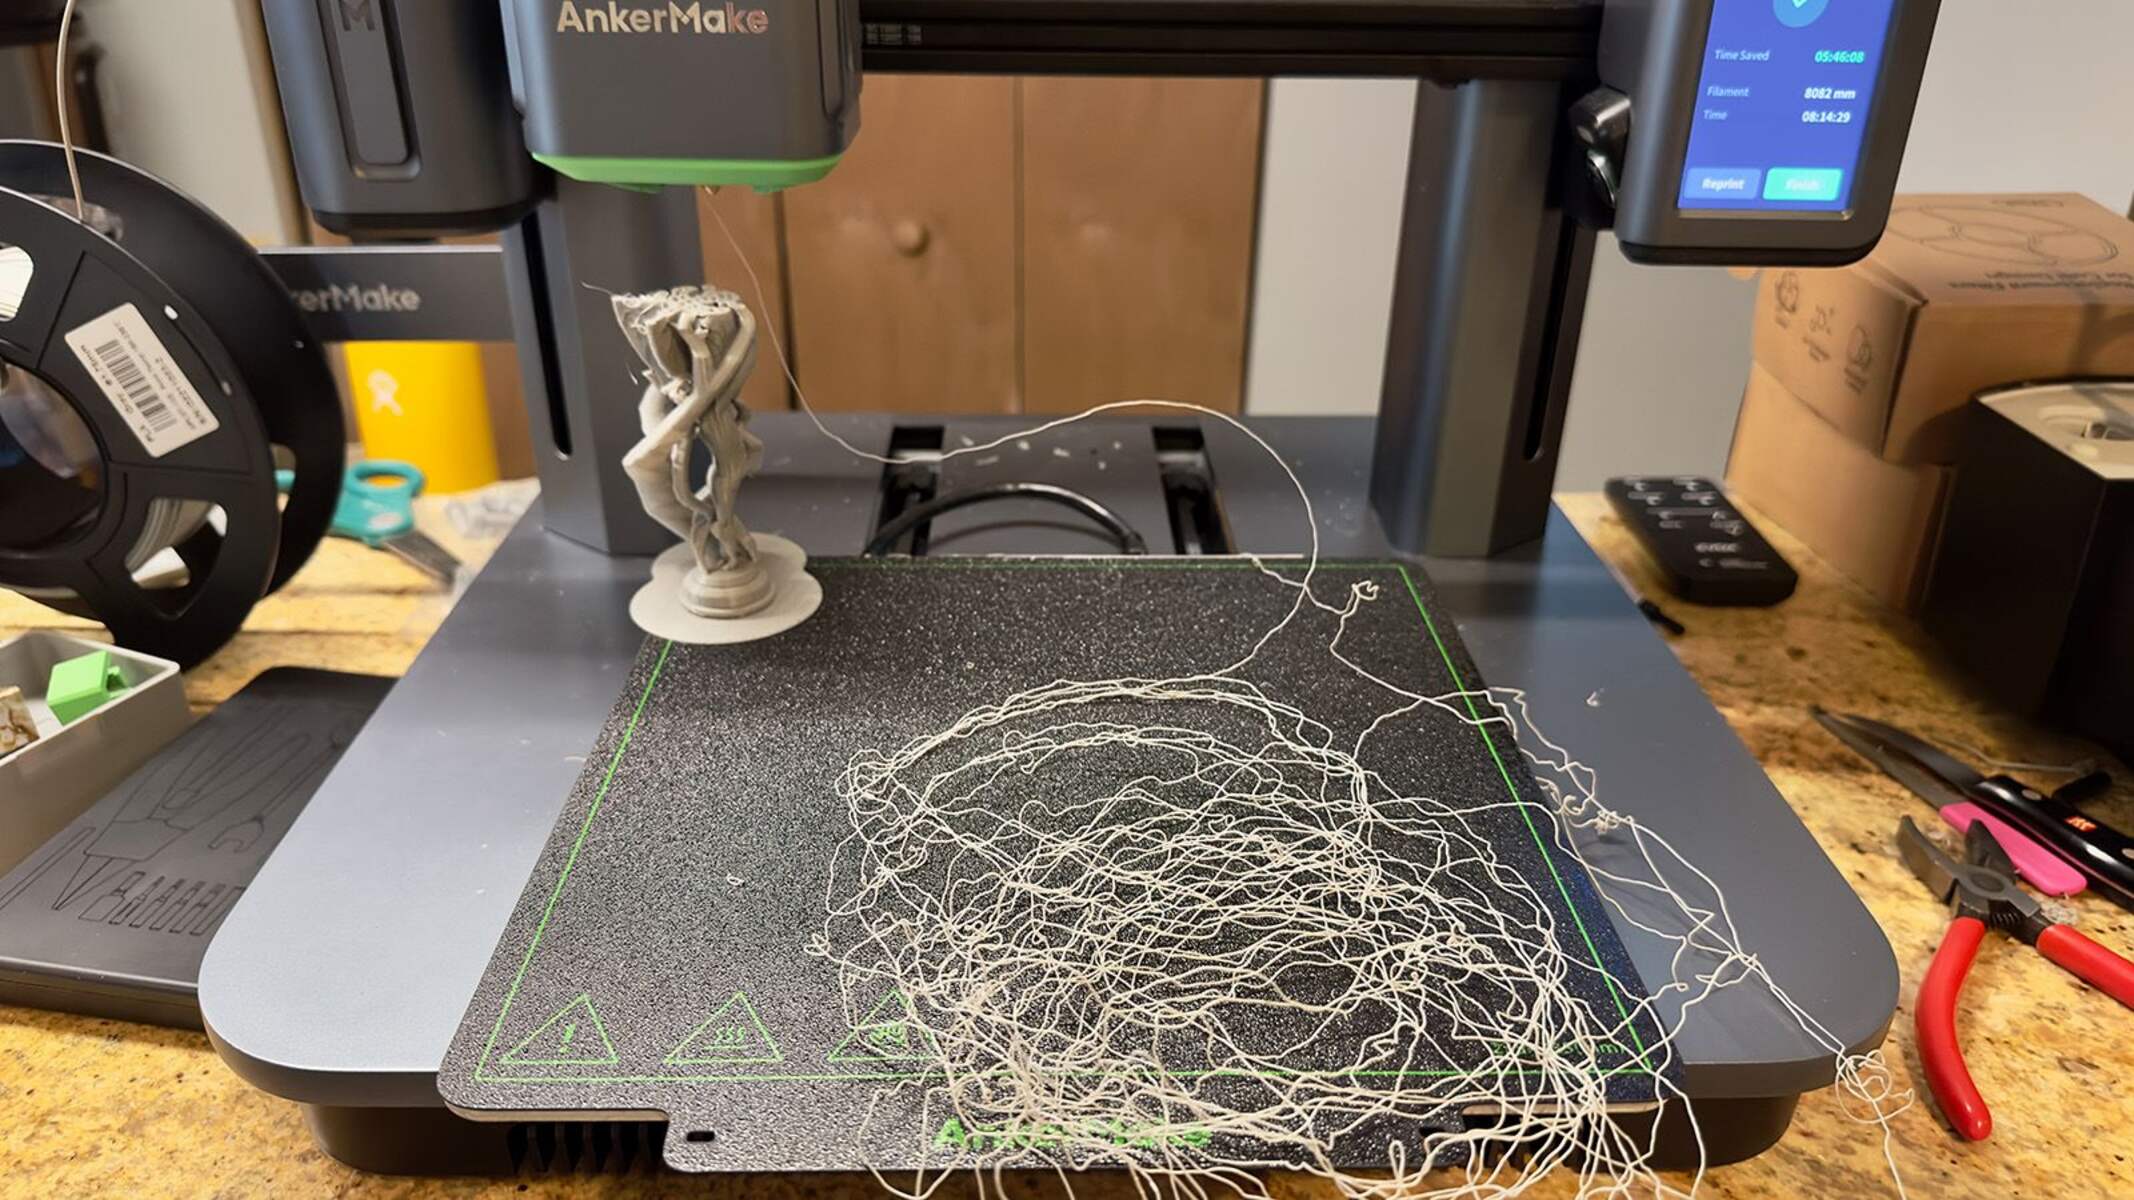
- Stringing and Blobbing: Excess stringing or blobbing can occur when the printer leaves unwanted strands of filament between different parts of the print or excessive material accumulates in certain areas. Adjusting temperature, retraction settings, and print speed can help minimize these issues.
- Warping and Cracking: Warping and cracking often occur due to uneven cooling or incorrect bed temperature. Ensure that the print bed is level and heated to the appropriate temperature. Consider using a heated enclosure or minimizing drafts in the printing environment to promote uniform cooling and prevent warping.
- Under-Extrusion or Over-Extrusion: Inconsistent flow of filament can lead to under-extrusion (thin or weak prints) or over-extrusion (bulging or excessive material). Adjust the extrusion multiplier or flow rate in the slicing software. Verify that the filament diameter is correctly set and make any necessary adjustments.
- Print Artifacts: Artifacts like ringing, ghosting, or banding can occur due to mechanical vibrations or resonance. Improve print quality by tightening belts, reducing print speed, adjusting acceleration and jerk settings, or adding dampeners to minimize vibrations.
- Inconsistent Layer Height: Inconsistent layer height can result from uneven bed leveling or a mechanical issue. Ensure that the print bed is properly leveled and that the Z-axis movement is smooth. Adjust the layer height settings in the slicing software and monitor for any improvements.
- Filament Jamming: If the filament gets stuck or refuses to extrude properly, check for any obstructions or clogs in the extruder or hotend. Heat the hotend to the recommended temperature for filament removal or carefully clear the nozzle using a thin, pointed tool. Consider adjusting retraction settings to minimize the chances of filament jams.
- Printer Errors and Malfunctions: If the printer displays error messages or malfunctions, consult the printer’s manual or error code guide to identify the issue. Check for loose connections, damaged components, or firmware updates. If the problem persists, reach out to the manufacturer’s customer support for further assistance.
Remember that troubleshooting can be a trial and error process, and it may require multiple adjustments and tests to achieve the desired print quality. Regular maintenance, proper calibration, and staying up-to-date with firmware updates are important for preventing issues and ensuring the smooth operation of your 3D printer.
By understanding and addressing common issues, you can overcome obstacles and achieve consistent, high-quality prints with your 3D printer.
Tips for Successful 3D Printing
To achieve consistent and high-quality prints with your 3D printer, consider these valuable tips and best practices:
- Ensure Proper Bed Leveling: Leveling the print bed is crucial for achieving proper adhesion and a successful first layer. Take the time to properly level the bed and make adjustments as necessary, ensuring a consistent gap between the nozzle and the print bed across the entire surface.
- Calibrate Extrusion Steps: Calibrate the extrusion steps of your printer to ensure accurate filament feeding. This helps prevent under-extrusion or over-extrusion, allowing for better print quality and dimensional accuracy. Follow your printer’s documentation or online guides for instructions on how to perform this calibration.
- Experiment with Print Speed and Layer Height: Adjusting the print speed and layer height can impact print quality and efficiency. Experiment to find the optimal settings for your specific printer and filament. Keep in mind that reducing the print speed generally improves detail and surface finish, while increasing the layer height can save time but may sacrifice some overall quality.
- Implement Proper Cooling: Cooling is crucial, especially for prints with overhangs or intricate geometries. Ensure that your printer’s cooling fan is functioning properly and adjust its speed based on the requirements of the print. Adequate cooling helps improve overhang performance, minimize warping, and enhance overall print quality.
- Choose the Right Support Structures: Enable support structures for complex prints that require them. Experiment with different support settings, such as density and pattern, to optimize their effectiveness. Consider using support dissolvable materials for easier post-processing.
- Monitor Prints: Keep a close eye on your prints, especially during the initial layers. Watch for any signs of issues like poor adhesion, filament jams, or layer shifting. Regular monitoring allows you to catch and address problems early on, saving time and materials.
- Proper Filament Handling: Store your filament in a dry and dust-free environment. Moisture absorption can negatively impact filament quality and performance. Consider using airtight containers or desiccant packs to preserve the integrity of your filament between prints.
- Post-Processing Care: Pay attention to post-processing steps to achieve the desired finish for your prints. Sanding, painting, or applying surface treatments can enhance the appearance of your objects and provide a professional touch. Take your time to ensure each post-processing step is done carefully and accurately to achieve the desired results.
- Learn from Failed Prints: Don’t get discouraged by failed prints. Instead, use them as opportunities to learn and improve. Analyze the failed prints to identify the cause and adjust the relevant parameters or take preventative measures. This continuous learning process will lead to better results in the long run.
- Stay Updated: Keep track of firmware updates for your printer and regularly update the software and firmware. Manufacturers often release updates that can improve print quality, reliability, and add new features. Stay informed about the latest advancements and take advantage of any enhancements that are available.
Remember, 3D printing is a dynamic and iterative process that requires patience and experimentation. Each printer and filament combination may have unique characteristics, so it’s important to be open to adjustments and continuously fine-tune your settings to achieve the best results.
By implementing these tips and continuously refining your process, you can optimize the performance of your 3D printer and unlock the full potential of this incredible technology.
Conclusion
Congratulations! You have reached the end of this guide, equipped with the knowledge and tips for a successful 3D printing journey. As you embark on your 3D printing adventures, remember that patience, practice, and continuous learning are key to mastering this exciting technology.
We started by understanding what a 3D printer is and explored the different types available in the market. We delved into the underlying 3D printing technology and walked through the essential steps to get started with a 3D printer, from choosing the right printer to setting it up and preparing the software.
We also covered important aspects like finding or creating 3D models, troubleshooting common issues, and shared tips for achieving successful prints. By following these guidelines, you will be better equipped to produce high-quality 3D prints that meet your expectations.
Keep in mind that 3D printing is a dynamic and iterative process. Don’t be discouraged by challenges or failures along the way. Instead, use them as opportunities to learn, refine your skills, and experiment with different techniques and materials.
Remember to leverage online resources, forums, and communities to seek help and share your experiences with fellow 3D printing enthusiasts. The 3D printing community is a vibrant and supportive one, eager to assist and inspire each other.
With your newfound knowledge and expertise, you are ready to unlock the vast possibilities offered by 3D printing. Whether you’re creating functional prototypes, personalized gifts, or artistic masterpieces, the only limit is your imagination.
Get started, embrace the learning process, and enjoy the incredible journey of bringing your concepts to life with the power of 3D printing!