Introduction
Welcome to the fascinating world of 3D printing! Over the years, this revolutionary technology has gained popularity and is now accessible for home use. Imagine being able to bring your ideas to life, creating three-dimensional objects right in the comfort of your own home. Whether you are a hobbyist, artist, or entrepreneur, having a 3D printer at home opens up a world of creative possibilities.
But where do you start? How does 3D printing actually work? Don’t worry, this article will guide you through the process of using a 3D printer at home, from choosing the right printer to troubleshooting common issues. By the end of this guide, you will have the knowledge and confidence to embark on your own 3D printing journey.
Before we delve into the details, it’s important to understand the basic concept of 3D printing. Unlike traditional manufacturing methods, which involve subtracting material, 3D printing is an additive manufacturing process. It builds objects layer by layer, using a range of materials such as plastic, metal, or even composites.
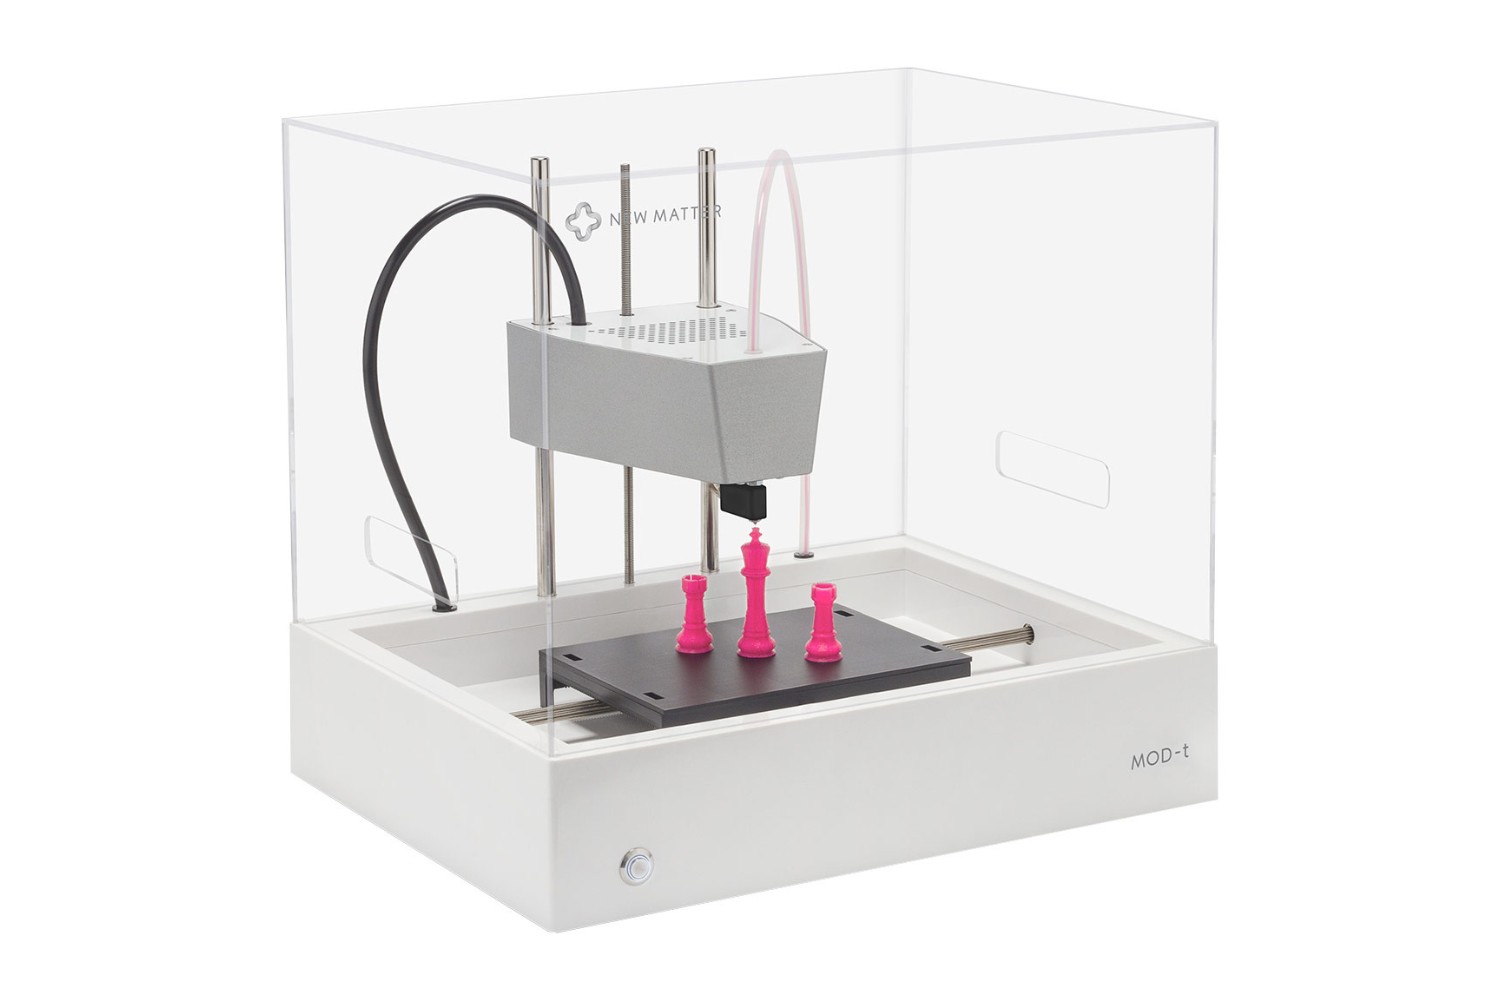
One of the first steps in setting up your 3D printing adventure is selecting the right printer for your needs. There are various types of 3D printers available on the market, including Fused Deposition Modeling (FDM), Stereolithography (SLA), and Selective Laser Sintering (SLS). Each printer has its own advantages and limitations, so it’s important to consider factors such as budget, printing speed, resolution, and material compatibility before making a decision.
Once you have chosen your printer, the next step is setting it up. This involves assembling the hardware, connecting it to your computer, and calibrating the printer to ensure precise and accurate prints. The setup process may vary depending on the specific model you have chosen, so make sure to follow the manufacturer’s instructions carefully.
Including subtitle and wrapped in HTML tags, the introduction section is now complete.
Choosing the Right 3D Printer for Your Home
When it comes to choosing a 3D printer for your home, there are several factors to consider. Understanding these factors will help you make an informed decision and select a printer that aligns with your specific needs and goals.
First and foremost, you need to establish your budget. Like any technology, 3D printers come in a range of prices, from affordable entry-level models to high-end professional machines. Determine how much you are willing to invest and set a budget that suits your financial capabilities.
Next, consider the intended use of the printer. Are you a hobbyist looking to create small-scale objects or prototypes, or do you have more ambitious projects in mind? The type of printer you choose will depend on the size and complexity of the objects you plan to print. For smaller items, a desktop FDM printer may be sufficient, while larger or more intricate designs may require a professional-grade SLA or SLS printer.
Printing speed and resolution are crucial factors to consider. FDM printers typically have faster print speeds but may have lower resolution compared to SLA or SLS printers. Consider the level of detail and intricacy required for your projects and choose a printer that can meet those requirements without compromising printing speed.
Material compatibility is another important consideration. Different printers support different types of printing materials, such as PLA (Polylactic Acid), ABS (Acrylonitrile Butadiene Styrene), or specialty filaments like wood or metal composites. Make sure the printer you choose supports the materials you plan to use, as this will have a direct impact on the versatility and quality of your prints.
Before making a final decision, it’s also important to take into account the availability and cost of replacement parts, as well as the level of technical support offered by the manufacturer. Having access to spare parts and reliable customer support can make a significant difference in the long run, especially if you encounter any issues or need assistance with your printer.
Lastly, consider the user experience and ease of use. Some printers come with user-friendly interfaces, intuitive software, and a supportive community of users who can provide guidance and troubleshooting tips. Others may have a steeper learning curve or require more technical expertise. Think about your level of comfort and familiarity with technology and choose a printer that matches your skills.
By considering all these factors, you can narrow down your options and choose a 3D printer that suits your budget, printing requirements, and technical skills. Remember, each printer has its own strengths and limitations, so take the time to research and read reviews to ensure you make the right choice.
Including subtitle and wrapped in HTML tags, the section on choosing the right 3D printer for your home is now complete.
Setting Up Your 3D Printer
Once you have chosen the right 3D printer for your home, it’s time to set it up and get ready for your first print. While the setup process may vary depending on the specific model, there are general steps that apply to most printers. Here’s a guide to help you set up your 3D printer:
1. Read the manual: Start by familiarizing yourself with the user manual provided by the manufacturer. The manual will provide step-by-step instructions specific to your printer model, ensuring that you set it up correctly.
2. Assemble the printer: If your printer requires assembly, carefully follow the instructions to put it together. Ensure that all components are securely connected and in their correct positions.
3. Connect the printer to power: Plug in the power cord of your printer and connect it to a power outlet. Make sure that the voltage matches your local electrical specifications.
4. Connect to your computer: Depending on the type of printer, you may need to connect it to your computer using a USB cable or through a wireless connection. Consult the manual for guidance on how to establish the connection.
5. Install the slicing software: Most 3D printers require slicing software to convert your 3D model into printable instructions. Install the software provided by the manufacturer or choose a compatible software package. Follow the software’s installation instructions and ensure that the printer is correctly connected to the software.
6. Level the print bed: Properly leveling the print bed is essential for successful prints. Consult the manual to determine the recommended method for your printer model. This usually involves adjusting the screws or knobs under the print bed to ensure that it is parallel to the printer’s nozzle.
7. Calibrate the printer: Calibration ensures that the printer accurately positions the print head and accurately extrudes filament. Each printer has its own calibration process, which may involve following on-screen prompts or adjusting specific settings in the software. Follow the manufacturer’s instructions carefully to calibrate the printer correctly.
8. Load the filament: If your printer uses filament, such as PLA or ABS, you will need to load it into the printer’s extruder. Consult the manual for instructions on how to feed the filament correctly, ensuring that it is securely inserted without any obstructions.
9. Preheat the printer: Preheating the printer is necessary to bring the extruder to the appropriate temperature for the selected filament. Use the software to set the desired temperature and allow the printer to heat up before starting your first print.
10. Test print: Before you dive into more complex prints, it’s a good idea to run a test print. Choose a simple object or a calibration print from the provided software and follow the instructions to start the print. This will help you verify that the printer is functioning correctly and gives you an opportunity to fine-tune the settings if necessary.
By following these steps, you will be able to set up your 3D printer correctly and prepare it for your first print. Take your time and refer to the user manual whenever needed. Once your printer is set up, you are ready to unleash your creativity and bring your ideas to life through the exciting world of 3D printing.
Including subtitle and wrapped in HTML tags, the section on setting up your 3D printer is now complete.
Understanding the Basics of 3D Printing
Before diving into the intricacies of 3D printing, it’s important to have a basic understanding of how this revolutionary technology works. At its core, 3D printing is an additive manufacturing process that builds objects layer by layer, using a range of materials such as plastic, metal, or composites.
The process begins with a 3D model, which serves as the blueprint for the object you want to create. This model can be created using various software programs, downloaded from online repositories, or generated through 3D scanning techniques.
Once you have your 3D model, it needs to be sliced into thin layers. The slicing software takes the 3D model and converts it into a series of 2D cross-sections, each representing a single layer that will be printed. These sliced layers are then sent to the 3D printer as instructions for building the object.
The printer itself consists of several key components. The most crucial part is the print head, also known as the extruder. The extruder contains a heating element that melts the printing material, known as filament, and a nozzle through which the molten filament is deposited onto the print bed.
The print bed, usually made of glass or metal, provides a stable surface on which the object is built. It can be heated to improve adhesion and prevent warping of the printed layers. Some printers also utilize additional mechanisms, such as a heated chamber or a build plate that moves along the Z-axis, to further enhance the printing process.
As the printing process begins, the first layer of filament is deposited onto the print bed. The print head then moves along the X and Y axes, following the instructions from the sliced model, to deposit subsequent layers of filament. This layer-by-layer approach continues until the entire object is created.
The choice of printing material can greatly impact the properties of the final object. Common materials used in 3D printing include PLA, ABS, PETG, and nylon, each offering different characteristics in terms of strength, flexibility, and appearance. Some printers are also capable of printing with specialized materials, such as wood-filled, metal-filled, or conductive filaments, to expand the range of applications.
Understanding the basics of 3D printing enables you to appreciate the underlying process and make informed decisions when it comes to selecting materials, adjusting print settings, and troubleshooting potential issues. As you gain more experience, you can explore advanced techniques and materials to push the boundaries of what you can create with your 3D printer.
Including subtitle and wrapped in HTML tags, the section on understanding the basics of 3D printing is now complete.
Finding and Downloading 3D Models
One of the most exciting aspects of 3D printing is the ability to bring digital designs to life. If you are not skilled in 3D modeling, don’t worry! There are numerous online resources where you can find ready-made 3D models that you can download and print using your 3D printer.
There are several websites and online repositories dedicated to providing a wide range of 3D models. Some of these platforms are specifically curated for 3D printing, ensuring that the models available are optimized for successful printing. Some popular websites for finding 3D models include Thingiverse, MyMiniFactory, and Cults.
When searching for 3D models, it’s important to consider the specific requirements of your project. Think about the size, complexity, and level of detail you need, as well as any specific functionality or design elements. Many models are available in different file formats, so make sure to choose one that is compatible with your slicing software.
Once you find a model you like, most websites will provide a download option. It’s a good practice to review the model and accompanying description to ensure it meets your requirements. Look for models with positive reviews and comments, as these can provide valuable insights into the quality and printing success of the model.
In addition to dedicated 3D model repositories, some software programs and online platforms offer built-in libraries of 3D models. For example, Autodesk’s Fusion 360 and Tinkercad have integrated libraries where you can explore and download models directly within the software. This can be particularly convenient if you prefer to work with a specific software environment.
Another option for finding 3D models is to commission a custom design. There are freelance designers and 3D modeling services available online that can create unique designs tailored to your specific requirements. Keep in mind that this approach may come with a cost, but it offers the advantage of having a bespoke model created solely for your project.
When downloading 3D models, it’s essential to respect the licenses and terms of use provided by the model creator. Many models are shared under Creative Commons licenses, which may have specific requirements such as attributing the original designer or prohibiting commercial use. Always read and adhere to the licensing terms to avoid any copyright or legal issues.
By exploring online repositories, utilizing built-in libraries, or commissioning custom designs, you can find a vast array of 3D models to bring your ideas to life. Whether you’re looking for functional objects, artistic sculptures, or intricate prototypes, there is a wealth of options available to spark your creativity and unleash the full potential of your 3D printer.
Including subtitle and wrapped in HTML tags, the section on finding and downloading 3D models is now complete.
Preparing the 3D Model for Printing
Once you have found and downloaded a suitable 3D model, the next step is to prepare it for printing. This involves a process known as “slicing,” where the 3D model is converted into a format that your 3D printer can understand and execute. Here’s a guide to help you prepare your 3D model for printing:
1. Import the model into slicing software: Open your slicing software, such as Ultimaker Cura or PrusaSlicer, and import the 3D model file. Most slicing software supports a variety of file formats, including STL, OBJ, and AMF.
2. Set the print parameters: Adjust the printing parameters according to your preferences and requirements. This includes selecting the appropriate printing material, layer height, print speed, infill density, and support structures if needed. These settings will have an impact on the final print quality and strength of the object.
3. Orient the model: Position the model in the desired orientation on the virtual build platform within the slicing software. Consider factors such as overhangs, support requirements, and the desired appearance of the printed object. Proper orientation can minimize the need for support structures and improve overall print quality.
4. Scale and resize (if necessary): If you need to adjust the size of the model, use the scaling tool in the slicing software. Keep in mind the limitations of your 3D printer’s build volume and ensure that the model fits within the available space. Make sure to maintain the correct proportions and aspect ratio to avoid distorting the design.
5. Add support structures (if needed): Some models may require support structures to be printed alongside them to prevent sagging or collapsing during the printing process. Enable the supports feature in the slicing software if necessary. Adjust the support settings to strike a balance between providing adequate support and minimizing the amount of material used.
6. Preview the print: Utilize the slicing software’s 3D preview function to inspect the layer-by-layer visualization of the print. This allows you to identify any potential issues or areas that may require further adjustments to improve the overall result. Pay attention to intricate details, bridging areas, and potential overhangs that may need additional support.
7. Generate the G-code: Once you are satisfied with the model and the print settings, generate the G-code file. This file contains the instructions for your 3D printer, including the precise movements, temperatures, and extrusion values needed to create the object.
8. Save and export the G-code: Save the generated G-code file onto an SD card or transfer it directly to your 3D printer. Make sure to follow the manufacturer’s instructions for loading G-code files onto your specific printer model.
By following these steps, you can properly prepare your 3D model for printing. The slicing process is crucial for achieving successful prints, ensuring that the printer understands how to reproduce the model accurately. Take your time to fine-tune the print settings and optimize the orientation and support structures to achieve the best possible print quality.
Including subtitle and wrapped in HTML tags, the section on preparing the 3D model for printing is now complete.
Loading and Setting the Filament
Once your 3D printer is set up and your 3D model is prepared, the next step is to load and set the filament. Filament is the material that is fed into the printer’s extruder and used to create the object layer by layer. Here’s a guide to help you load and set the filament for your 3D printing:
1. Prepare the filament: Start by ensuring that your filament is properly stored and free from any knots or tangles. If the filament is on a spool, unwind a sufficient length to reach the extruder comfortably. If it is a loose coil, make sure it is untangled.
2. Preheat the extruder: Use the 3D printer’s control panel or the slicing software to preheat the extruder to the recommended temperature for the filament you are using. Different types of filament require different extrusion temperatures, so consult the manufacturer’s guidelines or the filament packaging for the appropriate temperature.
3. Cut the end of the filament: Once the extruder is heated, cut the end of the filament to create a clean, flat surface. This helps prevent any irregularities or clogs when inserting the filament into the printer’s extruder.
4. Insert the filament: Locate the filament entry point on your printer’s extruder. Insert the cut end of the filament into the entry point, ensuring it is pushed in all the way until it reaches the extruder feed gear. Some printers have a filament guide tube that directs the filament into the extruder, so make sure to follow any additional steps specified by your printer’s manufacturer.
5. Feed the filament into the extruder: Use the printer’s control panel or software to advance the filament into the extruder. The extruder’s motor will grip the filament and start pulling it into the hot end. Make sure to keep a firm hold on the filament during the feeding process to guide it smoothly into the extruder.
6. Monitor the extrusion: As the filament is being fed into the extruder, observe the nozzle for the extruded filament. This initial extrusion helps ensure that any air gaps or remnants from previous prints are cleared from the nozzle. Once a consistent flow of molten filament is observed, the extrusion is considered successful.
7. Check for filament flow: After the initial extrusion, monitor the flow of filament from the nozzle. Ensure that it is continuous and consistent without any signs of blockages or irregularities. If you notice any issues, it may indicate a clog in the extruder, and you may need to perform additional troubleshooting steps.
8. Set the extrusion multiplier (if needed): Depending on the specific filament and printer, you may need to adjust the extrusion multiplier. This setting allows you to fine-tune the amount of filament being extruded during the printing process. Consult your slicing software or printer’s documentation for instructions on how to adjust this setting.
By following these steps, you can successfully load and set the filament for your 3D printer. Proper filament loading and setup ensure consistent extrusion and improve the overall print quality. Take care to follow the manufacturer’s guidelines and be attentive during the process to ensure a smooth printing experience.
Including subtitle and wrapped in HTML tags, the section on loading and setting the filament is now complete.
Adjusting the Print Settings
Once the filament is loaded and set, it’s time to adjust the print settings to ensure optimal results. Fine-tuning the print settings can greatly impact the quality and performance of your 3D prints. Here are some key aspects to consider when adjusting the print settings:
1. Layer height: This refers to the thickness of each printed layer. A smaller layer height produces smoother and more detailed prints, but it also increases the printing time. Strike a balance between print quality and printing time based on your specific requirements.
2. Printing speed: The printing speed determines how fast the print head moves during the printing process. Higher speeds reduce print time but can compromise the quality of the print. Experiment with different speeds to find the optimal balance between speed and quality.
3. Infill density: Infill refers to the internal structure of the printed object. Adjusting the infill density determines the amount of material used to fill the interior. Higher infill density improves the object’s strength but increases printing time and material consumption. Consider the required structural integrity and weight requirements when setting the infill density.
4. Support structures: Support structures are generated to provide stability for overhanging parts of the print. Adjust the support structure settings based on the geometry of your model. Consider enabling support only where necessary to minimize the usage of support material, making it easier to remove after printing.
5. Raft or brim: A raft or brim can be added to improve bed adhesion. A raft is a flat base created beneath the print, while a brim is a thin ring around the first layer. These features help prevent warping or detachment of the print from the build platform. Use rafts or brims when printing large or complex objects or when experiencing adhesion issues.
6. Cooling settings: Cooling is essential to ensure proper solidification of each layer. Adjust the cooling settings to avoid overheating and deformation, especially for small, intricate details of the print. Most slicing software allows you to set different cooling parameters for specific areas or layers of the model.
7. Print temperature: The print temperature is specific to the filament type being used. Consult the filament manufacturer’s recommendations for the appropriate print temperature, as different materials require different temperatures to achieve optimal print quality. Fine-tuning the print temperature can help minimize stringing, improve layer adhesion, and prevent overheating or under-extrusion issues.
8. Retraction settings: Retraction refers to the reverse movement of filament within the extruder to prevent oozing or stringing during non-printing moves. Adjust the retraction distance and speed to minimize the appearance of unwanted extrusions between different parts of the print, enhancing overall print quality.
9. Print orientation: The orientation of the model on the print bed can affect the strength, surface finish, and support requirements of the print. Experiment with different orientations to find the optimal position that minimizes the need for support structures and maximizes print quality.
Keep in mind that every 3D printer and filament combination may require different settings. It’s essential to experiment, make adjustments, and perform test prints to fine-tune the settings for your specific setup. Invest time in understanding how each setting affects the print outcome, and document the successful settings for future reference.
Including subtitle and wrapped in HTML tags, the section on adjusting the print settings is now complete.
Starting the Print Job
After adjusting the print settings, you are ready to start the print job and bring your 3D model to life. It’s an exciting moment that marks the culmination of your preparation and setup. Here are the steps to successfully start a print job:
1. Position the print bed: Ensure that the print bed is clean and free from any debris or obstructions. Some printers require a surface treatment, such as tape or adhesive, to improve bed adhesion. Follow the manufacturer’s recommendations for preparing the print surface.
2. Load the G-code file: Insert the SD card with the saved G-code file into the 3D printer or transfer the file to the printer using a connected computer. Follow the instructions provided by the printer’s interface to load the file and prepare for printing.
3. Verify settings: Double-check the printer settings, including the print temperature, print speed, layer height, infill density, and support structures. Ensure that all settings align with your desired outcome and that any adjustments made are accurately reflected in the printer’s interface.
4. Double-check filament: Confirm that the printer has properly loaded the filament and that it is ready for extrusion. Ensure that the filament is feeding smoothly into the extruder without any signs of blockages or irregularities.
5. Start the print: Initiate the print job using the controls on the printer’s interface or through the connected computer. The printer will begin the printing process, moving the extruder along the designated paths and depositing layers of molten filament to build the object.
6. Monitor the progress: Keep a close eye on the initial layers of the print to ensure proper adhesion and quality. Monitor the filament extrusion, layer bonding, and overall print progress. Address any issues or abnormalities that you observe, such as poor adhesion, stringing, or misaligned layers, by adjusting relevant settings or performing necessary interventions.
7. Avoid disturbances: Once the print is in progress, try to minimize disturbances or vibrations near the printer. Any movements or disruptions can impact the stability of the print, resulting in inconsistencies or defects. It’s best to keep the printer in a stable environment to ensure the highest quality print.
8. Allow the print job to complete: Depending on the size, complexity, and settings of your print, it may take anywhere from a few minutes to several hours for the print job to finish. Have patience and allow the printer to complete the entire printing process without interruption.
9. Post-print checks: After the print is complete, carefully remove the printed object from the print bed. Inspect the print for any defects, such as uneven layers, stringing, or warping. Use a sharp tool or sandpaper to remove any support structures or imperfections if necessary.
Starting a print job is an exciting moment in the 3D printing process. By following these steps and being attentive to the progress, you can ensure successful and high-quality prints with your 3D printer. Enjoy the satisfaction of seeing your digital design transformed into a physical object right before your eyes.
Including subtitle and wrapped in HTML tags, the section on starting the print job is now complete.
Troubleshooting Common Issues
While 3D printing can be a rewarding and enjoyable experience, it’s not without its challenges. Various issues can arise during the printing process that may affect the quality and success of your prints. Here are some common issues and troubleshooting steps to help you overcome them:
1. Poor bed adhesion: If your print is not sticking to the print bed, it may result in warping or detachment. Ensure that the print bed is clean and level. Consider using a bed adhesive, such as hairspray or a special bed adhesion solution, to improve adhesion. Increasing the print bed temperature or using a raft or brim can also help enhance adhesion.
2. Stringing and oozing: Stringing occurs when thin strands of filament are left between different parts of the print. To minimize stringing, adjust the retraction settings in your slicing software. Increase the retraction distance and speed to retract the filament when moving between different areas of the print, reducing the chances of unwanted strings.
3. Layer adhesion issues: If you notice gaps or weak bonds between layers in your print, consider adjusting the print temperature. Increasing the temperature can help ensure proper fusion between layers. Additionally, adjusting the extrusion multiplier or flow rate can help improve layer adhesion by ensuring the correct amount of filament is extruded.
4. Incomplete infill: If your infill is not fully printed or appears sparse, consider increasing the infill density setting in your slicing software. Additionally, double-check that the nozzle size and extrusion width settings match the slicing software configuration and the physical nozzle on your 3D printer.
5. Pillowing and overhang issues: Pillowing occurs when the top surface of a print appears uneven or puffy. Overhangs, on the other hand, refer to unsupported angles or slopes in a print that may result in sagging or drooping. Increasing the cooling settings can help combat these issues by ensuring proper solidification of each layer. Adding support structures or adjusting their density can also improve the results for prints with challenging overhangs.
6. Misaligned layers: If your print shows misaligned or shifted layers, ensure that the belts and pulleys on your 3D printer are properly tensioned. Loose belts or pulleys can cause shifts in the print. Additionally, check the slicer software settings to ensure that the printer’s build volume and dimensions are correctly configured.
7. Filament feeding issues: If you encounter consistent jams or extrusion problems, check the filament pathway and extruder mechanism for any obstructions. Clear away any potential clogs or foreign objects. Adjusting the temperature and retraction settings may also help address feeding issues. Additionally, make sure the spool of filament is able to freely unwind, without any knots or tangles.
8. Nozzle clogs: Nozzle clogs can occur if debris or partially melted filament blocks the nozzle opening. First, perform a cold pull or atomic pull to remove any debris or stuck filament. If the clog persists, you may need to disassemble and clean the nozzle manually. Following proper nozzle cleaning procedures and using nozzle clearing tools can help resolve clogging issues.
It’s important to remember that troubleshooting may require some iteration and experimentation. Keep a record of the changes you make, and test one adjustment at a time to identify the specific solution for a given problem. Additionally, consult online forums, communities, and manufacturer’s resources for specific troubleshooting tips related to your printer model.
By understanding common issues and following appropriate troubleshooting steps, you can overcome challenges and improve the quality of your 3D prints. Embrace the learning process, and each issue you encounter will serve as an opportunity to enhance your skills and achieve better results.
Including subtitle and wrapped in HTML tags, the section on troubleshooting common issues is now complete.
Post-Processing and Finishing Touches
After your 3D print is complete, there are several post-processing steps you can take to refine the appearance and functionality of your printed object. Post-processing allows you to add finishing touches and achieve the desired final result. Here are some common post-processing techniques:
1. Remove support structures: If your print was created with support structures, carefully remove them using appropriate tools like pliers, tweezers, or wire cutters. Take care not to damage or break the printed object in the process.
2. Surface smoothing: Depending on the material and print quality, the surface of your 3D print may have visible layer lines or roughness. Techniques such as sanding, filing, or using abrasive pads can help smooth the surface and achieve a more polished appearance. Start with coarse grit sandpaper and progress to finer grits for a smoother finish.
3. Fill or repair imperfections: If your print has small gaps or imperfections, you can use techniques like filler putty or epoxy resin to fill in those areas. Apply the filler material, let it dry or cure, and then sand it down to achieve a seamless finish.
4. Painting and finishing: 3D prints can be painted to enhance their appearance or match a desired color scheme. Use acrylic paints, spray paints, or specialized model paints to add color and detail to your print. You can also apply clear coats or varnishes to protect the paint and provide a glossy or matte finish.
5. Assembly and post-print assemblies: Depending on the complexity of your design, you may need to assemble multiple printed parts into a final object. Ensure that the parts fit and align correctly, and use appropriate bonding methods like glue, screws, or snap-fit connections. Take your time during assembly to ensure a secure and sturdy final product.
6. Functional finishes: Besides aesthetics, consider if your print requires any functional finishes. For example, you may want to lubricate moving parts with appropriate lubricants, apply electrical connections or coatings for conductive prints, or add springs or magnets for specialized functionality.
7. Decals and surface embellishments: You can enhance the appearance of your print by adding decals, stickers, or other surface embellishments. These can be applied directly onto the print surface and can range from logos and labels to intricate designs or patterns.
Remember to consider the specific properties of the material you used for printing when choosing post-processing techniques. Some materials may require specific treatment or may not be suitable for certain finishing methods. Always follow the manufacturer’s recommendations and best practices for post-processing to ensure the desired results without compromising the integrity of your print.
Post-processing not only improves the visual appeal of your 3D prints, but it can also enhance their functionality and durability. Experiment with different techniques, materials, and finishes to create one-of-a-kind objects that truly showcase your creativity and craftsmanship.
Including subtitle and wrapped in HTML tags, the section on post-processing and finishing touches is now complete.
Exploring Advanced 3D Printing Techniques
As you gain experience and confidence with 3D printing, you may be ready to dive into more advanced techniques that can take your prints to the next level. These techniques go beyond the basics and offer new possibilities for creativity and functionality. Here are some advanced 3D printing techniques to explore:
1. Multi-material printing: Many 3D printers support the ability to print with multiple materials simultaneously. This technique enables you to create prints with different colors, textures, or properties within a single object. By carefully setting up your slicer software and using printers with dual extruders or mixing capabilities, you can achieve stunning multi-material prints that have unique visual or functional characteristics.
2. Multi-color printing: Similar to multi-material printing, multi-color printing allows you to create objects with different colors without having to manually paint them. Some printers support dual extrusion, which enables you to switch between different filament colors during the printing process. By properly configuring your slicer software and utilizing color changes at specific layers, you can generate prints with intricate patterns, gradients, or color blends.
3. Variable layer heights: Instead of using a constant layer height throughout the entire print, you can experiment with variable layer heights. This technique involves adjusting the layer height in different sections of the print to optimize print quality and speed. For example, you can use finer layer heights for areas that require detailed features and larger layer heights for large, flat surfaces. Slicer software like Simplify3D or PrusaSlicer allows you to define selective layer height strategies to take advantage of this technique.
4. Experimental materials: Go beyond traditional filament materials and explore more exotic or specialized materials. Filaments infused with wood fibers, metal powders, or even conductive properties can add unique characteristics to your prints. These materials offer enhanced aesthetics, improved strength, or functional properties that can be beneficial for specific applications. Be aware that some experimental materials may require adjustments to your printer’s settings or specialized handling, so familiarize yourself with the manufacturer’s guidelines before using them.
5. Advanced support structures: Instead of relying on default support settings, mastering advanced support structures can significantly improve print quality and reduce post-processing efforts. Learning to manually add custom supports in strategic locations can minimize print time and reduce unnecessary material usage. Some slicer software even provides tools to create tree-like supports, breakaway supports, or custom support density settings, offering greater control and flexibility for complex prints.
6. Dual-color or multi-color gradient prints: With the right slicer software and a printer capable of printing in multiple colors or with variable flow rates, you can create prints with beautiful color gradients. By selecting different colors or adjusting the flow rate at specific layers, you can achieve smooth transitions between colors, resulting in eye-catching and vibrant prints. This technique is particularly effective for creating decorative objects, logos, or artistic designs.
Remember, advanced techniques may require additional time and experimentation to master. Be patient and embrace the learning process. It’s essential to be familiar with your 3D printer’s capabilities and settings, as well as the features provided by your chosen slicer software. Consult online communities, forums, and tutorials for guidance and inspiration as you delve into more advanced 3D printing techniques.
Exploring these advanced techniques opens up a whole new world of possibilities and allows you to push the boundaries of what you can achieve with your 3D printer. Have fun experimenting and don’t be afraid to think outside the box to create truly unique and remarkable prints.
Including subtitle and wrapped in HTML tags, the section on exploring advanced 3D printing techniques is now complete.
Conclusion
Congratulations! You have now gained a solid understanding of how to use a 3D printer at home. From choosing the right printer to troubleshooting common issues, you’re ready to embark on your own 3D printing journey. With this powerful technology at your fingertips, there are virtually limitless possibilities for creating unique, customized objects and prototypes.
By selecting the right 3D printer for your needs, setting it up correctly, and understanding the basics of 3D printing, you have laid a strong foundation for successful printing. Remember to find and download 3D models that inspire your creativity, and use slicing software to prepare the models for printing by adjusting settings like layer height, infill density, and support structures if needed.
As you gain more experience, you can experiment with advanced techniques such as multi-material printing, variable layer heights, and using exotic or specialized materials. Post-processing and finishing touches can further enhance the appearance and functionality of your prints, allowing you to create truly remarkable objects.
Throughout your 3D printing journey, it’s important to embrace the learning process and remain patient. Don’t be discouraged by challenges or setbacks, as they provide valuable opportunities for growth and improvement. By learning from your experiences and exploring new techniques, you’ll continue to sharpen your skills and expand your capabilities as a 3D printing enthusiast.
Remember to share your creations with others, join online communities to connect with fellow 3D printing enthusiasts, and exchange ideas and tips. This not only fosters a sense of camaraderie but also facilitates continuous learning and inspiration.
Whether you use 3D printing for practical applications, artistic endeavors, or simply to satisfy your curiosity, the possibilities are truly endless. So go ahead, unleash your creativity, and let your 3D printer unlock a world of innovation and imagination right in the comfort of your own home.
Including subtitle and wrapped in HTML tags, the conclusion section is now complete.