Introduction
Welcome to the world of computers, where we depend on these devices for work, entertainment, and communication. However, as time goes by, you may have noticed that your once lightning-fast computer has started to slow down. Don’t worry, you’re not alone. Many Windows 10 users experience this issue after using their machines for an extended period. But fear not, as there are several steps you can take to speed up your computer and restore its optimal performance.
In this guide, we will explore various methods to boost the speed of your Windows 10 computer. These techniques are designed to address common issues that can cause sluggishness, such as excessive startup programs, fragmented hard drives, outdated drivers, and more. By following these steps, you can optimize your computer’s performance and enjoy a smooth and efficient user experience.
Please note that the effectiveness of each method may vary depending on your specific computer setup. It’s always a good idea to back up your important files and create a system restore point before making any significant changes to your system. With that in mind, let’s dive into the various strategies you can employ to speed up your Windows 10 computer and get it running like new again.
Clearing Disk Space
One common reason for a slow computer is insufficient disk space. When your hard drive is running out of space, it can hinder your system’s performance and slow down various operations. That’s why it’s important to regularly clear unnecessary files and free up disk space. Here are some steps to help you achieve this:
- 1. Delete Temporary Files: Windows creates temporary files during various operations, and over time, they can accumulate and take up valuable disk space. To delete these files, press the Windows key + R on your keyboard to open the Run dialog box. Type “%temp%” (without quotes) and hit Enter. This will take you to the Temporary Files folder. Select all the files and folders inside and delete them.
- 2. Clean Up System Files: Apart from temporary files, there are other system files that can be safely removed to free up disk space. To do this, open the Windows Start menu and search for “Disk Cleanup.” Launch the Disk Cleanup tool and select the drive you want to clean. Check the boxes next to the file types you want to delete, such as Temporary Internet Files and Recycle Bin, and click OK.
- 3. Uninstall Unused Programs: Over time, you might accumulate numerous programs on your computer that you no longer use. These programs take up disk space and may also run background processes that consume system resources. To uninstall unused programs, go to the Control Panel and select “Programs” or “Programs and Features.” Find the programs you want to remove, right-click on them, and choose Uninstall.
- 4. Move Files to External Storage: If you have large files, such as videos or old documents, that you don’t frequently access, consider moving them to an external storage device like a USB drive or an external hard drive. This will not only free up disk space but also improve the overall performance of your computer.
By regularly clearing disk space, you can optimize your system’s performance and ensure that it runs smoothly. Remember to perform these steps periodically to prevent unnecessary clutter from slowing down your computer.
Disabling Startup Programs
When you start your computer, various programs and utilities may automatically launch in the background. While some of these programs are necessary, others can slow down your computer’s startup time and consume valuable system resources. Disabling unnecessary startup programs can significantly improve your computer’s speed. Here’s how you can do it:
- 1. Open Task Manager: Right-click on the taskbar and select “Task Manager” from the context menu. Alternatively, you can press the Ctrl + Shift + Esc keys to directly open the Task Manager.
- 2. Navigate to the Startup Tab: In the Task Manager window, click on the “Startup” tab. Here, you’ll see a list of programs that launch at startup.
- 3. Disable Unwanted Programs: Carefully review the list of programs and identify the ones that you don’t need to start with your computer. Often, programs like chat clients, media players, or document editors are set to launch on startup by default. Right-click on the program and choose “Disable” to prevent it from launching at startup. Don’t disable any programs that you are uncertain about, as they may be essential for your system’s functioning.
- 4. Restart Your Computer: After disabling the desired programs, restart your computer to apply the changes. You should notice improved startup times and a more responsive system.
Disabling unnecessary startup programs can have a significant impact on your computer’s performance. By minimizing the number of programs that launch at startup, you’ll have more system resources available for other tasks, leading to a faster and smoother experience.
Updating Windows
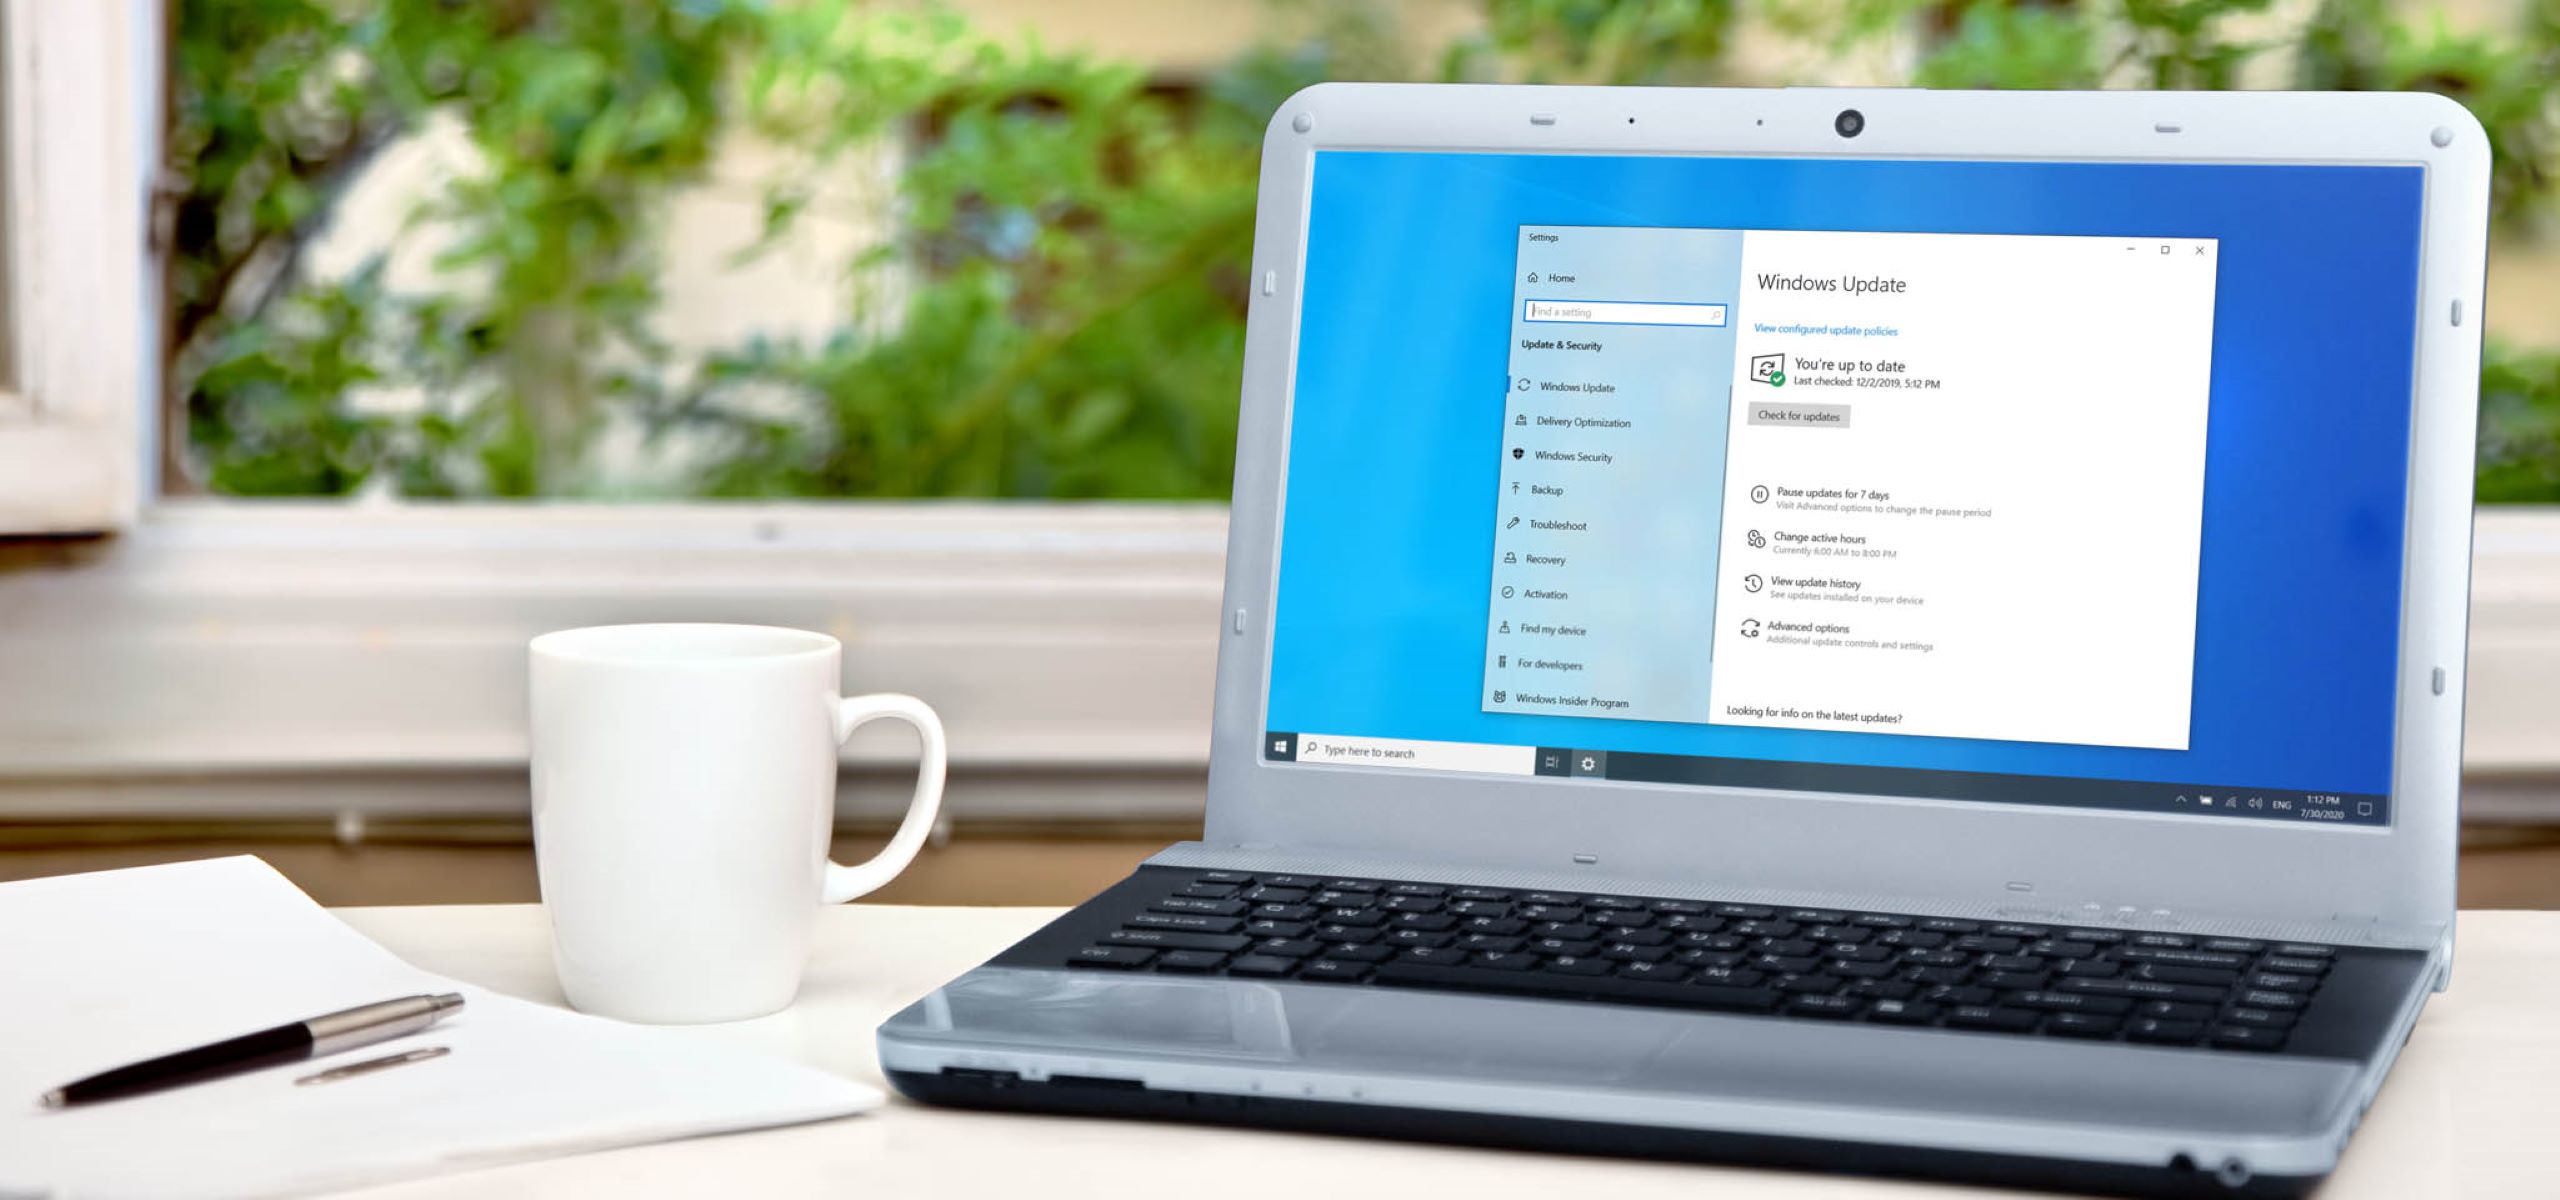
Keeping your Windows operating system up to date is crucial for optimal performance and security. Microsoft regularly releases updates that contain bug fixes, performance improvements, and new features. By updating Windows, you ensure that your computer is running the latest version, which can help resolve any compatibility issues and enhance overall speed. Here’s how you can update Windows:
- 1. Open Windows Settings: Click on the Start menu and select the gear icon to open the Windows Settings.
- 2. Go to Update & Security: In the Windows Settings window, click on “Update & Security.”
- 3. Check for Updates: In the Update & Security section, click on the “Check for updates” button. Windows will now scan for any available updates for your system.
- 4. Install Updates: If any updates are found, click on “Download” or “Install” to begin the installation process. Depending on the size of the update, it may take some time to complete. Ensure that your computer is connected to a stable internet connection during this process.
- 5. Restart Your Computer: After the updates are installed, you’ll be prompted to restart your computer. Save any unsaved work and click on “Restart” to apply the updates.
Regularly updating your Windows system ensures that your computer is equipped with the latest security patches and performance enhancements. It’s a good practice to check for updates at least once a month to stay up to date with Microsoft’s latest offerings.
Defragmenting Hard Drive
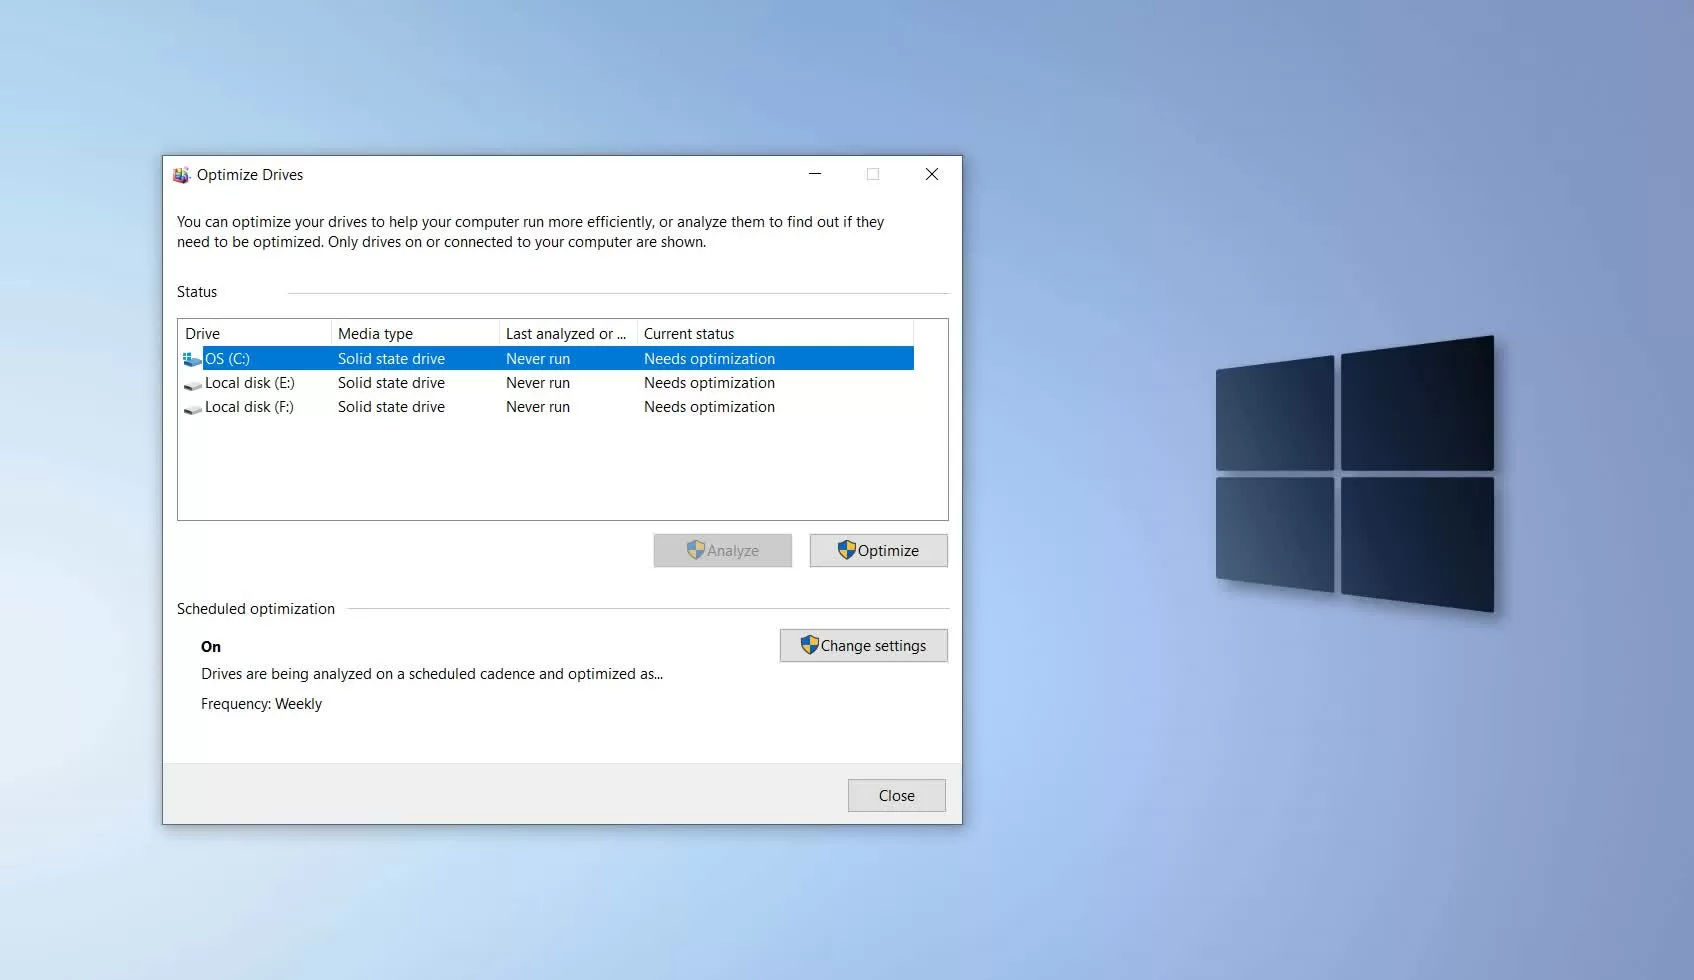
Over time, as you use your computer and save and delete files, your hard drive can become fragmented. Fragmentation occurs when files are scattered across different physical locations on the hard drive, making it slower for the system to access and read them. Defragmenting your hard drive reorganizes the fragmented files, improving overall performance. Here’s how you can defragment your hard drive in Windows 10:
- 1. Open the Disk Defragmenter: Press the Windows key and search for “Defragment and Optimize Drives.” Launch the Disk Defragmenter tool.
- 2. Analyze the Drive: In the Disk Defragmenter, select the drive you want to defragment and click on “Analyze.” This will evaluate the fragmentation level of the selected drive.
- 3. Defragment the Drive: If the analysis indicates that the drive is highly fragmented, click on “Optimize” or “Defragment” to start the defragmentation process. Depending on the size and fragmentation level of the drive, this process may take some time.
- 4. Schedule Regular Defragmentation: To ensure that your hard drive remains optimized, you can schedule regular automatic defragmentation. In the Disk Defragmenter tool, click on “Change settings” and choose the frequency at which you want the defragmentation process to run.
Defragmenting your hard drive can significantly improve your computer’s speed by allowing files to be accessed and read more efficiently. It’s recommended to defragment your hard drive on a regular basis, especially if you frequently add, delete, or modify large files.
Adjusting Power Settings
Windows 10 offers several power plans that determine how your computer uses energy. By adjusting the power settings, you can optimize your system’s performance and reduce unnecessary power consumption, which can result in a faster and more efficient computer. Here’s how you can adjust the power settings in Windows 10:
- 1. Open Power Options: Press the Windows key and search for “Power Options.” Open the Power Options control panel.
- 2. Choose a Power Plan: In the Power Options window, you’ll see a list of available power plans. Select the plan that best fits your needs. The “Balanced” power plan is recommended for most users as it balances performance and energy efficiency.
- 3. Customize Power Plan Settings: If you want more control over the power settings, click on “Change plan settings” next to the selected power plan. Here, you can adjust options such as the display brightness, sleep settings, and advanced power settings.
- 4. Optimize for Performance: If you prioritize performance over energy efficiency, you can select the “High performance” power plan. Keep in mind that this plan may consume more power and reduce battery life on laptops. Use this plan if you need maximum performance for tasks like gaming or video editing.
- 5. Consider Power Saving Features: Windows 10 offers additional power-saving features, such as Sleep mode and Hibernate mode. These features can help conserve power when your computer is idle for a certain period. You can customize the sleep and hibernate settings in the Power Options control panel.
By adjusting the power settings in Windows 10, you can strike a balance between performance and energy efficiency. Experiment with different power plans and settings to find the configuration that works best for your needs.
Removing Unused Applications
Over time, you may accumulate a variety of applications on your Windows 10 computer. However, having too many unused applications can clutter your system and may slow down performance. Removing these unnecessary applications can free up valuable disk space and resources, leading to a faster and more efficient computer. Here’s how you can remove unused applications from your Windows 10 system:
- 1. Open Control Panel: Click on the Start menu and search for “Control Panel.” Open the Control Panel application.
- 2. Navigate to “Programs” or “Programs and Features”: In the Control Panel window, locate the section labeled “Programs” or “Programs and Features,” depending on your view settings.
- 3. View Installed Programs: In the Programs or Programs and Features section, you’ll see a list of all the applications installed on your computer.
- 4. Uninstall Unwanted Applications: Scroll through the list of installed programs and identify the ones that you no longer need or use. Right-click on the program and select “Uninstall” or “Remove.” Follow the on-screen prompts to complete the uninstallation process. Be cautious and ensure that you are removing only the applications you no longer require.
- 5. Use the Settings App: Alternatively, you can uninstall applications directly from the Settings app in Windows 10. Open the Settings app, go to “Apps,” and then select “Apps & features.” From there, you can choose the applications you want to uninstall and click on the “Uninstall” button.
By removing unused applications, you not only free up disk space but also streamline your system’s resources. This can result in improved overall performance and a more organized computer environment. Regularly reviewing and uninstalling applications that you no longer need is a good practice to maintain a fast and efficient Windows 10 computer.
Disabling Visual Effects
Windows 10 comes with various visual effects and animations that enhance the user experience, but these can also put a strain on your system’s resources. Disabling or reducing visual effects can help improve the performance of your computer, especially if it is older or has lower specifications. Here’s how you can disable visual effects in Windows 10:
- 1. Open Performance Options: Press the Windows key and search for “Performance Options.” Open the Performance Options control panel.
- 2. Adjust Visual Effects Settings: In the Performance Options window, go to the “Visual Effects” tab. Here, you can choose between predefined options or customize your own settings.
- 3. Select “Adjust for best performance”: To disable all visual effects quickly, choose the “Adjust for best performance” option. This will remove most visual effects and animations.
- 4. Customize Visual Effects: If you prefer to keep some visual effects enabled, you can choose the “Custom” option and manually select the effects you want to disable. For example, you can disable options like “Animate windows when minimizing and maximizing” or “Fade or slide menus into view.”
- 5. Apply Changes: After adjusting the visual effects settings, click on “Apply” and then “OK” to save the changes. The effects will take effect immediately.
Disabling or reducing visual effects can improve the performance of your Windows 10 computer, especially if you notice slow response times or choppy animations. Experiment with different settings to find the right balance between aesthetics and performance for your system.
Cleaning Registry
The Windows Registry is a database that stores configuration settings, options, and preferences for the operating system and installed programs. Over time, the registry can become cluttered with obsolete or invalid entries, which can potentially slow down your computer. Cleaning the registry can help optimize your system’s performance by removing unnecessary entries. However, it’s important to approach registry cleaning with caution, as making incorrect changes can cause system instability. Here are some methods to clean the registry in Windows 10:
- 1. Using Registry Editor: Press the Windows key and search for “Registry Editor.” Open the Registry Editor application.
- 2. Create a System Restore Point: Before making any changes to the registry, it’s recommended to create a restore point. This allows you to revert back to a stable state in case something goes wrong.
- 3. Manually Cleaning the Registry: In the Registry Editor, navigate to different registry keys and remove the outdated or unnecessary entries. Exercise caution while deleting entries, as deleting the wrong ones can cause system issues. It’s recommended to research the entries beforehand or use a reliable registry cleaning tool.
- 4. Using a Registry Cleaning Tool: There are third-party registry cleaning tools available that can scan your registry for errors and safely remove invalid entries. These tools often have backup and restore features to protect against accidental changes. Popular registry cleaning utilities include CCleaner, Wise Registry Cleaner, and Auslogics Registry Cleaner. Before using such tools, research and choose a reputable one from a trusted source.
Cleaning the registry can potentially improve the performance of your Windows 10 computer by removing unnecessary and invalid entries. However, it’s important to approach registry cleaning with caution and create a backup before making any changes. If you’re unsure or uncomfortable with modifying the registry, it’s best to seek expert advice or use reliable registry cleaning utilities.
Running System Maintenance Tasks
Regular system maintenance tasks can help improve the performance and stability of your Windows 10 computer. These tasks involve cleaning up temporary files, checking disk errors, and optimizing system resources. By performing these maintenance tasks, you can keep your computer running smoothly. Here are some essential system maintenance tasks to consider:
- 1. Disk Cleanup: Windows 10 includes a built-in Disk Cleanup tool that allows you to remove temporary files, system files, and other unnecessary data. To run Disk Cleanup, press the Windows key and search for “Disk Cleanup.” Launch the tool, select the drive you want to clean, and let it calculate the amount of space you can free up. Review the file categories and select the ones you want to remove, then click “OK” to start the cleanup process.
- 2. Check Disk Errors: Hard drives can develop errors over time, which can impact performance and stability. To check for disk errors, open File Explorer, right-click on the drive you want to check, select “Properties,” and go to the “Tools” tab. Click on “Check” under the Error Checking section, and follow the prompts to scan and fix any errors on the drive.
- 3. Disk Defragmenter: As mentioned earlier, defragmenting your hard drive can improve performance by organizing fragmented files. Windows 10 automatically defragments drives on a regular schedule. However, if needed, you can manually run the Disk Defragmenter tool. Search for “Defragment and Optimize Drives” in the Start Menu, select the drive you want to defragment, and click “Optimize.” Allow the tool to complete the process.
- 4. System File Checker: Windows has a built-in System File Checker (SFC) tool that scans system files for corruption and restores them if necessary. To run the SFC tool, open the Command Prompt as an administrator and type “sfc /scannow” without quotes. Press Enter and wait for the scanning process to complete. Follow any instructions provided by the tool.
- 5. Windows Update: Keeping your system up to date is crucial for performance and security. Regularly check for and install Windows updates by going to Windows Settings, selecting “Update & Security,” and clicking on “Check for updates.” Install any available updates to ensure that you have the latest bug fixes and optimizations from Microsoft.
By regularly performing these system maintenance tasks, you can minimize issues and keep your Windows 10 computer running smoothly. It’s recommended to schedule these tasks periodically to maintain optimal system performance and reliability.
Updating Drivers
Drivers are software programs that allow your computer’s hardware to communicate with the operating system. Outdated or incompatible drivers can lead to performance issues and system instability. Updating drivers can improve the functionality and performance of your hardware components, such as graphics cards, sound cards, and network adapters. Here are steps to update drivers in Windows 10:
- 1. Identify Outdated Drivers: Start by identifying the drivers that need updating. You can manually check the manufacturer’s website for driver updates. Alternatively, you can use driver update software, such as Driver Booster or Driver Easy, which can scan your system and identify outdated drivers.
- 2. Windows Device Manager: Windows has a built-in utility called Device Manager that allows you to manage and update hardware drivers. Press the Windows key + X and select “Device Manager.” Expand the categories and locate the hardware with outdated drivers, indicated by a yellow exclamation mark or a red X icon.
- 3. Update Drivers Through Device Manager: Right-click on the hardware with outdated drivers and select “Update driver.” Choose to search automatically for updated driver software. Windows will search online and install the latest drivers for your hardware.
- 4. Manufacturer’s Website: If Windows does not find the latest drivers, visit the manufacturer’s website and locate the driver downloads section. Search for the specific driver for your hardware model and download and install it following the provided instructions.
- 5. Automatic Driver Update Software: Alternatively, you can use third-party driver update software to automate the driver update process. These programs scan your system, identify outdated drivers, and install the latest versions. However, ensure the software is reputable and from a trusted source.
Updating drivers is essential for maintaining the stability and performance of your Windows 10 computer. By keeping your drivers up to date, you can ensure compatibility with the latest software and enjoy optimal performance from your hardware components.
Managing Virtual Memory
Virtual memory, also known as the paging file, is a system feature that your computer uses when it runs out of available physical memory (RAM). Windows 10 automatically manages the virtual memory settings, but it can be beneficial to adjust them manually to optimize performance. Here’s how you can manage virtual memory in Windows 10:
- 1. Open System Properties: Right-click on the Start button and select “System.” In the System window, click on “Advanced system settings” on the left sidebar.
- 2. Go to Performance Settings: In the System Properties window, navigate to the “Advanced” tab and click on “Settings” under the Performance section.
- 3. Adjust Virtual Memory Settings: In the Performance Options window, select the “Advanced” tab. Click on “Change” under the Virtual Memory section.
- 4. Customize Virtual Memory: By default, the “Automatically manage paging file size for all drives” option is checked. If you want to specify custom settings, uncheck this option. Select the drive you want to modify and choose either “System managed size” or “Custom size.” If selecting custom size, you can specify the initial and maximum size of the virtual memory. Microsoft recommends setting the initial size equal to the amount of installed RAM and setting the maximum size to twice the initial size.
- 5. Apply Changes: After adjusting the virtual memory settings, click on “Set” and then “OK” to save the changes. You may be prompted to restart your computer for the changes to take effect.
Properly managing virtual memory can help improve the performance of your Windows 10 computer, especially when running memory-intensive applications. However, it’s essential to be mindful of the available disk space when modifying virtual memory settings and ensure that you allocate sufficient space to avoid potential issues.
Scanning for Malware and Viruses
Malware and viruses can significantly impact the performance and security of your Windows 10 computer. Regularly scanning your system for these malicious threats is crucial for maintaining a healthy and protected system. Here are some methods to scan for malware and viruses in Windows 10:
- 1. Windows Security: Windows 10 includes Windows Security, a built-in security program that provides real-time protection against viruses, malware, and other threats. Open the Start menu, search for “Windows Security,” and open the application. Click on “Virus & threat protection” and select “Quick scan” or “Full scan” to scan your system for potential threats. Follow the prompts to complete the scan.
- 2. Third-Party Antivirus Software: If you prefer using third-party antivirus software, there are several reputable options available, such as Norton, McAfee, and Avast. Install the antivirus program of your choice, and run a scan of your system to detect and remove any malware or viruses. Make sure to keep your antivirus software up to date to ensure the latest protection.
- 3. Malware Removal Tools: In addition to antivirus software, there are specialized malware removal tools designed to detect and remove specific types of malware. Malwarebytes and Spybot Search & Destroy are popular choices. Download and install the tool of your choice, perform a scan, and follow the provided instructions to eliminate any detected threats.
- 4. Safe Browsing and Email Practices: Along with regular scanning for malware, it’s essential to practice safe browsing habits and be cautious with email attachments. Avoid visiting suspicious websites, downloading files from unknown sources, and clicking on suspicious links. Be wary of phishing emails and avoid opening attachments from unfamiliar senders.
Regularly scanning your Windows 10 computer for malware and viruses is crucial for maintaining a secure and high-performing system. By combining powerful security software, safe browsing practices, and periodic scans, you can minimize the risks associated with malicious threats and safeguard your data and privacy.
Conclusion
Maintaining a fast and efficient Windows 10 computer requires regular attention and optimization. By implementing the strategies discussed in this guide, you can significantly improve the performance of your system.
Clearing disk space, disabling startup programs, updating Windows, defragmenting the hard drive, adjusting power settings, removing unused applications, disabling visual effects, cleaning the registry, running system maintenance tasks, updating drivers, managing virtual memory, and scanning for malware and viruses all contribute to a smoother and more responsive computing experience.
Remember to approach each optimization task with caution and create backups or restore points to safeguard your system in case of any unforeseen issues. Additionally, it’s essential to stay vigilant with security measures, such as regularly updating software and scanning for malware, to protect your computer and data.
By consistently implementing these optimization techniques and staying proactive in system maintenance, you can prolong the lifespan of your Windows 10 computer, enhance its performance, and ensure an enjoyable and efficient computing experience.


