Introduction
RAM speed is an important factor that can greatly impact the performance of your computer. Whether you’re a gamer looking for faster load times and smoother gameplay, or a professional running resource-intensive applications, understanding and optimizing your RAM speed can make a noticeable difference.
When it comes to RAM (Random Access Memory), most people associate it with the amount of memory available. However, the speed at which data is transferred between the RAM and the processor plays a crucial role in determining the overall speed and responsiveness of your system. Simply put, faster RAM speed allows for quicker data access, which in turn improves multitasking, application launching, and overall system performance.
In this article, we will explore how to set your RAM speed, ensuring that your computer is running at its full potential. We’ll cover everything from understanding RAM speed to checking your current speed, compatibility considerations, adjusting settings in the BIOS/UEFI, and even overclocking your RAM if you’re feeling adventurous.
Before we dive into the technicalities, it’s important to note that adjusting RAM speed may void your warranty and has the potential to cause system instability if not done properly. Therefore, it’s always recommended to proceed with caution and follow the manufacturer’s guidelines. Now, let’s get started on our journey to optimize your RAM speed.
Understanding RAM Speed
RAM speed refers to the frequency at which data can be read from or written to the RAM module. It is measured in megahertz (MHz) and determines how quickly your computer can access and transfer data stored in the RAM. The higher the RAM speed, the faster your computer can retrieve and process information, resulting in improved overall performance.
RAM speed is often confused with the term “CAS latency,” which refers to the delay between when the RAM receives a command and when it starts processing it. While CAS latency also affects performance, it is not the same as RAM speed. In fact, RAM speed and CAS latency work together to determine the overall memory performance.
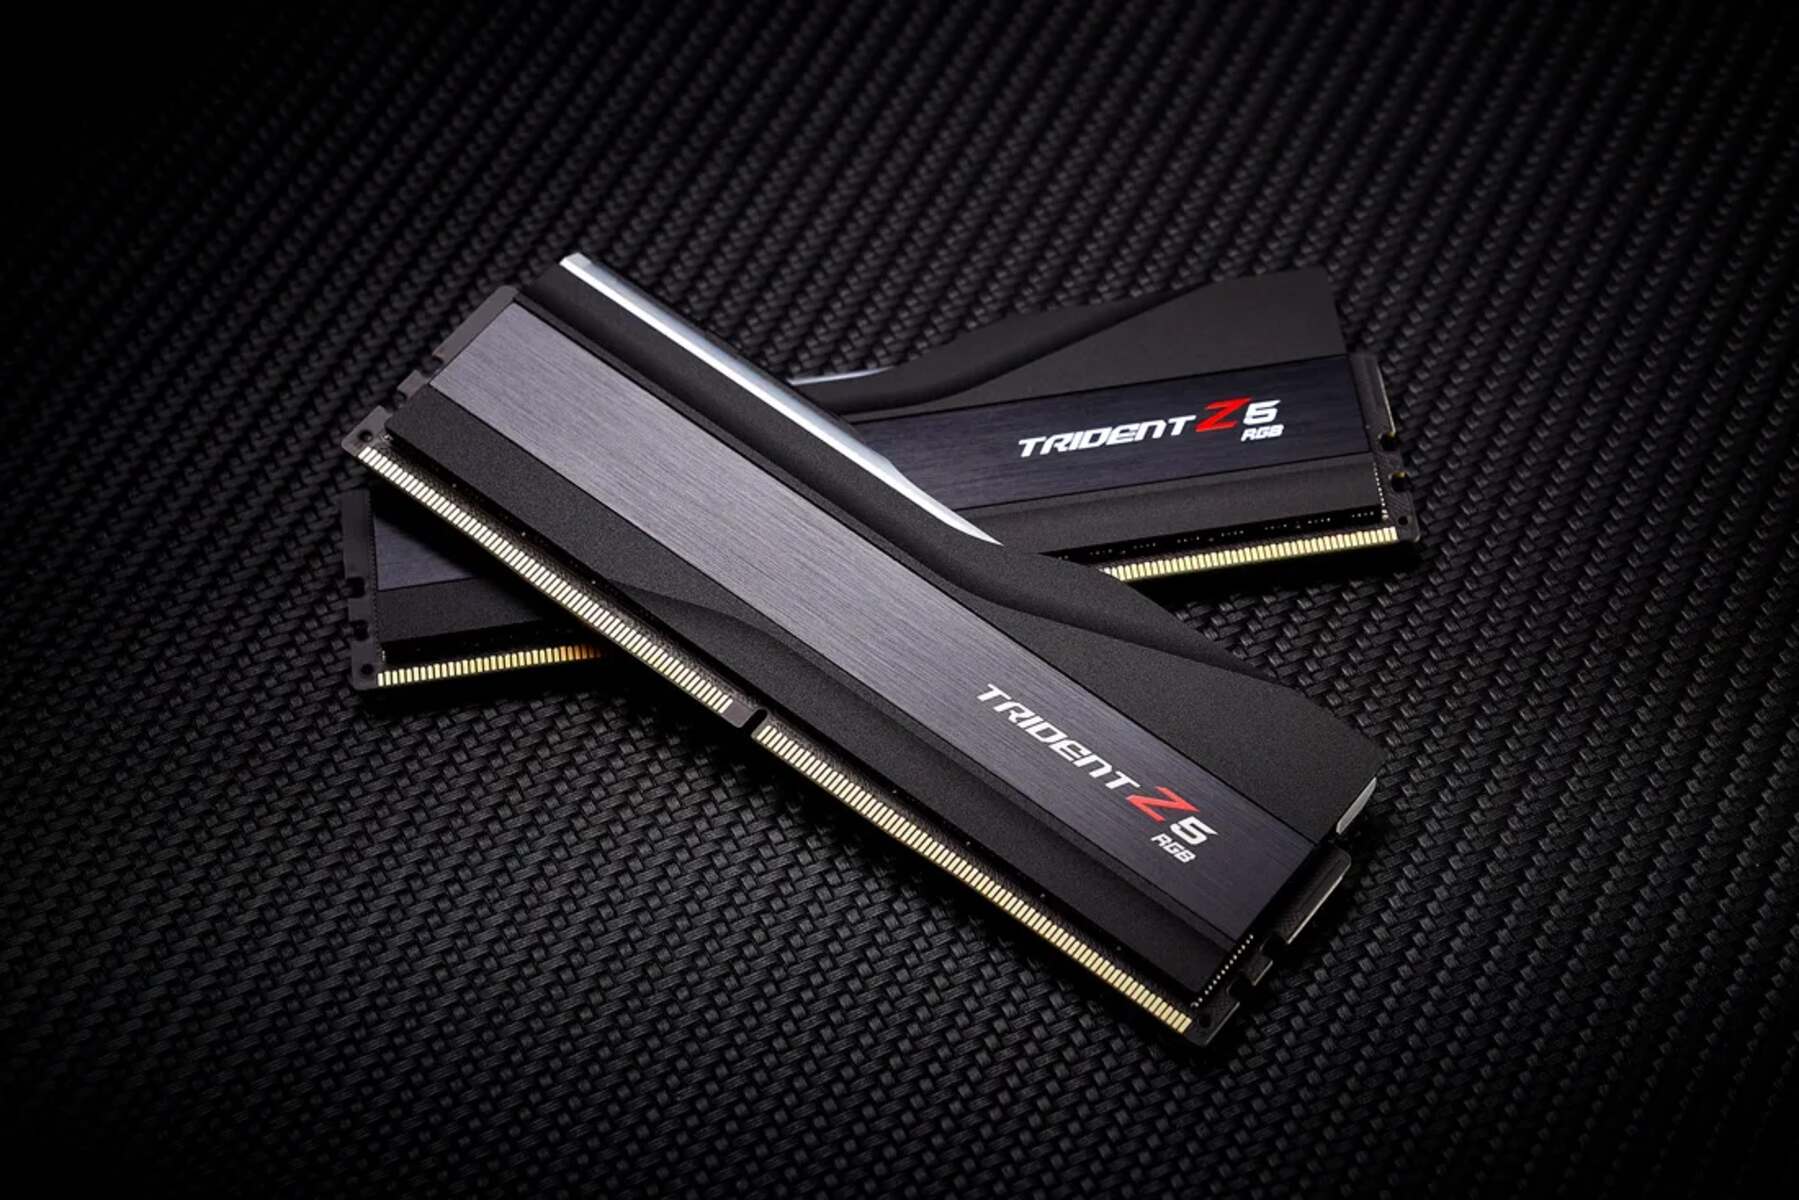
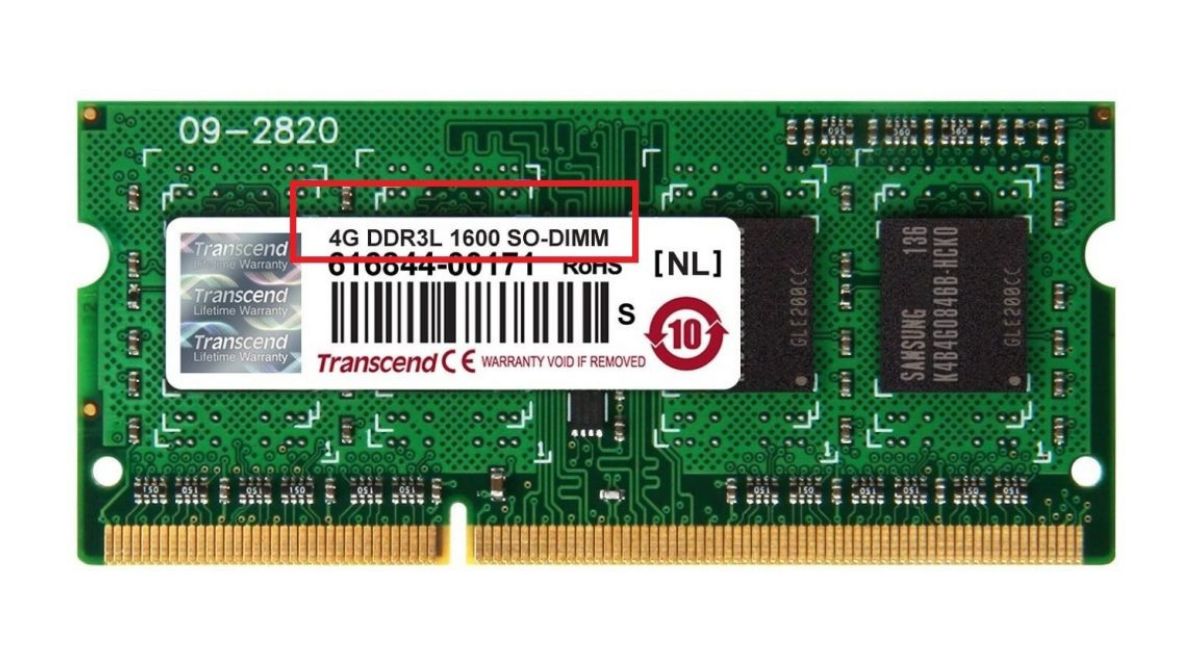
When purchasing RAM modules, you’ll often come across terms like DDR3, DDR4, or DDR5. These terms indicate the generation of RAM technology, with each subsequent generation offering faster data transfer rates. DDR4, for example, provides higher speeds and greater bandwidth compared to DDR3.
It’s important to note that the RAM speed you see on the module’s packaging or specification might not be the actual speed your computer is running at. This is because RAM speed is determined by both the RAM module and the motherboard it’s installed in. If your motherboard supports a lower maximum speed, the RAM module will operate at that speed.
Understanding the RAM speed of your system is crucial when upgrading or optimizing your computer’s performance. By knowing the current RAM speed, you can effectively compare it with the maximum supported speed of your motherboard and determine if an upgrade is beneficial. Additionally, identifying the RAM speed allows you to properly configure the BIOS/UEFI settings to optimize your system’s performance.
Now that we have a better understanding of RAM speed, let’s proceed to the next section and learn how to check the current speed of your RAM.
Check Your Current RAM Speed
Before you can start optimizing or adjusting your RAM speed, it’s important to know the current speed at which your RAM is operating. There are several methods you can use to check the current RAM speed on your computer:
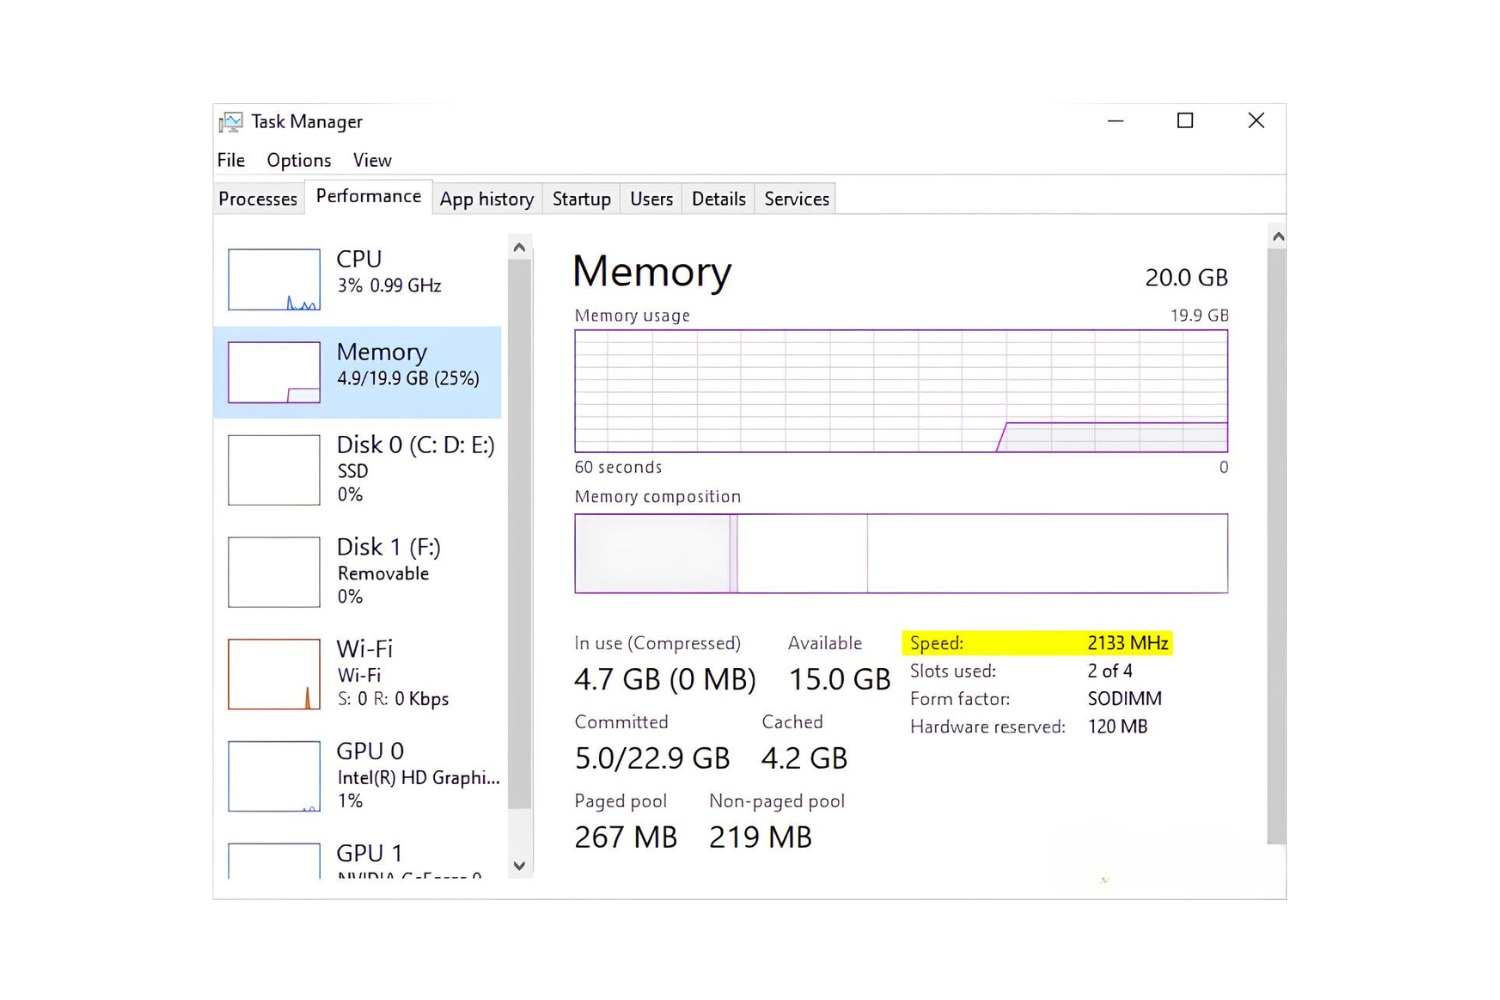
- Task Manager or System Information: On Windows, you can open Task Manager by pressing Ctrl+Shift+Esc and navigate to the “Performance” tab. Under the “Memory” section, you’ll find information about the installed RAM and its speed. Alternatively, you can use System Information by typing “msinfo32” in the Run dialog box (Windows Key + R) and looking for “Installed Physical Memory” under the “System Summary” section.
- About This Mac: If you’re using a Mac, you can click on the Apple menu and select “About This Mac.” In the window that appears, click on the “Memory” tab to see information about the installed RAM, including the speed.
- Third-Party Software: There are various third-party software tools available that can provide detailed information about your computer’s hardware, including the RAM speed. CPU-Z, HWiNFO, and Speccy are popular choices that can display comprehensive information about your RAM, including its speed.
Once you have determined the current speed of your RAM, you can compare it to the maximum supported speed of your motherboard to see if there is room for improvement. If your RAM speed is already at the maximum supported by your motherboard, optimizing it further may not provide significant performance gains.
It’s important to note that RAM speed is not the only factor that affects your computer’s performance. Other components, such as the CPU and storage drives, also play a role. So, if you’re experiencing sluggish performance, it’s advisable to consider other potential bottlenecks before solely focusing on RAM speed.
Now that you know how to check your current RAM speed, let’s move on to the next section to understand the compatibility considerations when setting RAM speed.
Compatibility with RAM Speed
When it comes to adjusting your RAM speed, it’s important to consider the compatibility between your RAM modules, motherboard, and processor. Not all combinations of RAM speed, motherboard, and processor are compatible, and using incompatible configurations can lead to system instability or even failure to boot.
The first step in ensuring compatibility is to refer to the motherboard’s user manual or the manufacturer’s website. They usually provide a list of supported RAM speeds and modules. Pay attention to the maximum supported speed, as well as any specific requirements or recommendations.
Another important factor to consider is the compatibility with your processor. Different generations and models of processors have different memory controllers, and their compatibility with certain RAM speeds can vary. It’s always recommended to check the specifications of your processor to ensure compatibility with the desired RAM speed.
It’s worth noting that even if your motherboard and processor support higher RAM speeds, your existing RAM modules might not. If you’re planning to upgrade your RAM to a higher speed, make sure to purchase compatible modules. Mixing RAM modules with different speeds or using incompatible modules can hinder performance and stability.
Lastly, keep in mind that enabling higher RAM speeds may require tweaking BIOS/UEFI settings. To ensure stability and compatibility, it’s important to update your motherboard’s BIOS/UEFI to the latest version before attempting to adjust RAM speed. This can help address potential compatibility issues and provide better support for higher memory speeds.
By considering the compatibility between your RAM, motherboard, and processor, you can avoid potential compatibility issues and ensure a stable and optimized system. Once you’ve confirmed compatibility, you can proceed with adjusting the RAM speed in the BIOS/UEFI, which we’ll cover in the next section.
Setting RAM Speed in BIOS/UEFI
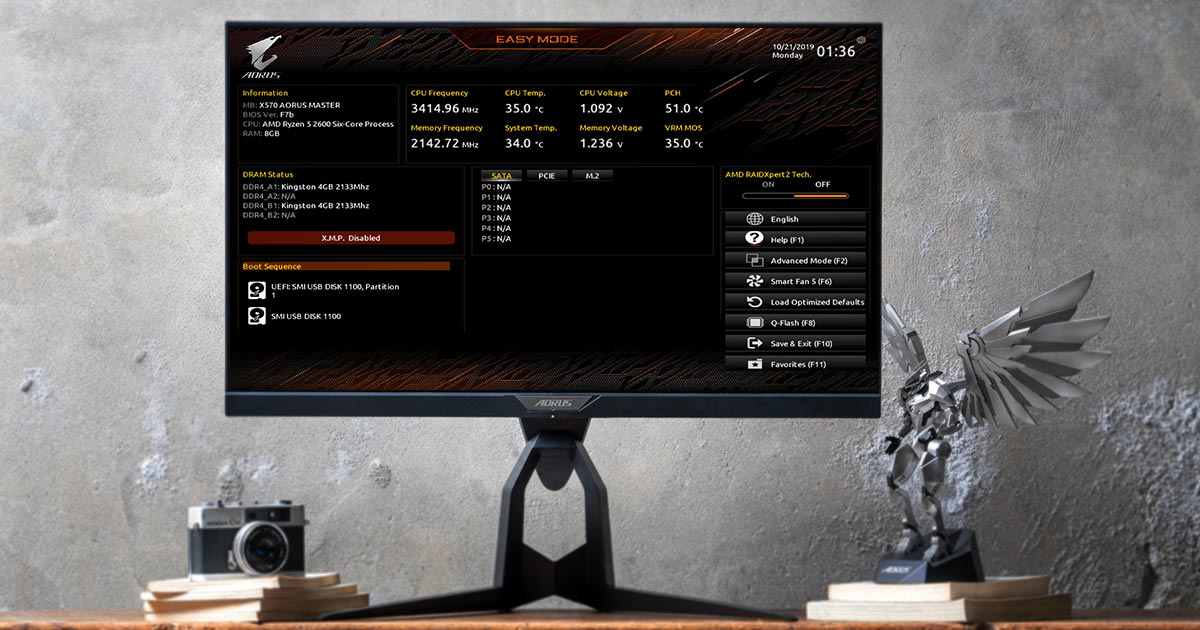
To adjust the RAM speed, you’ll need to access the BIOS (Basic Input Output System) or UEFI (Unified Extensible Firmware Interface) settings of your computer. These settings allow you to control various hardware configurations, including RAM speed. Here’s a step-by-step guide on how to set your RAM speed:
- Restart your computer: Start by restarting your computer and continuously press the designated key (such as Del, F2, or F10) to enter the BIOS/UEFI settings. The correct key may vary depending on your motherboard manufacturer, so refer to the user manual or the manufacturer’s website if you’re unsure.
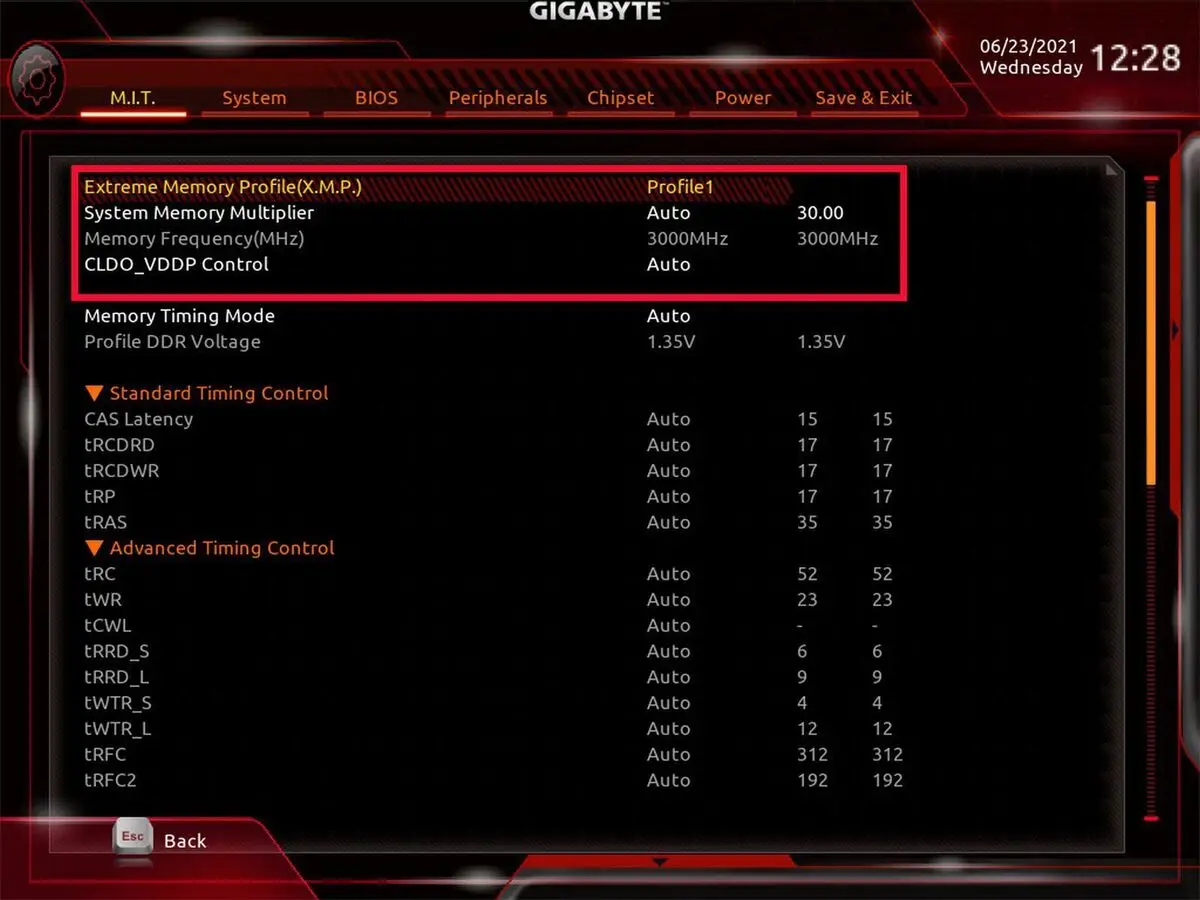
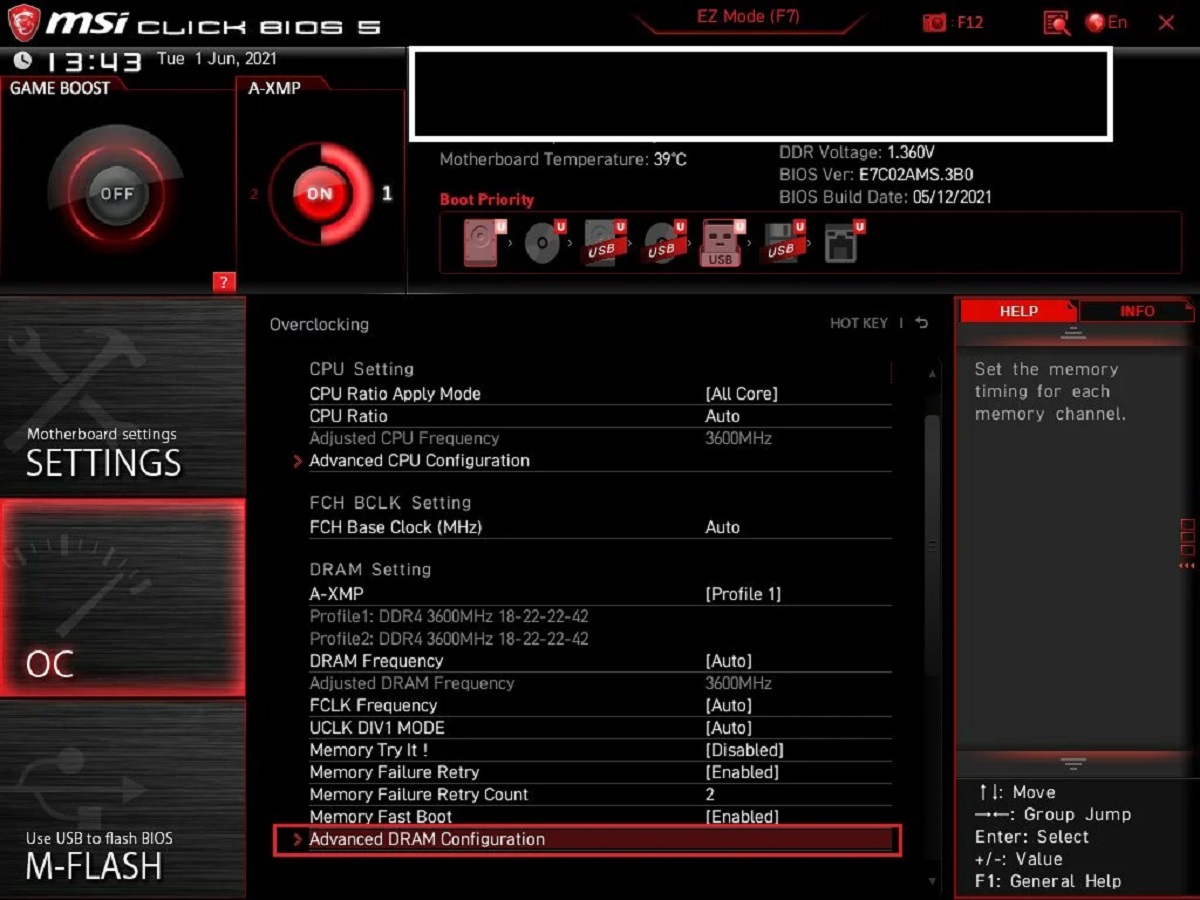
- Navigate to the Memory settings: Once inside the BIOS/UEFI settings, navigate to the “Memory” or “DRAM Configuration” section. The exact location and naming of this section may vary depending on your motherboard’s firmware.
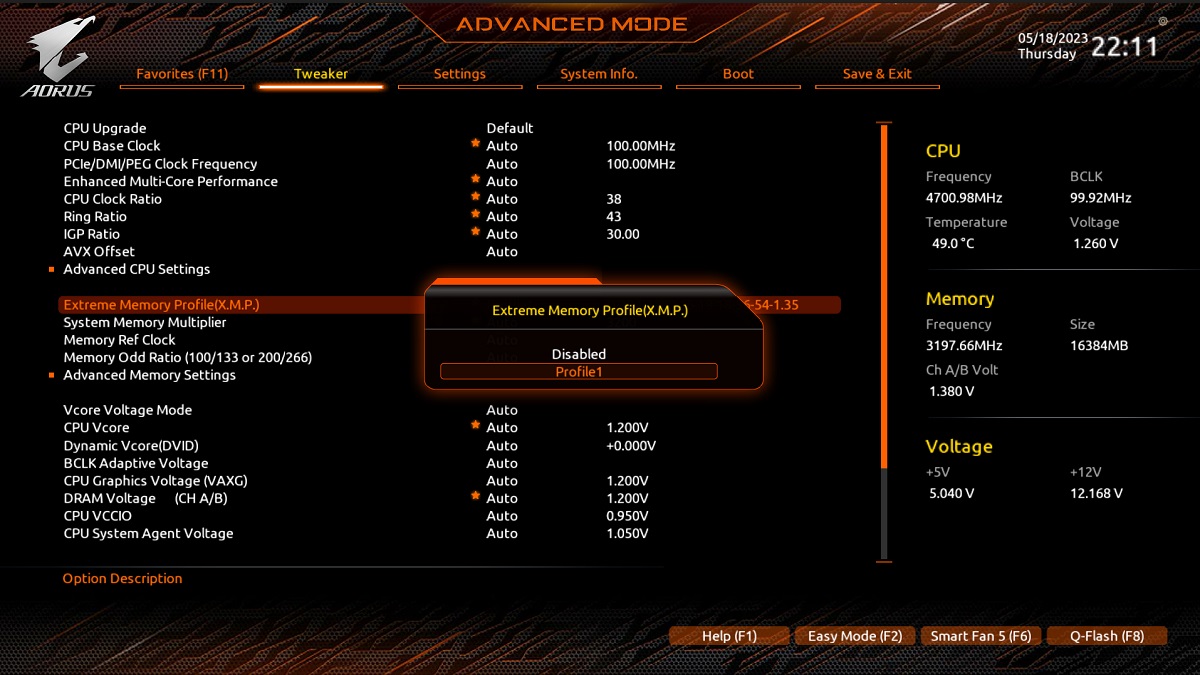
- Locate the RAM speed option: Within the Memory settings, look for an option related to RAM speed, often referred to as “DRAM Frequency” or “Memory Clock.” The available options might be presented in frequency values (e.g., 1600MHz, 2400MHz) or multipliers (e.g., 16x, 24x).
- Select the desired RAM speed: Select the desired RAM speed based on your motherboard’s supported speeds and the specifications of your RAM modules. Keep in mind that it’s generally recommended to select a speed that matches the rated speed of your RAM modules or a supported speed that is slightly higher.
- Save and exit: Once you’ve adjusted the RAM speed, save the changes and exit the BIOS/UEFI settings. The key combination to save and exit may vary, but it’s often done by pressing F10 or selecting the “Save and Exit” option.
After saving and exiting the BIOS/UEFI settings, your computer will restart with the new RAM speed. To confirm that the changes were applied successfully, you can use the methods mentioned earlier to check the current RAM speed.
Remember, adjusting the RAM speed involves modifying critical settings, and incorrect configurations can lead to system instability or failure to boot. If you’re unsure or uncomfortable with making these changes yourself, it’s advisable to seek assistance from a knowledgeable individual or consult the motherboard manufacturer’s support.
Now that you’ve adjusted the RAM speed in the BIOS/UEFI, let’s explore the option of overclocking your RAM to squeeze out even more performance, in the next section.
Overclocking Your RAM
If you’re looking to push your RAM performance further, you may consider overclocking. Overclocking involves running your RAM modules at speeds higher than their rated specifications, potentially providing a boost in performance. However, it’s important to note that overclocking your RAM carries certain risks and should be approached with caution.
Before proceeding with overclocking, ensure that your motherboard and RAM modules are capable of supporting higher speeds. Refer to the user manual or the manufacturer’s website for information on overclocking capabilities and recommendations.
To overclock your RAM, follow these general steps:
- Enter the BIOS/UEFI: Restart your computer and access the BIOS/UEFI settings using the designated key.
- Navigate to memory settings: Locate the memory settings section as explained in the previous section.
- Adjust memory multiplier or frequency: Look for options that allow you to increase the RAM speed. This can typically be done by adjusting the memory multiplier or frequency. Increase it gradually in small increments (e.g., 200MHz or 0.1x) and save the changes.
- Test stability: After overclocking your RAM, it’s crucial to test for stability. Use stress-testing software like Memtest86 or Prime95 to ensure your system can handle the increased RAM speed without crashes, errors, or instability. Run the tests for an extended period to thoroughly evaluate the stability.
- Monitor temperatures: Overclocking can generate additional heat, so keep an eye on the temperatures of your CPU and RAM modules using monitoring software. If temperatures climb too high, consider improving the cooling solution in your computer.
Keep in mind that not all RAM modules will overclock to the same extent, and the results may vary. Some modules may reach higher speeds with stability, while others may have limitations. It’s also worth noting that overclocking your RAM may void the warranty on your modules.
If you encounter stability issues or crashes during the testing phase, you may need to lower the RAM speed or increase the voltage slightly. However, extreme adjustments can lead to long-term damage, so proceed cautiously and be aware of the risks involved.
Overall, overclocking your RAM is an advanced technique that requires careful consideration and experimentation. While it can provide performance gains, it’s essential to strike a balance between performance and system stability, ensuring that your computer remains reliable and safe.
With an understanding of overclocking, let’s move on to the next section where we discuss testing stability and compatibility to ensure a smooth experience with your adjusted RAM speed.
Testing Stability and Compatibility
Once you’ve adjusted your RAM speed or overclocked it, it’s crucial to test the stability and compatibility of your system. Testing allows you to ensure that your system can handle the changes without encountering crashes, errors, or other issues. Here are some essential steps to test the stability and compatibility of your adjusted RAM speed:
- Run Stress Tests: Use stress-testing software such as Memtest86, Prime95, or AIDA64 to put your system under heavy load and monitor its performance. These tests help identify any potential instability or errors that may arise from the adjusted RAM speed.
- Observe System Behavior: During normal usage, pay close attention to your system’s behavior. Look out for any sudden freezes, application crashes, or system reboots. These may indicate compatibility issues or instability caused by the adjusted RAM speed.
- Monitor Temperatures: Increased RAM speed or overclocking can generate additional heat. Keep an eye on the temperatures of your CPU, GPU, and RAM modules using monitoring software. If temperatures exceed safe limits, consider improving your system’s cooling solution.
- Check for Compatibility Issues: Some applications or games may be more sensitive to changes in RAM speed. If you encounter crashing or compatibility issues with specific software, try reverting to the default RAM speed or adjusting the settings to find a stable configuration. Updating drivers and software to their latest versions can also help resolve compatibility issues.
- Monitor System Stability Over Time: It’s important to monitor the stability of your system over an extended period, especially if you’ve made significant changes to the RAM speed. Test your system’s stability for an extended duration to ensure that it remains reliable even during prolonged usage or heavy workloads.
Testing the stability and compatibility of your adjusted RAM speed allows you to identify and address any issues proactively. If you encounter instability or compatibility problems, consider reverting to the default RAM speed or adjusting other system settings to find a stable configuration.
Remember, stability and compatibility are paramount when it comes to your computer’s performance. It’s always better to have a slightly lower RAM speed that is stable and compatible than to push for higher speeds at the expense of system reliability.
Now that you’ve tested the stability and compatibility of your adjusted RAM speed, you can confidently enjoy the enhanced performance of your optimized memory configuration.
Conclusion
Optimizing your RAM speed can have a significant impact on your computer’s performance and overall user experience. By understanding RAM speed, checking your current speed, ensuring compatibility, adjusting settings in the BIOS/UEFI, and even considering overclocking, you can unlock the full potential of your system.
RAM speed plays a crucial role in how quickly data can be accessed and processed, affecting multitasking capabilities, application launching, and overall system responsiveness. By checking your current RAM speed, you can compare it to the maximum supported speed of your motherboard and determine if an upgrade or adjustment is necessary.
When adjusting RAM speed, it’s essential to consider compatibility between your RAM modules, motherboard, and processor. Consult the user manual or manufacturer’s website to ensure you’re within the supported specifications and recommendations.
Accessing the BIOS/UEFI settings allows you to adjust the RAM speed by selecting a suitable frequency or multiplier. Remember to save your changes and test for stability using stress-testing software and monitoring system behavior and temperatures.
For more advanced users, overclocking can provide additional performance gains. However, this should be done with caution, being mindful of potential risks, such as stability issues and voiding the warranty on your RAM modules.
Ultimately, testing the stability and compatibility of your adjusted RAM speed is crucial to ensure a reliable and optimized system. Use stress tests, monitor system behavior and temperatures, and watch for any compatibility issues to address them promptly.
By following these steps, you can unleash the true power of your RAM and enjoy a faster, more responsive computing experience. Remember to always proceed with caution, follow manufacturer guidelines, and seek assistance if you’re unsure about making any adjustments.
Now that you have the knowledge to set your RAM speed and optimize your system, go ahead and take control of your computer’s performance!