Introduction
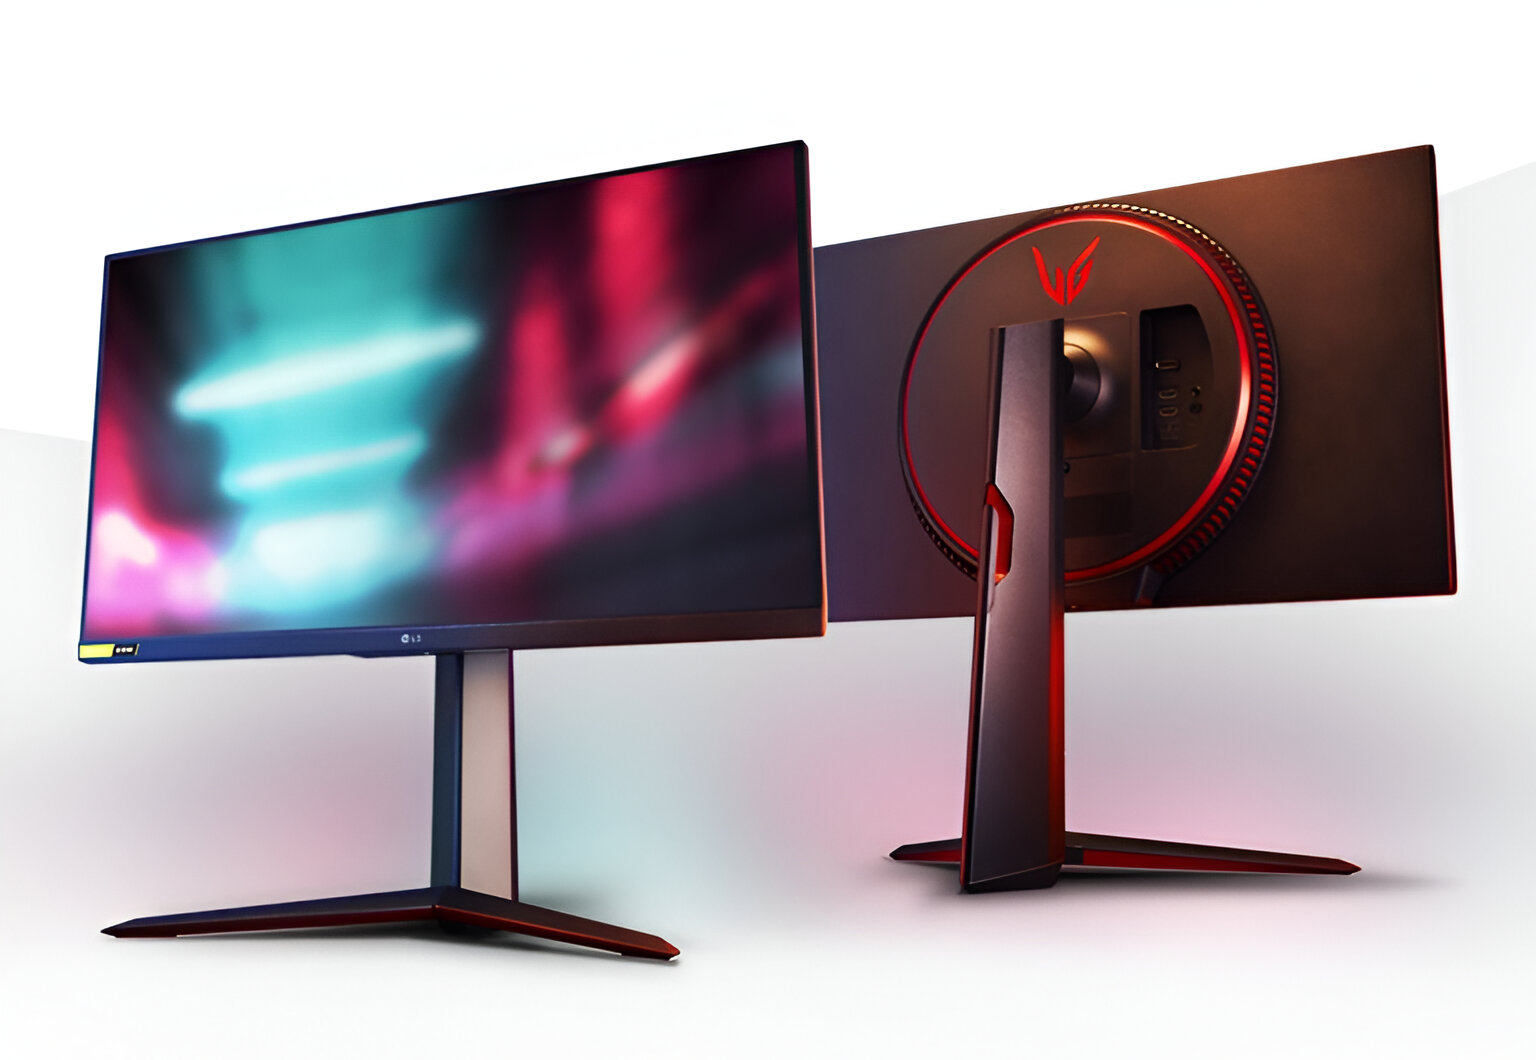
Welcome to our guide on how to set up the LG Ultragear Gaming Monitor. If you’re a gaming enthusiast or a professional gamer, investing in a high-quality gaming monitor can greatly enhance your gaming experience. The LG Ultragear Gaming Monitor is known for its impressive features, including a high refresh rate, low response time, and excellent color accuracy.
In this article, we will walk you through the step-by-step process of unboxing and setting up your LG Ultragear Gaming Monitor. Whether you’re a beginner or an experienced user, this guide will help you seamlessly integrate the monitor into your gaming setup.
Before we dive into the setup process, it’s worth mentioning that the specific steps may vary slightly depending on the model and version of the LG Ultragear Gaming Monitor you have. However, the basic principles and concepts remain the same, so you can still follow along even if you have a different version of the monitor.
Ready to get started? Let’s begin by unboxing the LG Ultragear Gaming Monitor and exploring the components that come with it.
Unboxing the LG Ultragear Gaming Monitor
The first step in setting up your LG Ultragear Gaming Monitor is to unbox it. Carefully remove the monitor from its packaging, ensuring that you don’t damage any of the components in the process.
Inside the box, you will find the LG Ultragear Gaming Monitor itself, along with several accessories. These may include a stand, power cable, DisplayPort or HDMI cable, user manual, and any additional cables or adapters that may be required.
Before proceeding, take a moment to inspect the monitor for any signs of damage. If you notice any issues, such as cracks, scratches, or dents, it’s important to contact the seller or LG customer support for further assistance.
Once you have confirmed that the monitor is in good condition, place it on a clean and stable surface. It’s a good idea to have the monitor facing downward to avoid any accidental scratches while unboxing and attaching the stand.
Now, let’s move on to the next step of setting up your LG Ultragear Gaming Monitor – attaching the stand.
Attaching the Stand
Attaching the stand is a crucial step in setting up your LG Ultragear Gaming Monitor. The stand provides stability and allows you to adjust the monitor’s height and tilt according to your preference.
Begin by locating the stand that was included in the box. It is usually wrapped in protective packaging or placed separately. Carefully remove any packaging or protective covers from the stand.
Next, take your LG Ultragear Gaming Monitor and locate the attachment area on the back. The attachment area is typically marked with screw holes or slots to secure the stand.
Align the stand with the attachment area on the back of the monitor and carefully insert it. Depending on the model, you may need to align the stand with the screws and use a screwdriver to secure it firmly.
Once you have attached the stand, ensure that it is securely in place by gently shaking the monitor. If there is any wobbling or instability, double-check that the stand is properly attached and tightened.
Now that the stand is securely attached, you can adjust the height and tilt of the monitor to find the optimal viewing position. Most LG Ultragear Gaming Monitors offer height and tilt adjustments, allowing you to customize the monitor’s position for maximum comfort during long gaming sessions.
Simply locate the height adjustment mechanism on the stand and adjust it accordingly. For tilt adjustment, gently tilt the monitor forward or backward to achieve the desired angle.
With the stand securely attached and the monitor adjusted to your preference, you’re ready to move on to the next step of setting up your LG Ultragear Gaming Monitor – connecting the power cable.
Adjusting the Monitor Height and Tilt
Once you have attached the stand to your LG Ultragear Gaming Monitor, the next step is to adjust the monitor’s height and tilt to achieve the optimal viewing position. Proper monitor positioning is essential for reducing eye strain and ensuring a comfortable gaming experience.
To adjust the height of the monitor, locate the height adjustment mechanism on the stand. This mechanism typically consists of a lever, button, or knob that allows you to raise or lower the monitor. Gently press or pull the lever/button/knob and adjust the height of the monitor to your preferred level. Make sure the monitor is at eye level or slightly below for optimal viewing comfort.
Similarly, to adjust the tilt of the monitor, locate the tilt adjustment mechanism. This mechanism usually allows you to tilt the monitor forward or backward to find the ideal angle. Gently push or pull the monitor to tilt it to your desired position. Adjust the tilt until the screen is parallel to your line of sight.
As you adjust the height and tilt, pay attention to any resistance or click sounds that indicate the monitor is securely locked in position. Ensure that the adjustments are stable and the monitor doesn’t wobble or move unintentionally.
Take some time to test different height and tilt settings and see which position feels the most comfortable for you. Everyone’s preferences may vary, so find the optimal position that allows you to view the screen without straining your neck or eyes.
Remember, finding the right height and tilt adjustment is crucial for maintaining good posture and reducing discomfort during long gaming sessions. It’s worth investing time in getting it just right to ensure a pleasurable gaming experience.
After adjusting the monitor’s height and tilt, you’re now ready to proceed to the next step: connecting the power cable.
Connecting the Power Cable
Now that you have adjusted the height and tilt of your LG Ultragear Gaming Monitor, it’s time to connect the power cable. The power cable is essential for supplying electricity to the monitor and enabling it to function.
Start by locating the power input port on the back of the monitor. It is usually labeled as “Power” or marked with a power icon. Take the power cable that came with your monitor and plug one end into the power input port.
Next, find a nearby power outlet or surge protector and plug the other end of the power cable into it. Ensure that the power outlet is easily accessible and not blocked by any objects to allow for a seamless power connection.
Once you have connected the power cable, check to see if the power indicator light on the monitor turns on. If the monitor has an integrated power button, press it to turn on the display. You should hear a soft humming sound or see the LG logo appearing on the screen, indicating that the monitor is receiving power.
It’s essential to confirm that there are no loose connections or frayed cables, as these can potentially cause disruptions in power supply or electrical hazards. Ensure that the power cable is securely plugged into both the monitor and the power source.
If there are any issues with the power supply or the monitor does not turn on, double-check the connections and try a different power outlet. If the problem persists, consult the user manual or contact the LG customer support for further assistance.
With the power cable successfully connected and the monitor powered on, you’re now ready to move on to the next step in setting up your LG Ultragear Gaming Monitor – connecting the DisplayPort or HDMI cable.
Connecting the DisplayPort/HDMI cable
Now that you have connected the power cable to your LG Ultragear Gaming Monitor, the next step is to connect the DisplayPort or HDMI cable. This cable will enable you to transmit video and audio signals from your computer or gaming console to the monitor.
First, locate the DisplayPort or HDMI port on the back of your LG Ultragear Gaming Monitor. These ports are typically labeled as “DP” or “HDMI” and may be color-coded for easy identification.
If you are using a DisplayPort cable, align the cable’s connector with the port on the monitor, ensuring that the shapes and pins match. Gently push the cable into the port until it clicks into place.
Alternatively, if you are using an HDMI cable, align the HDMI connector with the HDMI port on the monitor and push it in firmly but gently until it is securely connected.
Next, locate the corresponding DisplayPort or HDMI port on your computer or gaming console. Insert the other end of the cable into the port, making sure it is properly aligned and securely connected.
If you’re using multiple monitors or additional devices, you may need to repeat these steps to connect each display using separate cables.
Once the DisplayPort or HDMI cable is connected, make sure to tighten any screws if applicable, as this will provide extra stability and prevent accidental disconnections.
After the cable is connected, power on your computer or gaming console. The LG Ultragear Gaming Monitor should detect the video and audio signals automatically and display the content from your device.
If the monitor does not display anything or shows an “No Signal” message, double-check the cable connections and ensure that the correct input source is selected on your monitor. You can usually switch between different input sources using the monitor’s on-screen display (OSD) menu or physical buttons.
Once the DisplayPort or HDMI cable is successfully connected and the monitor is displaying the content from your device, you can proceed to the next step – setting up the display settings.
Setting up the Display Settings
After connecting the DisplayPort or HDMI cable, it’s time to set up the display settings on your LG Ultragear Gaming Monitor. Fine-tuning these settings will help you achieve the best visual experience while gaming.
To access the display settings, use the buttons or joystick located on the monitor’s bezel. These buttons allow you to navigate through the on-screen display (OSD) menu and make adjustments to various display parameters.
Start by pressing the menu button to open the OSD menu. Next, use the navigation buttons to move through the options and find the display settings section. The exact location of the display settings may vary depending on the model of your LG Ultragear Gaming Monitor.
Once you have accessed the display settings, you will typically find options to adjust parameters such as brightness, contrast, sharpness, color temperature, and gamma. These settings allow you to optimize the display according to your preferences and the lighting conditions in your gaming environment.
Begin by adjusting the brightness and contrast settings. Ensure that the brightness level is comfortable for your eyes while still providing clear visibility of the on-screen content. Fine-tune the contrast setting to enhance the differentiation between dark and light areas of the image.
Next, you can adjust the sharpness setting to improve the overall clarity of the displayed content. Be cautious not to over-sharpen the image, as this can introduce artifacts and unnatural visuals.
If your monitor offers color settings, you can calibrate the color temperature and gamma to achieve accurate and vibrant colors. Adjust the color temperature to match your preference – warmer for a more yellowish tone or cooler for a bluish tone. Additionally, adjust the gamma setting to fine-tune the brightness and contrast of different shades in the image.
Remember to make gradual adjustments and evaluate the visuals as you go along. This will help you find the optimal settings that align with your personal preferences and gaming requirements.
Once you have adjusted the display settings to your liking, use the exit or menu button to save the changes and exit the OSD menu.
With the display settings properly configured, you can now enjoy an enhanced visual experience while gaming on your LG Ultragear Gaming Monitor. However, there are more features specific to gaming that you can explore and customize, which we will cover in the next section.
Accessing the OSD Menu
The OSD (On-Screen Display) menu on your LG Ultragear Gaming Monitor allows you to access and adjust various settings to customize your gaming experience. This menu provides you with control over features such as brightness, contrast, color settings, gaming presets, and more.
To access the OSD menu, locate the menu button on your monitor’s bezel. Press this button to open the menu. The exact location and labeling of the menu button may vary depending on the model of your LG Ultragear Gaming Monitor.
Once the OSD menu is open, you can navigate through the different options using the navigation buttons or joystick that are usually located near the menu button.
Use the up and down buttons to scroll through the menu options and the left and right buttons to adjust the settings within each category.
The OSD menu typically includes various categories such as Picture, Audio, Game, Input, etc. Within these categories, you will find a range of settings that you can fine-tune to suit your preferences.
For example, in the Picture category, you can adjust the brightness, contrast, sharpness, color temperature, gamma, and other visual settings. This is where you can make changes to achieve the desired display aesthetics and optimize it for gaming.
In the Audio category, you can adjust the volume, audio mode, and other sound-related settings if your monitor has built-in speakers or audio output options.
The Game category is particularly important for gaming enthusiasts. Here, you can find features like gaming presets, response time settings, FreeSync or G-Sync compatibility, crosshair customization, and other gaming-specific options. Explore these settings to improve your gaming experience and tailor it to your specific preferences.
When you encounter a specific setting that you want to modify, select it using the navigation buttons or joystick, and use the left and right buttons to make adjustments. Some settings may also have sub-menus or additional options that you can access by pressing the menu button again.
Once you have made the desired changes, use the exit or menu button to save the settings and exit the OSD menu.
Remember to experiment with different settings and presets to find the configuration that suits your gaming style and preferences the best. The OSD menu is a powerful tool that allows you to customize and optimize your LG Ultragear Gaming Monitor according to your individual needs.
Now that you are familiar with accessing the OSD menu, let’s move on to the next section, where we will delve into adjusting the picture settings to enhance your gaming visuals.
Adjusting Picture Settings
When it comes to gaming, adjusting the picture settings on your LG Ultragear Gaming Monitor is crucial for optimizing the visuals and creating an immersive gaming experience. By fine-tuning the picture settings, you can enhance the contrast, color accuracy, and overall display quality to make your games look their best.
Access the OSD menu on your monitor by pressing the menu button, then navigate to the Picture category using the navigation buttons or joystick.
Within the Picture category, you will find a range of settings that you can adjust. Let’s explore some of the key settings:
Brightness: Adjust the brightness level to achieve optimal visibility. Make sure it is not too bright or too dim, as it can affect the image quality and strain your eyes.
Contrast: Fine-tune the contrast to enhance the differentiation between dark and light areas of the screen. Finding the right balance will provide better detail in dark scenes, making them more vibrant and immersive.
Color Temperature: Color temperature determines the warmth or coolness of the display. Experiment with different presets or manually adjust the color temperature to match your preference. Warmer tones produce a more yellowish hue, while cooler tones tend to have a bluish tint.
Gamma: Adjusting the gamma setting allows you to fine-tune the brightness and contrast of different shades in the image. Increasing the gamma value can improve visibility in darker areas, while decreasing it can enhance details in brighter areas.
Sharpness: Sharpening the image can enhance clarity and make details in the game visually crisp. However, be mindful not to over-sharpen, as it can introduce artifacts and degrade the overall image quality.
It’s worth noting that the ideal picture settings can vary depending on personal preference, lighting conditions, and the specific game you’re playing. Experiment with different adjustments and find the balance that suits your gaming style best.
Beyond these basic settings, your LG Ultragear Gaming Monitor may offer additional features such as HDR (High Dynamic Range) support, Black Stabilizer, or Game Mode presets. Explore these options to further enhance the visuals and tailor them to different genres or specific gaming scenarios.
Once you have made the desired adjustments, save the settings and exit the OSD menu to apply the changes to your gaming monitor.
Remember, adjusting the picture settings is a continuous process. As you encounter different games or lighting conditions, you may need to re-adjust the settings to ensure the best possible visual experience.
Now that you have optimized the picture settings of your LG Ultragear Gaming Monitor, let’s move on to the next section, where we will explore various gaming features that you can configure.
Configuring Gaming Features
LG Ultragear Gaming Monitors come equipped with various gaming features that can enhance your gameplay and provide a competitive edge. These features are designed to optimize performance, reduce input lag, and enhance visual clarity. Let’s explore some of the gaming features you can configure on your monitor.
Response Time: One important gaming feature is the response time setting. Adjusting the response time allows you to reduce motion blur and ghosting in fast-paced games. Choose a lower response time for smoother visuals, but keep in mind that lower response times may increase the risk of visual artifacts.
Refresh Rate: The refresh rate determines how many times the screen refreshes per second. Higher refresh rates, such as 144Hz or 240Hz, result in smoother gameplay and reduced motion blur. Make sure to set the monitor’s refresh rate to match the capabilities of your graphics card and ensure the best gaming experience.
FreeSync or G-Sync: If your LG Ultragear Gaming Monitor supports FreeSync or G-Sync technology, enable this feature if you have a compatible graphics card. FreeSync and G-Sync synchronize the monitor’s refresh rate with the GPU’s output, reducing screen tearing and providing a smoother gaming experience.
Black Stabilizer: The Black Stabilizer feature enhances visibility in dark areas of the game by adjusting the gamma in those regions. This can give you an advantage by allowing you to spot enemies or objects that would otherwise be difficult to see in the shadows.
Crosshair Customization: Some LG Ultragear Gaming Monitors also offer crosshair customization options. This feature allows you to superimpose a crosshair on the screen, which can be especially useful in games that don’t have a built-in crosshair or for improving accuracy in shooting games.
Game Mode presets: Game Mode presets are preconfigured settings tailored for specific gaming genres or scenarios. These presets optimize the display settings to enhance the gaming experience. Experiment with different presets or customize them to suit your preferences and the specific game you’re playing.
Access the OSD menu on your monitor to configure these gaming features. Navigate to the Game category (or a similar named category) and explore the available options. Adjust the settings based on personal preference and the requirements of the game you’re playing.
Remember to consult the user manual or the manufacturer’s website to learn more about each gaming feature and how to make the most of them.
By configuring these gaming features on your LG Ultragear Gaming Monitor, you can optimize your gameplay experience and gain a competitive edge, ensuring you enjoy every gaming session to the fullest.
Now that you have configured the gaming features, let’s move on to the next section, where we will discuss enabling Adaptive Sync.
Enabling Adaptive Sync
Adaptive Sync is a beneficial feature available on certain LG Ultragear Gaming Monitors. It is designed to synchronize the monitor’s refresh rate with the graphics card’s frame rate, resulting in smoother gameplay, reduced screen tearing, and improved overall visual performance.
There are two main versions of Adaptive Sync: FreeSync and G-Sync. FreeSync is compatible with AMD graphics cards, while G-Sync is compatible with NVIDIA graphics cards. Depending on your monitor’s specifications, you will need to enable the appropriate Adaptive Sync technology.
To enable Adaptive Sync, follow these steps:
- Ensure that your LG Ultragear Gaming Monitor supports Adaptive Sync technology. Check the manufacturer’s specifications or consult the user manual for confirmation.
- Connect your monitor to a compatible graphics card using an HDMI or DisplayPort cable.
- Access the OSD menu on your monitor using the menu button and navigate to the appropriate settings section (sometimes labeled as “Adaptive Sync”, “AMD FreeSync”, or “NVIDIA G-Sync”).
- Enable the Adaptive Sync feature by selecting the appropriate option and confirming your selection.
- Save the settings and exit the OSD menu.
Once Adaptive Sync is enabled, your LG Ultragear Gaming Monitor will dynamically adjust its refresh rate to match the graphics card’s frame rate, resulting in smoother and more fluid gameplay.
It’s essential to ensure that your graphics card is compatible with the Adaptive Sync technology supported by your monitor. If you encounter any issues or have trouble enabling Adaptive Sync, consult the user manual, LG support, or the graphics card manufacturer for assistance.
Remember that to experience the full benefits of Adaptive Sync, your game must run within the monitor’s supported refresh rate range. If your monitor has a specific refresh rate range, make sure the game’s frame rate falls within that range to ensure optimal performance.
By enabling Adaptive Sync on your LG Ultragear Gaming Monitor, you can enjoy smoother gameplay, reduced tearing, and an overall enhanced visual experience.
Now that you have enabled Adaptive Sync, let’s move on to the next section, where we will explore calibrating the color settings to achieve accurate and vibrant colors.
Calibrating the Color Settings
Calibrating the color settings on your LG Ultragear Gaming Monitor is essential for achieving accurate and vibrant colors while gaming. When properly calibrated, the monitor’s colors will be more lifelike, ensuring that you enjoy a visually immersive gaming experience. Here’s how you can calibrate the color settings:
- Access the OSD menu on your monitor using the menu button and navigate to the Picture or Color category. The exact location and naming of the color settings may vary depending on the model.
- Locate the color temperature setting and adjust it according to your preference. You can choose between presets like Warm, Neutral, or Cool. Experiment with different presets to find the one that suits your visual preference.
- Next, look for settings related to color saturation, hue, or RGB values. These settings allow you to fine-tune the intensity and balance of individual colors. Adjust them incrementally until you achieve the desired color accuracy and vibrancy. It’s important to ensure that colors appear natural and consistent across different games and content.
- If your monitor has a color management system or advanced color settings, you can further calibrate the individual color channels (Red, Green, Blue) to achieve better color accuracy. Use calibration tools or software, such as colorimeters or calibration software, for a more precise calibration process.
- Some LG Ultragear Gaming Monitors offer preset color modes designed for specific scenarios or content, such as FPS (First Person Shooter), RTS (Real-Time Strategy), or Cinema. These presets optimize the color settings to cater to different usage scenarios. Explore and experiment with these presets to find the one that matches your gaming preferences.
- As you make adjustments to the color settings, it’s important to refer to reference images or content with known accurate colors to ensure that the adjustments are achieving the desired results. This could be calibration test patterns or professional photography.
- Once you have made the necessary adjustments, save the settings and exit the OSD menu to apply the newly calibrated color settings to your LG Ultragear Gaming Monitor.
Keep in mind that every monitor is unique, and the ideal color settings can vary based on personal preference and lighting conditions. Regular calibration and adjustment of color settings can help maintain accurate and vibrant colors over time.
For more precise color calibration, you may consider using professional calibration tools or seeking a professional’s assistance. These tools can help you achieve even greater accuracy and consistency in color reproduction.
By calibrating the color settings on your LG Ultragear Gaming Monitor, you can ensure that the visuals are represented as intended, with accurate and vibrant colors that enhance your gaming experience.
Now that you have calibrated the color settings, let’s move on to the next section, where we will explore the process of mounting the monitor onto a wall.
Mounting the Monitor onto a Wall
If you prefer a clean and space-saving setup, you have the option to mount your LG Ultragear Gaming Monitor onto a wall. This allows you to create an ergonomic and customized gaming station. Follow these steps to safely and securely mount your monitor:
- Start by ensuring that your LG Ultragear Gaming Monitor is compatible with VESA mounting standards. Look for the VESA mount screw holes on the back of the monitor. The most common VESA sizes are 75x75mm and 100x100mm.
- Measure and mark the desired position on the wall where you want to mount the monitor. Use a level to ensure the marks are straight and aligned properly.
- Using a wall mount kit that corresponds to the VESA size of your monitor, attach the mounting bracket securely to the wall using wall anchors, screws, and any provided mounting hardware. Follow the instructions provided with your wall mount kit for the specific installation process.
- Gently lift the monitor and align the VESA mount screw holes on the back of the monitor with the corresponding screws on the wall mounting bracket. Carefully attach the monitor to the bracket, making sure it is securely in place.
- Double-check that the monitor is straight and level on the wall. Make any necessary adjustments to ensure it is properly aligned.
- Tighten the screws on the wall mounting bracket to securely hold the monitor in place. Be cautious not to overtighten, as it may damage the monitor or the bracket.
- Once the monitor is securely mounted, give it a gentle shake to ensure it is stable and properly attached to the wall. If there is any wobbling or instability, recheck the screws and mounting bracket.
- Connect the necessary cables, such as power and video cables, to the mounted monitor. Ensure that the cables are properly routed and do not obstruct the monitor’s movement or cause strain on the connections.
It’s essential to follow the manufacturer’s instructions and guidelines for mounting your specific LG Ultragear Gaming Monitor. If you are uncertain or need assistance, consult the user manual or contact the manufacturer’s customer support for further guidance.
Mounting your LG Ultragear Gaming Monitor onto a wall not only saves desk space but also allows for improved ergonomics by placing the screen at eye level, reducing neck strain, and enhancing your overall gaming experience.
Now that you have successfully mounted your gaming monitor, let’s move on to the next section, where we will explore troubleshooting common issues you may encounter.
Troubleshooting Common Issues
While setting up and using your LG Ultragear Gaming Monitor, you may encounter some common issues. Troubleshooting these issues can help resolve them quickly and ensure a smooth gaming experience. Here are some common problems you may encounter and their possible solutions:
No Power/No Display: If your monitor is not turning on or there is no display, double-check the power cable connection. Ensure that it is securely plugged into both the monitor and the power outlet. If the problem persists, try plugging the power cable into a different outlet or test it with another power cable. Additionally, verify that the monitor is using the correct input source.
Blurry or Distorted Image: If the image on your monitor appears blurry or distorted, check the resolution and refresh rate settings on your computer. Make sure they are set to match the recommended settings for your monitor. Adjust the sharpness and image settings through the OSD menu to improve image clarity. If using a HDMI cable, ensure that it is securely connected.
Screen Tearing: If you are experiencing screen tearing, where the image seems to be split or lagging, enable Adaptive Sync (FreeSync or G-Sync) if your monitor and graphics card support it. These technologies synchronize the monitor’s refresh rate with the GPU’s output, reducing screen tearing. Make sure your graphics card drivers are up to date as well.
Inaccurate Colors: If the colors on your monitor appear inaccurate, consider calibrating the color settings using the OSD menu. Adjust the color temperature, saturation, and individual color channels (if available) to achieve more accurate and vibrant colors. Use calibration tools or professional references to ensure precise adjustments.
Ghosting or Motion Blur: If you notice blurring or ghosting during fast-moving scenes, check the response time setting on your monitor. Lower response times can reduce motion blur. Make sure that the response time mode is appropriate for the content you are viewing or the game you are playing. Keep in mind that reducing response times can increase the risk of visual artifacts.
Audio Issues: If you are experiencing audio issues, ensure that the audio cable is correctly connected and securely plugged into the appropriate port on your computer or gaming console. Confirm that the audio settings on your computer or console are correctly configured and that the volume is adjusted appropriately on the monitor and audio source.
If you continue to experience issues, consult the user manual provided with your LG Ultragear Gaming Monitor. It often contains specific troubleshooting steps and guidance tailored to your model. Additionally, you can reach out to LG customer support for further assistance and troubleshooting tips.
Remember to keep your monitor’s drivers and firmware up to date to ensure compatibility and access to the latest features and performance improvements.
By troubleshooting these common issues, you can quickly address any problems that arise and enjoy your gaming sessions on your LG Ultragear Gaming Monitor without interruptions.
Now that we have covered troubleshooting, let’s wrap up this guide and summarize what we have discussed.
Conclusion
Congratulations! You have successfully set up your LG Ultragear Gaming Monitor and optimized it for an immersive and enjoyable gaming experience. In this guide, we covered the step-by-step process of unboxing the monitor, attaching the stand, adjusting the height and tilt, connecting the power and display cables, and configuring various settings through the OSD menu.
We explored how to adjust the display settings, including brightness, contrast, color temperature, and sharpness, to achieve optimal visuals. Additionally, we discussed enabling Adaptive Sync, such as FreeSync or G-Sync, to eliminate screen tearing and enhance smooth gameplay.
Calibrating the color settings and exploring gaming features like response time, refresh rate, black stabilizer, crosshair customization, and game mode presets helped us fine-tune the monitor according to our personal preferences and gaming requirements.
We also discussed the option of mounting the monitor onto a wall for a clean and ergonomic gaming setup, as well as troubleshooting common issues that may arise during the setup or usage of the monitor.
Remember, every LG Ultragear Gaming Monitor model may have slight variations in features and settings, so it’s always good practice to refer to the user manual for specific instructions and guidance.
We hope this guide has provided you with valuable insights into setting up and optimizing your LG Ultragear Gaming Monitor. Now it’s time to dive into your favorite games and experience the full potential of your new gaming monitor!


